Unit Testing
Please make sure that all unit tests pass before starting the program to proactively identify and address any issues.
Notice: All tests must be executed from the project's root directory using python tests/testX.py as the command to start them.
Robot Testing
Open the terminal in root directory. Enter python .\tests\test1_robot.py in the terminal.
Please select robot arm model first, enter with corresponding number.
Follow the prompt to input the serial port for connecting to the robot (enter the corresponding index, e.g., 0 in the above example).
Observe the movement of the robot. If all 6 axes show changes, it indicates that the communication with the robotic arm is functioning properly. If the robot does not move, there may be communication or firmware issues.
Camera Testing
Open the terminal in root directory. Enter python .\tests\test2_camera.py in the terminal.
Camera initialization could be slow on some system, don't panic if it looks stuck
If the camera has no image, you can try modifying the cam_index in test2_camera.py. You can attempt numbers like 0, 1, 2, 3, etc.
You can press Q to quit when you're done testing.
Below all tests requires to select robot arm model and serial port, please select based on actual situation.
Observe if the camera image is clear. If the image is blurry, consider cleaning the lens.
Chess Trigger Testing
The chess trigger is a special structure fixed to the end of the robotic arm. To test this project, make sure the chess trigger is installed properly and can function correctly. Note: Before running the test, make sure the chess trigger is loaded with enough chess pieces (>5).
<ReactPlayer playing controls url="/docs/connect-4/videos/test3.mp4" />
Open the terminal in root directory. Enter python .\tests\test3_tigger.py in the terminal.
Observe if the chess trigger can push the chess pieces out.
Robot Movement Point Testing
This test requires the chessboard and robotic arm to be fully installed. The robotic arm will attempt to visit all the points in order. You need to observe the accuracy of the robotic arm reaching each point.
Open the terminal in root directory. Enter python .\tests\test4_drop_point.py in the terminal.
If it doesn't meet your expectations, you can manually modify the values in self.chess_table within core\ArmInterface.py. You can use software like myBlockly to assist with the operation.
How to Adjust Positions Based on Results
The positions for playing chess in the robotic arm system are fixed angle values. Due to mechanical precision reasons, each robotic arm may have some errors, requiring manual calibration. Below, I will demonstrate how to modify the calibration positions.
First, open myBlockly software.
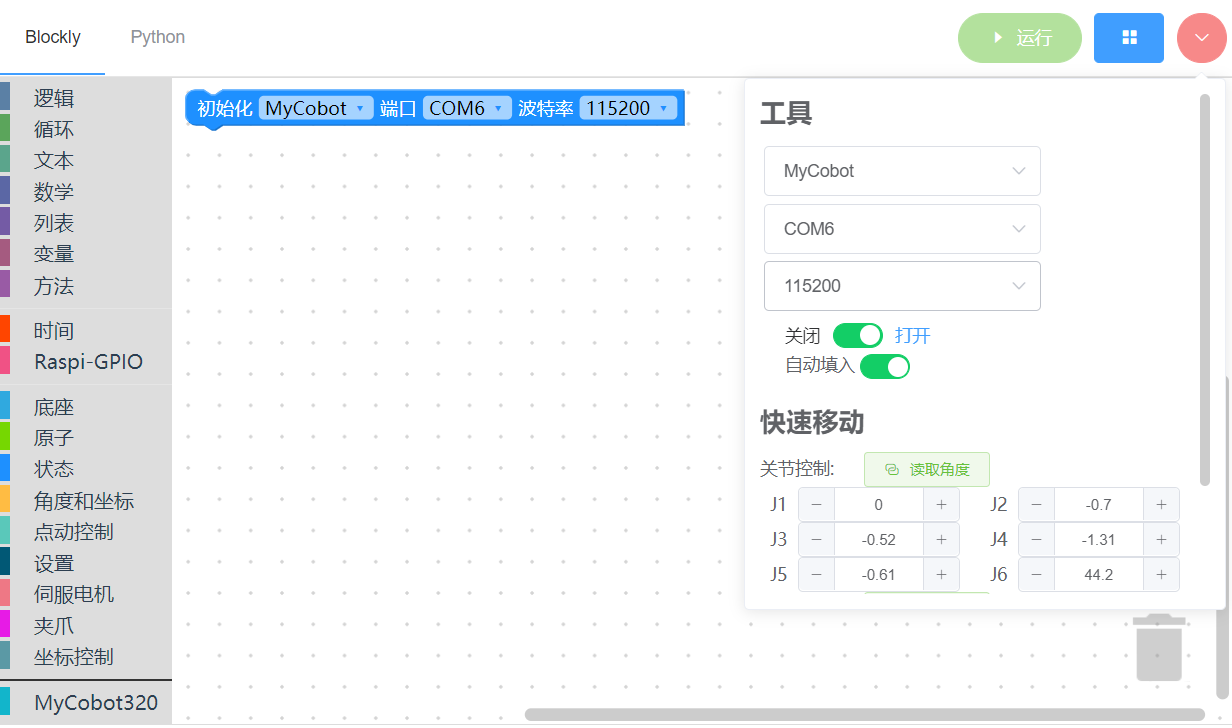
Then, open your code editor and locate core\ArmInterface.py.
If you are using the MyCobot series robotic arm, navigate to the _MyCobot class. If it is the MyArm series, then locate the _MyArm class.
The definition of chessboard angles is in self.chess_table.
Note: MyCobot is a 6-axis robotic arm, and MyArm is a 7-axis robotic arm. Therefore, each chessboard position for MyCobot has 6 values, while MyArm has 7.
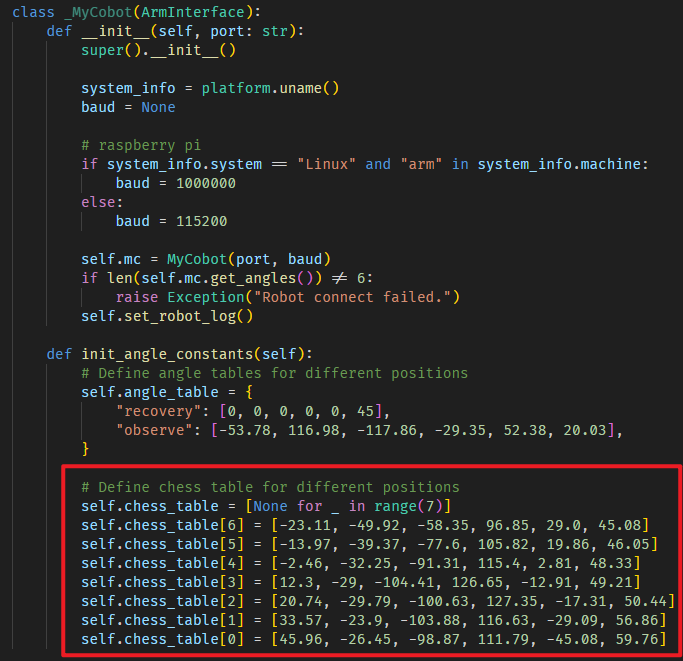
Let's assume you want to modify the position of the first chess piece, which is self.chess_table[0]. Use myBlockly to move the robotic arm to this position first.
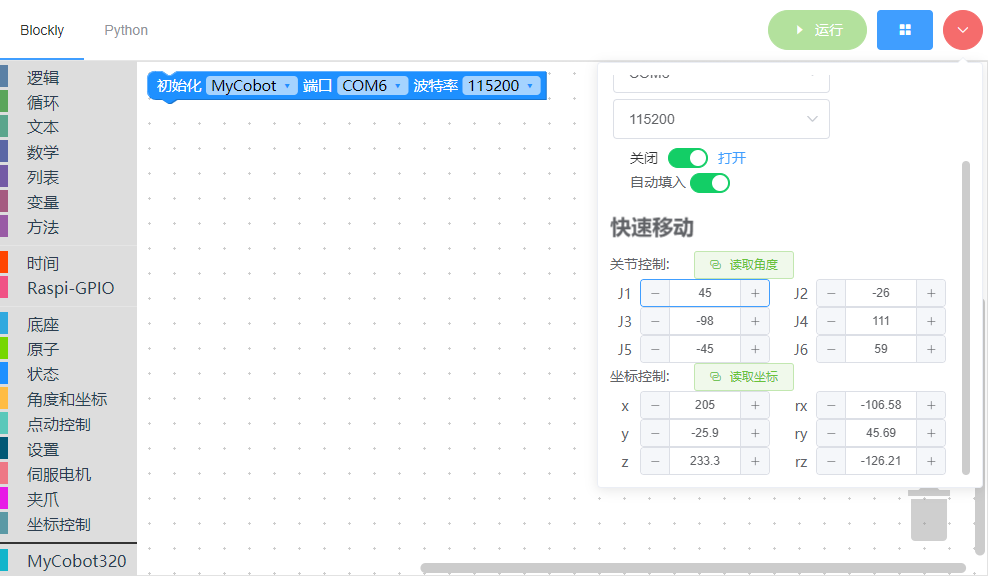
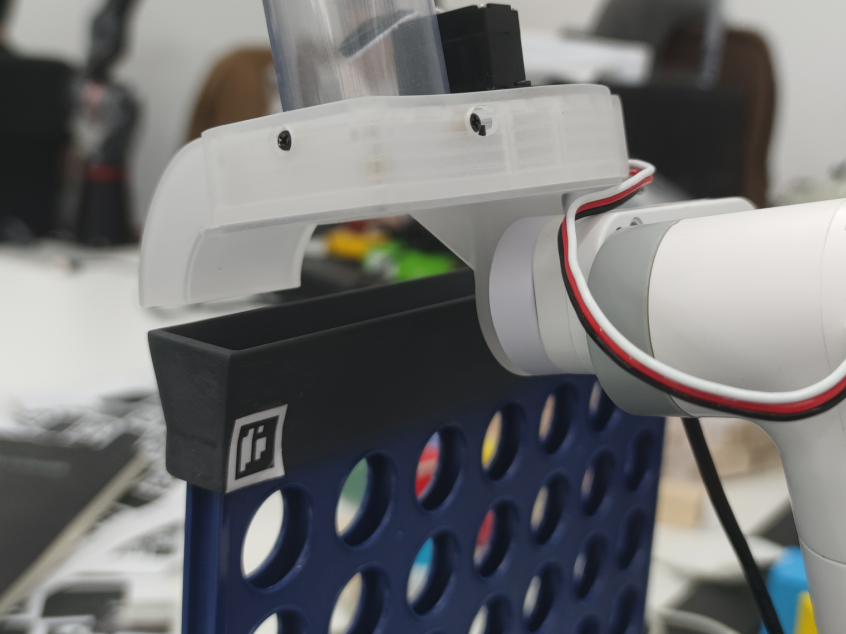
You can see that the robotic arm's position is a bit too forward from the target, so it needs adjustment. The robotic arm's coordinate system is defined such that its front is the positive X-axis direction, left is the positive Y-axis direction, and up is the positive Z-axis direction. Therefore, depending on the situation, we need to decrease the X-coordinate.
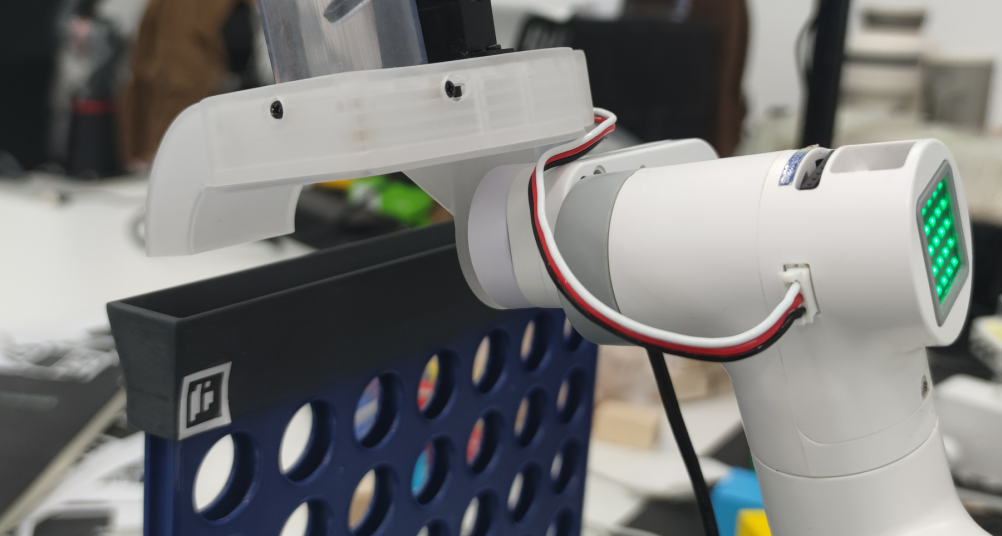
Now, read the angle values and write this value back into core\ArmInterface.py.
Note: The contents of chess_table are angle values, not coordinate values.
Image Capture Point Testing
In this test, the robotic arm will automatically move to the observation position. If the QR codes and the relative position of the robotic arm are correct, you will see another window with only the chessboard.
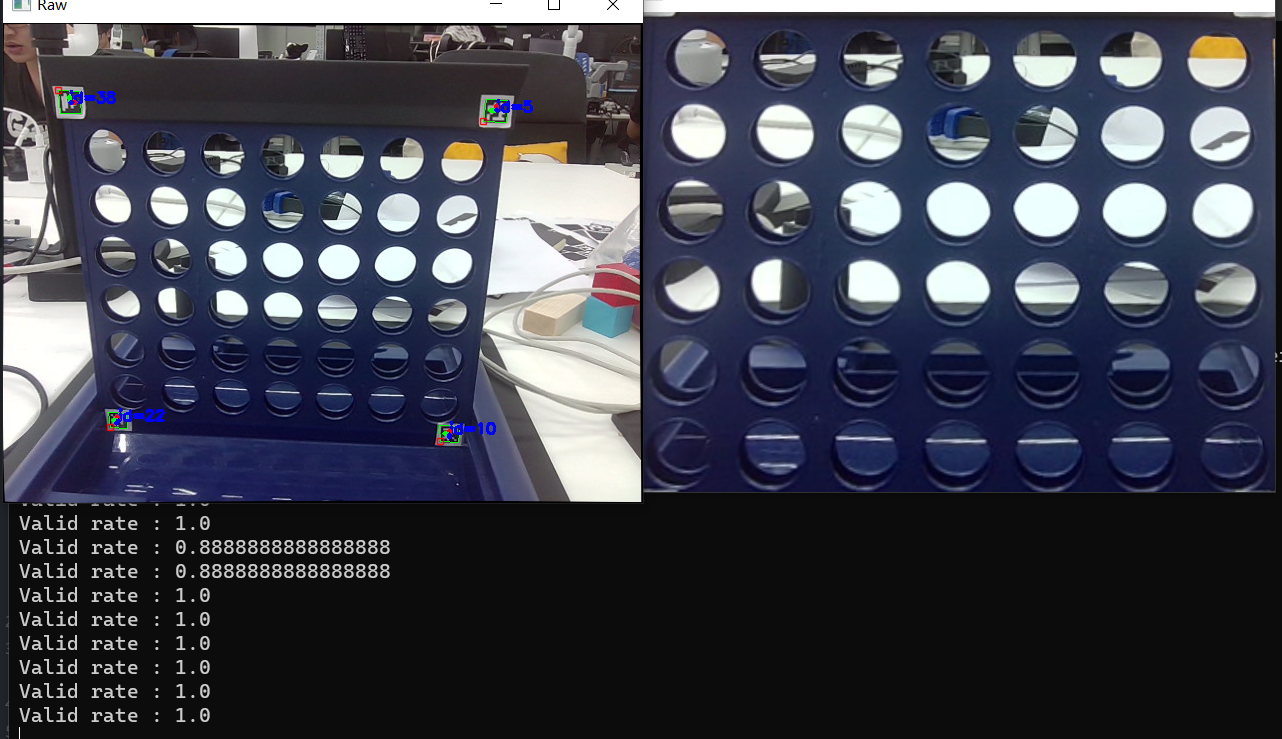
Navigate to the tests directory and open the terminal here. Enter python .\tests\test5_detect.py in the terminal.
If the camera has no image, you can try modifying the cam_index in test5_detect.py. You can attempt numbers like 0, 1, 2, 3, etc.
This test will also output the "valid rate" in the command line, which represents the recognition rate. The closer this number is to 1, the better. A value of 1 indicates that all four Aruco codes are recognized in every frame. Generally, to ensure the program is running properly, a recognition rate of at least 0.8 or above is required.