AiKit 3D UI Instructions
Before running the AiKit 3D UI program, make sure that the environment setup is complete.
Note: If the machine device is the 280 PI version, you need to start the server script in the 280 PI system in advance and use it as a server
1 Startup method
In PyCharm, in the /AiKit_3D_UI path:
- Run in the virtual environment terminal
python3 main.py
- You can directly run the
main.pyscript in the/AiKit_3D_UIpath in PyCharm
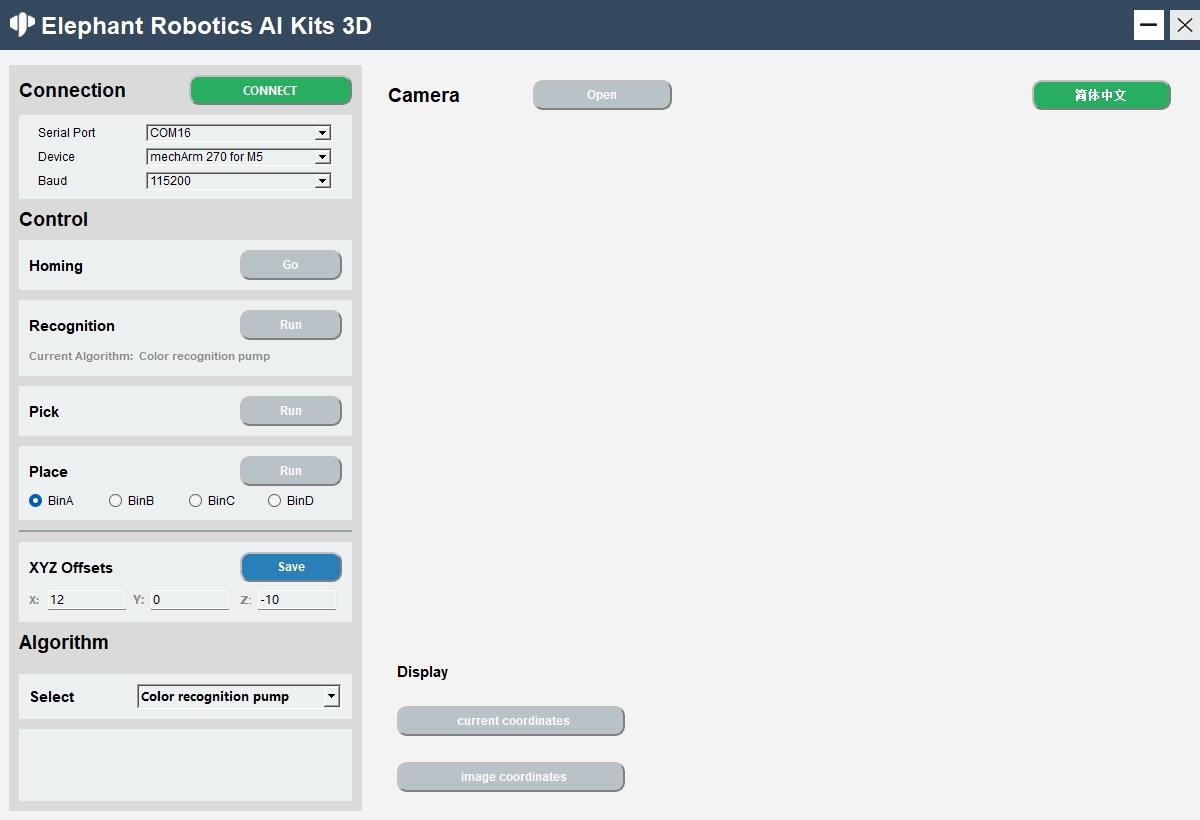
After the startup is successful, as shown in the figure below:
myCobot 280 M5, mechArm 270 M5 version
myCobot 280 PI version

2 Function Introduction
language switch
Click the button in the upper right corner of the window to switch between languages (Chinese, English).

device connection
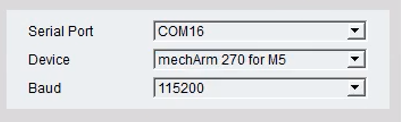
Select serial port, device, baud rate, server IP
M5 version: need to select serial port and baud rate
280PI version: need to enter the server IP address, 1. Port number does not need to be entered, the default is 9000, the specific information is subject to the server prompt information.

Click the 'CONNECT' button to connect, after the connection is successful, the 'CONNECT' button will change to 'DISCONNECT'

Clicking the 'DISCONNECT' button will disconnect the robot arm

After the robotic arm is successfully connected, the gray button will be lit and become clickable.
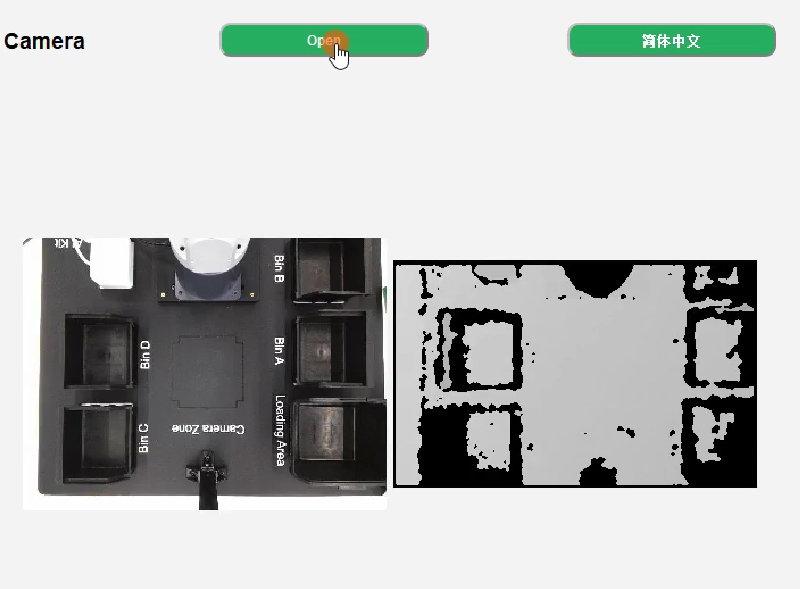
Turn on the camera
When the program runs successfully, turn on the camera.
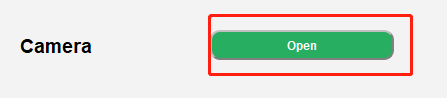
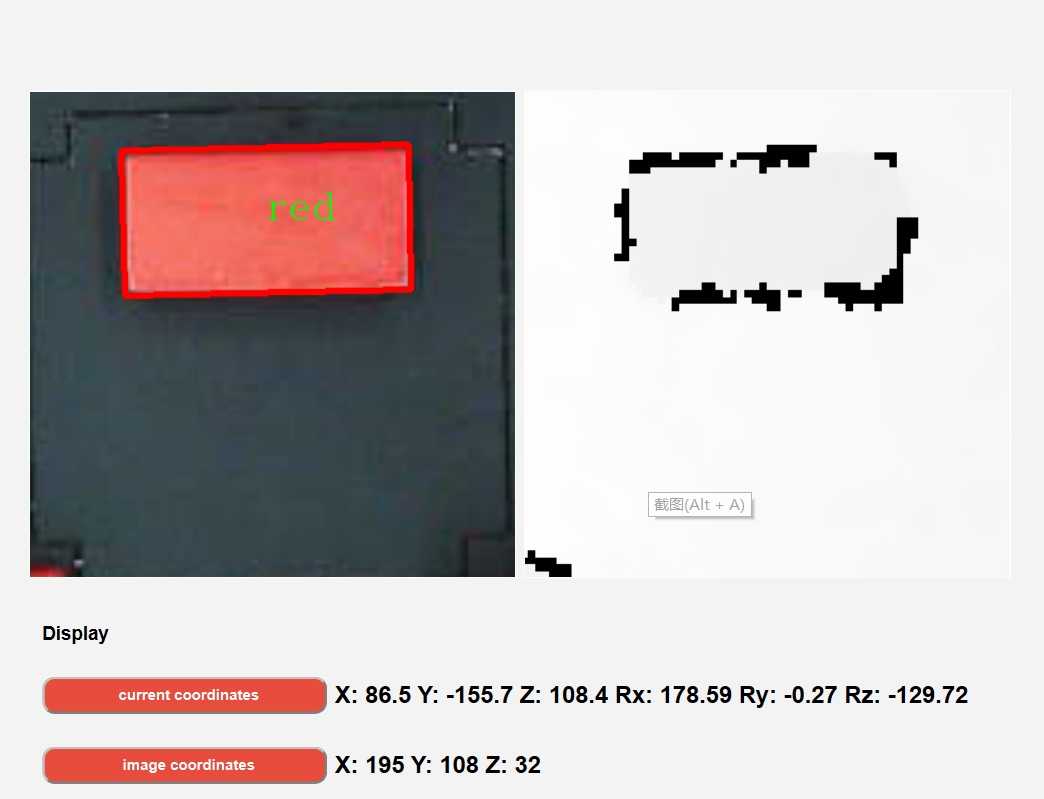
Click the 'Open' button to try to open the camera. If it fails to open, you should check whether the camera is connected correctly; the camera is successfully opened as shown in the figure below: Note: Before use, the camera should be adjusted to be parallel to the desktop.
algorithm control
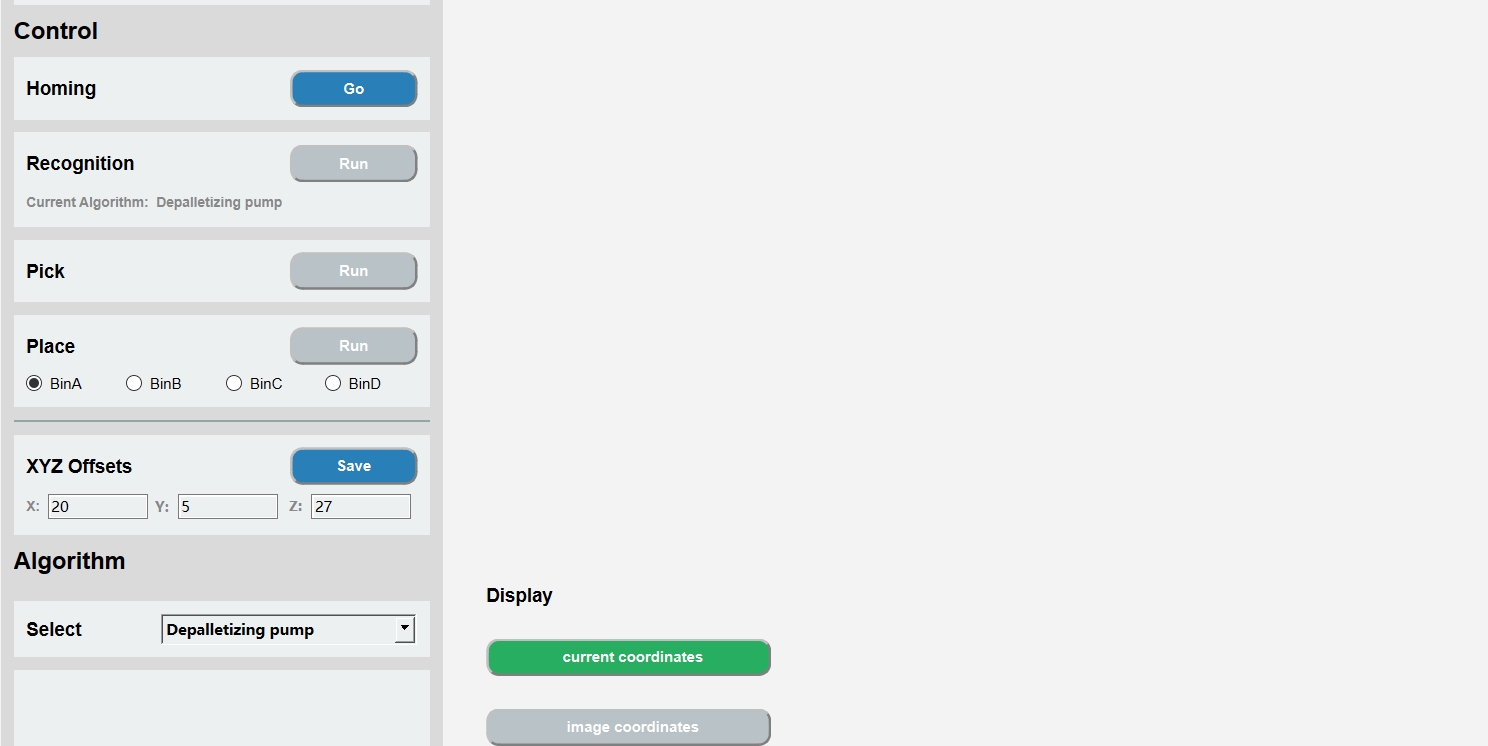
Go back to the initial point of grabbing, click the 'Go' button, it will stop the current operation and return to the initial point.

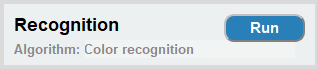
Step-by-step Recognition recognition: click the 'Run' button to start the recognition, Aigorithm is the current algorithm used.
 Pick: Click the 'Run' button to start the capture. After the capture is successful, the recognition and capture will be automatically closed, and you need to click it again for the next use.

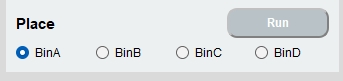
Placement: Click the "Run" button to start placement. The BinA, BinB, BinC, and BinD selection boxes correspond to the four storage boxes of BinA, BinB, BinC, and BinD respectively. After selection, they will be placed in the specified storage box.
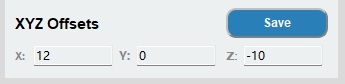
Grasping point adjustment, X offset, Y offset, and Z offset respectively represent the position of the X-axis, Y-axis, and Z-axis of the robot arm coordinates, and can be modified according to actual needs.
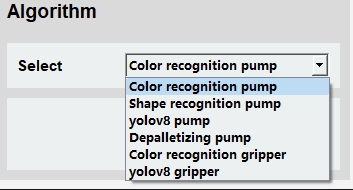
Algorithm selection includes Color Recognition Suction Pump, Shape Recognition Suction Pump, yolov8 Suction Pump, Depalletizing Suction Pump, Color Recognition Clamp, yolov8 gripper, selecting the corresponding algorithm will perform corresponding recognition.
coordinate display
Real-time coordinate display of the robotic arm: click the 'current coordinates' button to open
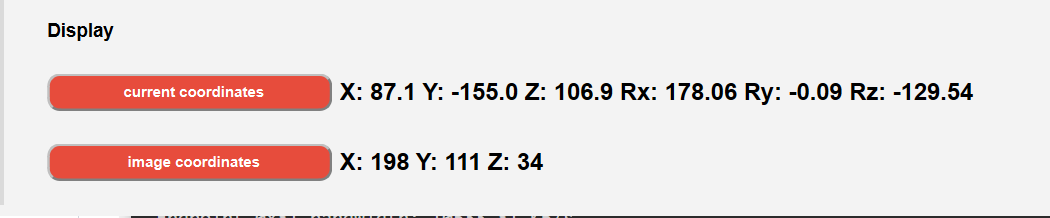
Recognition coordinate display: click the ''image coordinates' button to open
3 Usage steps
3.1 280, 270 M5 version
The numbering sequence in the figure is the order of steps.
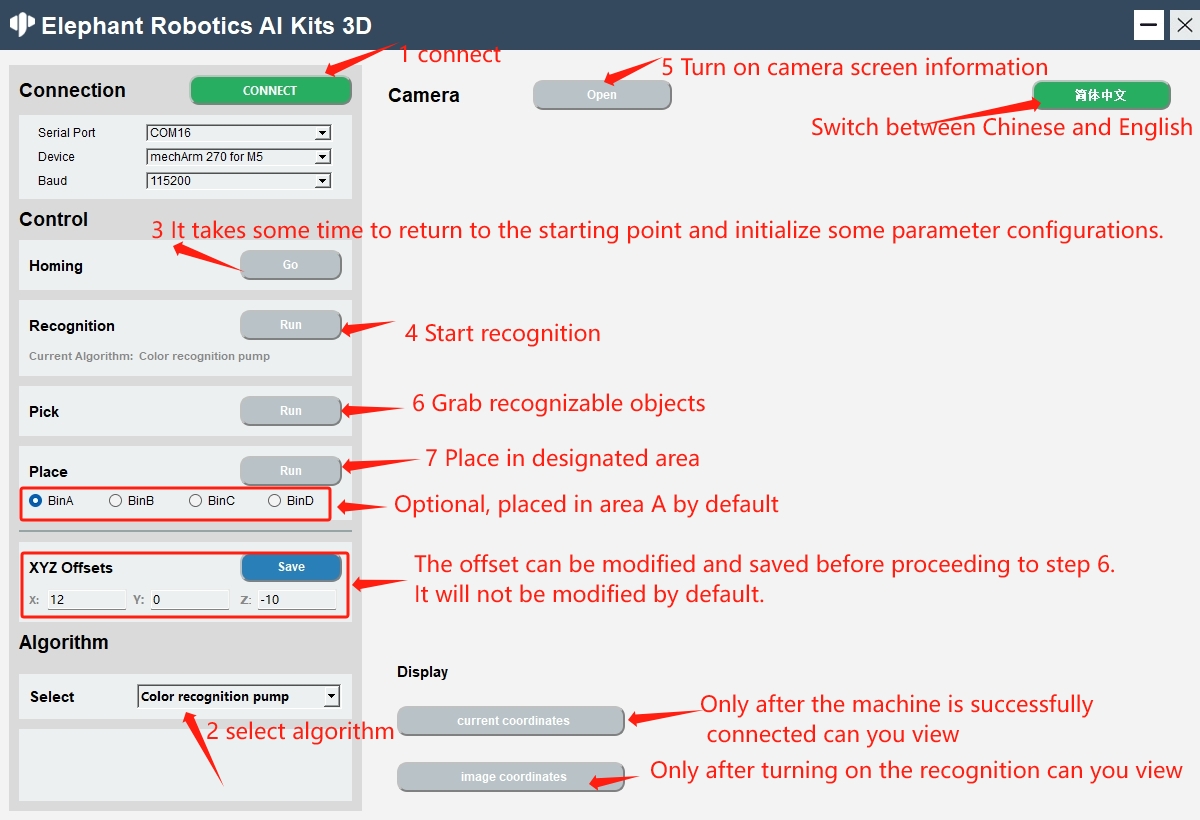
When switching algorithms, if you switch from the gripper algorithm to the suction pump algorithm or from the suction pump algorithm to the gripper algorithm, you must perform Step 3 because some parameter configurations of the gripper or suction pump need to be initialized. .
After Step 3 is completed, the button color will change back to blue
When performing the depalletizing algorithm, the grabbing process only needs to go through Step 6, and there is no need to go through Step 7,and it will not be recognized during the grabbing process, but the grabbing process operation is completed once After that, it will continue to identify and crawl, and so on
Only after executing Step 3 can you view the image coordinates. If the image coordinates are all 0, it means that they have not been recognized.
The current coordinates can only be viewed after executing Step 1.
The xyz offset can be modified and saved before executing Step 6. It can be modified according to the actual crawling situation. It is not modified by default. Taking the front of the robotic arm as the benchmark, the larger the x value, the farther forward the end is to grab, and vice versa; the larger the y value, the further the end is to grab, and vice versa. Fetch to the right; the larger the z value, the further up you will grab, and vice versa.
3.2 280 PI version
The numbering sequence in the figure is the order of the steps
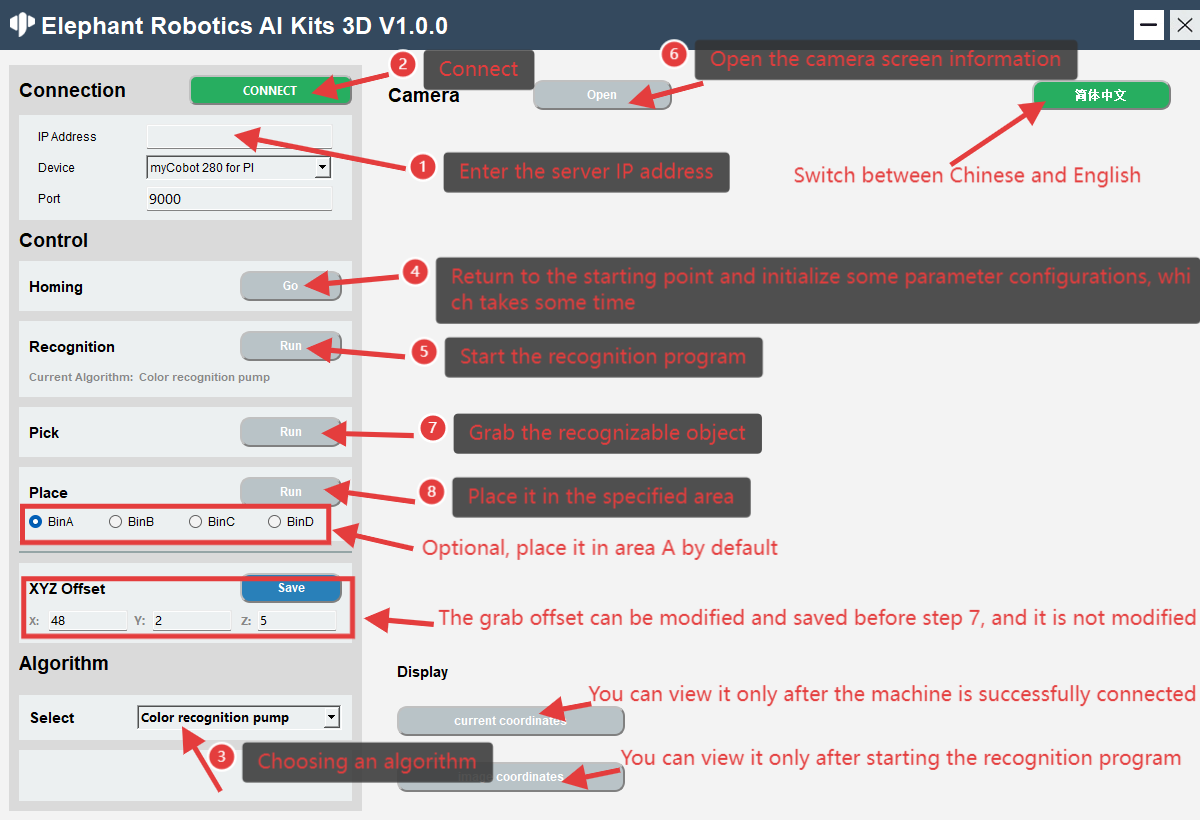
After starting the UI program on the PC, perform the robot arm communication connection operation according to the IP address and port number output by the server.
For the server startup script method, refer to the TCP & IP Communication chapter content.

When switching algorithms, if you switch from the gripper algorithm to the suction pump algorithm or from the suction pump algorithm to the gripper algorithm, you must execute Step 4, because you need to initialize some parameter configurations of the gripper or suction pump.
After Step 4 is executed, the button color will return to blue.
When performing the Depalletizing algorithm, the grasping process only needs to perform Step 7, and there is no need to perform Step 8. In addition, the grasping process will not be recognized, but after completing a grasping process operation, it will continue to recognize and grasp, and so on.
After executing Step 4, you can view the image coordinates. If the image coordinates are all 0, it means that they are not recognized.
After executing Step 2, you can view the current coordinates.
xyz offset can be modified and saved before executing step 7. It can be modified according to the actual grasping situation. It is not modified by default. Taking the front of the robot as the reference, the larger the x value, the more forward the end grasps, and vice versa, the more backward the end grasps; the larger the y value, the more to the left the end grasps, and vice versa, the to the right the end grasps; the larger the z value, the more up the end grasps, and vice versa, the down the end grasps.
4 Notes
The M5 version model uses the serial port baud rate connection.
The 280 PI version model uses socket for communication connection. It is necessary to start the server script in the 280 pi system as the server, and the Windows PC as the client to start the AiKit_3D_UI program.
After selecting the algorithm and modifying the offset, the recognition program can be started.
After the recognition program is successfully started, the camera button can be clicked to view the camera screen information.
After grabbing, you can view the coordinate display information.
If you need to switch the algorithm during use, stop the current recognition program first, and then switch the algorithm.