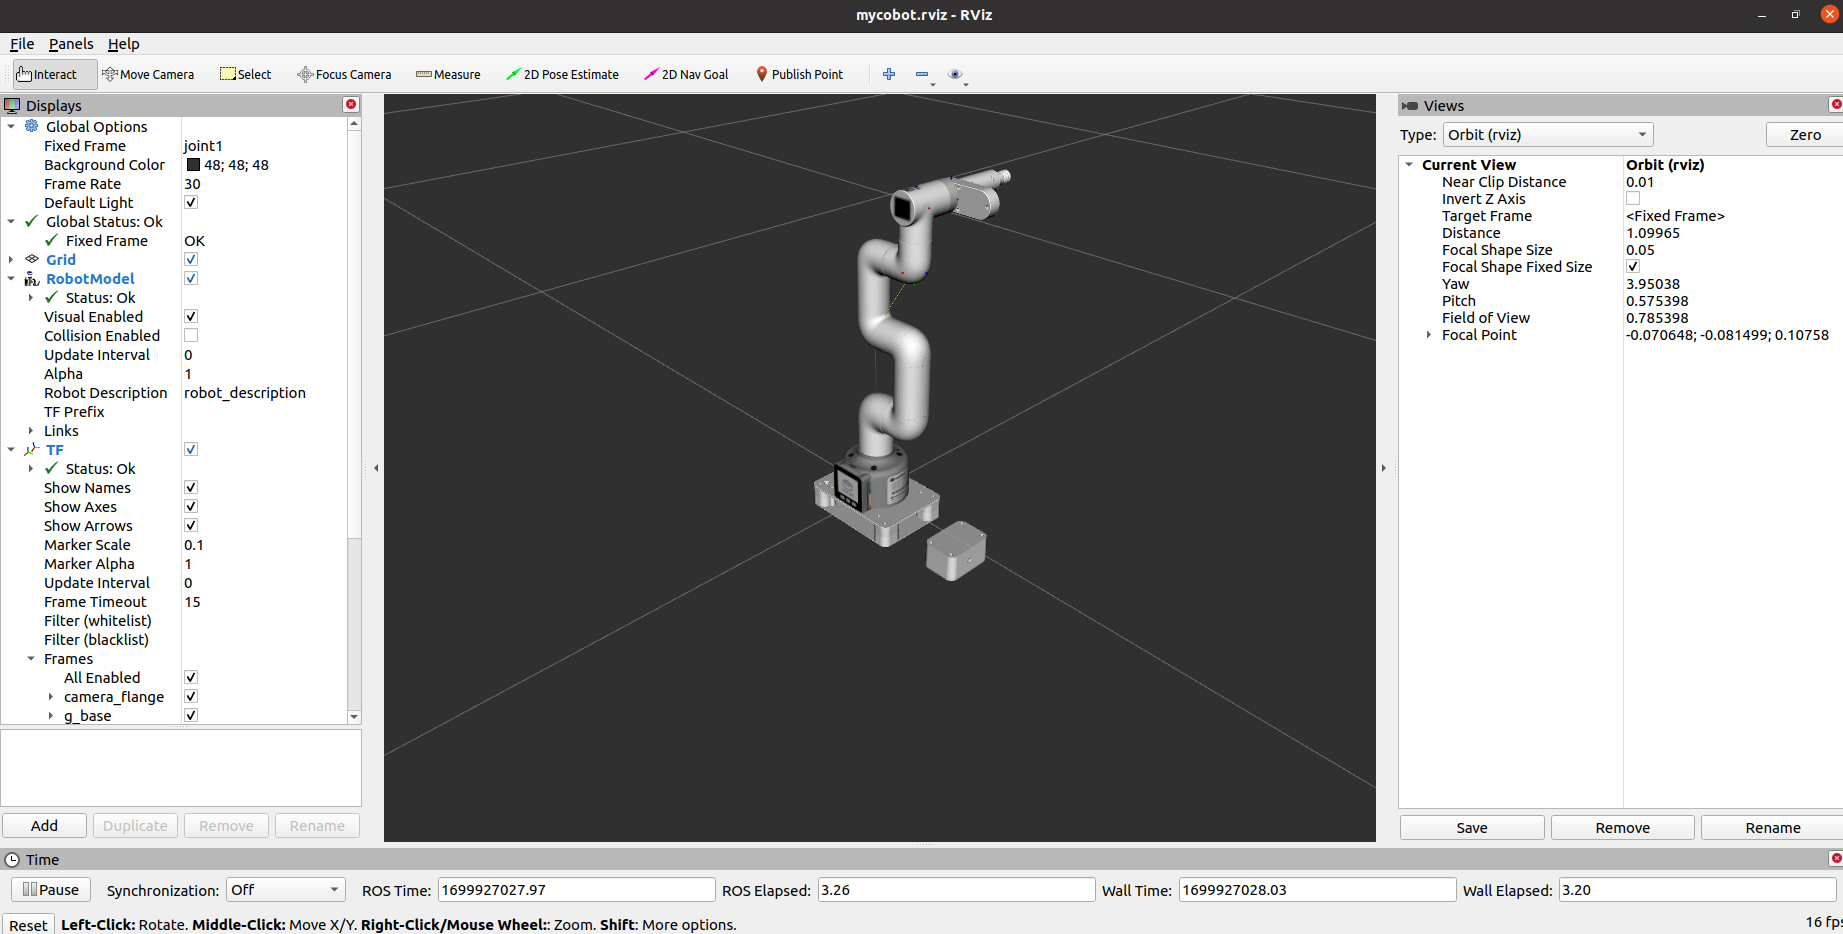
Control and following of the robot arm
1 Slider Control
Open a command line and run:
- mycobot 280-M5 version:
# The default serial port name of mycobot 280-M5 version is "/dev/ttyUSB0", and the baud rate is 115200. The serial port name of some models is "dev/ttyACM0". If the default serial port name is wrong, you can change the serial port name to "/dev/ttyACM0".
roslaunch mycobot_280 slider_control.launch port:=/dev/ttyUSB0 baud:=115200
- mycobot 280-Pi version:
# The default serial port name of mycobot 280-Pi version is "/dev/ttyAMA0", and the baud rate is 1000000.
roslaunch mycobot_280pi slider_control.launch port:=/dev/ttyAMA0 baud:=1000000
- mycobot 280-JetsonNano version:
# The default serial port name of mycobot 280-JetsonNano version is "/dev/ttyTHS1", and the baud rate is 1000000.
roslaunch mycobot_280jn slider_control.launch port:=/dev/ttyTHS1 baud:=1000000
- mycobot 280-Arduino version:
# The default serial port name of mycobot 280-Arduino version is "/dev/ttyACM0", and the baud rate is 115200.
roslaunch mycobot_280arduino slider_control.launch port:=/dev/ttyACM0 baud:=115200
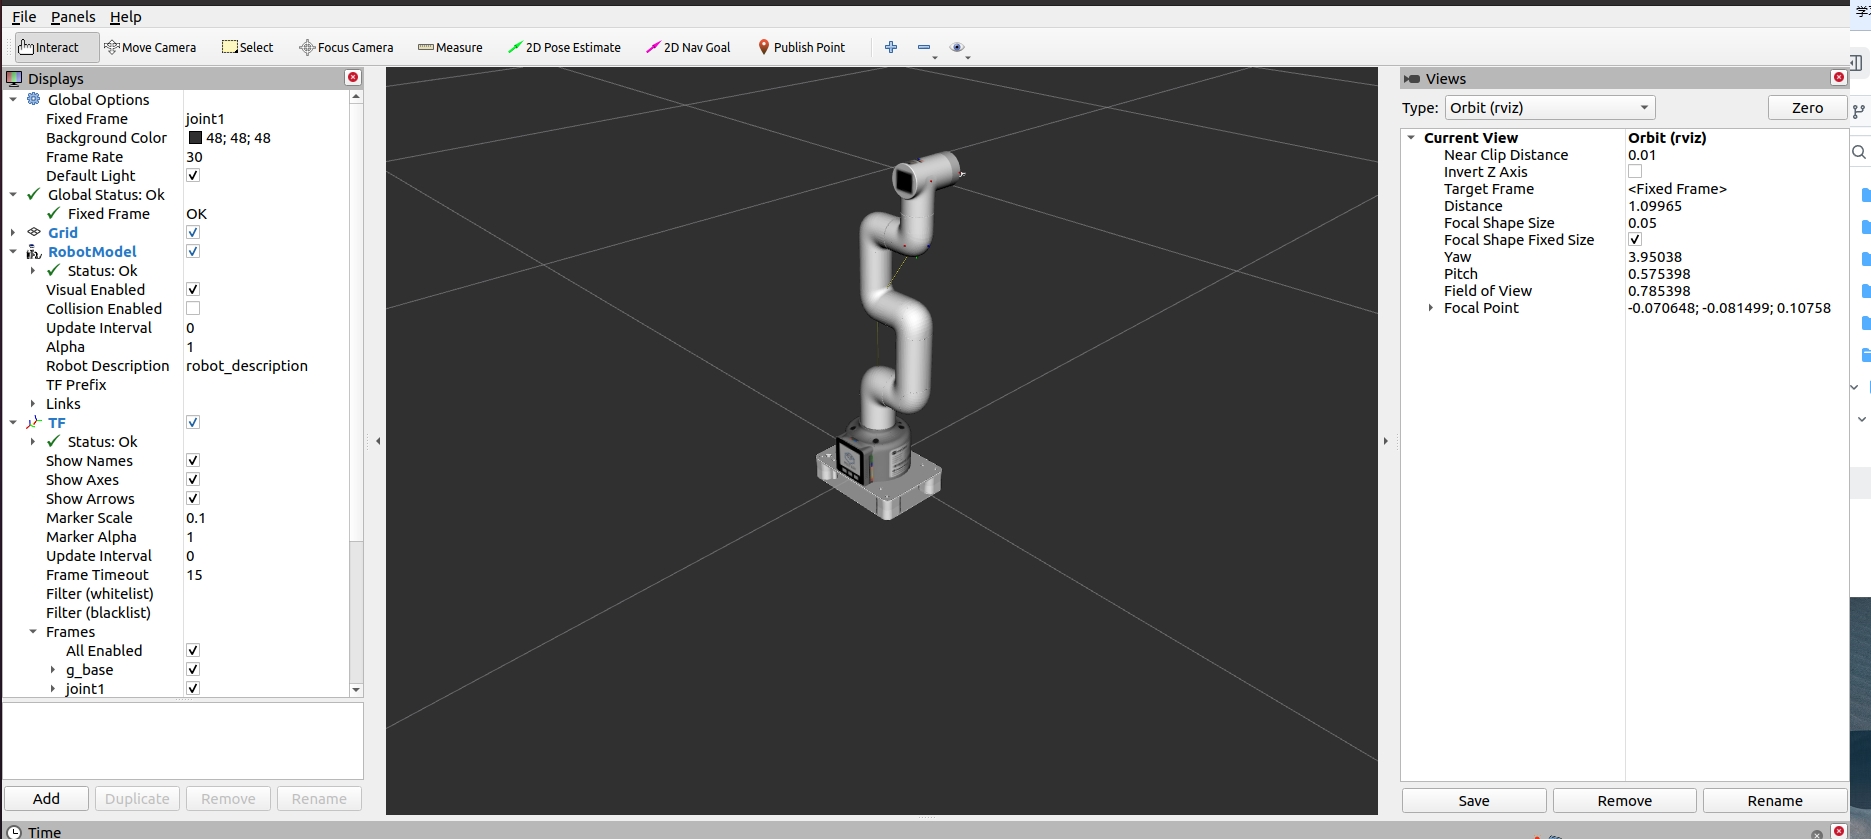
rviz and a slider component will be opened, and you will see the following interface:
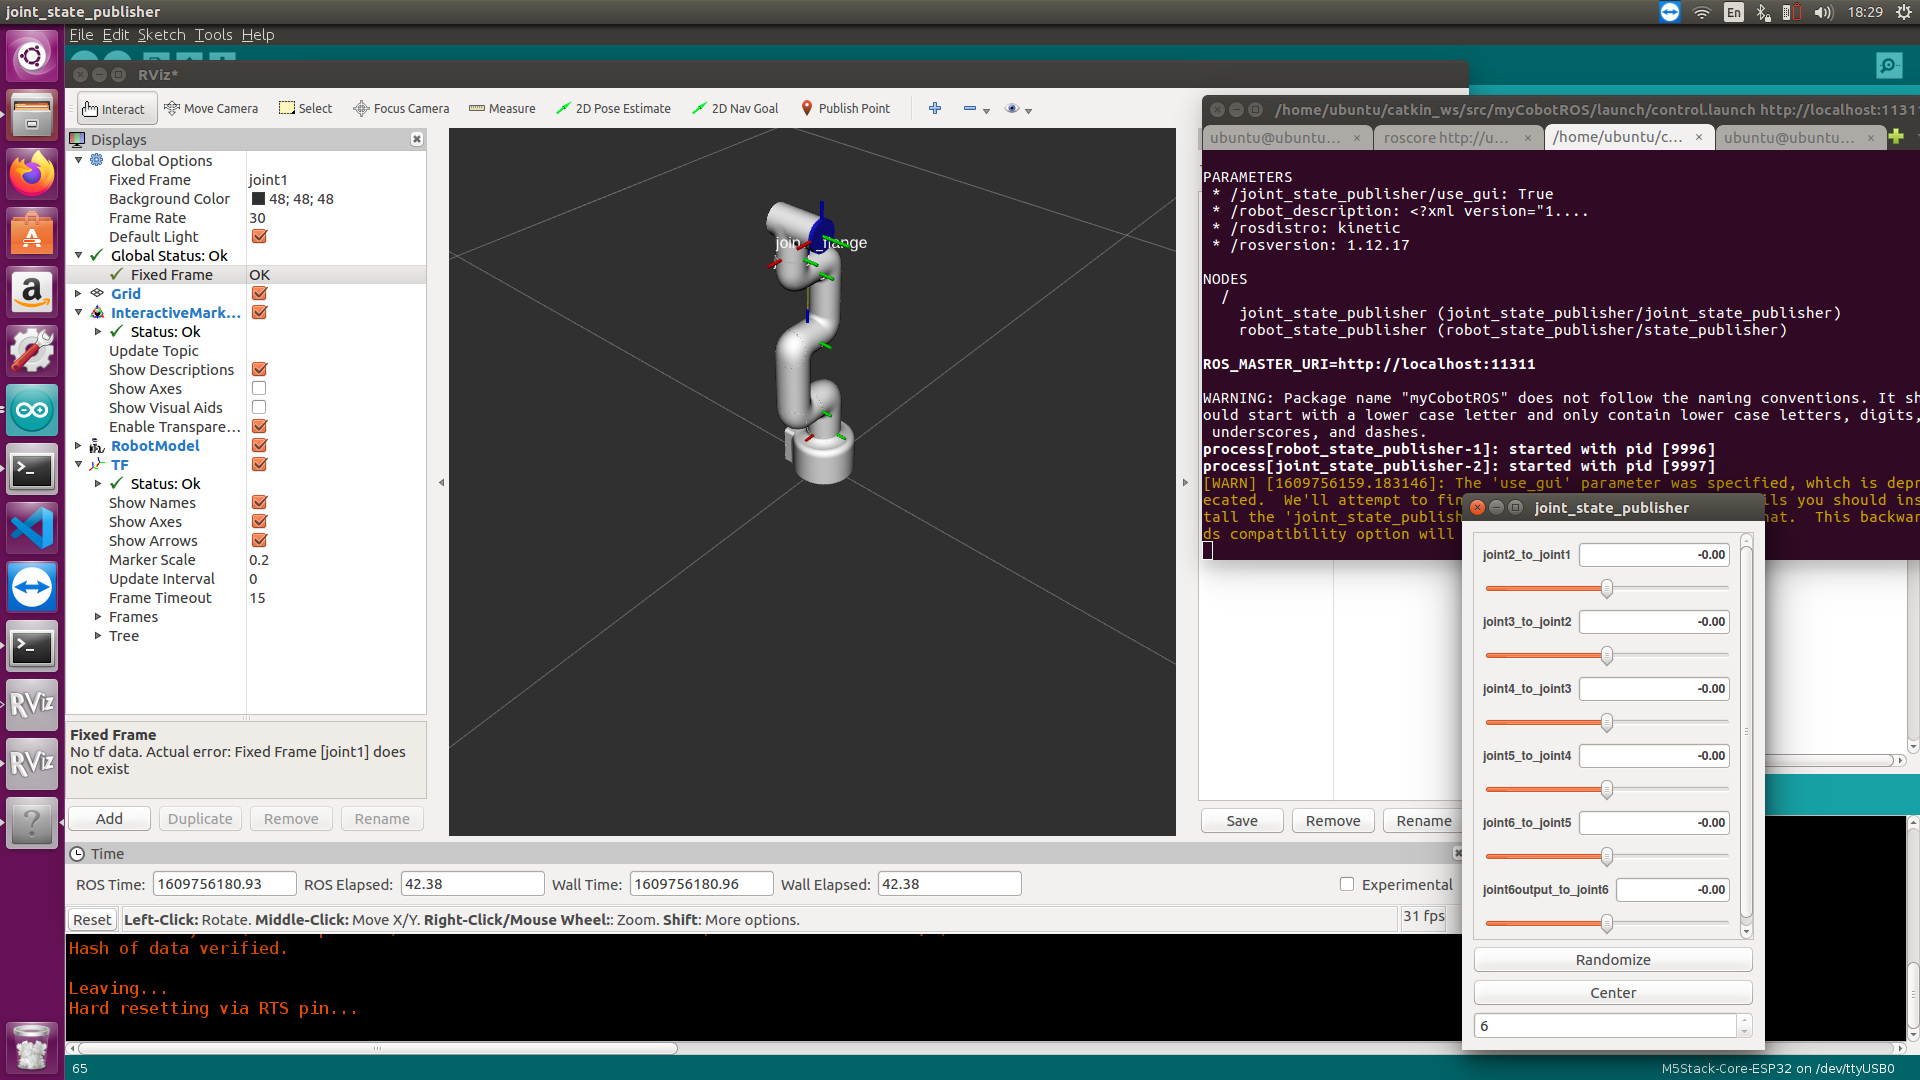
Then you can control the model in rviz to make it move by dragging the slider. If you want the real mycobot to move with the model, you need to open another command line and run:
- mycobot 280-M5 version:
# The default serial port name of mycobot 280-M5 version is "/dev/ttyUSB0", and the baud rate is 115200. The serial port name of some models is "dev/ttyACM0". If the default serial port name is wrong, you can change the serial port name to "/dev/ttyACM0".
rosrun mycobot_280 slider_control.py _port:=/dev/ttyUSB0 _baud:=115200
- mycobot 280-Pi version:
# The default serial port name of mycobot 280-Pi version is "/dev/ttyAMA0", and the baud rate is 1000000.
rosrun mycobot_280pi slider_control.py _port:=/dev/ttyAMA0 _baud:=1000000
- mycobot 280-JetsonNano version:
# The default serial port name of mycobot 280-JetsonNano version is "/dev/ttyTHS1", and the baud rate is 1000000.
rosrun mycobot_280jn slider_control.py _port:=/dev/ttyTHS1 _baud:=1000000
- mycobot 280-Arduino version:
# The default serial port name of mycobot 280-Arduino version is "/dev/ttyACM0", and the baud rate is 115200.
rosrun mycobot_280arduino slider_control.py _port:=/dev/ttyACM0 _baud:=115200
Note: Since the robot arm will move to the current position of the model when the command is input, make sure that the model in rviz does not appear to be worn out before you use the command.**
**Do not drag the slider quickly after connecting the robot arm to prevent damage to the robot arm.
2 Model Following
In addition to the above controls, we can also let the model move by following the real robot arm. Open a command line and run:
- mycobot 280-M5 version:
# The default serial port name of mycobot 280-M5 version is "/dev/ttyUSB0", and the baud rate is 115200. The serial port name of some models is "dev/ttyACM0". If the default serial port name is wrong, you can change the serial port name to "/dev/ttyACM0".
rosrun mycobot_280 follow_display.py _port:=/dev/ttyUSB0 _baud:=115200
- mycobot 280-pi version:
# The default serial port name of mycobot 280-Pi version is "/dev/ttyAMA0", and the baud rate is 1000000.
rosrun mycobot_280pi follow_display.py _port:=/dev/ttyAMA0 _baud:=1000000
- mycobot 280-JetsonNano version:
# The default serial port name of mycobot 280-JetsonNano version is "/dev/ttyTHS1", and the baud rate is 1000000.
rosrun mycobot_280jn follow_display.py _port:=/dev/ttyTHS1 _baud:=1000000
- mycobot 280-Arduino version:
# The default serial port name of mycobot 280-Arduino version is "/dev/ttyACM0", and the baud rate is 115200.
rosrun mycobot_280arduino follow_display.py _port:=/dev/ttyACM0 _baud:=115200
Then open another command line and run:
- mycobot 280-M5 version:
roslaunch mycobot_280 mycobot_follow.launch
- mycobot 280-Pi version:
roslaunch mycobot_280pi mycobot_follow.launch
- mycobot 280-JetsonNano version:
roslaunch mycobot_280jn mycobot_follow.launch
- mycobot 280-Arduino version:
roslaunch mycobot_280arduino mycobot_follow.launch
It will open rviz to show the model following effect.
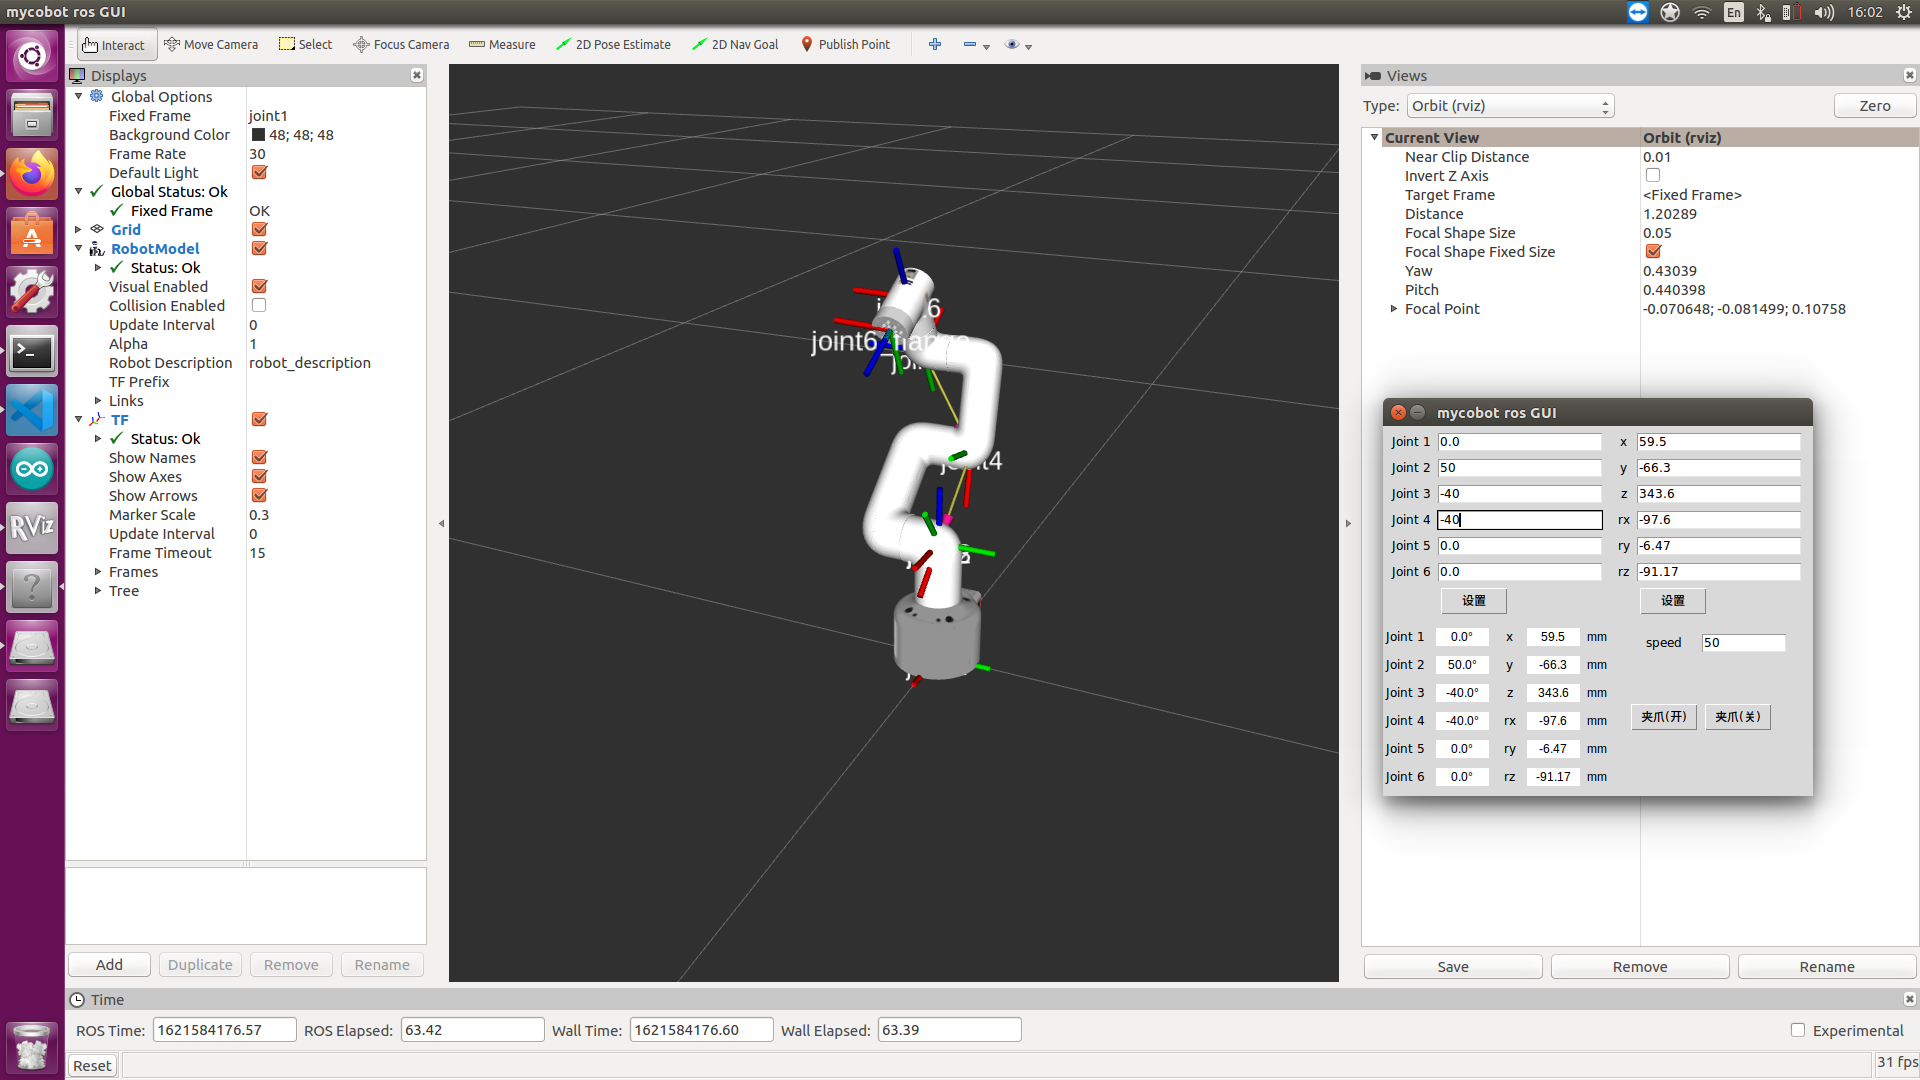
3 GUI control
On the basis of the previous contents, this package also provides a simple GUI control interface. This method is used for interaction between real robot arms. Connect to mycobot.
Open a command line:
- mycobot 280-M5 version:
# The default serial port name of mycobot 280-M5 version is "/dev/ttyUSB0", and the baud rate is 115200. The serial port name of some models is "dev/ttyACM0". If the default serial port name is wrong, you can change the serial port name to "/dev/ttyACM0".
roslaunch mycobot_280 simple_gui.launch port:=/dev/ttyUSB0 baud:=115200
- mycobot 280-Pi version:
# The default serial port name of mycobot 280-Pi version is "/dev/ttyAMA0", and the baud rate is 1000000.
roslaunch mycobot_280pi simple_gui.launch port:=/dev/ttyAMA0 baud:=1000000
- mycobot 280-JetsonNano version:
# The default serial port name of mycobot 280-JetsonNano version is "/dev/ttyTHS1", and the baud rate is 1000000.
roslaunch mycobot_280jn simple_gui.launch port:=/dev/ttyTHS1 baud:=1000000
- mycobot 280-Arduino version:
# The default serial port name of mycobot 280-Arduino version is "/dev/ttyACM0", and the baud rate is 115200.
roslaunch mycobot_280arduino simple_gui.launch port:=/dev/ttyACM0 baud:=115200
Running effect:
4 Keyboard control
Keyboard control is added in mycobot_280 package, and real-time Synchronization is performed in rviz. This function depends on pythonApi, so be sure to connect with the real robot arm.
Open a command line and run:
- mycobot 280-M5 version:
# The default serial port name of mycobot 280-M5 version is "/dev/ttyUSB0", and the baud rate is 115200. The serial port name of some models is "dev/ttyACM0". If the default serial port name is wrong, you can change the serial port name to "/dev/ttyACM0".
roslaunch mycobot_280 teleop_keyboard.launch port:=/dev/ttyUSB0 baud:=115200
- mycobot 280-Pi version:
# The default serial port name of mycobot 280-Pi version is "/dev/ttyAMA0", and the baud rate is 1000000.
roslaunch mycobot_280pi teleop_keyboard.launch port:=/dev/ttyAMA0 baud:=1000000
- mycobot 280-JetsonNano version:
# The default serial port name of mycobot 280-JetsonNano version is "/dev/ttyTHS1", and the baud rate is 1000000.
roslaunch mycobot_280jn teleop_keyboard.launch port:=/dev/ttyTHS1 baud:=1000000
- mycobot 280-Arduino version:
# The default serial port name of mycobot 280-Arduino version is "/dev/ttyACM0", and the baud rate is 115200.
roslaunch mycobot_280arduino teleop_keyboard.launch port:=/dev/ttyACM0 baud:=115200
Running effect is as follows:
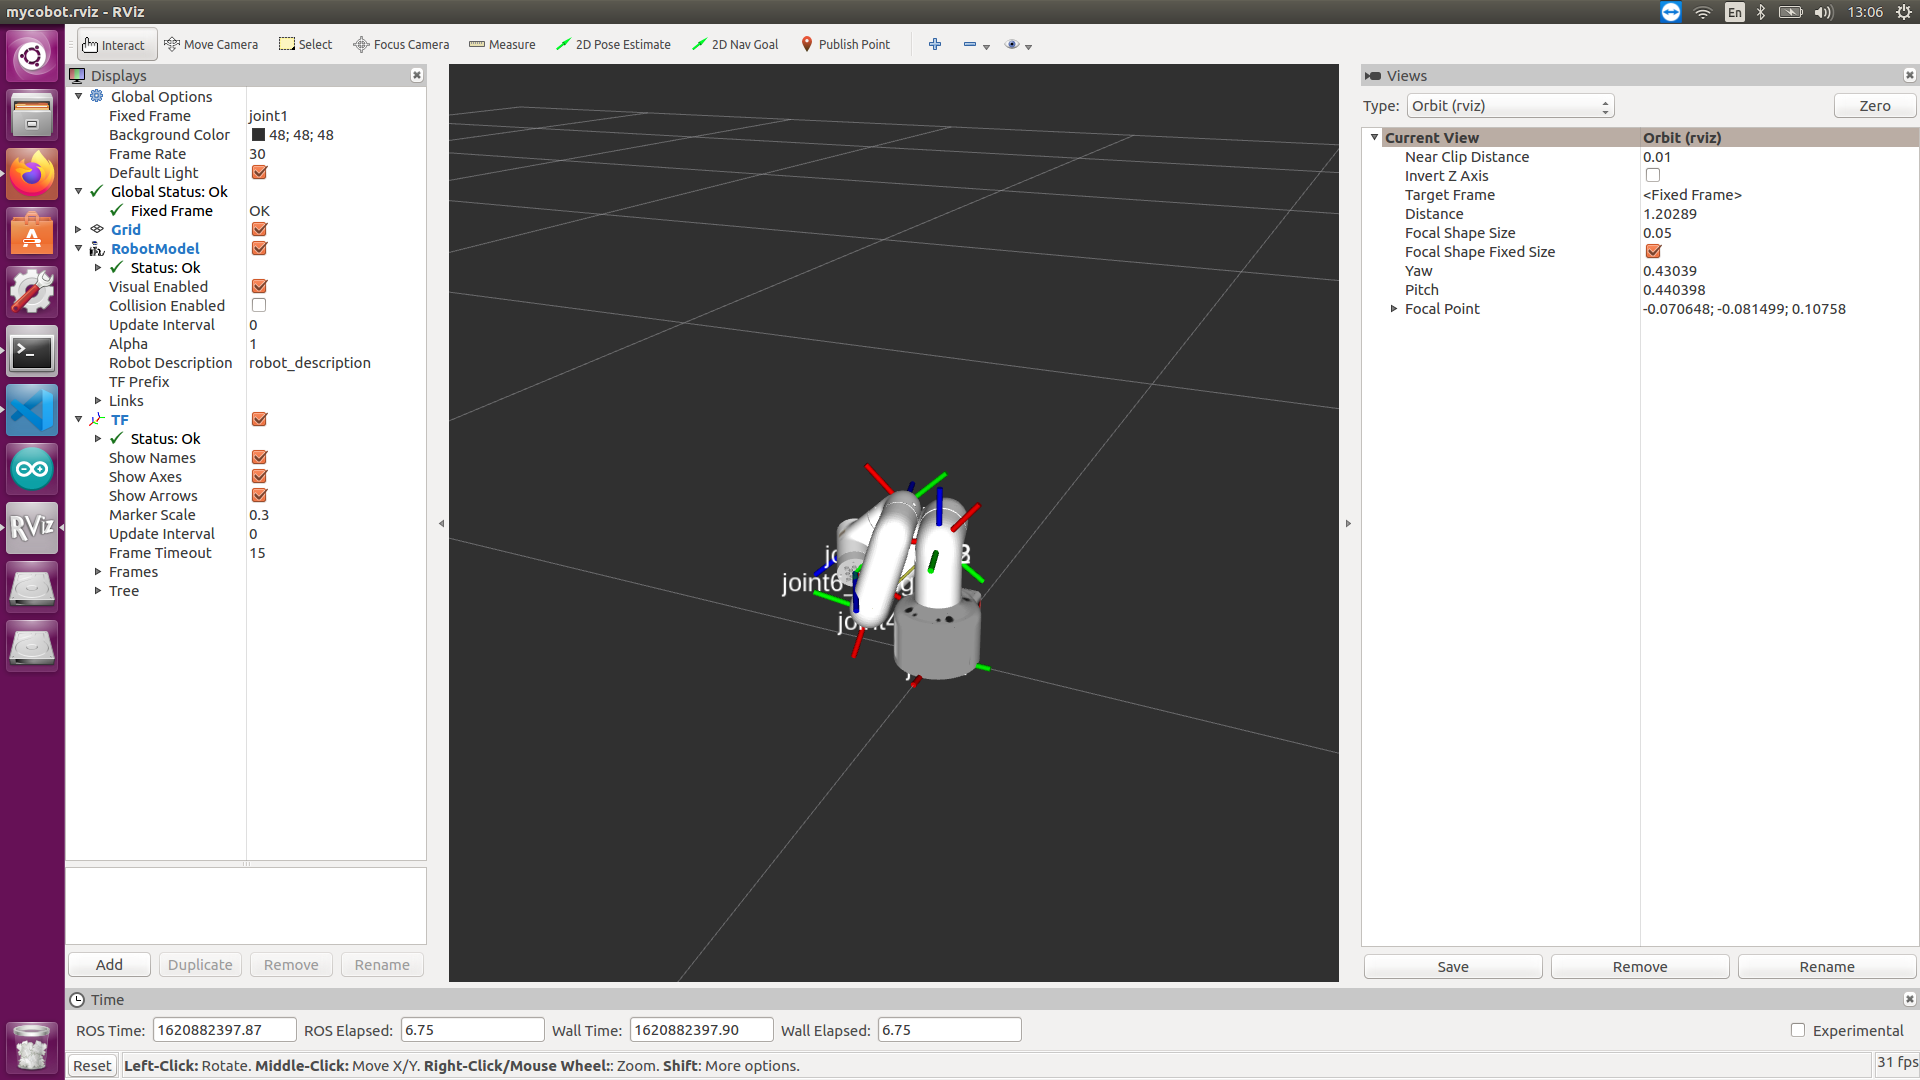
mycobot information will be output in the command line as follows:
SUMMARY
========

PARAMETERS
 * /mycobot_services/baud: 115200
 * /mycobot_services/port: /dev/ttyUSB0 or /dev/ttyAMA0
 * /robot_description: <?xml version="1....
 * /rosdistro: kinetic
 * /rosversion: 1.12.17

NODES
  /
    mycobot_services (mycobot_280/mycobot_services.py)
    real_listener (mycobot_280/listen_real.py)
    robot_state_publisher (robot_state_publisher/state_publisher)
    rviz (rviz/rviz)

auto-starting new master
process[master]: started with pid [1333]
ROS_MASTER_URI=http://localhost:11311

setting /run_id to f977b3f4-b3a9-11eb-b0c8-d0c63728b379
process[rosout-1]: started with pid [1349]
started core service [/rosout]
process[robot_state_publisher-2]: started with pid [1357]
process[rviz-3]: started with pid [1367]
process[mycobot_services-4]: started with pid [1380]
process[real_listener-5]: started with pid [1395]
[INFO] [1620882819.196217]: start ...
[INFO] [1620882819.205050]: /dev/ttyUSB0,115200

MyCobot Status
--------------------------------
Joint Limit:
    joint 1: -170 ~ +170
    joint 2: -170 ~ +170
    joint 3: -170 ~ +170
    joint 4: -170 ~ +170
    joint 5: -170 ~ +170
    joint 6: -180 ~ +180

Connect Status: True

Servo Infomation: all connected

Servo Temperature: unknown

Atom Version: unknown

[INFO] [1620882819.435778]: ready
Then open another command line and run:
- mycobot 280-M5 verion:
rosrun mycobot_280 teleop_keyboard.py
#or
rosrun mycobot_280 teleop_keyboard.py _speed:=70
- mycobot 280-Pi version:
rosrun mycobot_280 teleop_keyboard.py
#or
rosrun mycobot_280pi teleop_keyboard.py _speed:=70
- mycobot 280-JetsonNano version:
rosrun mycobot_280jn teleop_keyboard.py
#or
rosrun mycobot_280jn teleop_keyboard.py _speed:=70
- mycobot 280-Arduino version:
rosrun mycobot_280arduino teleop_keyboard.py
#or
rosrun mycobot_280arduino teleop_keyboard.py _speed:=70
You will see the following output in the command line:
Mycobot Teleop Keyboard Controller
---------------------------
Movimg options(control coordinations [x,y,z,rx,ry,rz]):
              w(x+)

    a(y-)     s(x-)     d(y+)

    z(z-) x(z+)

u(rx+)   i(ry+)   o(rz+)
j(rx-)   k(ry-)   l(rz-)

Gripper control:
    g - open
    h - close

Other:
    1 - Go to init pose
    2 - Go to home pose
    3 - Resave home pose
    q - Quit

currently:      speed: 50       change percent 5
In this terminal, you can control the state of the robot arm and move it using the keys in the command line.
Parameters supported by this script:
- _speed: the movement speed of the robot arm
- _change_percent: movement distance percentage
5 Vision
Install the camera at the end of mycobot. This vision part uses the eye-in-hand method. After reinstalling the camera, a hand-eye calibration is required.

5.1 Prerequisites for use
5.1.1 Python dependency libraries
Use pip to install the following Python libraries
pip install stag-python

pip install opencv-python

pip install scipy

pip install numpy

pip install pymycobot
5.1.2 Stag Code
This article uses stag code for QR code tracking. It is recommended to use color printing, as the recognition rate of black and white printing is low.
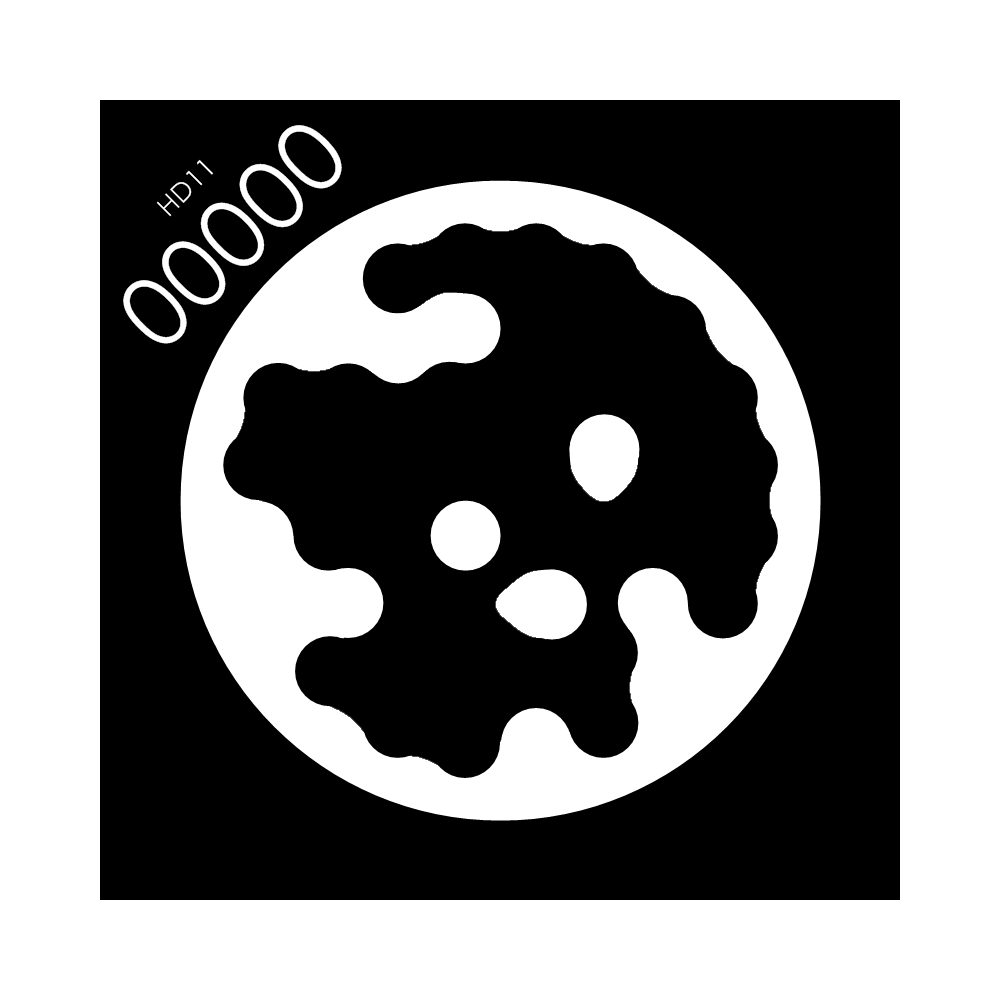
Download address: Stag code download
Note: The upper left corner of the stag code is a number, which can be identified by the stag recognition library of OpenCV. You can design different behavior logic for different numbers, such as 00 is set for position tracking, 01 is set for posture tracking, and 02 is set for returning to the observation point.
5.1.3 Firmware Update
Using the stag tracking firmware will give better results. This firmware will limit the deflection of the robot arm. Using the send_coords interface in refresh mode will filter out adjacent coordinates with an angle deviation of more than 90°.
The firmware is named mycobot280_atom0926_vision.bin and is located in the folder ~/mycobot_ros/mycobot_280/mycobot_280/config of this project.
5.1.4 Camera initialization
In this project, the file ~/mycobot_ros/mycobot_280/mycobot_280/camera_calibration/camera_calibration.py defines a visual recognition class called camera_detect.
class camera_detect:
    #Camera parameter initialize
    def __init__(self, camera_id, marker_size, mtx, dist):
The four parameters initialized are:
camera_id 相机编号(范围一般是0~10,默认为0)
marker_size Stag码的边长(mm)
mtx, dist 相机参数
An initialization example has been given in the program. The user only needs to modify camera_id and marker_size.
camera_params = np.load("camera_params.npz")  # Camera Profiles
mtx, dist = camera_params["mtx"], camera_params["dist"]
m = camera_detect(0, 32, mtx, dist)
Note: The default camera_id in Linux system is usually 0. If it is wrong, change it to other parameters from 0 to 10.
5.2 Hand-eye calibration
5.2.1 Hand-eye matrix principle
Hand-eye calibration is an essential part of visual tracking. Its function is to obtain the relative relationship between the robot arm coordinate system (hand) and the camera coordinate system (eye). We use a 4*4 hand-eye matrix to represent this relative relationship. The specific principle can be referred to: Hand-Eye Matrix Principle
5.2.2 Hand-eye calibration method
Note: After reinstalling the camera, a hand-eye calibration is required.
Install the camera on the robotic arm (usually at the end of the robotic arm) and connect the robotic arm to be controlled.
Run the command line:
- mycobot 280-M5版本:
cd ~/mycobot_ros/mycobot_280/mycobot_280/camera_calibration  # The terminal switches to the target path
python3 camera_calibration.py  # Camera id, default is 0.
At this time, the robotic arm will first move to the observation posture.
self.origin_mycbot_level = [0, 5, -104, 14, 0, 0]
def Eyes_in_hand_calibration(self, ml):
    ml.send_angles(self.origin_mycbot_level, 50)  # 移动到观测点
Note: Users can customize the observation points, such as rotating the 6 joints to put the camera in a more suitable position.
- After moving to the observation posture, the terminal will pop up the following prompt, place the stag code in the camera's field of view, and enter any key to continue recognition.
make sure camera can observe the stag, enter any key quit
- If the camera recognizes the stag code, it will automatically enter the next step of recognition, the robot arm moves and captures the position information of the robot arm and camera.
Move the end of the robot arm to the calibration point, press any key to release servo
- After attaching, follow the prompts and enter any key to complete the hand-eye calibration.
focus servo and get current coords
- The EyesInHand_matrix information will be printed at this time, and the calibration is considered complete. The "EyesInHand_matrix.json configuration file is generated. After the calibration is successful, there is no need to repeat the operation!
Please refer to the following video for specific effects, the effect is similar to mycobot 280:
Note: Hand-eye calibration may have errors due to improper operation, machine virtual position, etc. When the visual tracking effect is not good, hand-eye calibration needs to be re-performed
5.3 Visual Tracking
The control method of the robot arm in this case: Use the topic in ROS for communication. USB camera startup method: Use the camera usb_cam node in ROS to start.
usb_cam installation command:
# Ubuntu 20.04
sudo apt install ros-noetic-usb-cam
Mainly involved code files:
1. communication_topic.launch 2. mycobot_topics.py 3. open_camera.launch 4. listen_real_of_topic.py 5. detect_marker_with_topic.launch 6. detect_stag.py
The default camera device parameter in the camera file open_camera.launch is /dev/video0.
<!-- //Specify the device file name, the default is /dev/video0 -->
    <param name="video_device" value="/dev/video0" />
Command line operation:
- mycobot 280-M5 version:
cd ~/catkin_ws
source devel/setup.bash
# The default serial port name of mycobot 280-M5 is "/dev/ttyUSB0" and the baud rate is 115200. The serial port name of some models is "dev/ttyACM0". If the default serial port name is wrong, you can change the serial port name to "/dev/ttyACM0".
roslaunch mycobot_280 detect_marker_with_topic.launch port:=/dev/ttyUSB0 baud:=115200
- port: serial port string
- baud: baud rate
The status of mycobot will be displayed in real time.
Then run the stag recognition and tracking script. Open a new command line:
- mycobot 280-M5 version:
cd ~/catkin_ws
source devel/setup.bash
rosrun mycobot_280 detect_stag.py
After starting, the robot arm will move to the observation point:
self.origin_mycbot_horizontal = [0,60,-60,0,0,0]
ml.send_angles(self.origin_mycbot_horizontal, 50)  # 移动到观测点
The specific effects are as follows:
6 End Effector
Supported end effectors: myCobot adaptive gripper, myCobot vertical suction pump V2.0, camera flange
Applicable devices: myCobot 280 M5、myCobot 280 PI
Note: myCobot adaptive gripper only supports myCobot 280 M5 device
6.1 myCobot adaptive gripper
1 Load model
Open a command line and run:
- myCobot 280-M5 version:
roslaunch mycobot_280 test_gripper.launch
It will open rviz and you will see the following screen:

2 Slider Control
Open a command line and run:
- myCobot 280-M5 version:
# The default serial port name of myCobot 280-M5 version is "/dev/ttyUSB0" and the baud rate is 115200. The serial port name of some models is "dev/ttyACM0". If the default serial port name is wrong, you can change the serial port name to "/ dev/ttyACM0".
roslaunch mycobot_280 slider_control_gripper.launch port:=/dev/ttyUSB0 baud:=115200
It will open rviz and a slider component, and you will see something like this:

You can then control the model movement in rviz by dragging the slider. If you want the real myCobot to move along with you, you need to open another command line** and run:
- myCobot 280-M5 version:
# The default serial port name of myCobot 280-M5 version is "/dev/ttyUSB0" and the baud rate is 115200. The serial port name of some models is "dev/ttyACM0". If the default serial port name is wrong, you can change the serial port name to "/ dev/ttyACM0".
rosrun mycobot_280 slider_control_gripper.py _port:=/dev/ttyUSB0 _baud:=115200
Please note: Since the robot arm will move to the current position of the model when the command is entered, please make sure that the model in rviz does not have mold penetration before you use the command. Do not quickly drag the slider after connecting the robotic arm to prevent damage to the robotic arm.
3 Model Follows
In addition to the above controls, we can also make the model follow the movement of the real robotic arm. Open a command line and run:
- mycobot 280-M5 version:
# The default serial port name of mycobot 280-M5 version is "/dev/ttyUSB0", and the baud rate is 115200. The serial port name of some models is "dev/ttyACM0". If the default serial port name is wrong, you can change the serial port name to " /dev/ttyACM0".
rosrun mycobot_280 follow_display_gripper.py _port:=/dev/ttyUSB0 _baud:=115200
Then open another command line and run:
- mycobot 280-M5 version:
roslaunch mycobot_280 mycobot_follow_gripper.launch
It will open rviz to display the model following effect.
4 GUI Control
On the basis of the previous ones, this package also provides a simple Gui control interface. This method is intended for real robot arms to interact with each other, please connect to myCobot.
Open the command line:
- mycobot 280-M5 version:
# The default serial port name of mycobot 280-M5 version is "/dev/ttyUSB0", and the baud rate is 115200. The serial port name of some models is "dev/ttyACM0". If the default serial port name is wrong, you can change the serial port name to " /dev/ttyACM0".
roslaunch mycobot_280 simple_gui_gripper.launch port:=/dev/ttyUSB0 baud:=115200
It will open rviz and a GUI interface, and you will see the following screen:

5 Keyboard Control
The keyboard control function has been added to the mycobot_280 package and synchronized in real time in rviz. This function relies on pythonApi, so make sure it is connected to the real robot arm.
Open a command line and run:
- mycobot 280-M5 version:
# The default serial port name of mycobot 280-M5 version is "/dev/ttyUSB0", and the baud rate is 115200. The serial port name of some models is "dev/ttyACM0". If the default serial port name is wrong, you can change the serial port name to " /dev/ttyACM0".
roslaunch mycobot_280 teleop_keyboard_gripper.launch port:=/dev/ttyUSB0 baud:=115200
The running effect is as follows:

myCobot information will be output on the command line, as follows:
SUMMARY
========

PARAMETERS
 * /mycobot_services/baud: 115200
 * /mycobot_services/port: /dev/ttyUSB0
 * /robot_description: <?xml version="1....
 * /rosdistro: kinetic
 * /rosversion: 1.12.1.17

NODES
  /
    mycobot_services (mycobot_280/mycobot_services.py)
    real_listener (mycobot_280/listen_real.py)
    robot_state_publisher (robot_state_publisher/state_publisher)
    rviz (rviz/rviz)

auto-starting new master
process[master]: started with pid [1333]
ROS_MASTER_URI=http://localhost:11311

setting /run_id to f977b3f4-b3a9-11eb-b0c8-d0c63728b379
process[rosout-1]: started with pid [1349]
started core service [/rosout]
process[robot_state_publisher-2]: started with pid [1357]
process[rviz-3]: started with pid [1367]
process[mycobot_services-4]: started with pid [1380]
process[real_listener-5]: started with pid [1395]
[INFO] [1620882819.196217]: start ...
[INFO] [1620882819.205050]: /dev/ttyUSB0,115200

MyCobot Status
--------------------------------
Joint Limit:
    joint 1: -170 ~ +170
    joint 2: -135 ~ +140
    joint 3: -150 ~ +150
    joint 4: -145 ~ +135
    joint 5: -170 ~ +170
    joint 6: -180 ~ +180

Connect Status: True

Servo Infomation: all connected

Servo Temperature: unknown

Atom Version: unknown

[INFO] [1620882819.435778]: ready
Next, open another command line and run:
- mycobot 280-M5 version:
rosrun mycobot_280 teleop_keyboard.py
You will see the following output on the command line:
Mycobot Teleop Keyboard Controller
---------------------------
Movimg options(control coordinations [x,y,z,rx,ry,rz]):
              w(x+)

    a(y-)     s(x-)     d(y+)

    z(z-) x(z+)

u(rx+)   i(ry+)   o(rz+)
j(rx-)   k(ry-)   l(rz-)

Gripper control:
    g - open
    h - close

Pump control:
    b - open
    m - close

Other:
    1 - Go to init pose
    2 - Go to home pose
    3 - Resave home pose
    q - Quit

currently:      speed: 50       change percent 5
In this terminal, you can control the status of the robotic arm and move the robotic arm through the keys on the command line.
Parameters supported by this script:
- _speed: Robot arm moving speed.
- _change_percent: Percentage of moving distance.
6.2 myCobot vertical suction pump V2.0
1 Load model
Open a command line and run:
- myCobot 280-M5 version:
roslaunch mycobot_280 test_pump.launch
- myCobot 280-PI version:
roslaunch mycobot_280pi test_pump.launch
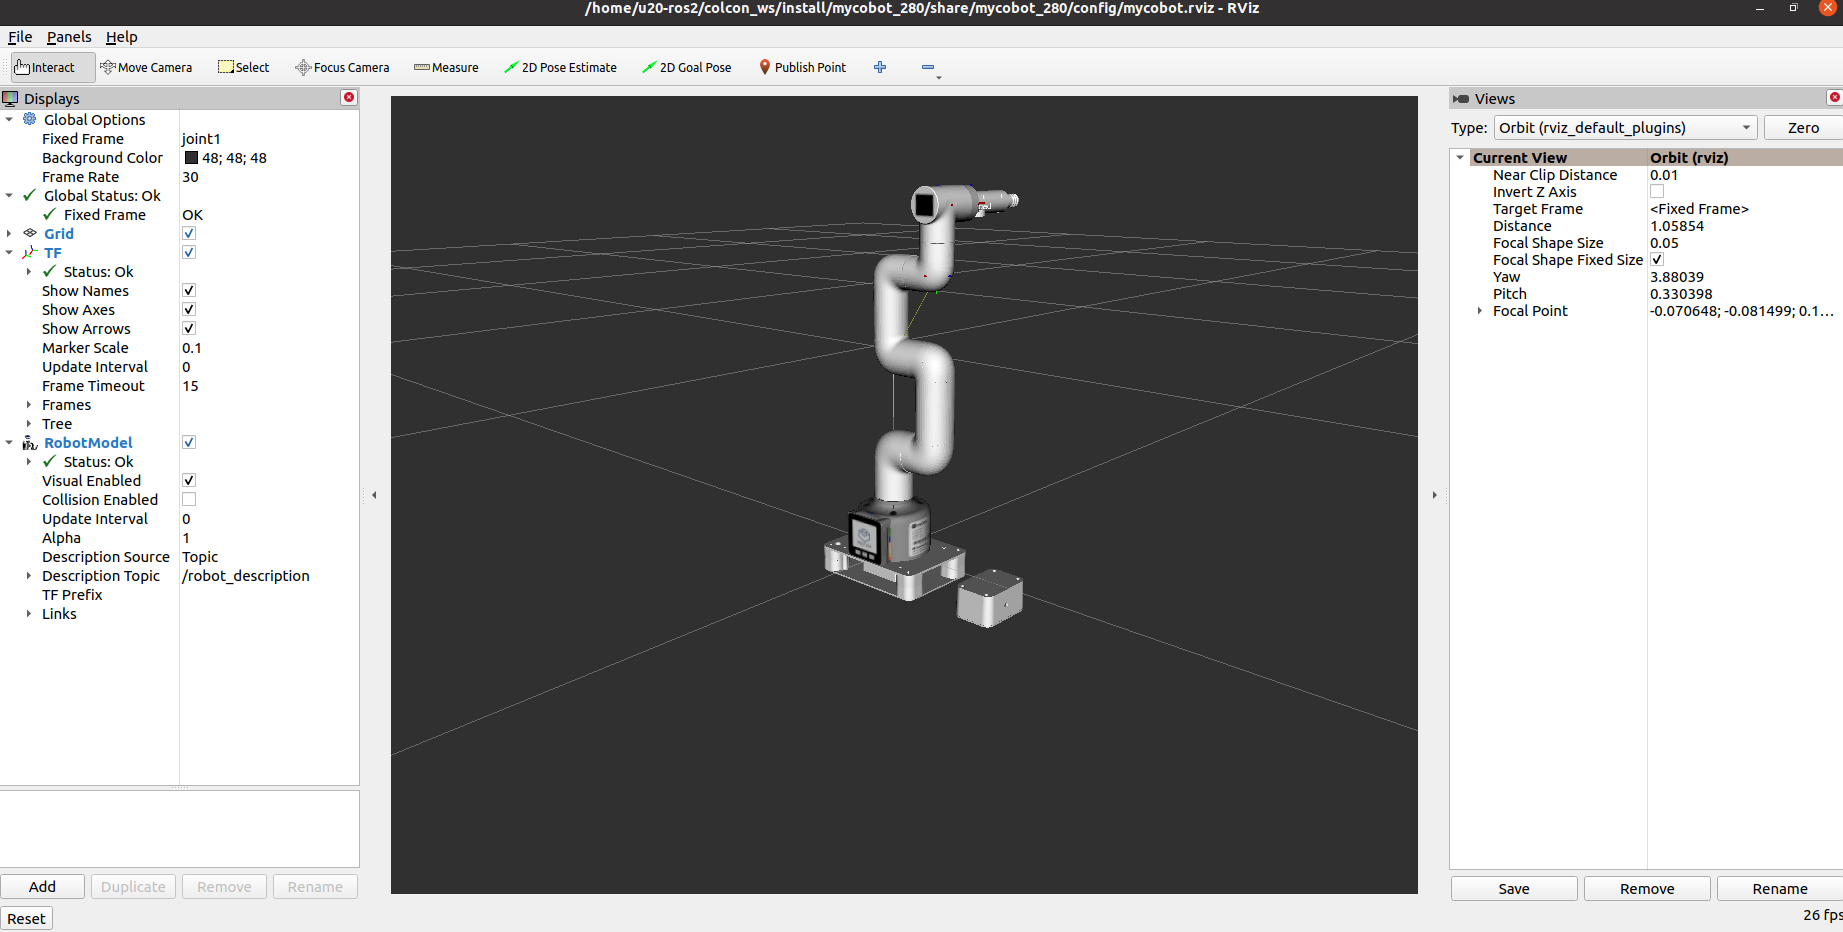
It will open rviz and you will see the following screen:
2 Slider Control
Note: This function only supports control of the robotic arm
Open a command line and run:
- myCobot 280-M5 version:
# The default serial port name of myCobot 280-M5 version is "/dev/ttyUSB0", and the baud rate is 115200. The serial port name of some models is "dev/ttyACM0". If the default serial port name is wrong, you can change the serial port name to " /dev/ttyACM0".
roslaunch mycobot_280 slider_control_pump.launch port:=/dev/ttyUSB0 baud:=115200
- myCobot 280-PI version:
# The default serial port name of myCobot 280-Pi version is "/dev/ttyAMA0", and the baud rate is 1000000.
roslaunch mycobot_280pi slider_control_pump.launch port:=/dev/ttyAMA0 baud:=1000000
It will open rviz and a slider component, and you will see something like this:
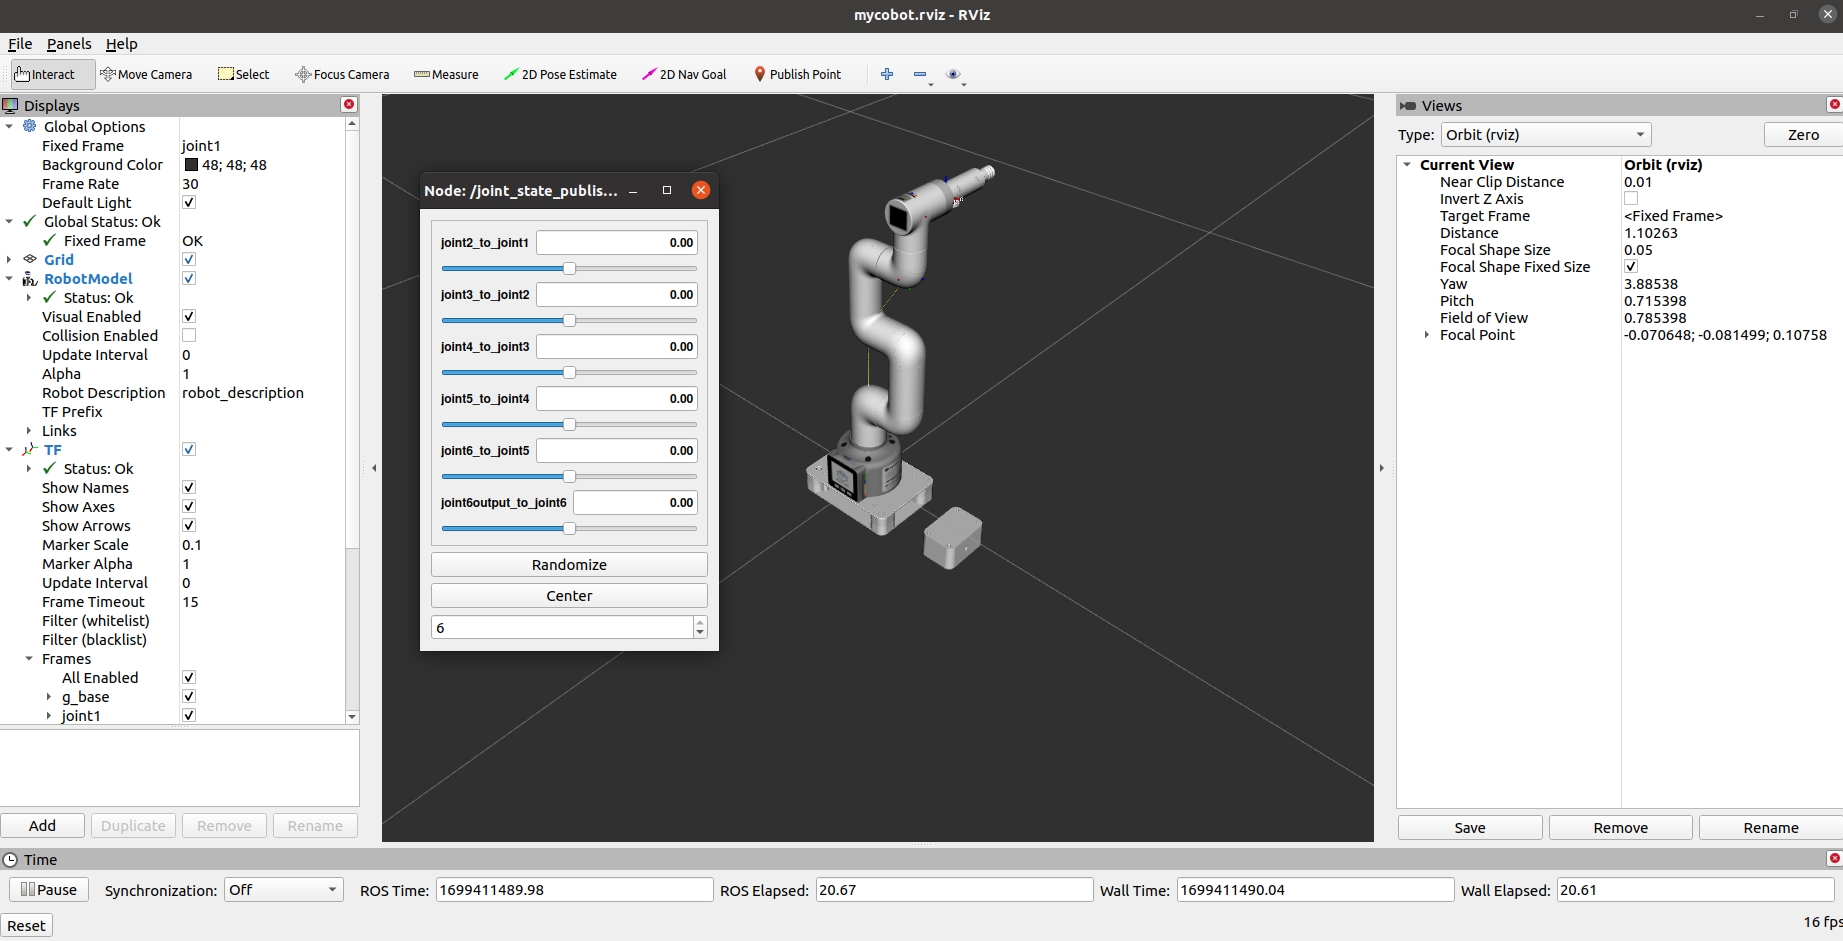
You can then control the model movement in rviz by dragging the slider. If you want the real myCobot to move along with you, you need to open another command line** and run:
- myCobot 280-M5 version:
# The default serial port name of myCobot 280-M5 version is "/dev/ttyUSB0", and the baud rate is 115200. The serial port name of some models is "dev/ttyACM0". If the default serial port name is wrong, you can change the serial port name to " /dev/ttyACM0".
rosrun mycobot_280 slider_control.py _port:=/dev/ttyUSB0 _baud:=115200
- myCobot 280-PI version:
# The default serial port name of myCobot 280-Pi version is "/dev/ttyAMA0", and the baud rate is 1000000.
rosrun mycobot_280pi slider_control.py _port:=/dev/ttyAMA0 _baud:=1000000
Please note: Since the robot arm will move to the current position of the model when the command is entered, please make sure that the model in rviz does not have mold penetration before you use the command. Do not quickly drag the slider after connecting the robotic arm to prevent damage to the robotic arm.
3 GUI control
On the basis of the previous ones, this package also provides a simple Gui control interface. This method is intended for real robot arms to interact with each other, please connect to myCobot.
Open the command line:
- mycobot 280-M5 version:
# The default serial port name of mycobot 280-M5 version is "/dev/ttyUSB0", and the baud rate is 115200. The serial port name of some models is "dev/ttyACM0". If the default serial port name is wrong, you can change the serial port name to " /dev/ttyACM0".
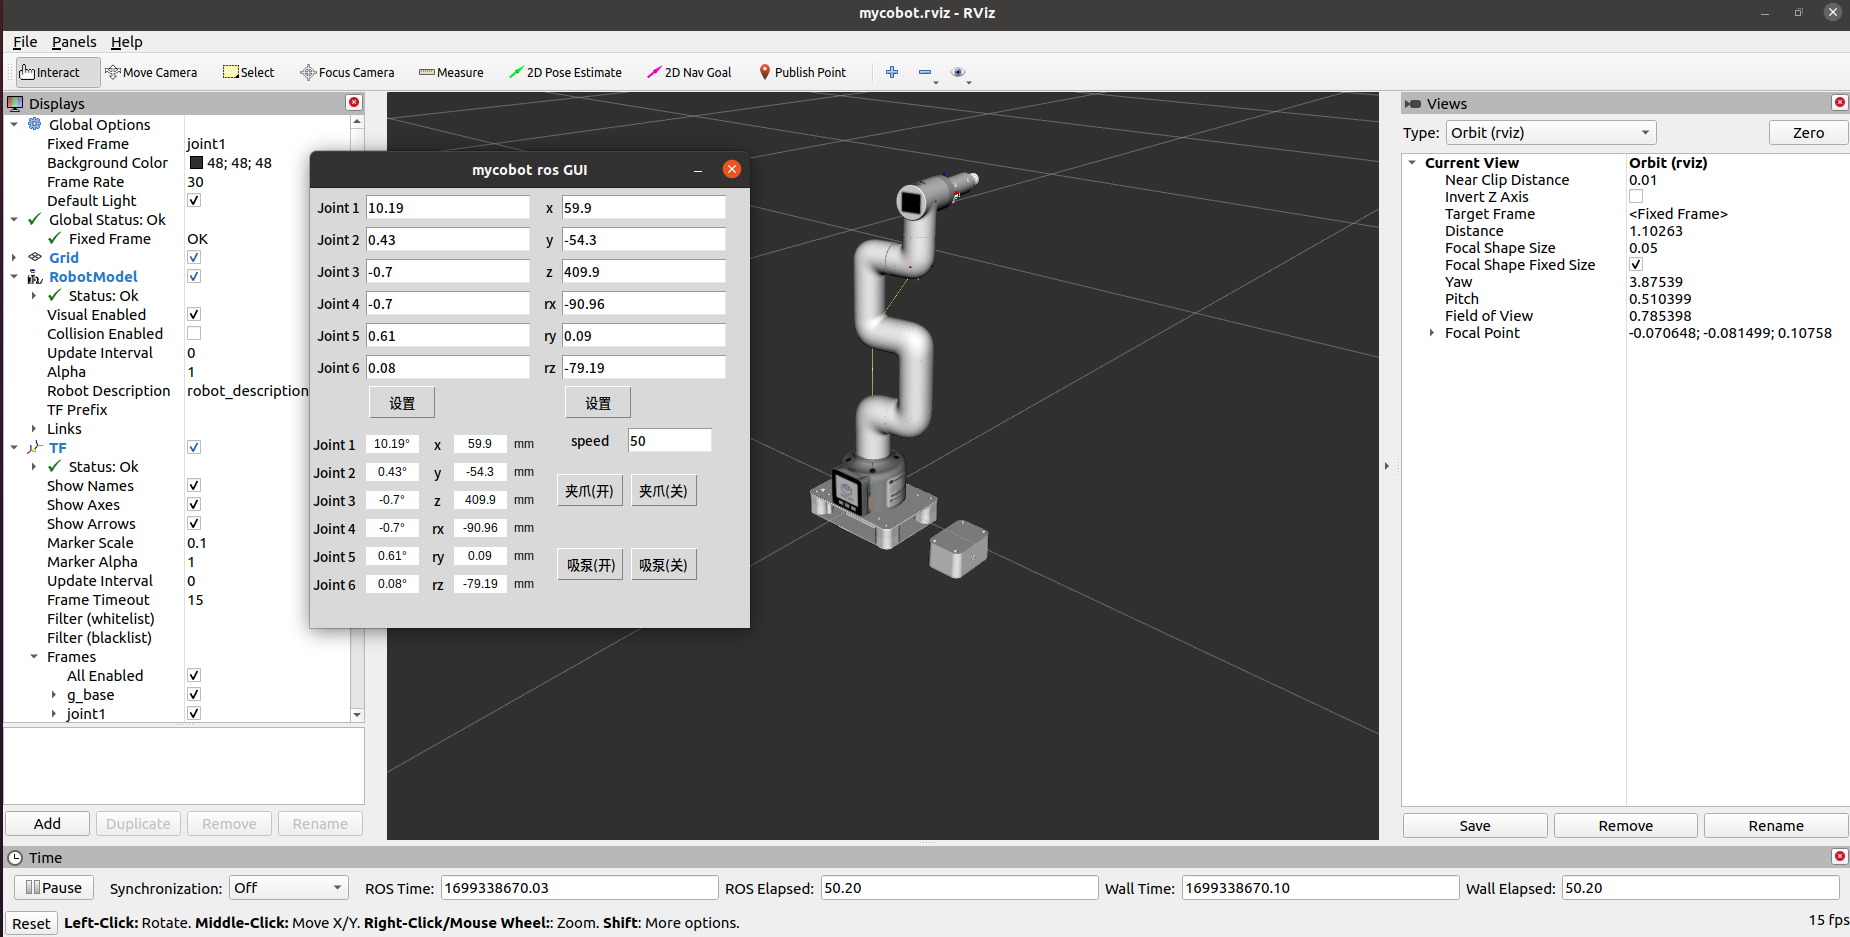
roslaunch mycobot_280 simple_gui_pump.launch port:=/dev/ttyUSB0 baud:=115200
It will open rviz and a GUI interface, and you will see the following screen:
4 Keyboard Control
The keyboard control function has been added to the mycobot_280 package and synchronized in real time in rviz. This function relies on python API, so make sure it is connected to the real robot arm.
Open a command line and run:
- mycobot 280-M5 version:
# The default serial port name of mycobot 280-M5 version is "/dev/ttyUSB0", and the baud rate is 115200. The serial port name of some models is "dev/ttyACM0". If the default serial port name is wrong, you can change the serial port name to " /dev/ttyACM0".
roslaunch mycobot_280 teleop_keyboard_pump.launch port:=/dev/ttyUSB0 baud:=115200
The running effect is as follows:

Next, open another command line and run:
- mycobot 280-M5 version:
rosrun mycobot_280 teleop_keyboard.py
You will see the following output on the command line:
Mycobot Teleop Keyboard Controller
---------------------------
Movimg options(control coordinations [x,y,z,rx,ry,rz]):
              w(x+)

    a(y-)     s(x-)     d(y+)

    z(z-) x(z+)

u(rx+)   i(ry+)   o(rz+)
j(rx-)   k(ry-)   l(rz-)

Gripper control:
    g - open
    h - close

Pump control:
    b - open
    m - close

Other:
    1 - Go to init pose
    2 - Go to home pose
    3 - Resave home pose
    q - Quit

currently:      speed: 50       change percent 5
In this terminal, you can control the status of the robotic arm and move the robotic arm through the keys on the command line.
Parameters supported by this script:
- _speed: Robot arm moving speed.
- _change_percent: Percentage of moving distance.
6.3 Camera Flange
1 Load model
Open a command line and run:
- myCobot 280-M5 version:
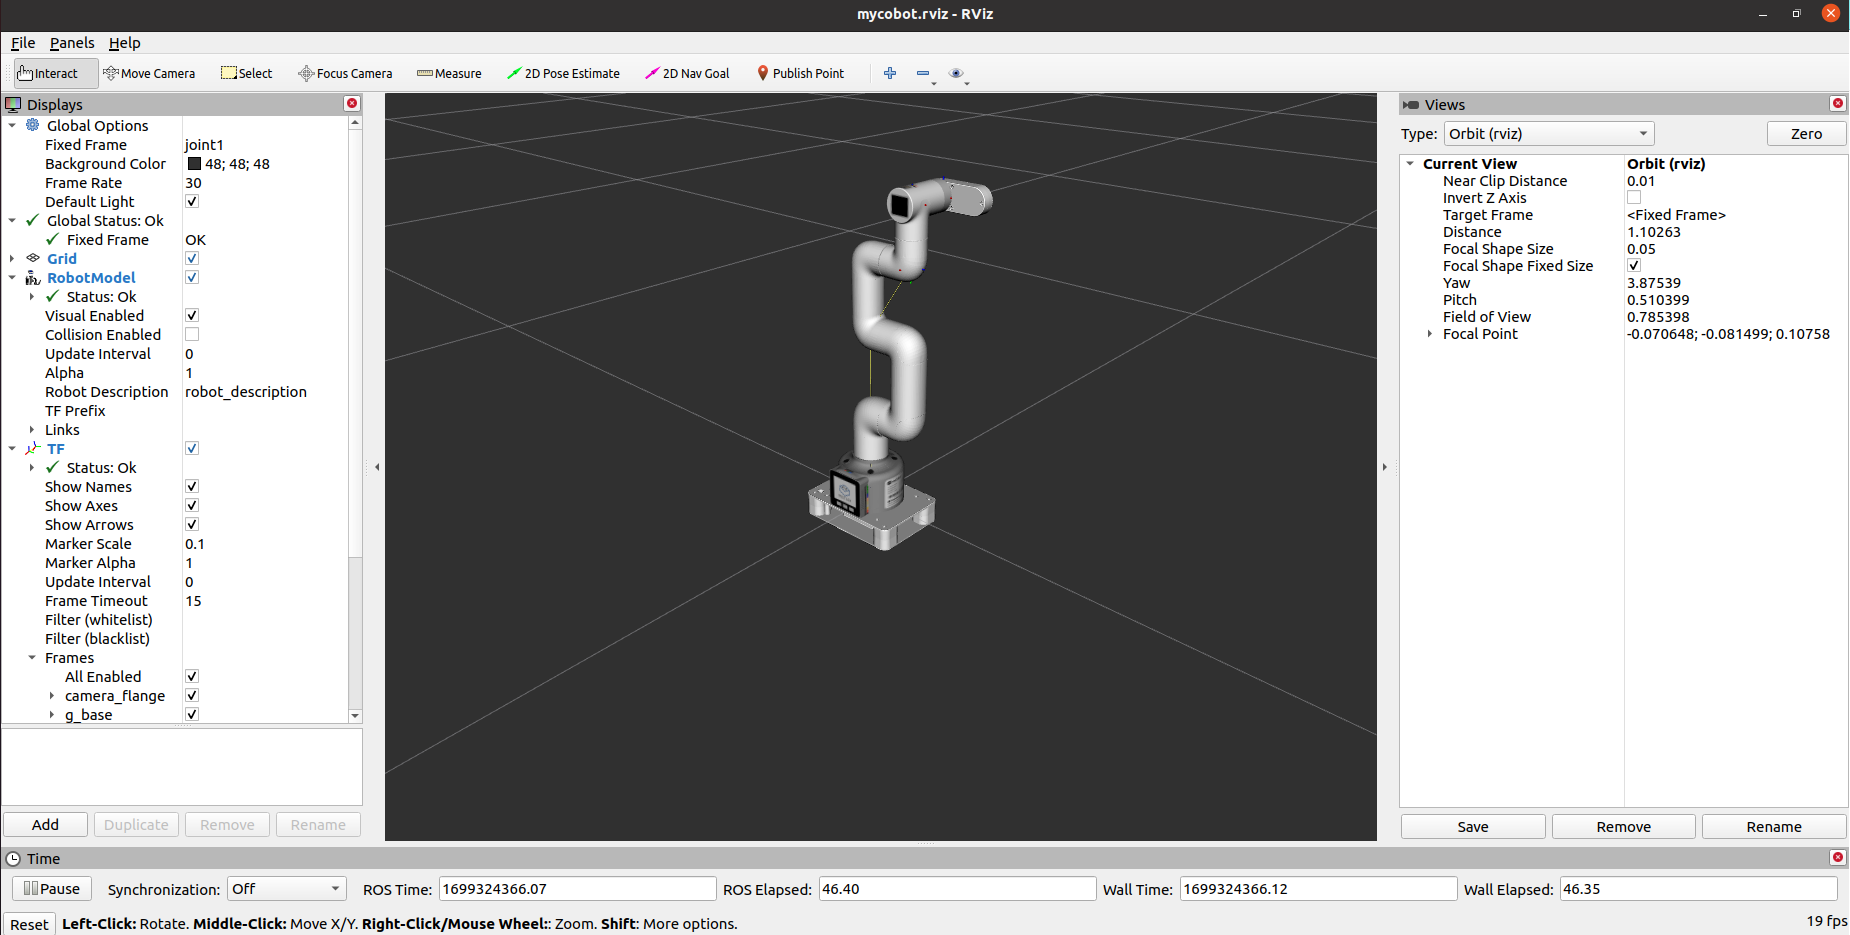
roslaunch mycobot_280 test_camera_flange.launch
- myCobot 280-PI version:
roslaunch mycobot_280pi test_camera_flange.launch
It will open rviz and you will see the following screen:
2 Slider Control
Note: This function only supports control of the robotic arm
Open a command line and run:
- myCobot 280-M5 version:
# The default serial port name of myCobot 280-M5 version is "/dev/ttyUSB0", and the baud rate is 115200. The serial port name of some models is "dev/ttyACM0". If the default serial port name is wrong, you can change the serial port name to " /dev/ttyACM0".
roslaunch mycobot_280 slider_control_camera_flange.launch port:=/dev/ttyUSB0 baud:=115200
- myCobot 280-PI version:
# The default serial port name of myCobot 280-Pi version is "/dev/ttyAMA0", and the baud rate is 1000000.
roslaunch mycobot_280pi slider_control_camera_flange.launch port:=/dev/ttyAMA0 baud:=1000000
It will open rviz and a slider component, and you will see something like this:
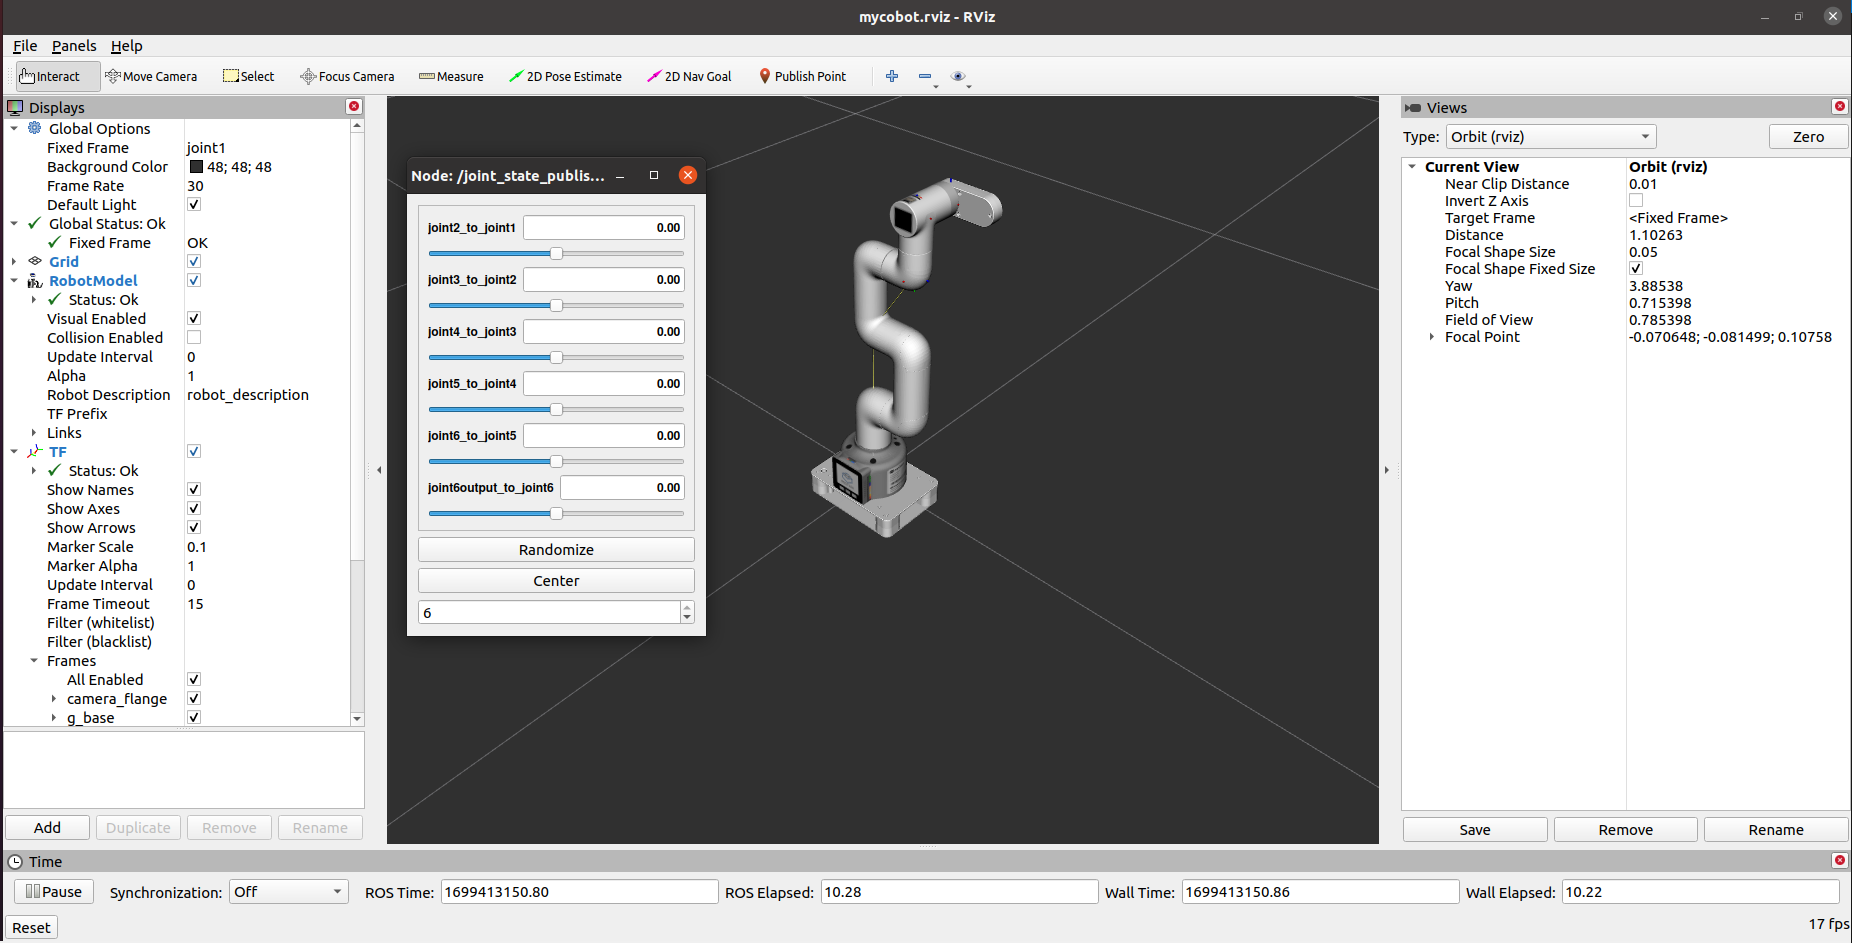
You can then control the model movement in rviz by dragging the slider. If you want the real myCobot to move along with you, you need to open another command line and run:
- myCobot 280-M5 version:
# The default serial port name of myCobot 280-M5 version is "/dev/ttyUSB0", and the baud rate is 115200. The serial port name of some models is "dev/ttyACM0". If the default serial port name is wrong, you can change the serial port name to " /dev/ttyACM0".
rosrun mycobot_280 slider_control.py _port:=/dev/ttyUSB0 _baud:=115200
- myCobot 280-PI version:
# The default serial port name of myCobot 280-Pi version is "/dev/ttyAMA0", and the baud rate is 1000000.
rosrun mycobot_280pi slider_control.py _port:=/dev/ttyAMA0 _baud:=1000000
Please note: Since the robot arm will move to the current position of the model when the command is entered, please make sure that the model in rviz does not have mold penetration before you use the command. Do not quickly drag the slider after connecting the robotic arm to prevent damage to the robotic arm.
6.4 Camera Flange && pump
1 Load model
Open a command line and run:
- myCobot 280-M5 version:
roslaunch mycobot_280 test_camera_flange_pump.launch
- myCobot 280-PI version:
roslaunch mycobot_280pi test_camera_flange_pump.launch
It will open rviz and you will see the following screen:
