7.1 Getting Started with UNO Q and Arduino App Lab
This section is intended for first-time use of myCobot 280 with Arduino UNO Q. It explains how to choose a control mode, connect the hardware, install Arduino App Lab, import examples, and run the first verification program.
For the official board overview, power options, and mode description, refer to the Arduino UNO Q user manual. App Lab installation and operation should always follow the latest official Arduino pages.
1. Read the Official UNO Q User Manual
UNO Q power, USB-C, display output, networking, expansion interfaces, and system functions follow the Arduino UNO Q User Manual. Read it before first power-on, connecting peripherals, or confirming board capabilities.
This GitBook explains using UNO Q with myCobot 280; it does not replace Arduino's board documentation. If board-operation guidance differs, follow the latest official Arduino documentation.
2. Control Modes
| Mode | Where the program runs | Typical use | Recommended interface |
|---|---|---|---|
| App Lab PC-hosted mode | App Lab on a PC | First setup, importing examples, quick verification | App Lab Run |
| SBC mode | UNO Q Debian desktop | Standalone use with monitor, keyboard, mouse, USB Hub, and gamepad | App Lab on UNO Q or terminal Python |
| Python on UNO Q | UNO Q Debian / App Lab Python | Local scripts and customer demos | MyCobot280(unoq_bridge=True) |
| TCP Socket | PC on the same LAN | Remote Python control from a PC | MyCobot280Socket("UNO_Q_IP", 9000) |
Only one control entry should send motion commands at the same time. Stop the current App Lab project or Python script before switching to another mode.
3. Hardware Checklist
- myCobot 280 for Arduino.
- Arduino UNO Q development board installed on the robot base.
- Original robot power adapter and a stable power outlet.
- USB-C cable that supports data transfer.
- PC running Windows, macOS, or Linux.
- Optional for SBC mode: monitor, keyboard, mouse, USB Hub with power delivery, and USB gamepad receiver.
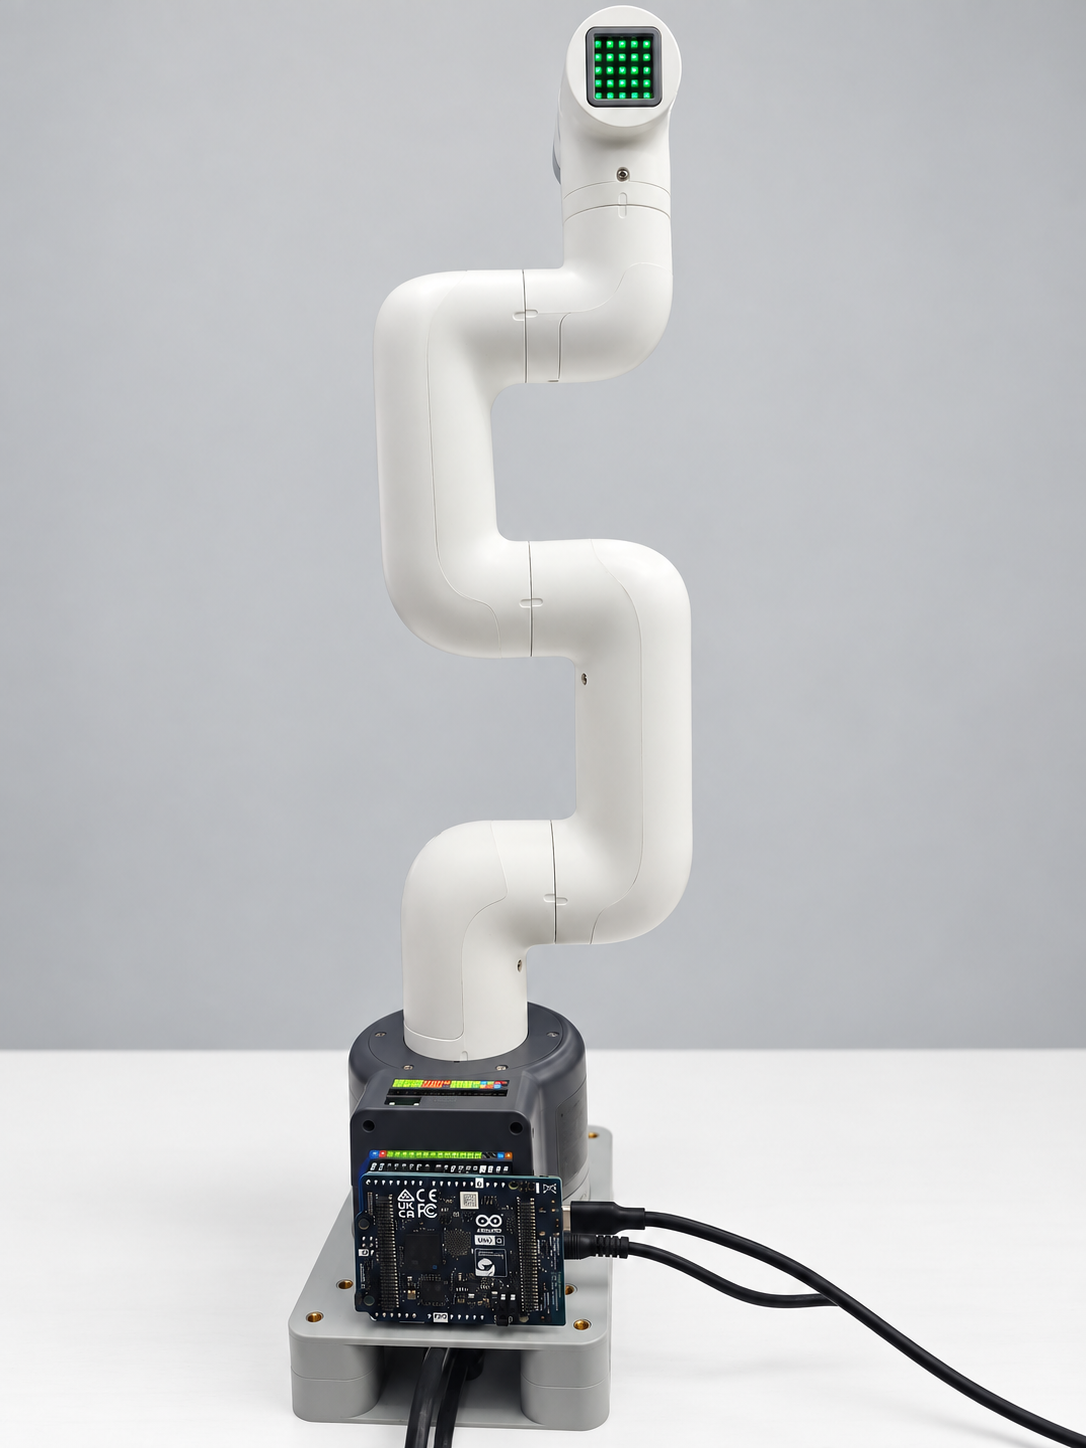
Figure 7.1-2. UNO Q connected to myCobot 280.
4. Power and Safety
UNO Q can be powered through USB-C, the 5V pin, or the VIN pin. For robot use, keep the robot powered by its standard power adapter and avoid changing power wiring while the robot is powered on.
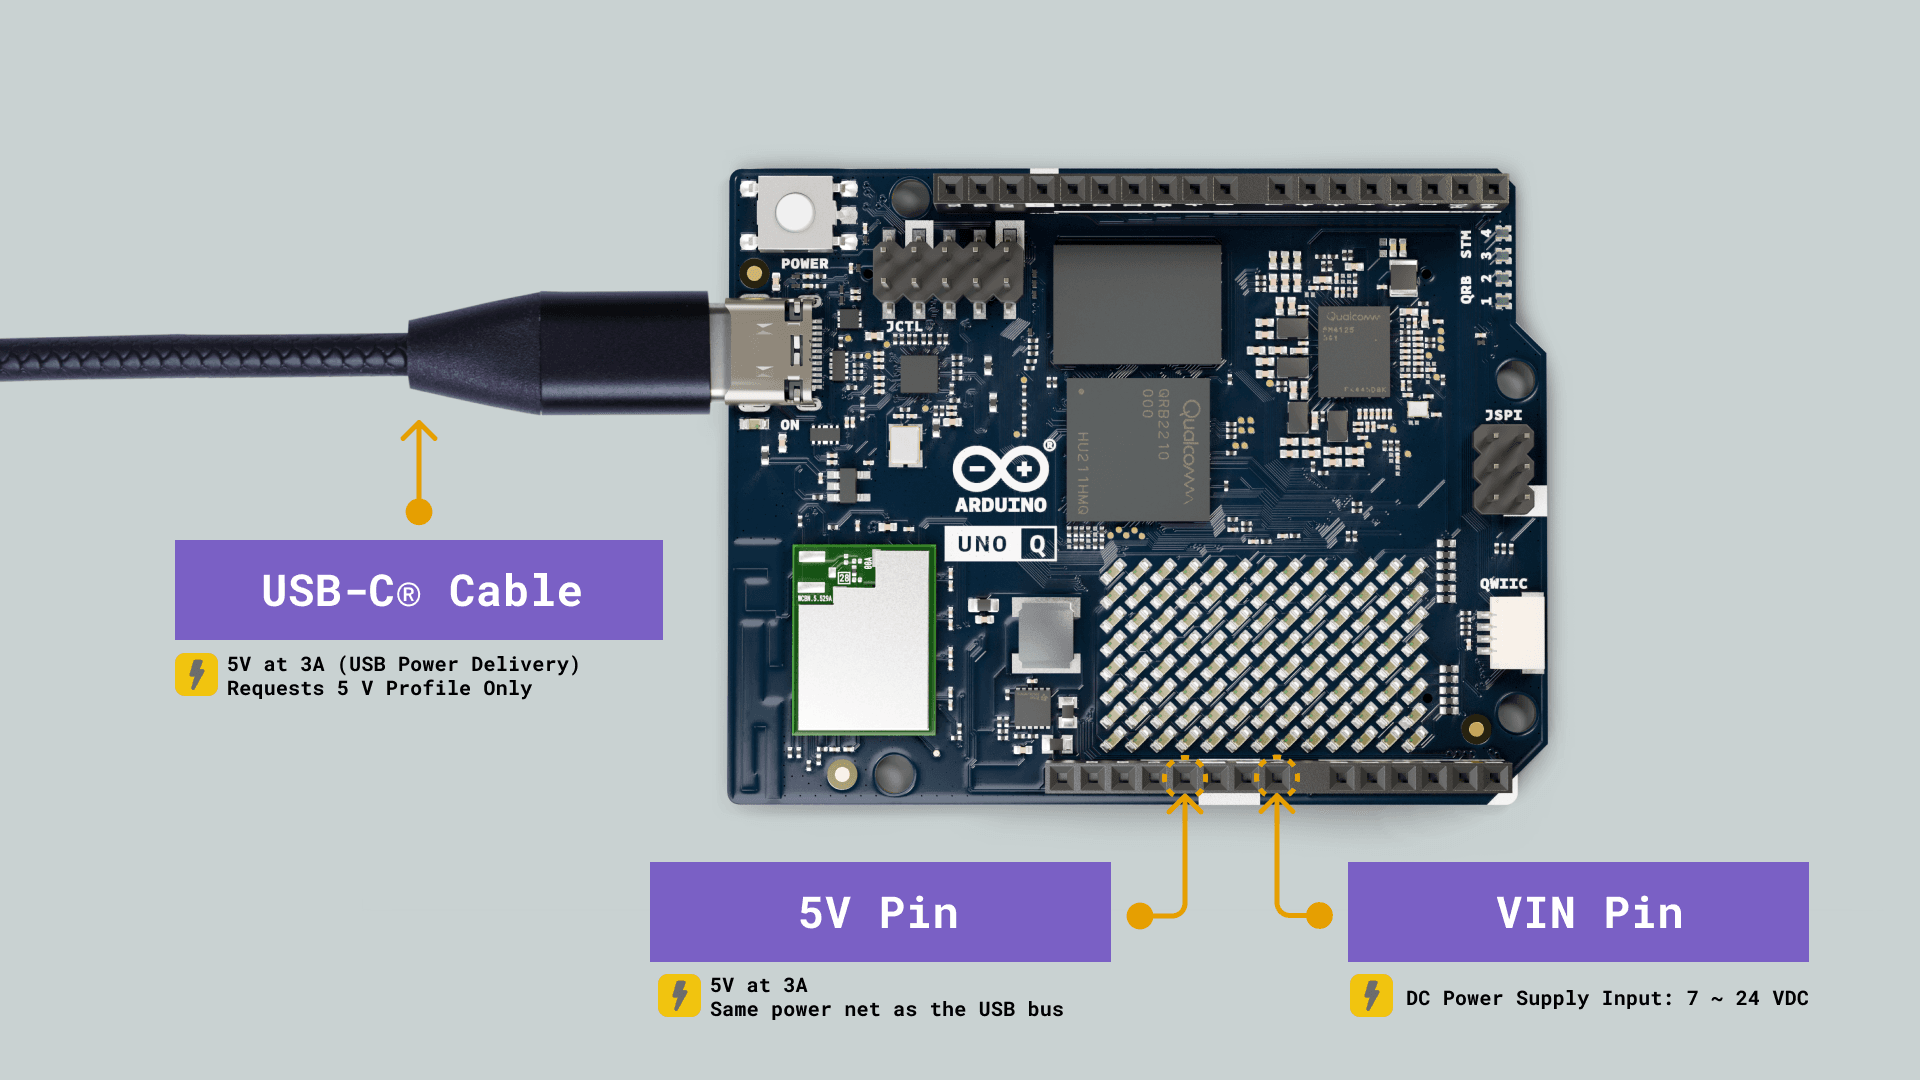
Figure 7.1-1. UNO Q power options. Source: Arduino UNO Q User Manual.
Before every motion test:
- Place the robot on a stable desktop or fixture.
- Keep the arm away from people, cables, and fragile objects.
- Run RGB or read-only examples before running motion examples.
- Use a low speed for the first joint or coordinate movement.
- Keep the Stop button or terminal interrupt method ready.
5. Install Arduino App Lab
Arduino App Lab is used to develop and run UNO Q apps. An app can contain Linux-side Python, an MCU-side Arduino Sketch, and optional Bricks.
5.1 Download Arduino App Lab
Open Arduino Software, find Arduino App Lab, and download the latest package for your operating system. Do not select Arduino IDE or Arduino Lab for MicroPython.
5.2 Windows
- Open the Arduino Software page.
- Find the Arduino App Lab download area.
- Download the Windows installer.
- Run the installer and follow the on-screen instructions.
- Start Arduino App Lab and confirm it opens normally.
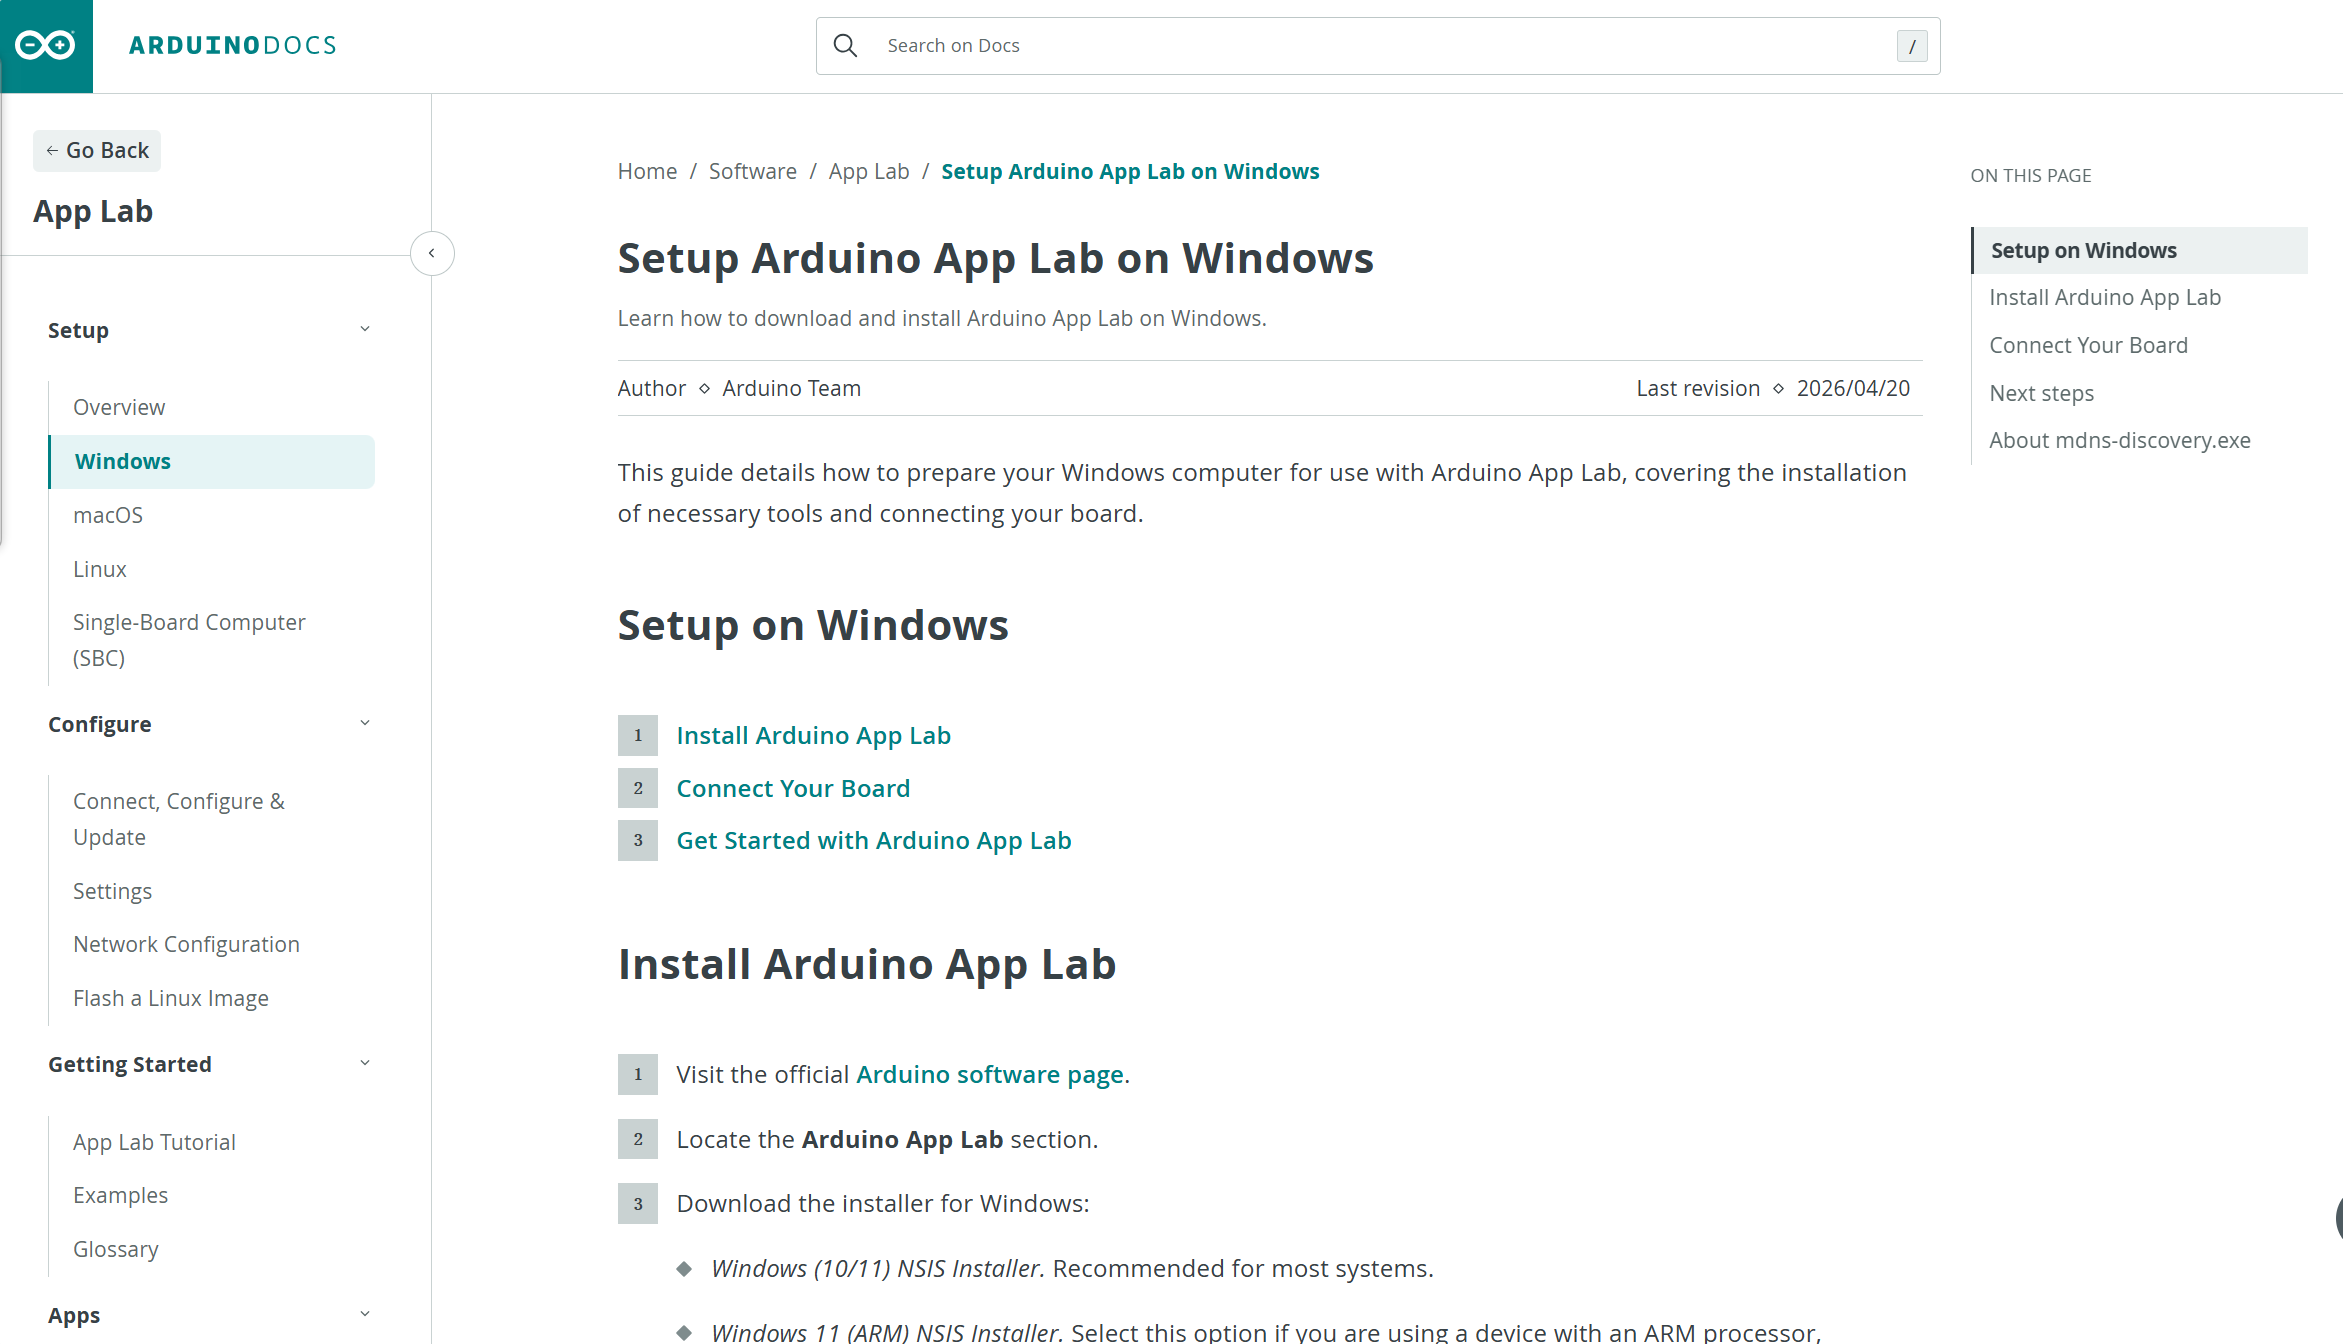
Figure 7.1-3. Arduino App Lab Windows installation. Source: Arduino official documentation.
5.3 macOS and Linux
macOS
Download the App Lab DMG file from the official software page, open it, and drag Arduino App Lab into Applications. If macOS blocks the first launch, allow it in System Settings according to the system prompt.
Linux
Download the TAR.GZ package from the official software page, extract it, and start App Lab from the extracted application directory. Use the official Arduino documentation if the package name or launch command changes.
6. First Device Configuration
Use a USB-C cable that supports data transfer to connect UNO Q to the PC. In PC-hosted mode, App Lab runs on the PC and communicates with UNO Q through USB-C.
In App Lab, complete the first-time configuration according to the prompts:
- Detect the UNO Q device.
- Check system updates.
- Set or confirm the device name.
- Set the user password.
- Configure Wi-Fi or Ethernet if network functions are needed.
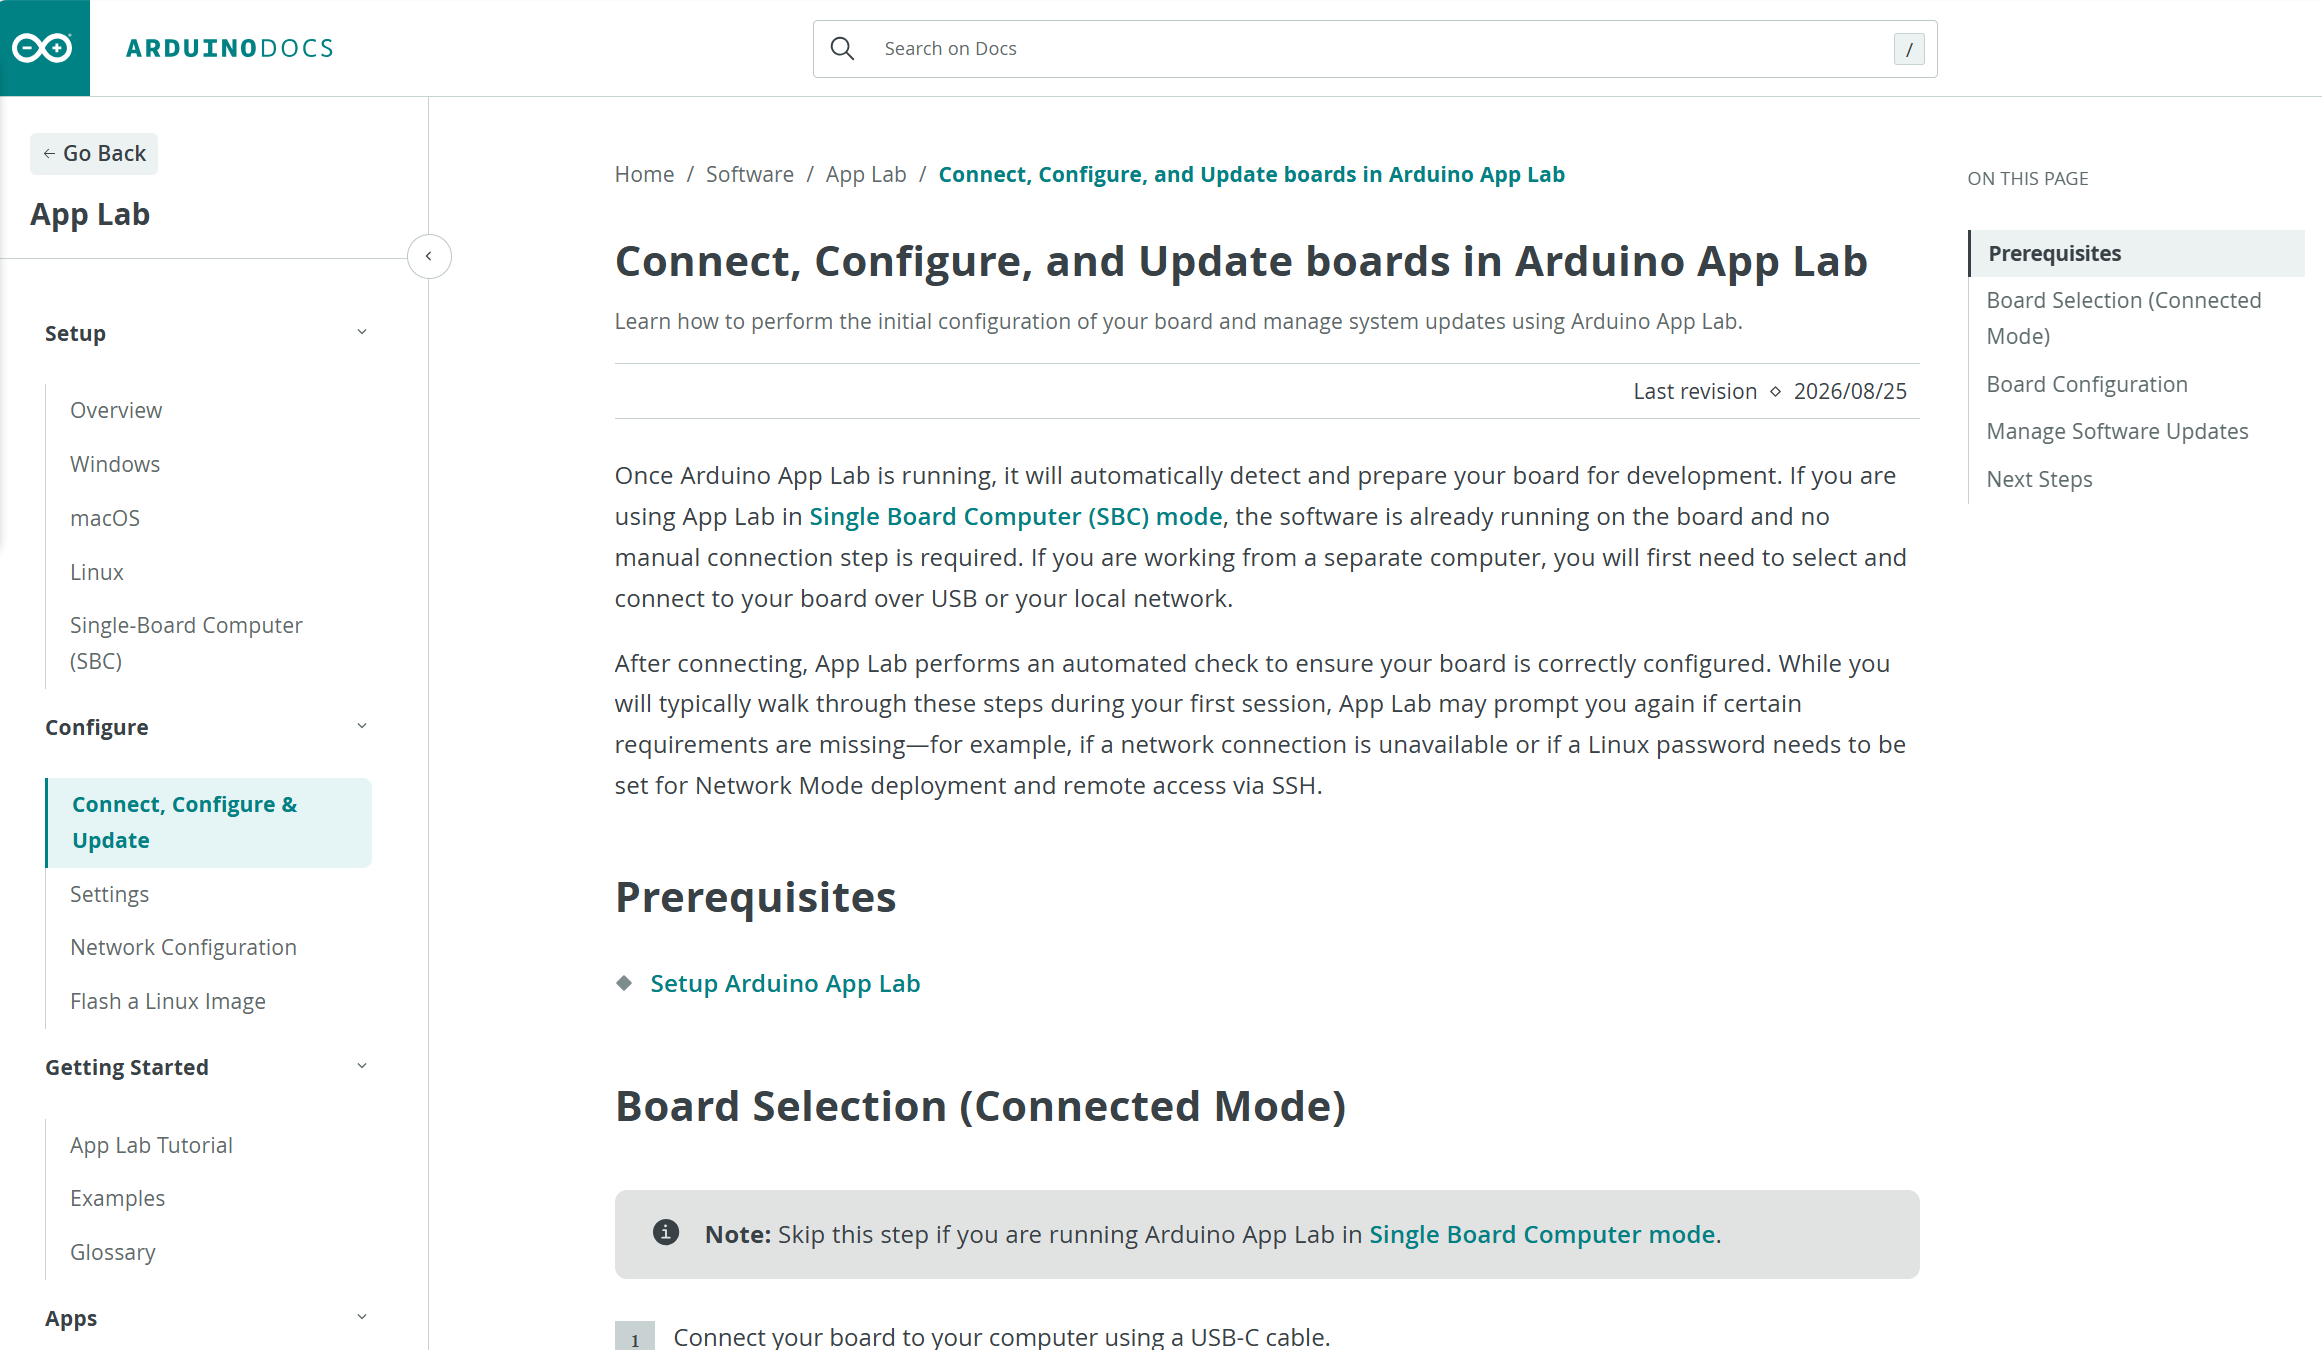
Figure 7.1-4. UNO Q connection, configuration, and update. Source: Arduino official documentation.
Keep the password set during first-time configuration secure. Do not send it in public tickets or chats.
For manual App Lab updates, follow the official help center article: Manually update Arduino App Lab.
7. SBC Mode (Optional)
In SBC mode, UNO Q works as a small single-board computer. Connect an external monitor, keyboard, mouse, and USB Hub with power delivery. This mode is useful when the robot needs to run without a PC.
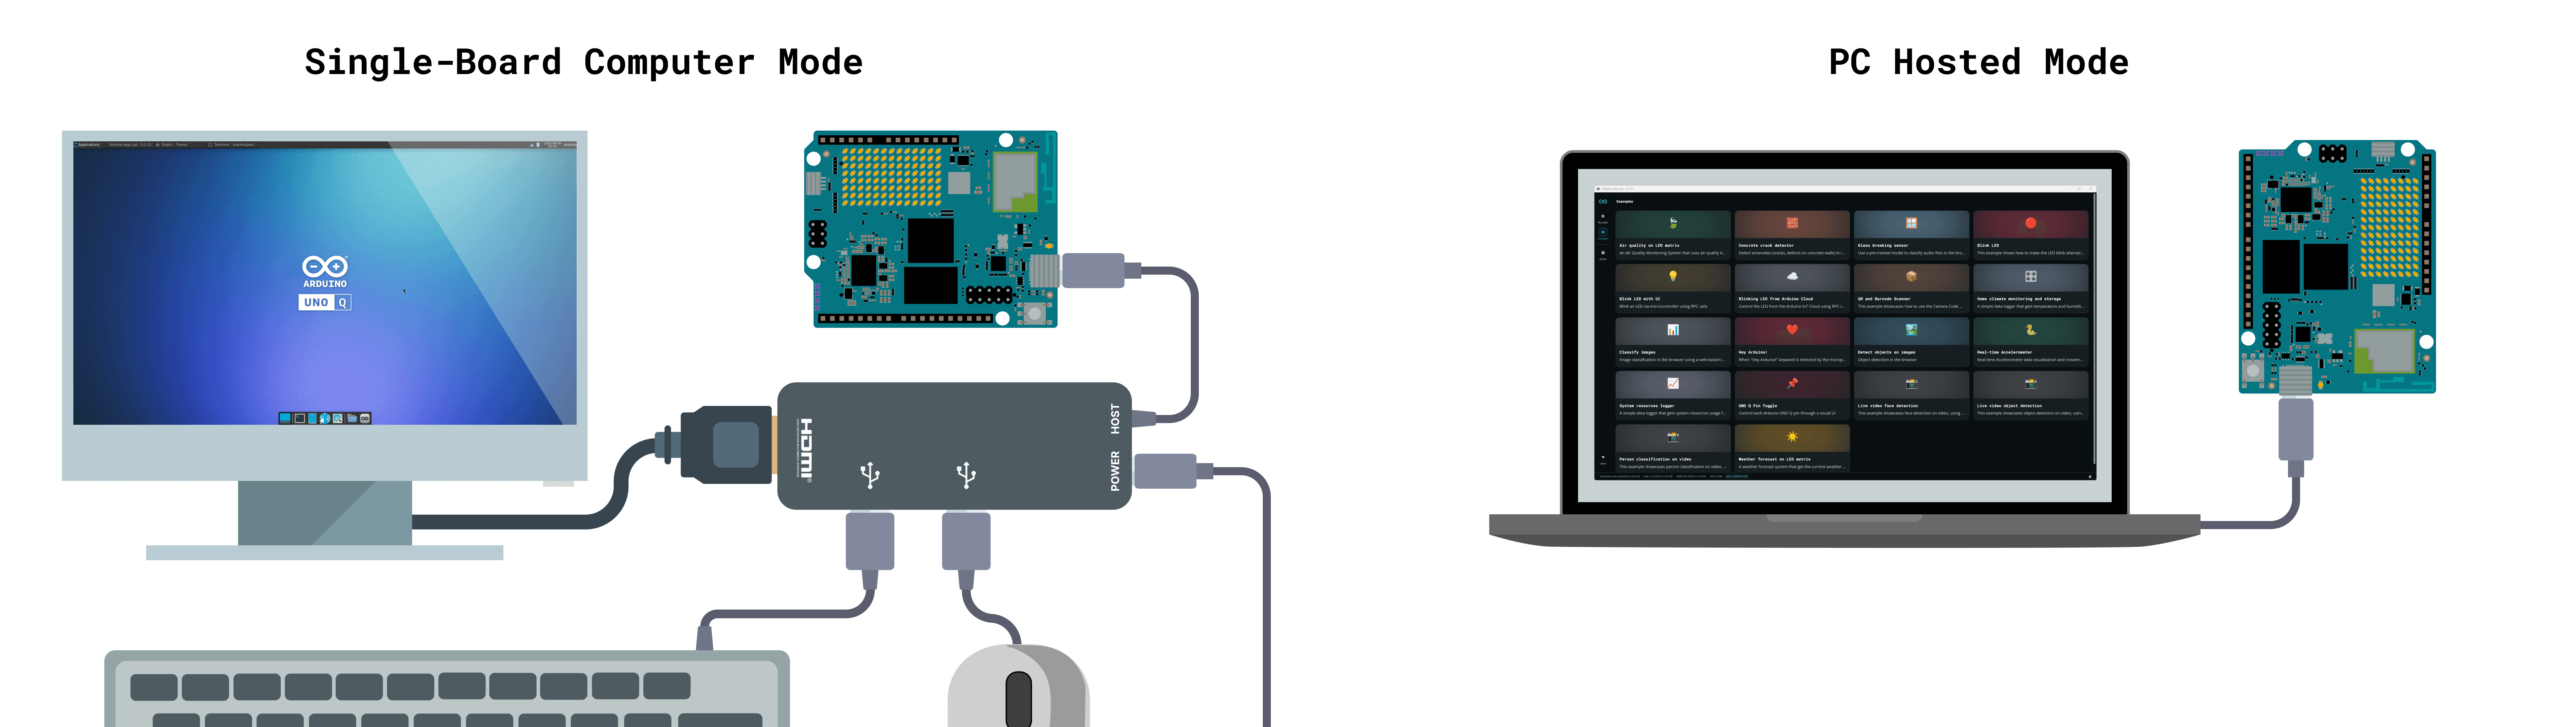
Figure 7.1-5. SBC mode and PC-hosted mode. Source: Arduino UNO Q User Manual.
The gamepad example in this chapter is designed for SBC use. It can be run from App Lab or directly from a Python terminal on UNO Q Debian.
8. Import and Run myCobot Examples
An App Lab project is imported as a complete ZIP package. Do not copy only main.py into a blank project, because the project also depends on python/, sketch/, app.yaml, and local wheel files.
8.1 Import and Run an Example
General workflow:
- Open Arduino App Lab.
- Choose Import and select the complete ZIP package.
- Select the UNO Q device.
- Click Run.
- Watch the Start-up, Main/Python, and Sketch Console outputs.
- Click Stop before disconnecting the device or switching to another control mode.
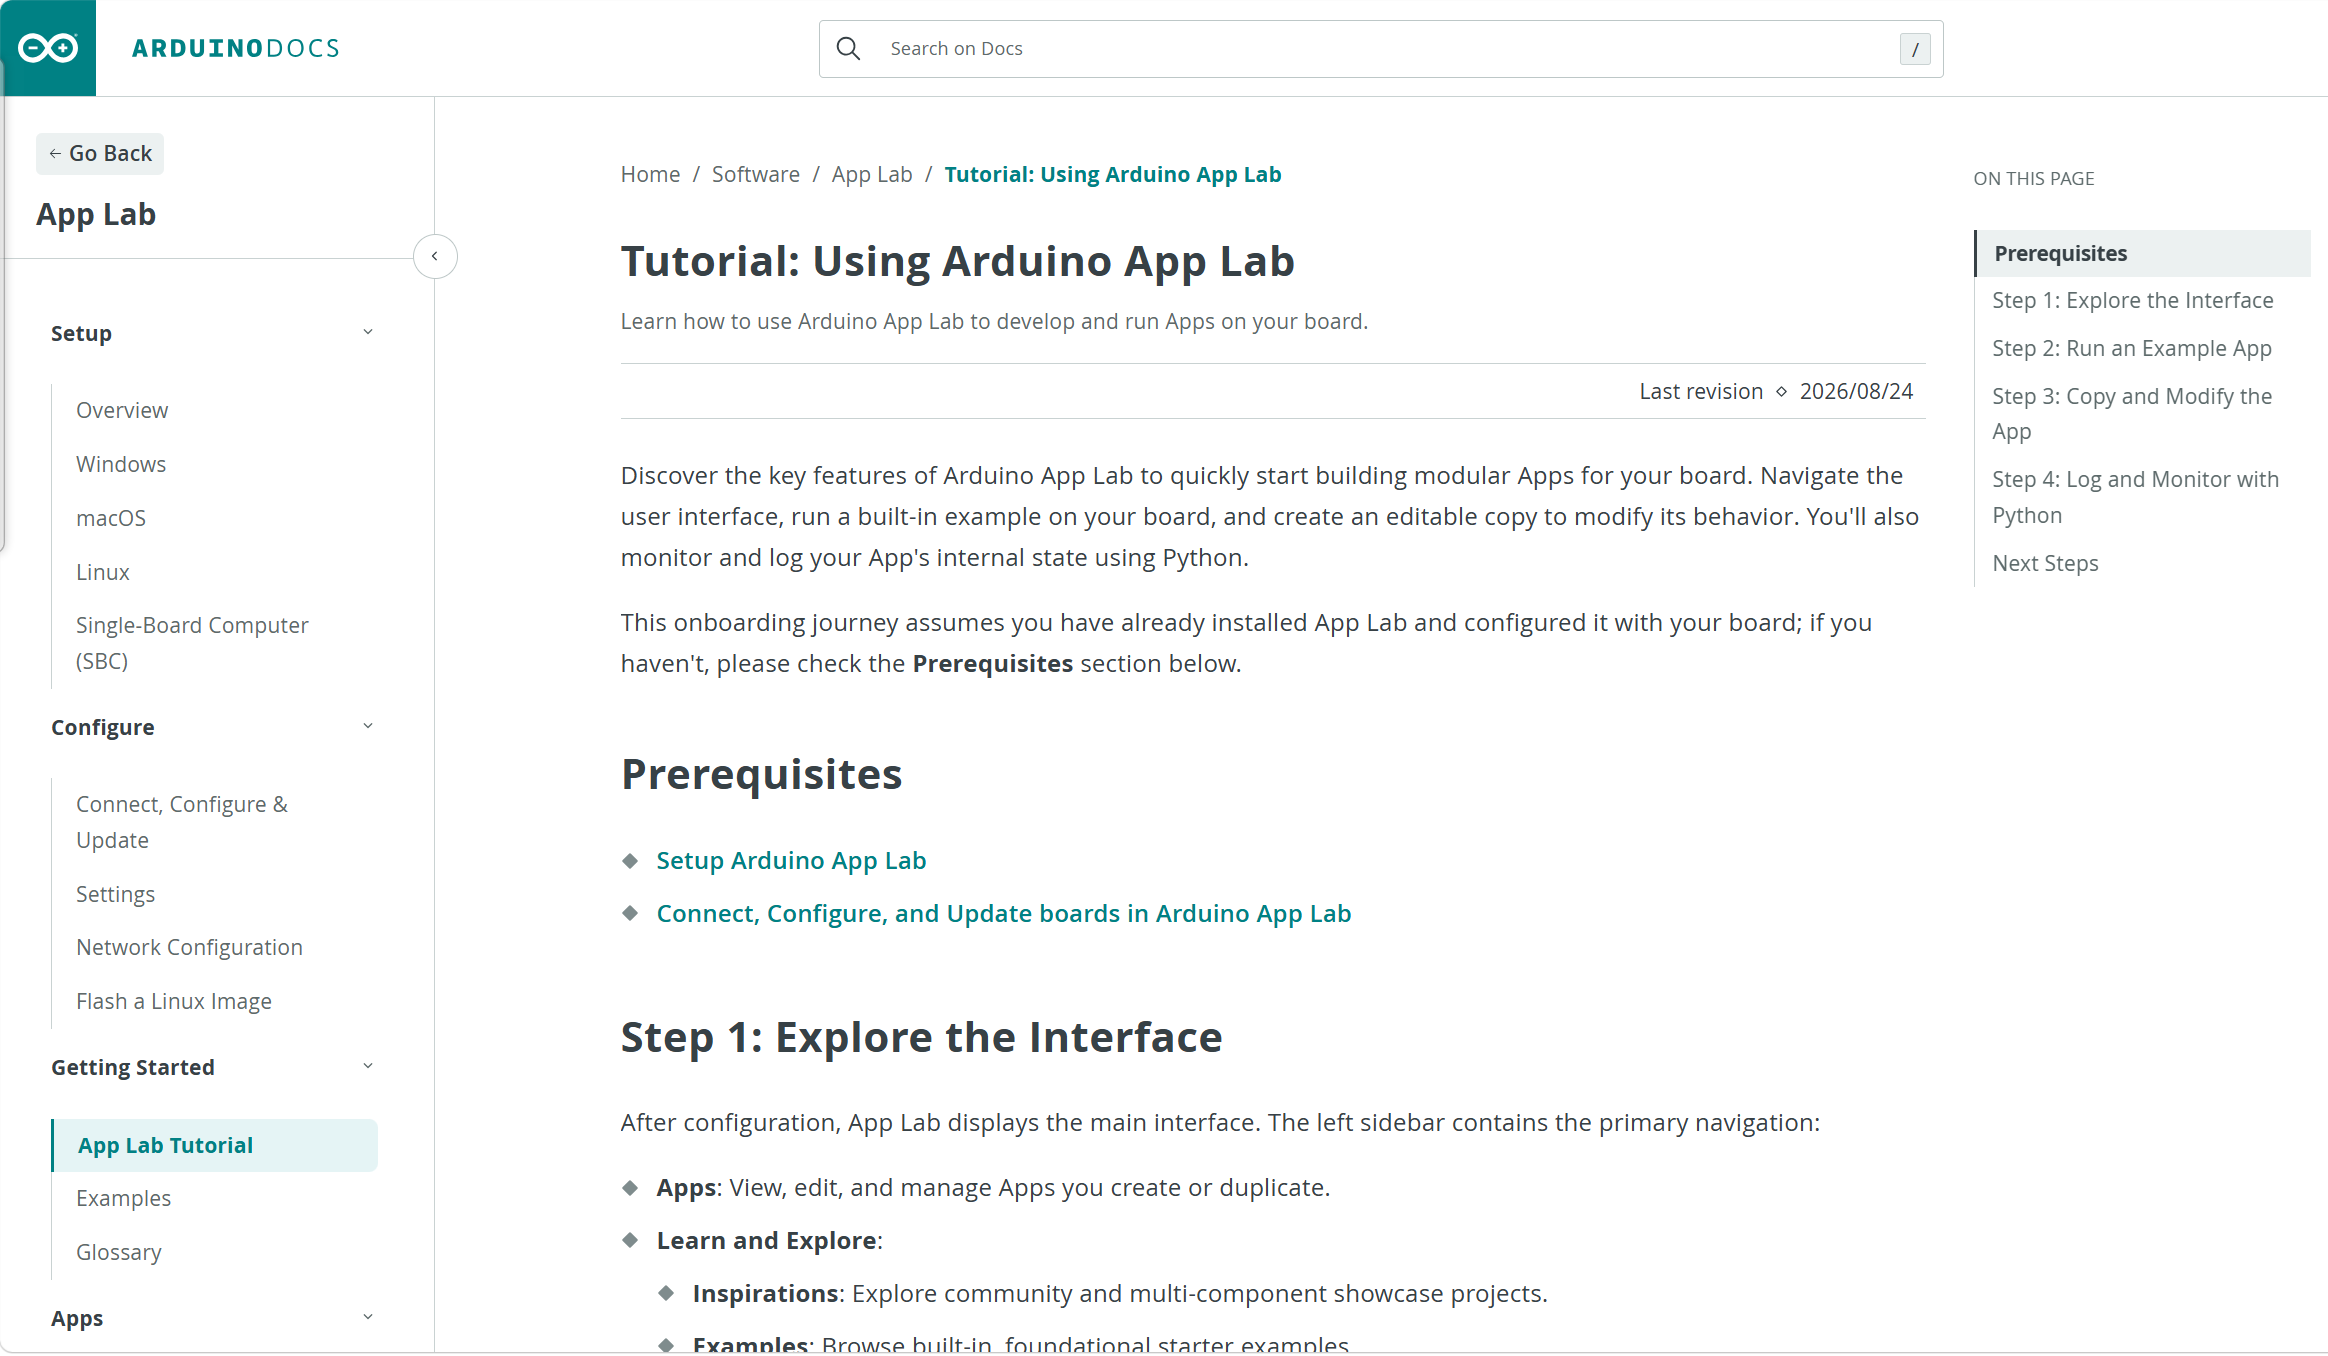
Figure 7.1-6. Arduino App Lab quick start. Source: Arduino official documentation.
8.2 Recommended Test Order
Recommended test order:
- RGB example without robot motion.
- Home position example.
- Single-joint example.
- Multi-joint example.
- Dance example.
- Gripper example.
- Pump example.
8.3 Common Startup Issues
If import fails, confirm that the selected file is the complete ZIP project. If the board is not detected, replace the USB-C cable with a data cable and reconnect UNO Q. If dependency installation fails, check the wheel files included in the project. If XferBridgeMsg is unavailable, update the UNO Q system and firmware side according to the App Lab and project instructions.