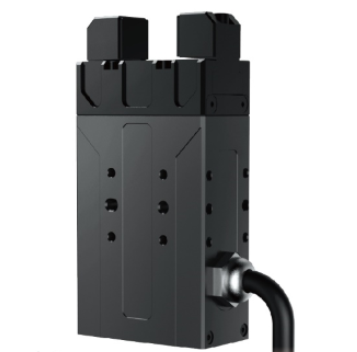
Electric Gripper
Compatible models: myCobot 320, myCobot Pro 630
product icon

Specifications:
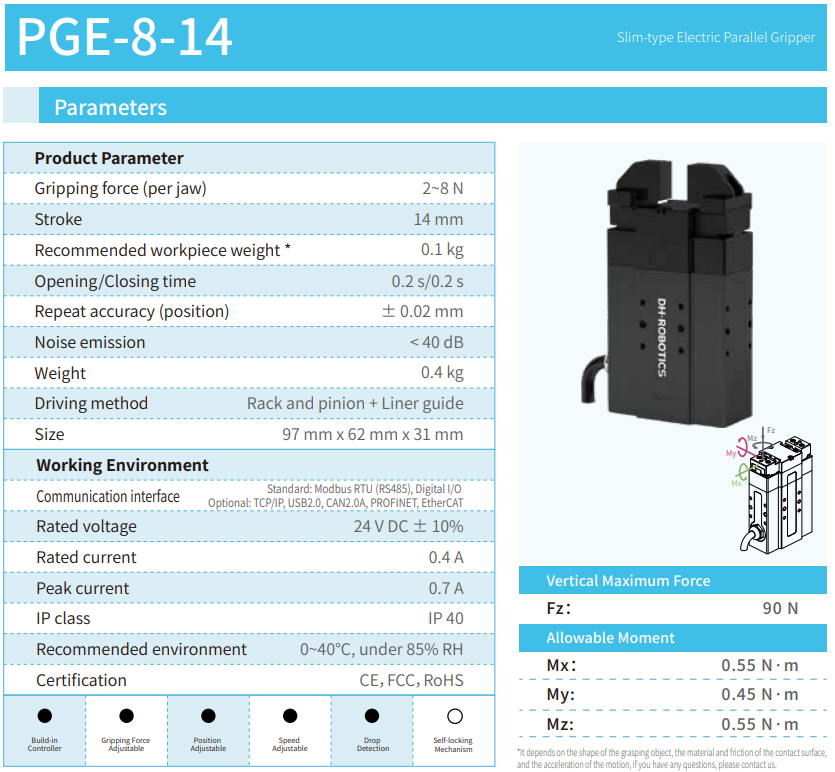
| name | mycobot Pro Electric Gripper |
|---|---|
| Model model | myCobotPro_Gripper_PGE_8 |
| craft | Metal + 7500 Nylon |
| Clamping rangeClamp size | 0-14mm |
| Clamp force | 2-5N |
| Repeatability precision | 1mm |
| Lifetime | one year |
| drive mode drive | electric |
| transfer method | Rack and pinion + cross roller guide |
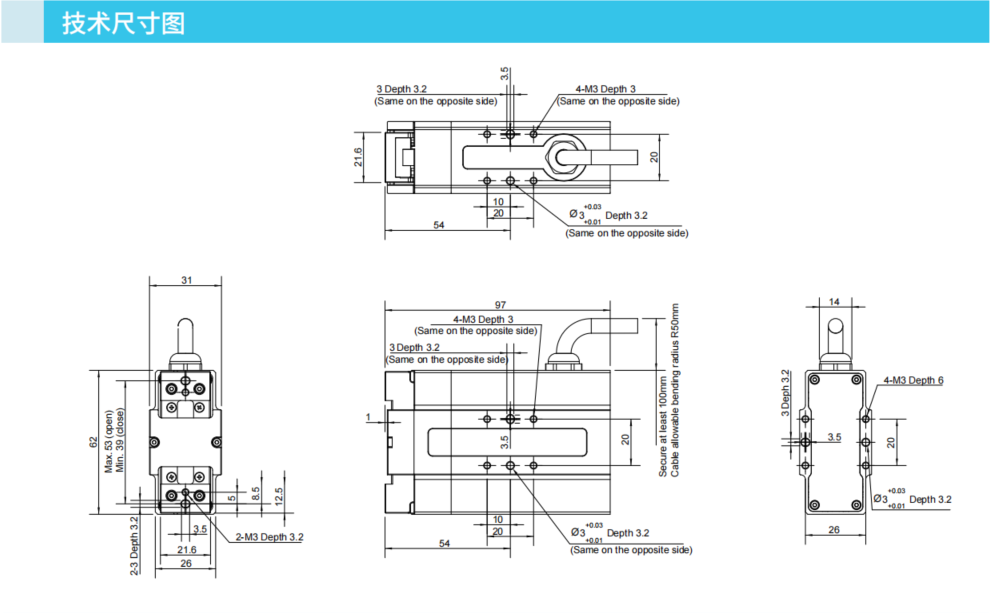
| size | 97×62×31mm |
| weightweight | 460g |
| Fixed method Fixed | screw fixed |
| Use environment requirements | Temperature and pressure |
| control interface control | Serial port/IO control |
| Applicable equipment | ER myCobot 320 ,ER myCobot Pro 630 |
Electric Gripper: Used to pick up objects
Introduction
PGE series are industrial thin parallel electric grippers, and the numbers represent the maximum clamping force of the grippers. The gripper is equipped with a pair of parallel fingertips, which run symmetrically during the movement. The main structure of the gripper is a smooth rectangular structure, which is small in size and saves installation space. It has 5 mounting holes to meet different installation conditions of the equipment.
Quick response, high grabbing frequency, and equipped with an 8-core communication interface, mainly to achieve clamping or stuck objects, suitable for relatively light objects.
working principle
- The motor drives the rack and pinion and the cross roller guide to realize the opening or closing action of the gripper. The positioning point of the electric gripper is controllable and the clamping is controllable.
Applicable object
The volume is smaller than the clamping stroke
The weight is less than the maximum clamping weight
Custom fingertips can expand more items
Product parameters


operating environment
| surroundings | illustrate |
|---|---|
| Protocol | RS-485 |
| Operating Voltage | 24V |
| rated current | 0.25A |
| peak current | 0.5A |
| degree of protection | IP40 |
| Recommended environment | 0-40℃ |
Installation and use
Check that the kit is complete: screws, hexagonal spanner, clamping jaws with connecting wires, clamping jaws with arm end fixing device

Jaw mounting:
Structural mounting:
Place the short screws into the holes in the fixture:

Align the screws with the four screw holes on the end of the robot arm and tighten:

Insert the motorised jaws into the fixture and tighten with fine screws on both sides, eight in total:

Electrical connections:
Plug the 485 cable into the robot arm control connector:


Instructions for use:
- M5 version:
from pymycobot import MyCobot320
import time

# Initialise a MyCobot320 object
mc = MyCobot320("COM3", 115200)

# Allows you to control the jaws to open and close and open:
mc.set_eletric_gripper(0)
time.sleep(3)
mc.set_eletric_gripper(1)
time.sleep(3)
mc.set_eletric_gripper(0)
time.sleep(3)
- Pi version:
from pymycobot import MyCobot320
from pymycobot import PI_PORT, PI_BAUD # When using the Raspberry Pi version of mycobot, you can reference these two variables for MyCobot320 initialisation
import time

# Initialise a MyCobot320 object
mc = MyCobot320(PI_PORT, PI_BAUD)

# Allows you to control the jaws to open and close and open:
mc.set_eletric_gripper(0)
time.sleep(3)
mc.set_eletric_gripper(1)
time.sleep(3)
mc.set_eletric_gripper(0)
time.sleep(3)
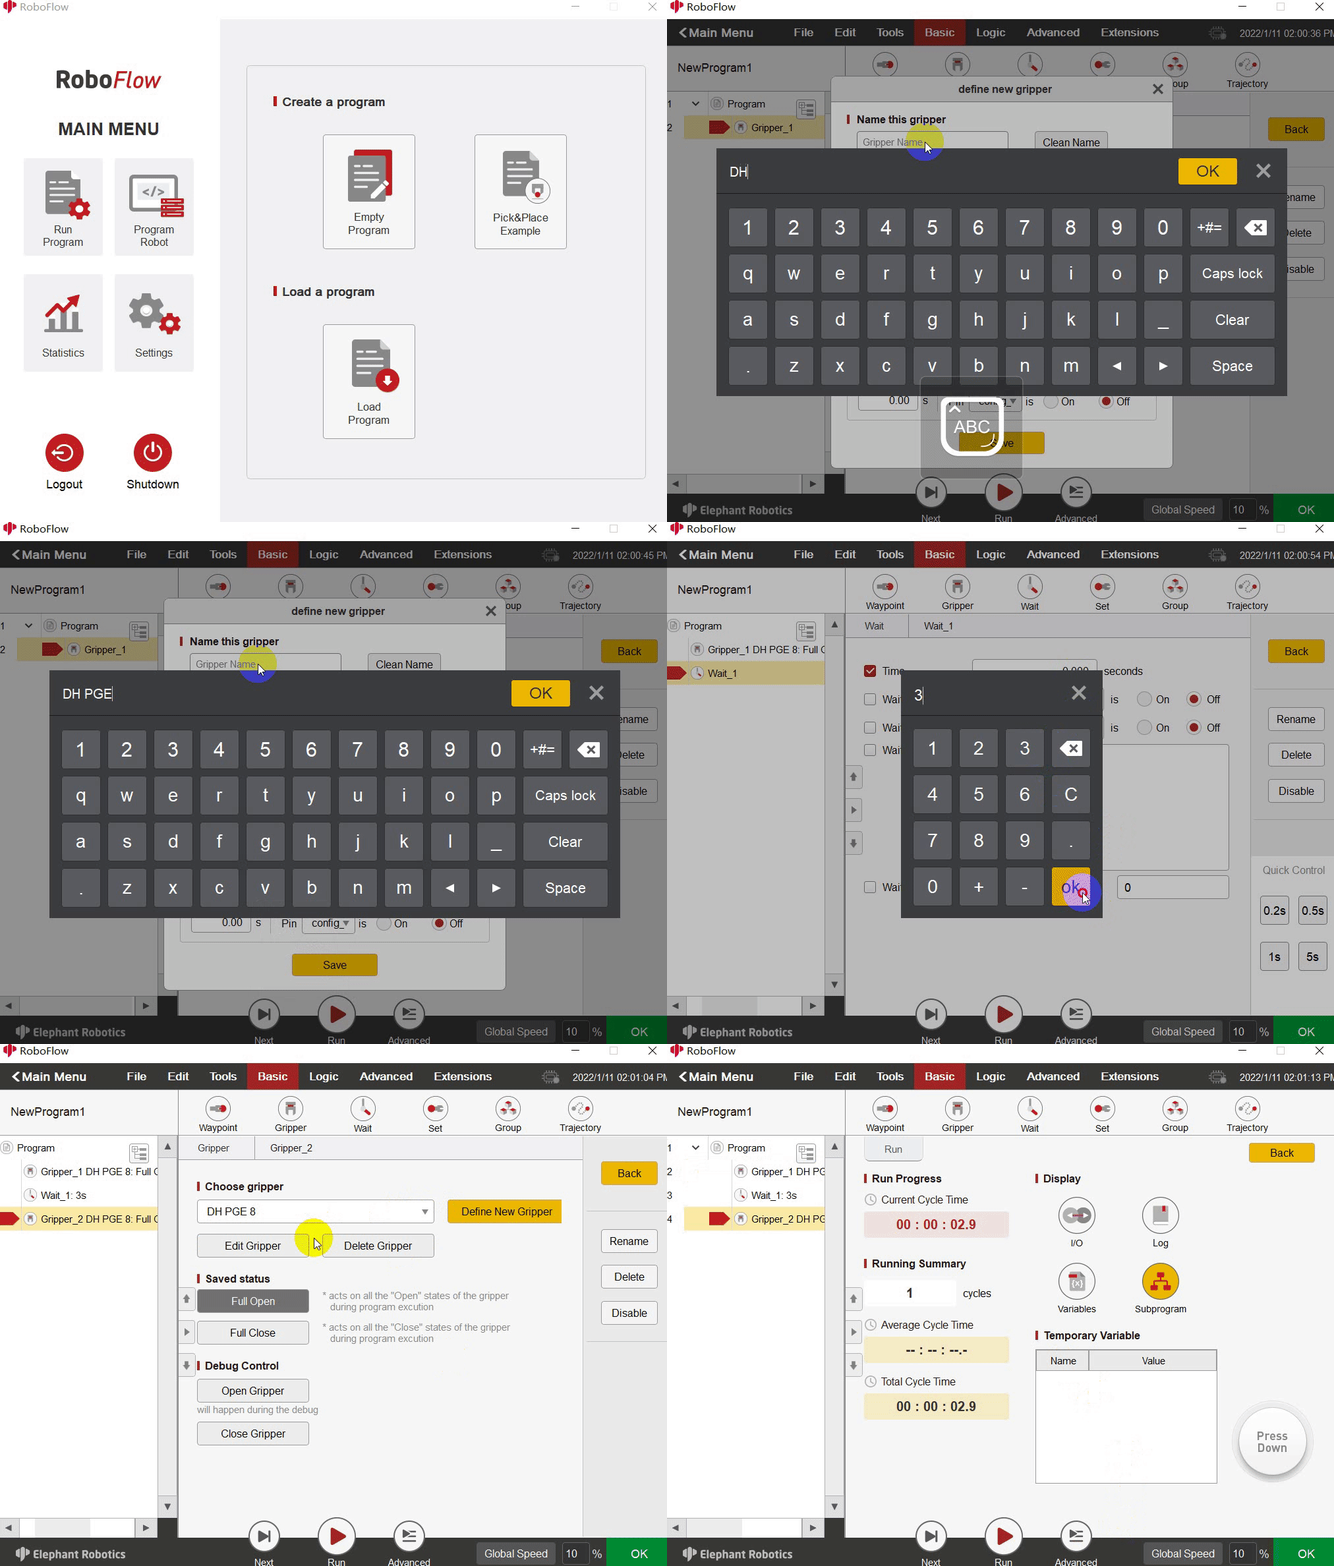
myCobot Pro 600 Instructions for use:
- Run RoboFlow, select M5Stack-basic--Gripper. Click Define New Gripper, fill in the Gripper Name as "DH PGE 8" (must be this);
- Click Define New Gripper, fill in the Gripper Name as "DH PGE 8" (must be this name), then click Save;
- Saved status select open or close, the overall steps are shown in the figure below:
