MCU door opening training
1. Hardware deployment
1.1 Hardware list
| Name | Quantity | Remarks |
|---|---|---|
| External fixing plate | 2 | |
| M5 slider nut | 8 | |
| M5*10 screw | 8 | |
| MyCobot Pro630 | 1 | |
| MyCobot Pro630 power adapter | 1 | |
| Power bank | 1 | |
| myAGV Pro navigation-visual version | 1 | |
| Wireless handle | 1 | |
| USB cable | 1 | |
| Wrench tool | 1 | |
| XT60 adapter cable | 1 | |
| Force control gripper | 1 | |
| Emergency stop | 1 |
1.2 Hardware connection
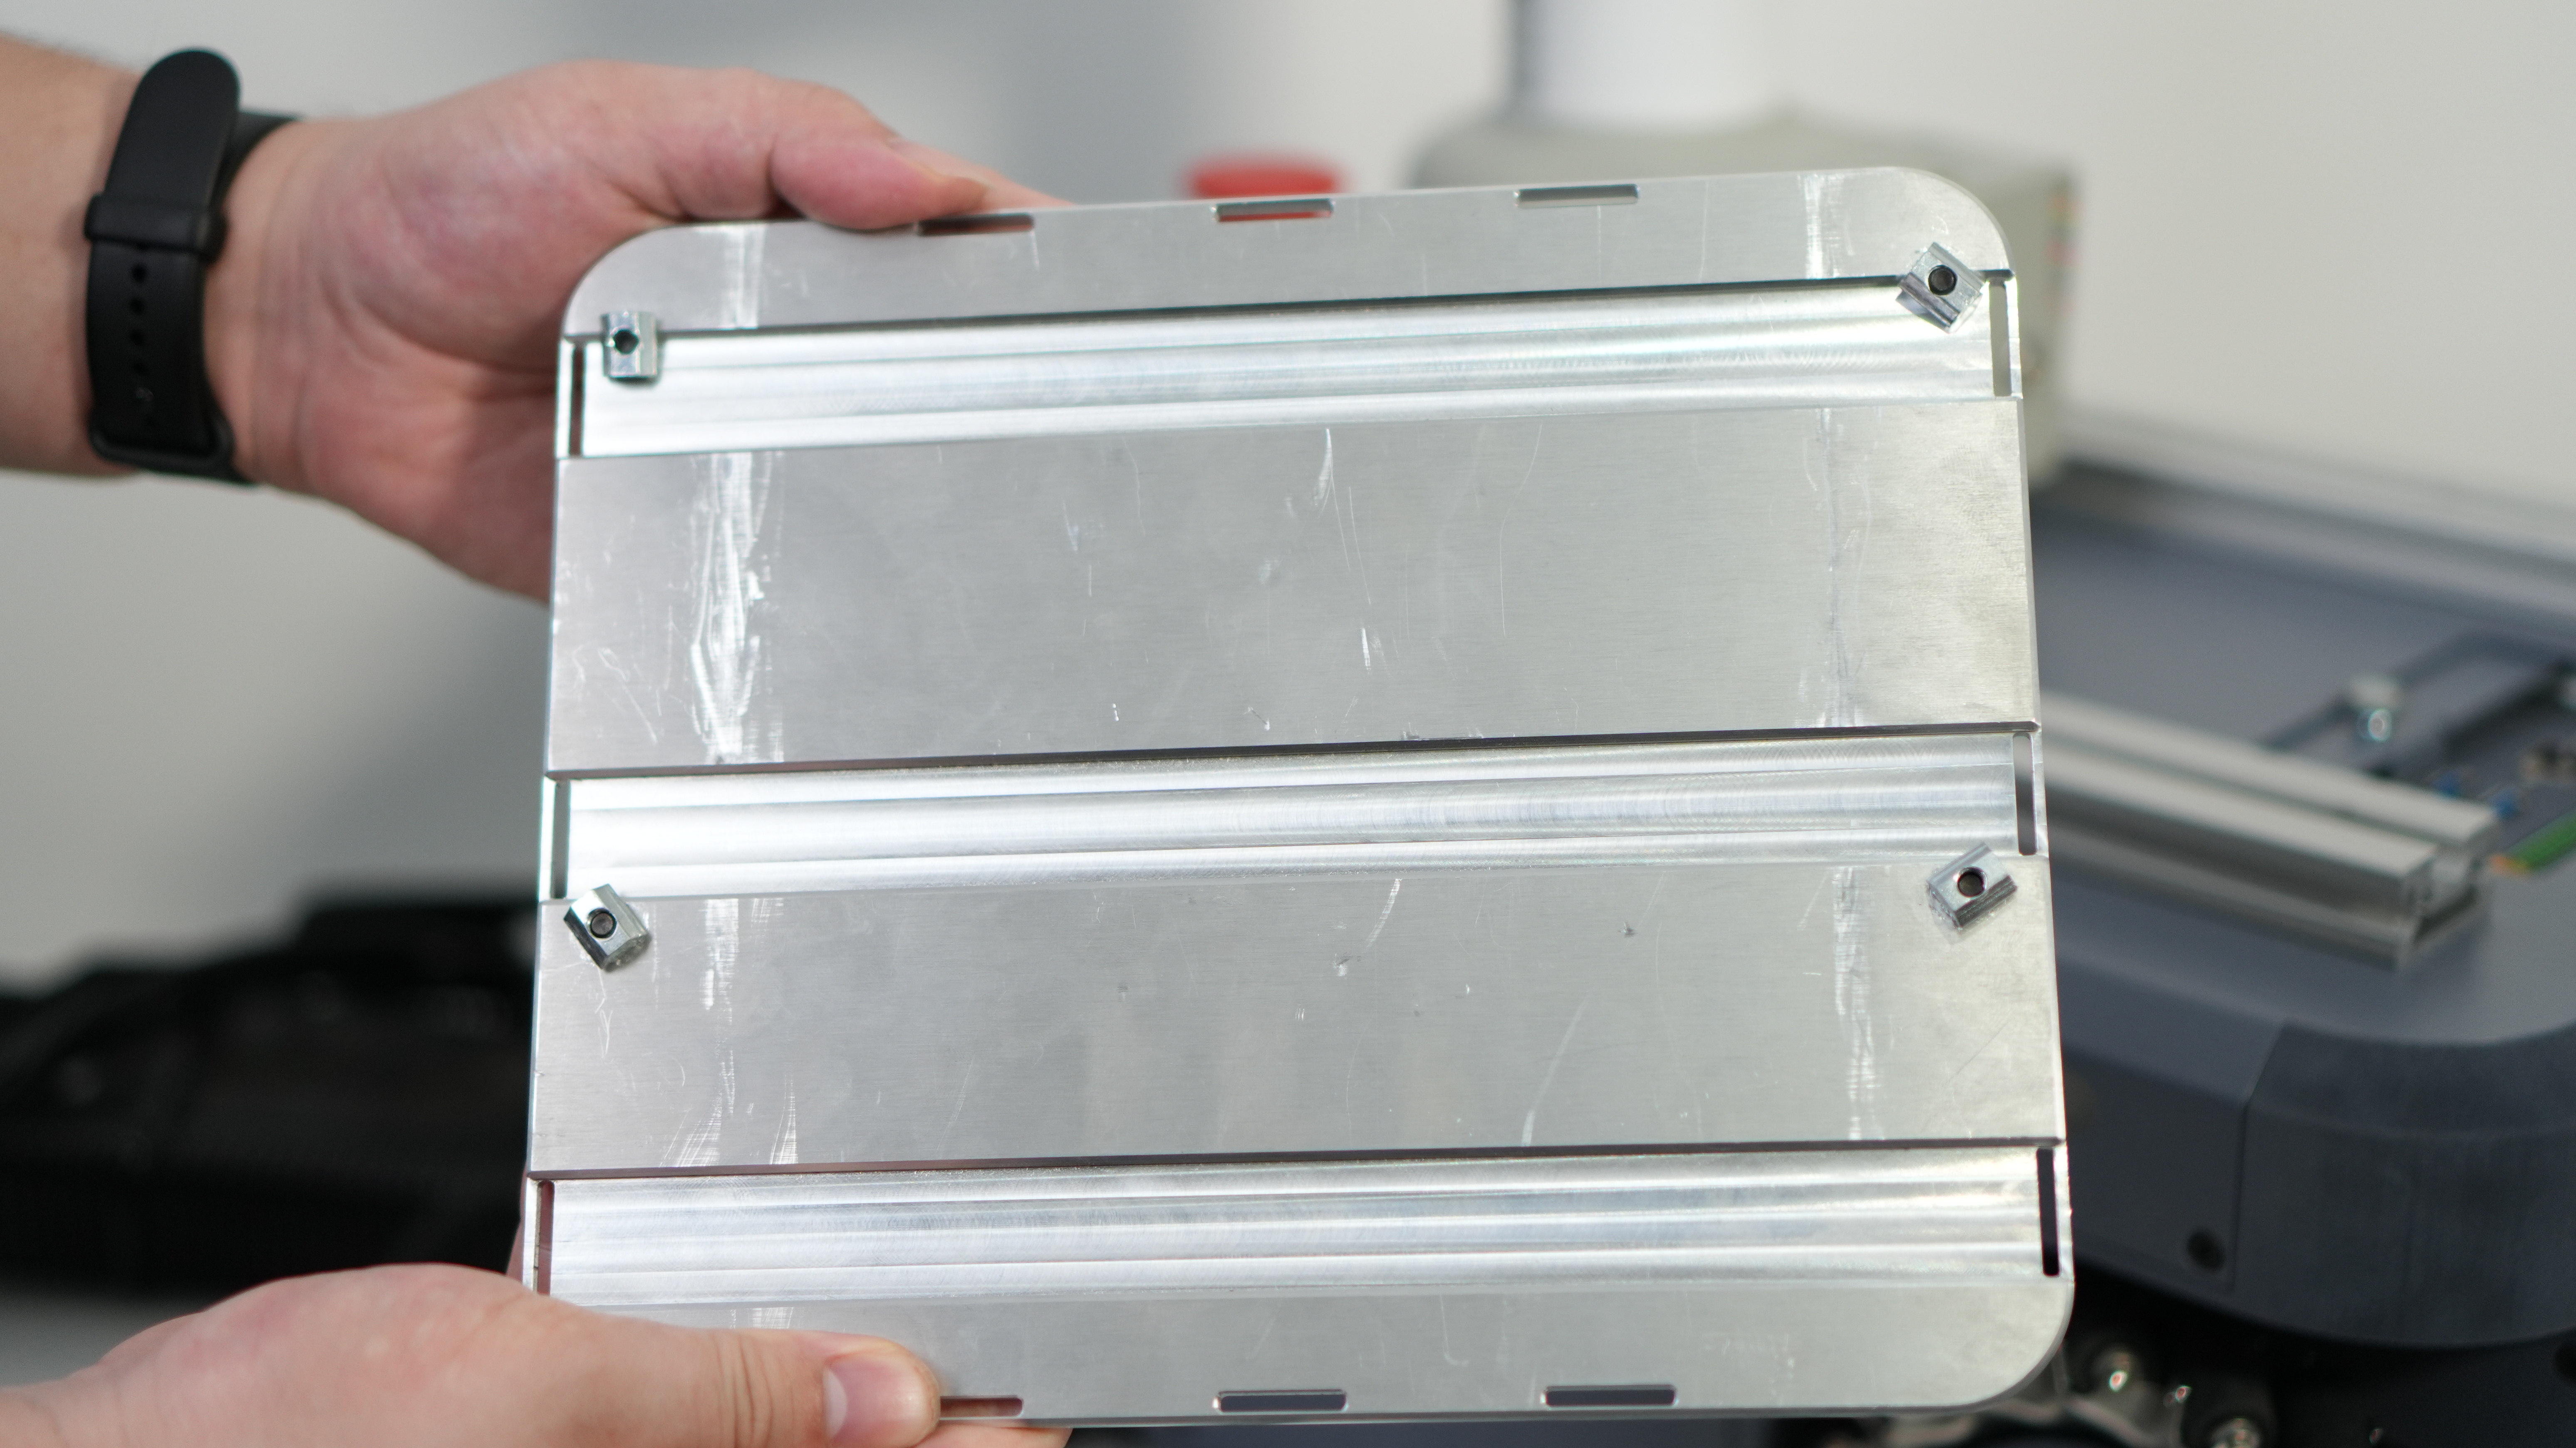
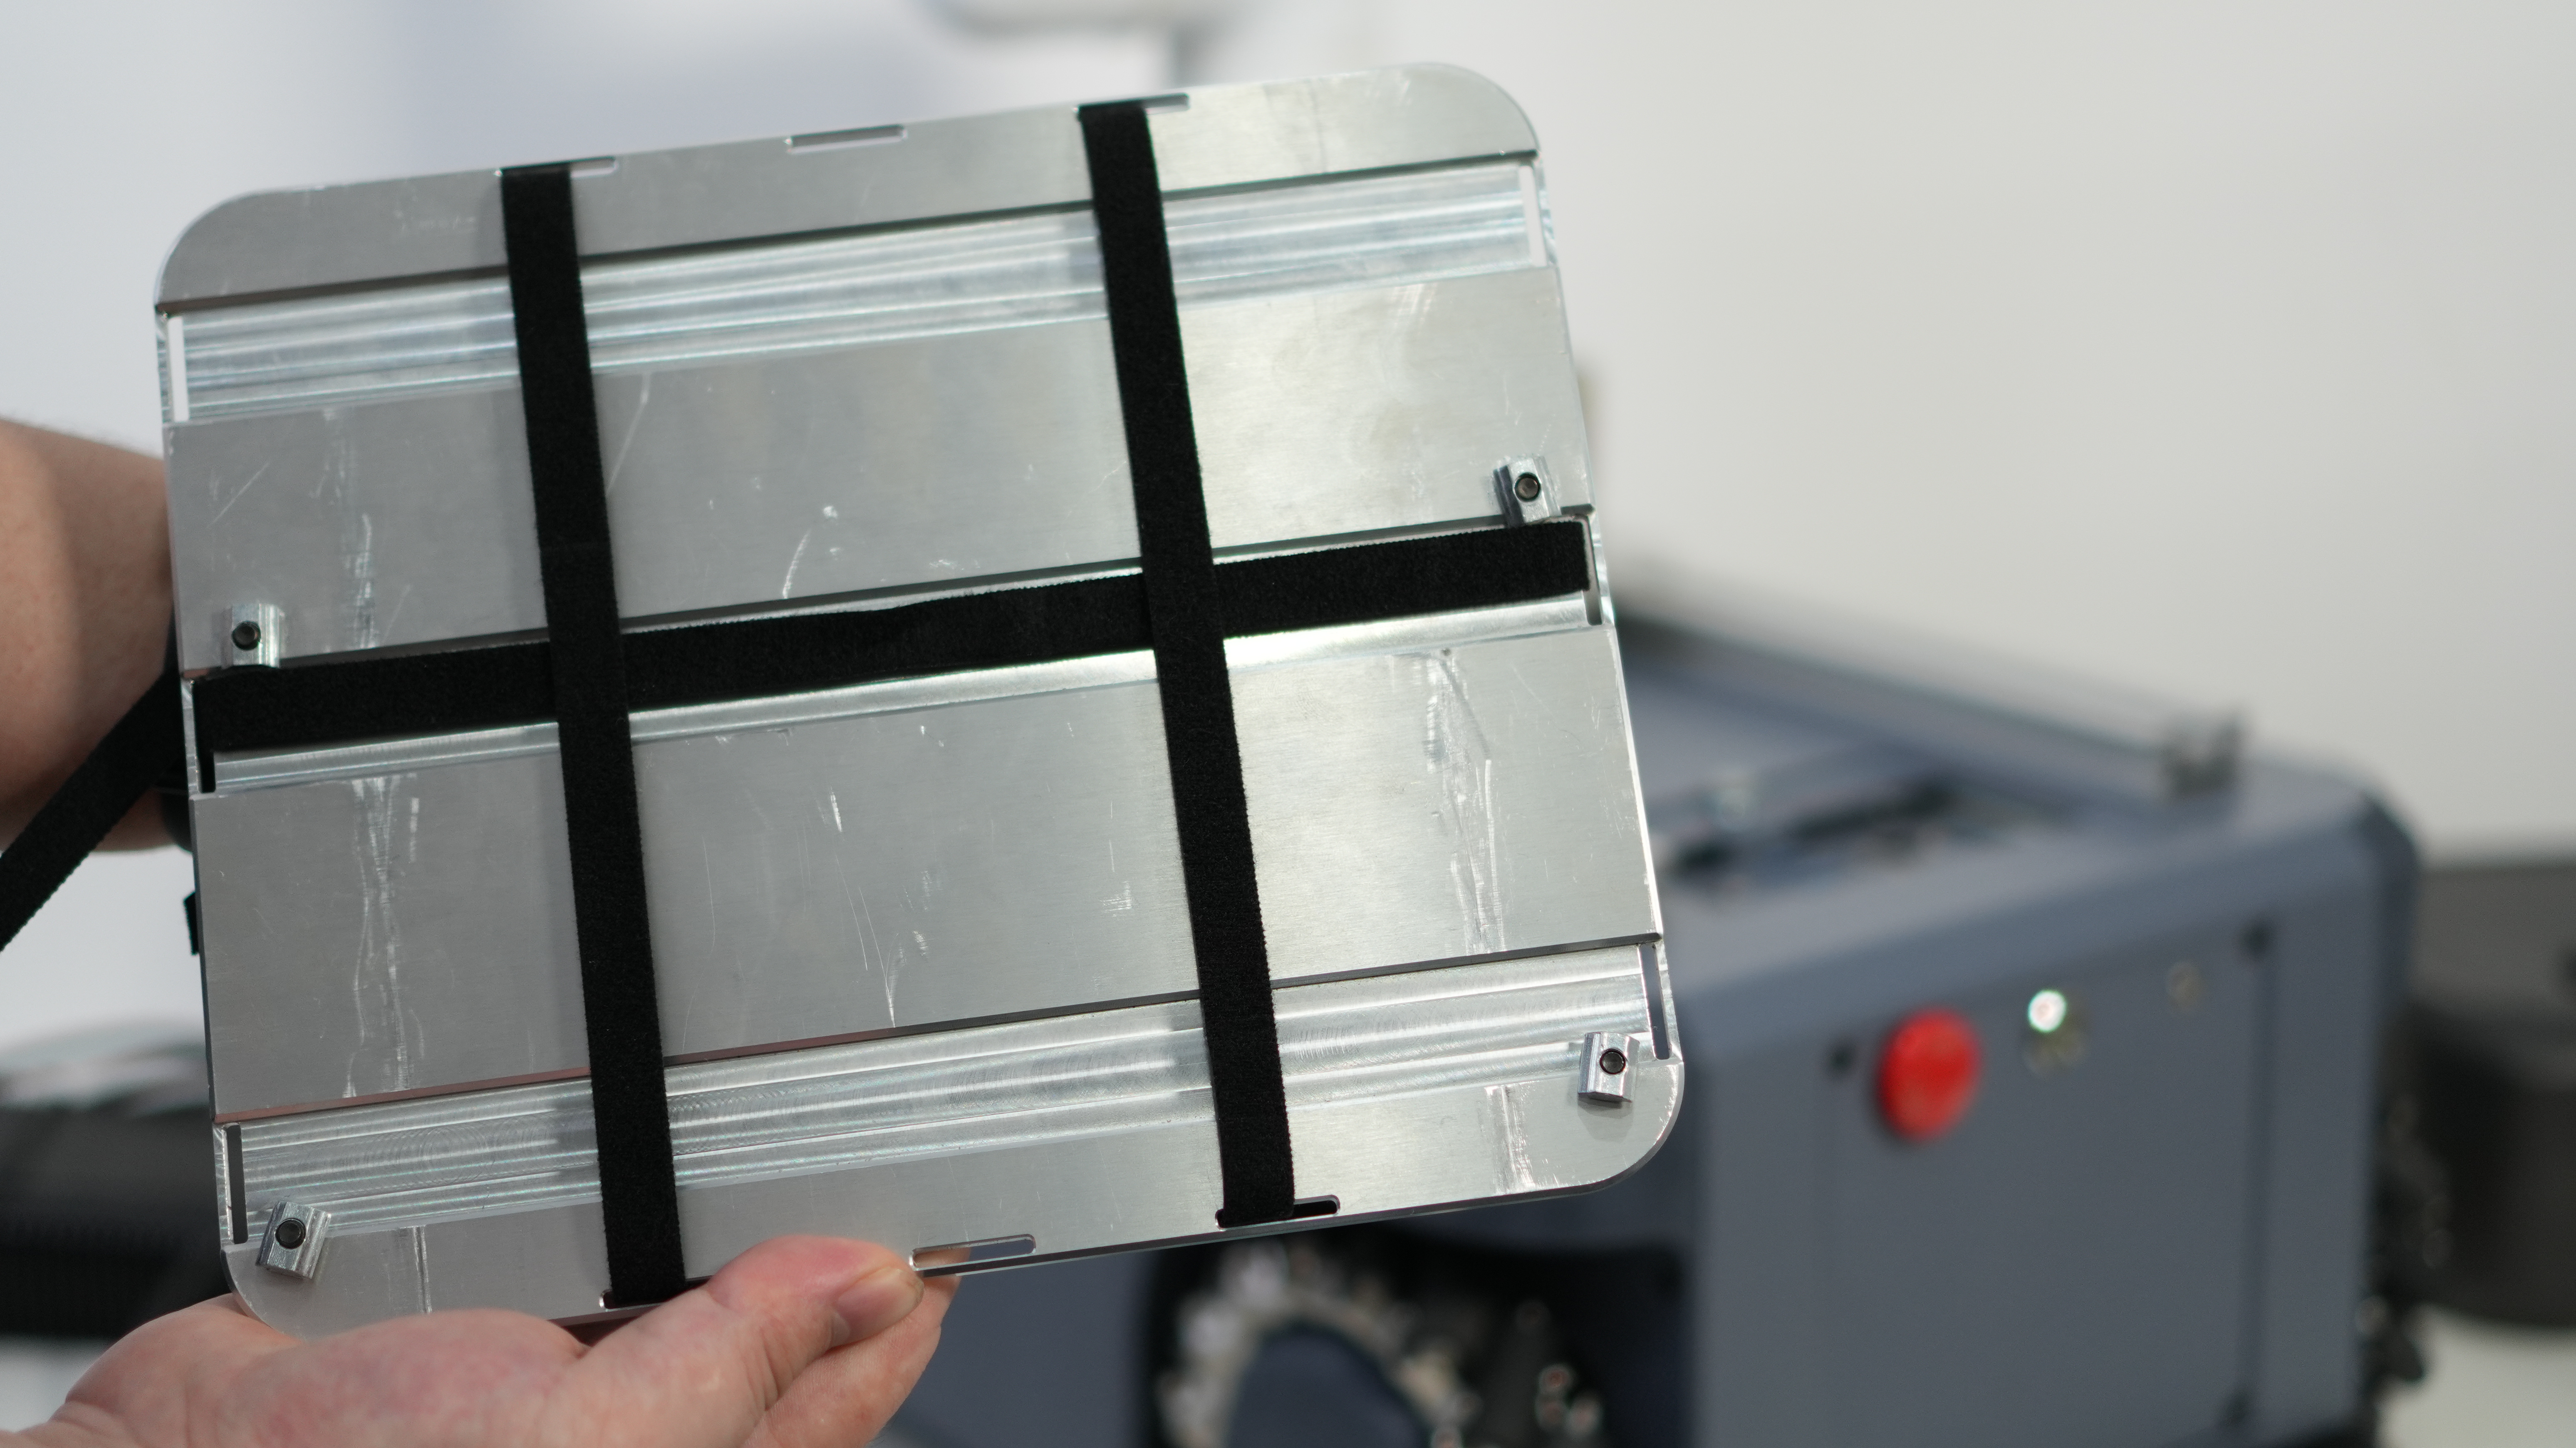
Use M5*10 screws to fix the M5 slider nut on the external fixing plate
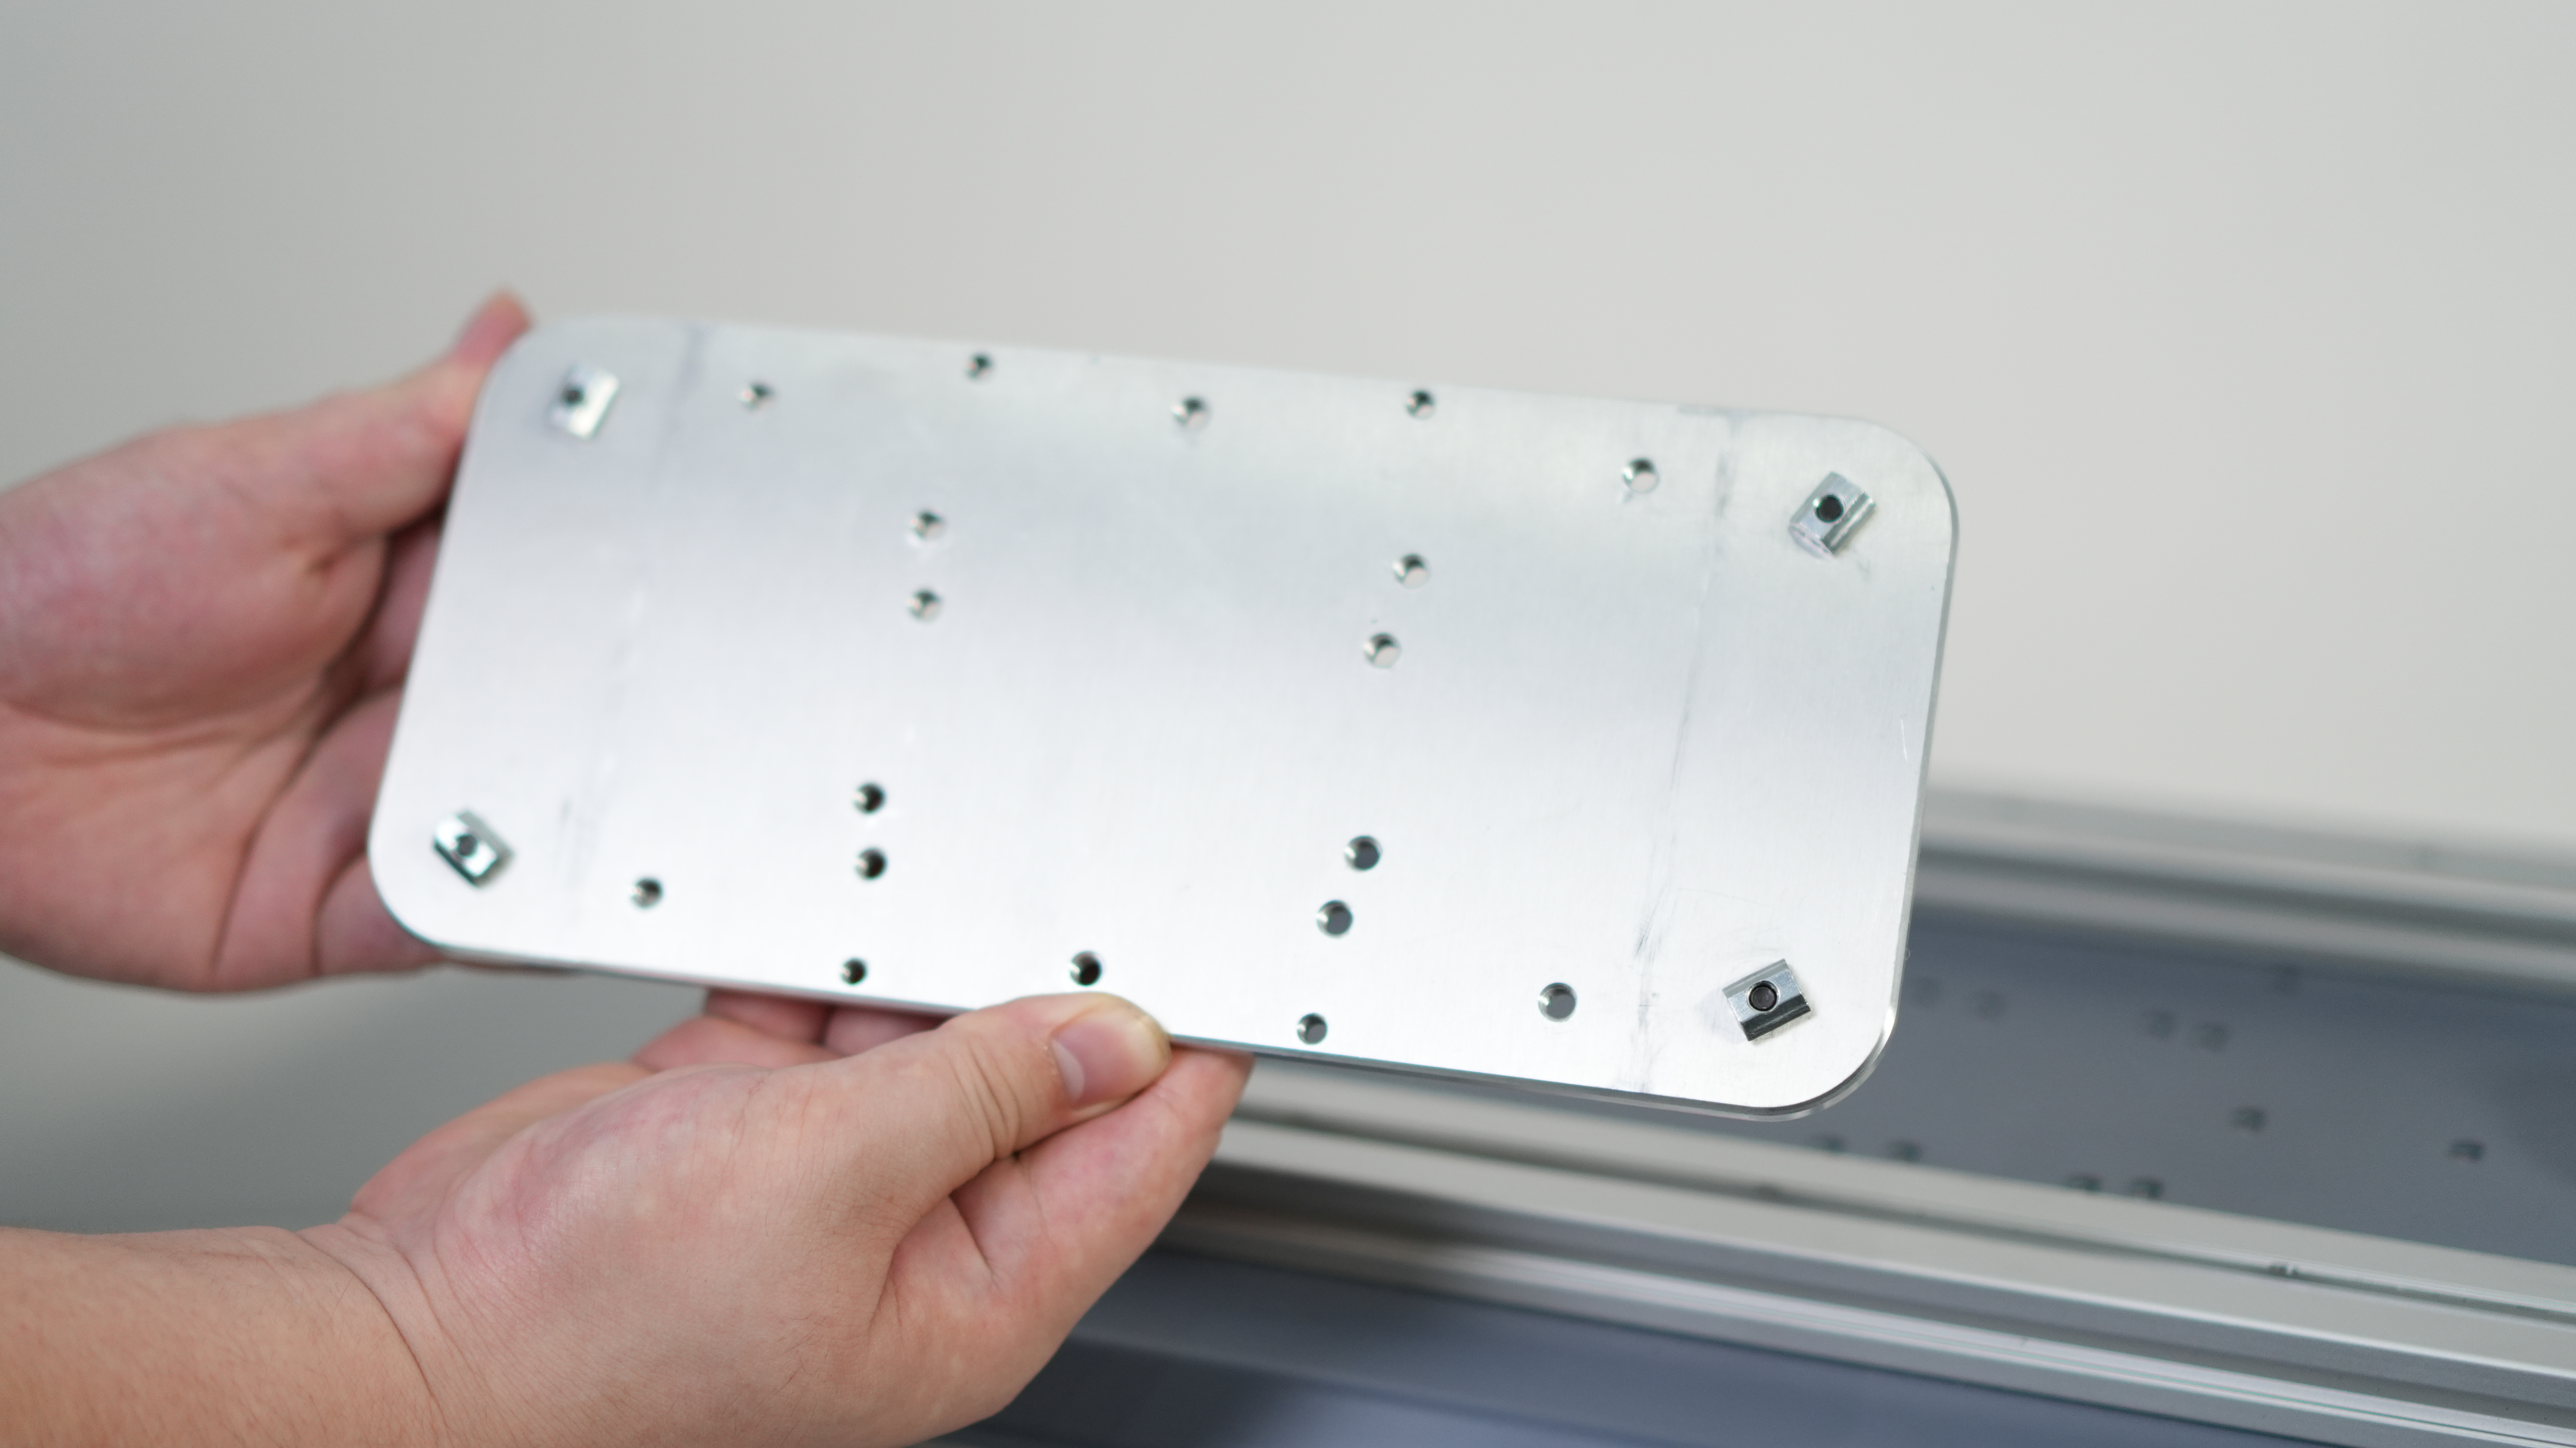
Connect the external fixing plate to the 2040 profile on myAGVPro

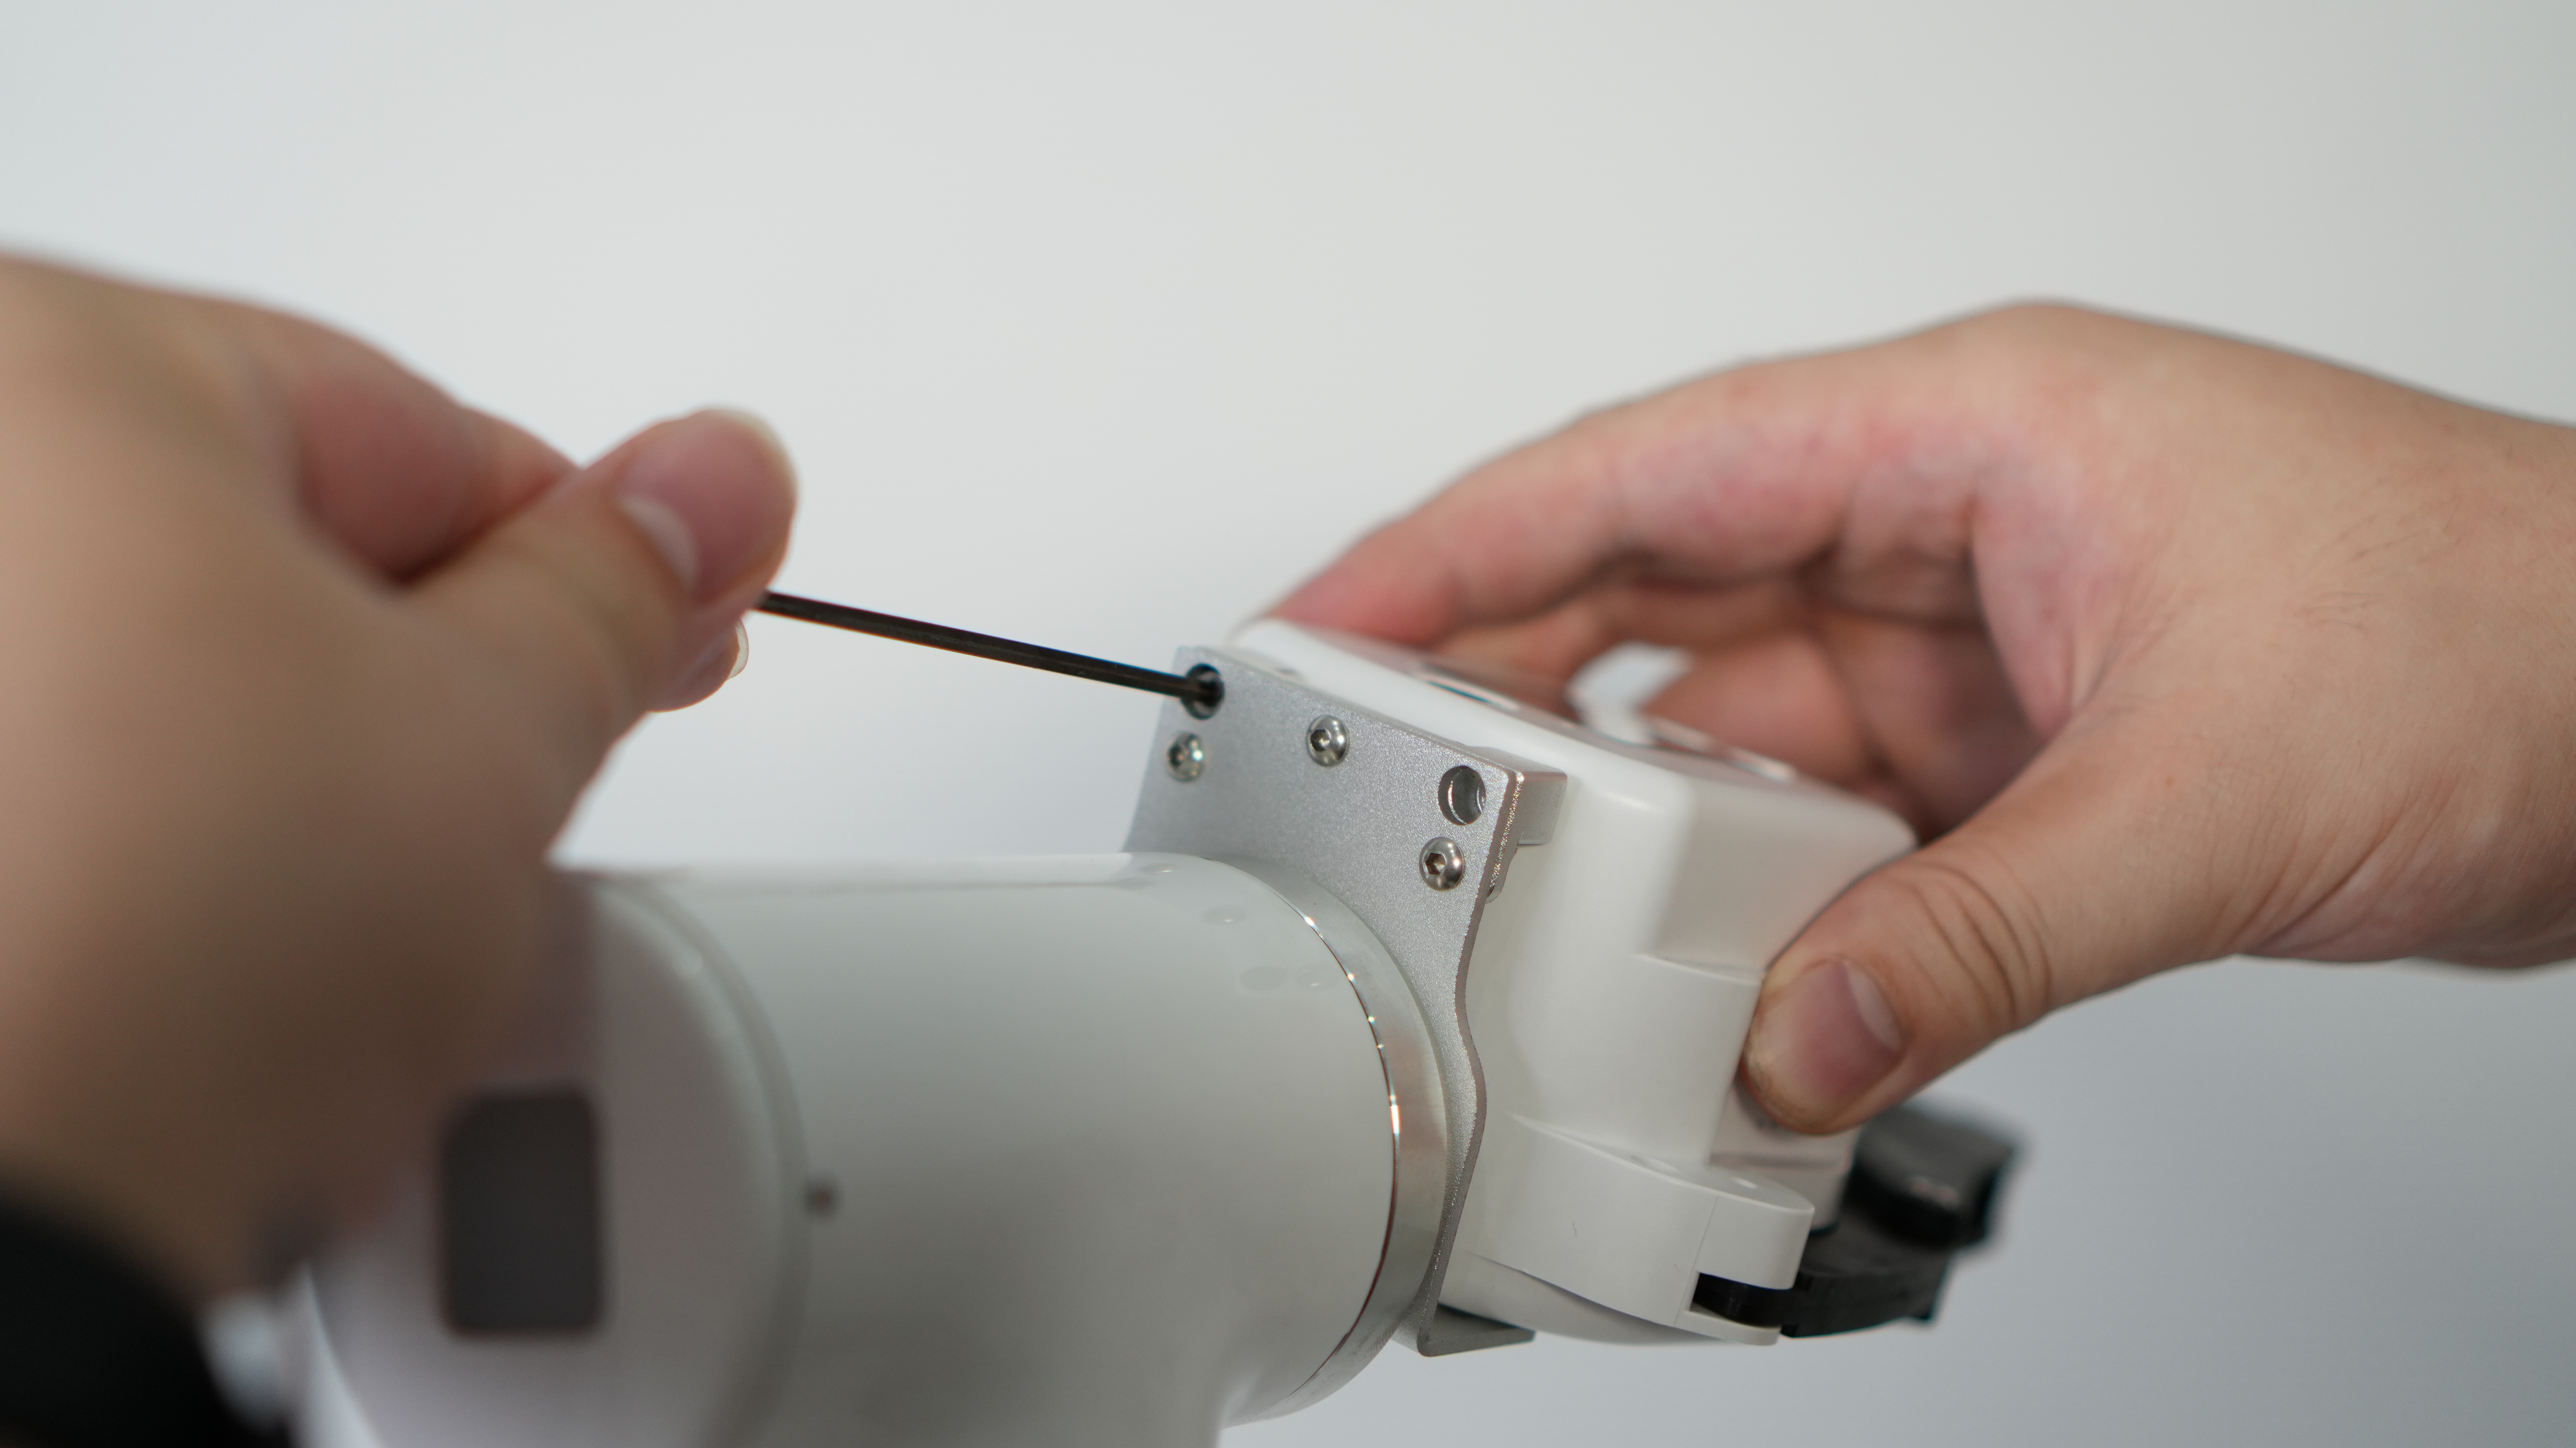
Align the MyCobot Pro630 base with the screw holes on the external fixing plate
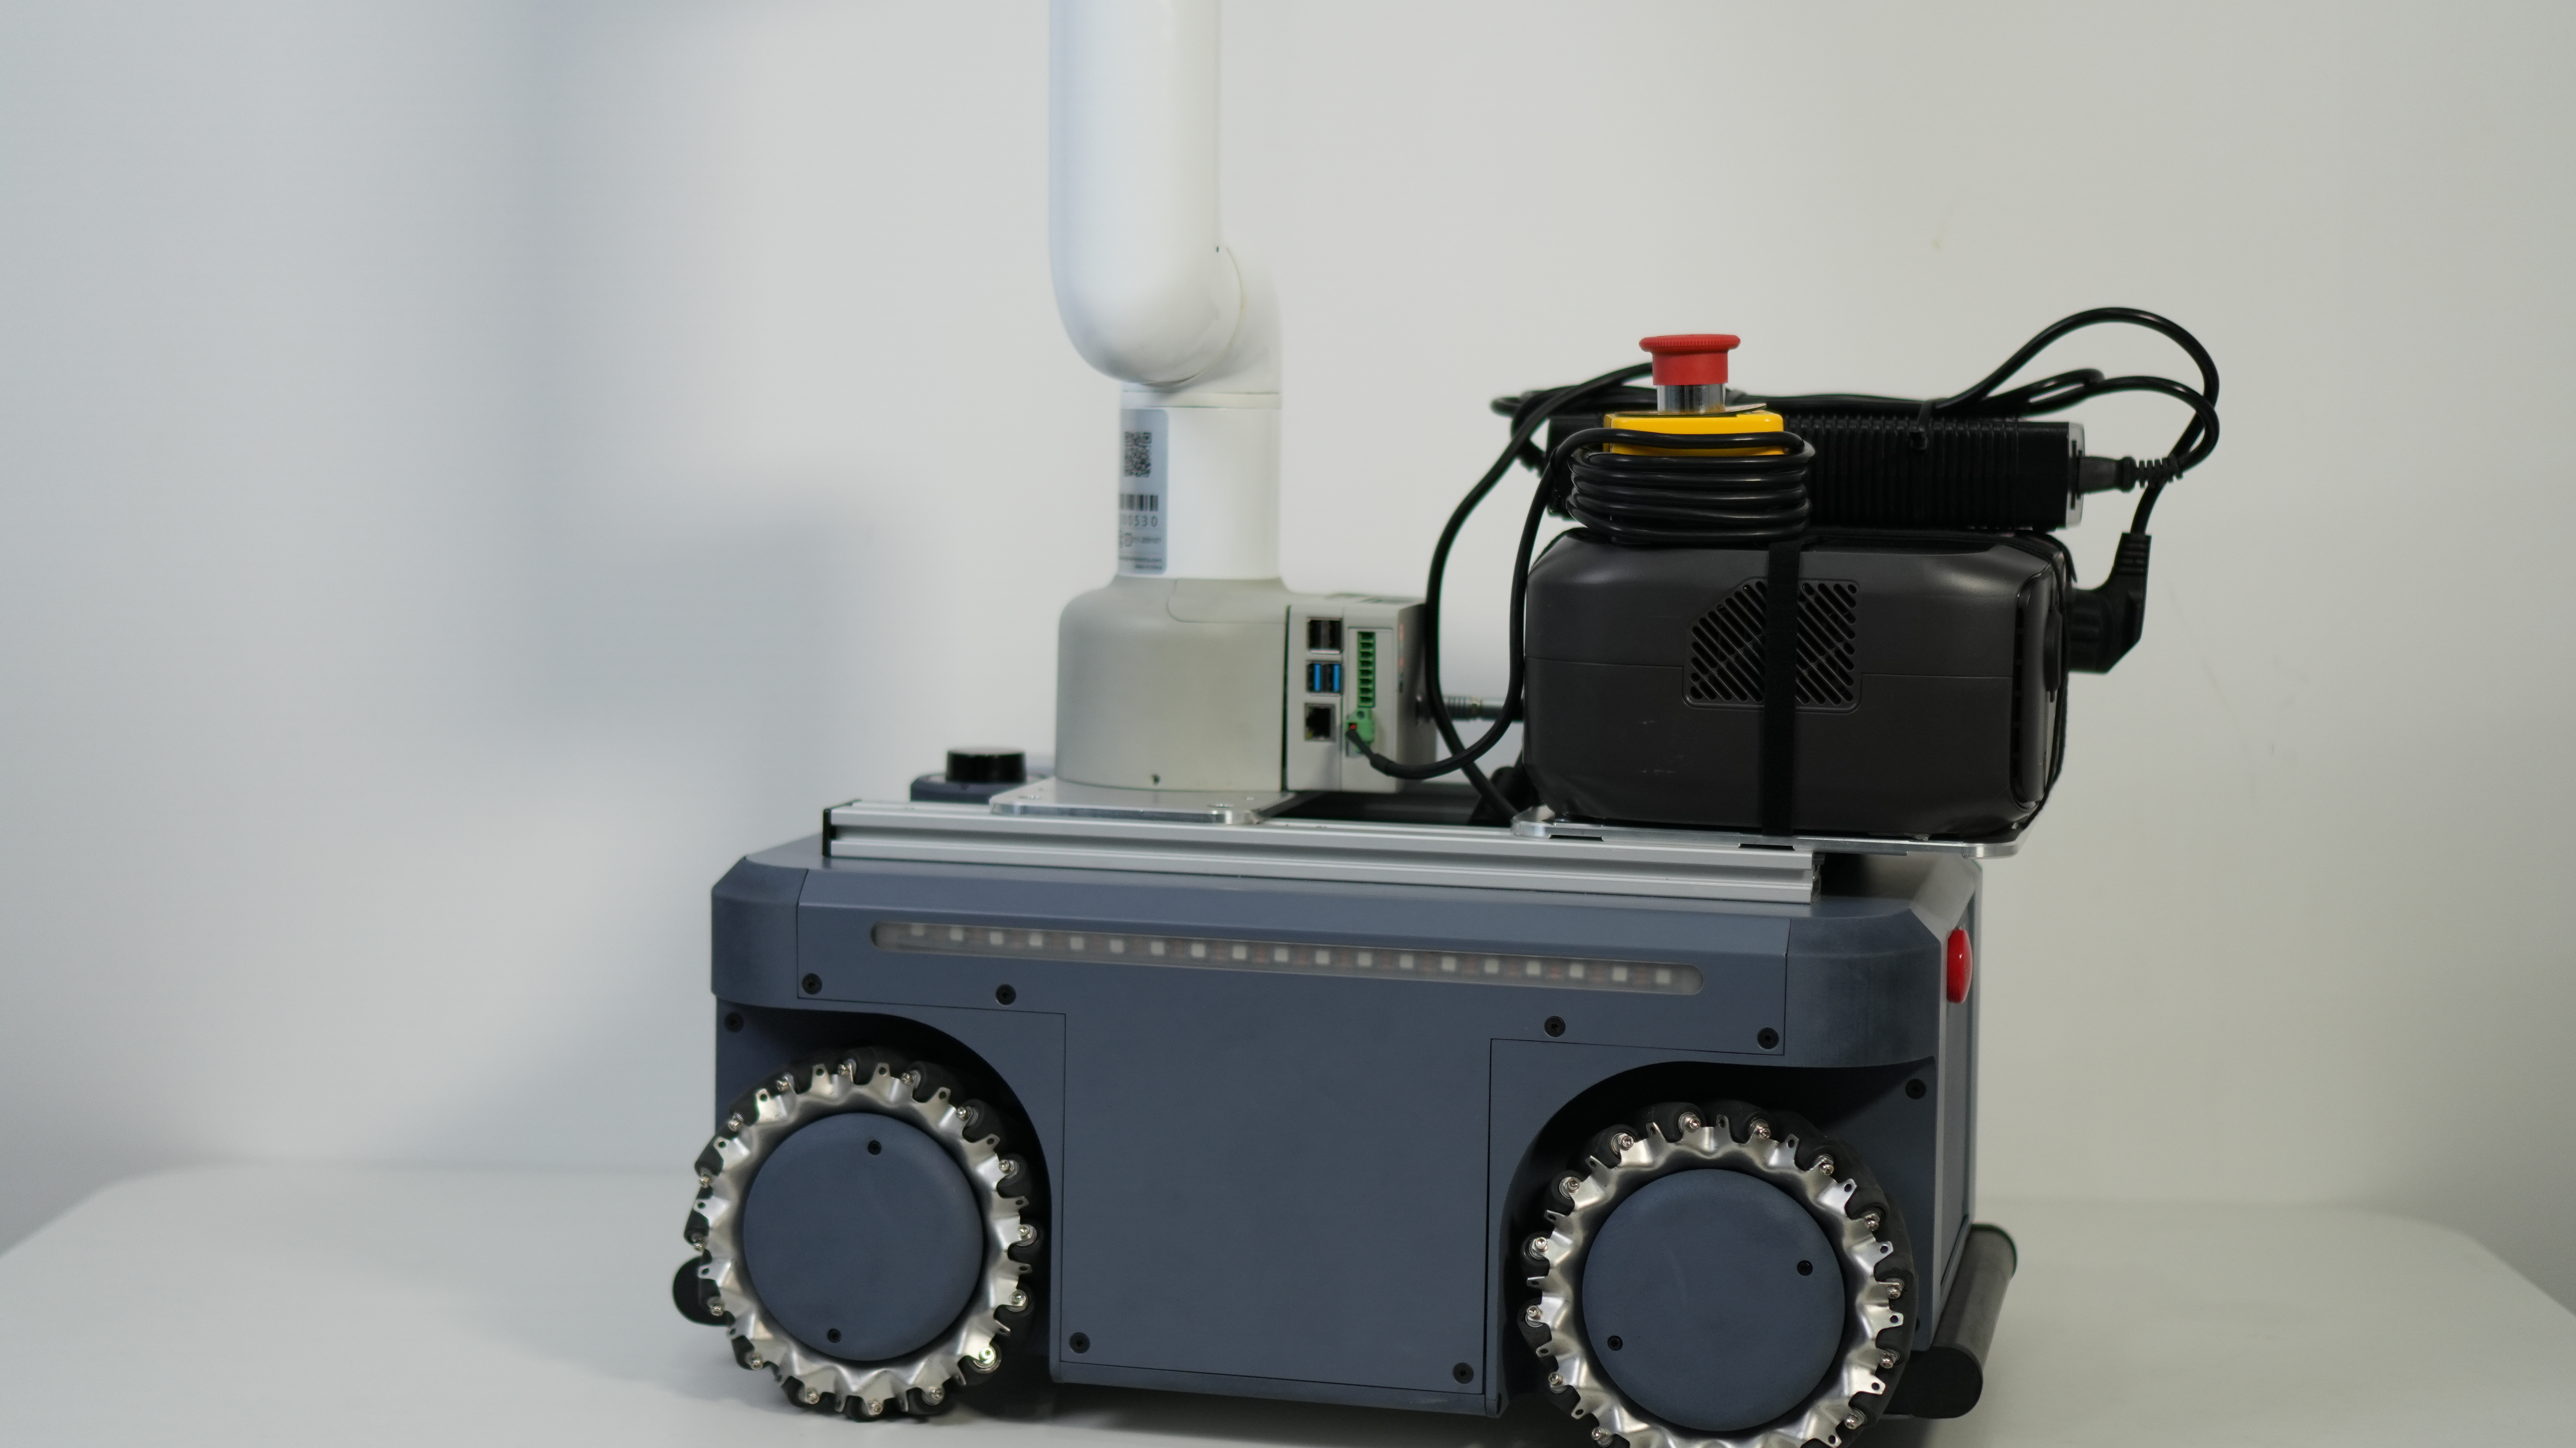
Fix MyCobot Pro630 on the external fixing plate
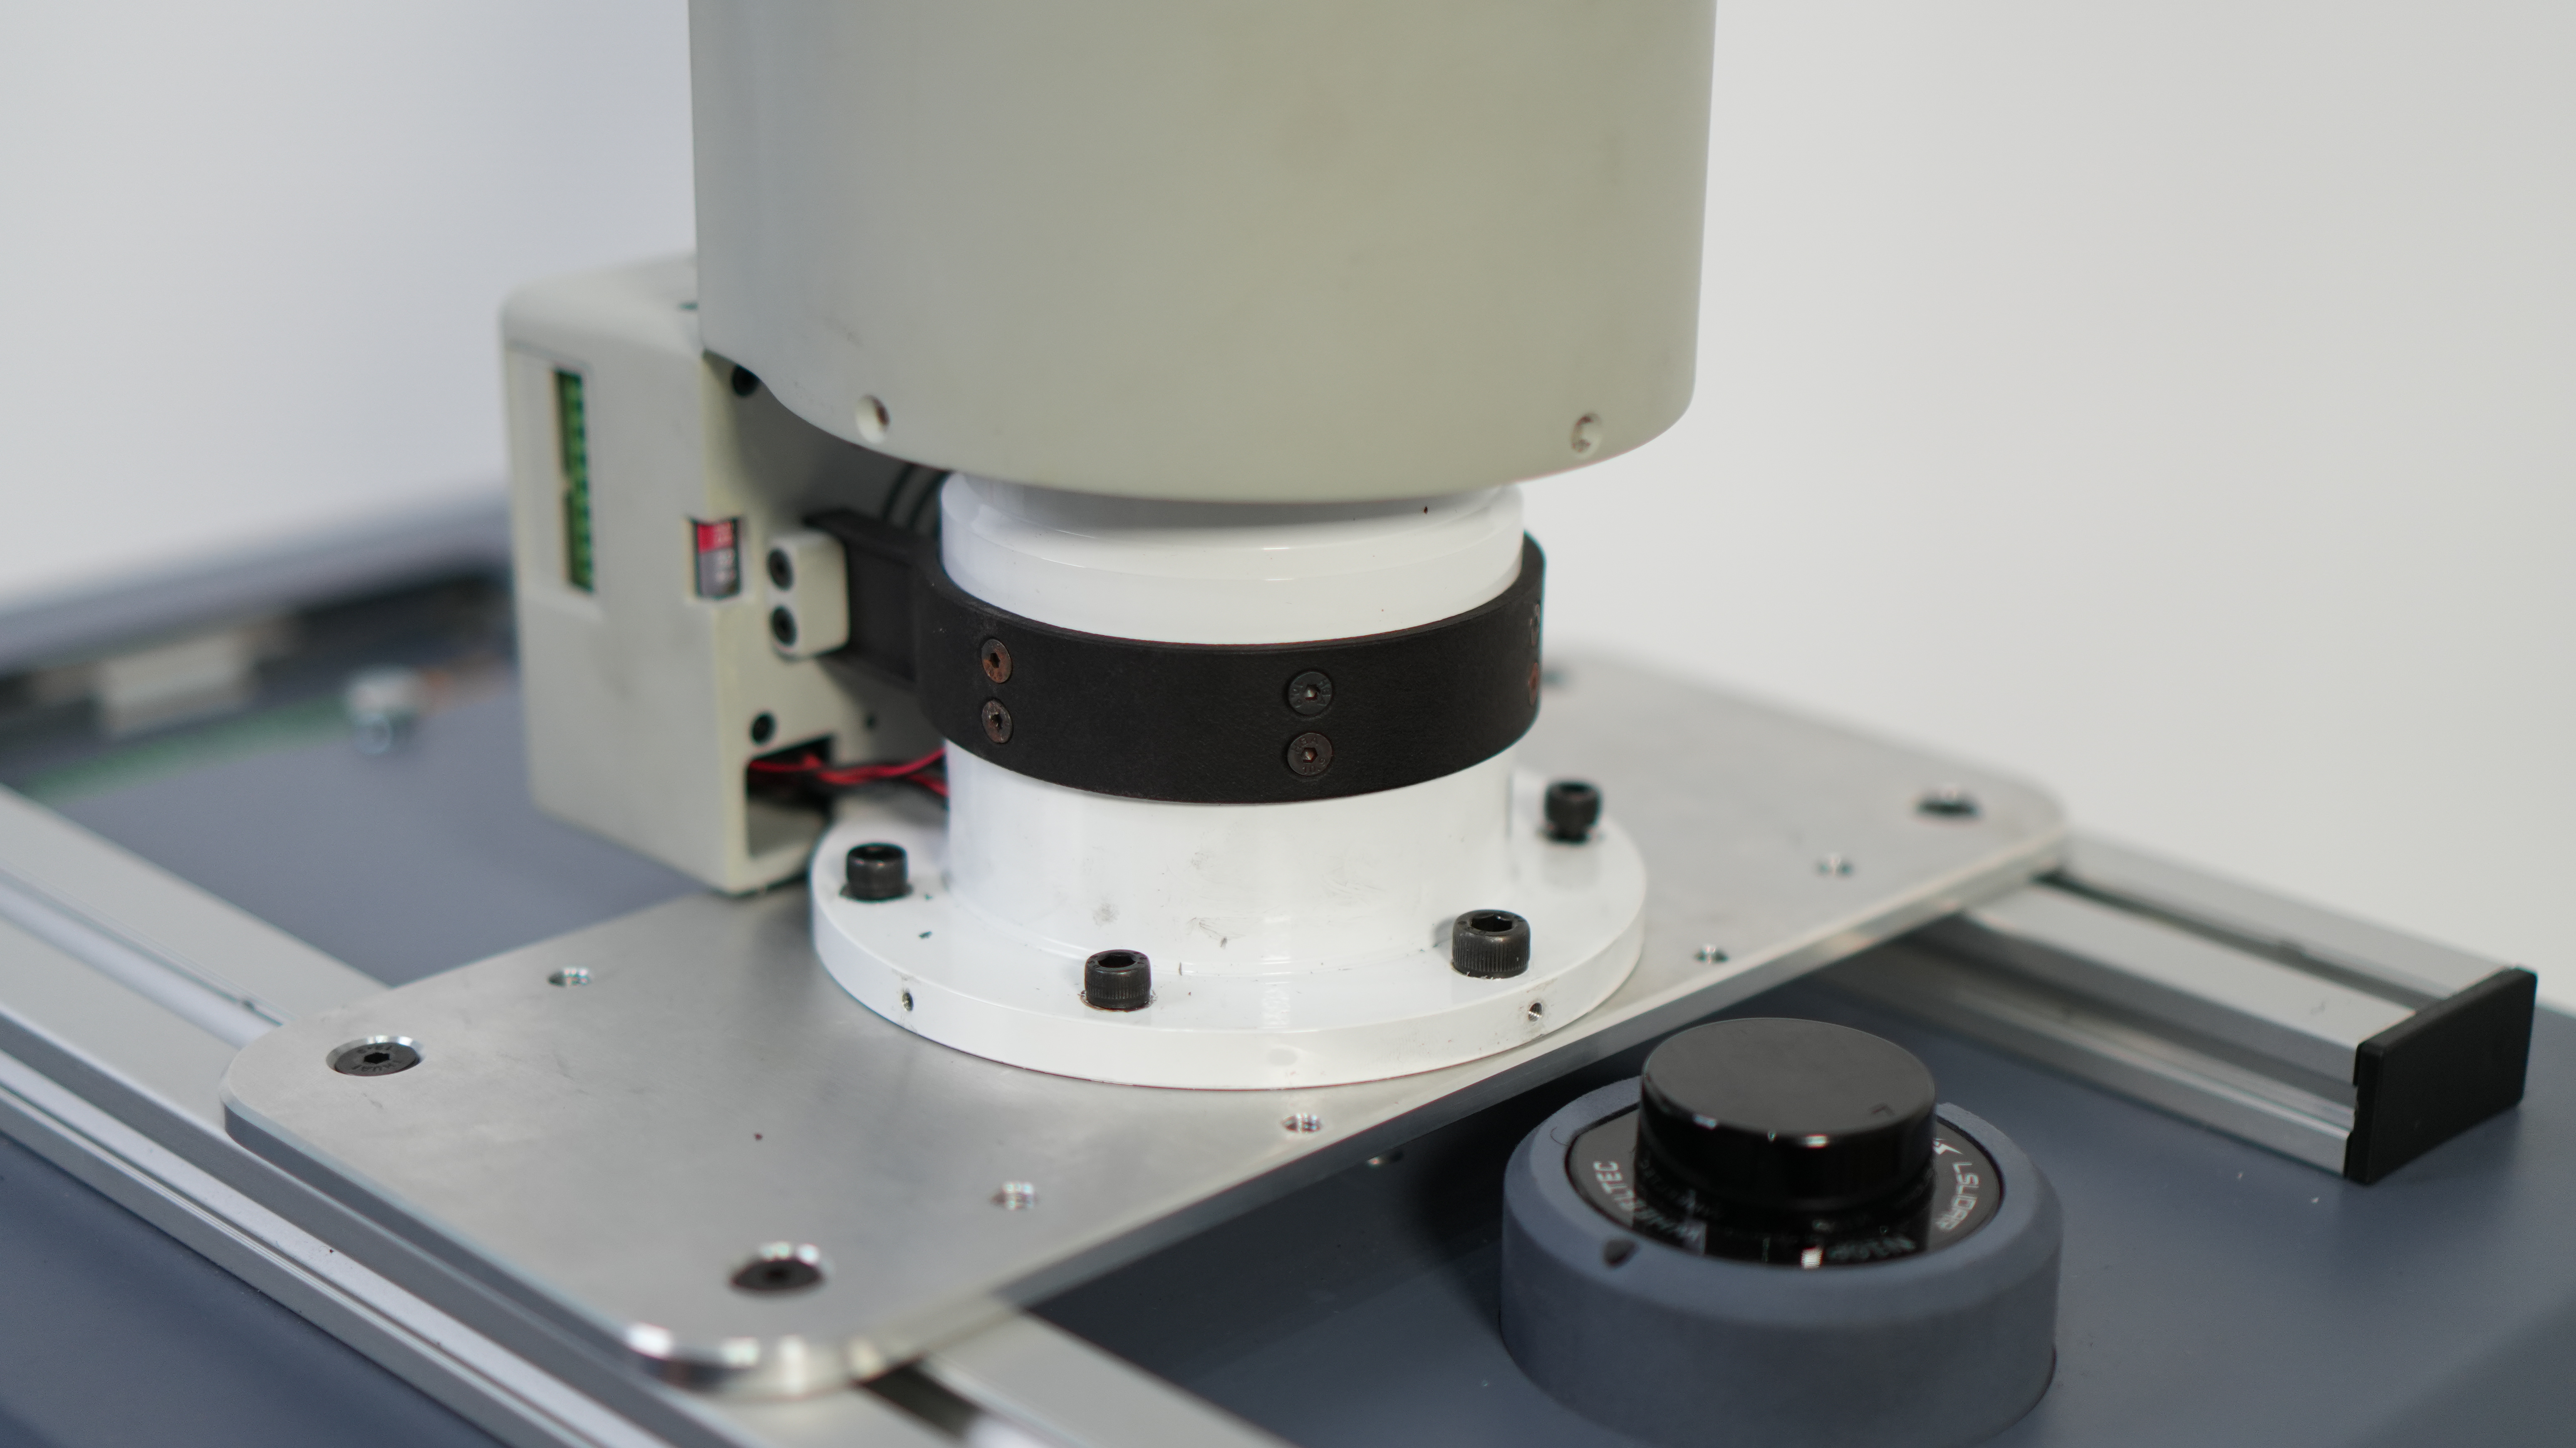
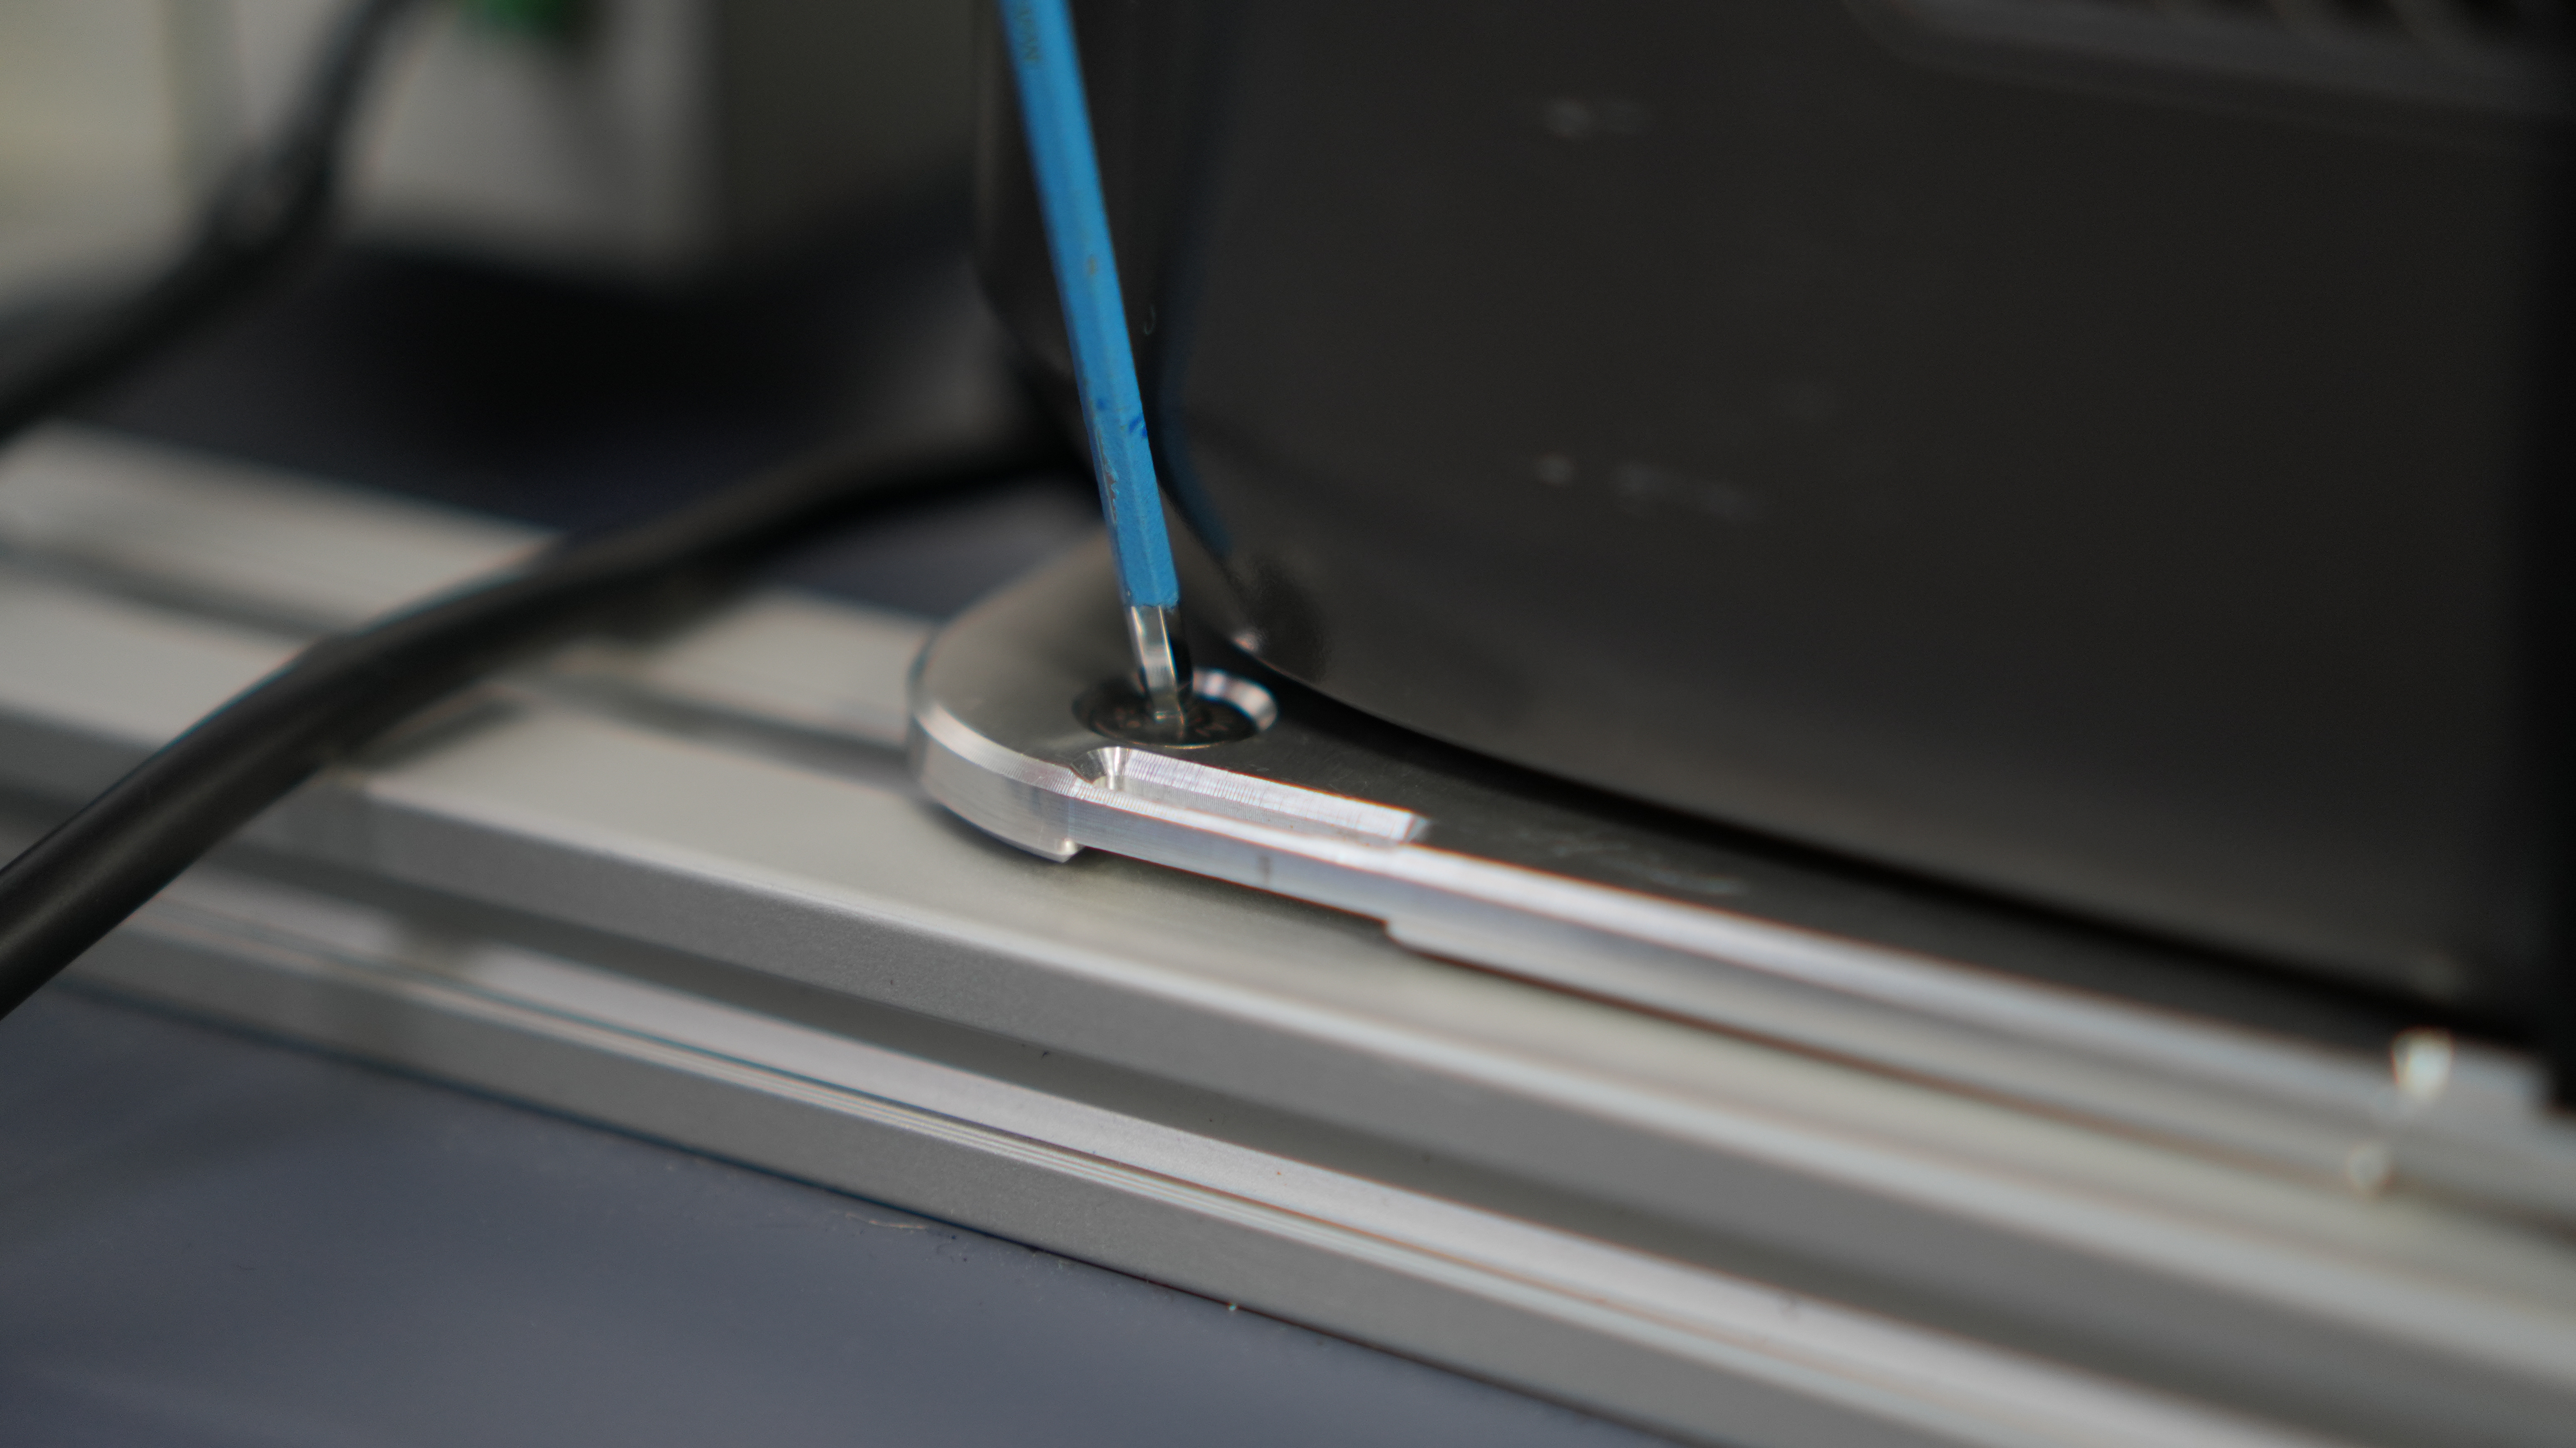
Fix the force control gripper to the gripper interface of MyCobot Pro630
- Fix the force control gripper flange to the end
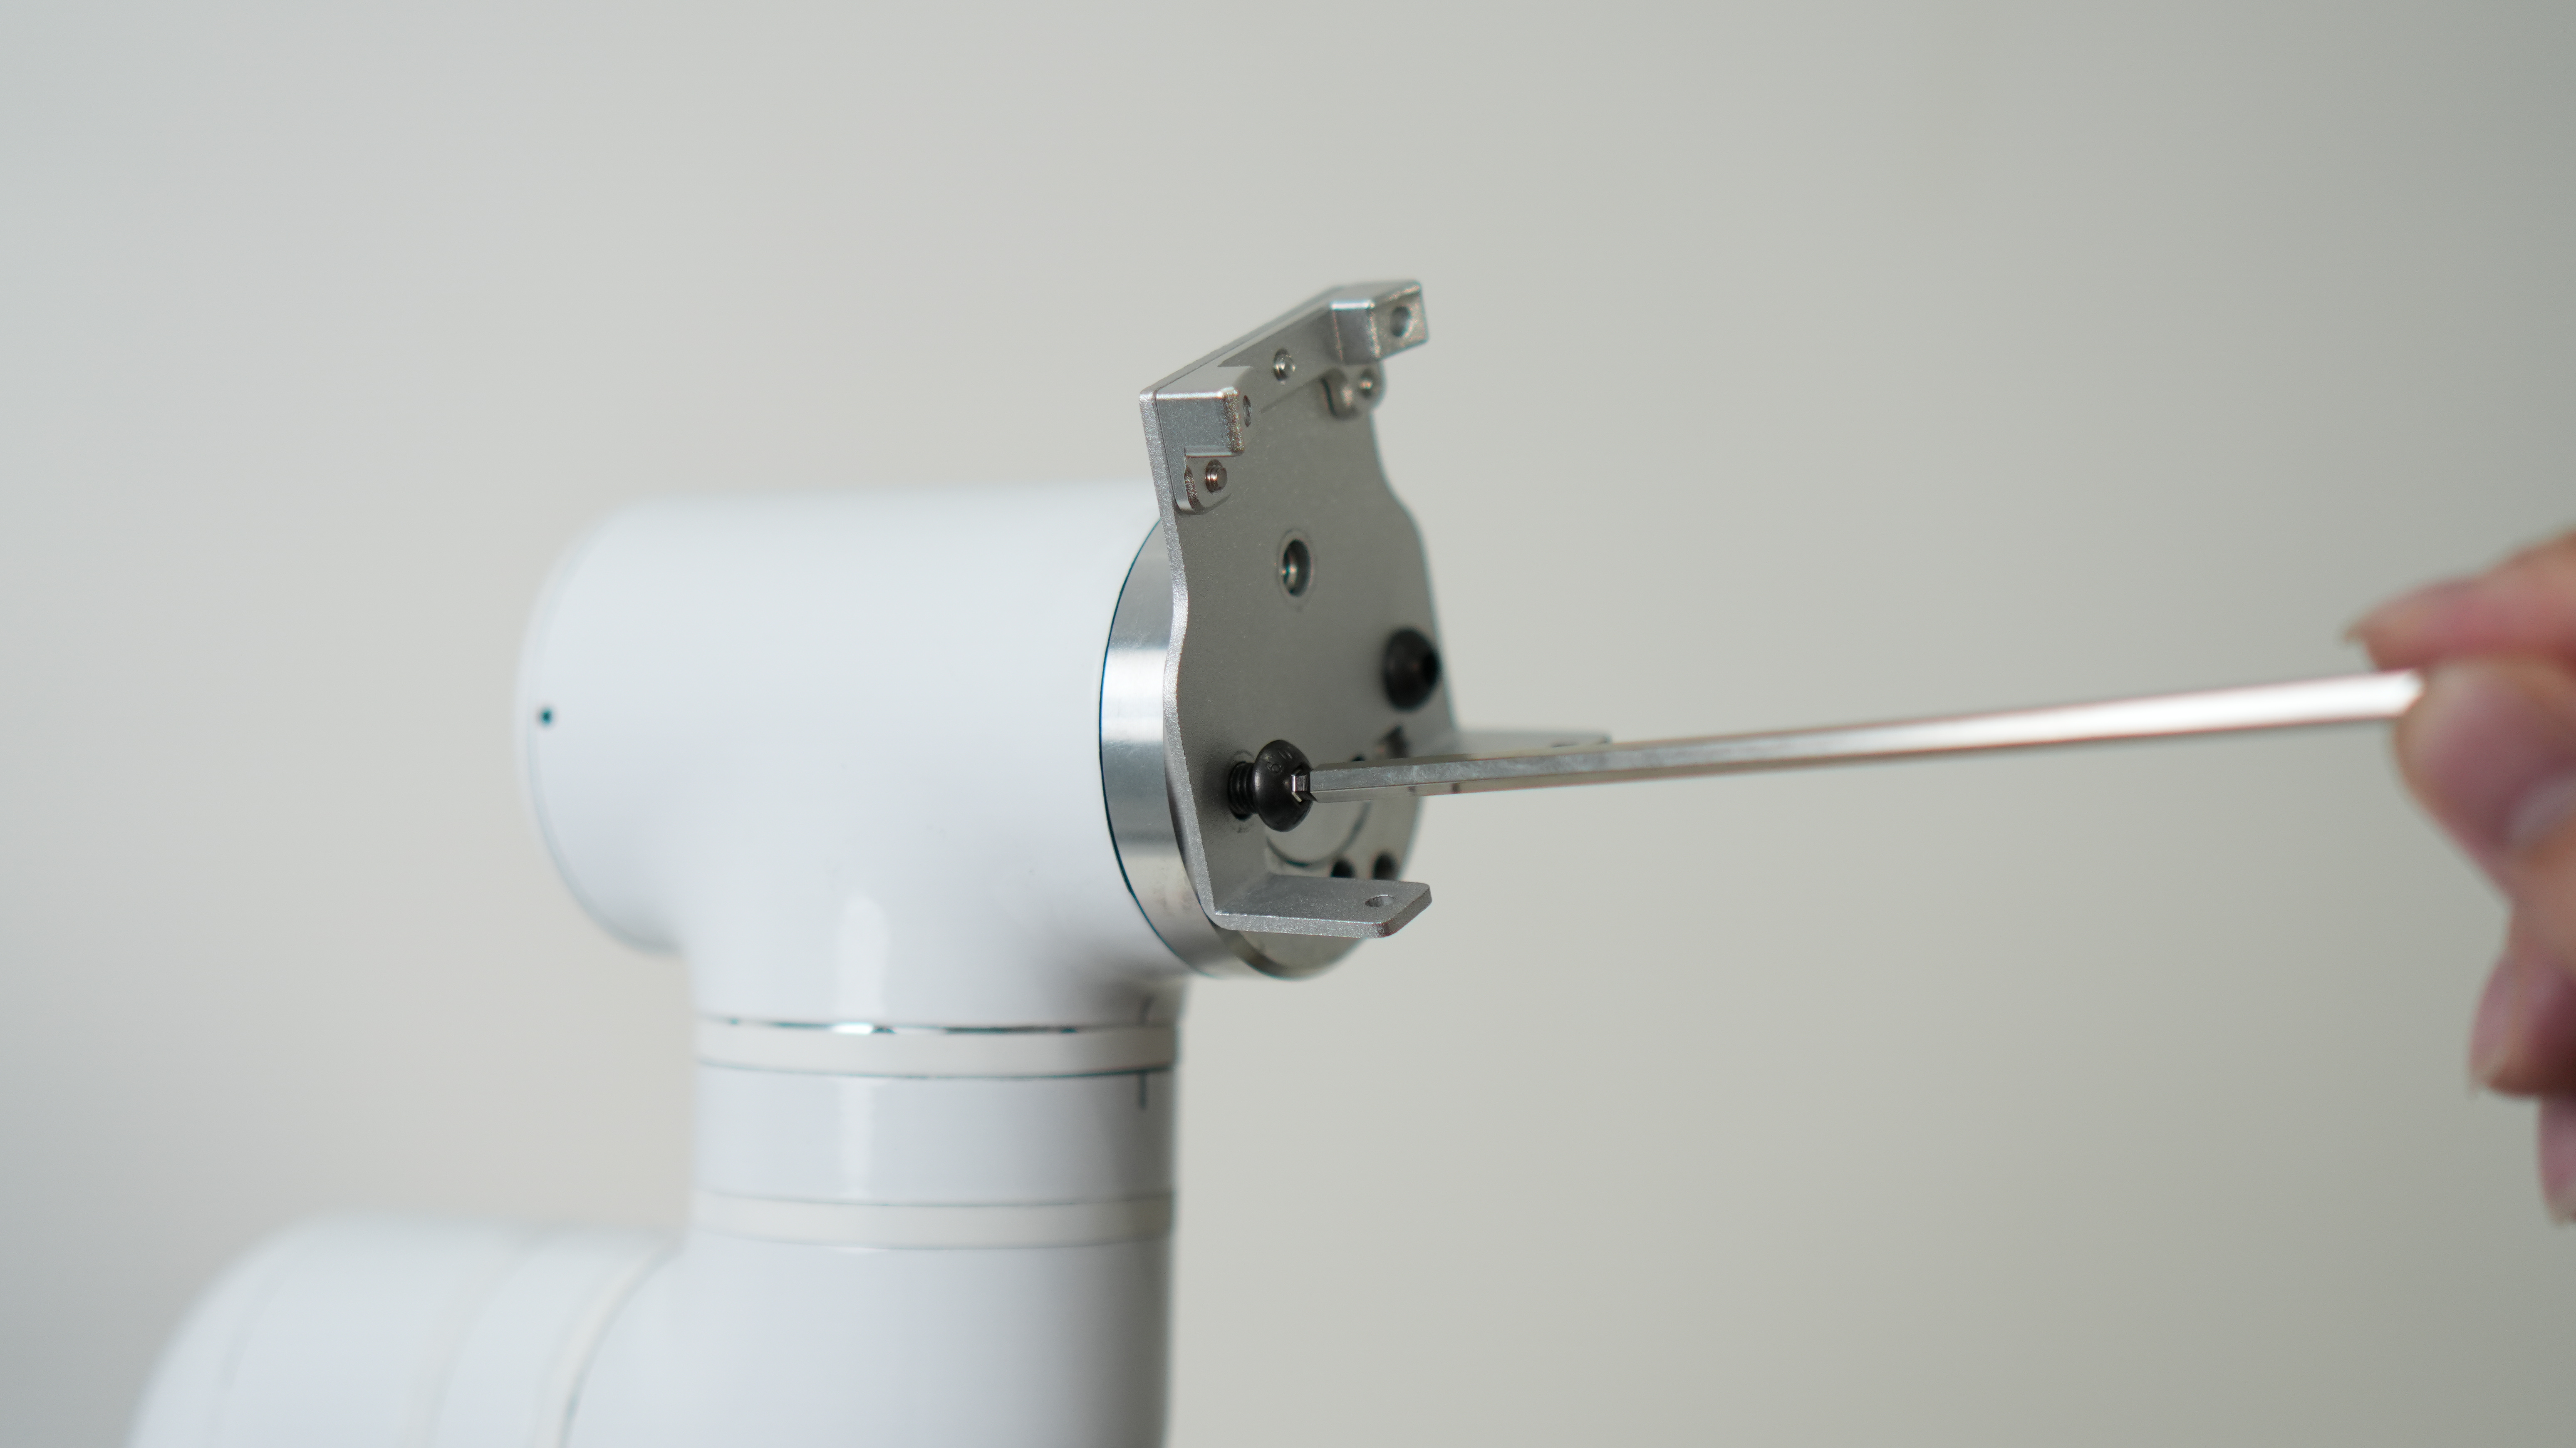
- Connect the force control gripper to the flange
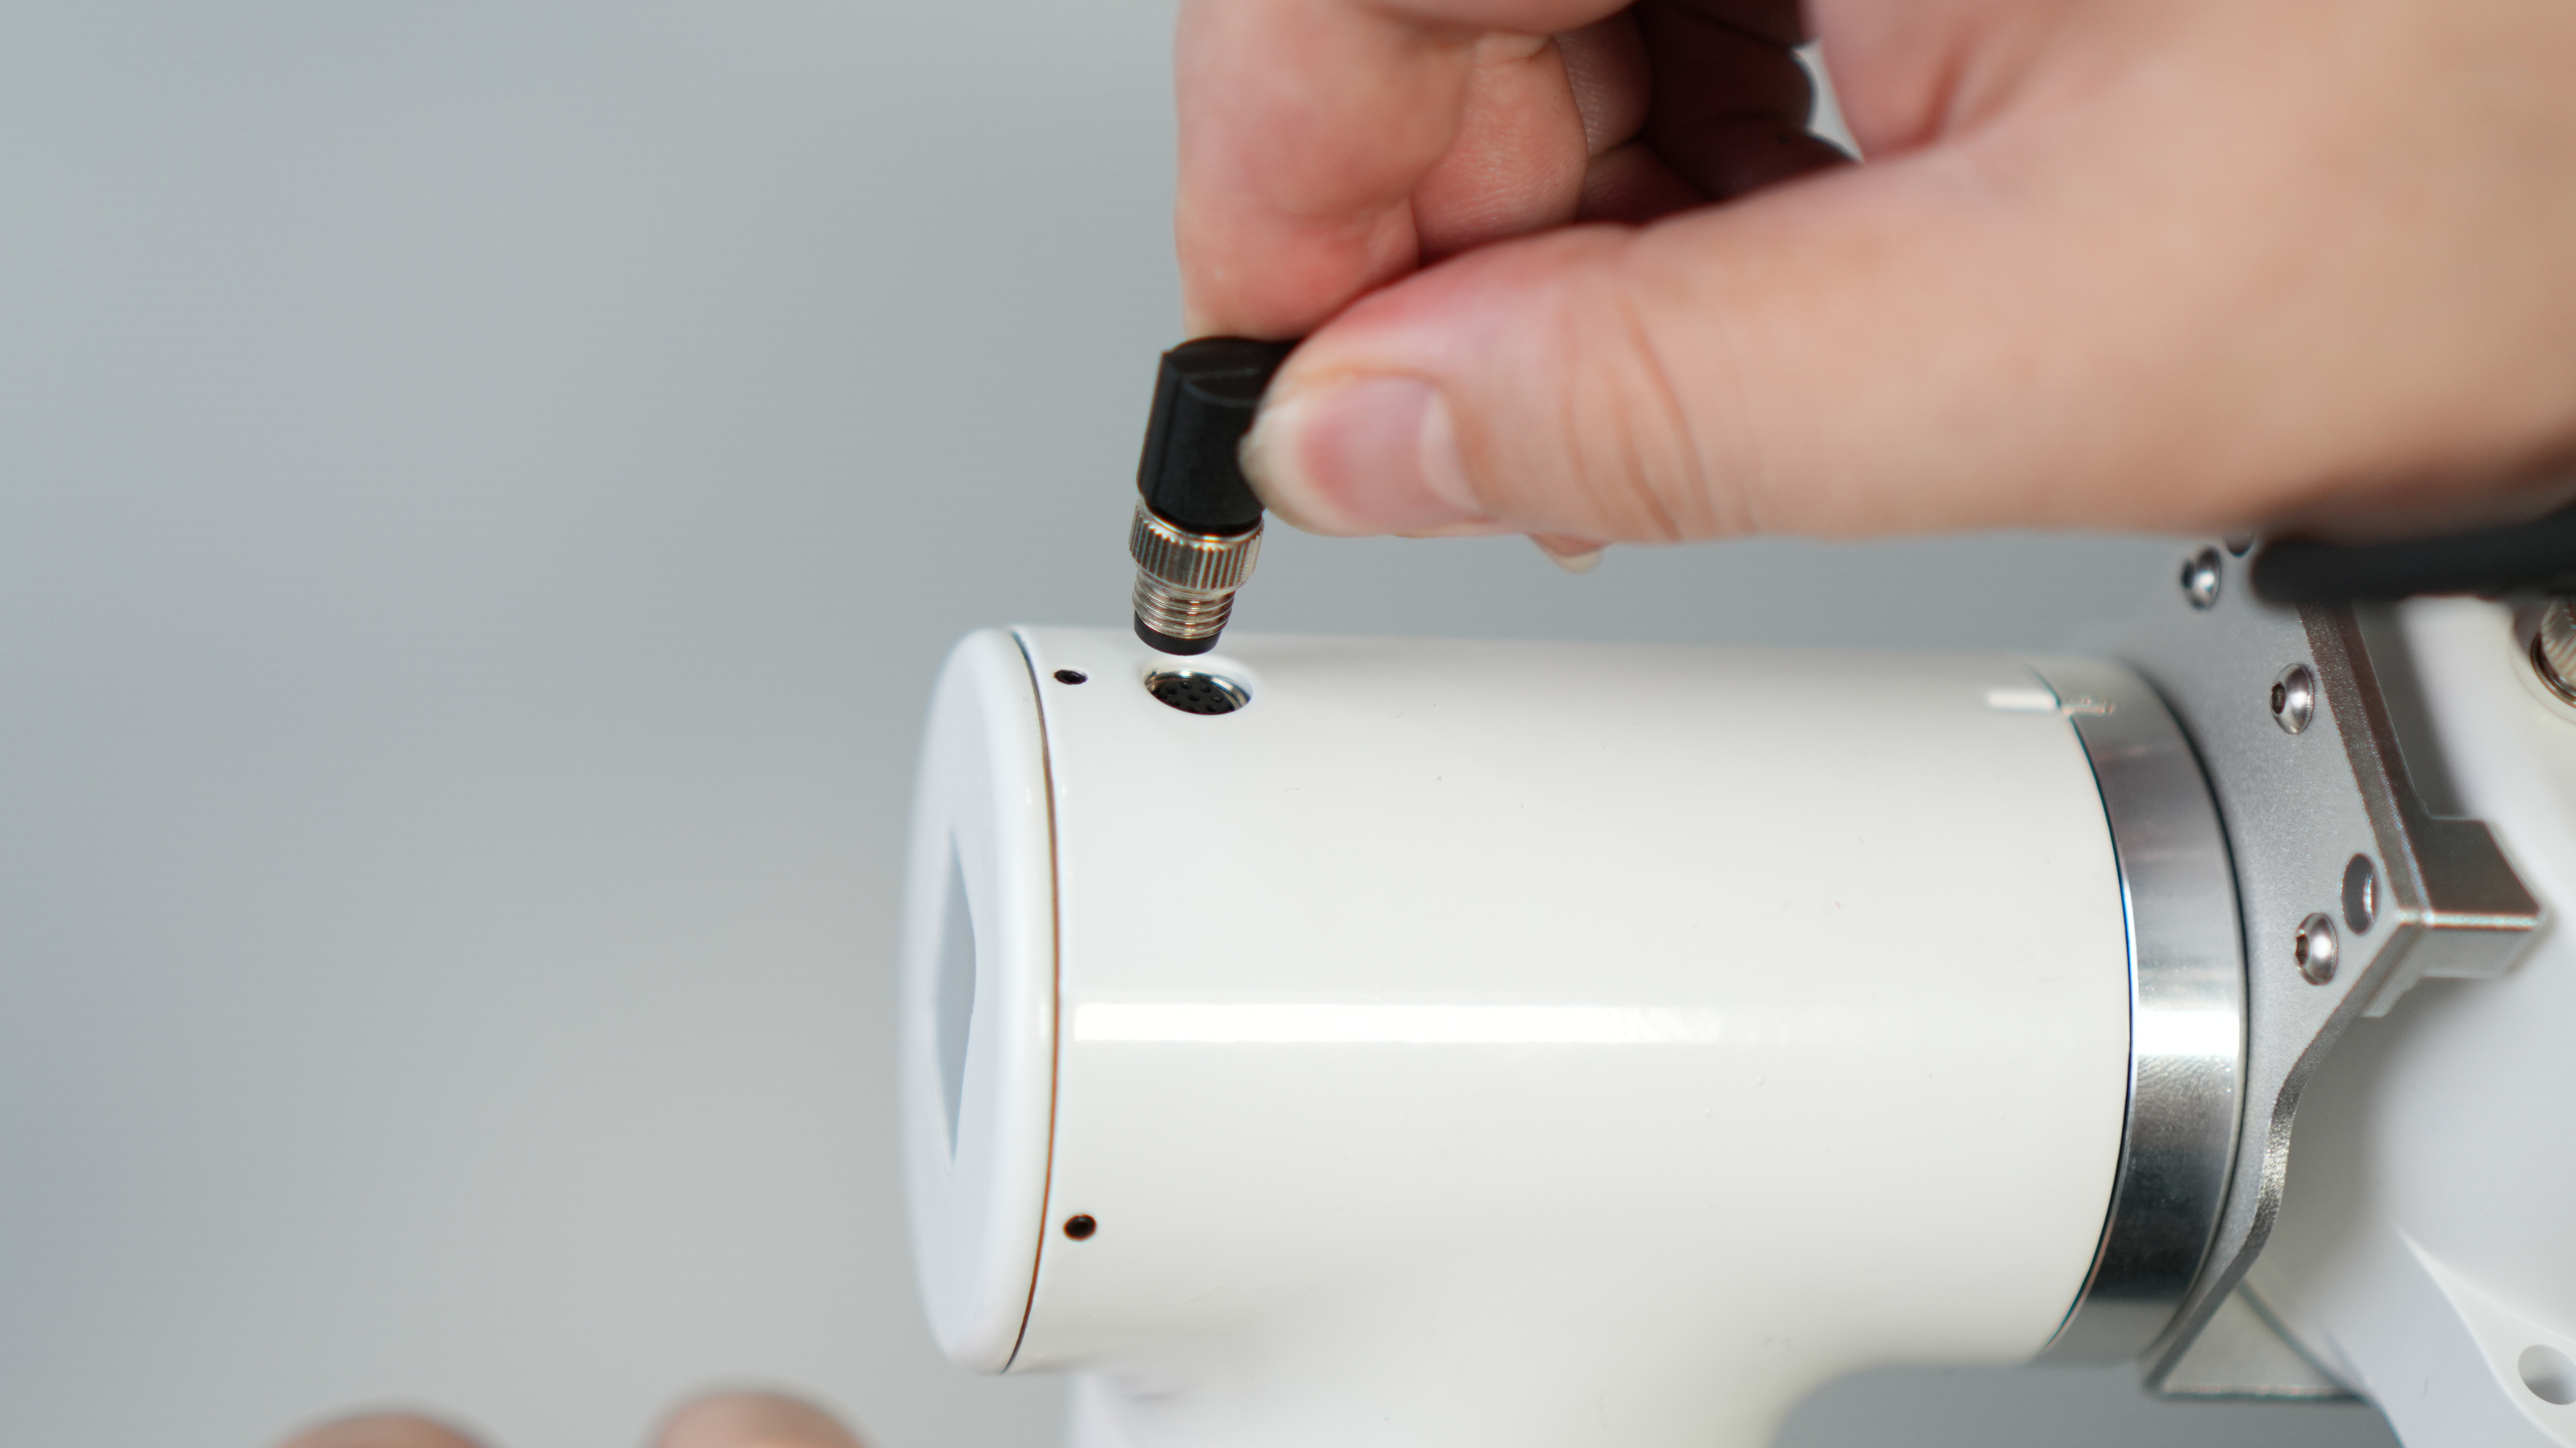
- Use M8 cable to connect to the force control gripper
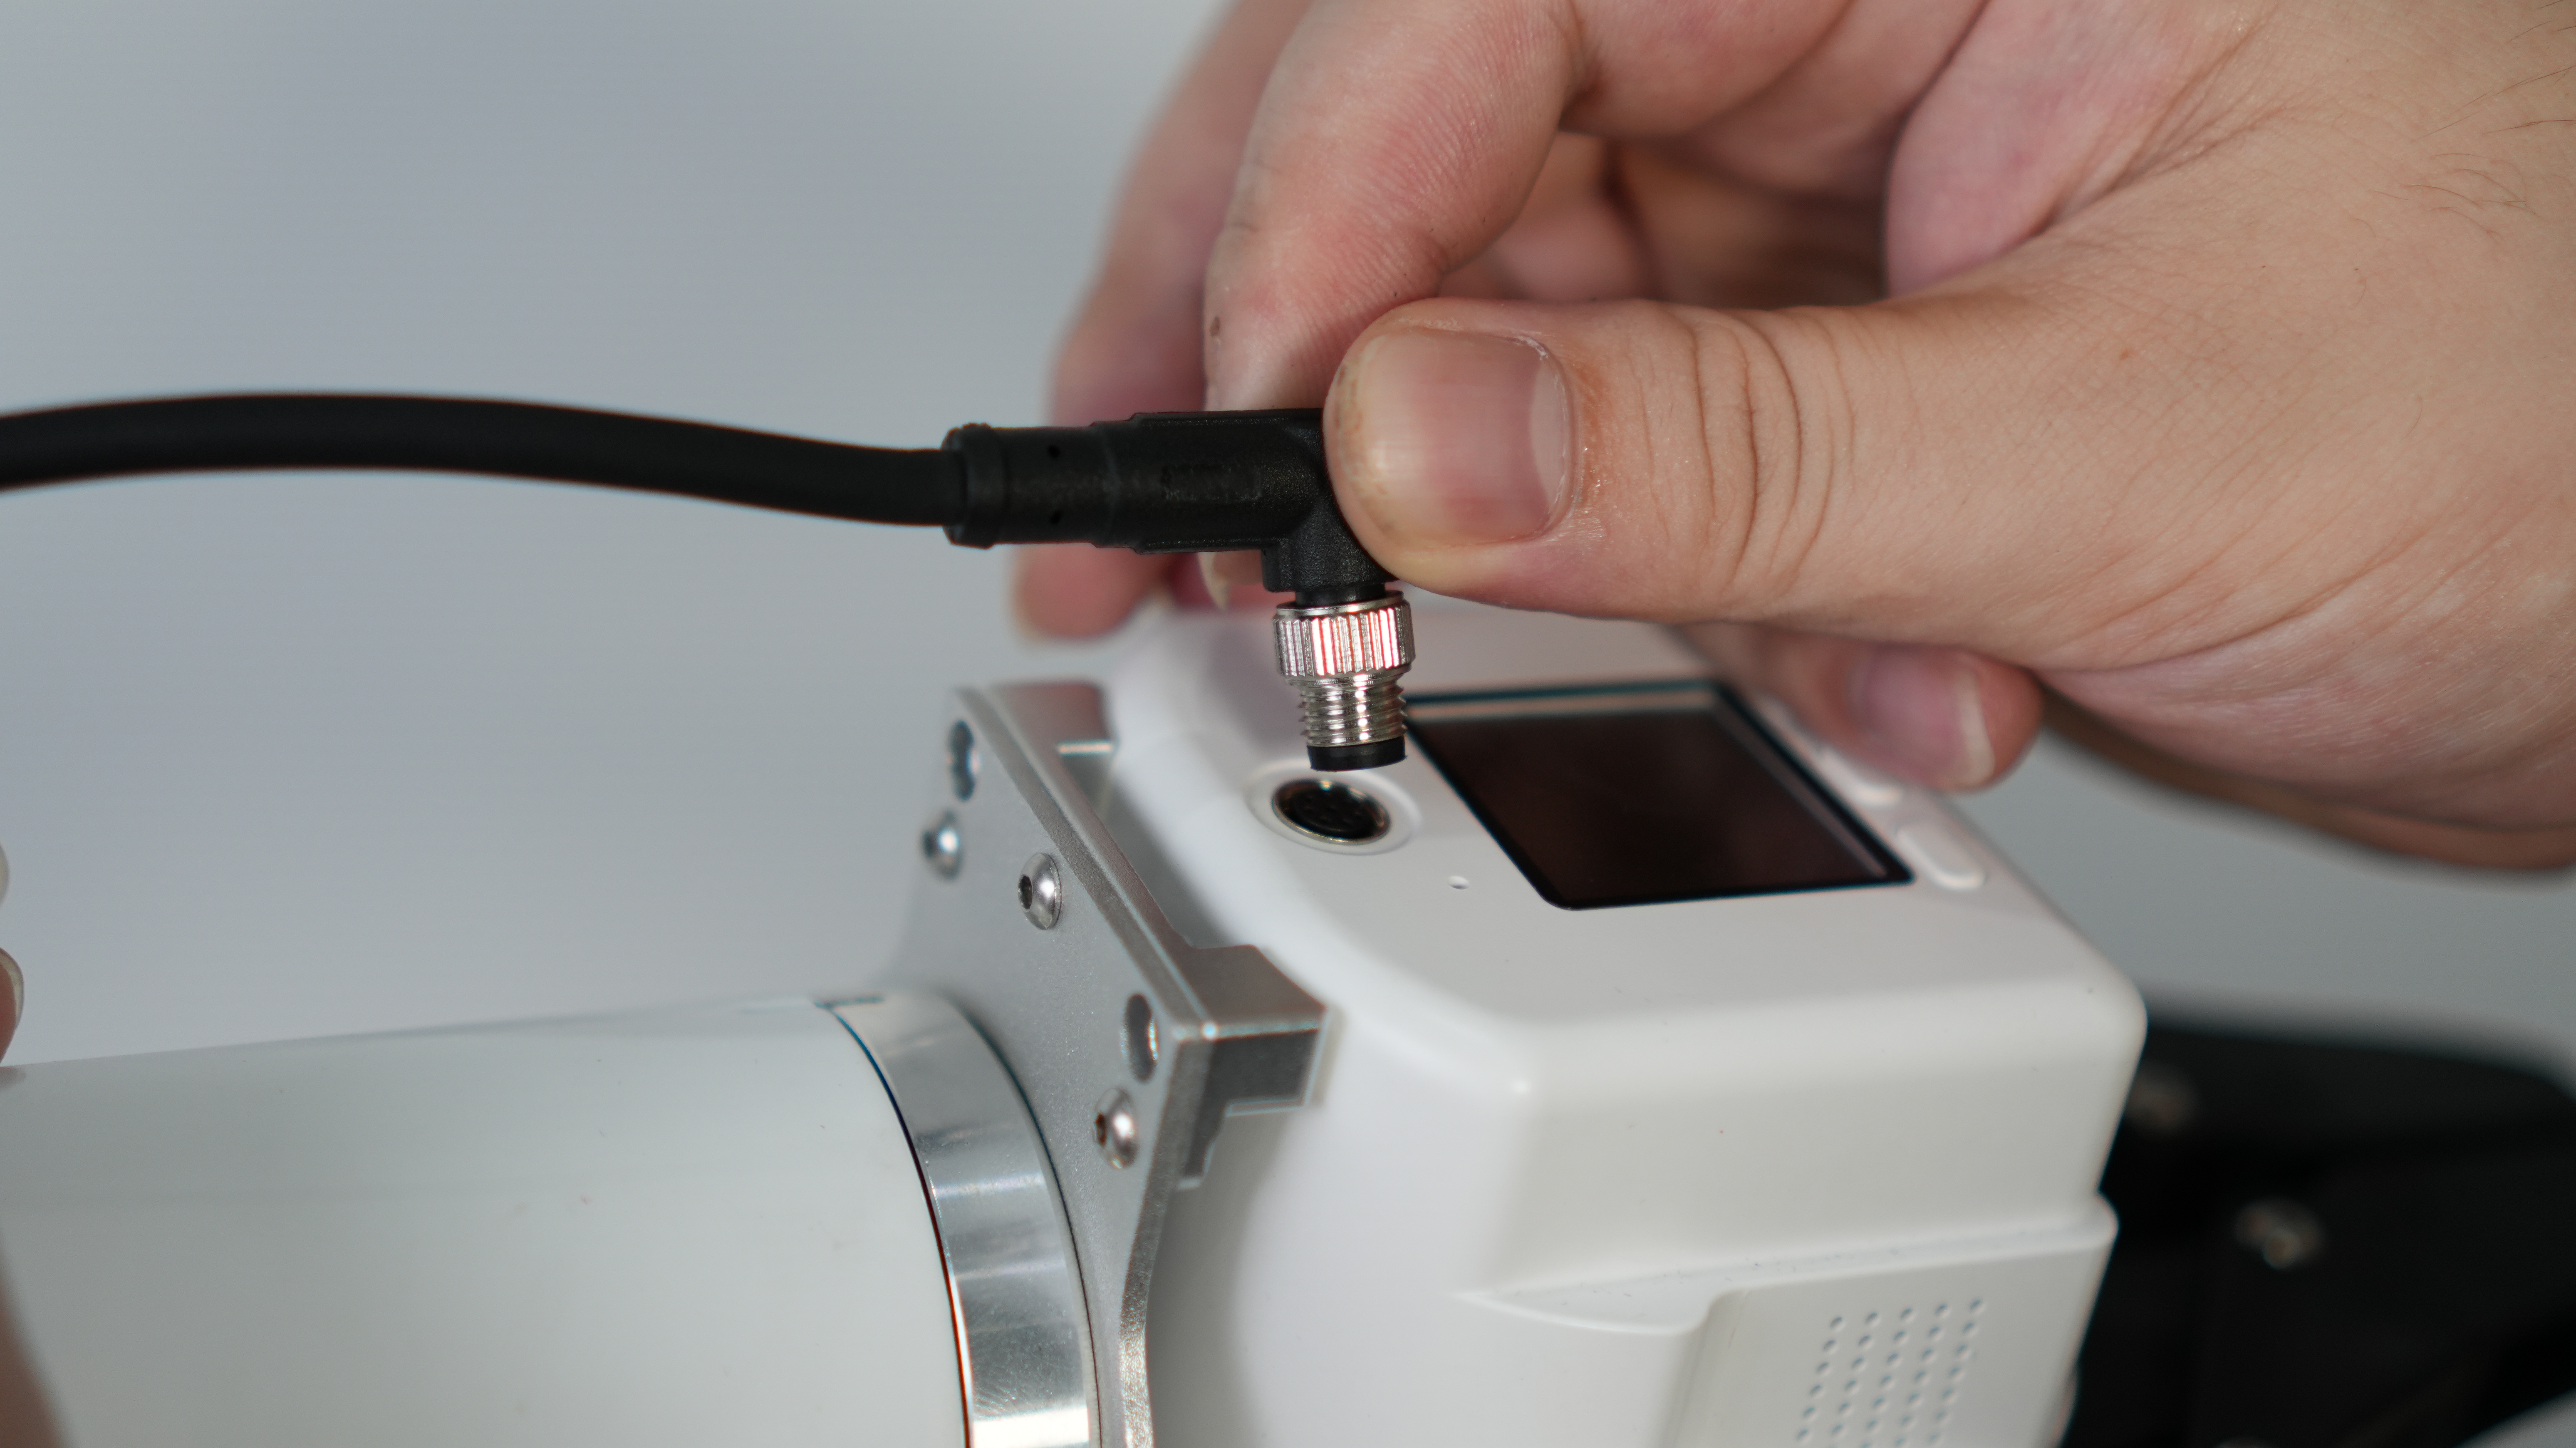
- Connect the M8 cable to the robot arm
- The finished product is shown below
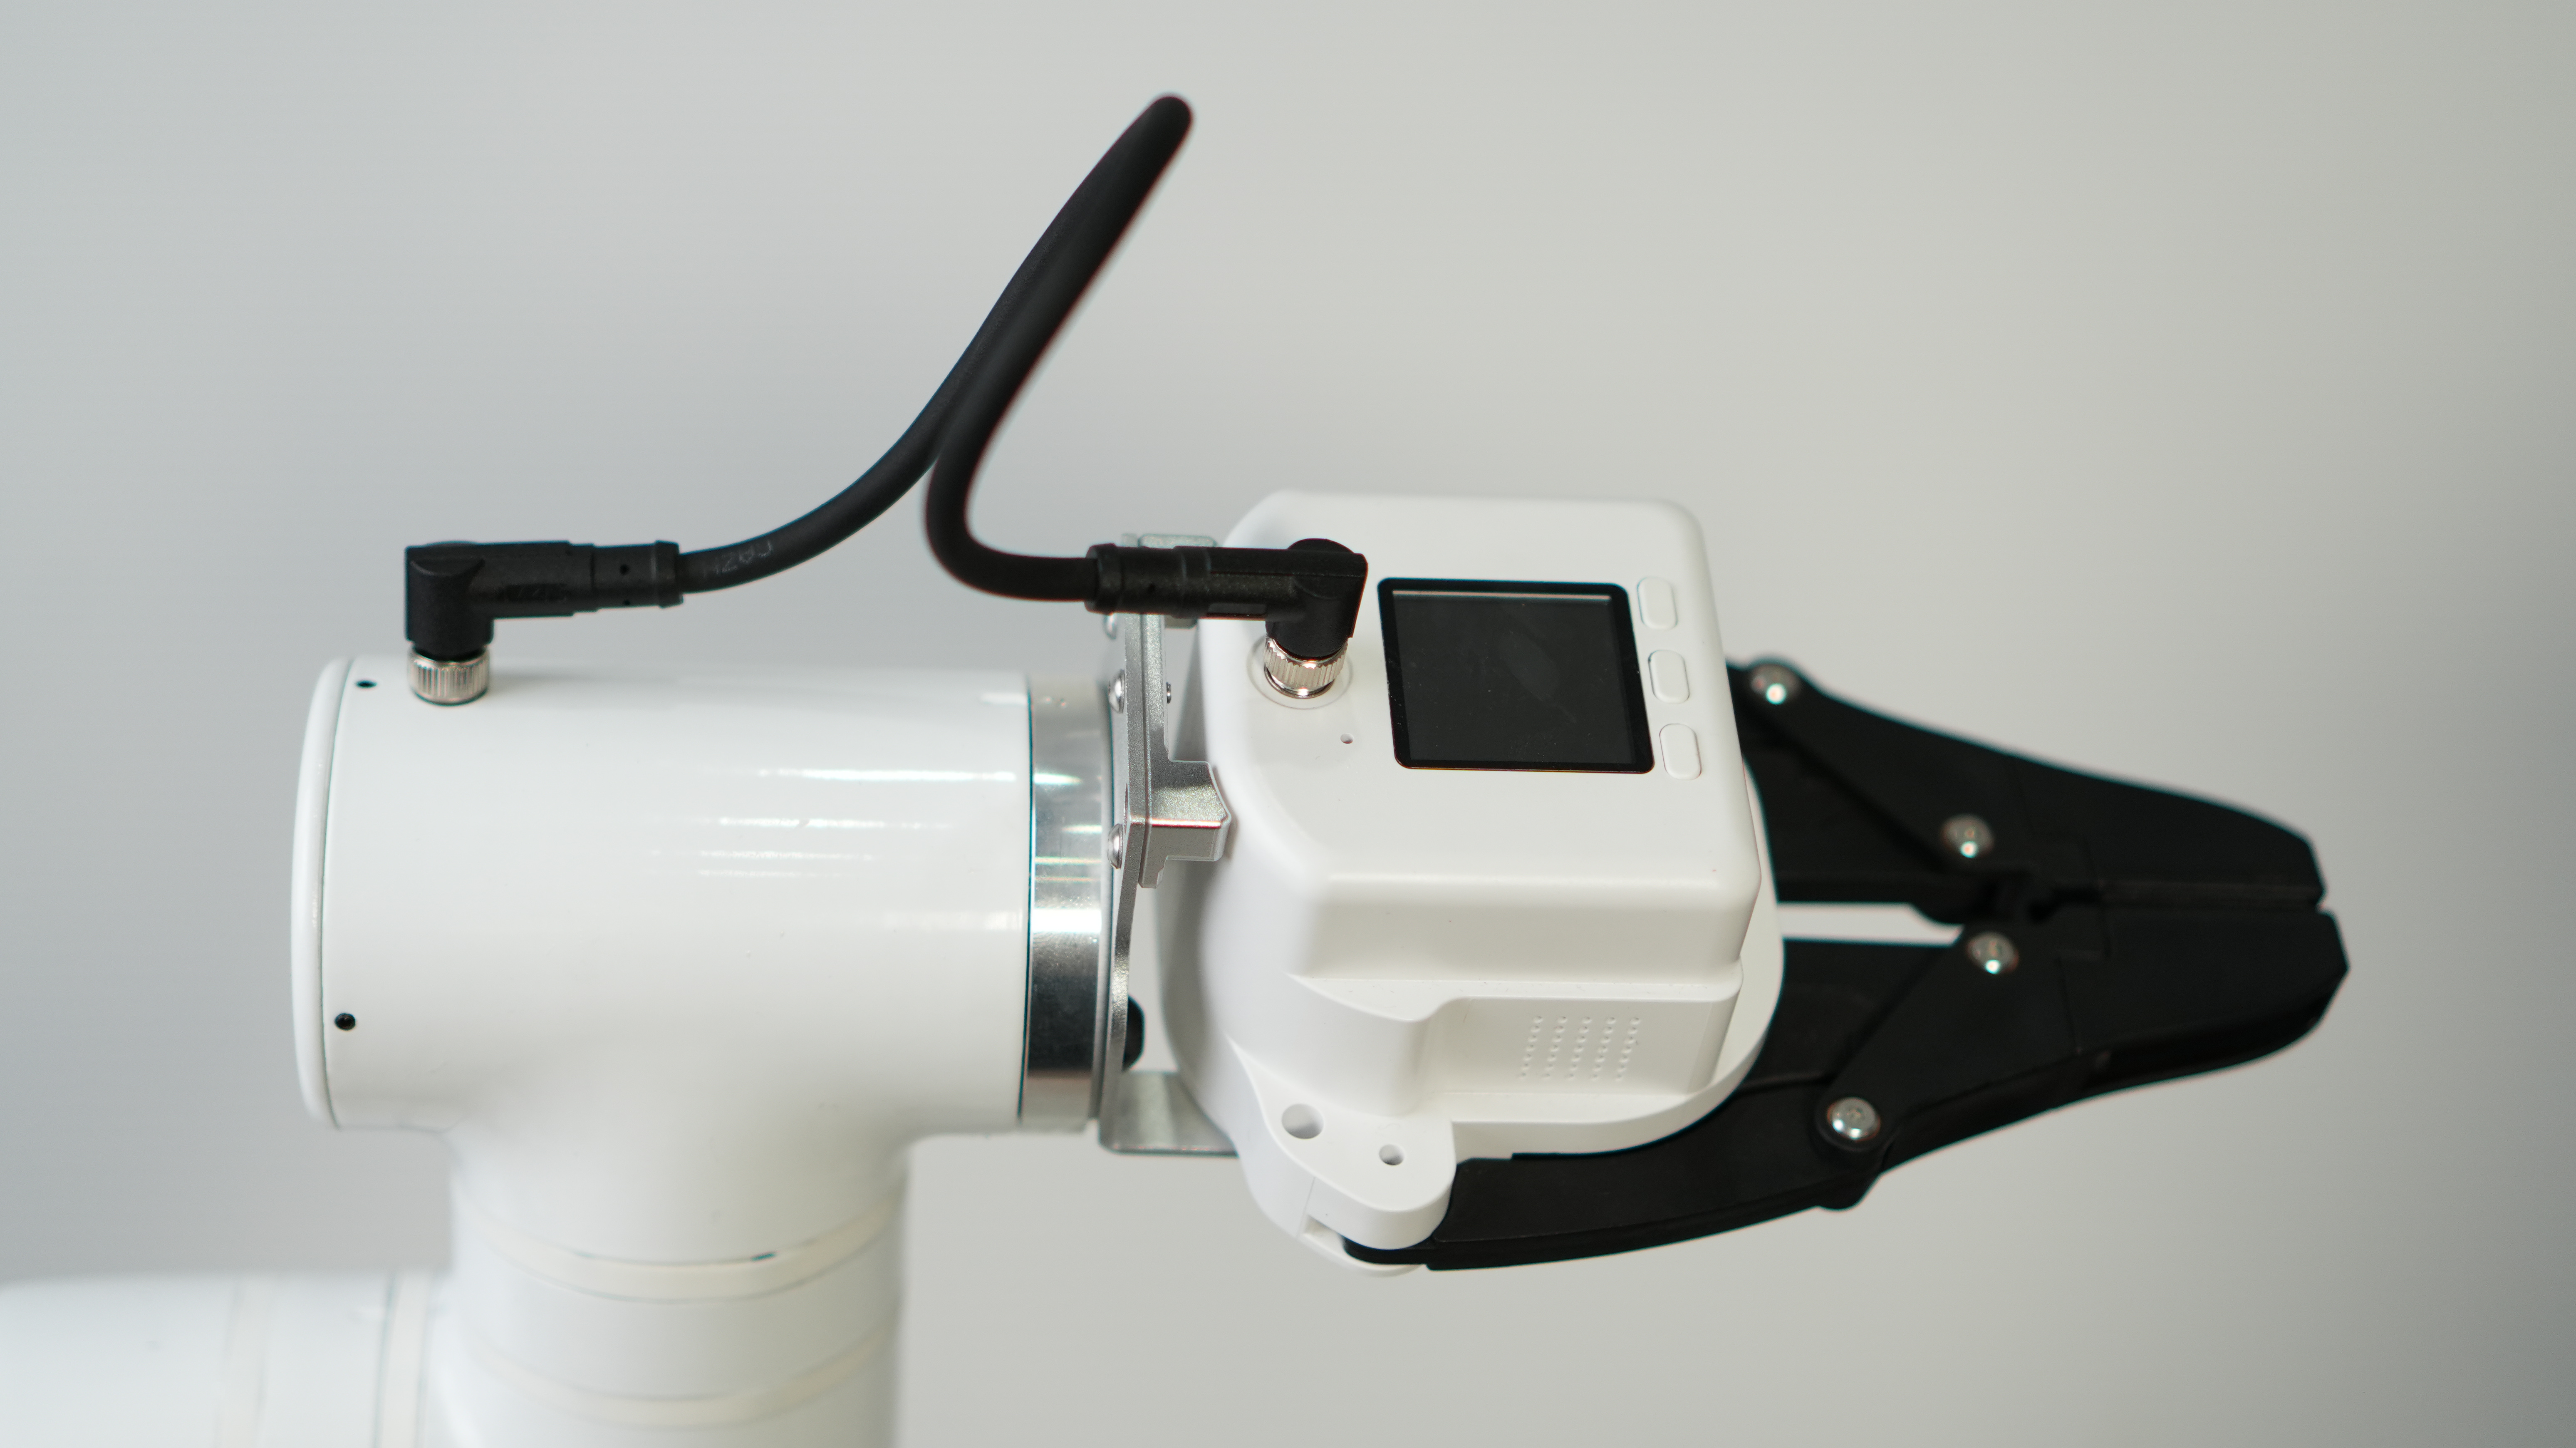
- Fix the force control gripper flange to the end
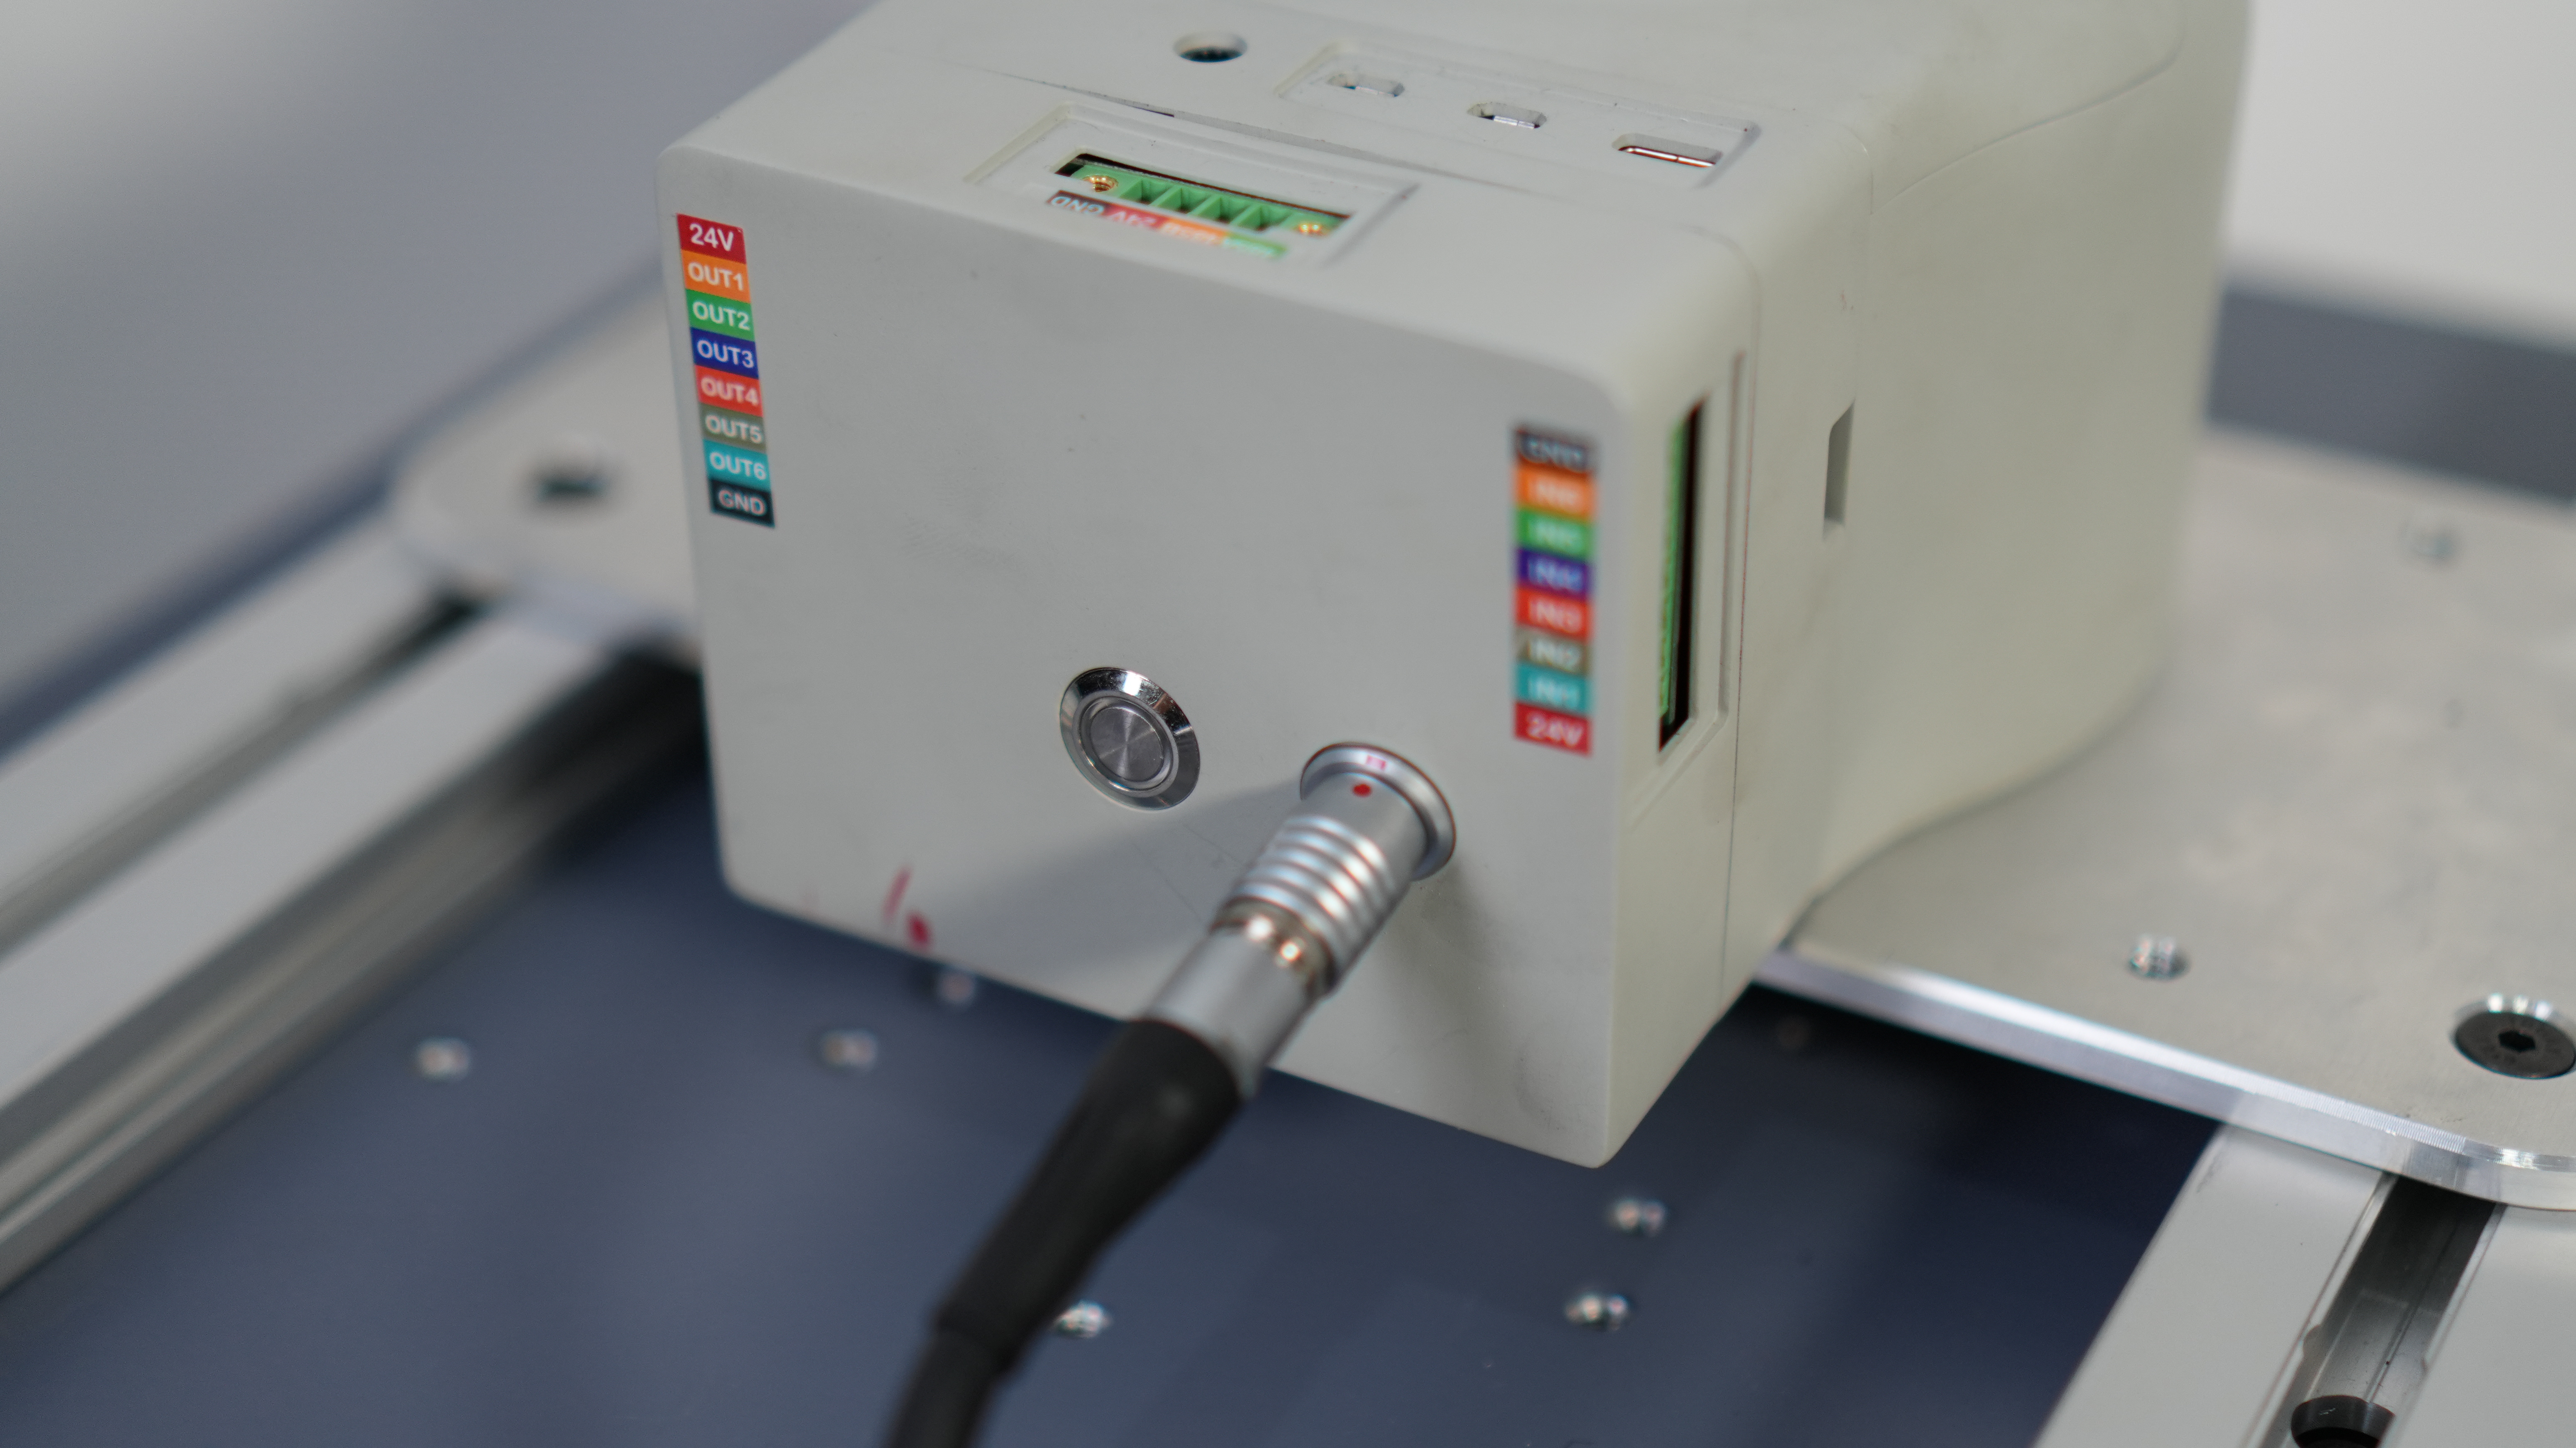
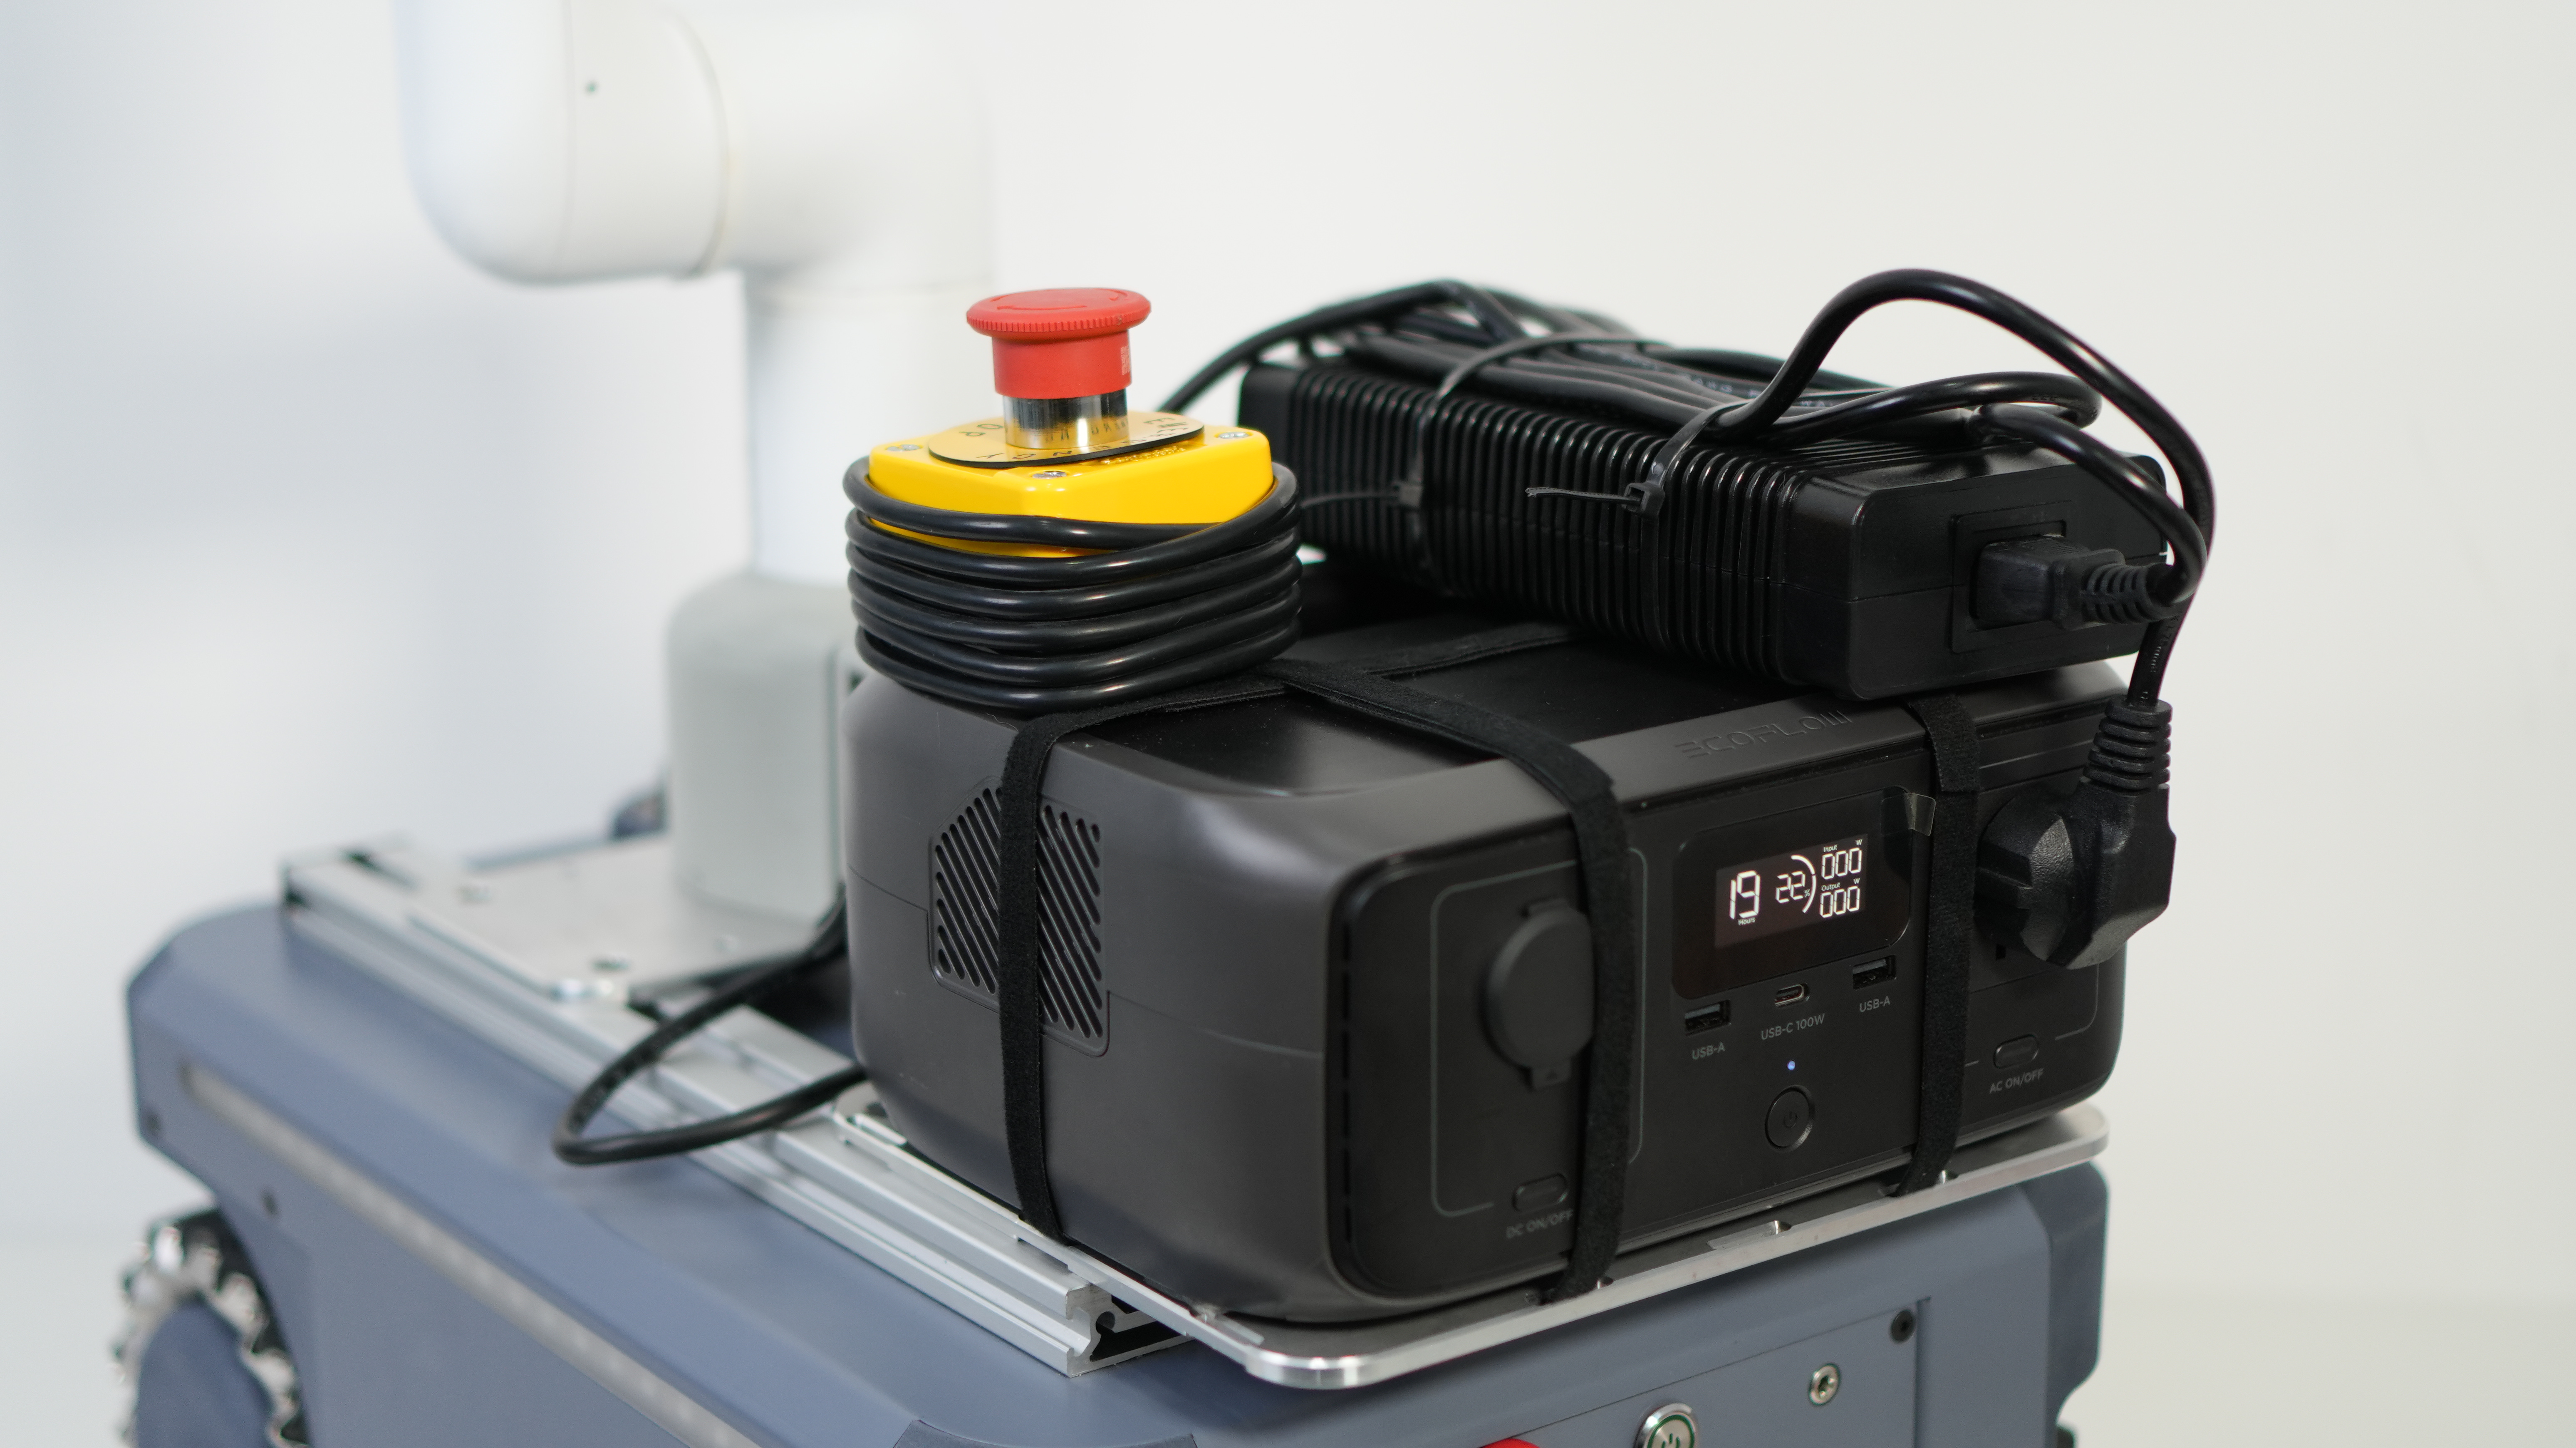
Connect the emergency stop
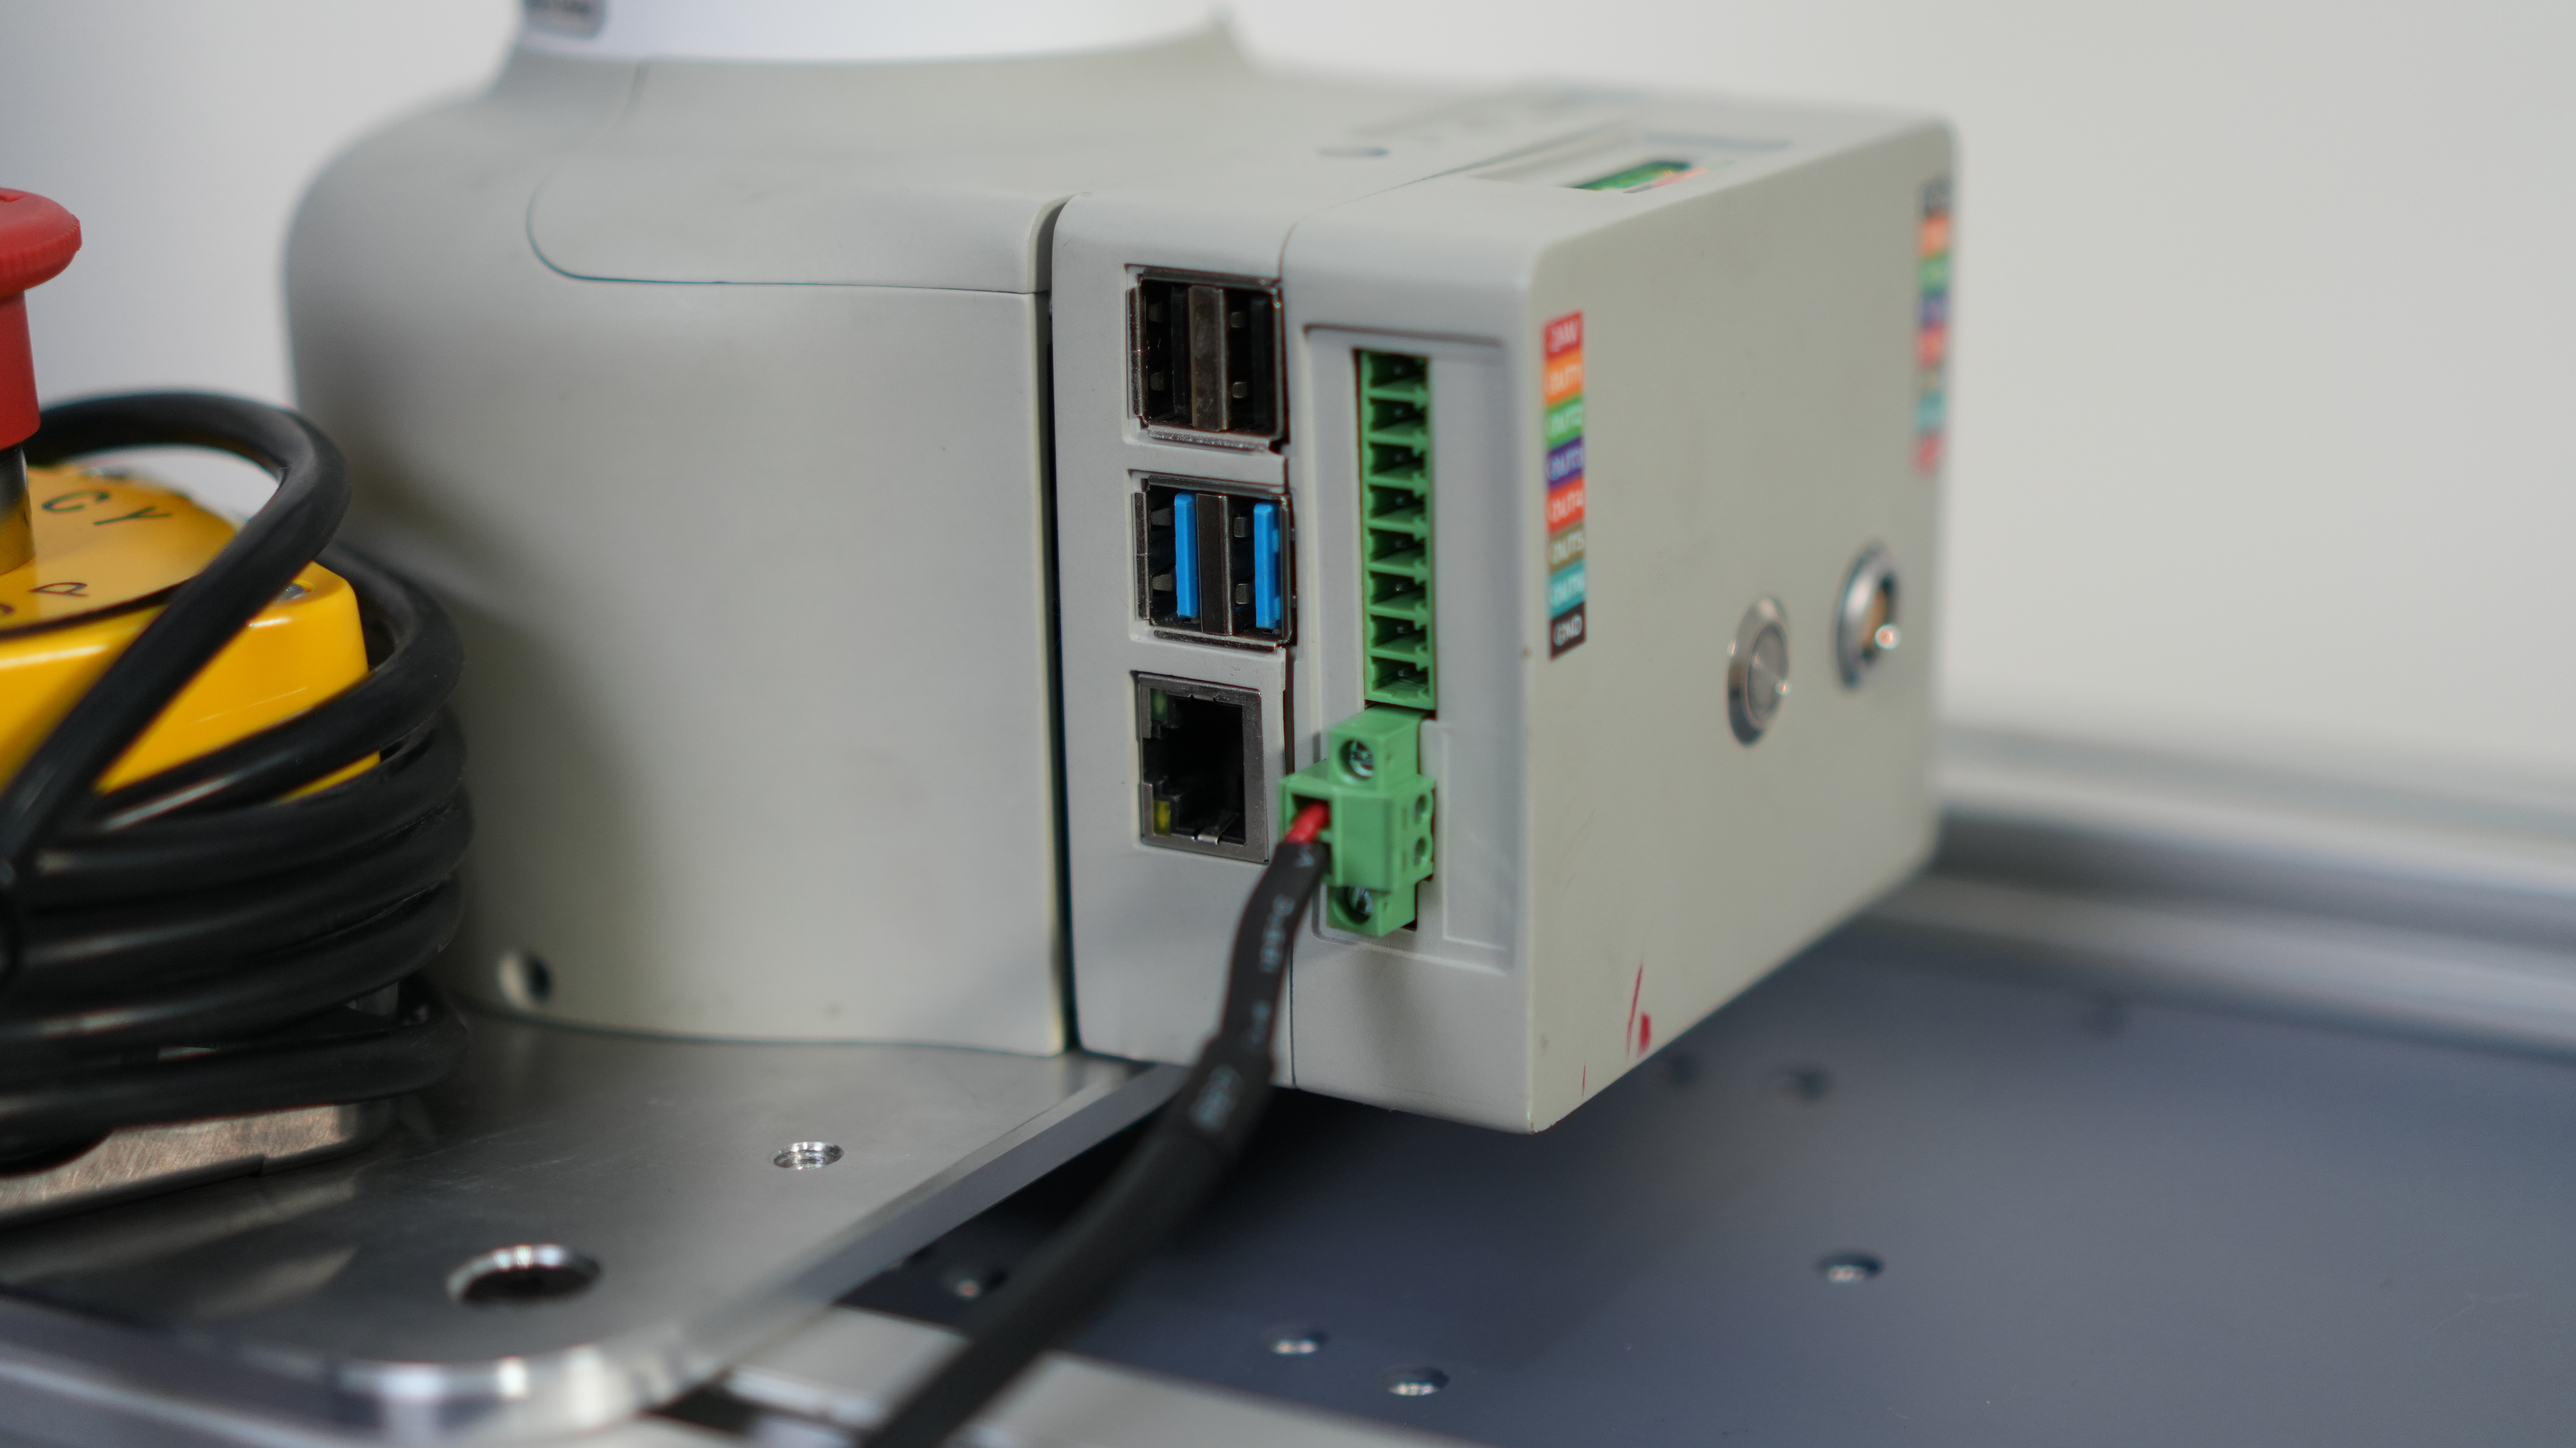
Connect the power cord
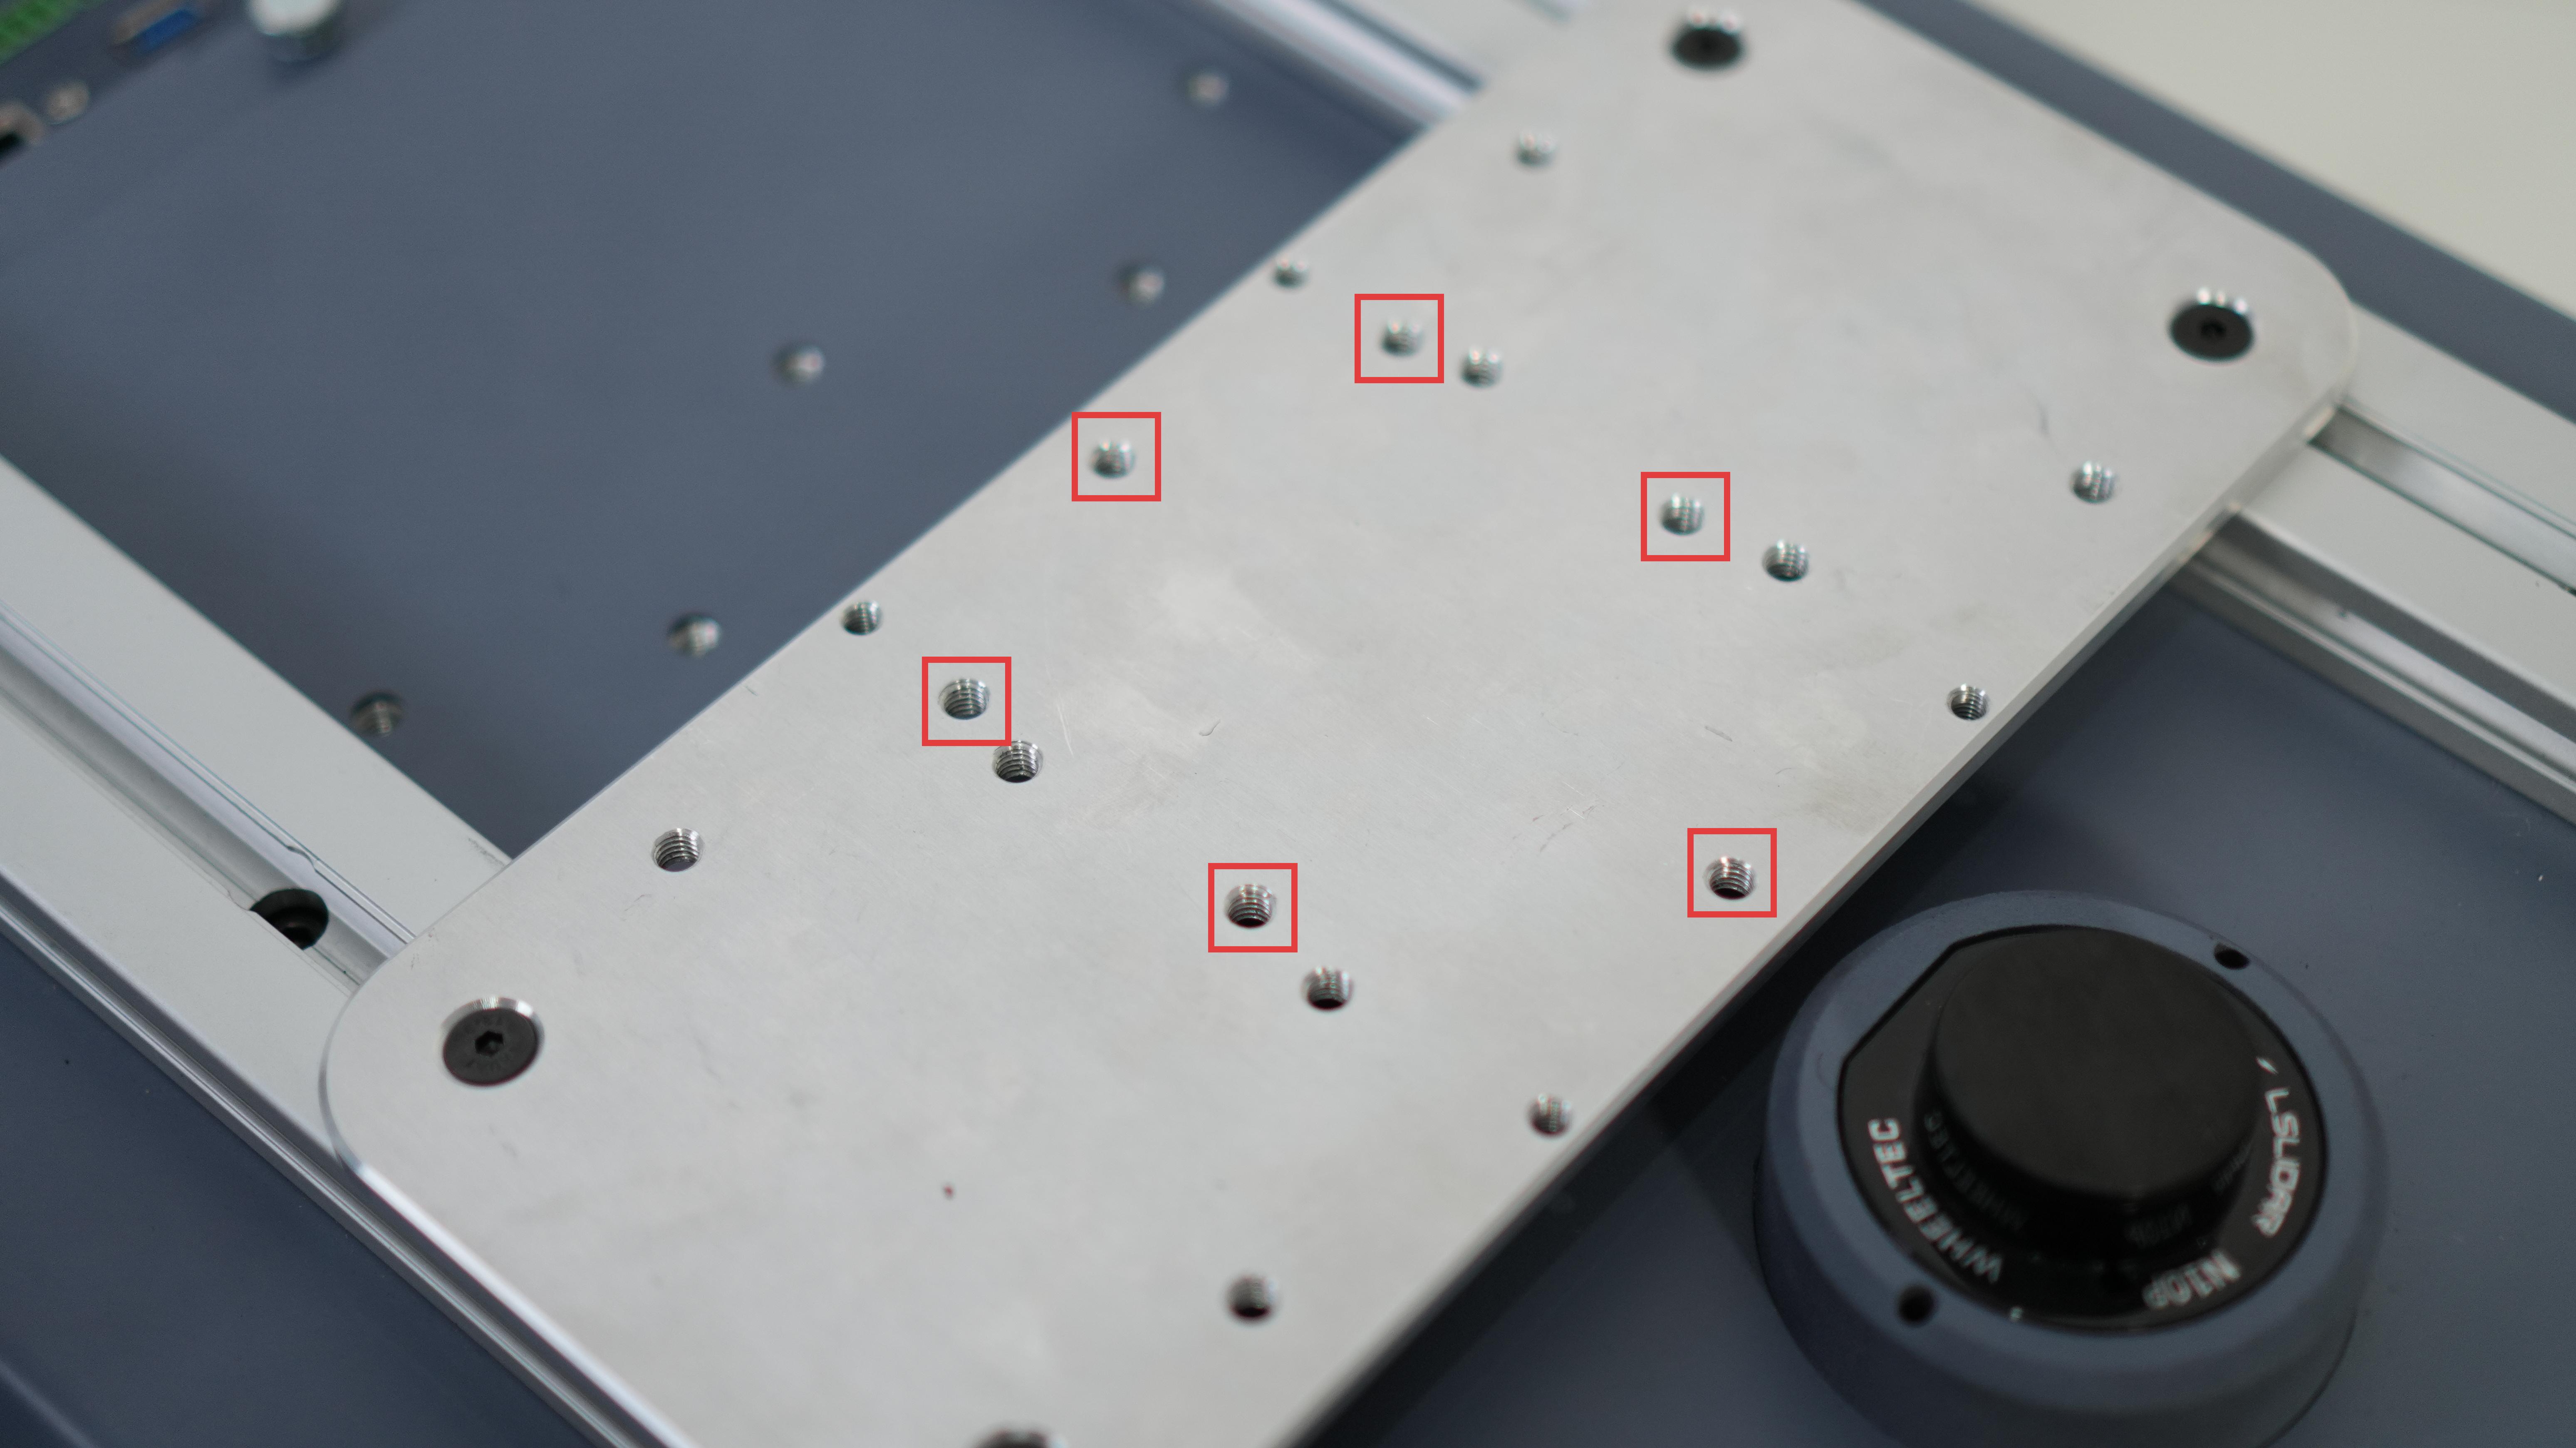
Fix the mobile power supply to the 2040 profile on myAGVPro
- Use M5*10 screws to fix the M5 slider nut to the external fixing plate
- Divide the Velcro into three strips to fix the mobile power supply and insert it into the hole of the external
fixing plate
- Fix the mobile power supply on the fixing plate
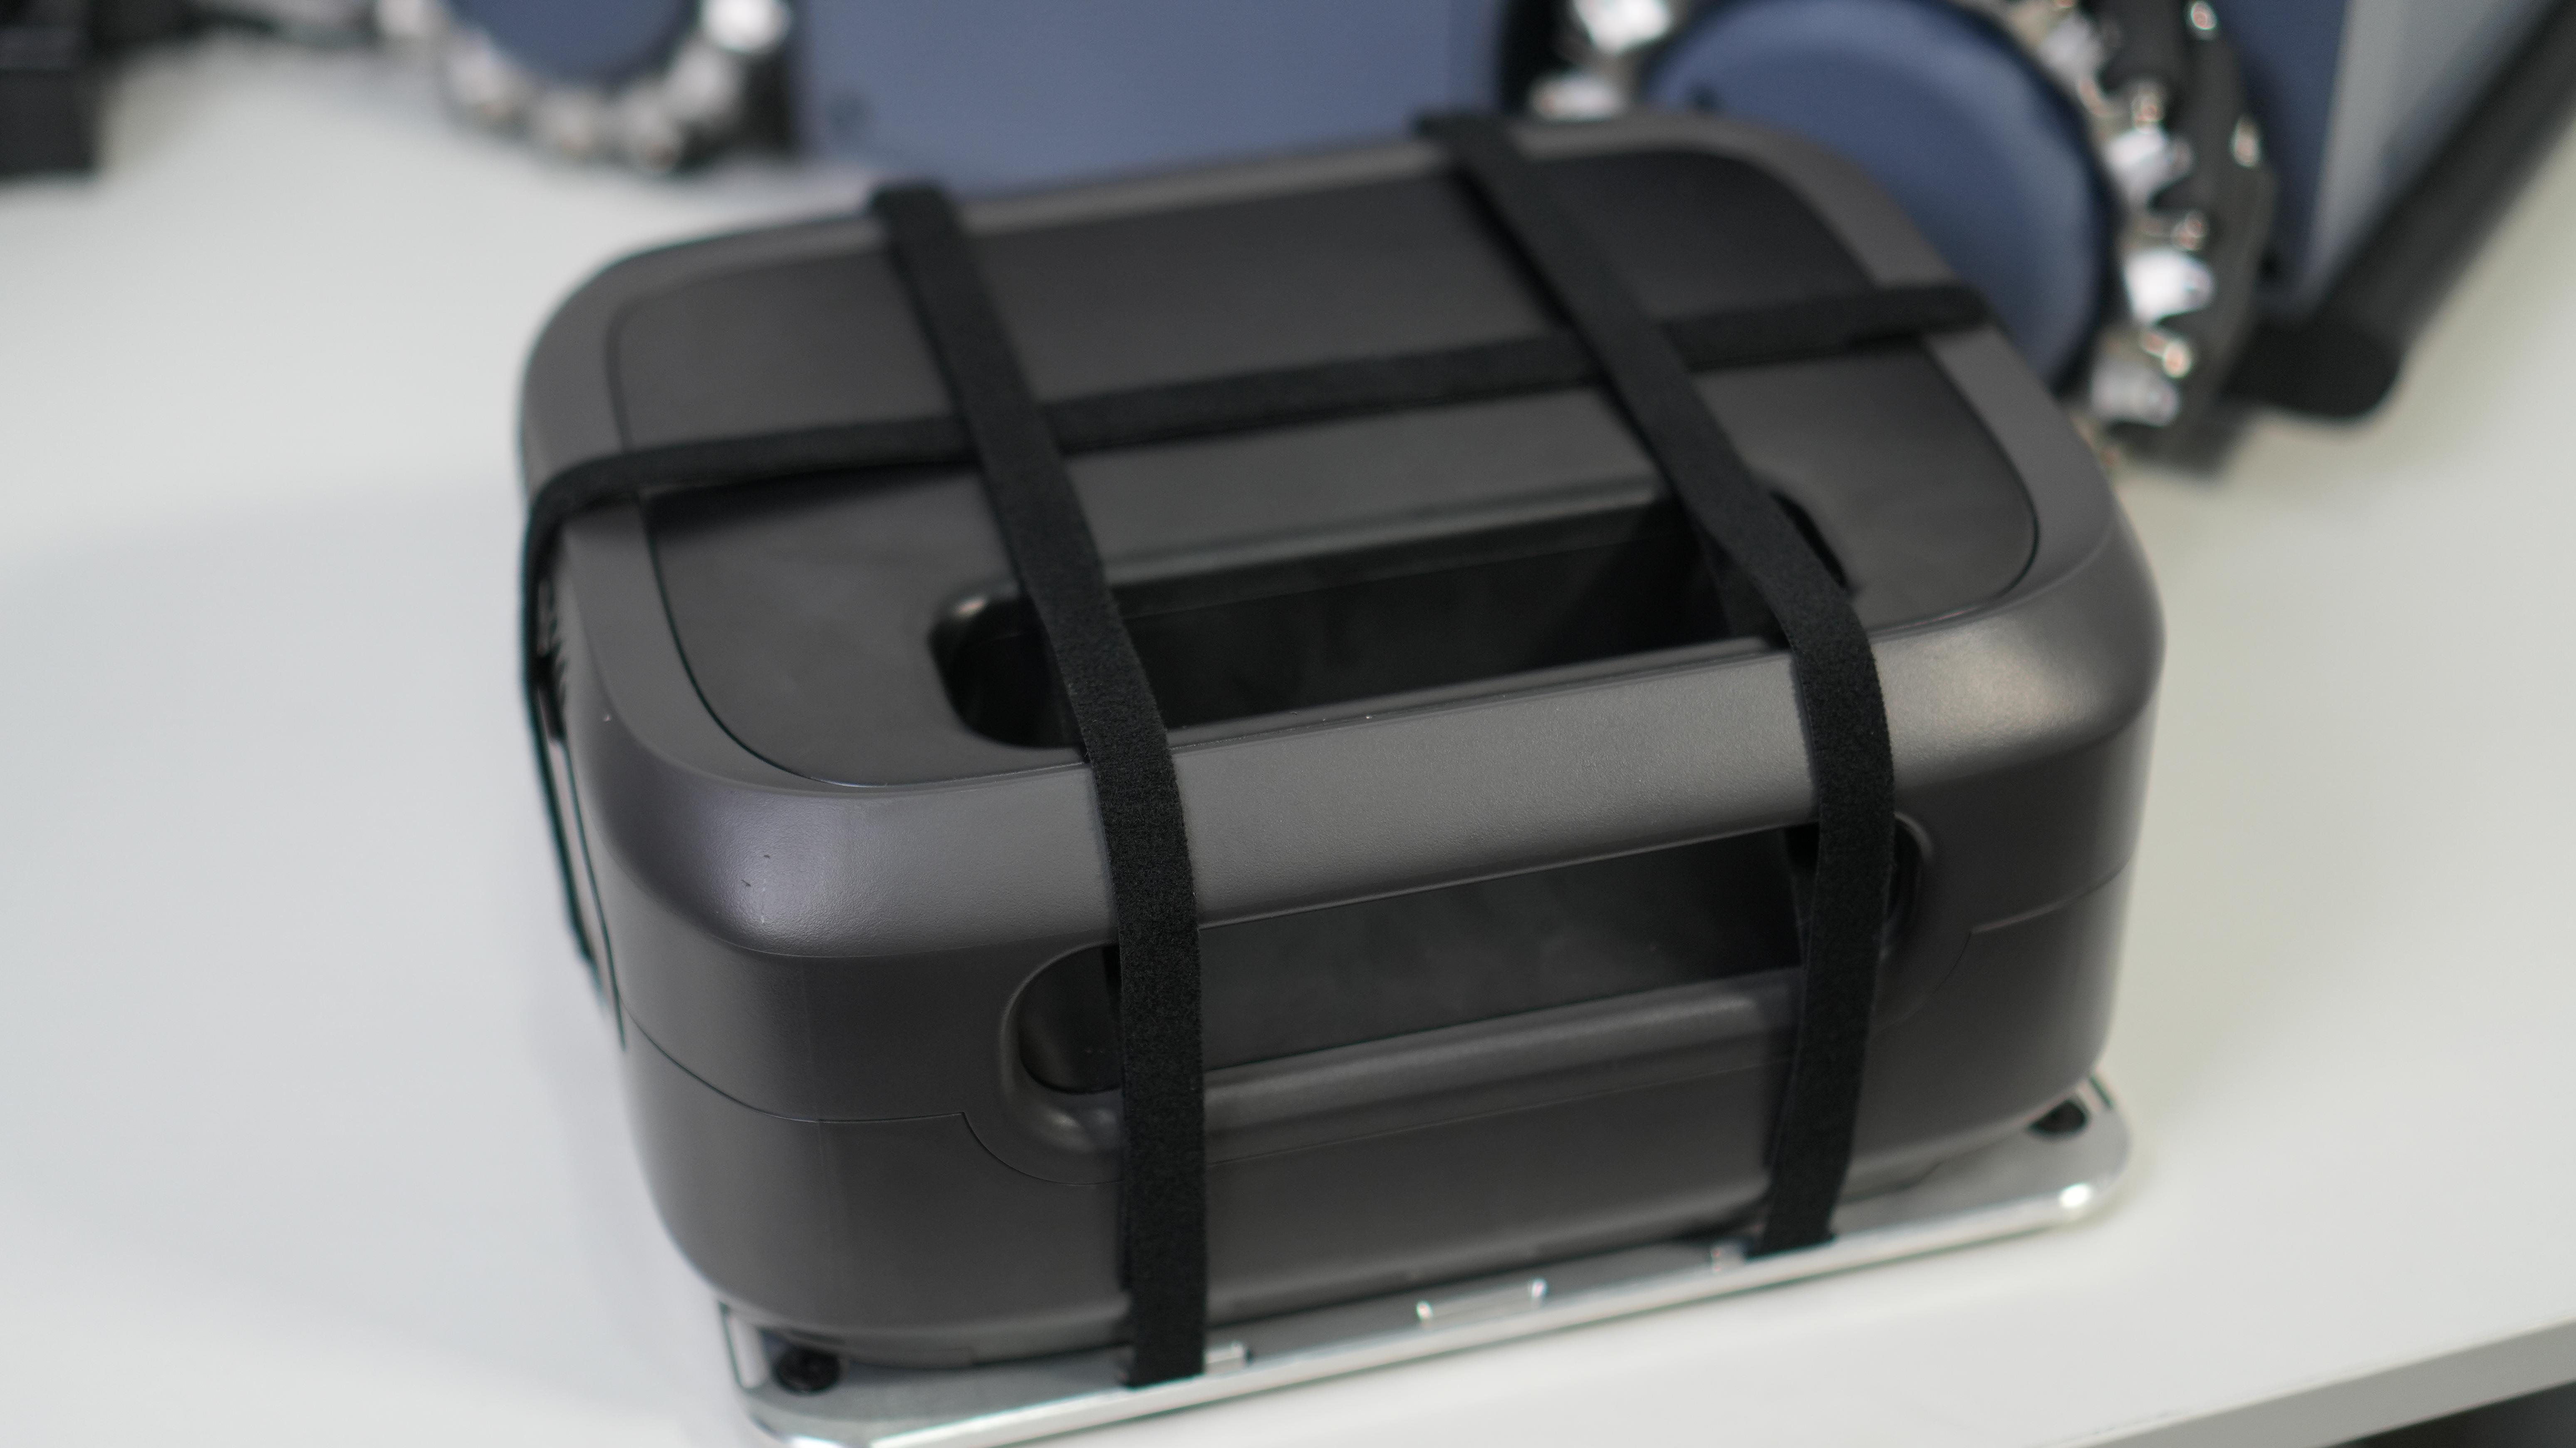
- Fix the fixed mobile power supply on the 2040 profile
- Arrange the line sequence and connect the robot power adapter plug to the mobile power supply
- Use M5*10 screws to fix the M5 slider nut to the external fixing plate
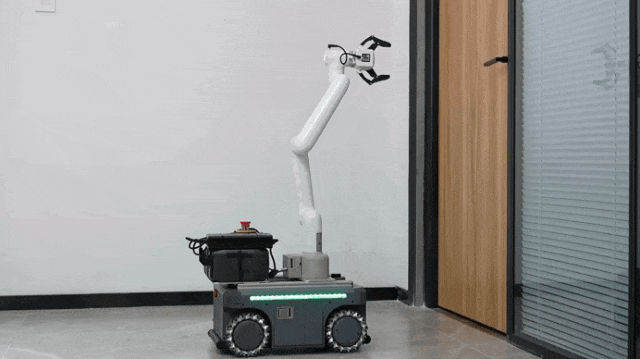
At this point, the hardware connection between MyCobot Pro630 and myAGV Pro is complete, and the finished product is as follows:
2. Software deployment
2.1 MyCobot Pro630 usage
Please visit Basic Function Usage for learning
2.2 myAGVPro firmware burning
Burn the firmware by visiting myAGVPro How to Burn Firmware chapter
3. Source code download
Download the MyCobot Pro630MCU door opening training handle control case source code to your local computer
3.1 Download source code
- Use git tool to download source code to local
git clone https://github.com/elephantrobotics/pymycobot.git Use browser to visit the URL to download source code compressed package
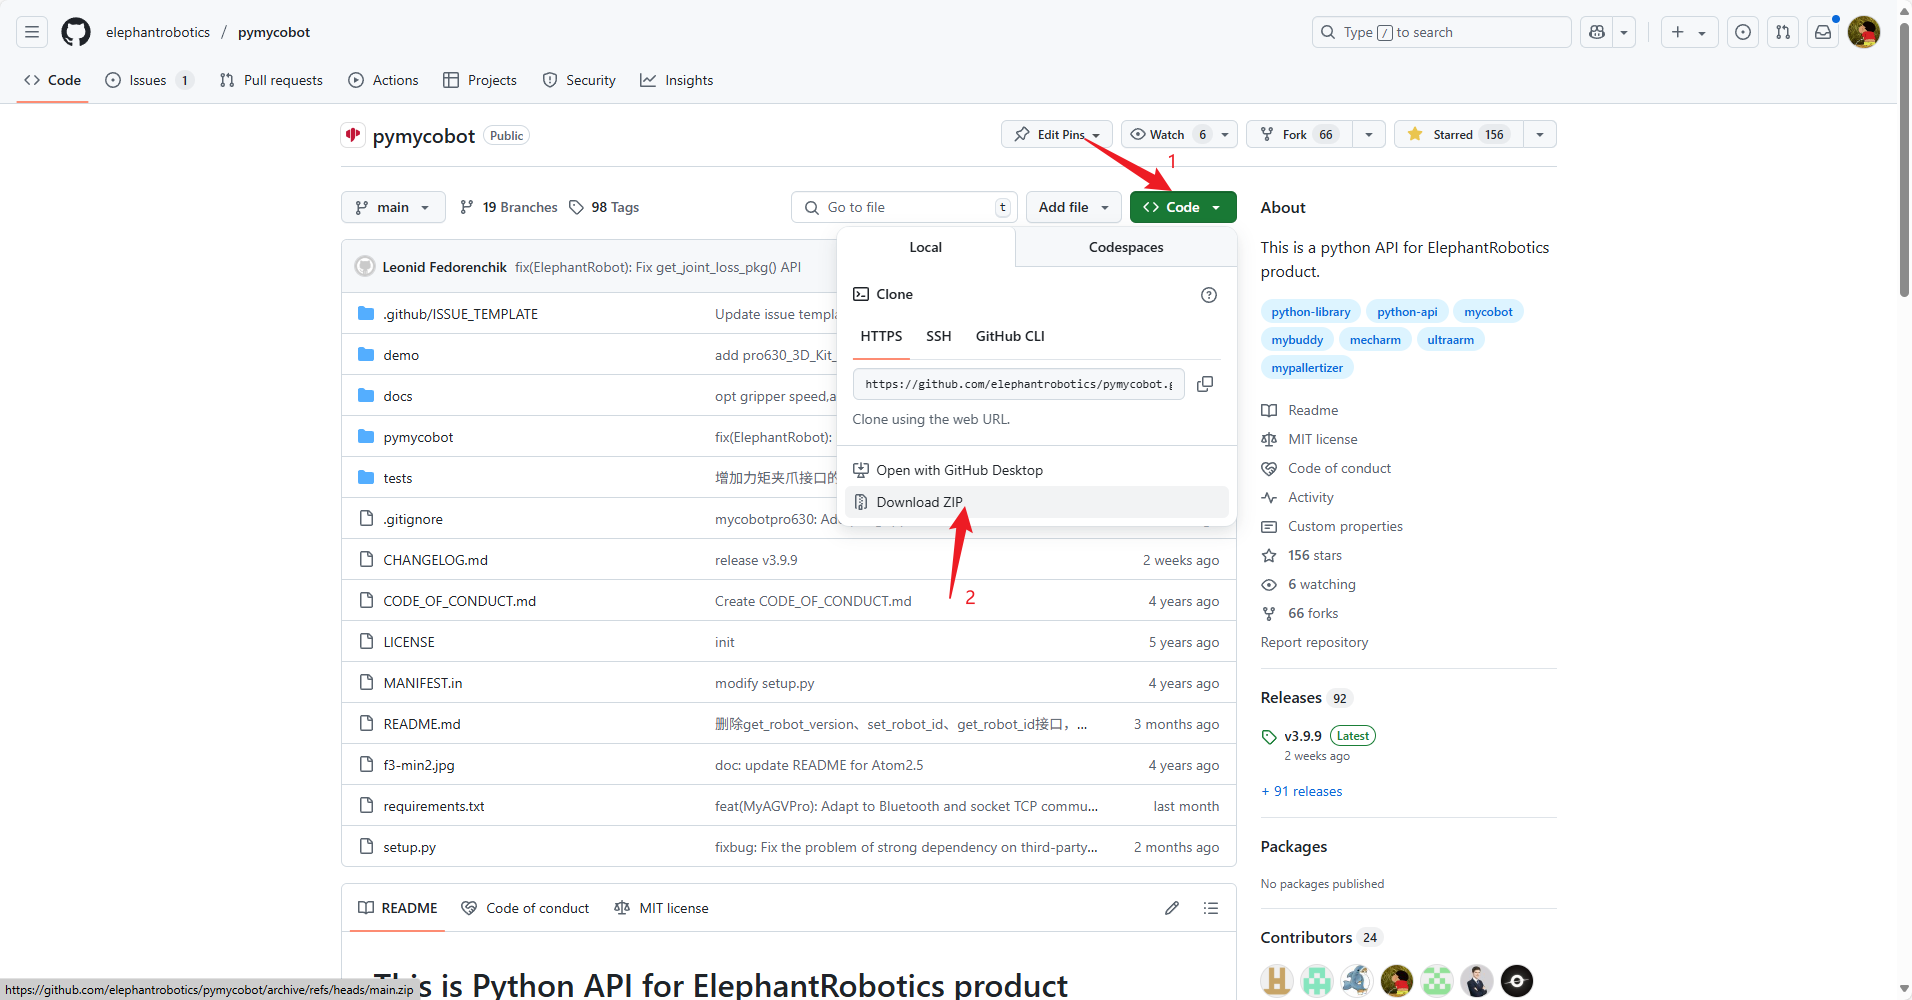
Click the
Codebutton- Click the
Download ZIPbutton - After downloading, unzip to any folder
3.2 Enter the myAGVPro_Composite_Kit directory
Use the cd command to enter the pymycobot/demo/myAGVPro_Composite_Kit directory
cd pymycobot/demo/myAGVPro_Composite_Kit
3.3 Download dependencies
Use the pip command to download dependencies
pip install -r requirements.txt
3.4 Modify configuration
Open the
main.pyfile and change the value ofCOMPOSITE_KIT_TYPEtoMyCobotPro630... # ############################################################################################## # Composite kit configuration # ############################################################################################## COMPOSITE_KIT_TYPE = "MyCobotPro630" # MyCobotPro630, MyCobot320, MyArmM750, Undefined DEBUG = False ...Configure
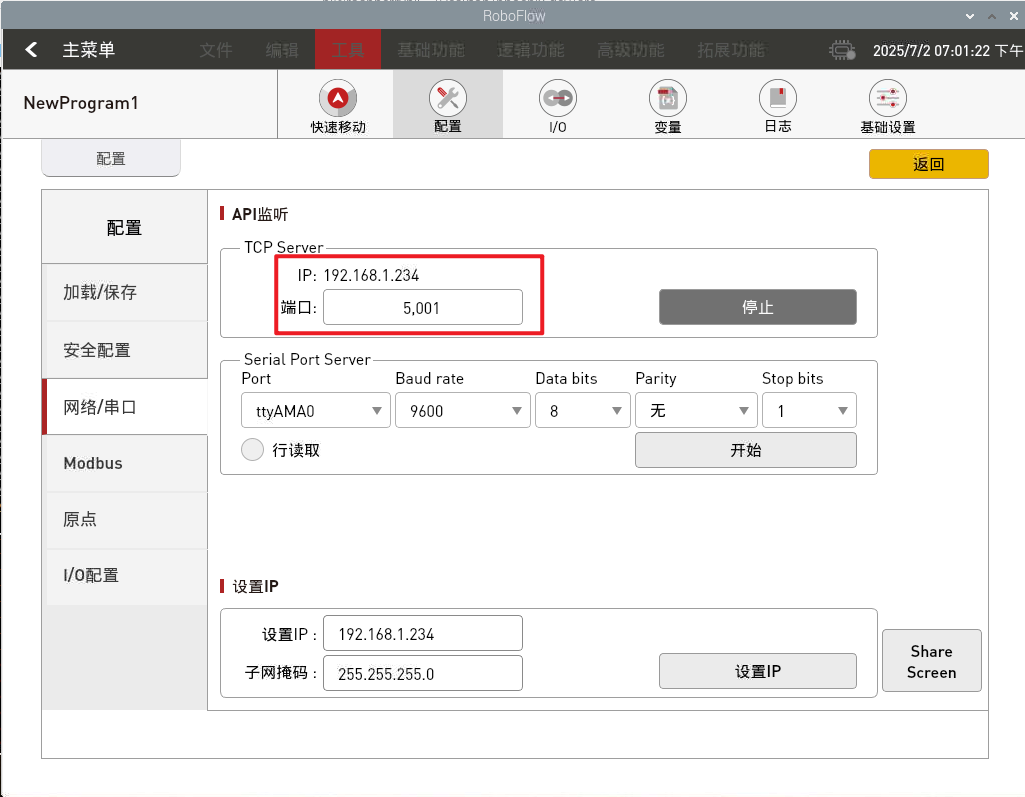
MyCobot Pro630TCP IP and port, changeCOMPOSITE_KIT_HOSTto the IP address of MyCobot Pro630, the default port is 5001Note: This case uses the remote control function of MyCobot Pro630, pay attention to the following issues:
- Make sure MyCobot Pro630 and myAGvPro are in the same LAN
- Make sure the roboflow program in MyCobot Pro630 has been started
- Make sure the IP address and port number of MyCobot Pro630 are correct
...
# ##############################################################################################
# MyCobot Pro630 Configuration
# ##############################################################################################
COMPOSITE_KIT_HOST = "192.168.1.234"
COMPOSITE_KIT_PORT = 5001
...
How to get the IP address of MyCobot Pro630
You can get the IP address of MyCobot Pro630 by using the
ip acommand in the system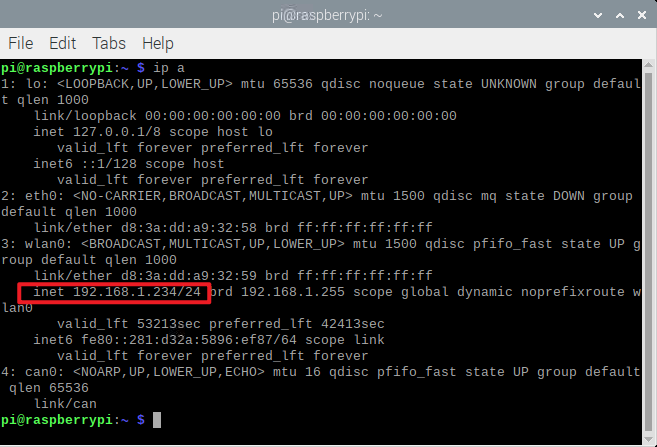
You can get it through the roboflow program
3.5 Run source code
Use the python command to run the source code
python main.py
4. Quick experience
The myAGVPro+MyCobotPro630 handle control function is defined as follows:
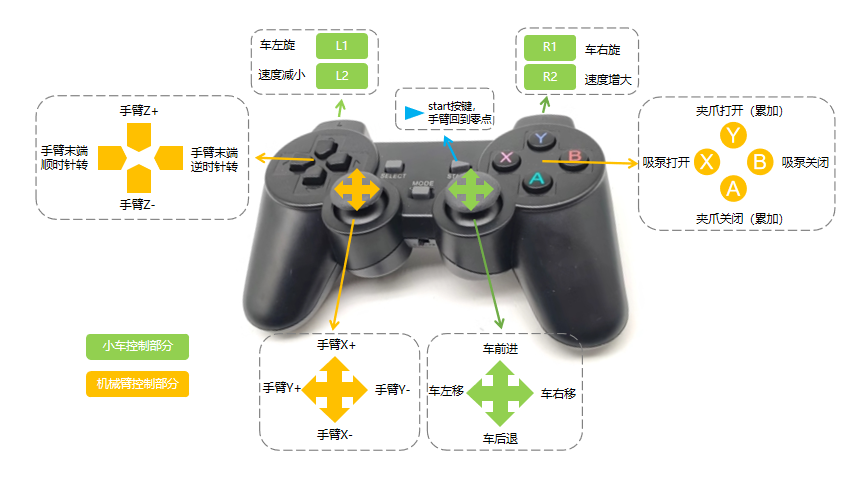
Note: Before starting the program, you need to connect the handle receiver to the
USBport of myAGV Pro. After the program is started, when the handle receiver is disconnected, the program will automatically exit