Burn and update firmware
Customers get the machine does not need to be burned in non-essential cases, the factory has already been burned, only a few cases need to be burned.
For example: minirobot corresponding to the need to burn the scene of the LCD screen does not light up, burn the Arduino program needs to be switched to python program control, Atom firmware corresponding to the need to burn the scene of the joints can not be locked, Atom lights do not light up and so on.
Burn Atom firmware
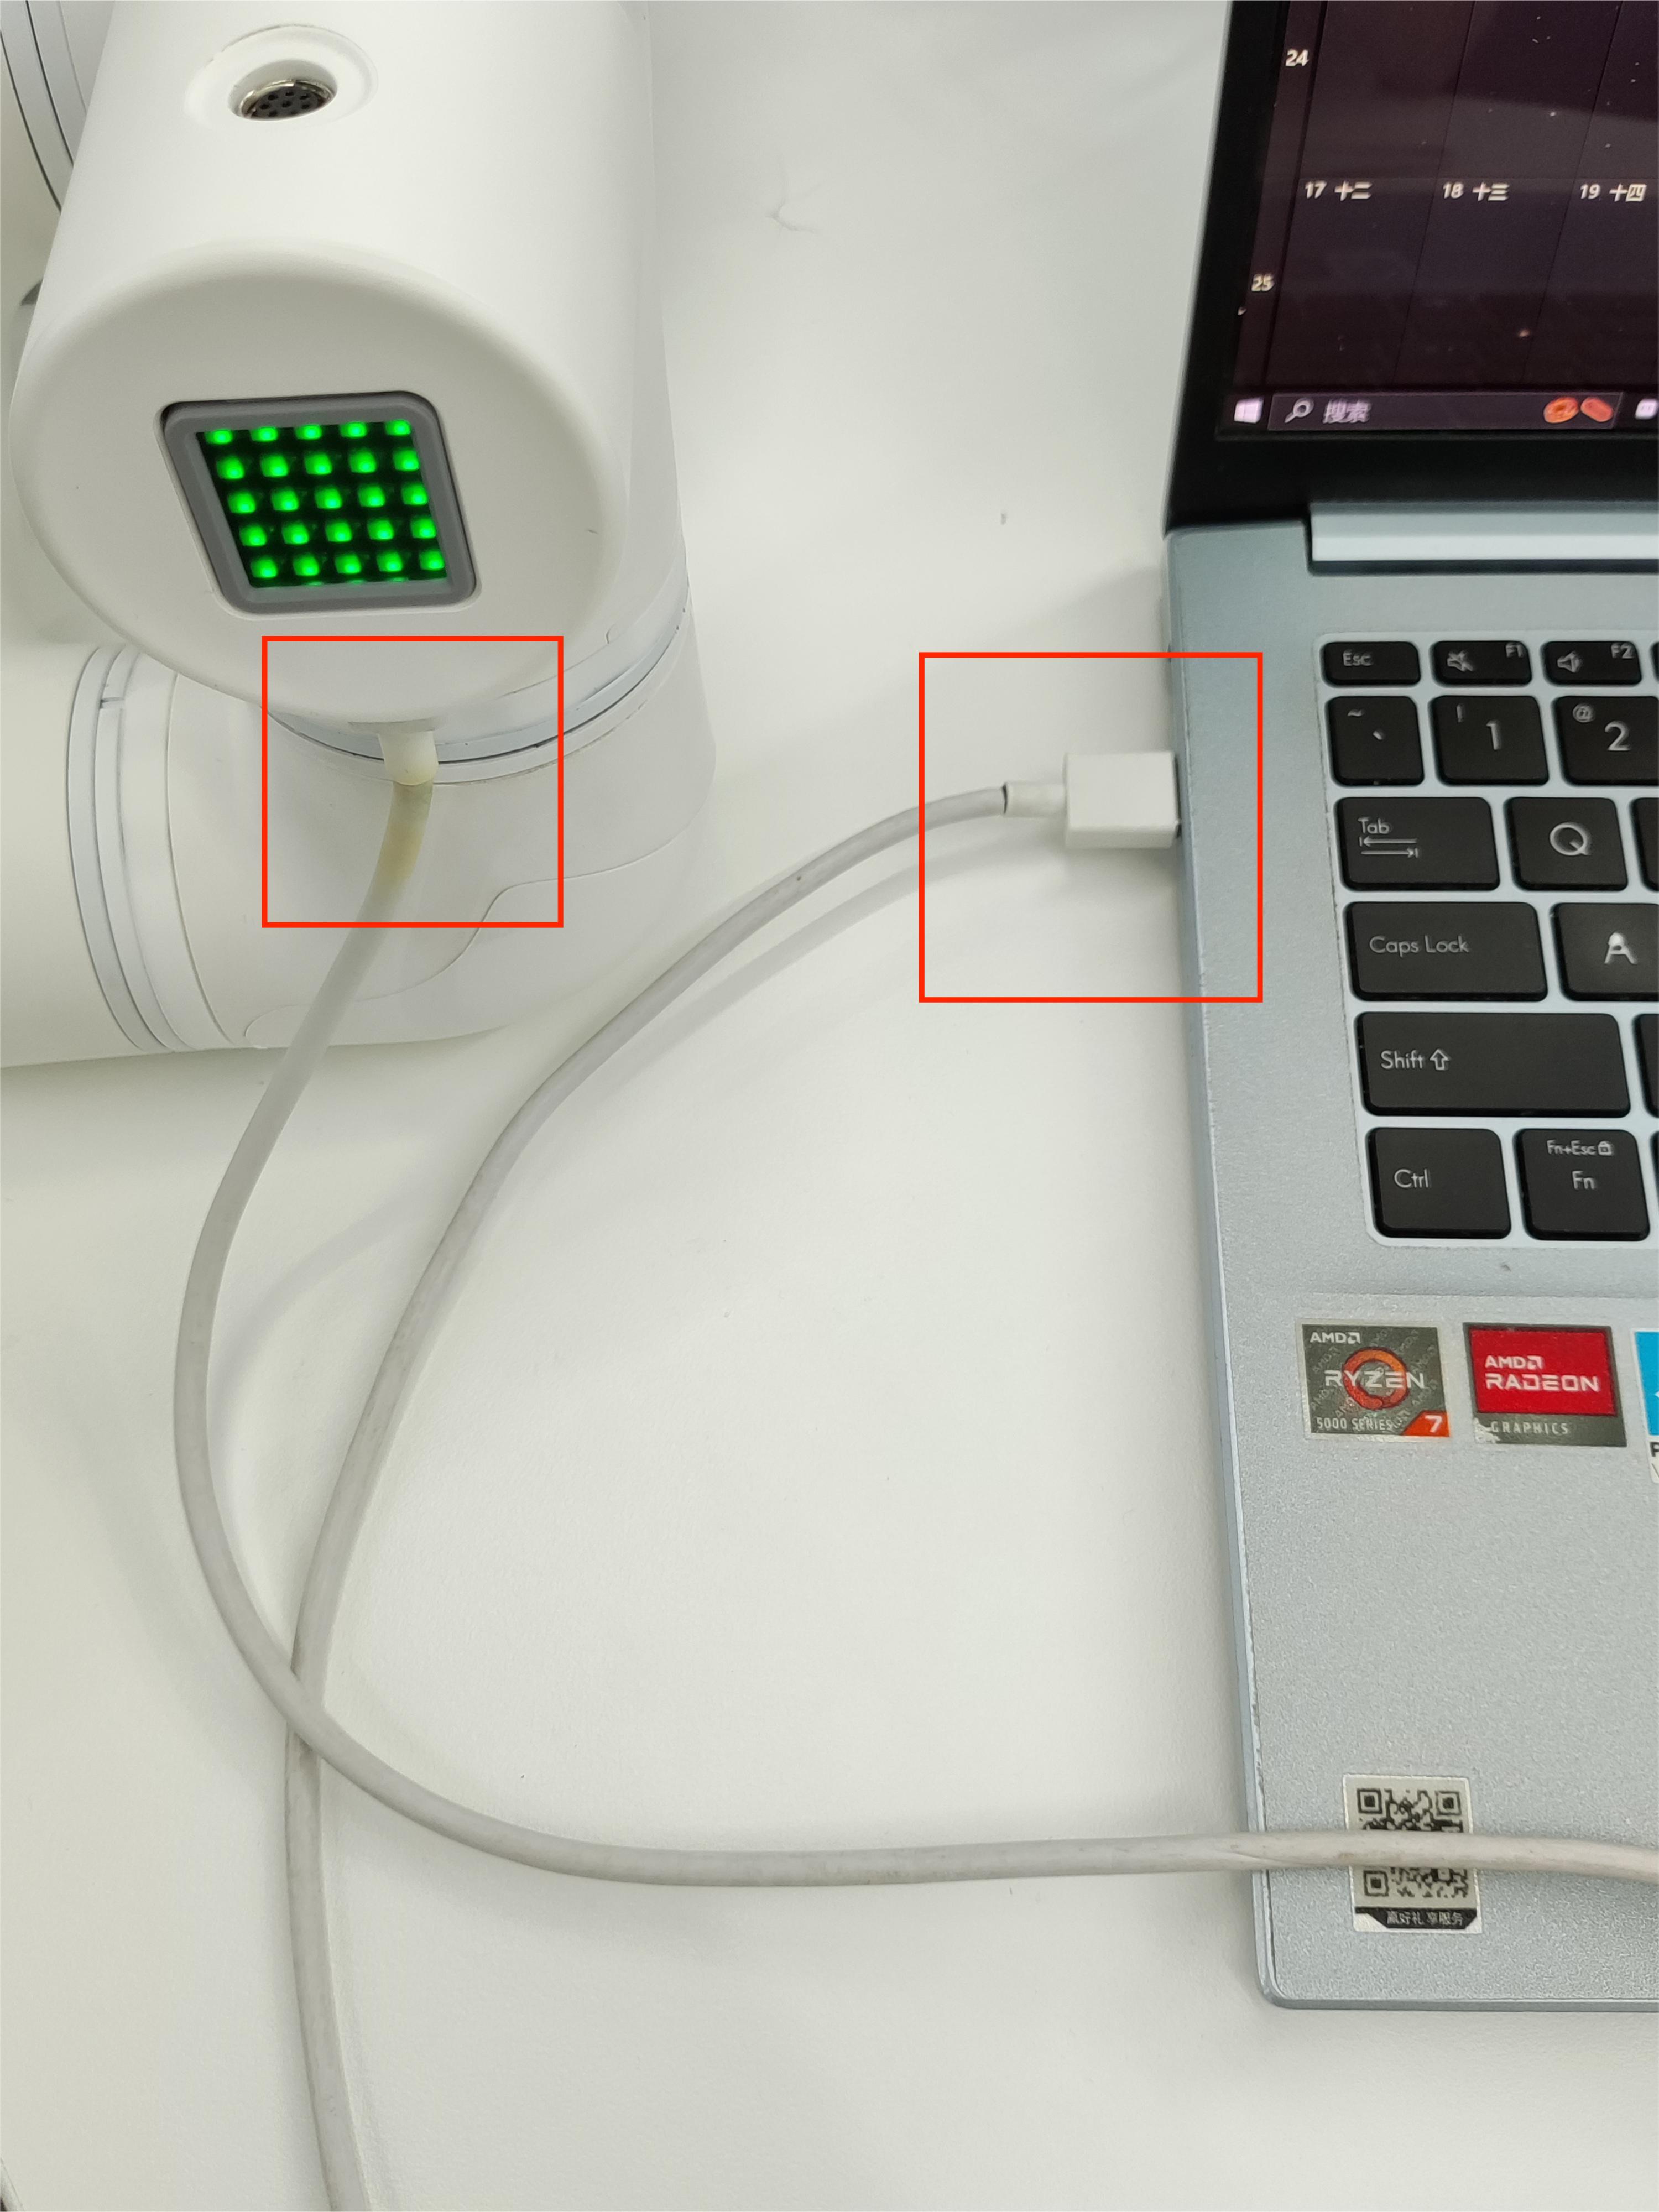
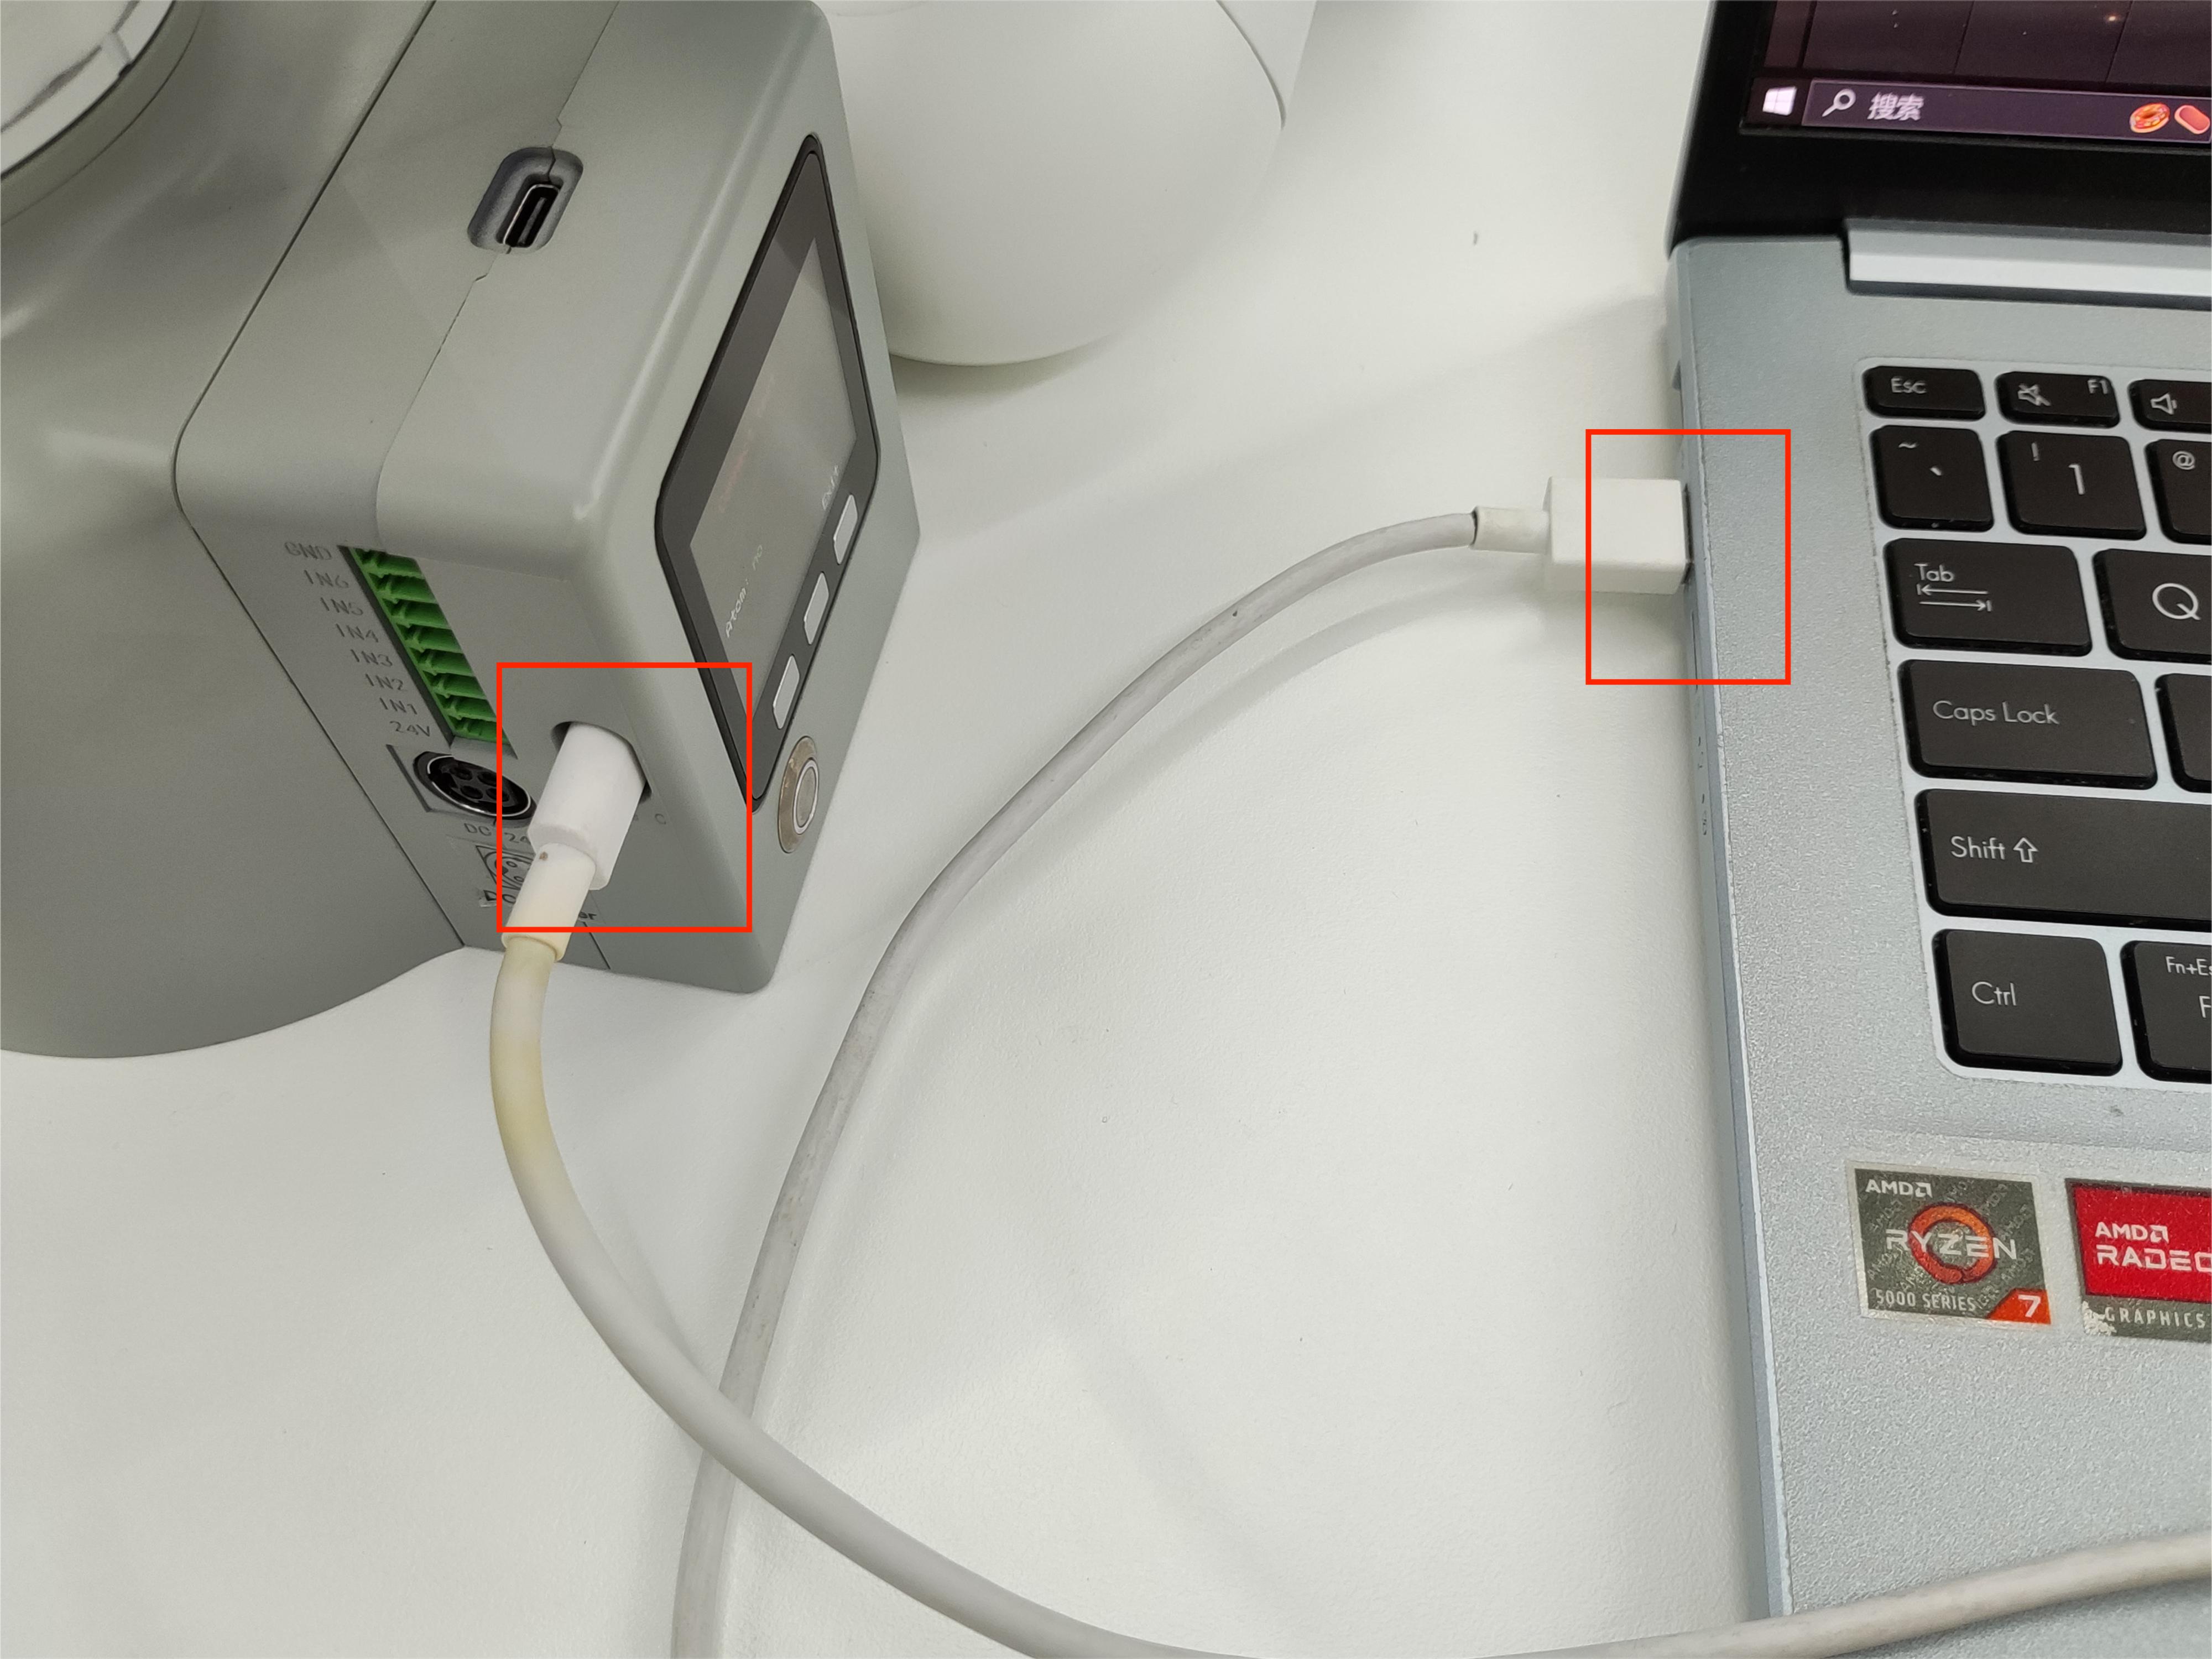
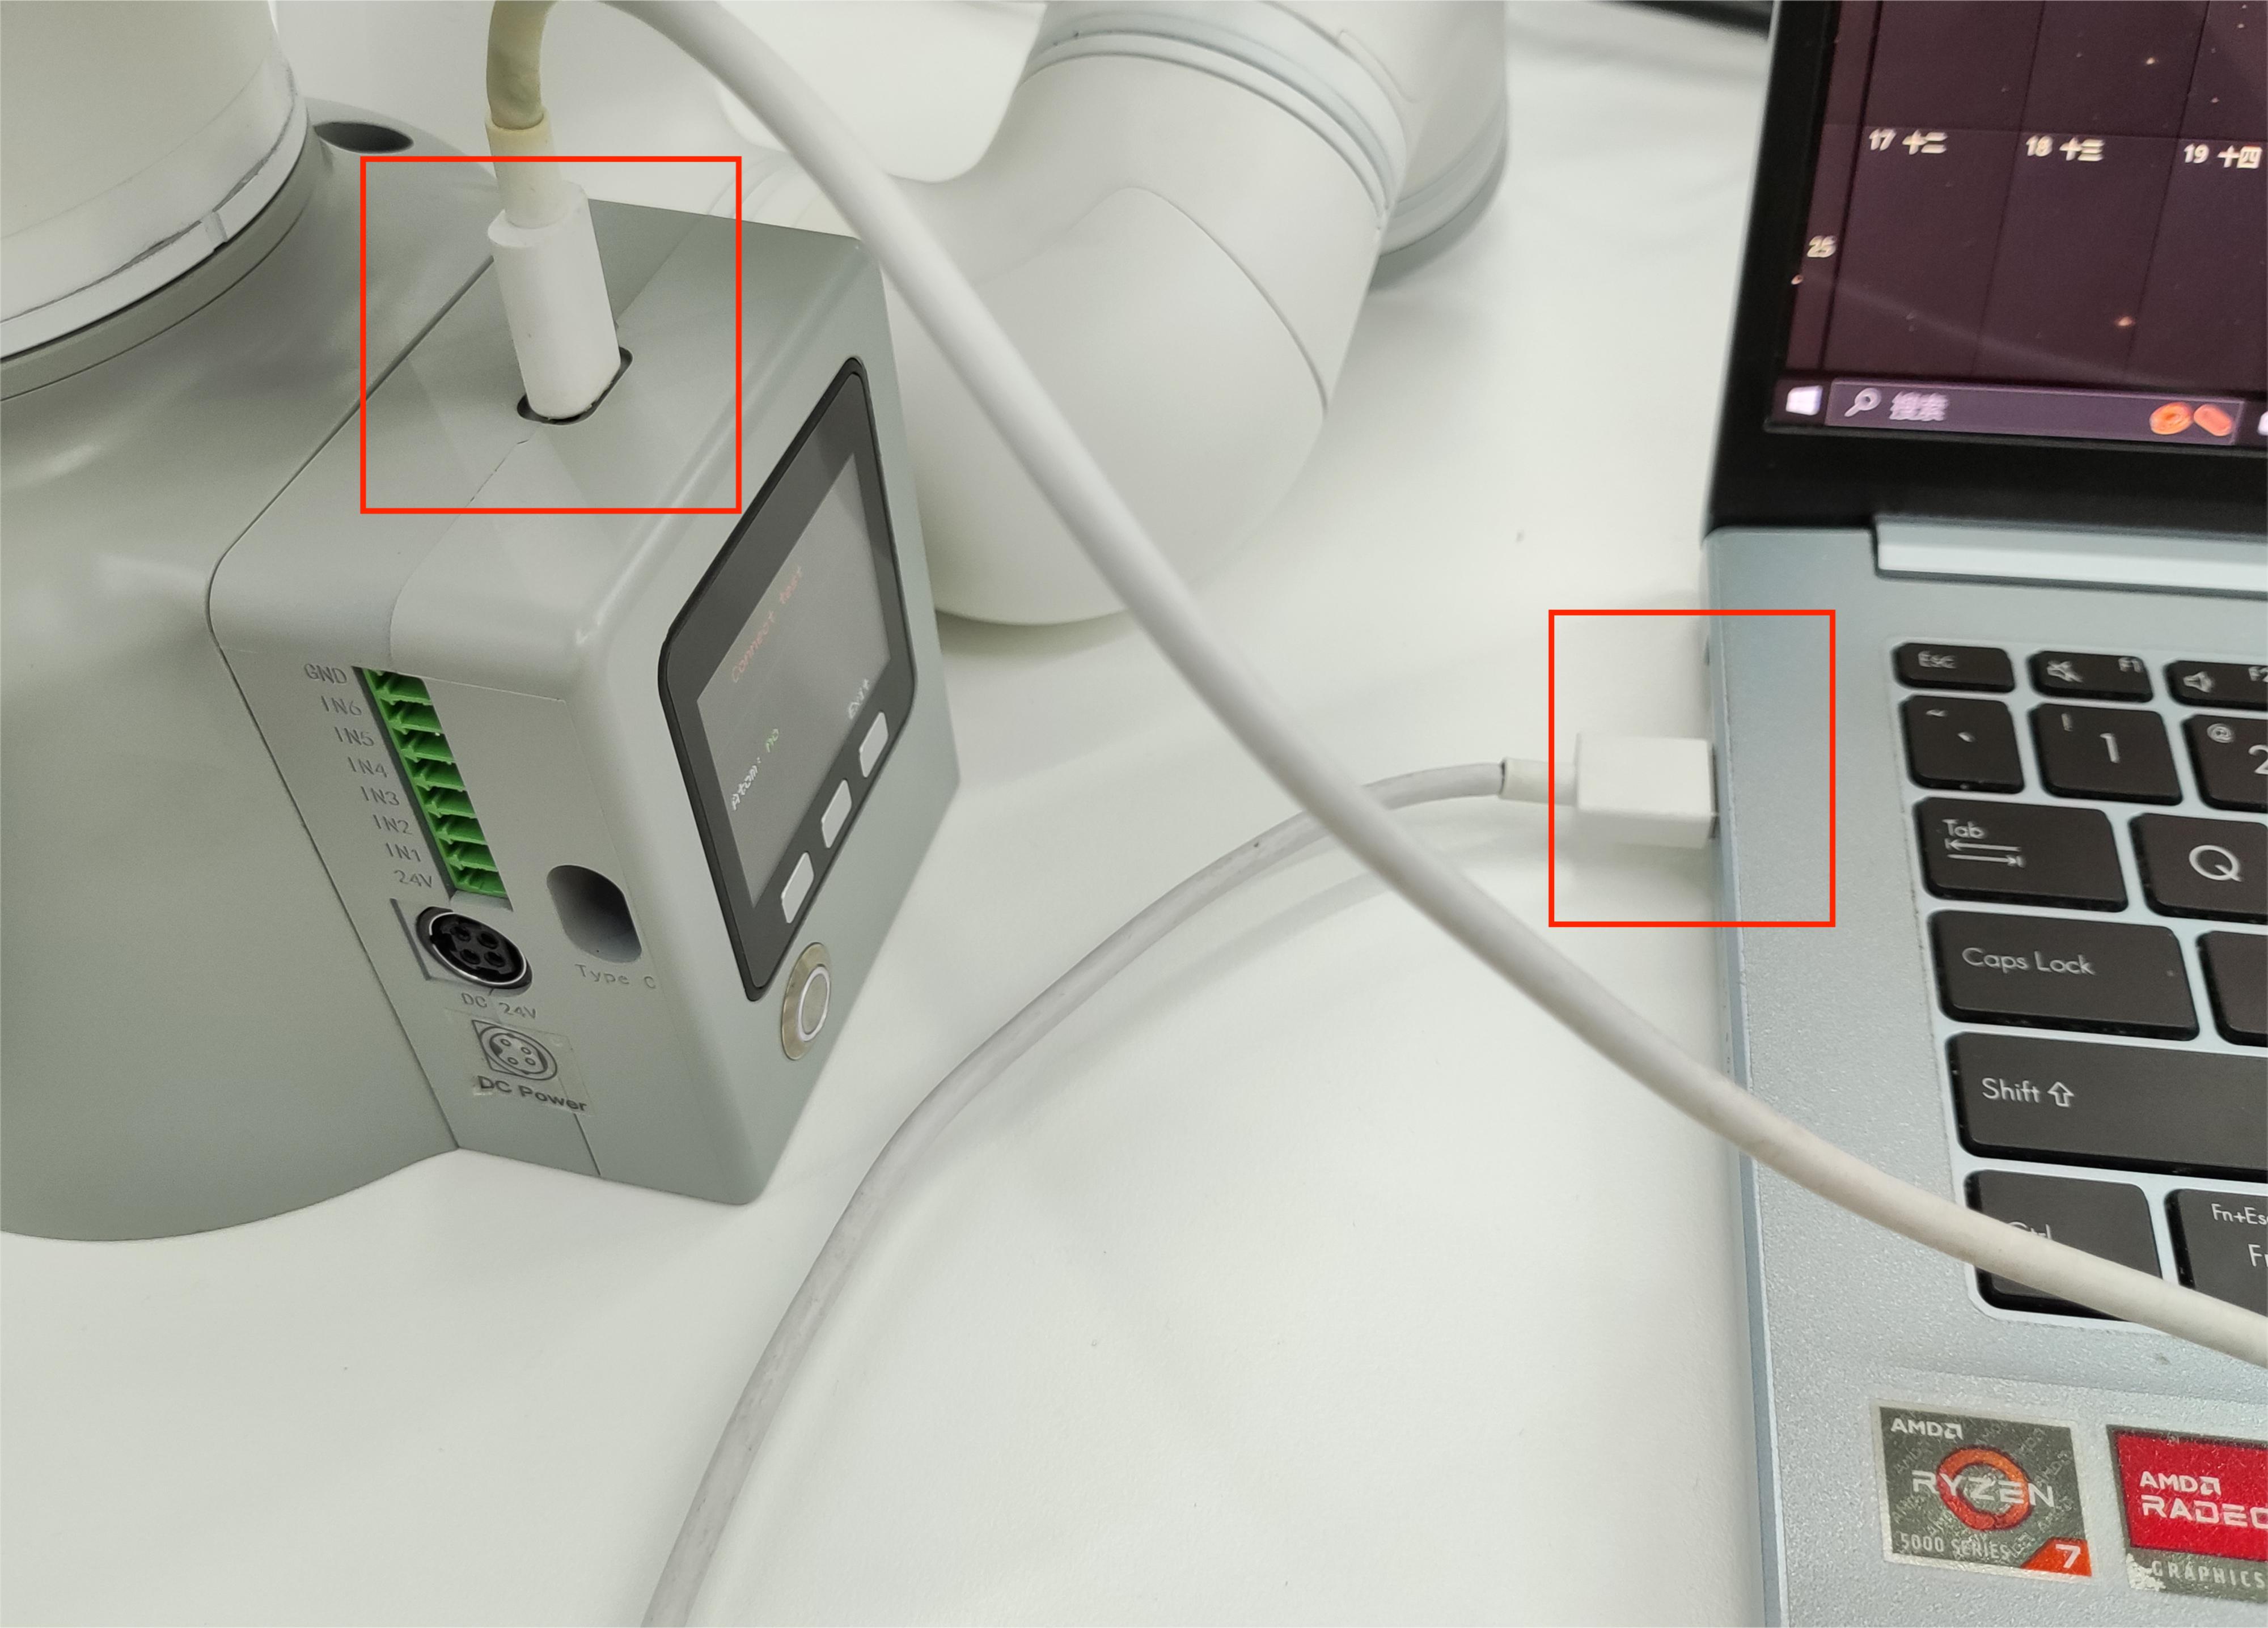
Step 1: Connect to PC. Connect the Atom at the end with USB.
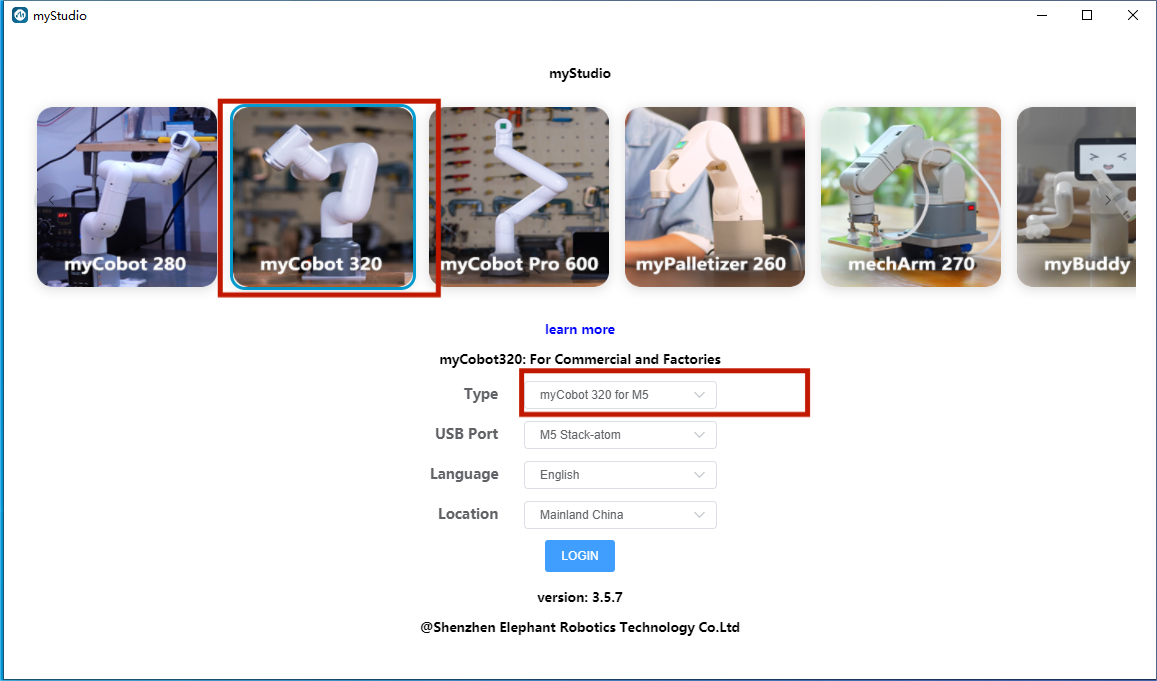
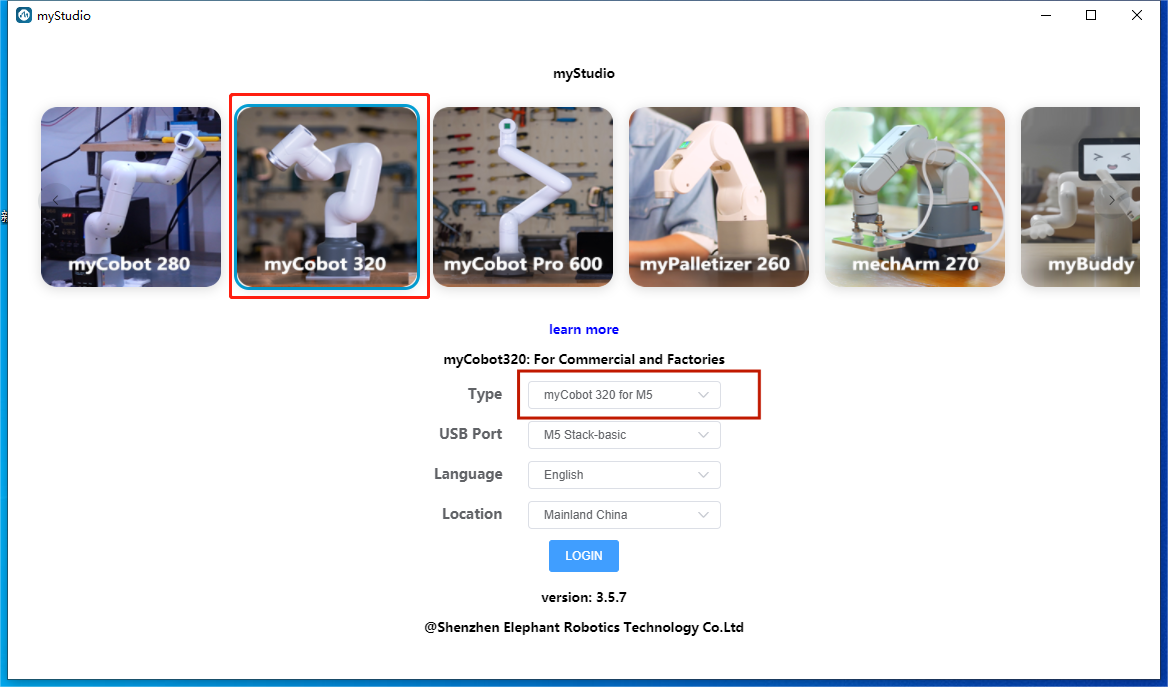
Step 2 :Select Robot myCobot 320 M5
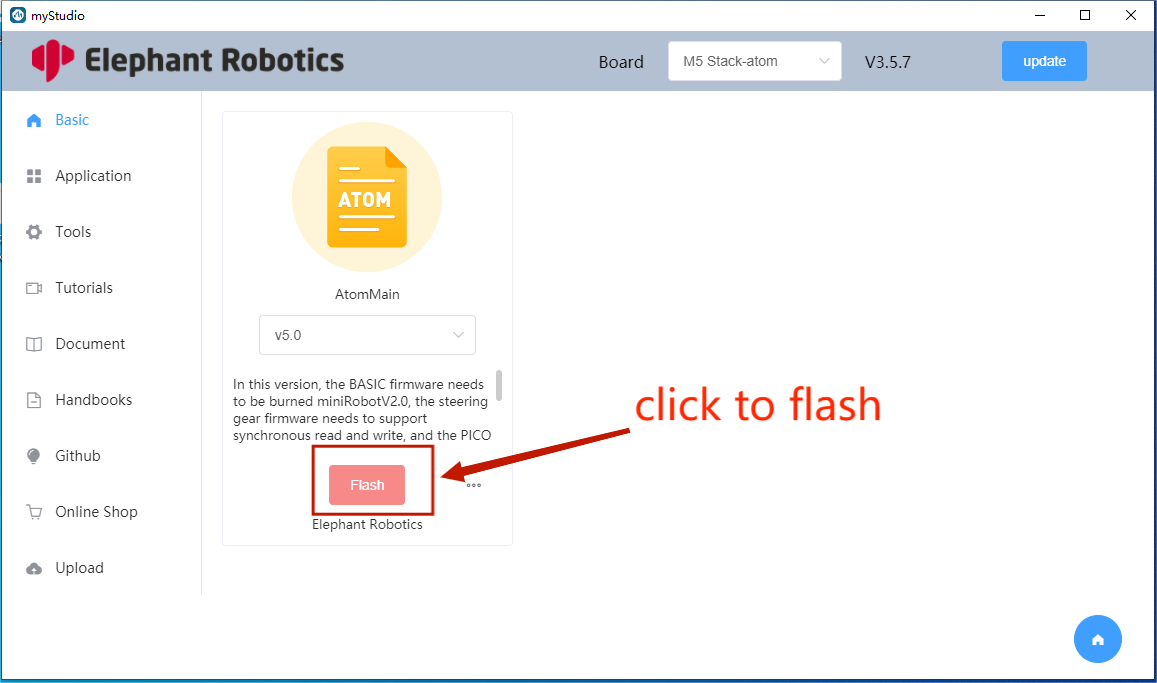
Step 2: Select ATOM in the Board column, and the Atom firmware will appear in the sidebar Basic. There is only one firmware for Atom, just click to Download it in.
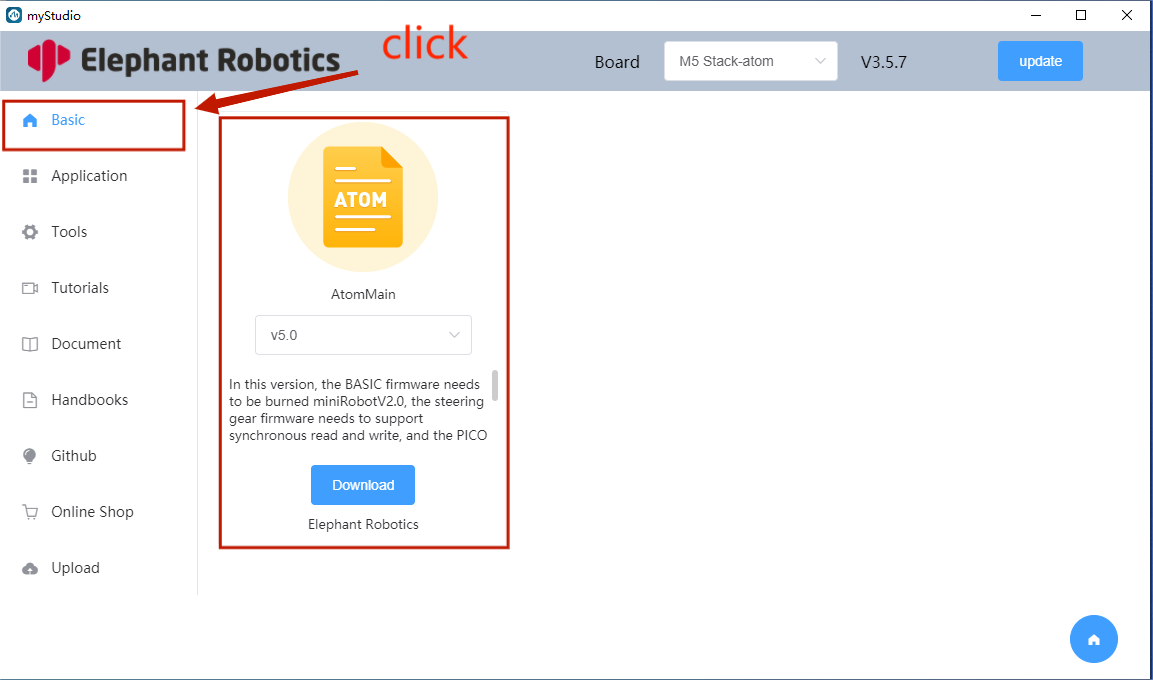
Step 3: After download finish, click the Flash button to start burn.
Burning M5Stack-Basic firmware——minirobot
Step 1: Connect M5Stack-Basic to PC.
Step 2 :Select Robot myCobot 320 for M5,and click LOGIN button.
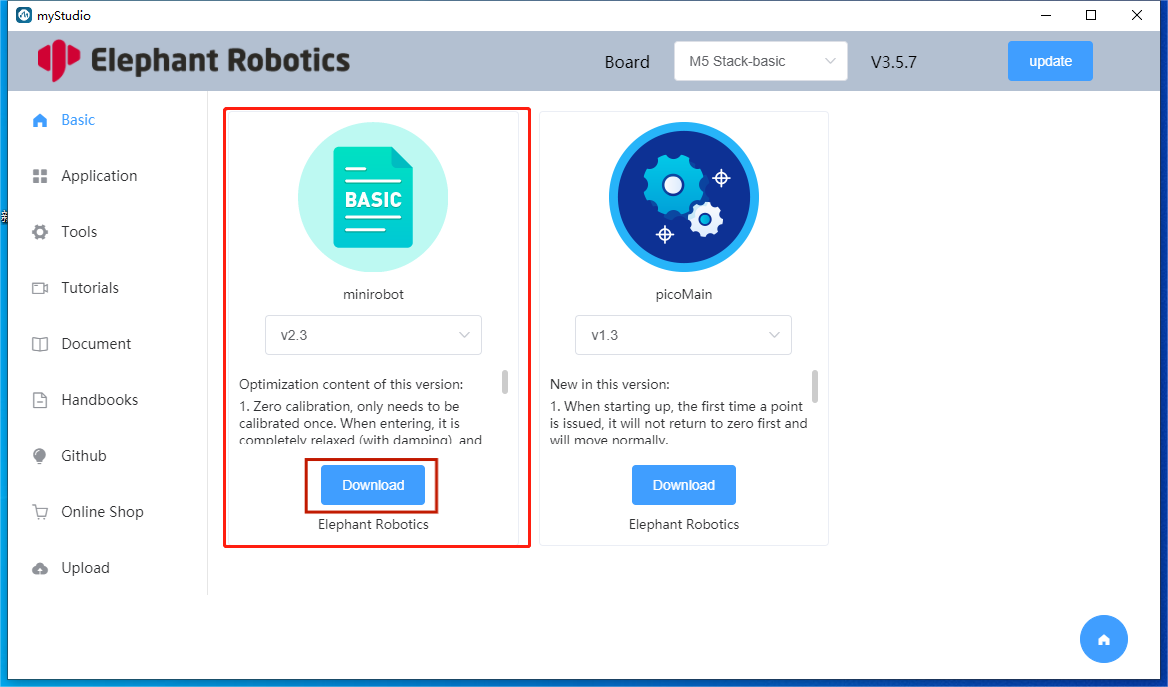
Step 3: After logging in, click Basic
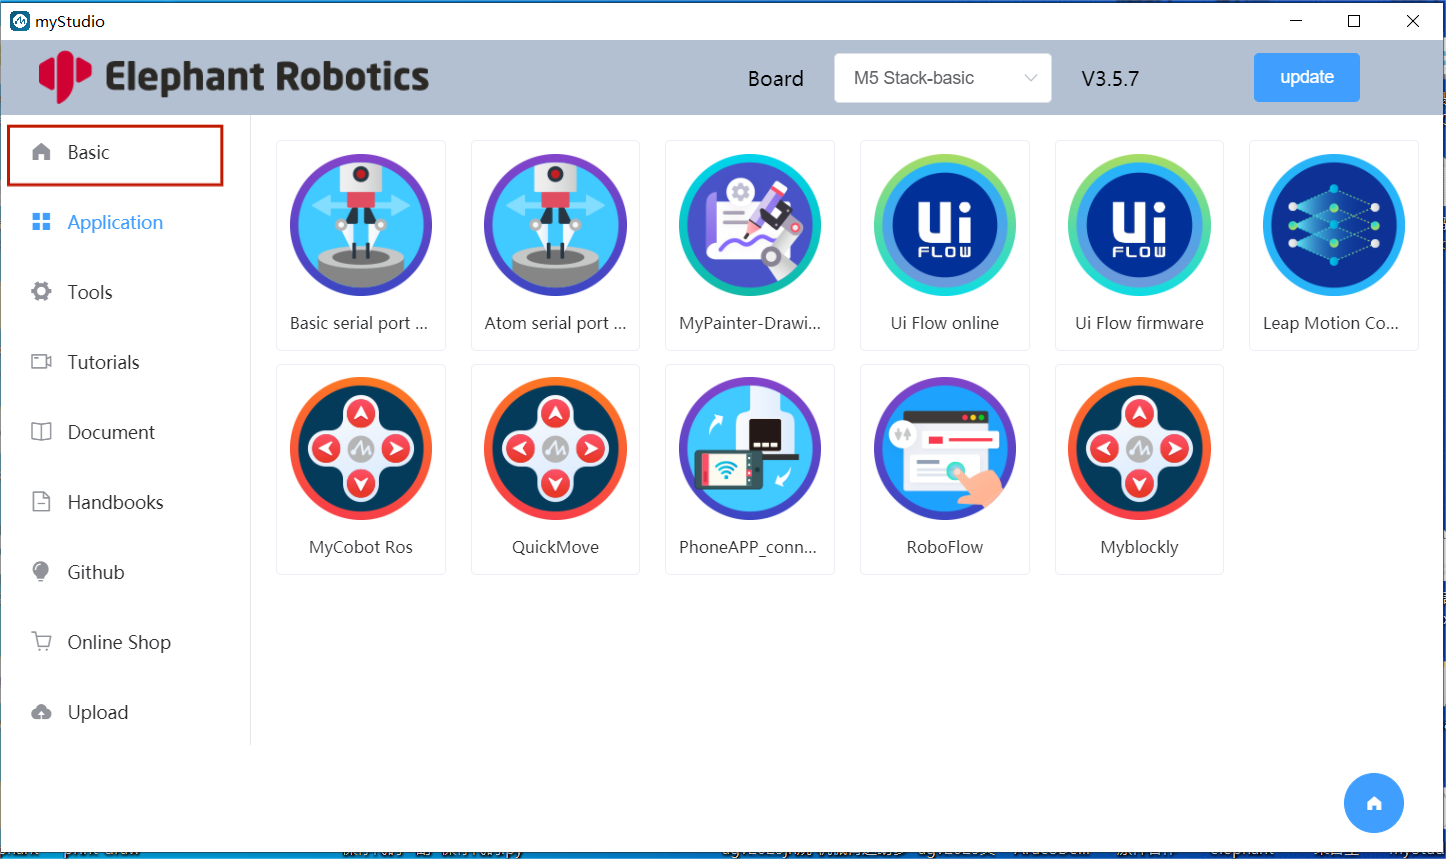
Step 4: click Download
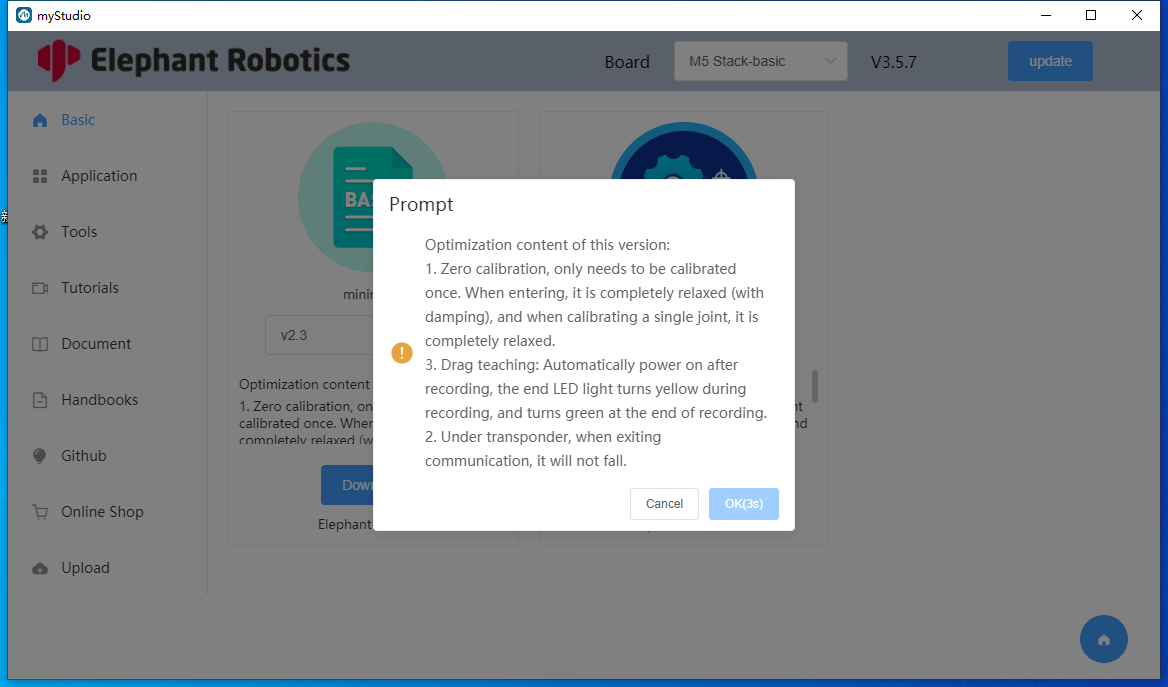
Step 5: click Ok
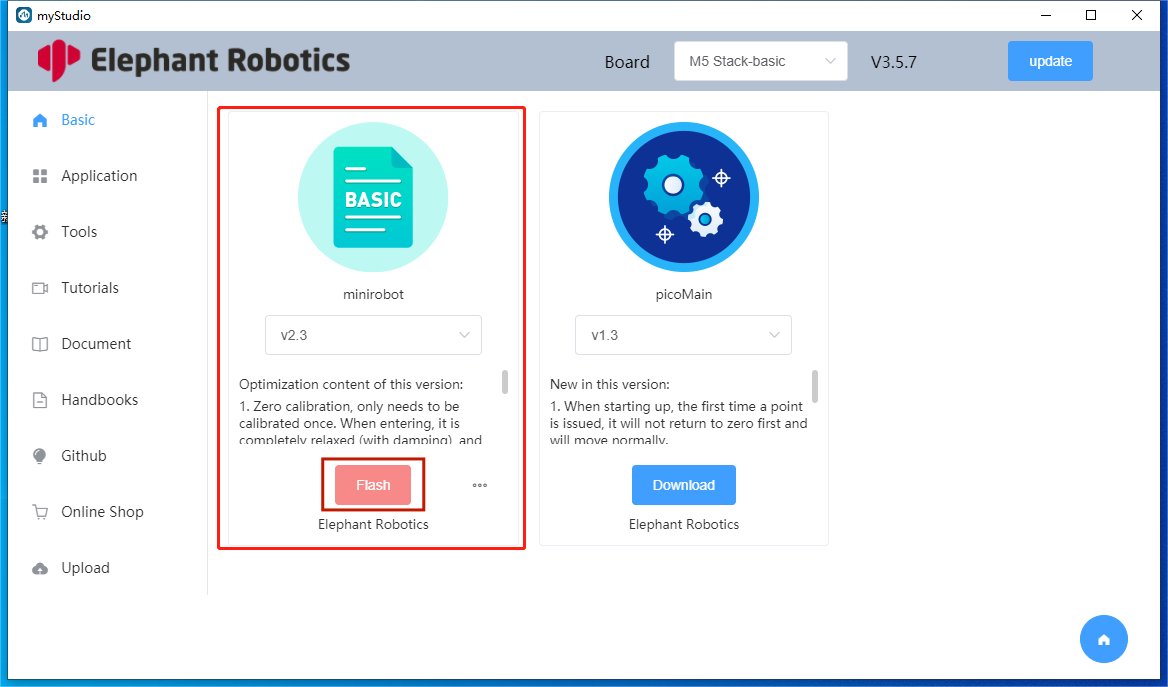
Step 5: click Flash
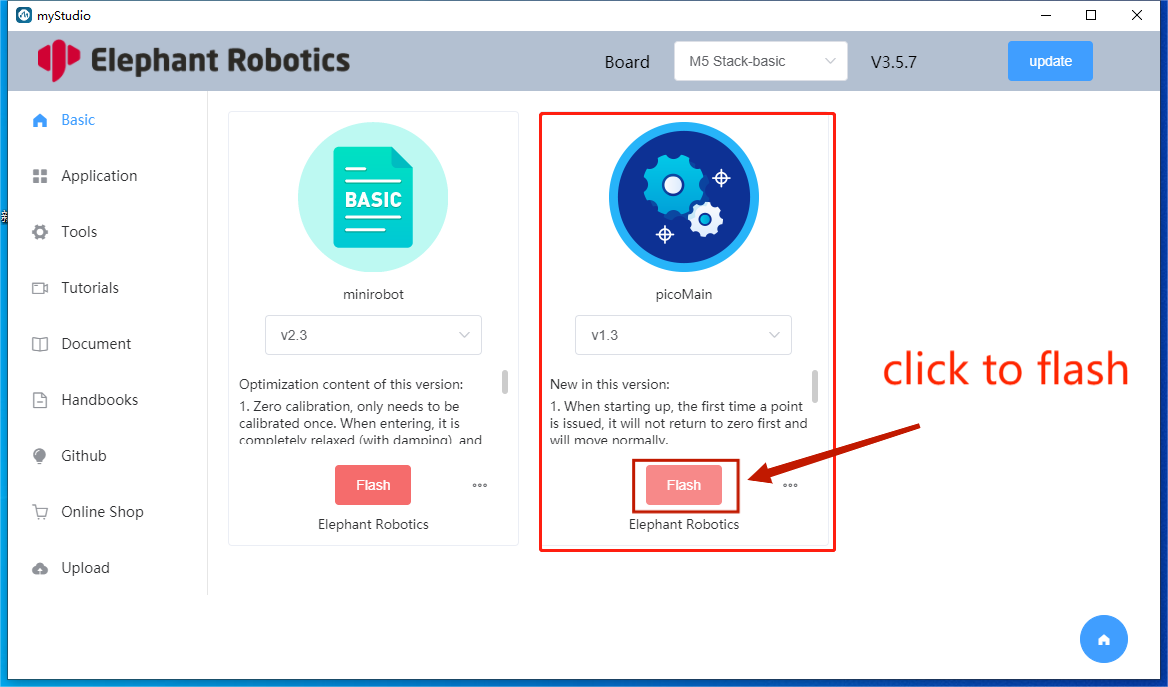
Burn pico firmware——picoMain
Step 1: Connect M5Stack-Basic to PC.
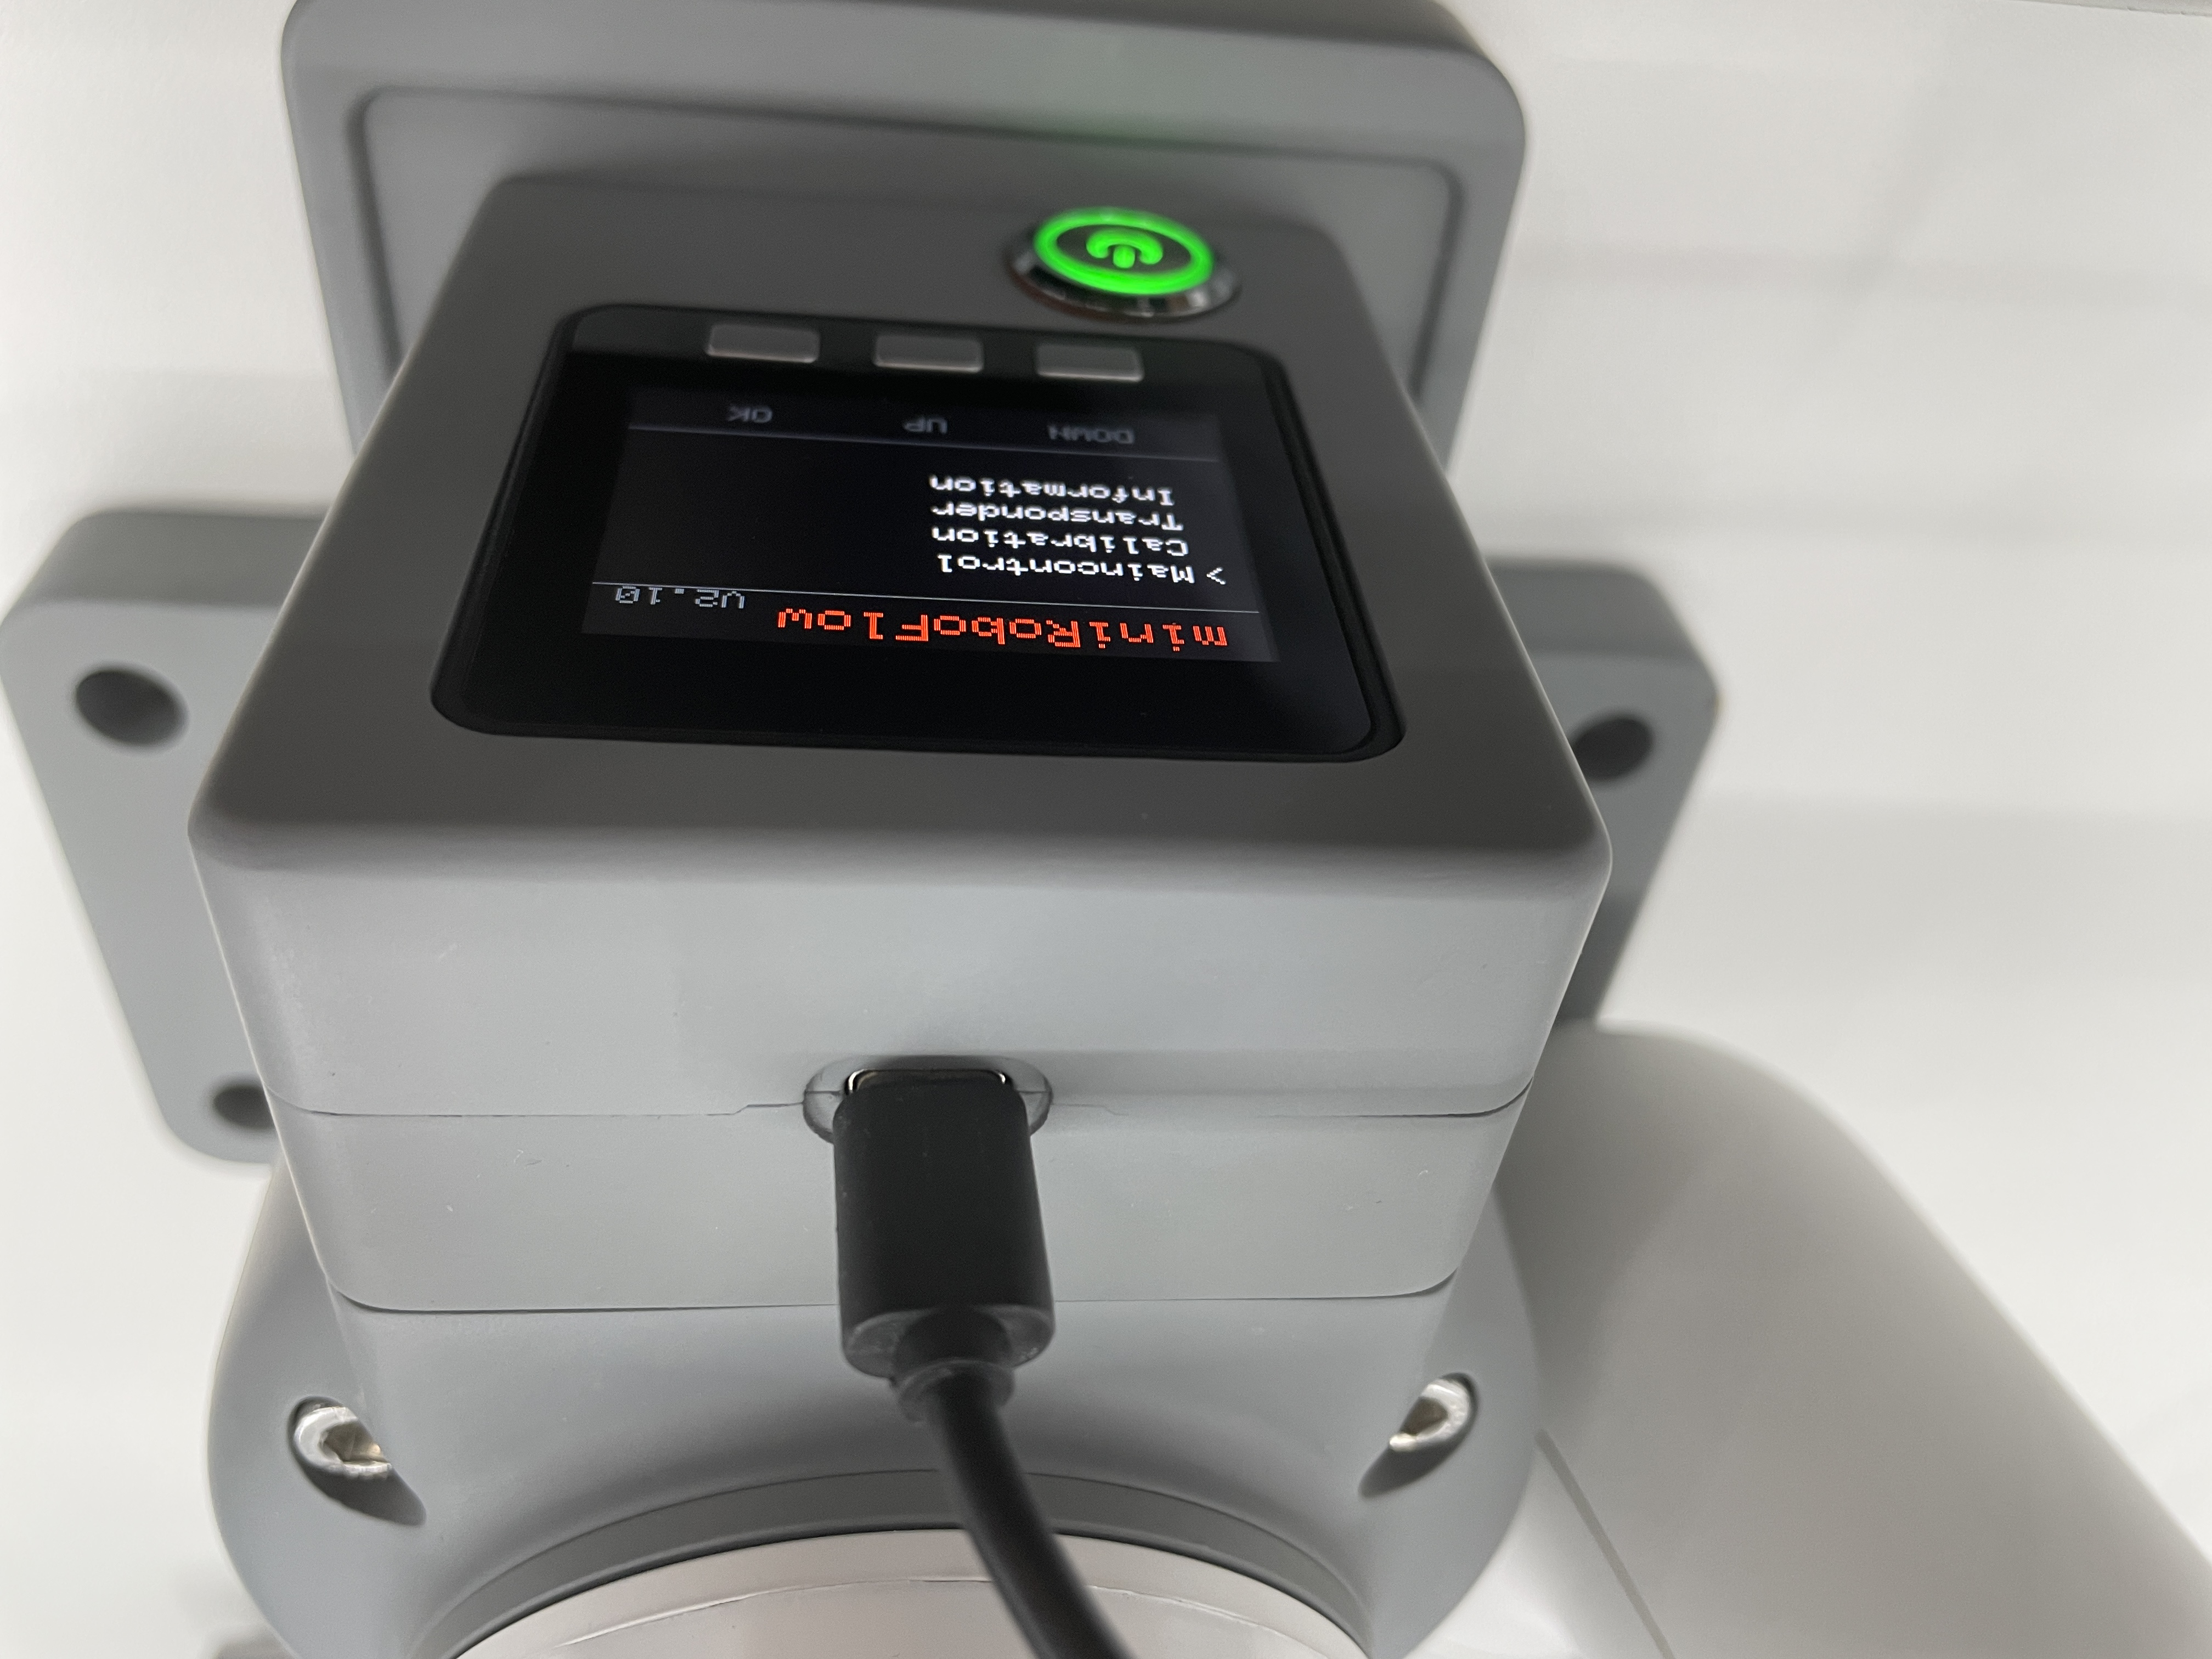
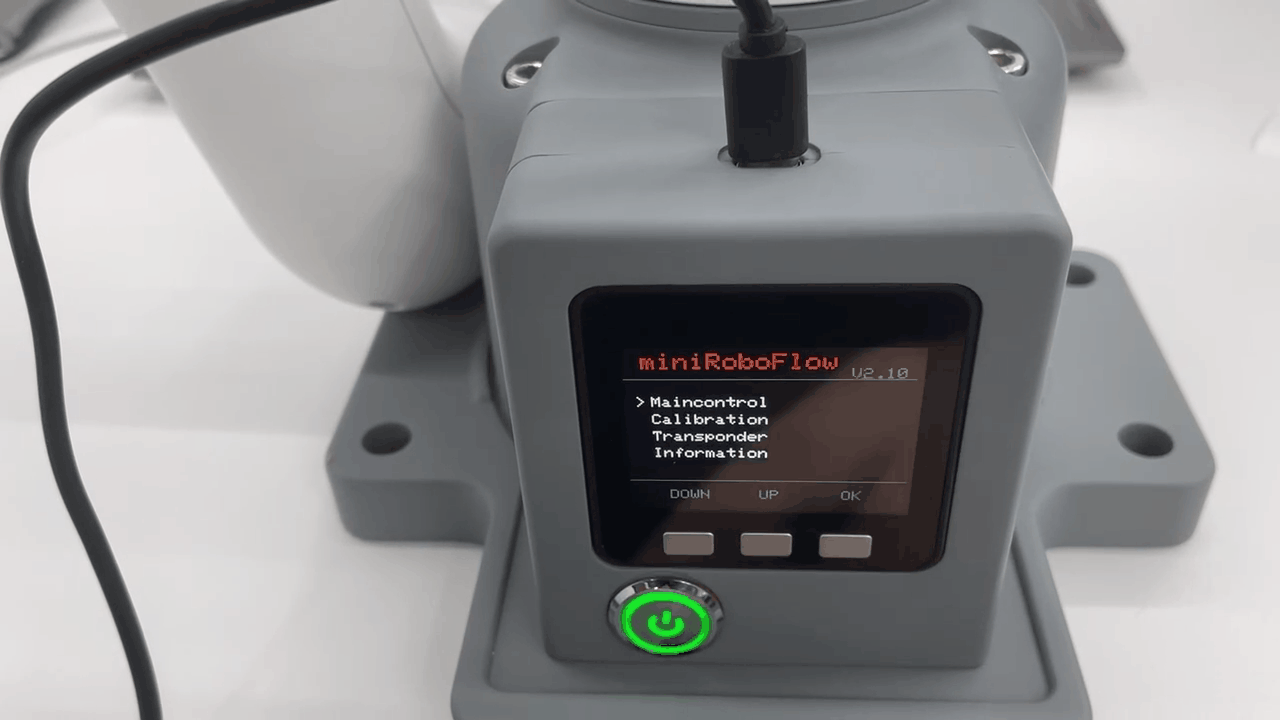
Step 2: Select Flash mode in the robot arm base (you can choose to press the UP key once or the Down key four times), and then the base will sleep with a black screen for about 30 seconds.
Step 3: Enter the myStudio firmware burning page and select picoMain firmware burning.
Note: To burn the pico firmware, you need to select Flash mode, that is, to burn in the sleep state. If the sleep time is exceeded, the base display will restart and then burning the pico firmware will fail. Step 2: Step 2 :Select Robot
myCobot 320 for M5,and clickLOGINbutton.
Step 4: Select Robot myCobot 320 for M5,and click LOGIN button.
Step 5: After logging in, click Basic
Step 6: click Download and click Flash to burn.
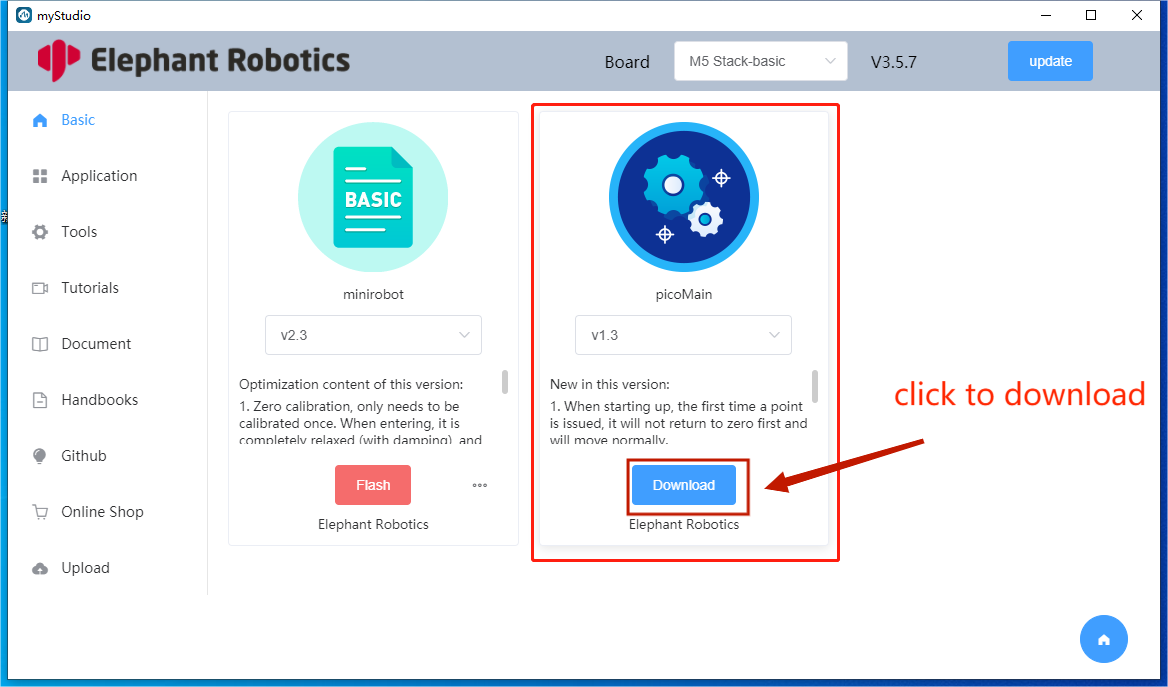
Step 7: click Flash to burn.