First-Time Use
Preparing for the first-time use
Follow the steps below to download Python and burn firmware via MyStudio.
Step 1 Download Python. myBlockly is used in Python environment. Make sure Python is downloaded on PC (Reference for information about configuration of Python environment).
Step 2 Burning firmware.
- Before burning firmware, download corresponding serial port driver according to the USB chip on your PC. CP210X is suitable for CP2104 version and CP34X is suitable for CH9102 version. You can install both of them if you are unable to confirm the type of USB chip. Go to the address below to download and install serial port driver.
- serial port driver for M5Stack-basic:
- CP210X: Windows 10, MacOS, Linux
- CP34X: Windows 10, MacOS
- serial port driver for Atom:
- serial port driver for M5Stack-basic:
Notice:
- An error may be reported during installation of CH9102_VCP_SER_MacOS. However, the installation already completes. Just ignore the error.
- Go to 4.1.1 MyStudio Installing driver for specific information about serial port driver installation.
- Make sure that settings of the system \"Preferred settings -> Security and privacy ->General\" is correct and allow the user to get it from App Store or an approved developer.
Step 3 M5Stack-basic burning is not required on Raspberry Pi series and JETSON NANO series, and their lasted atomMain on Atom is factory burnt.
Step 4 For M5Stack series, miniRobot is required to be burnt on M5Stack-basic via MyStudio. The lasted atomMain on Atom is factory burnt. Go to 4.1 MyStudio for its download and installation. Follow the steps below to burn miniRobot.

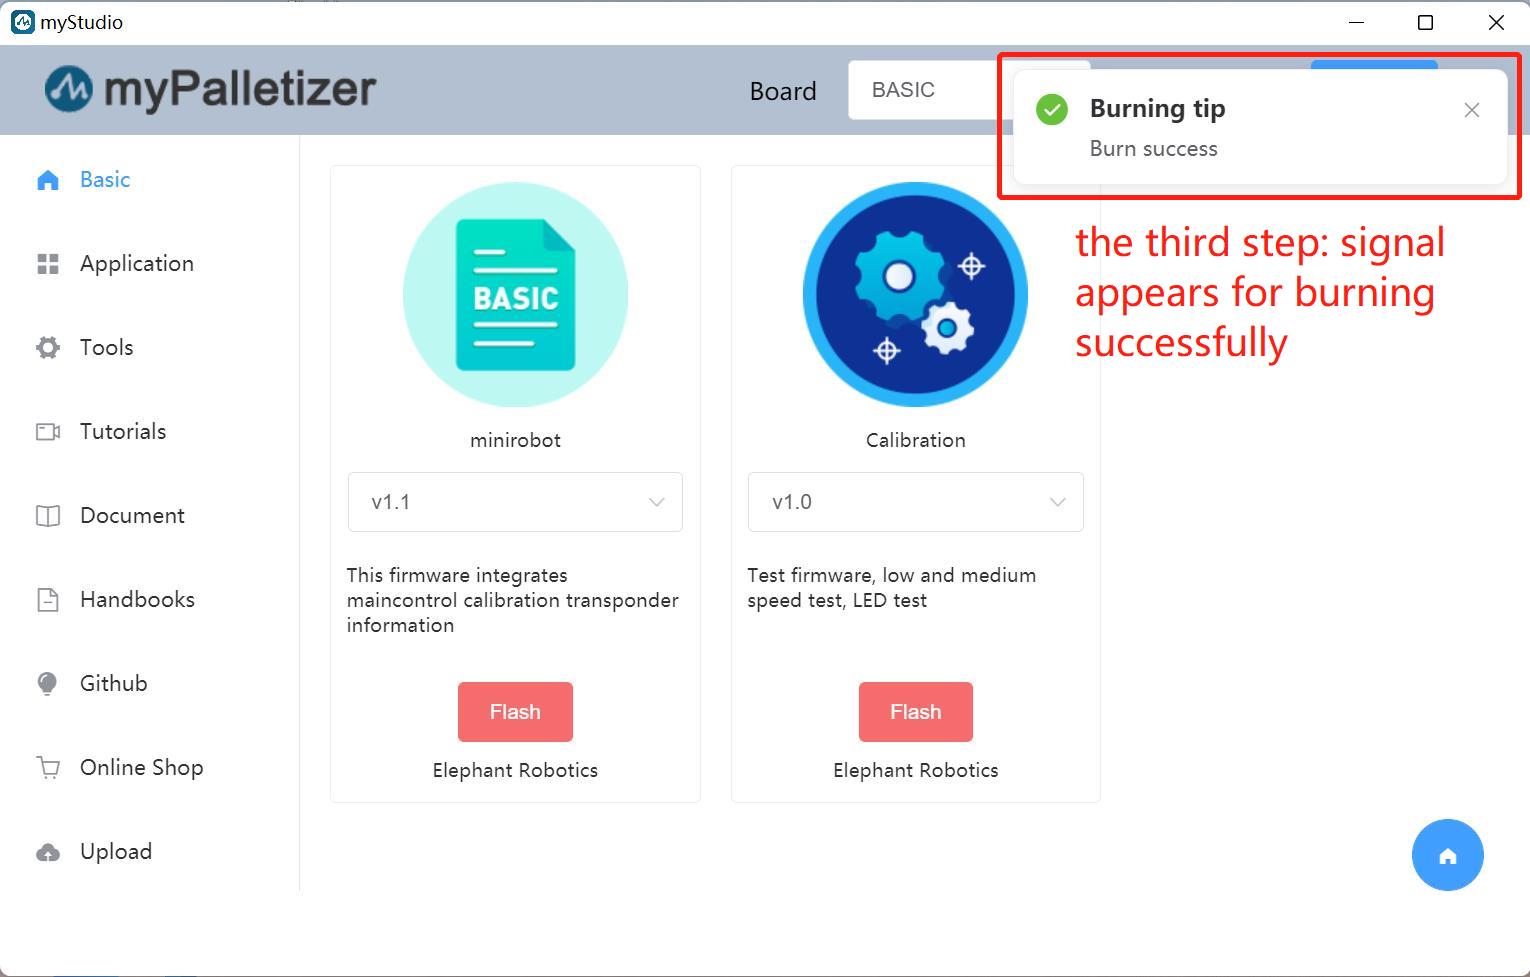
Step 5 Press "Transponder" button on M5Stack-basic, and then press "Atom ConnectTest".


Installing myBlockly
Go to the addresses below to download myBlockly.
Notice:
Make sure to download the latest version.
Before use
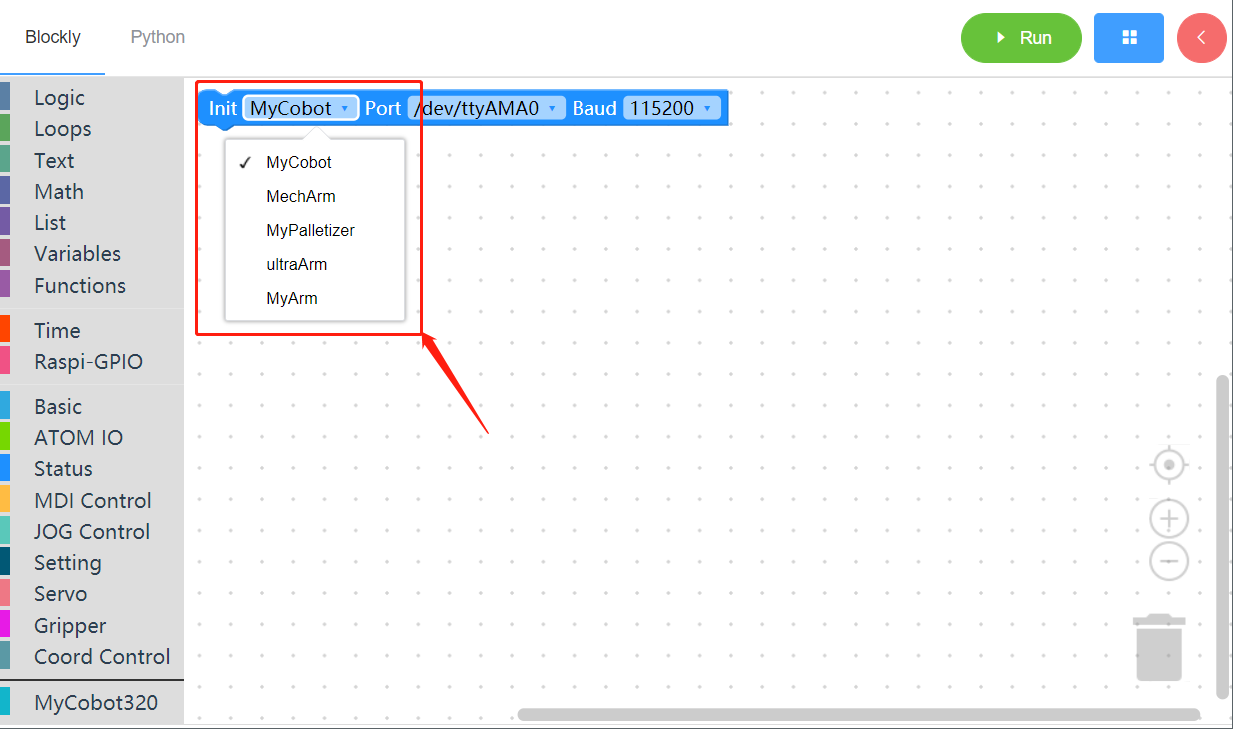
Before start to programming, be sure to select the corresponding machine model , otherwise it is easy to cause hardware damage
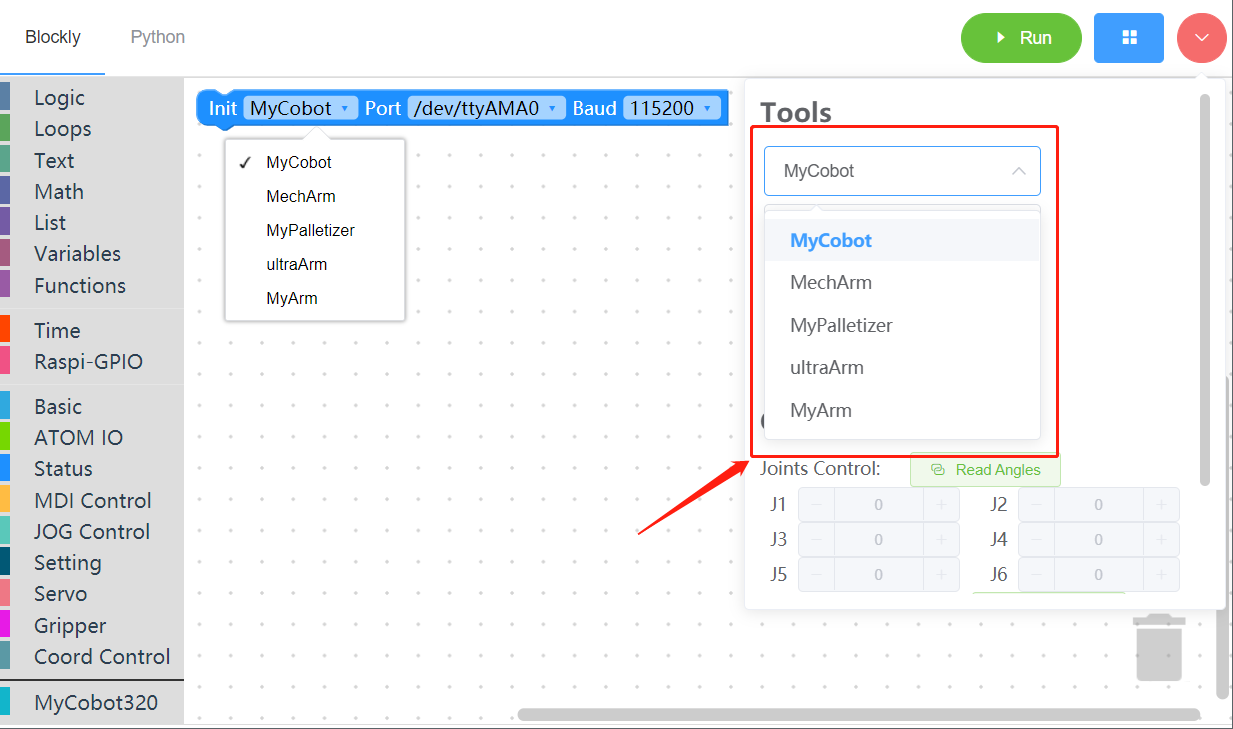
When controling robot by quick move,be sure to select the corresponding machine model , otherwise it is easy to cause hardware damage
myBlockly View
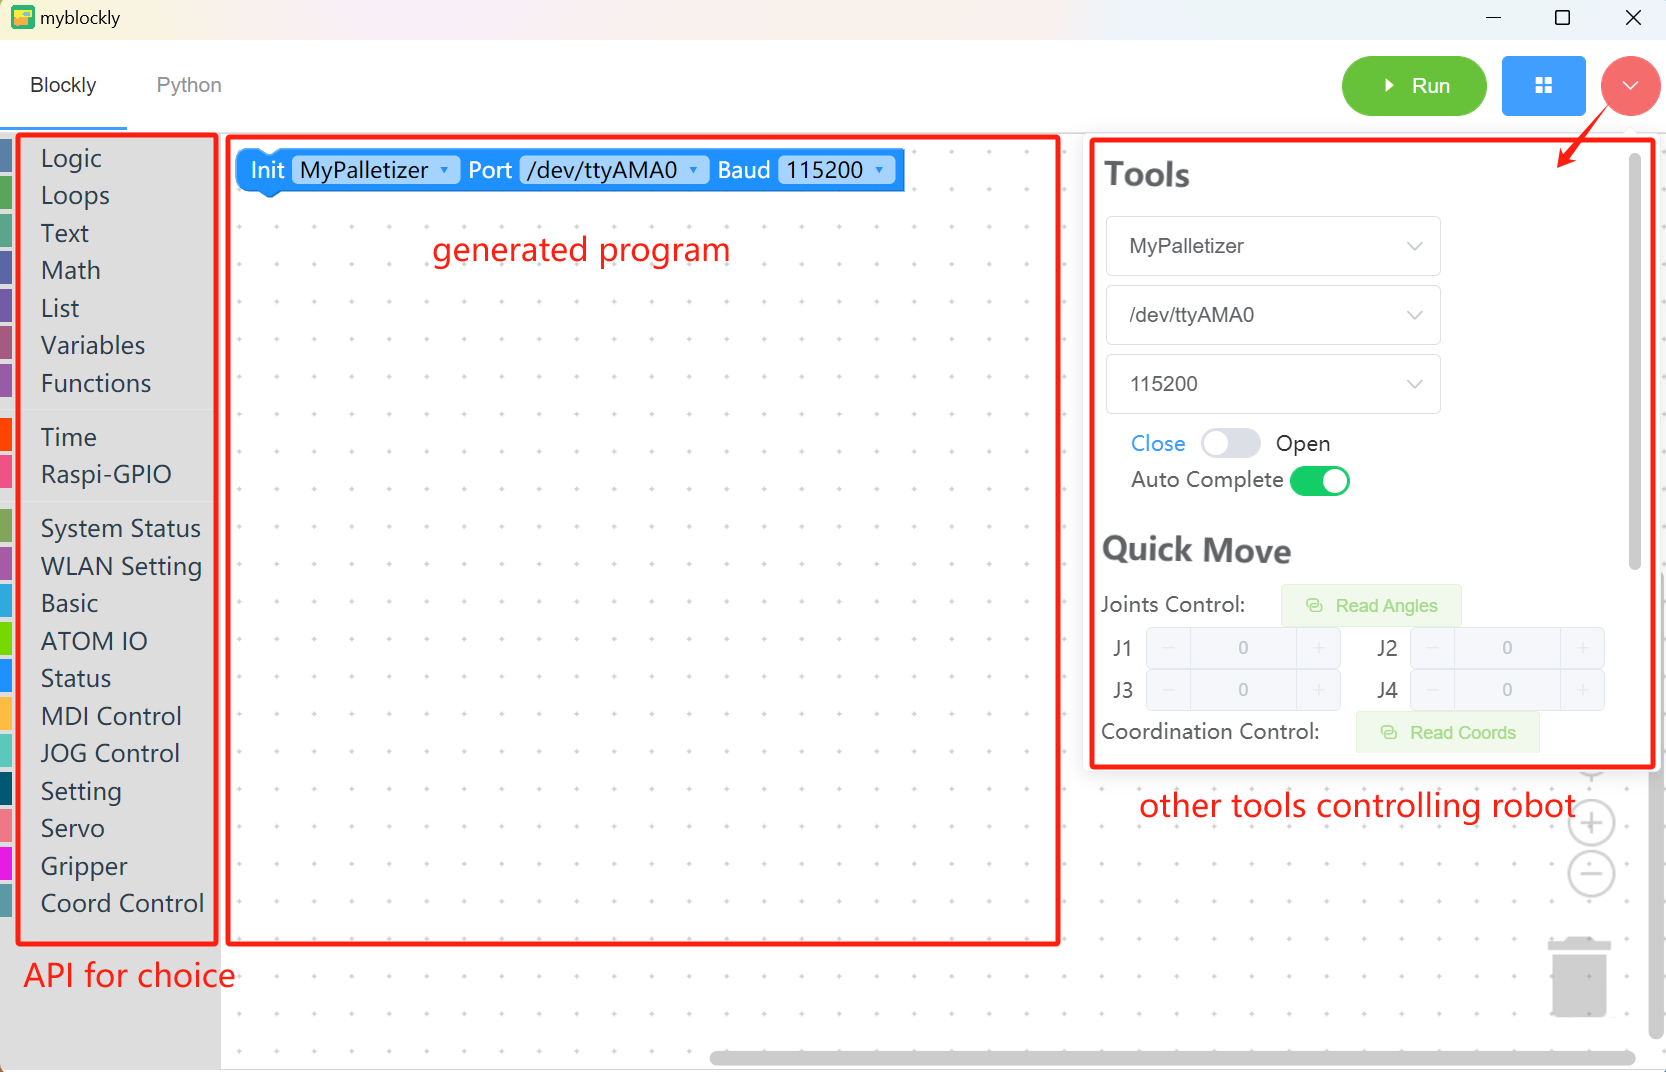
API blocks:
- Display API used to generate programs
- Contains method modules required for programming, which can be concatenated by placing the mouse into the program editing area
Generated program:
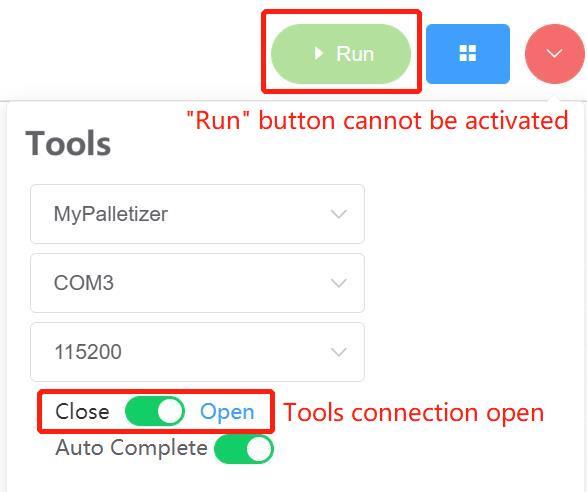
- Before running the program, it is necessary to select the correct model, port, and baud rate in the initialization module or other tools controlling, otherwise the program cannot run normally.
- Drag and drop the required module methods to the area and concatenate them to implement your own program.
- If the baud rate and serial port have been modified in the right toolbar, but the current address is still/dev/ttyAMA0, it is due to the myBlockly version issue. You need to update the software version on the official website first (the latest version will change the information in the editing area after selecting the serial port and baud rate in the toolbar).
Other tools controlling robots:
- Click on the pink icon in the top right corner to select the corresponding robot type, serial port and baud rate.
- Other tools — Quickly move
Find the Quick Move module below in the other toolbars. Tap
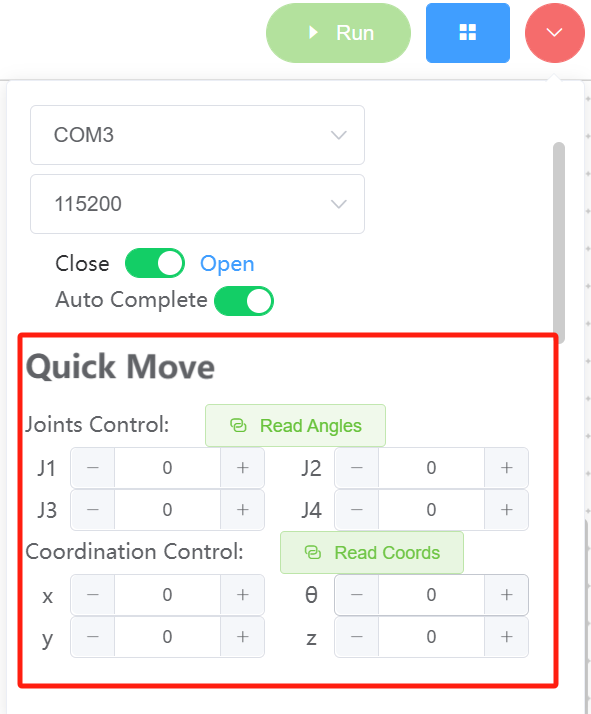
Joints ControlorCoordination Controlfor joints' real-time angles and coords. Tap+or-to control robot movements. - Other tools — Gripper Test (At present, the gripper test function only adapts to the following models: MyCobot 280 series, MeCharm 270 series, MyPalletizer 260 series, MyARM 300 PI.)
Find the Gripper Test module in other toolbars. You can set the type of gripper and the movement speed of the gripper. Click the 'Read Angle' button to obtain the current value of the gripper. Set gripper status: open, close, release. Pay attention to the movement of the gripper.(Please refer to the specific testing steps--Gripper Test)
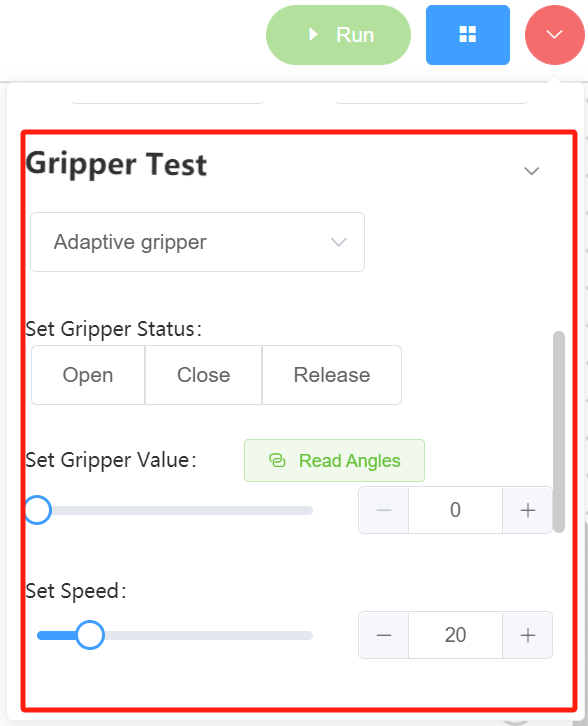
- Other tools— IO Test(At present, the IO test function only adapts to the following models: MyCobot 280 series, MeCharm 270 series, MyPalletizer 260 series, MyARM 300 PI.)
Find the IO test module in other toolbars. Select the machine and IO type, and choose the IO value. You can click the low or high button to change the current selected IO port status.(Please refer to the specific testing steps--IO test)
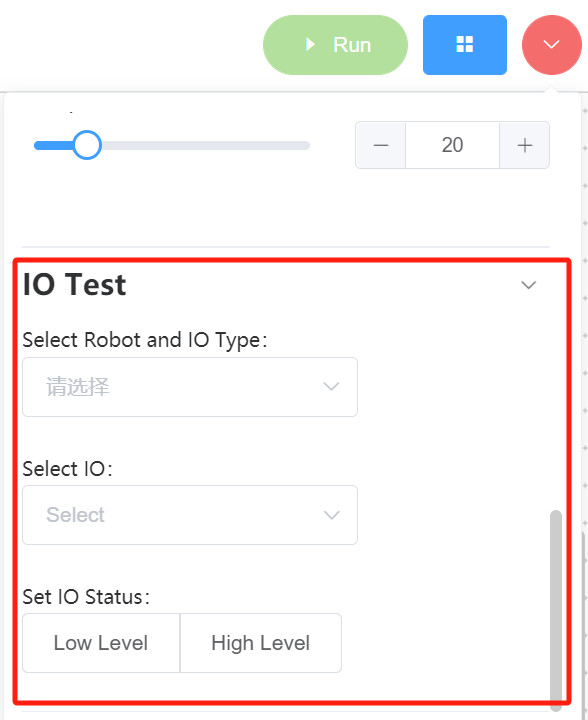
Notice:
- Baud rate for M5Stack series and Raspberry Pi series is 115200 and 1000000 respectively.
| Robot | Port | Baudrate |
|---|---|---|
| 260 M5 | Win: COM; Linux: /dev/ttyUSB; | 115200 |
| 270 M5 | Win: COM; Linux: /dev/ttyUSB; | 115200 |
| 280 M5 | Win: COM; Linux: /dev/ttyUSB; | 115200 |
| 320 M5 | Win: COM; Linux: /dev/ttyUSB; | 115200 |
| 260 PI | /dev/ttyAMA0 | 1000000 |
| 270 PI | /dev/ttyAMA0 | 1000000 |
| 280 PI | /dev/ttyAMA0 | 1000000 |
| 320 PI | /dev/ttyAMA0 | 115200 |
| 280 Jetson Nano | /dev/ttyTHS1 | 1000000 |
| 280 Arduino | Win: COM; Linux: /dev/ttyUSB or /dev/ttyACM* ; | 1000000 |
Go to 4.1.1 Download and Installation of myStudio for serial port and baud rate of different types of robots.
Check connection of
Toolsin top right corner if program cannot run successfully.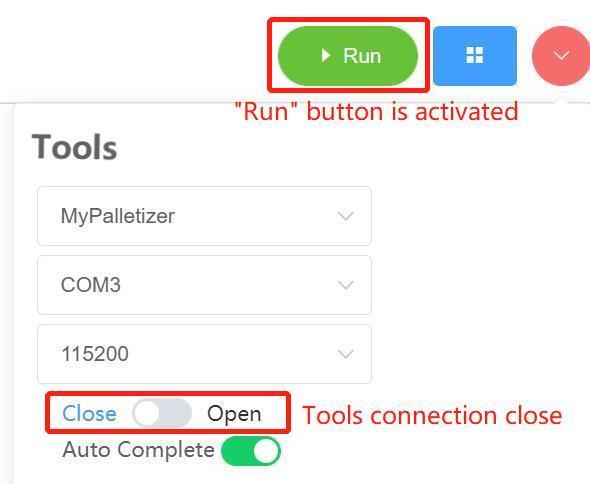
API for MyCobot 320 is specifically set in the bottom left corner. It does not affect any program.

Running Program
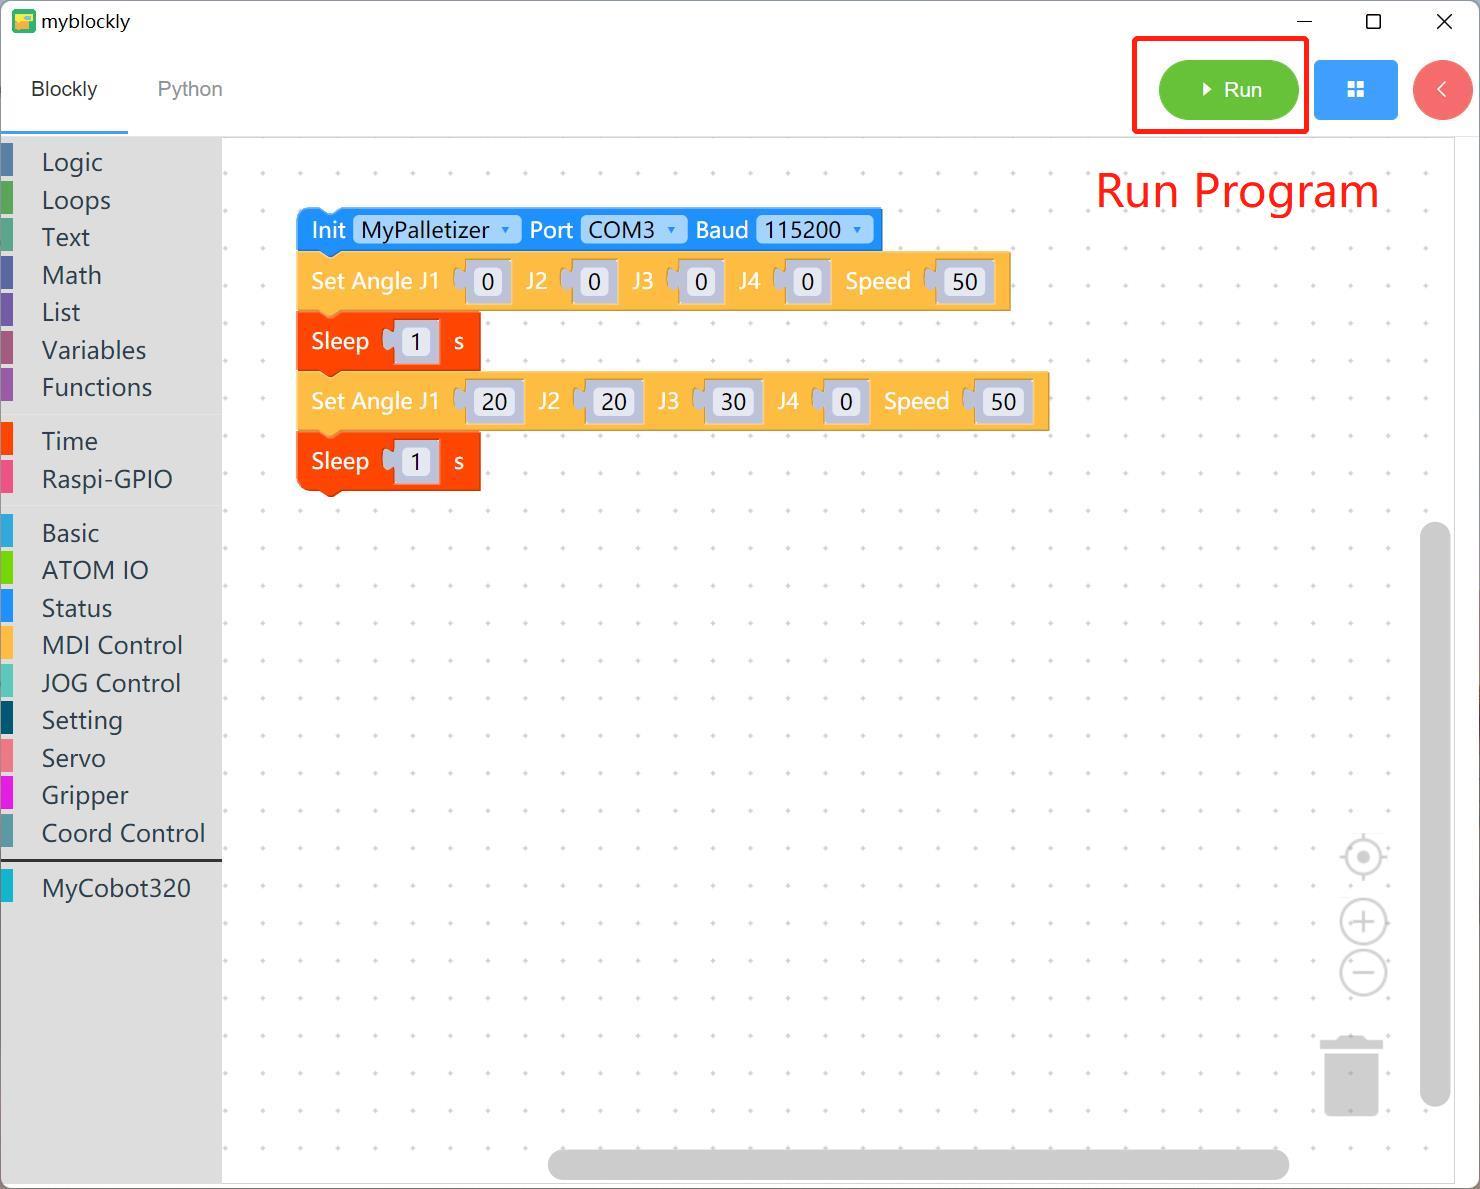
Drag API blocks from the left side to integrate them with each other for program edition. Then, tap "Run" button to run the program.
Notice:
Sleep block is required to provide no less than 0.5 second for a robot to move. Otherwise the robot cannot run successfully.
Click on Python for Python codes corresponding to blocks edited in myBlockly.
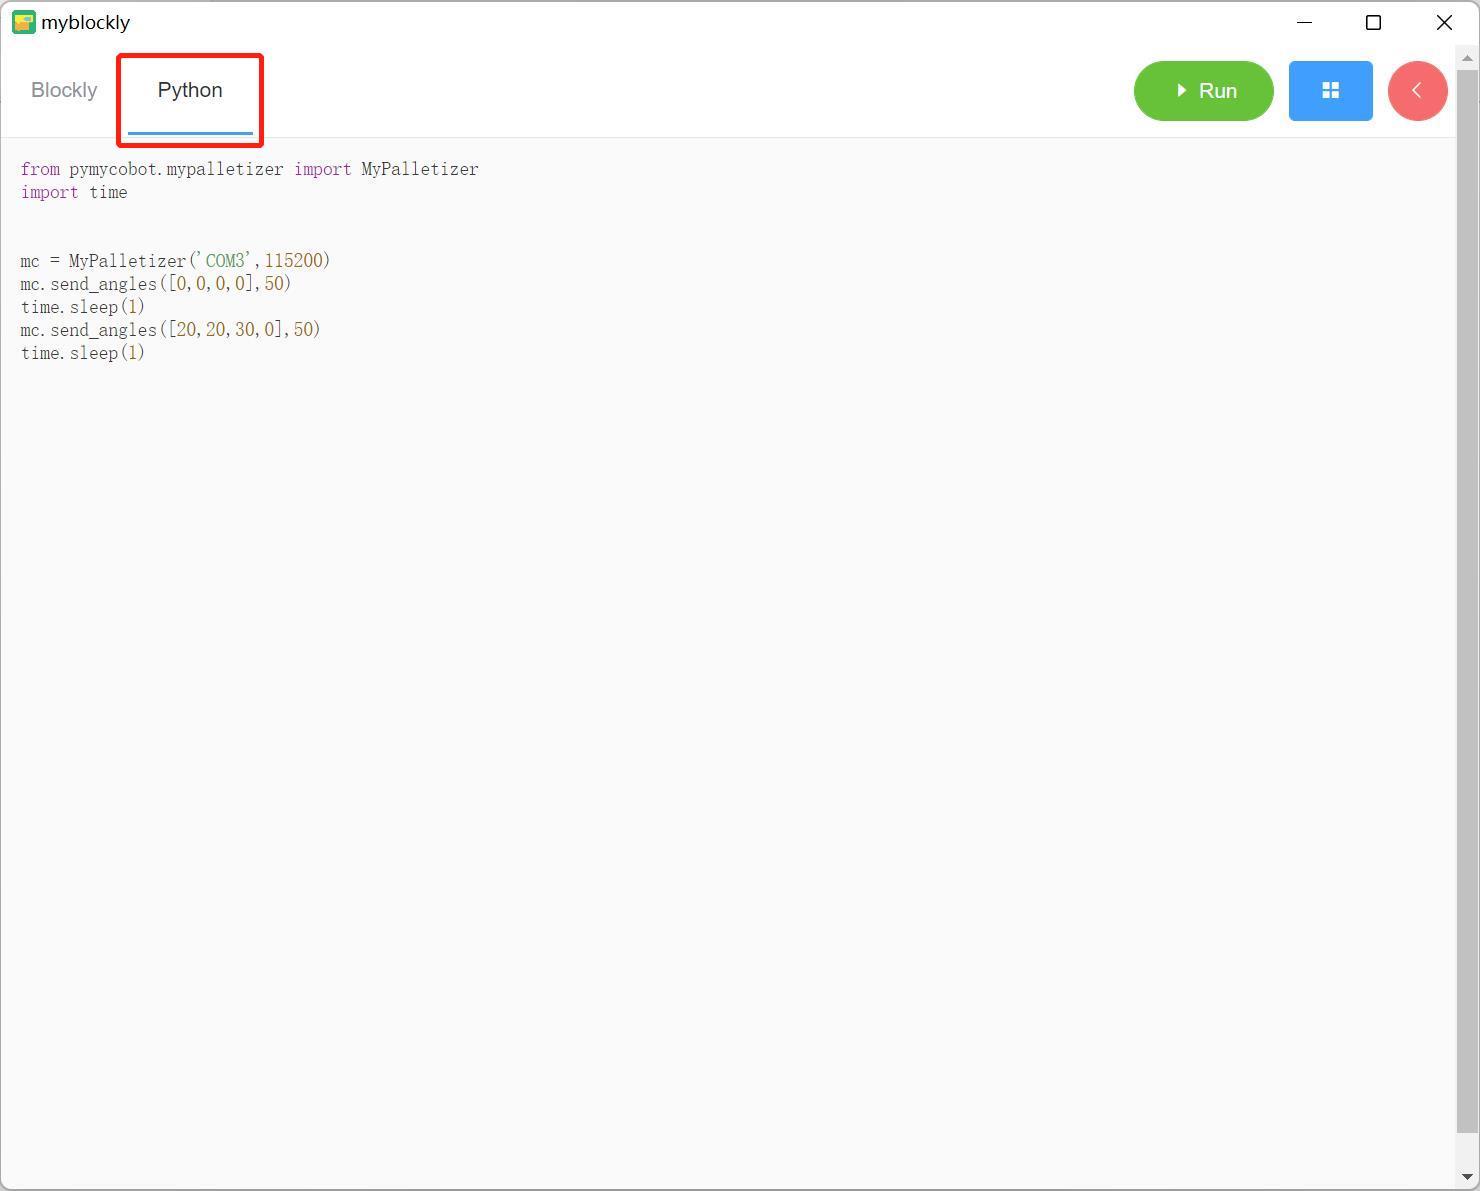
Saving and Loading Programs
- myBlockly files are saved as "*.json" format. Click on the blue button in the top left corner, and then click on "Save".

- Click on "Load" button to import existing programs.

How to install and update the software
The installation and update of myBlockly need to go to the official website to download the latest version.
Inside the software, you can update the software through the following steps.
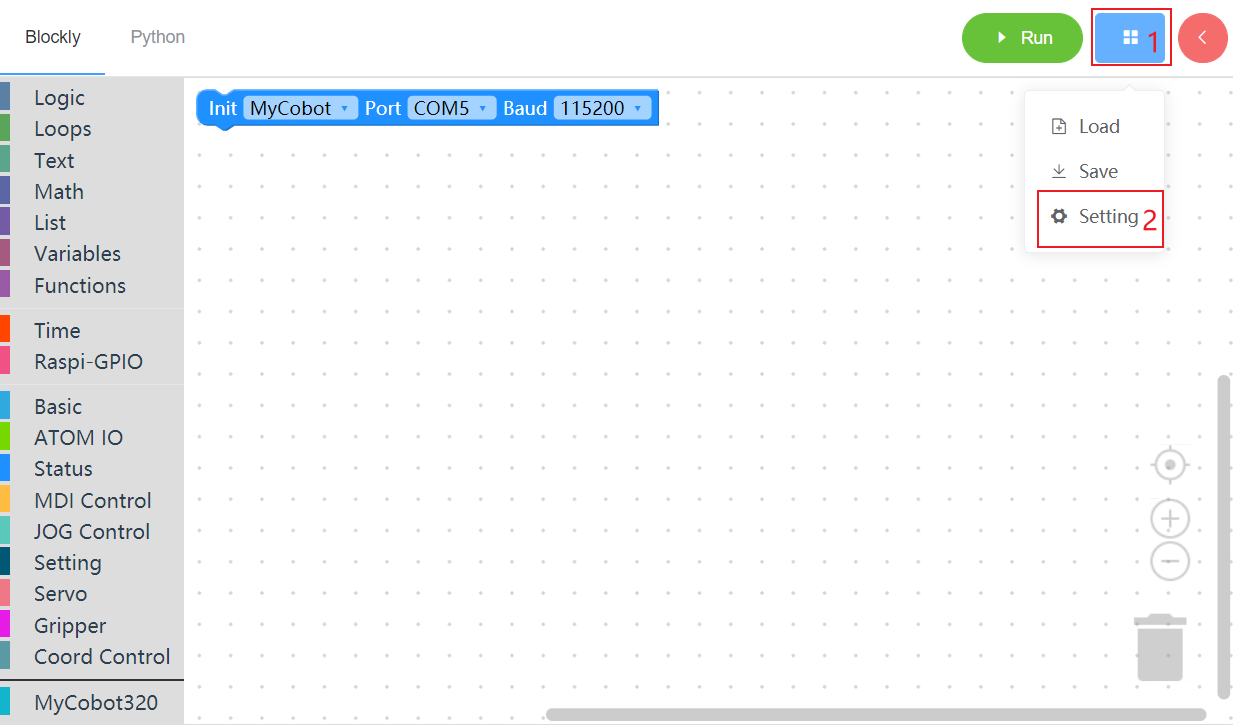
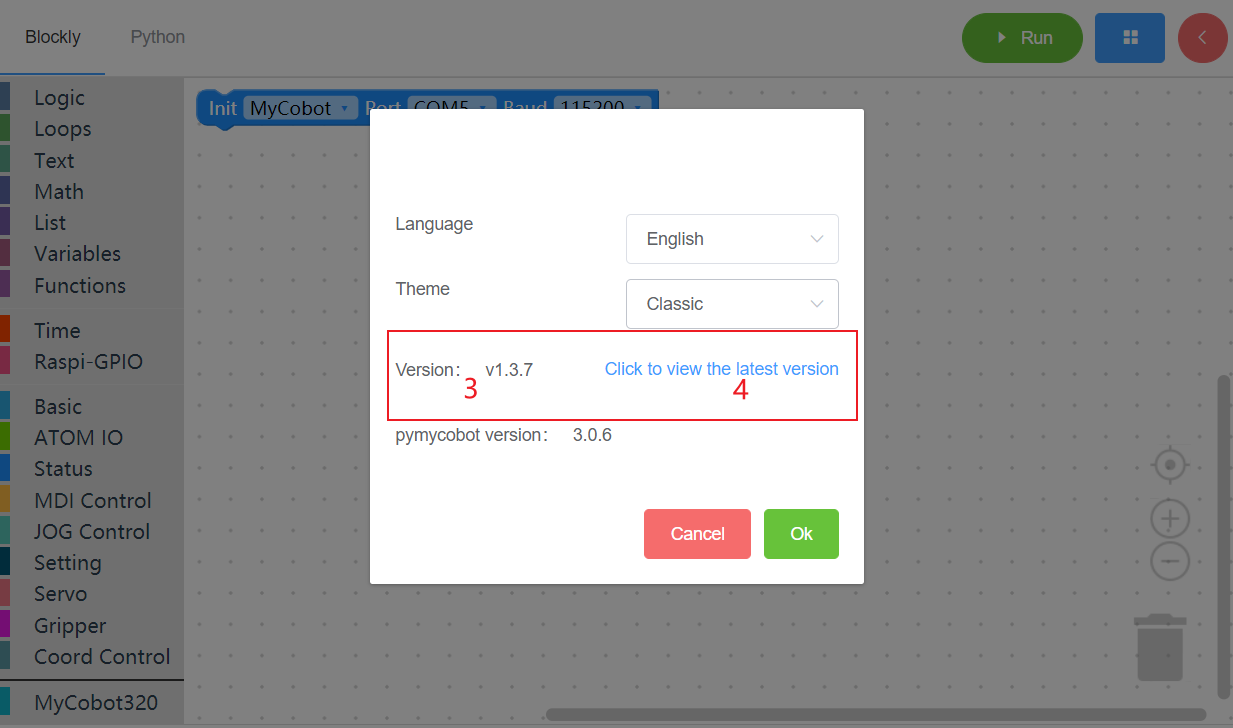
- 1 Mouse move here
- 2 Click setting
- 3 This is your current version
- 4 Click this link to view the latest version and download
And if you need to know the detailed update log of the software, you can go to github to view.
How to run the sample code
We provide a wealth of sample codes, please select the code you are interested in, then find the sample building blocks from the left menu bar, drag them to the workspace, and click Run to see the result.
- Setting the Color of RGB Light Panel
- Setting All Arms to Starting Point
- Controlling Single-Joint Motion
- Controlling Multi-Joint Motion
- Swinging Arms Left and Right
- Let Robot Dance
- The Use of Gripper
- The Use of Sucking Pump
How to view the drive library open interface
Myblockly implements all interfaces of pymycobot. You only need to find the corresponding block of the interface you want to use in the menu bar on the left side of the workspace, and then drag it to the workspace to use it.