myAGV 2023-rtabmap Mapping
1. Open the SLAM Laser Scan Launch File
After opening the car, open three terminal consoles (shortcut keys Ctrl+Alt+T) and enter the following commands in each of them:
// Launch the odometry and laser scanner
roslaunch myagv_odometry myagv_active.launch
// Launch the depth camera corresponding launch file
roslaunch orbbec_camera astra_pro2.launch
// Launch the 3D mapping algorithm
roslaunch myagv_navigation rtabmap_mapping.launch
2. Open the Keyboard Control File
Open a new terminal console. In the terminal command line, enter the following:
cd myagv_ros
roslaunch myagv_teleop myagv_teleop.launch
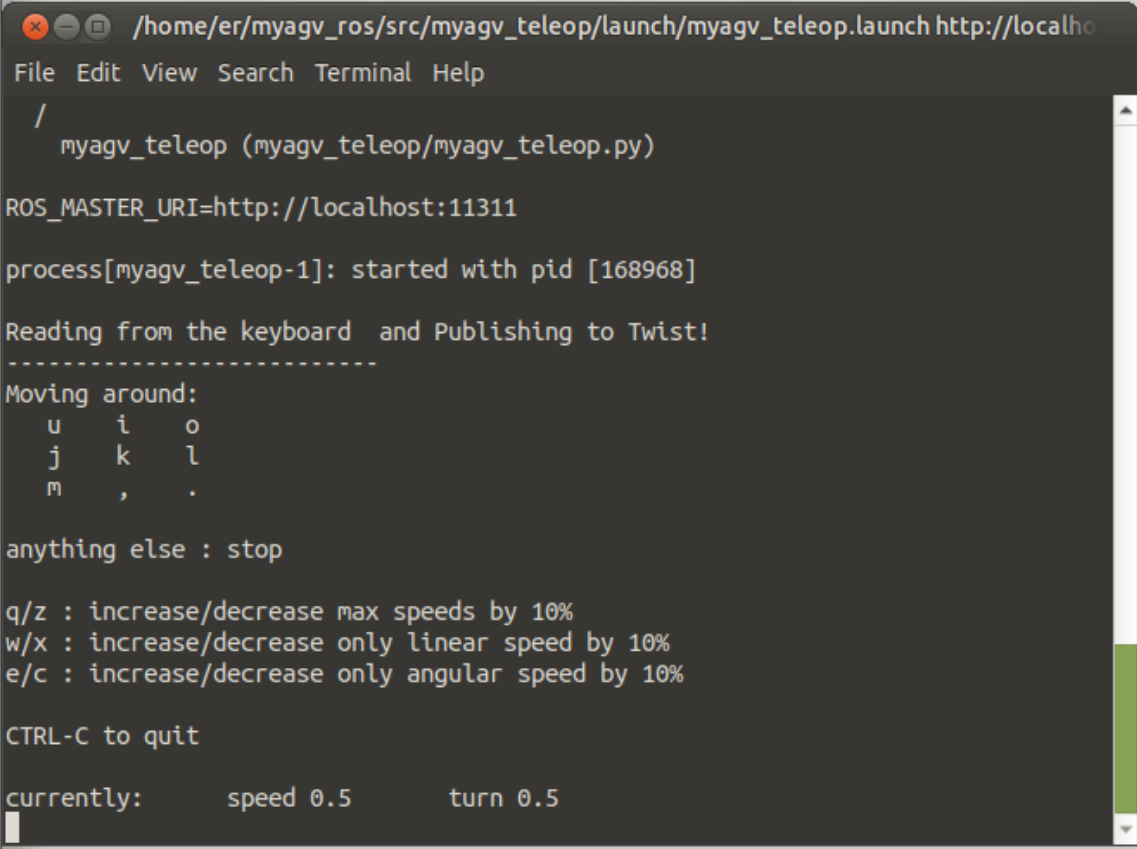
| Key | Direction |
|---|---|
| i | Forward |
| , | Backward |
| j | Move Left |
| l | Move Right |
| u | Rotate Counterclockwise |
| o | Rotate Clockwise |
| k | Stop |
| m | Rotate Clockwise Backward |
| . | Rotate Counterclockwise Backward |
| q | Increase Linear and Angular Velocity |
| z | Decrease Linear and Angular Velocity |
| w | Increase Linear Velocity |
| x | Decrease Linear Velocity |
| e | Increase Angular Velocity |
| c | Decrease Angular Velocity |
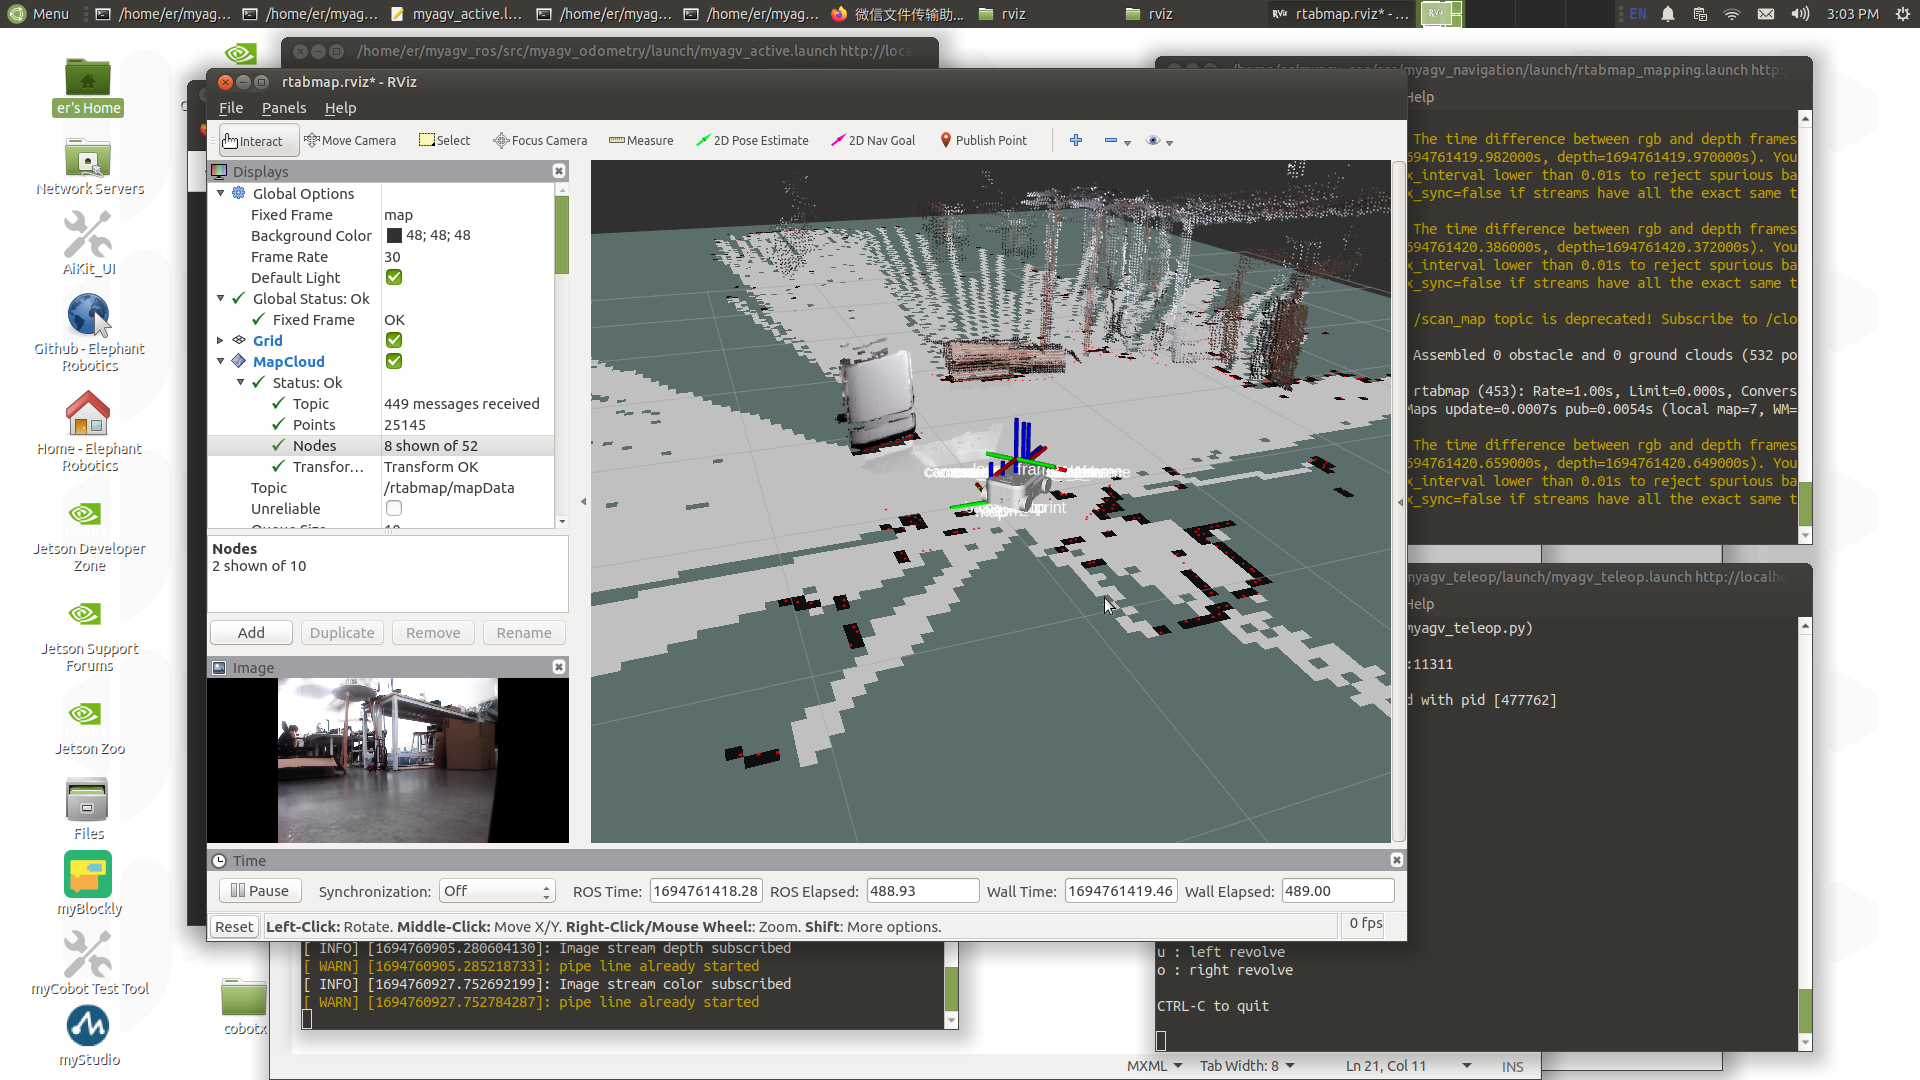
Now the car can start moving under the control of the keyboard. Control the car to make a complete turn within the space where you want to map. At the same time, you will see that in the Rviz space, our map is gradually being constructed as the car moves.
Note: When operating the car with the keyboard, make sure the terminal running the myagv_teleop.launch file is the currently selected window. Otherwise, the keyboard control program won't recognize the keyboard inputs.
After completing the map by moving the car with keyboard control, use Ctrl+C to stop the mapping node, and the map data will be generated in ~/.ros/rtabmap.db.
3. Navigation Usage
After opening the car, open four terminal consoles (shortcut: Ctrl + Alt + T), and enter the following commands in each terminal:
// Start the odometry and laser
roslaunch myagv_odometry myagv_active.launch

// Start the launch file for the depth camera
roslaunch orbbec_camera astra_pro2.launch

// Start the rtabmap node
roslaunch myagv_navigation rtabmap_navigation.launch

// Start the move_base node
roslaunch myagv_navigation rtabmap_move_base.launch
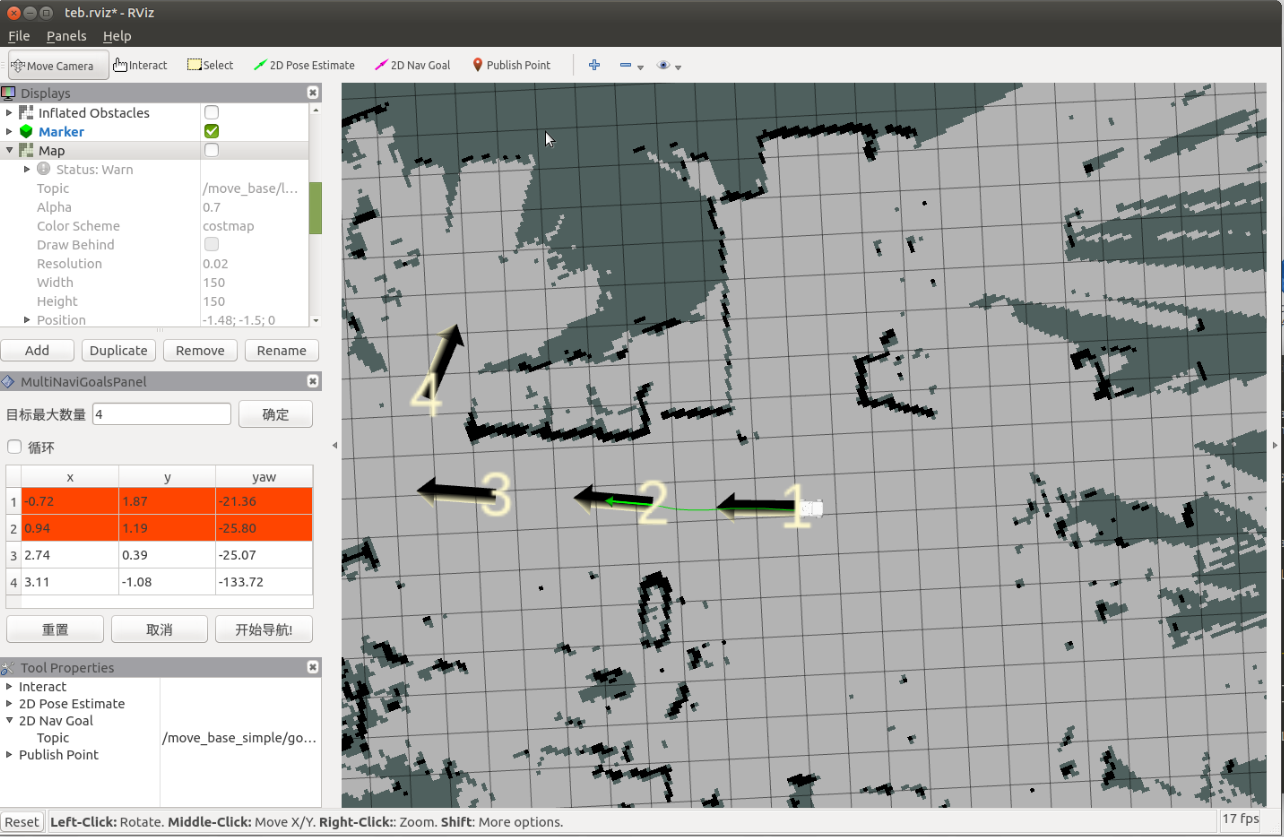
- Here is the explanation of the navigation operation area in the bottom-left corner:
① Maximum Target Points: Set the maximum number of target points allowed. The number of set target points should not exceed this limit (but can be fewer).
② Loop: If selected, the navigation will loop back to the first target point after reaching the last one. For example: 1 -> 2 -> 3 -> 1 -> 2 -> 3, but you need to check this option before starting navigation.
③ Task Target Point List: Shows the X/Y/Yaw coordinates of the target points on the map (with xy coordinates and yaw angle).
- After setting the maximum target point number and saving, this list will generate the corresponding number of entries.
- Each time you provide a target point, the coordinates and orientation of that point will be displayed here.
④ Start Navigation: Begin the navigation task.
⑤ Cancel: Cancel the current target point navigation task, causing the robot to stop. When you click "Start Navigation" again, the robot will continue from the next target point.
- Example: If you have points 1 -> 2 -> 3, and you click "Cancel" during the 1 -> 2 part, the robot stops. Clicking "Start Navigation" again will make the robot navigate from the current location to point 3.
⑥ Reset: Clear all currently set target points.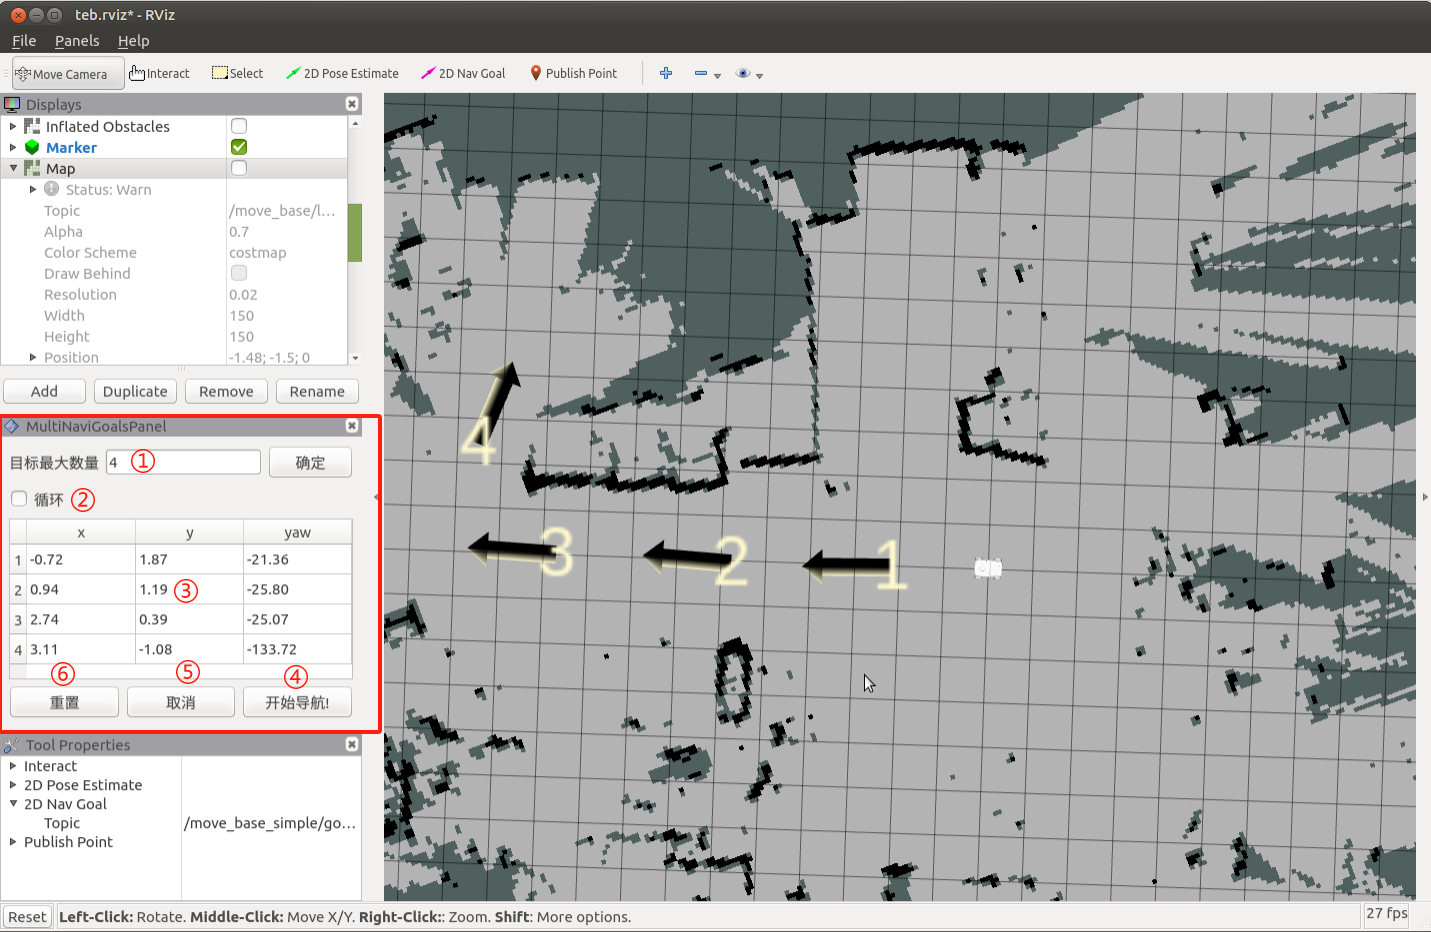
- Set the number of task target points and click "Save" to confirm. Then, click "2D Nav Goal" on the Toolbar to specify the target point on the map. Each time you set a target point, make sure to click "2D Nav Goal" first. The target points have direction, and the arrowhead represents the vehicle's front direction. Click "Start Navigation" to begin the navigation. In Rviz, you will see a planned path for the robot from the starting point to the target point, and the robot will move along this path to reach the destination.