myAGV 2023 - Gamepad Control
1 Start the lower-level communication of the car
After powering on the car, open a terminal console (shortcut: Ctrl+Alt+T), and enter the following command in the command line:
cd myagv_ros
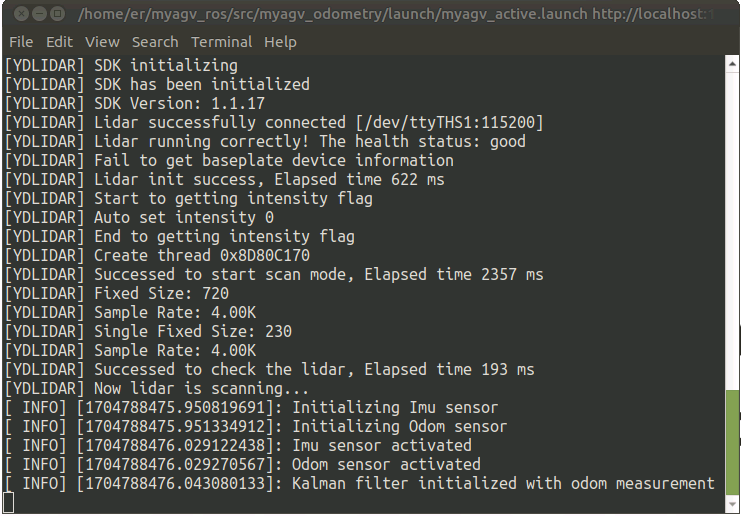
roslaunch myagv_odometry myagv_active.launch
Open the launch files required for the car's SLAM laser scanning and wheels, if displayed.
myAGV initialized successful! ...... Now YDLIDAR is scanning ......
In that case, it means that the car's radar and wheels have successfully established communication. The status displayed in the terminal is as follows:
2 Start Keyboard Communication
Open a new terminal console, and in the terminal command line, enter:
cd myagv_ros
roslaunch myagv_teleop myagv_teleop.launch
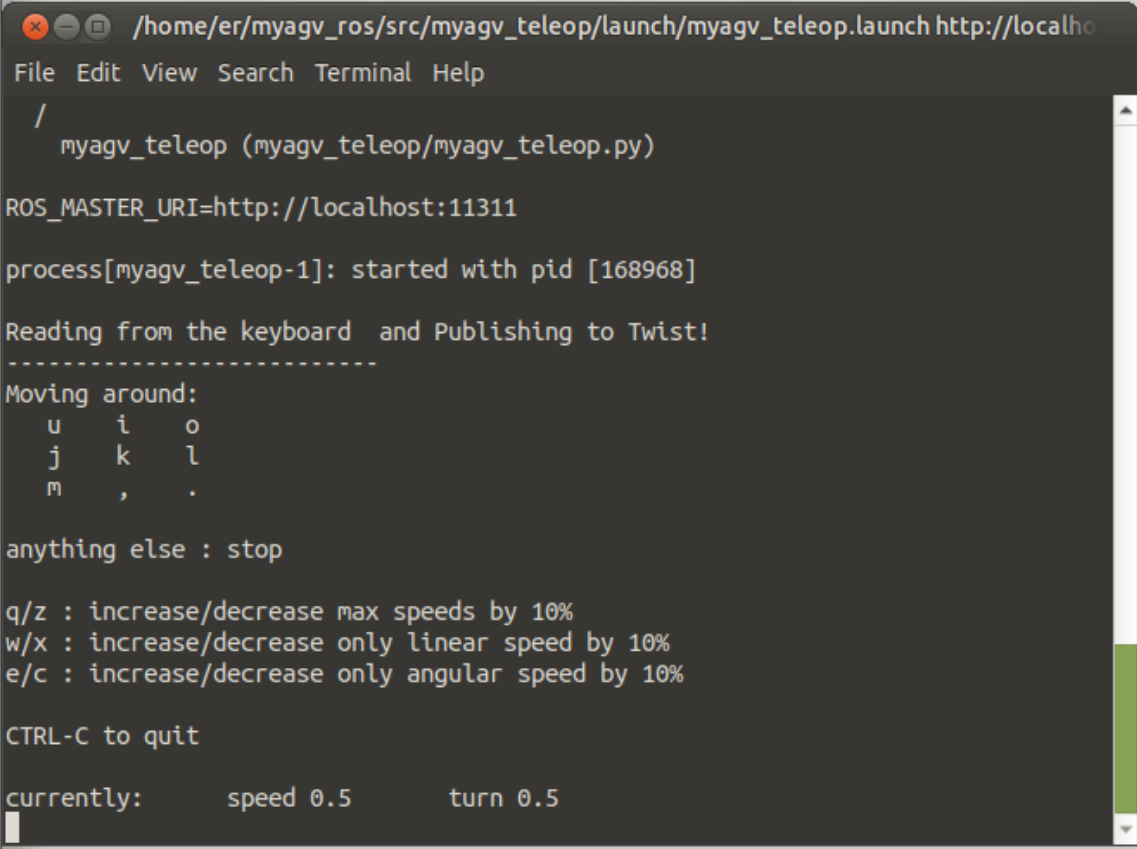
| Key | Direction |
|---|---|
| i | Forward |
| , | Backward |
| j | Move Left |
| l | Move Right |
| u | Rotate Counterclockwise |
| o | Rotate Clockwise |
| k | Stop |
| m | Rotate Clockwise Backward |
| . | Rotate Counterclockwise Backward |
| q | Increase Linear and Angular Velocity |
| z | Decrease Linear and Angular Velocity |
| w | Increase Linear Velocity |
| x | Decrease Linear Velocity |
| e | Increase Angular Velocity |
| c | Decrease Angular Velocity |
myAGV 2023-Gamepad Control
1. Install the Driver
Open a new terminal console, and enter the following command in the command line:
sudo apt-get install joystick
When prompted to make a selection, simply enter Y and press Enter.
2. Launch the Car's Launch Files
Open a new terminal console, and enter the following command in the command line:
cd myagv_ros
roslaunch myagv_odometry myagv_active.launch
Success indicator:
Now YDLIDAR is scanning ......
3. Launch the Gamepad Control Launch File
Currently, two gamepads are supported, and different files need to be run for control.
Gamepad One
The startup method for controlling Jetson Nano with a gamepad differs from that of Raspberry Pi. Follow the steps below to proceed:
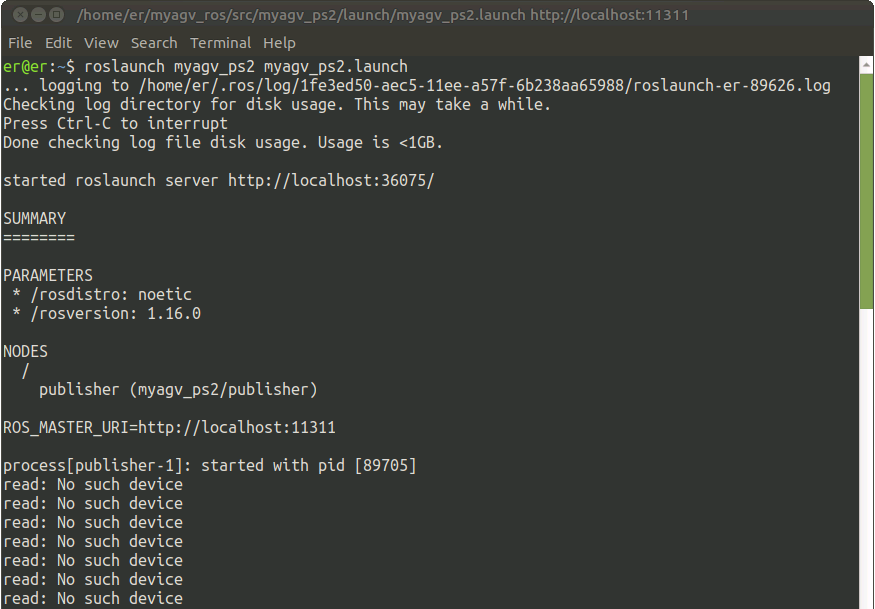
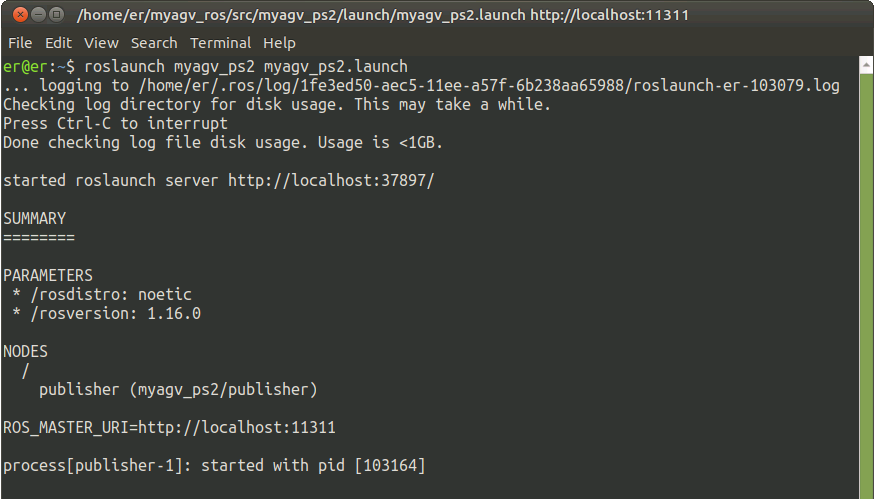
Step 1: Plug the USB receiver of the Bluetooth gamepad into the robot. Open a new terminal console, and type the following command in the command line:
cd myagv_ros
roslaunch myagv_ps2 myagv_ps2.launch
At this point, you may encounter the terminal showing: "read: No such device," while the gamepad's indicator light is green.

Step 2: Requires holding down the MODE button for three seconds to switch to POWER mode. At this point, the gamepad's indicator light will turn red.
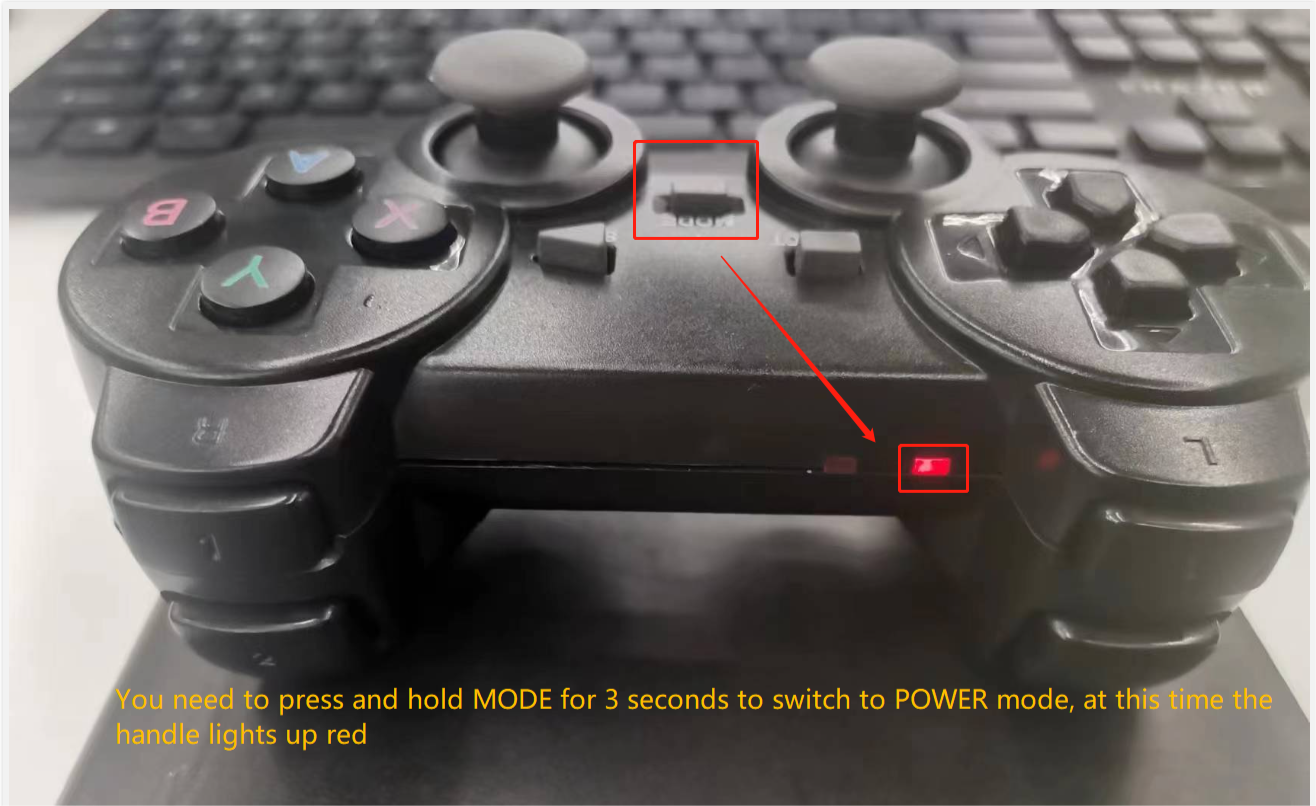
Step three involves closing the myagv_ps2.launch program for the gamepad by pressing Ctrl+C on the keyboard, then relaunching the myagv_ps2.launch program using the command "roslaunch myagv_ps2 myagv_ps2.launch". Now you can begin controlling with the gamepad.
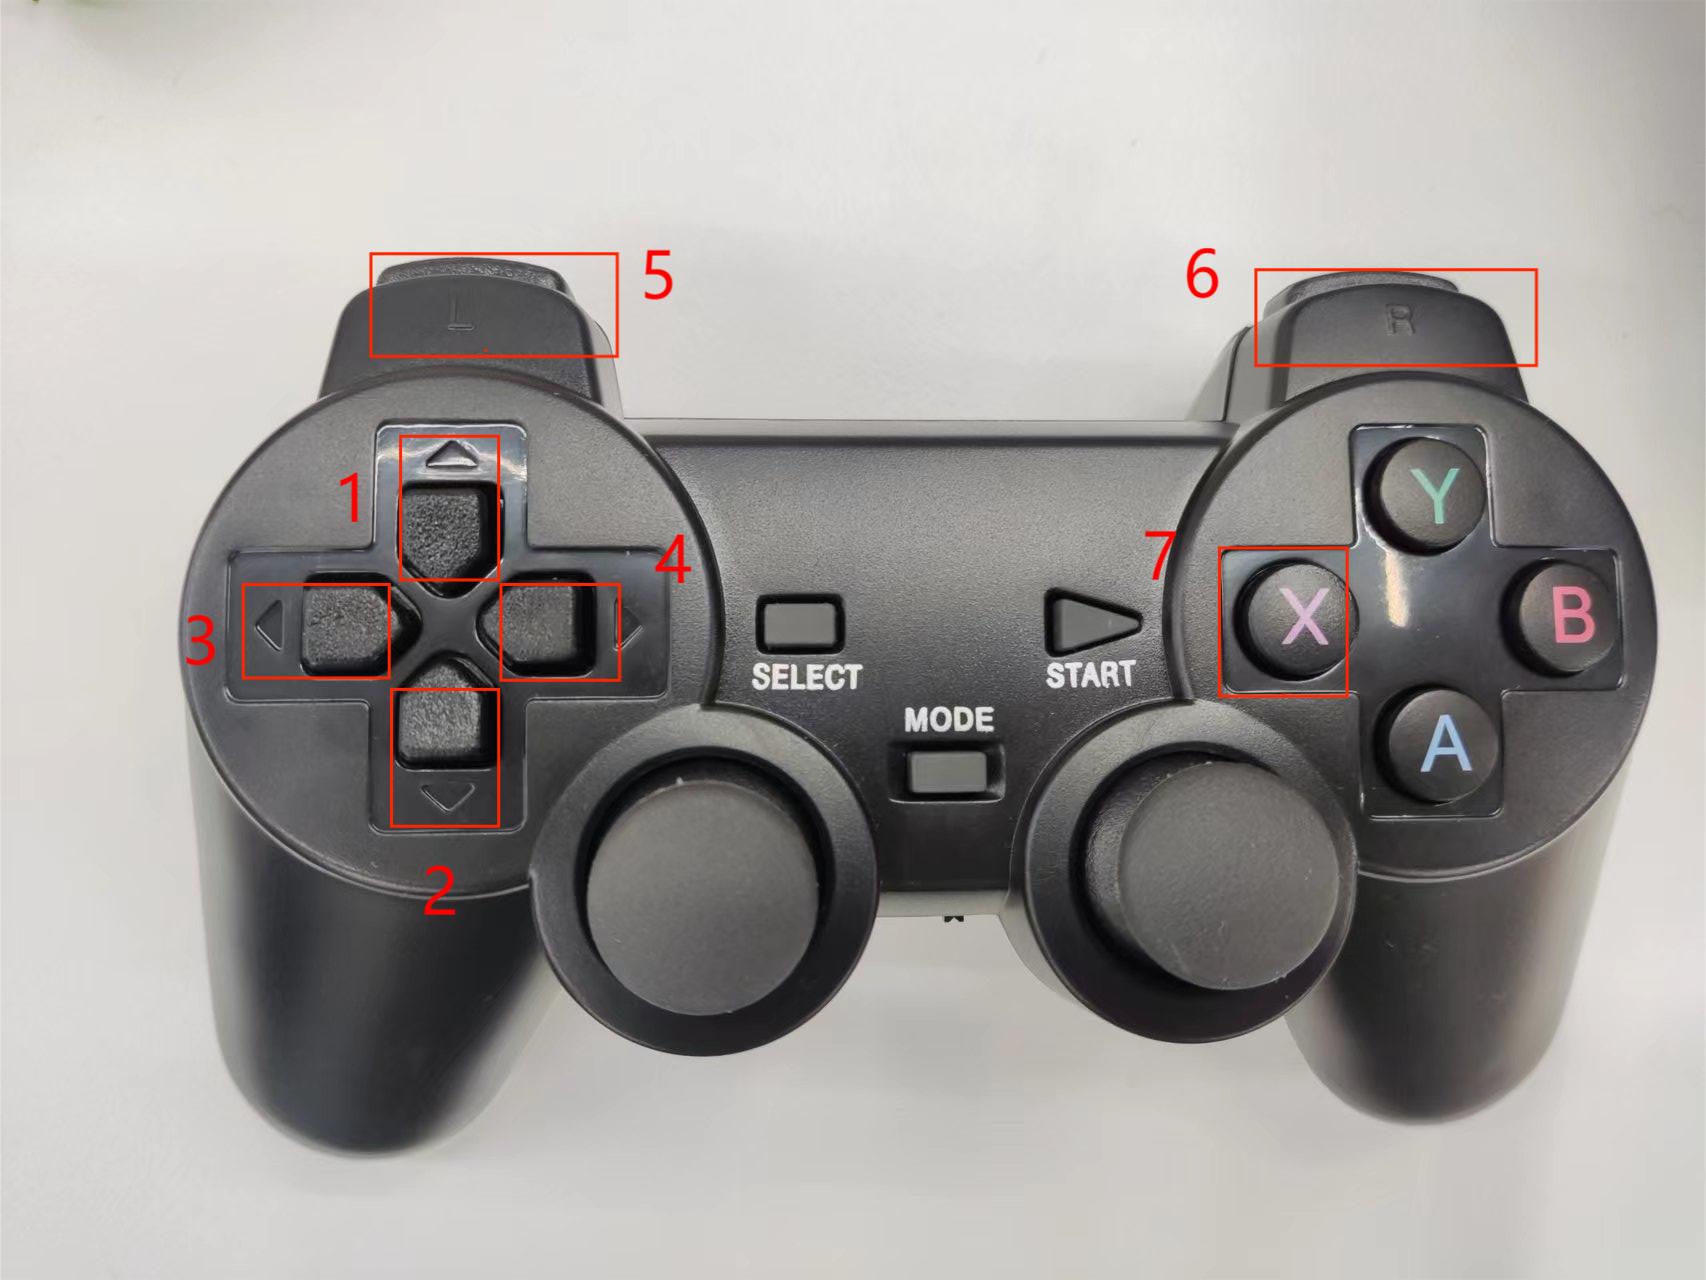
If you have reached this point successfully, you can now control the car's movement using the gamepad. The gamepad has 7 buttons to control the car's movement, as shown in the figure: 1~4 control the car's forward, backward, left, and right movement, 5 controls counterclockwise rotation, 6 controls clockwise rotation, and 7 is the stop button.
Gamepad Two
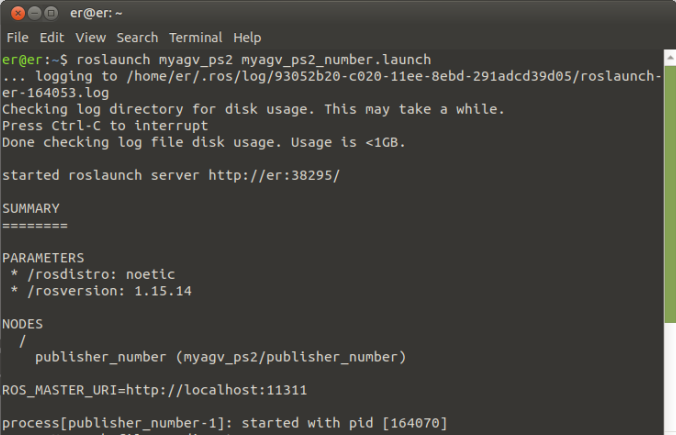
Insert the USB receiver of the Bluetooth gamepad into the car. Open a new terminal console, and enter the following command in the command line:
cd myagv_ros
roslaunch myagv_ps2 myagv_ps2_number.launch
If you encounter an error stating that the
myagv_ps2_number.launchfile cannot be found, please visit GitHub to download the latest ROS package and reinstall it for use.
If you've reached this point successfully, you can now control the car's movement using the gamepad. The gamepad has 7 buttons to control the car's movement, as shown in the figure: 1~4 control the car's forward, backward, left, and right movement, 5 controls counterclockwise rotation, 6 controls clockwise rotation, and 7 is the stop button.
