Learning To Use Coordinate Control
Before You Begin
1. Ensure the robot is powered on
2. Ensure the robot server is running
3. Ensure the robot is at zero position
This chapter describes how to use coordinates to control the robotic arm.
Mainly Covered APIs:
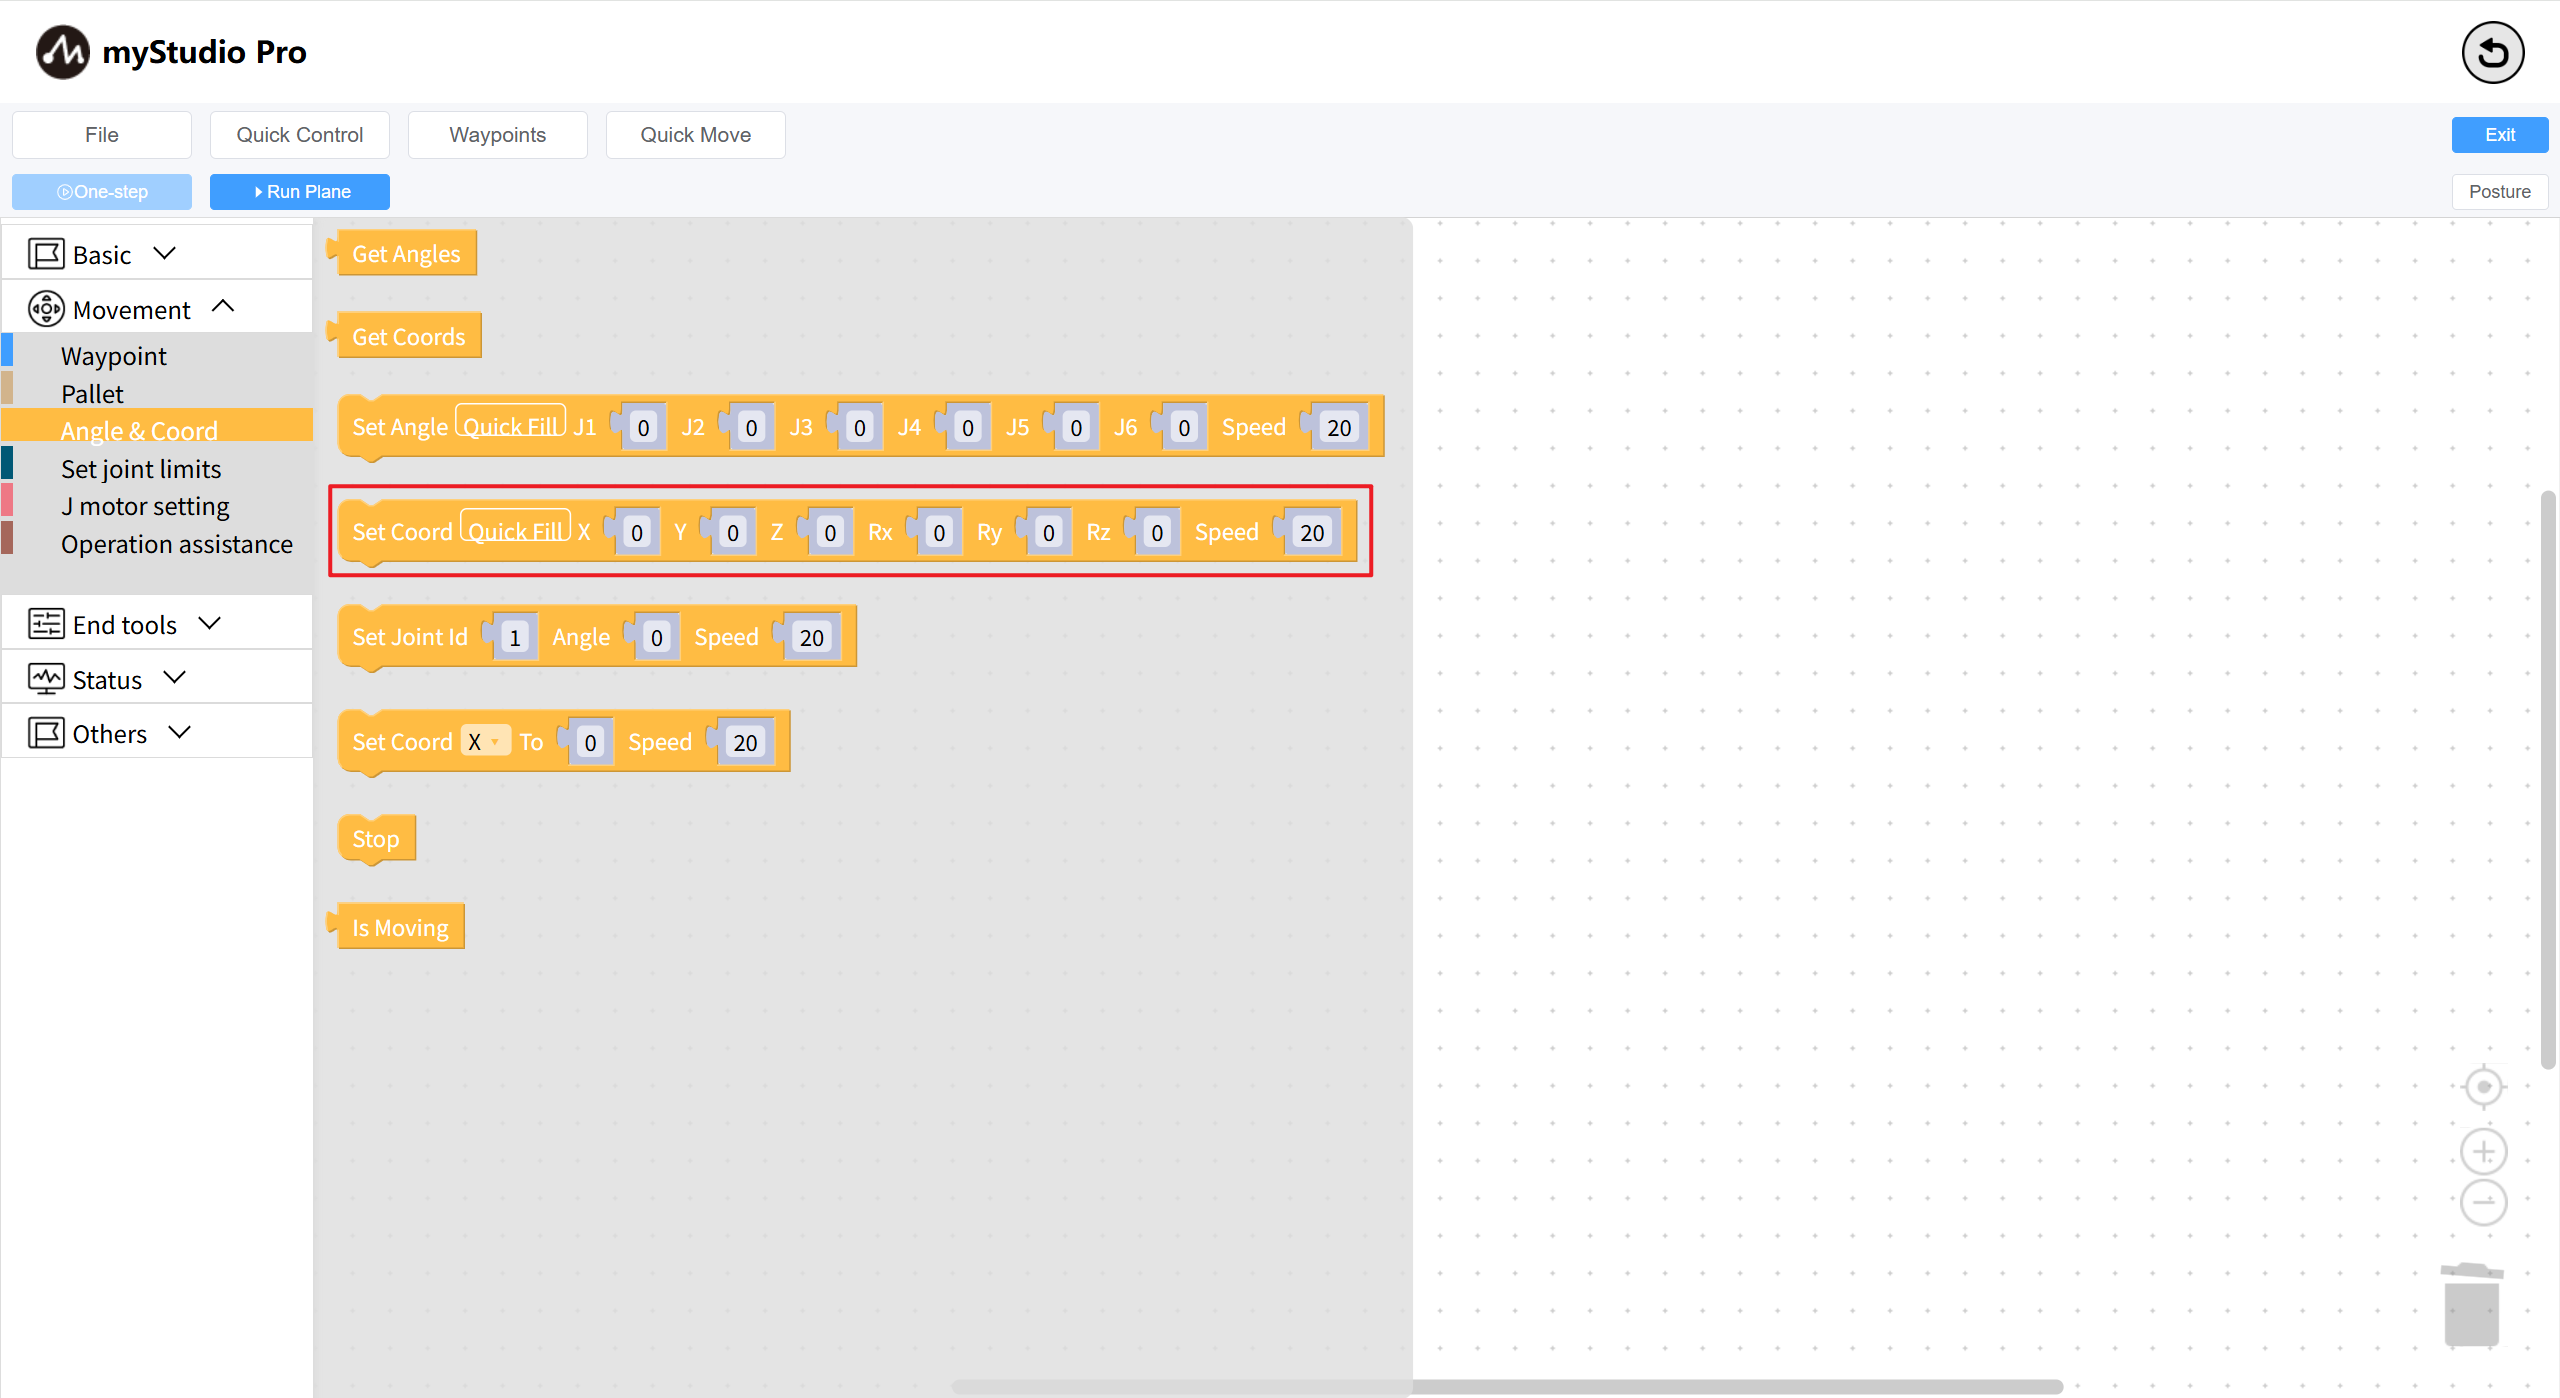
Set Coordinates
Prototype:
send_coords(values,speed)Interface Description: Set multiple coordinates for the robotic arm
Parameters:
values: [X, Y, Z, RX, RY, RZ]
speed: Speed, range: 1-100
Small Case
Before using coordinate movement for the first time, some steps are required:
Return the robotic arm to its zero position. For details, refer to Controlling the Robotic Arm to Return to Zero
Set the initial pose for the robotic arm's coordinate movement (J3 of the robot must be parallel to the ground)
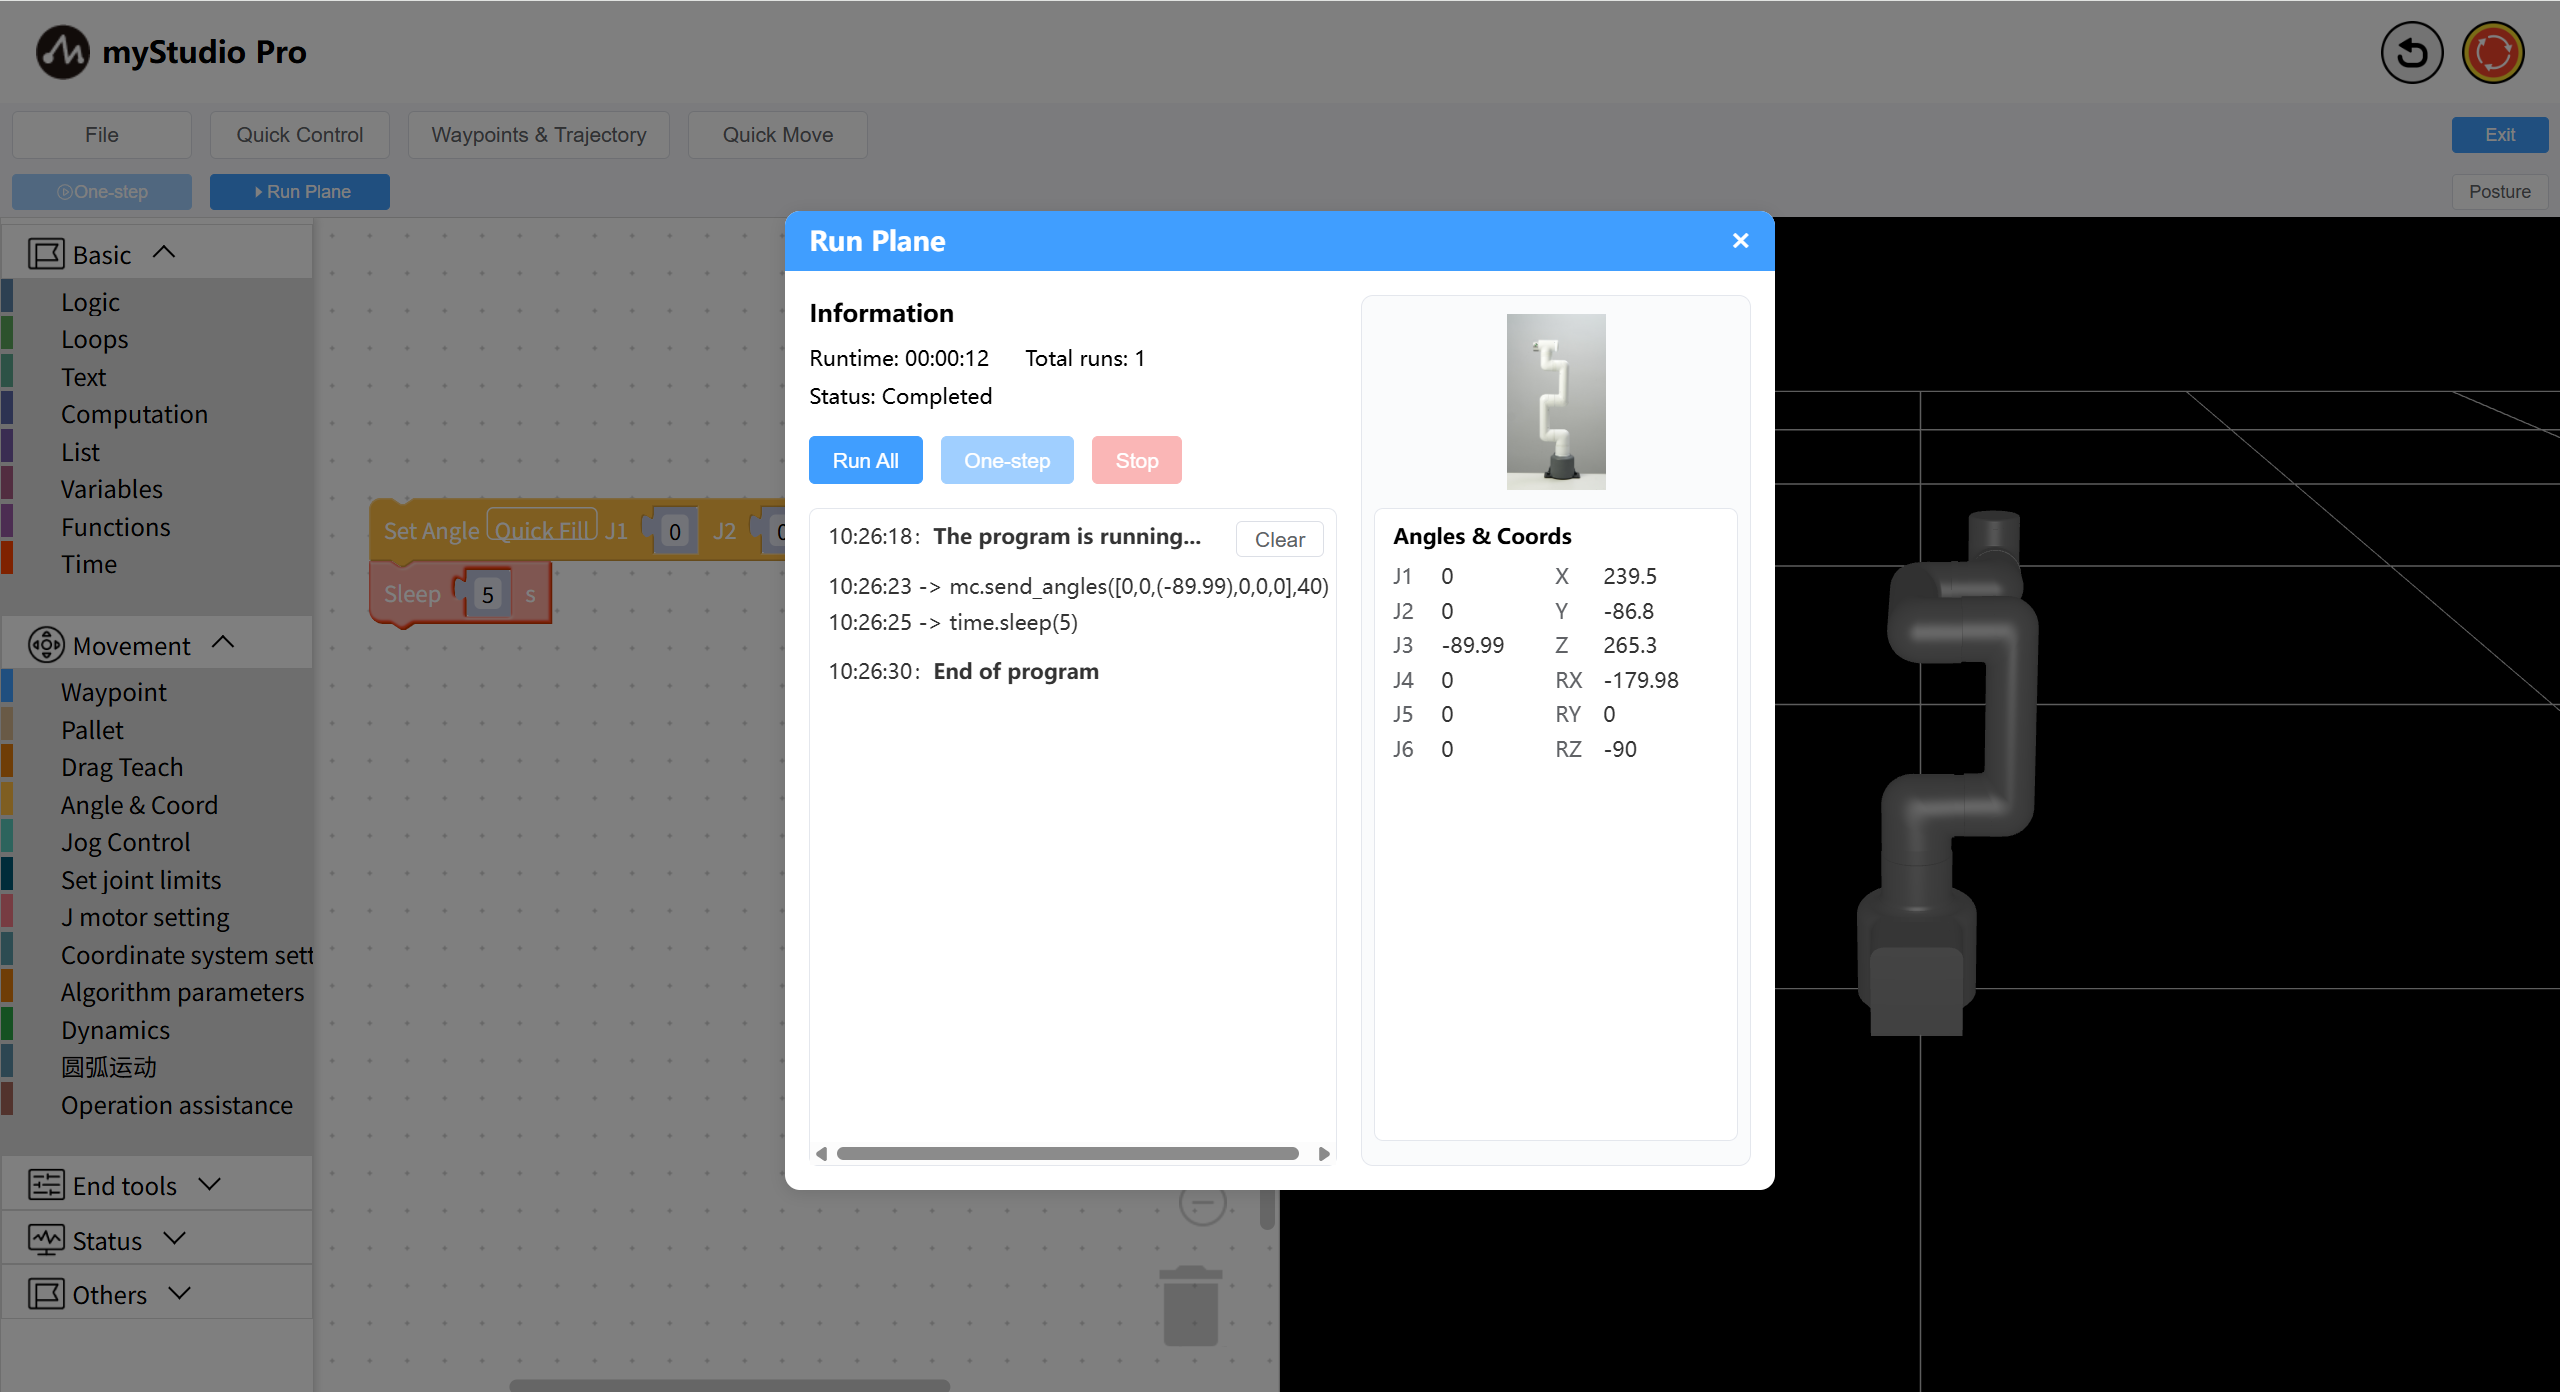
As shown in the code below:
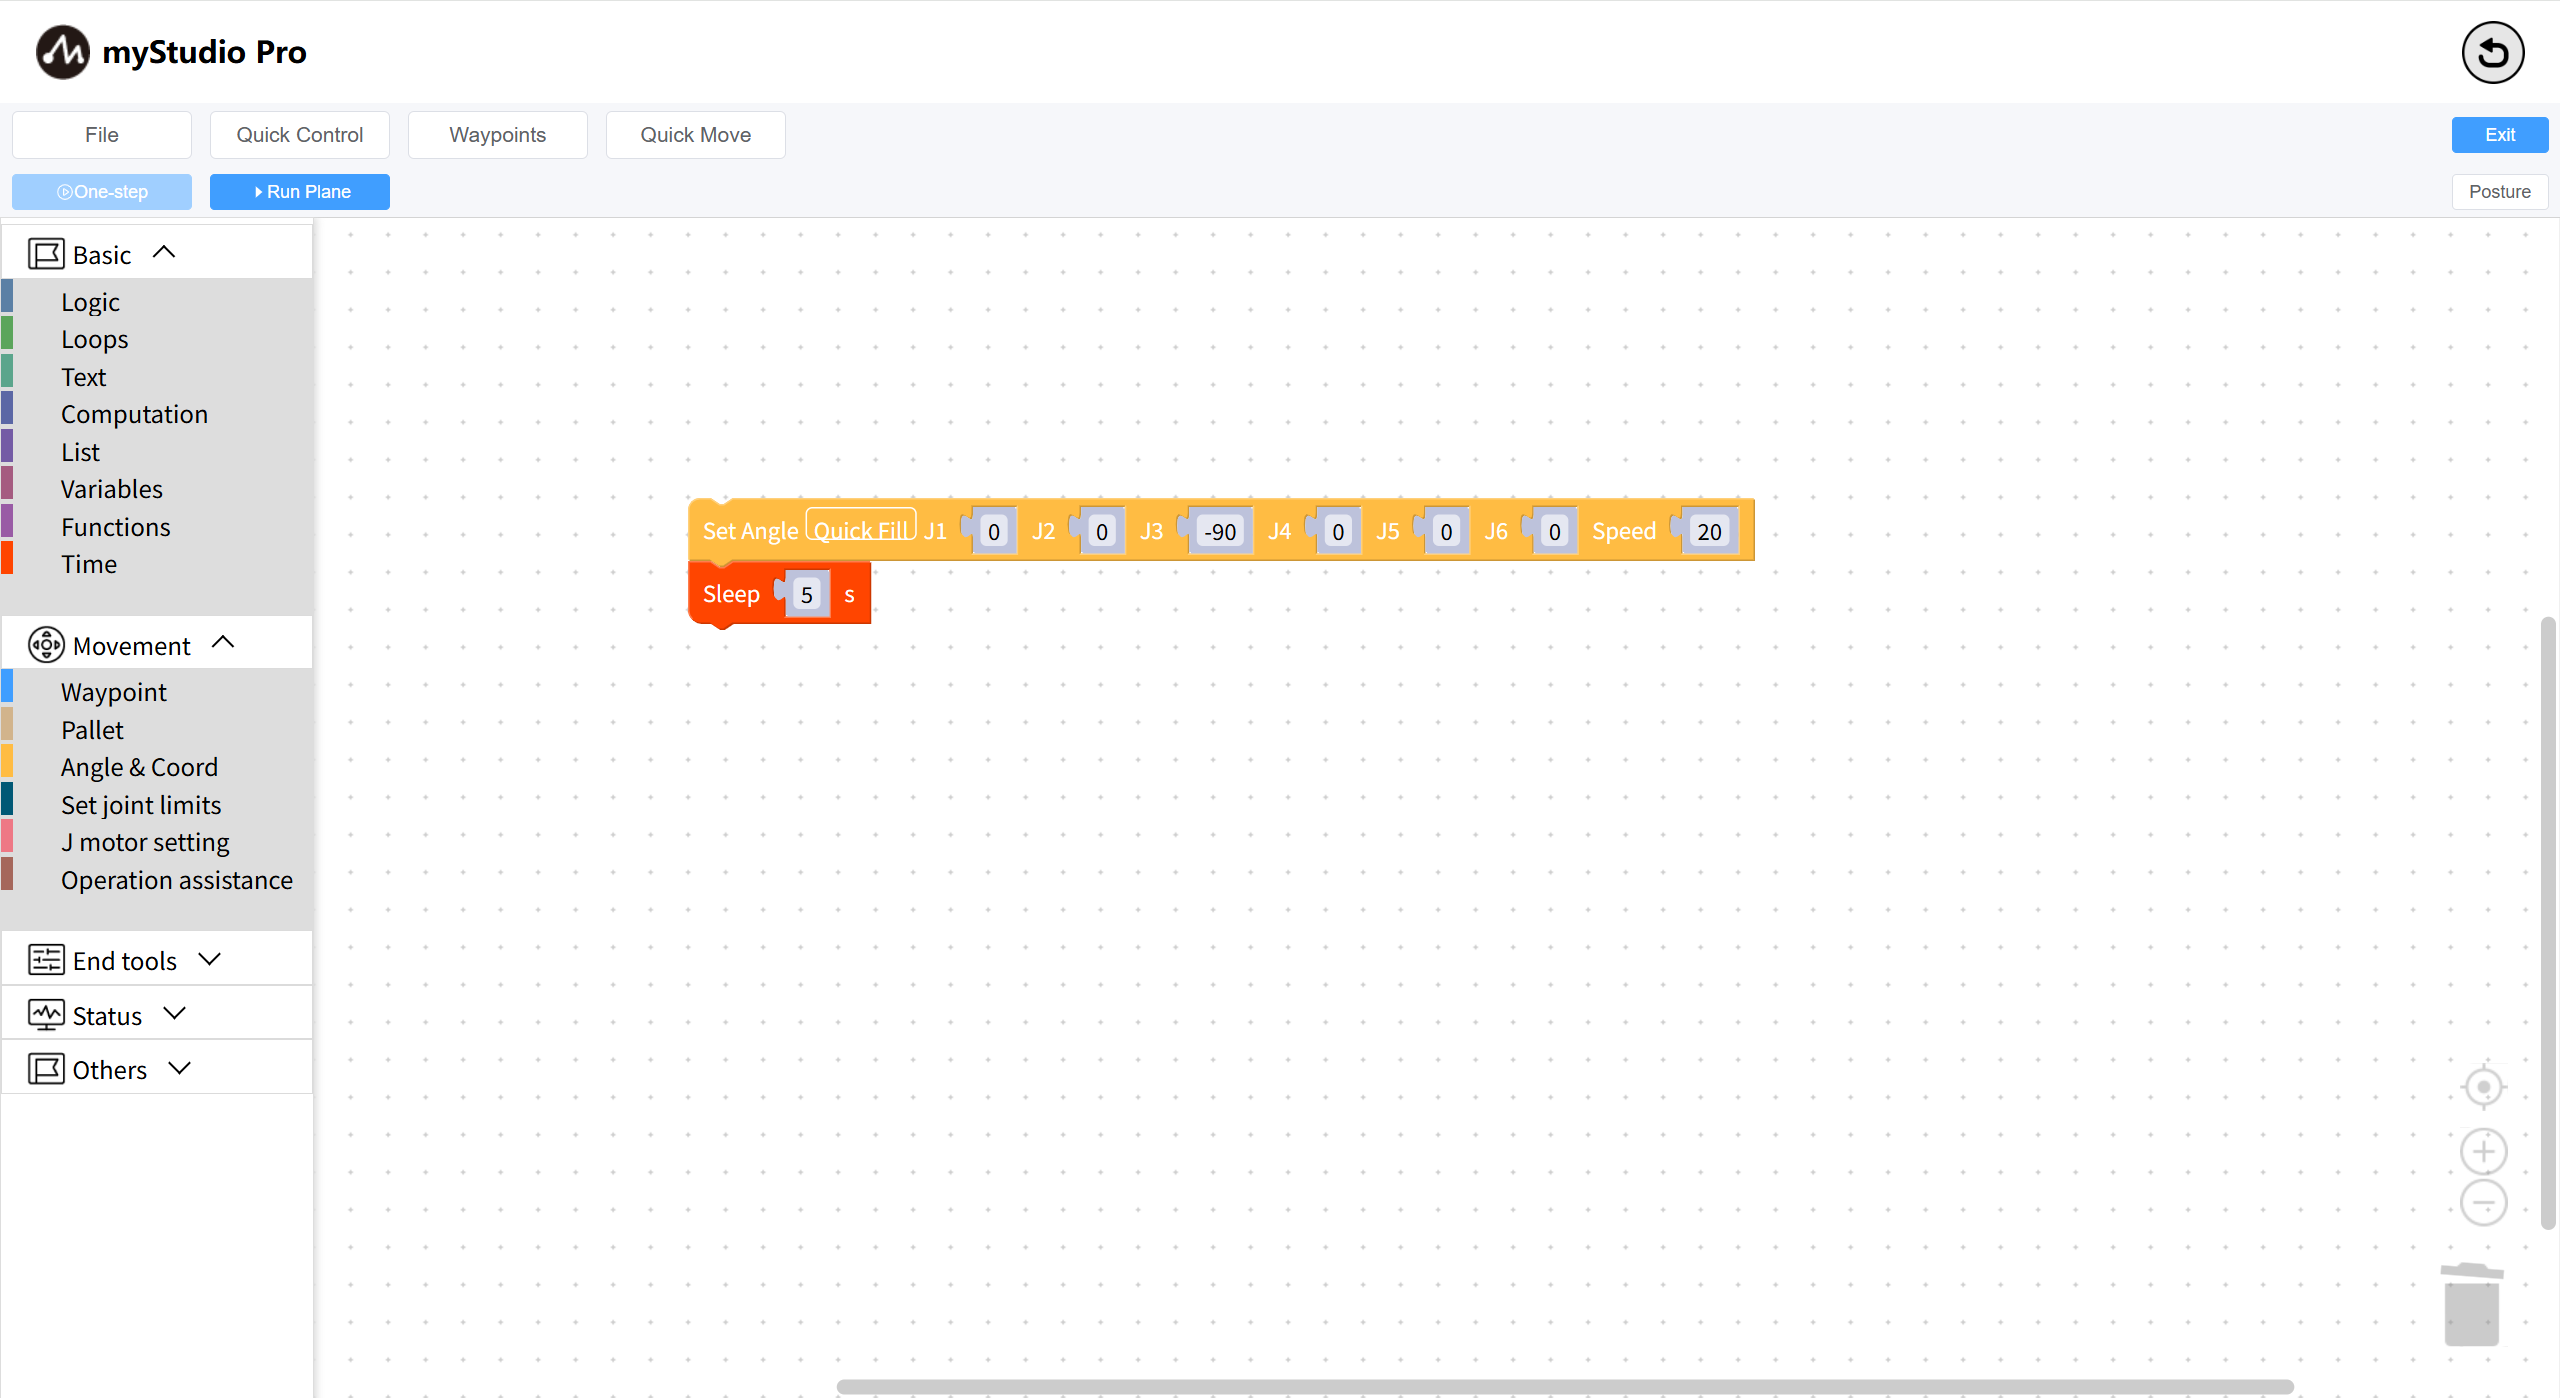
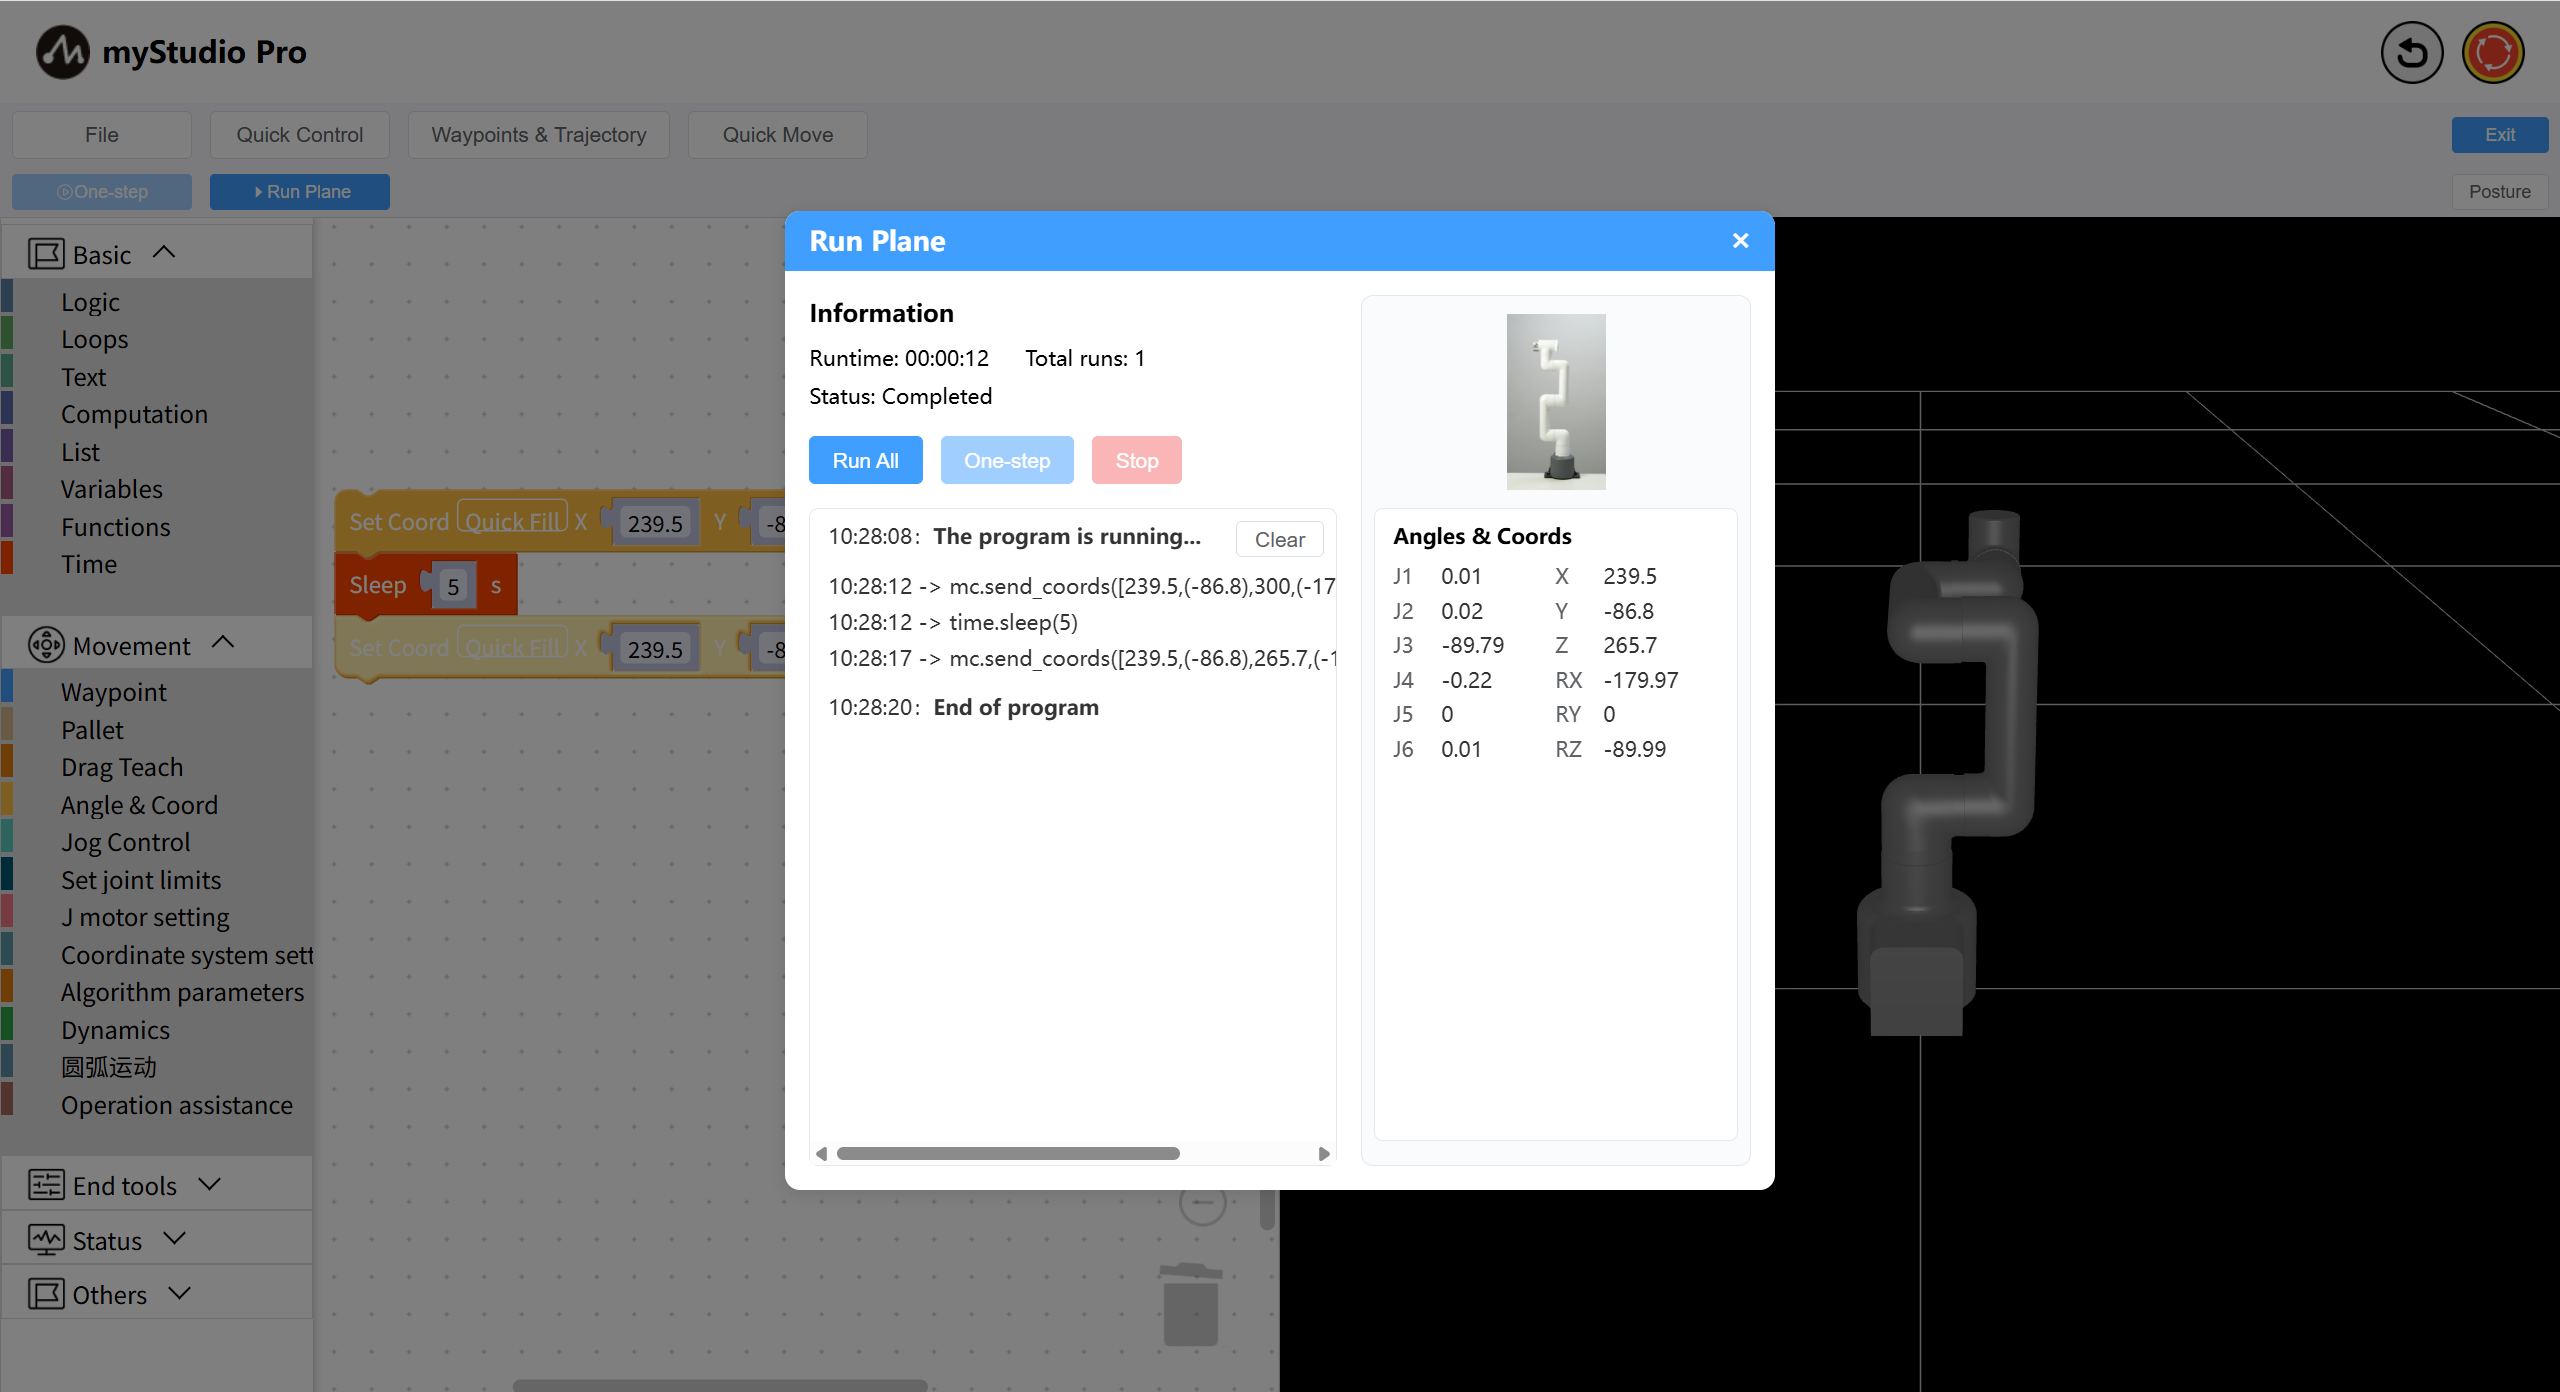
Open the Run Panel and run the code.
Coordinate Movement
Drag a Set Coordinates block onto the workspace and click the Quick Fill button to fill in the data. Change the Z axis data to 300.
The complete code is as follows:
Execute the code and observe the robot arm moving up and down.