Control and following of the robot arm
1 Slider Control
Click the ROS1 Shell icon on the desktop or the corresponding icon in the lower bar of the desktop to open the ROS1 environment terminal:


Then run the command:
Note: If the end effector uses myGripper F100 force-controlled gripper, the version of the pymycobot driver library must be greater than 3.6.4
# The default serial port name of 2022 mycobot 320-Pi version is "/dev/ttyAMA0", and the baud rate is 115200.
roslaunch new_mycobot_320_pi mycobot_320_slider.launch port:=/dev/ttyAMA0 baud:=115200

# If the end is equipped with a Pro adaptive gripper, run:
roslaunch new_mycobot_320_pi mycobot_320_gripper_slider.launch

# If the end is equipped with a myGripper F100 force-controlled gripper, run:
roslaunch new_mycobot_320_pi mycobot_320_force_gripper_slider.launch
rviz and a slider component will be opened, and you will see the following interface:
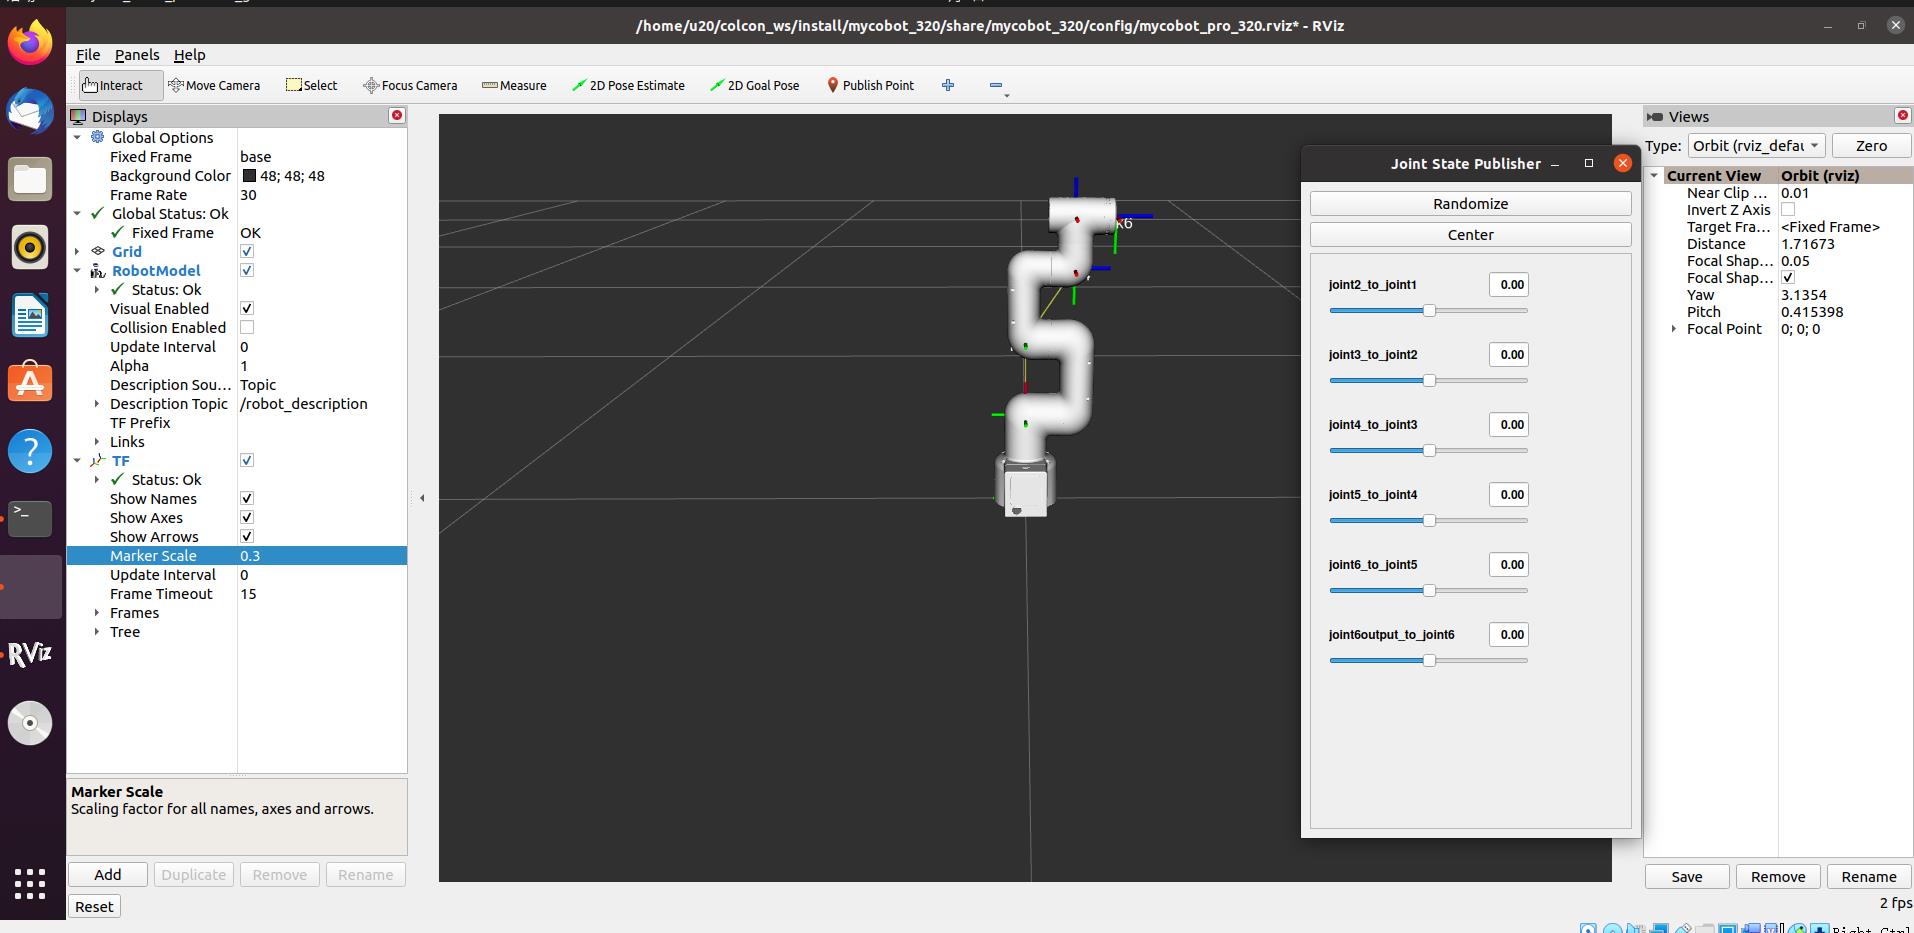
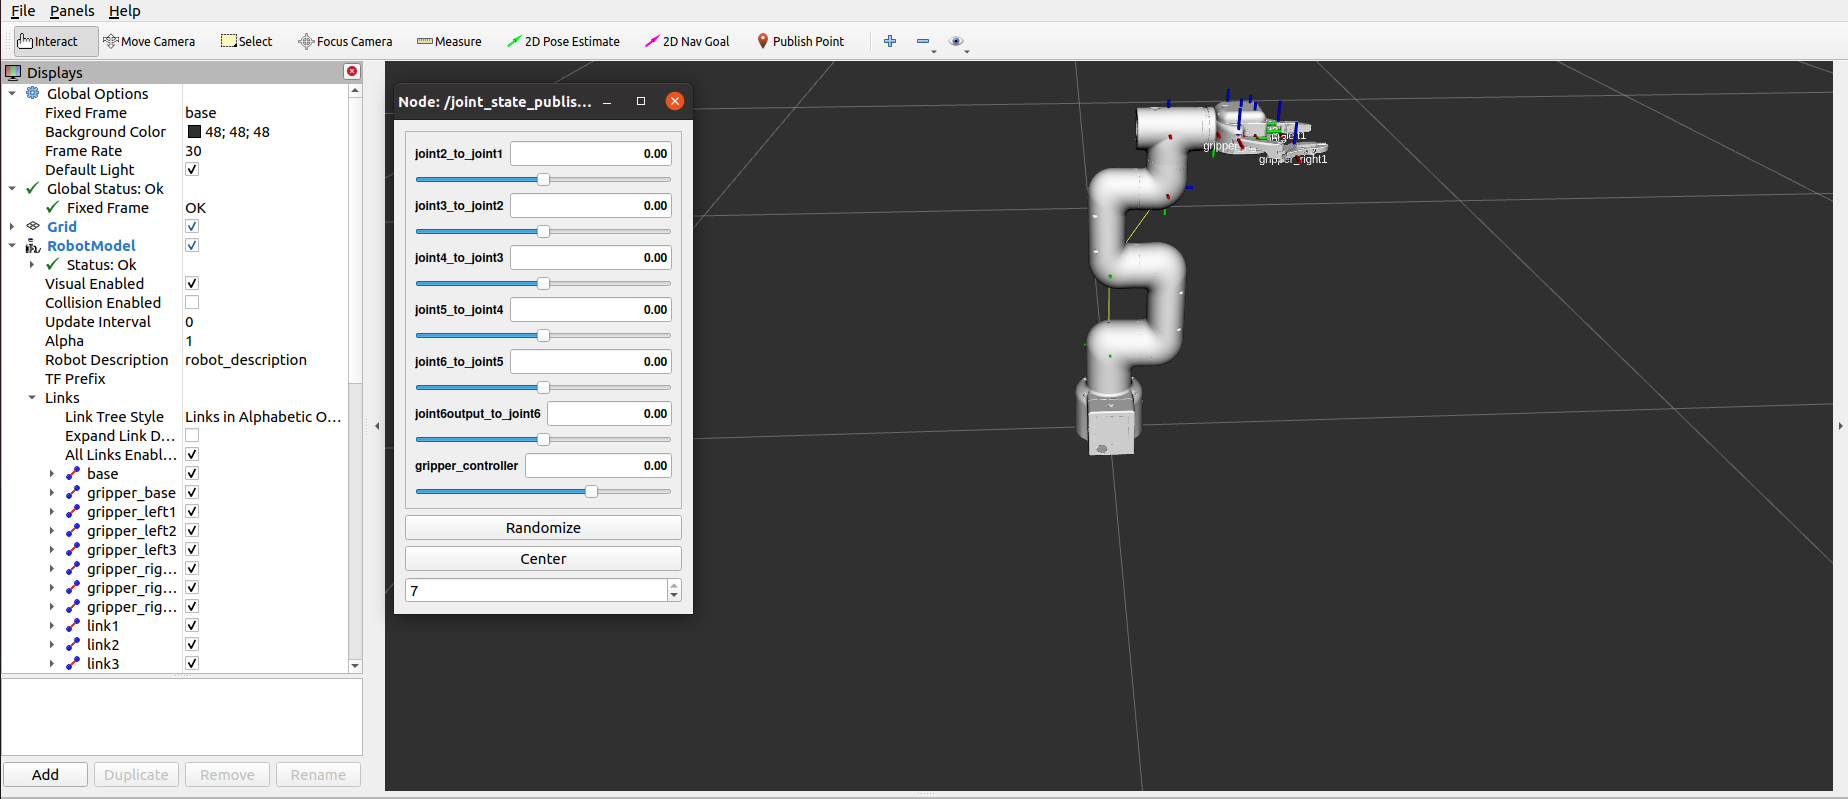
If the Pro adaptive gripper is installed at the end, you will see the following interface:
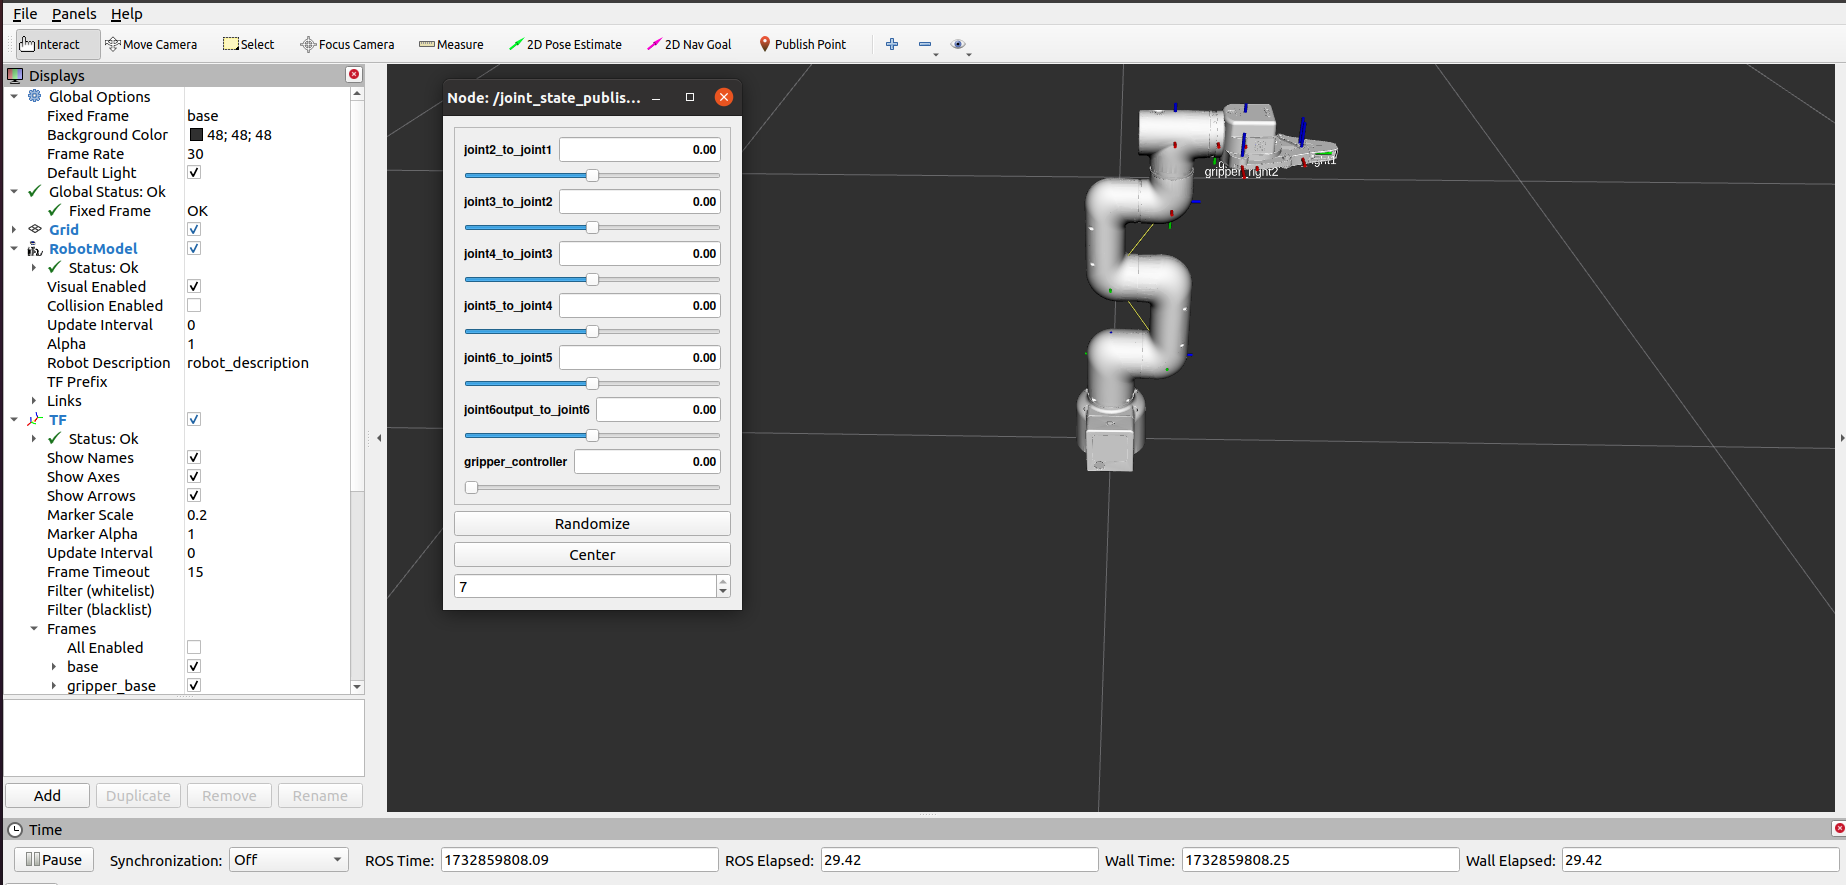
If the myGripper F100 force-controlled gripper is installed at the end, you will see the following interface:
Then you can control the model in rviz to make it move by dragging the slider. If you want the real mycobot to move with the model, you need to open another ROS1 environment terminal:


Then run the command:
Note: If the end effector uses myGripper F100 force-controlled gripper, the version of the pymycobot driver library must be greater than 3.6.4
# The default serial port name of 2022 mycobot 320-Pi version is "/dev/ttyAMA0", and the baud rate is 115200.
rosrun new_mycobot_320_pi mycobot_320_slider.py _port:=/dev/ttyAMA0 _baud:=115200

# If the end is equipped with a Pro adaptive gripper, run:
rosrun new_mycobot_320_pi mycobot_320_gripper_slider.py

# If the end is equipped with a myGripper F100 force-controlled gripper, run:
rosrun new_mycobot_320_pi mycobot_320_force_gripper_slider.py
Note: Since the robot arm will move to the current position of the model when the command is input, make sure that the model in rviz does not appear to be worn out before you use the command.
Do not drag the slider quickly after connecting the robot arm to prevent damage to the robot arm.
2 Model Following
In addition to the above controls, we can also let the model move by following the real robot arm. Open a ROS1 environment terminal:


Then run the command:
# The default serial port name of 2022 mycobot 320-Pi version is "/dev/ttyAMA0", and the baud rate is 115200.
rosrun new_mycobot_320_pi mycobot_320_follow_display.py _port:=/dev/ttyAMA0 _baud:=115200
Then open another ROS1 environment terminal:


Then run the command:
roslaunch new_mycobot_320 mycobot_320_follow_display.launch
It will open rviz to show the model following effect.
3 GUI control
On the basis of the previous contents, this package also provides a simple GUI control interface. This method is used for interaction between real robot arms. Connect to mycobot.
Open a ROS1 environment terminal:


Then run the command:
# The default serial port name of 2022 mycobot 320-Pi version is "/dev/ttyAMA0", and the baud rate is 115200.
roslaunch new_mycobot_320_pi mycobot_320_simple_gui.launch port:=/dev/ttyAMA0 baud:=115200
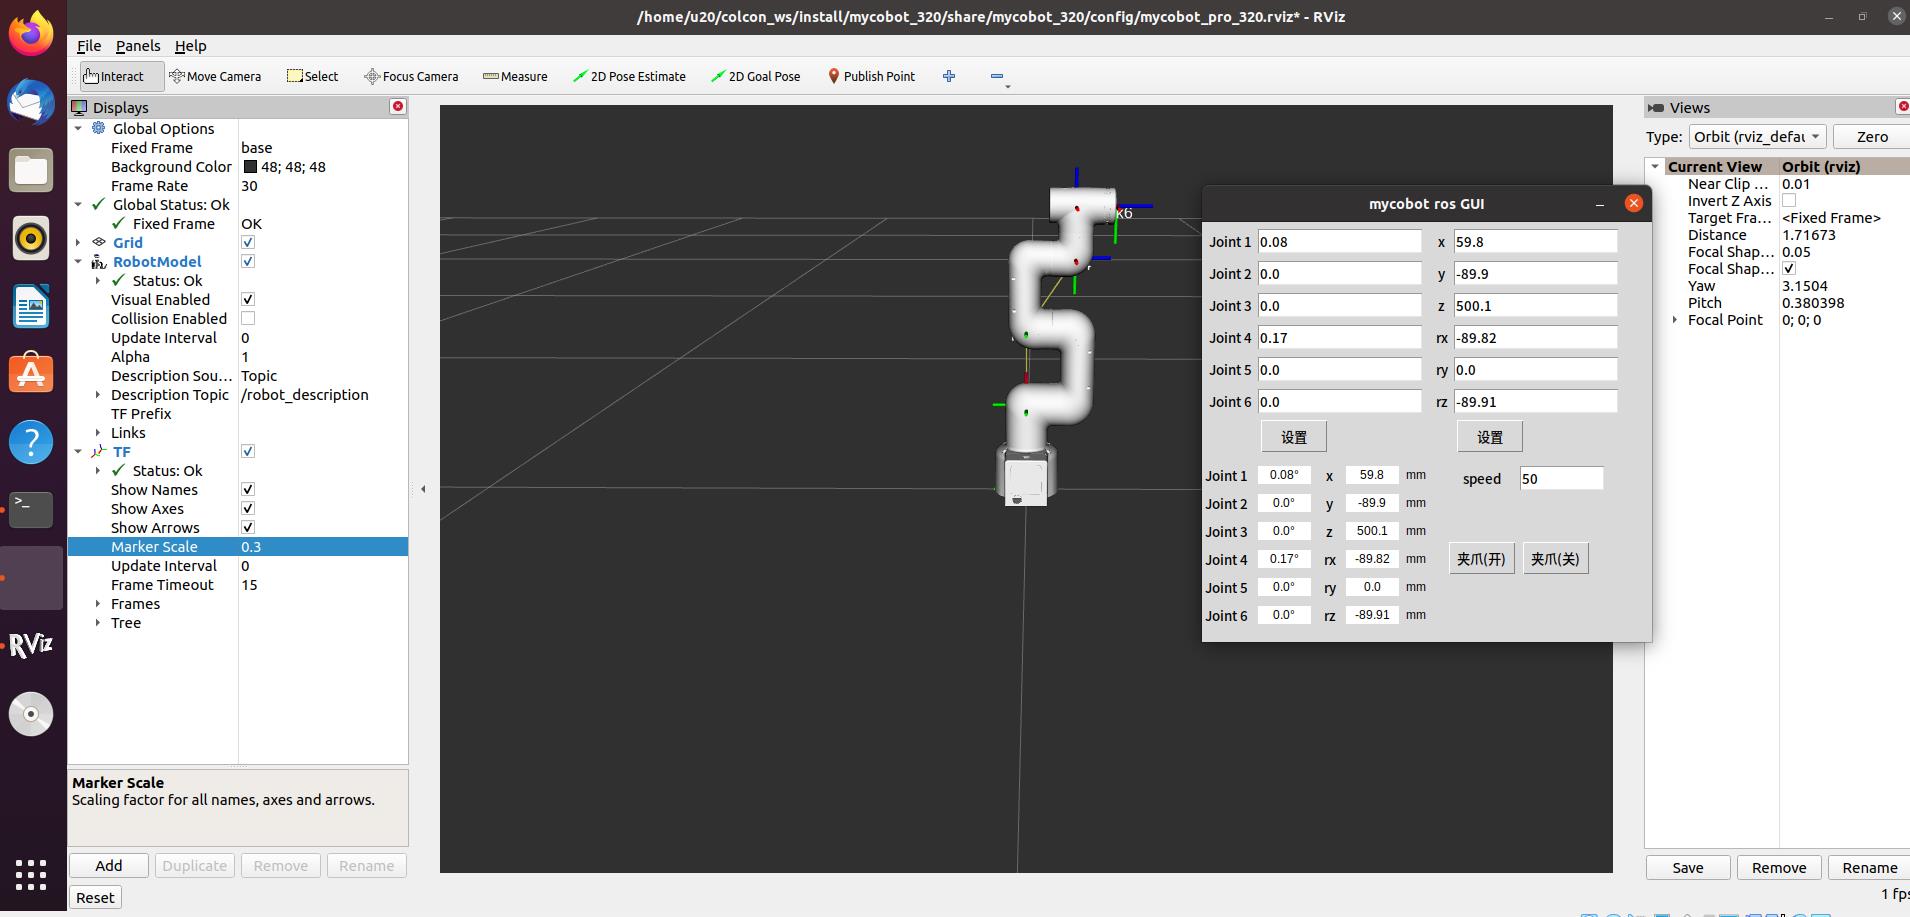
Note: Before using the gripper switch button, make sure the adaptive gripper is connected to the end of the robot arm.
4 Keyboard control
Keyboard control is added in new_mycobot_320_pi package, and real-time Synchronization is performed in rviz. This function depends on pythonApi, so be sure to connect with the real robot arm.
Open a ROS1 environment terminal:


Then run the command:
# The default serial port name of mycobot 320-Pi version is "/dev/ttyAMA0", and the baud rate is 115200.
roslaunch new_mycobot_320_pi mycobot_320_teleop_keyboard.launch port:=/dev/ttyAMA0 baud:=115200
Running effect is as follows:
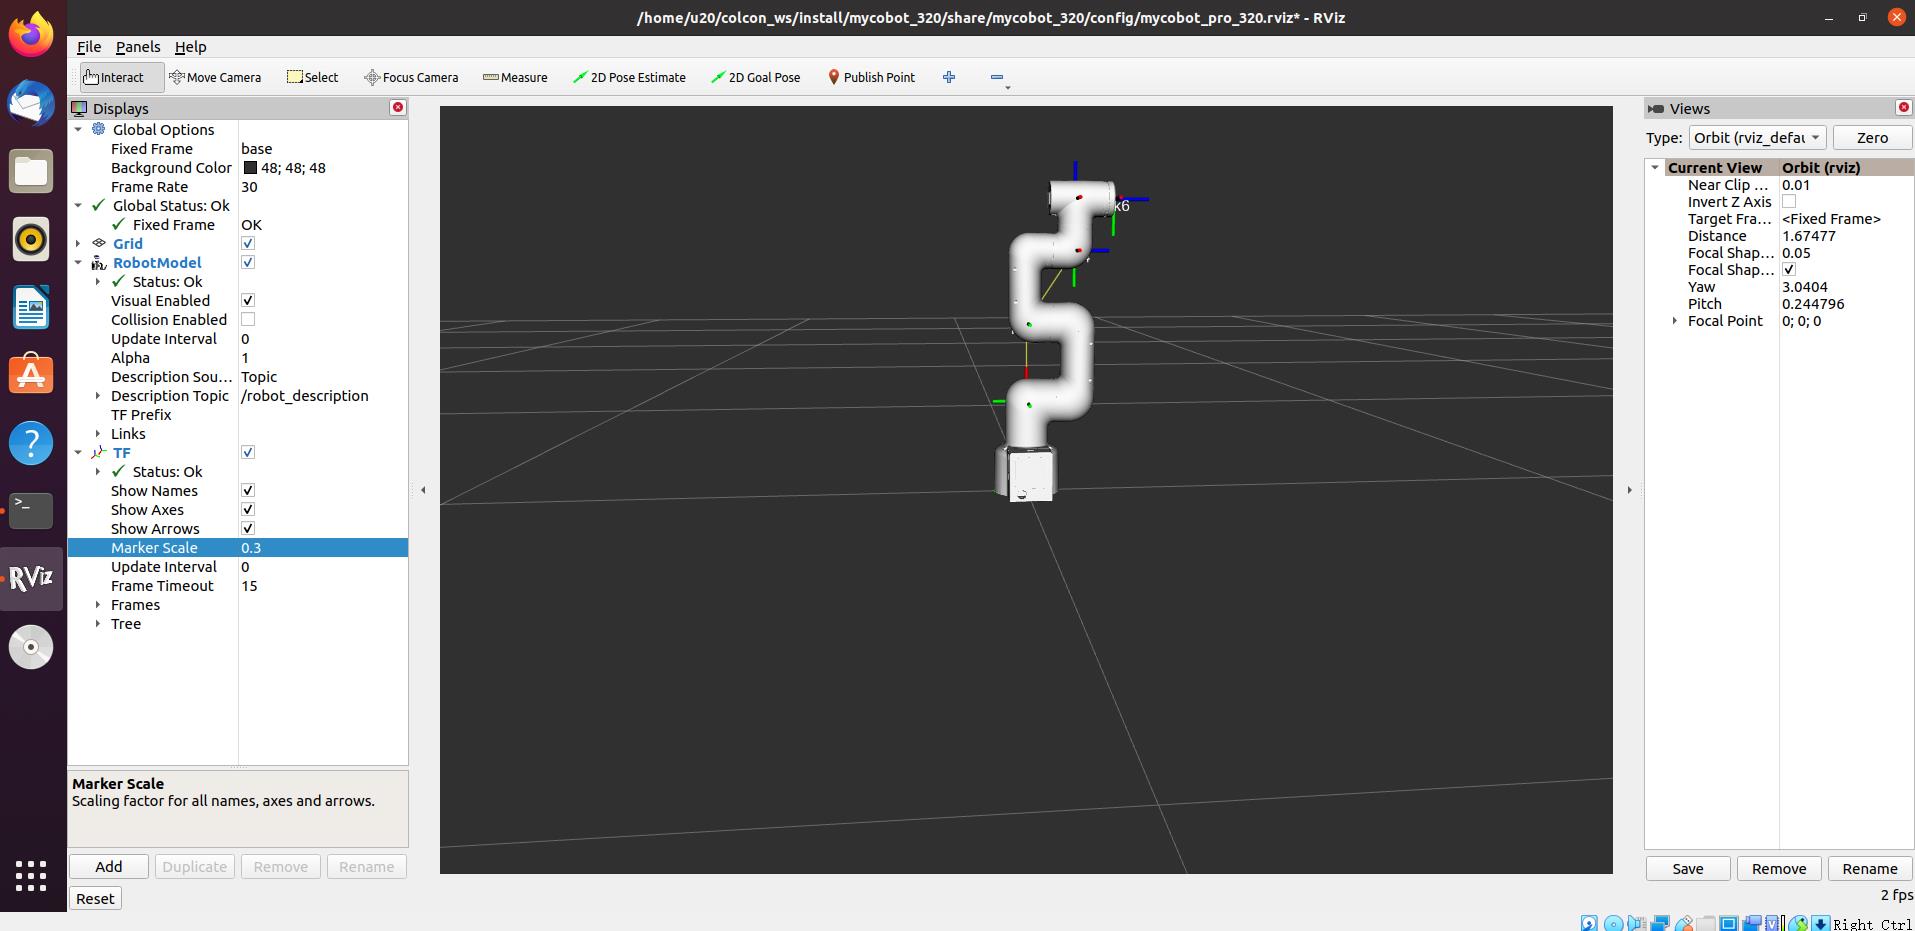
mycobot information will be output in the command line as follows:
SUMMARY
========

PARAMETERS
 * /mycobot_services/baud: 115200
 * /mycobot_services/port: /dev/ttyUSB0
 * /robot_description: <?xml version="1....
 * /rosdistro: kinetic
 * /rosversion: 1.12.1.17

NODES
  /
    mycobot_services (new_mycobot_320_pi/mycobot_services.py)
    real_listener (new_mycobot_320_pi/listen_real.py)
    robot_state_publisher (robot_state_publisher/state_publisher)
    rviz (rviz/rviz)

auto-starting new master
process[master]: started with pid [1333]
ROS_MASTER_URI=http://localhost:11311

setting /run_id to f977b3f4-b3a9-11eb-b0c8-d0c63728b379
process[rosout-1]: started with pid [1349]
started core service [/rosout]
process[robot_state_publisher-2]: started with pid [1357]
process[rviz-3]: started with pid [1367]
process[mycobot_services-4]: started with pid [1380]
process[real_listener-5]: started with pid [1395]
[INFO] [1620882819.196217]: start ...
[INFO] [1620882819.205050]: /dev/ttyUSB0,115200

MyCobot Status
--------------------------------
Joint Limit:
    joint 1: -165 ~ +165
    joint 2: -165 ~ +165
    joint 3: -165 ~ +165
    joint 4: -165 ~ +165
    joint 5: -165 ~ +165
    joint 6: -175 ~ +175

Connect Status: True

Servo Infomation: all connected

Servo Temperature: unknown

Atom Version: unknown

[INFO] [1620882819.435778]: ready
Then open another ROS1 environment terminal:


Then run the command:
rosrun new_mycobot_320_pi mycobot_320_teleop_keyboard.py
You will see the following output in the command line:
Mycobot Teleop Keyboard Controller
---------------------------
Movimg options(control coordinations [x,y,z,rx,ry,rz]):
              w(x+)

    a(y-)     s(x-)     d(y+)

    z(z-) x(z+)

u(rx+)   i(ry+)   o(rz+)
j(rx-)   k(ry-)   l(rz-)

Gripper control:
    g - open
    h - close

Other:
    1 - Go to init pose
    2 - Go to home pose
    3 - Resave home pose
    q - Quit

currently:      speed: 50       change percent 5
In this terminal, you can control the state of the robot arm and move it using the keys in the command line.
Parameters supported by this script:
- _speed: the movement speed of the robot arm
- _change_percent: movement distance percentage
5 moveit use
mycobot_ros has integrated the MoveIt section.
Note: If the end effector uses myGripper F100 force-controlled gripper, the version of the pymycobot driver library must be greater than 3.6.4
Open the command line and run:
roslaunch new_mycobot_320_pi_moveit mycobot320_moveit.launch

# If the Pro adaptive gripper is installed at the end, run:
roslaunch new_mycobot_320_pi_gripper_moveit mycobot320_gripper_moveit.launch

# If the myGripper F100 force-controlled gripper is installed at the end, run:
roslaunch new_mycobot_320_pi_force_gripper_moveit mycobot320_force_gripper_moveit.launch
The operation effect is as follows:
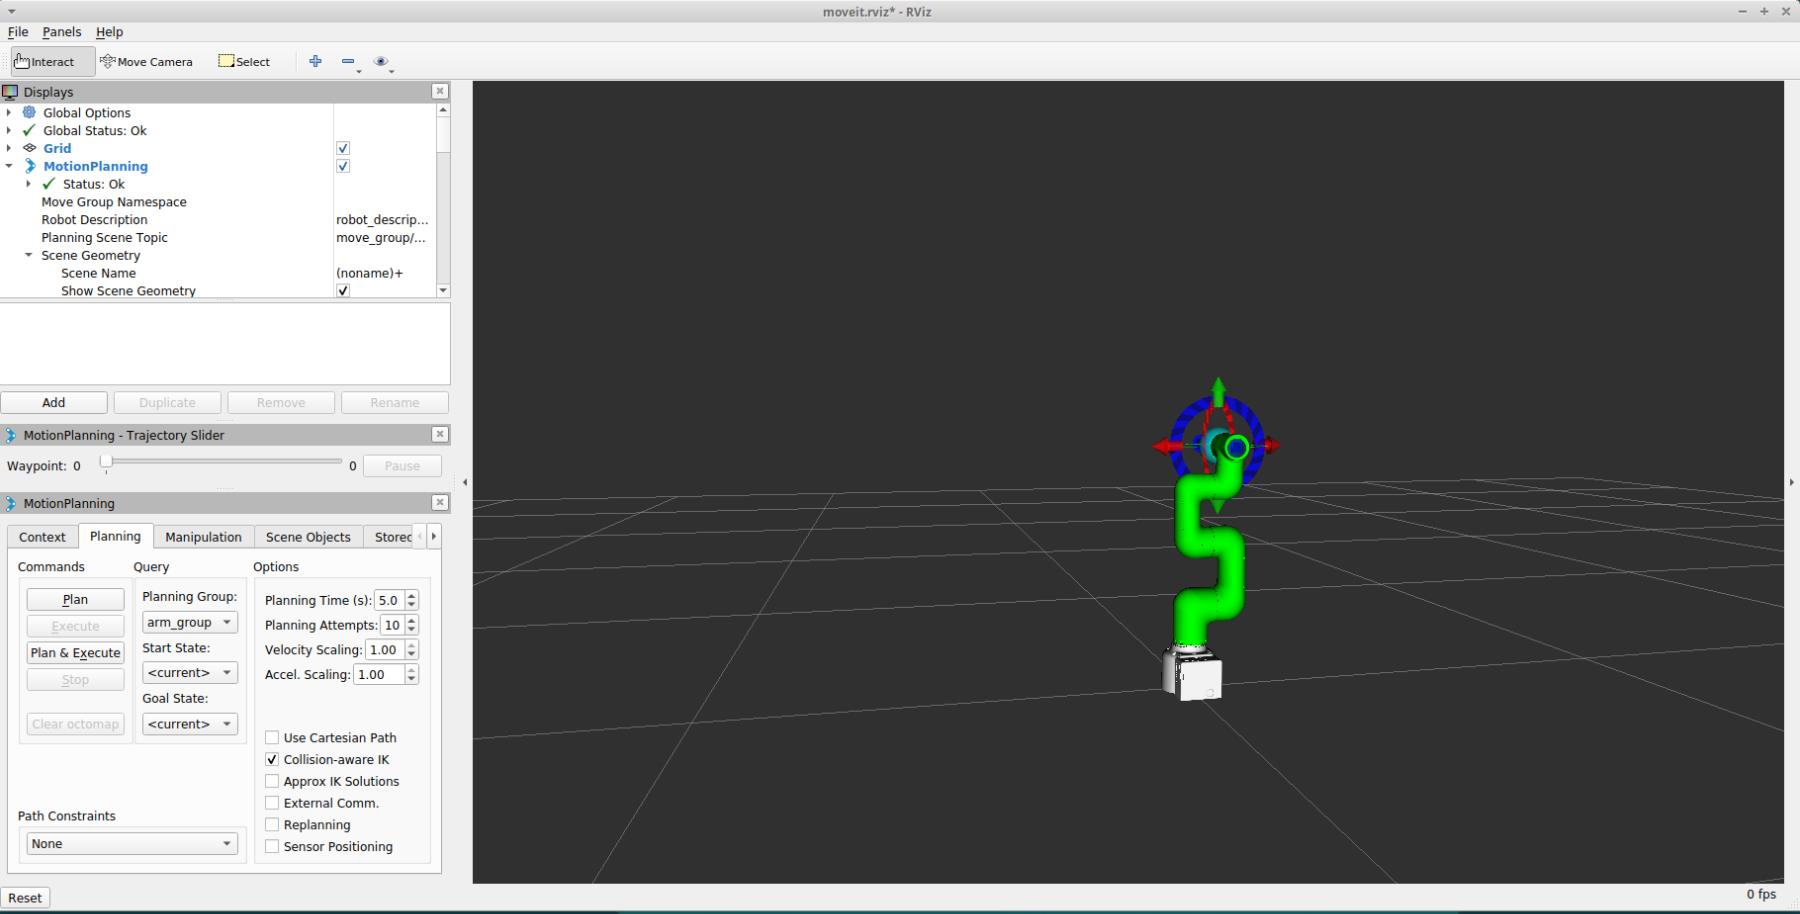
If the end is equipped with a Pro adaptive gripper, the operation effect is as follows:
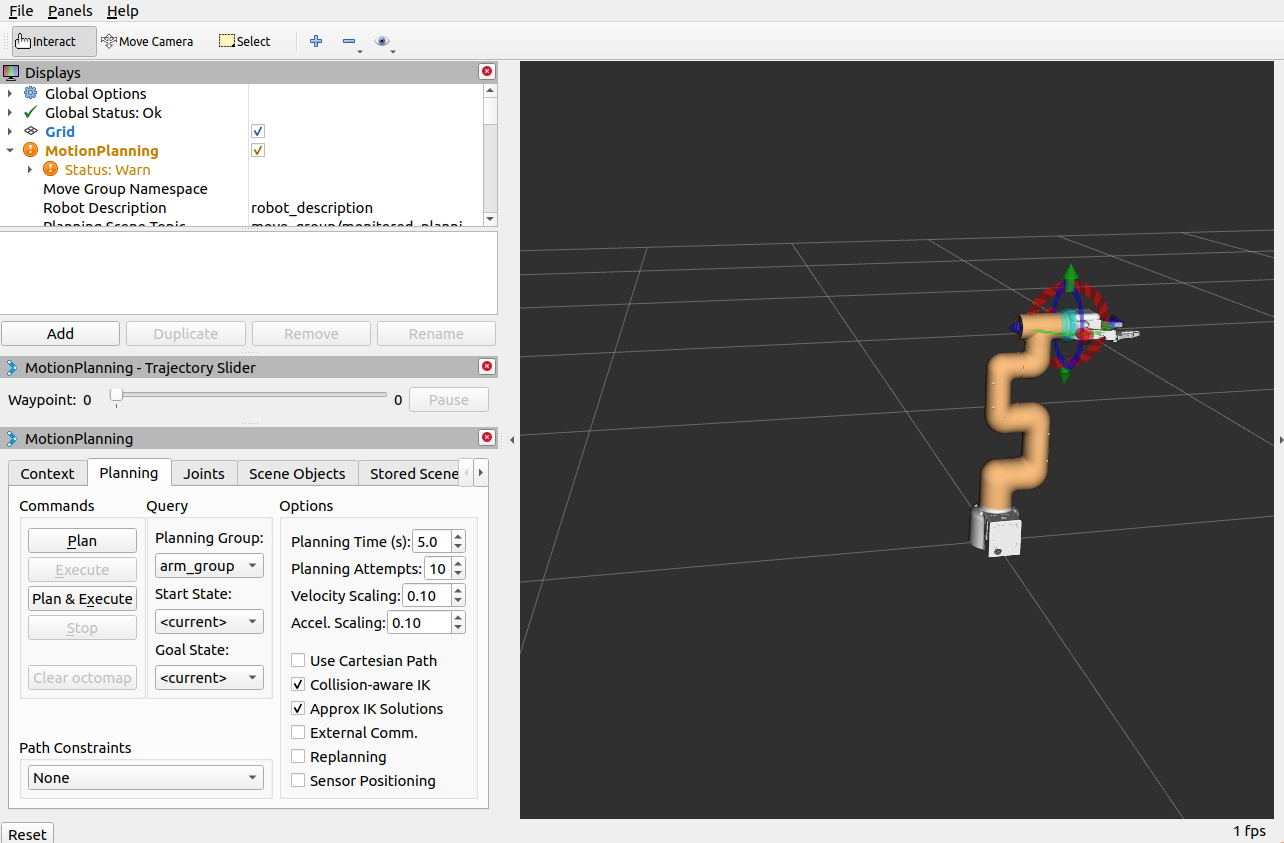 >
>
If the end is equipped with a myGripper F100 force-controlled gripper, the operation effect is as follows:
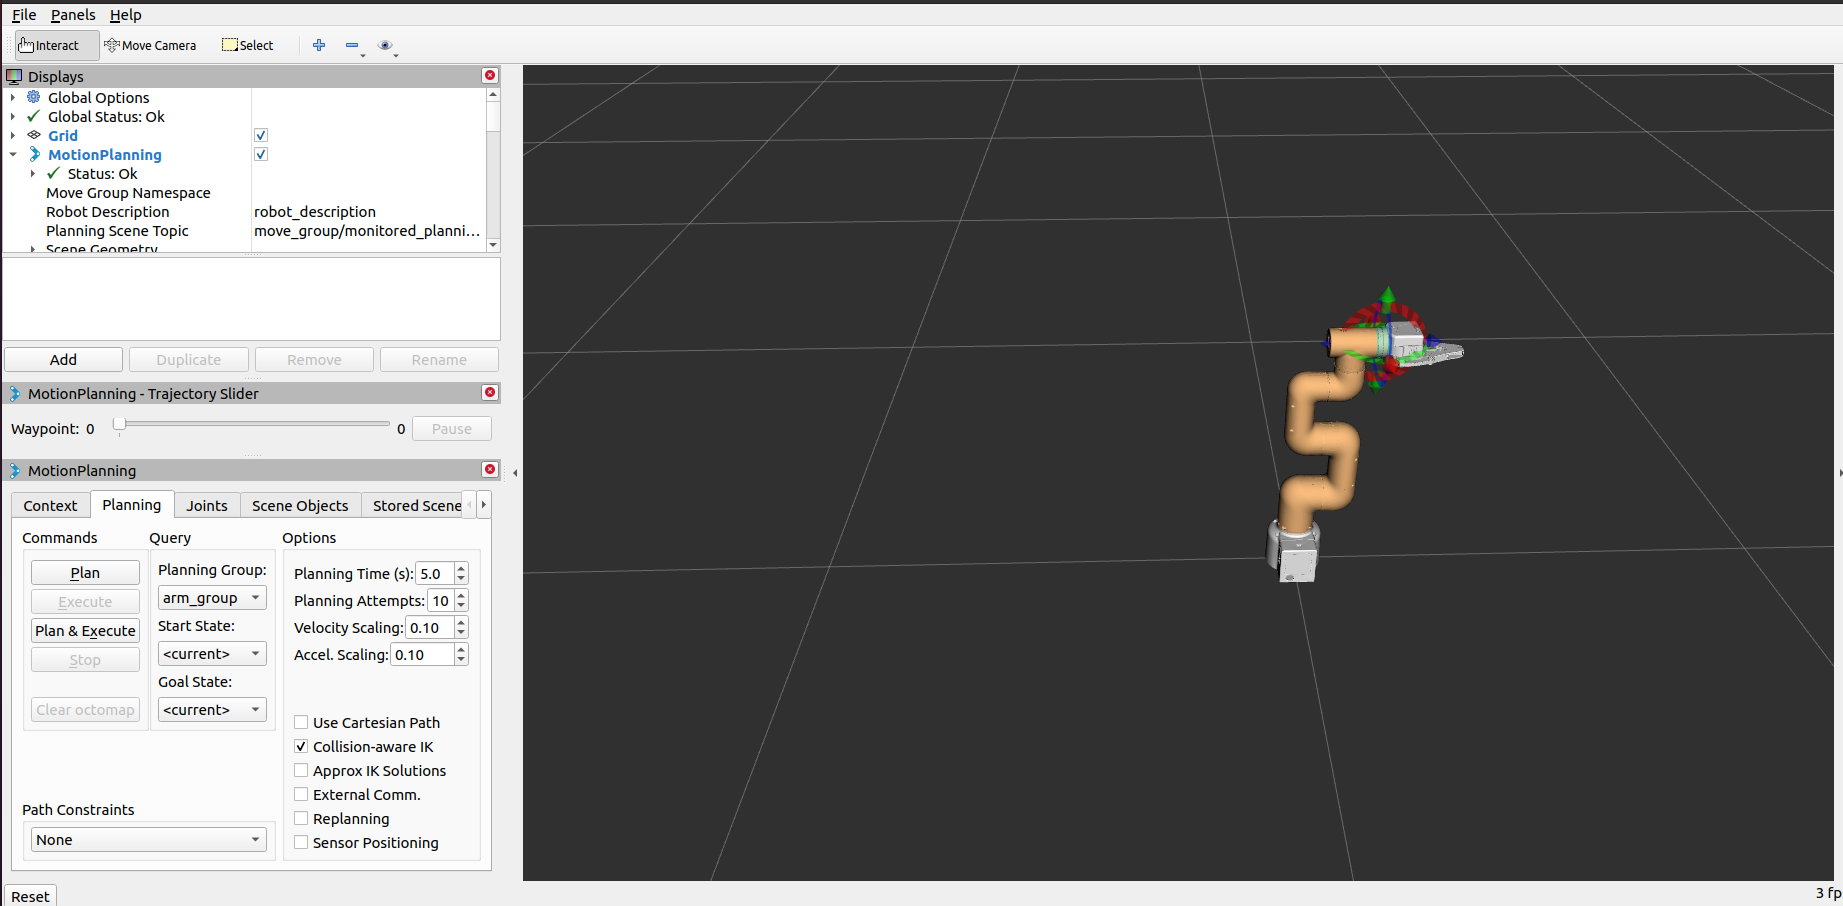
If you want a real robot arm to execute a plan synchronously, you need to open another command line and run:
# The default serial port name of 2022 mycobot 320-Pi version is "/dev/ttyAMA0", and the baud rate is 115200.
rosrun new_mycobot_320_pi_moveit sync_plan.py _port:=/dev/ttyAMA0 _baud:=115200
Note: If the end effector is equipped with an adaptive gripper or myGripper F100 force-controlled gripper and the gripper needs to be planned, the planning group needs to be switched to the planning group of the gripper.
 >
>
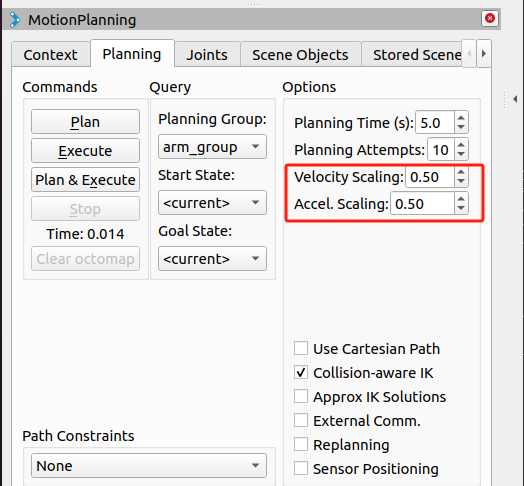
Modify motion speed
In order to prevent the joints from shaking during the movement of the real robotic arm, the movement speed of the joints needs to be reduced.
In the
sync_plan.pyfile, modify the speed parameter of the robot arm Python API, here it is changed to 25.... def callback(data): # rospy.loginfo(rospy.get_caller_id() + "%s", data) data_list = [] for index, value in enumerate(data.position): radians_to_angles = round(math.degrees(value), 2) data_list.append(radians_to_angles) rospy.loginfo(rospy.get_caller_id() + "%s", data_list) mc.send_angles(data_list, 25) # Change speed to 25 ...In the Moveit RViz interface, modify the scaling ratio of speed and acceleration. Here, change it to 0.5, and then save the current configuration.
 >
>