Hardware Problem
Q: How to solve the problem that the robot arm cannot be locked when powered on?
- Check whether the original power adapter is connected or whether the adapter has good contact. You can try to re-plug the power adapter
Check whether the joint can rotate normally when it is powered off, whether there is too much or too little resistance, and preliminarily determine whether the internal structure is physically broken. If there is no physical break, continue to check.
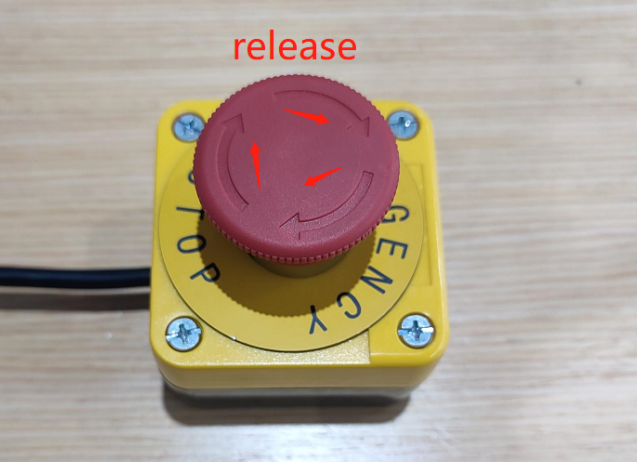
For 320 series products, it is necessary to check whether the emergency stop switch is in the released state. The joint can only be used normally in the released state. When the emergency stop switch is in the stopped state (the switch is pressed), it is impossible to power on and communicate normally. The switch needs to be turned clockwise to keep the emergency stop switch in the released state
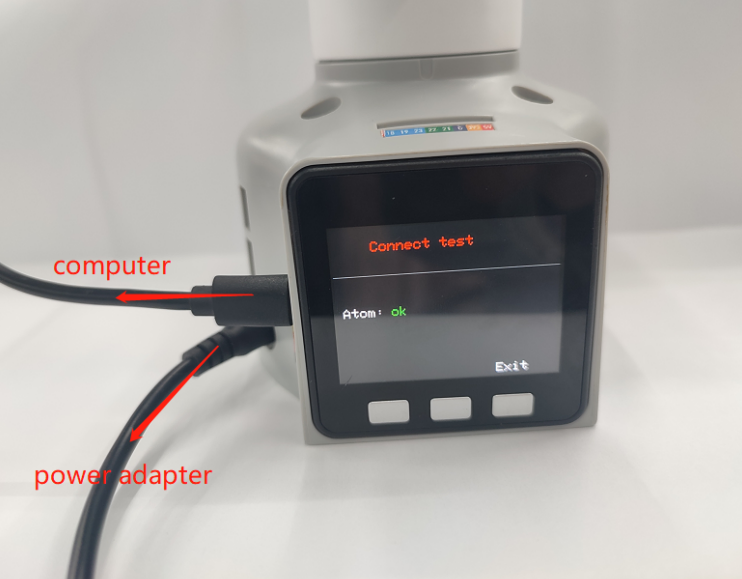
- Check the Atom firmware as follows:
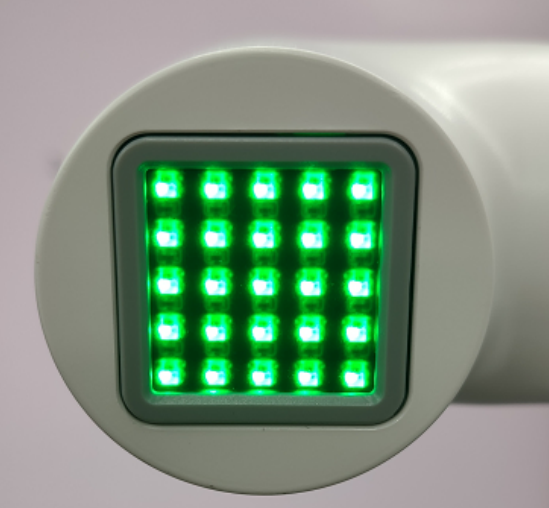
Under normal circumstances, the robot arm will self-lock after power-on, and Atom will light up green, as shown in the figure below (note that mechArm has no light display)
After the robot arm is powered on, Atom does not light up green or the joint cannot self-lock. You can follow the following points to troubleshoot: ① Gently press the Atom screen to make Atom in good contact with the internal plate of the robot arm.
② Check gitbook to get the method of using mystudio. According to the model and version information, use mystudio to download the corresponding Atom firmware. If you encounter any problems during the burning process, please refer to the "Firmware Download Abnormality" related to mystuidio in this article to obtain the troubleshooting steps.
③ After the Atom firmware is successfully burned and the robot arm is not connected to the power supply, use type-c to connect Atom. If the green light of Atom is on, but the green light of Atom goes out after the type-c is unplugged, it is judged that Atom is normal, but there is a problem of line detachment or damage inside the robot arm, and it is necessary to contact the technician to deal with it.
④ After the Atom firmware is successfully burned and the robot arm is not connected to the power supply, use type-c to connect Atom but the green light does not turn on, it is judged that the Atom hardware is damaged, and it is necessary to contact the technician to replace it
Q: After pressing the emergency stop, the emergency stop cannot be locked after release. How to make the robot arm lock again?
You need to power on the machine again, for example, power on the machine with myblockly
Q: How to optimize joint shaking, excessive joint angle deviation or joint weakness and falling?
Refer to the robot parameter introduction section to check whether the actual load is within the effective load range of the robot arm. Excessive load will cause joint vibration. The load of the actual joint can be appropriately reduced.
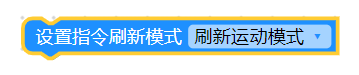
Change the motion mode to refresh mode, so that the movement trajectory of the robot arm will be relatively smooth. For specific APIs, please refer to set_fresh_mode(1)
Check the following link to adjust pid: https://drive.google.com/file/d/1UWhaaSTuwLFImuEGY1J2tvgxTQDwWxK_/view?usp=sharing
Check the gitbook section and use mystudio to download the corresponding version of Atom firmware. It is recommended to download the latest version
- Check Chapter 5 of the gitbook to calibrate the robot arm at zero position. You can also refer to the calibration steps in the following link: https://drive.google.com/file/d/1XtKH-ykKWPH0q9Z_YHwzkgwNKRhstHhi/view?usp=sharing
- For machines that have been used for a long time (more than 3 months), joints may age and produce joint gaps. You can follow the following video to manually bend the joints to check if there is any joint gap: https://drive.google.com/file/d/1tXDUALmfw1z0u6lM9uH5hOHivjbRoWxW/view?usp=sharing
- If there is a joint gap problem due to joint aging, this kind of jitter is inevitable due to the natural aging of the machine.
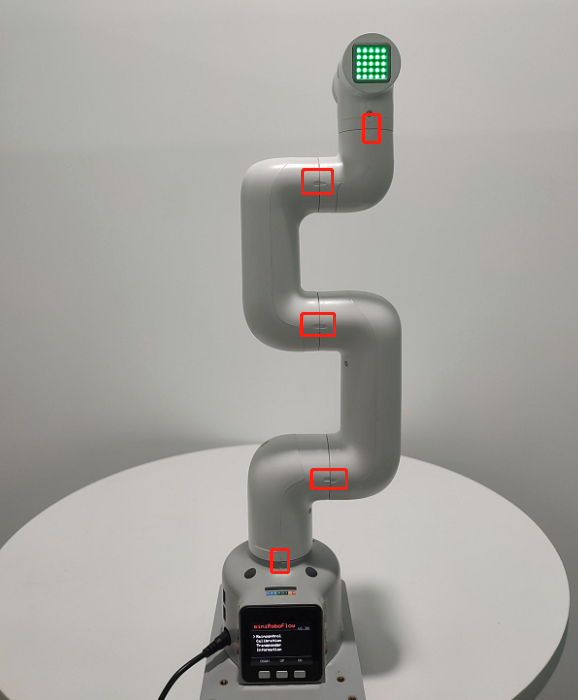
Q: What is the joint zero position?
Take the following figure as an example, there is an arched groove designed between the joint and the edge of the joint shell, which is the zero point of the joint

Generally, the zero point posture after calibration is as follows:
Q: Is there a method for zero point calibration?
Please refer to Chapter 5 of gitbook or the following link:
https://drive.google.com/file/d/1XtKH-ykKWPH0q9Z_YHwzkgwNKRhstHhi/view?usp=sharing
Q: How to use the GPIO at the bottom of the mycobot320 machine?
- A: Please refer to the following usage
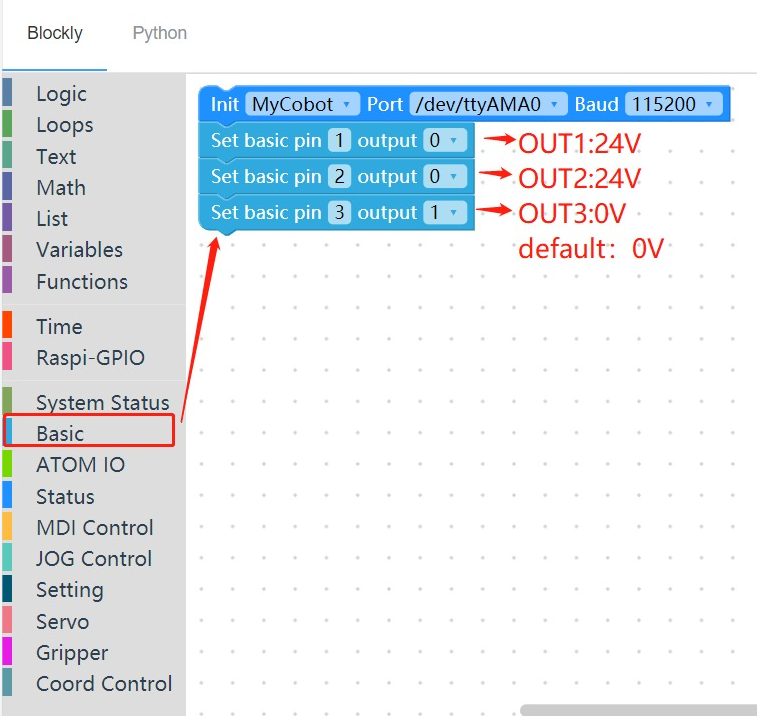
Q: Is there any way to control the 5V LED light with the IO at the bottom of the mycobot320 machine?
A: Please refer to the example of the IO pin at the bottom of the Raspberry Pi, where the high level of the output is 24V. If you want to use 5V to control the LED, it is recommended to use it after connecting an external step-down module. At present, we have no case of using the bottom IO to control the LED
Q: What is the role of atom in the robot arm?
- A: Atom is mainly used in the robot arm to control the kinematic algorithm of the robot arm: including forward and inverse kinematics, solution selection, acceleration and deceleration, speed synchronization, multi-square interpolation, coordinate conversion, etc., and the required real-time control and multi-threading. The related programs of atom are not open source yet.
Q: What communication interfaces do different versions of the robot arm support?
- A: The microprocessor-based robot supports socket communication TCP; the microcontroller-based robot can use USB to serial communication.
Q: Why does the motor automatically cut off during use?
- A: The motor is overheated after a long period of use. This phenomenon is normal and can be continued after waiting for a few minutes.