myAGV Plus Auto Recharge Navigation Feature User Manual
The factory image workspace is ~/myagv_plus_ros2 (humble branch)
The first full compile takes about an hour.
# Create a new workspace
mkdir -p ~/myagv_plus_ros2
cd ~/myagv_plus_ros2
git clone https://github.com/elephantrobotics/myagv_plus_ros2.git myagv_plus_ros2/src
# Install the dependencies
sudo apt install -y ros-humble-geographic-msgs ros-humble-aruco-markers-msgs ros-humble-robot-localization libgeographic-dev geographiclib-tools libzbar0 python3-pyzbar ros-humble-geometry-msgs ros-humble-common-interfaces
# Compile
colcon build
1. Overview
The auto-recharge function of myAGV Plus uses long-range Nav2 navigation and short-range serial control based on infrared sensors, allowing the vehicle to automatically navigate to the charging station and connect to the charging port for charging.
2. Charging pile location management, Nav2 navigation relative position settings
Charging Pile Location Management: The charging pile locations are saved in the config/charger_position.json file in the software package directory, and position updates are handled by subscribing to the /charger_position_update topic.
The location information saved in the json file is for the charging stations, and the latest charger locations will keep being published to the /goal_marker topic and can be visualised. The location information is represented using quaternions as follows:
{
  "p_x": 0.0,
  "p_y": 0.0,
  "orien_z": 0.0,
  "orien_w": 1.0
}
Nav2 Navigation Position Settings: You can adjust the Nav2 navigation target point relative to the charging station's position and orientation, so the vehicle switches to serial control only after reaching the target position and orientation.
The relative position parameters of the navigation point and the charging station can be configured in the config/nav_goal_params.yaml file, with the default values as follows:
forward_distance: 0.35      # 0.35 metres from the front of the charging pile
yaw_offset_deg: 0.0         # Rotate 0 degrees clockwise
Charging pile location entry
Pick one of the two ways.
Method one: manually control entry
When entering, make sure the trolley is directly facing the charging pile contacts and is closely attached to the charging pile, as any position deviation can prevent the serial port docking from correctly guiding to the charging contacts.
Terminal 1: Start chassis radar
ros2 launch myagv_plus_bringup myagv_plus_bringup.launch.py
Terminal 2: Start navigation
ros2 launch myagv_plus_navigation2 navigation2_active.launch.py
Open RViz and use '2D Pose Estimate' to set the car's initial position, make sure AMCL localisation is working fine.
Terminal 3: Start keyboard control
ros2 run teleop_twist_keyboard teleop_twist_keyboard
Use the keyboard to drive the car to the charging point.
Terminal 4: Start the recharge programme and note down the charging station location
ros2 run myagv_plus_autocharge combined_auto_recharger
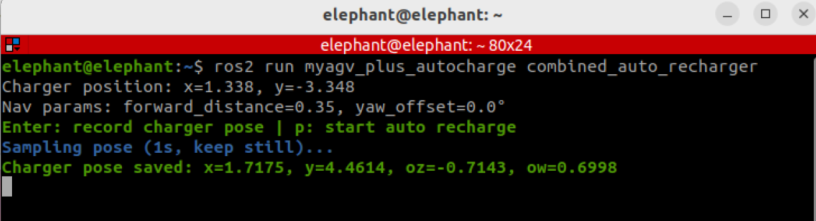
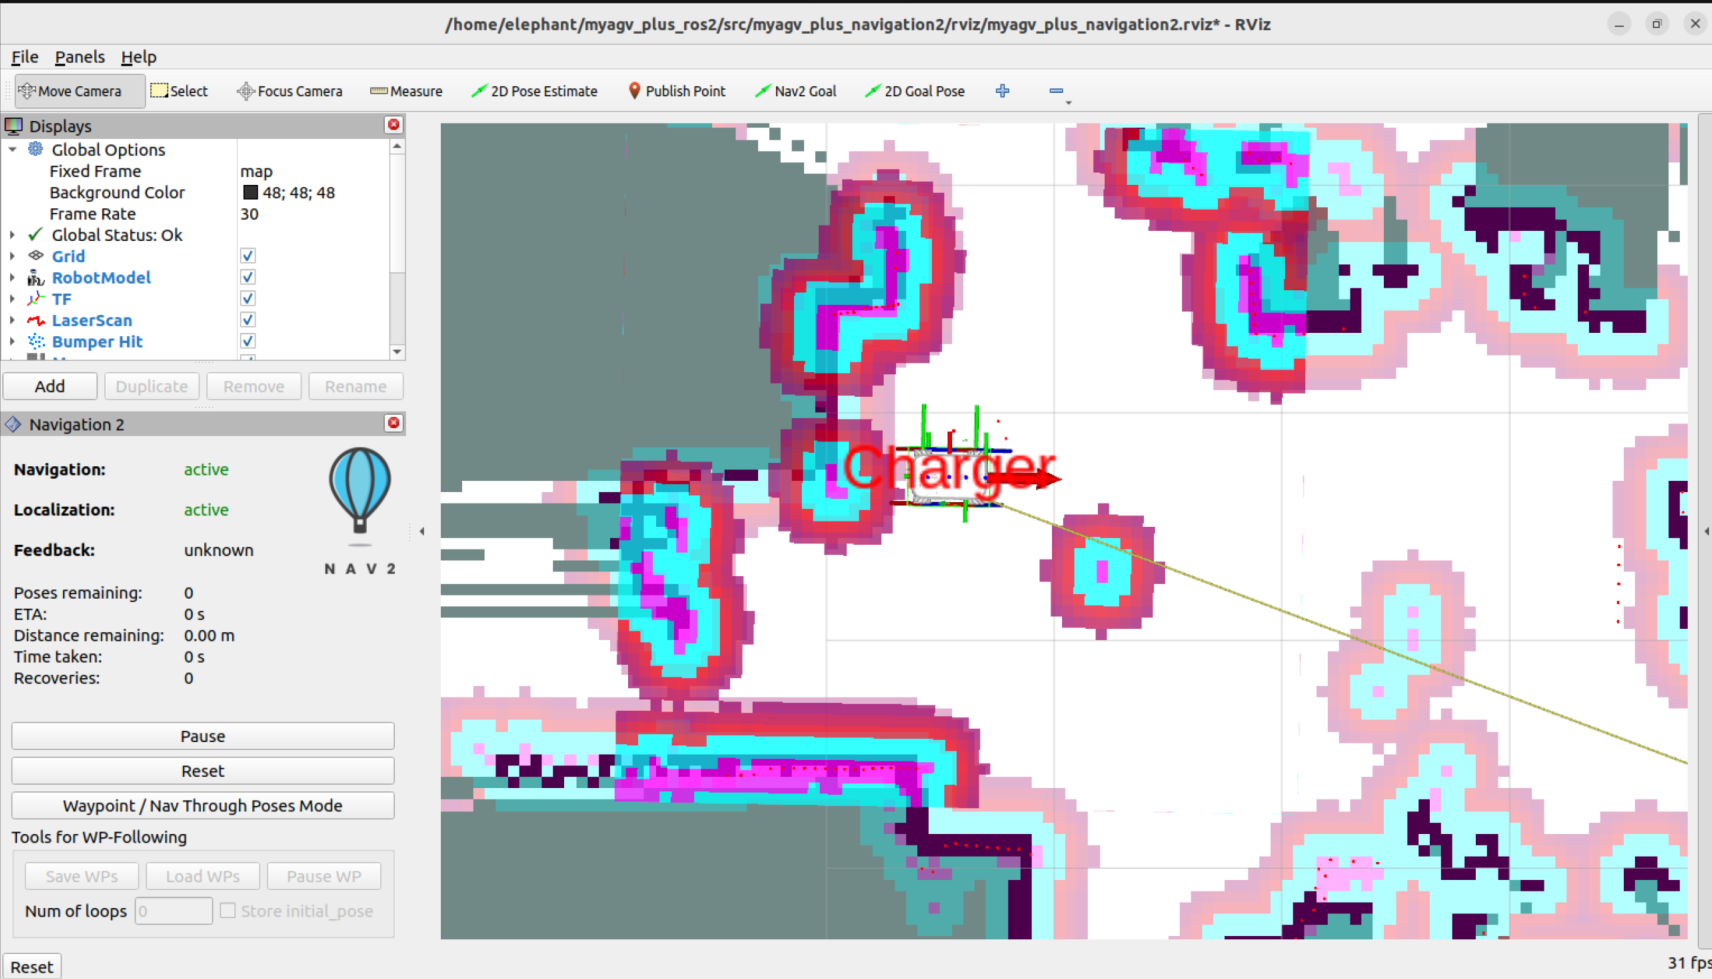
After the cart is in place, press Enter in terminal 4 to record the current pose. The program samples for 1 second, takes the median, and writes it to charger_position.json, with the red arrow in RViz updating to the new position.
Terminal print:
The charging station's location will show up immediately in rviz.
Method two: Click settings in RViz
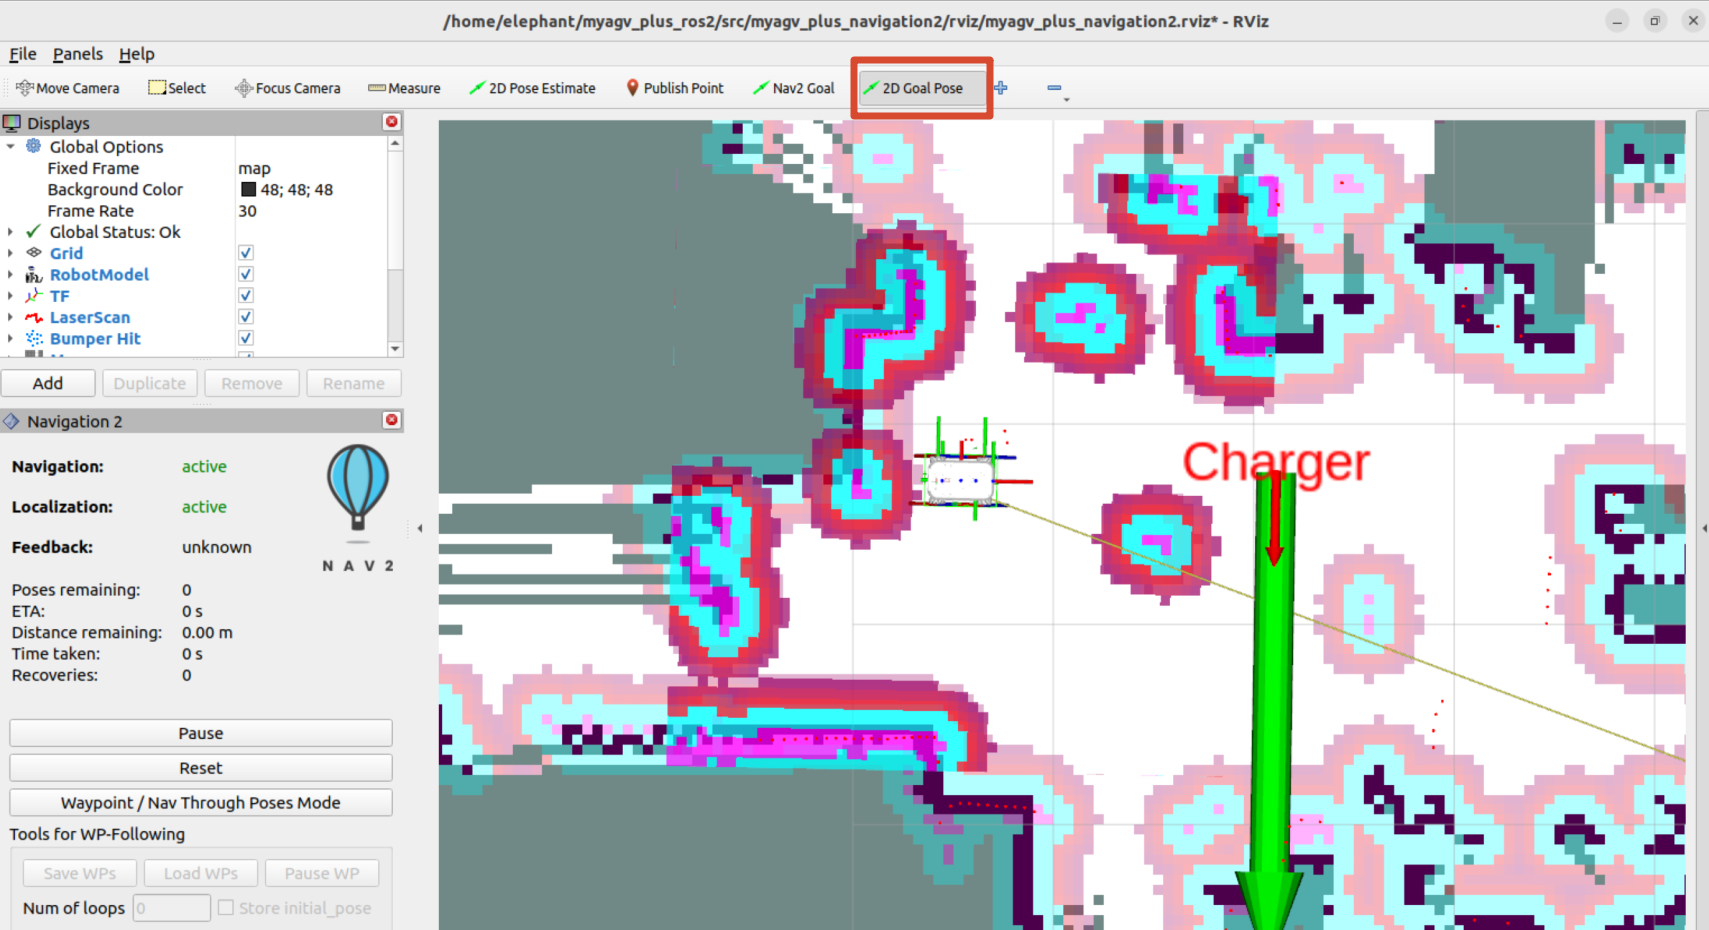
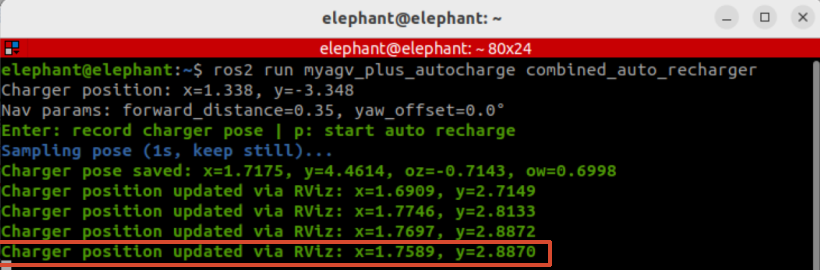
After starting the chassis, navigation and recharge programs (same for terminals 1, 2, 4), select the "2D Goal Pose" tool in the RViz toolbar (already preconfigured to publish to the /charger_position_update topic), then click and drag on the charging pile location on the map to set the orientation, and the recharge program will automatically receive and update charger_position.json.
Terminal print:
3. Function Use
Terminal 1: Start chassis radar
ros2 launch myagv_plus_bringup myagv_plus_bringup.launch.py
Terminal 2: Start navigation
ros2 launch myagv_plus_navigation2 navigation2_active.launch.py
Set the initial position and make sure the location is okay.
Terminal 3: Start the recharge programme
ros2 run myagv_plus_autocharge combined_auto_recharger
After starting, you can see red arrow markers in RViz showing where the charging stations are.
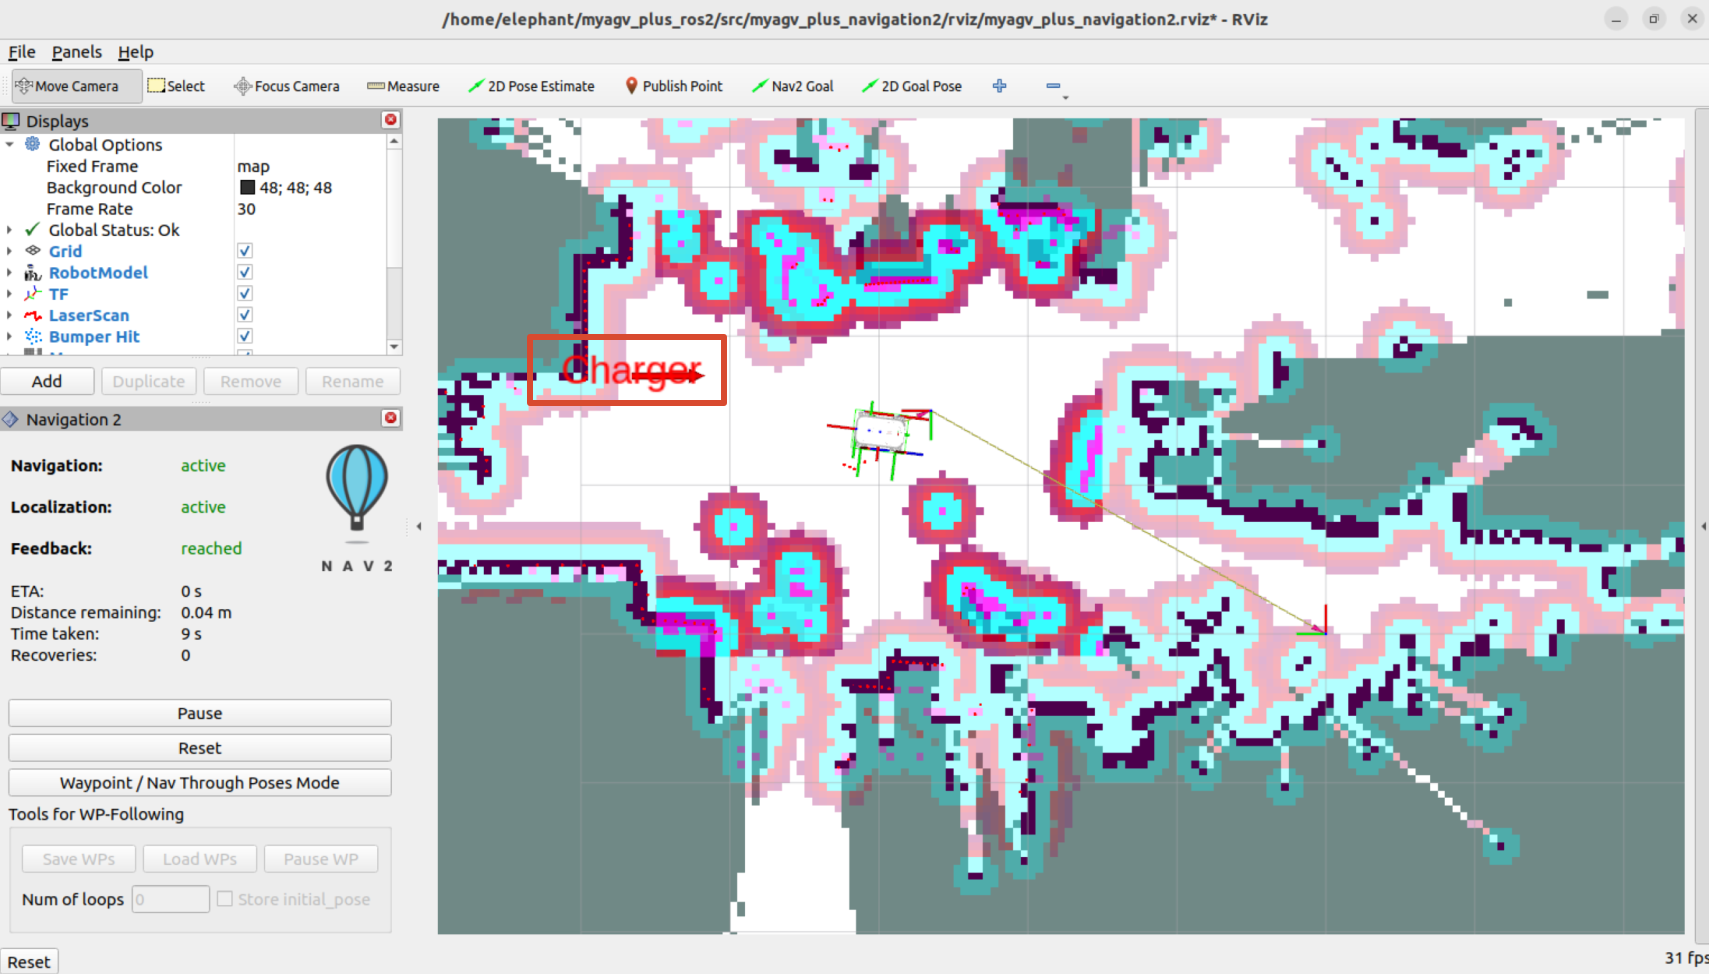
Press the p key in Terminal 3 to trigger recharge.

The small car carries out a two-stage recharge:
- Navigation stage: Nav2 navigates to
forward_distancein front of the charging station
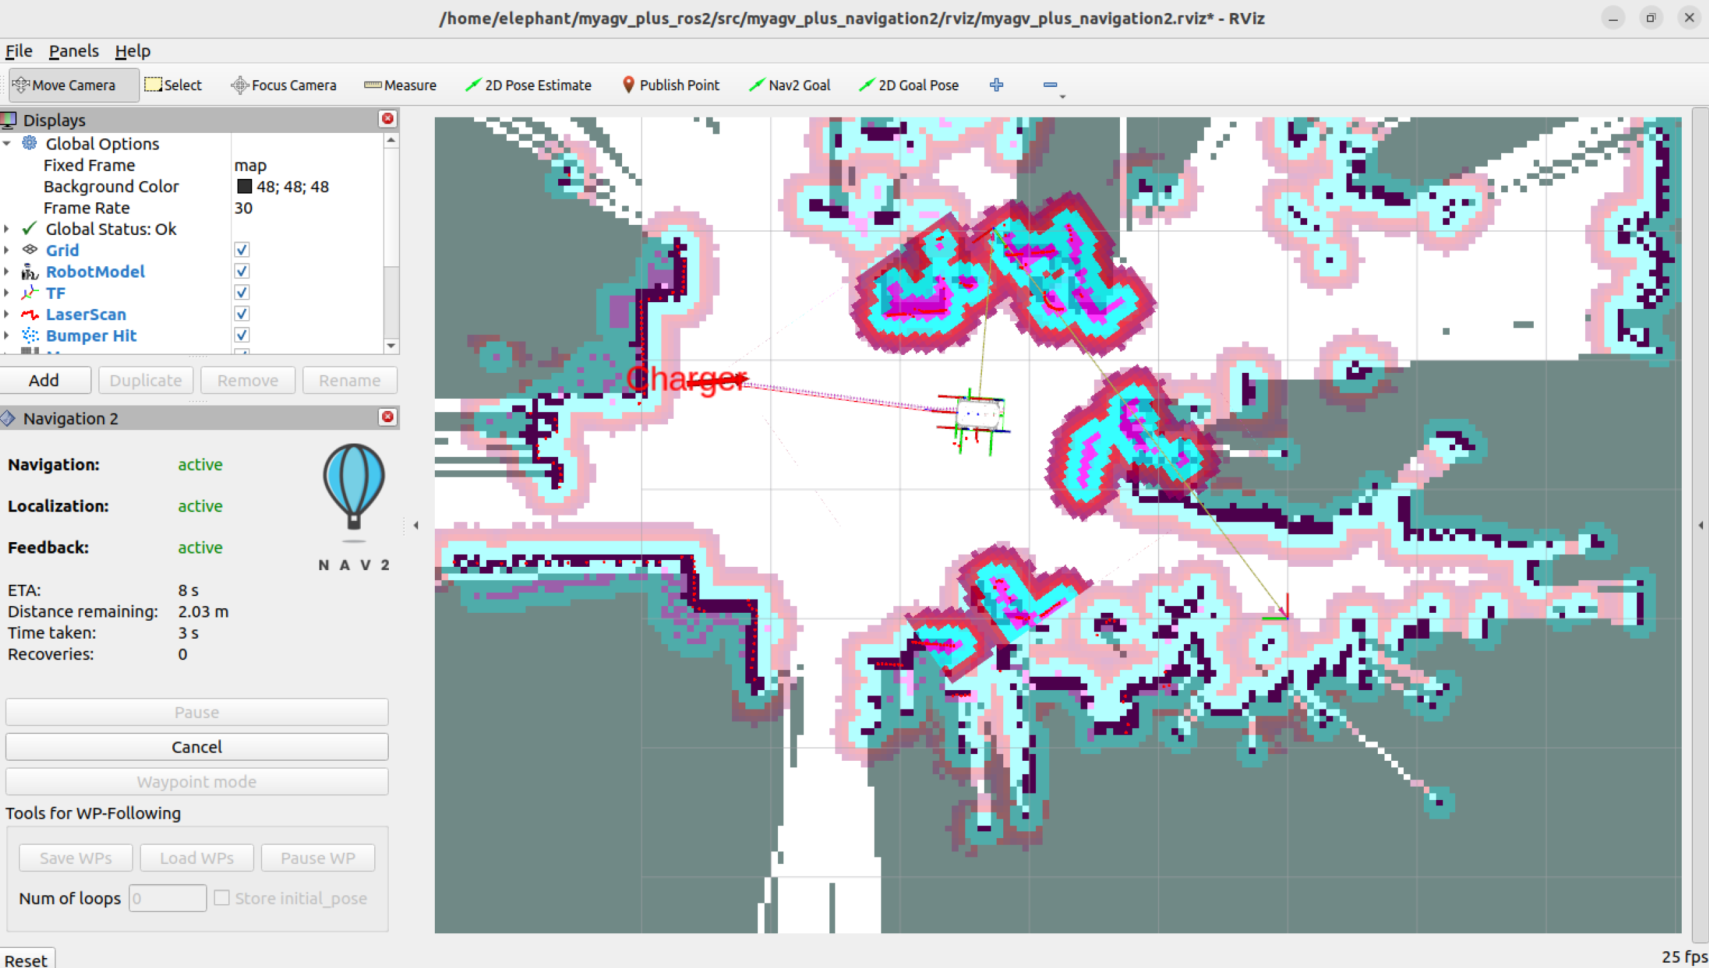
Serial Port Docking Stage: Open the USB-CAN serial port upon arrival, read the charging pile
0x182guide frame, and publish/cmd_velaccording to the x/z speeds in the frame to complete the final docking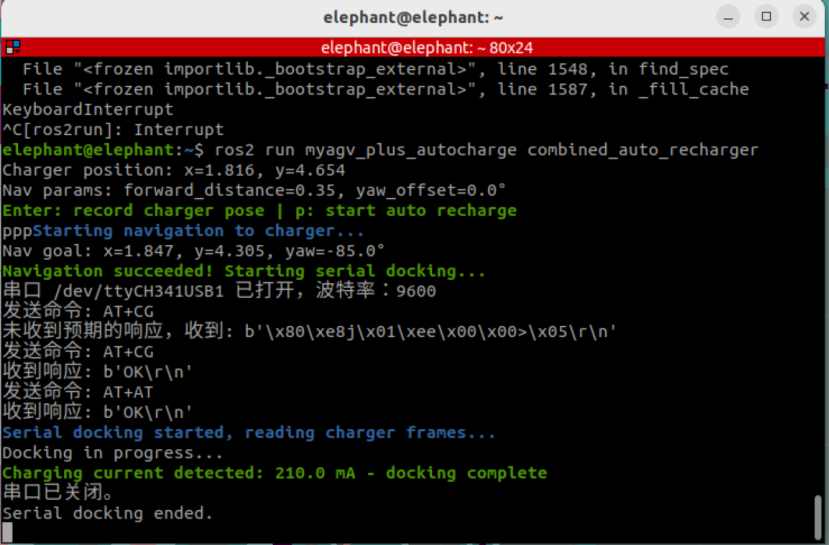
The connected terminal shows the current charging current:
Charging current detected: 210.0 mA - docking complete