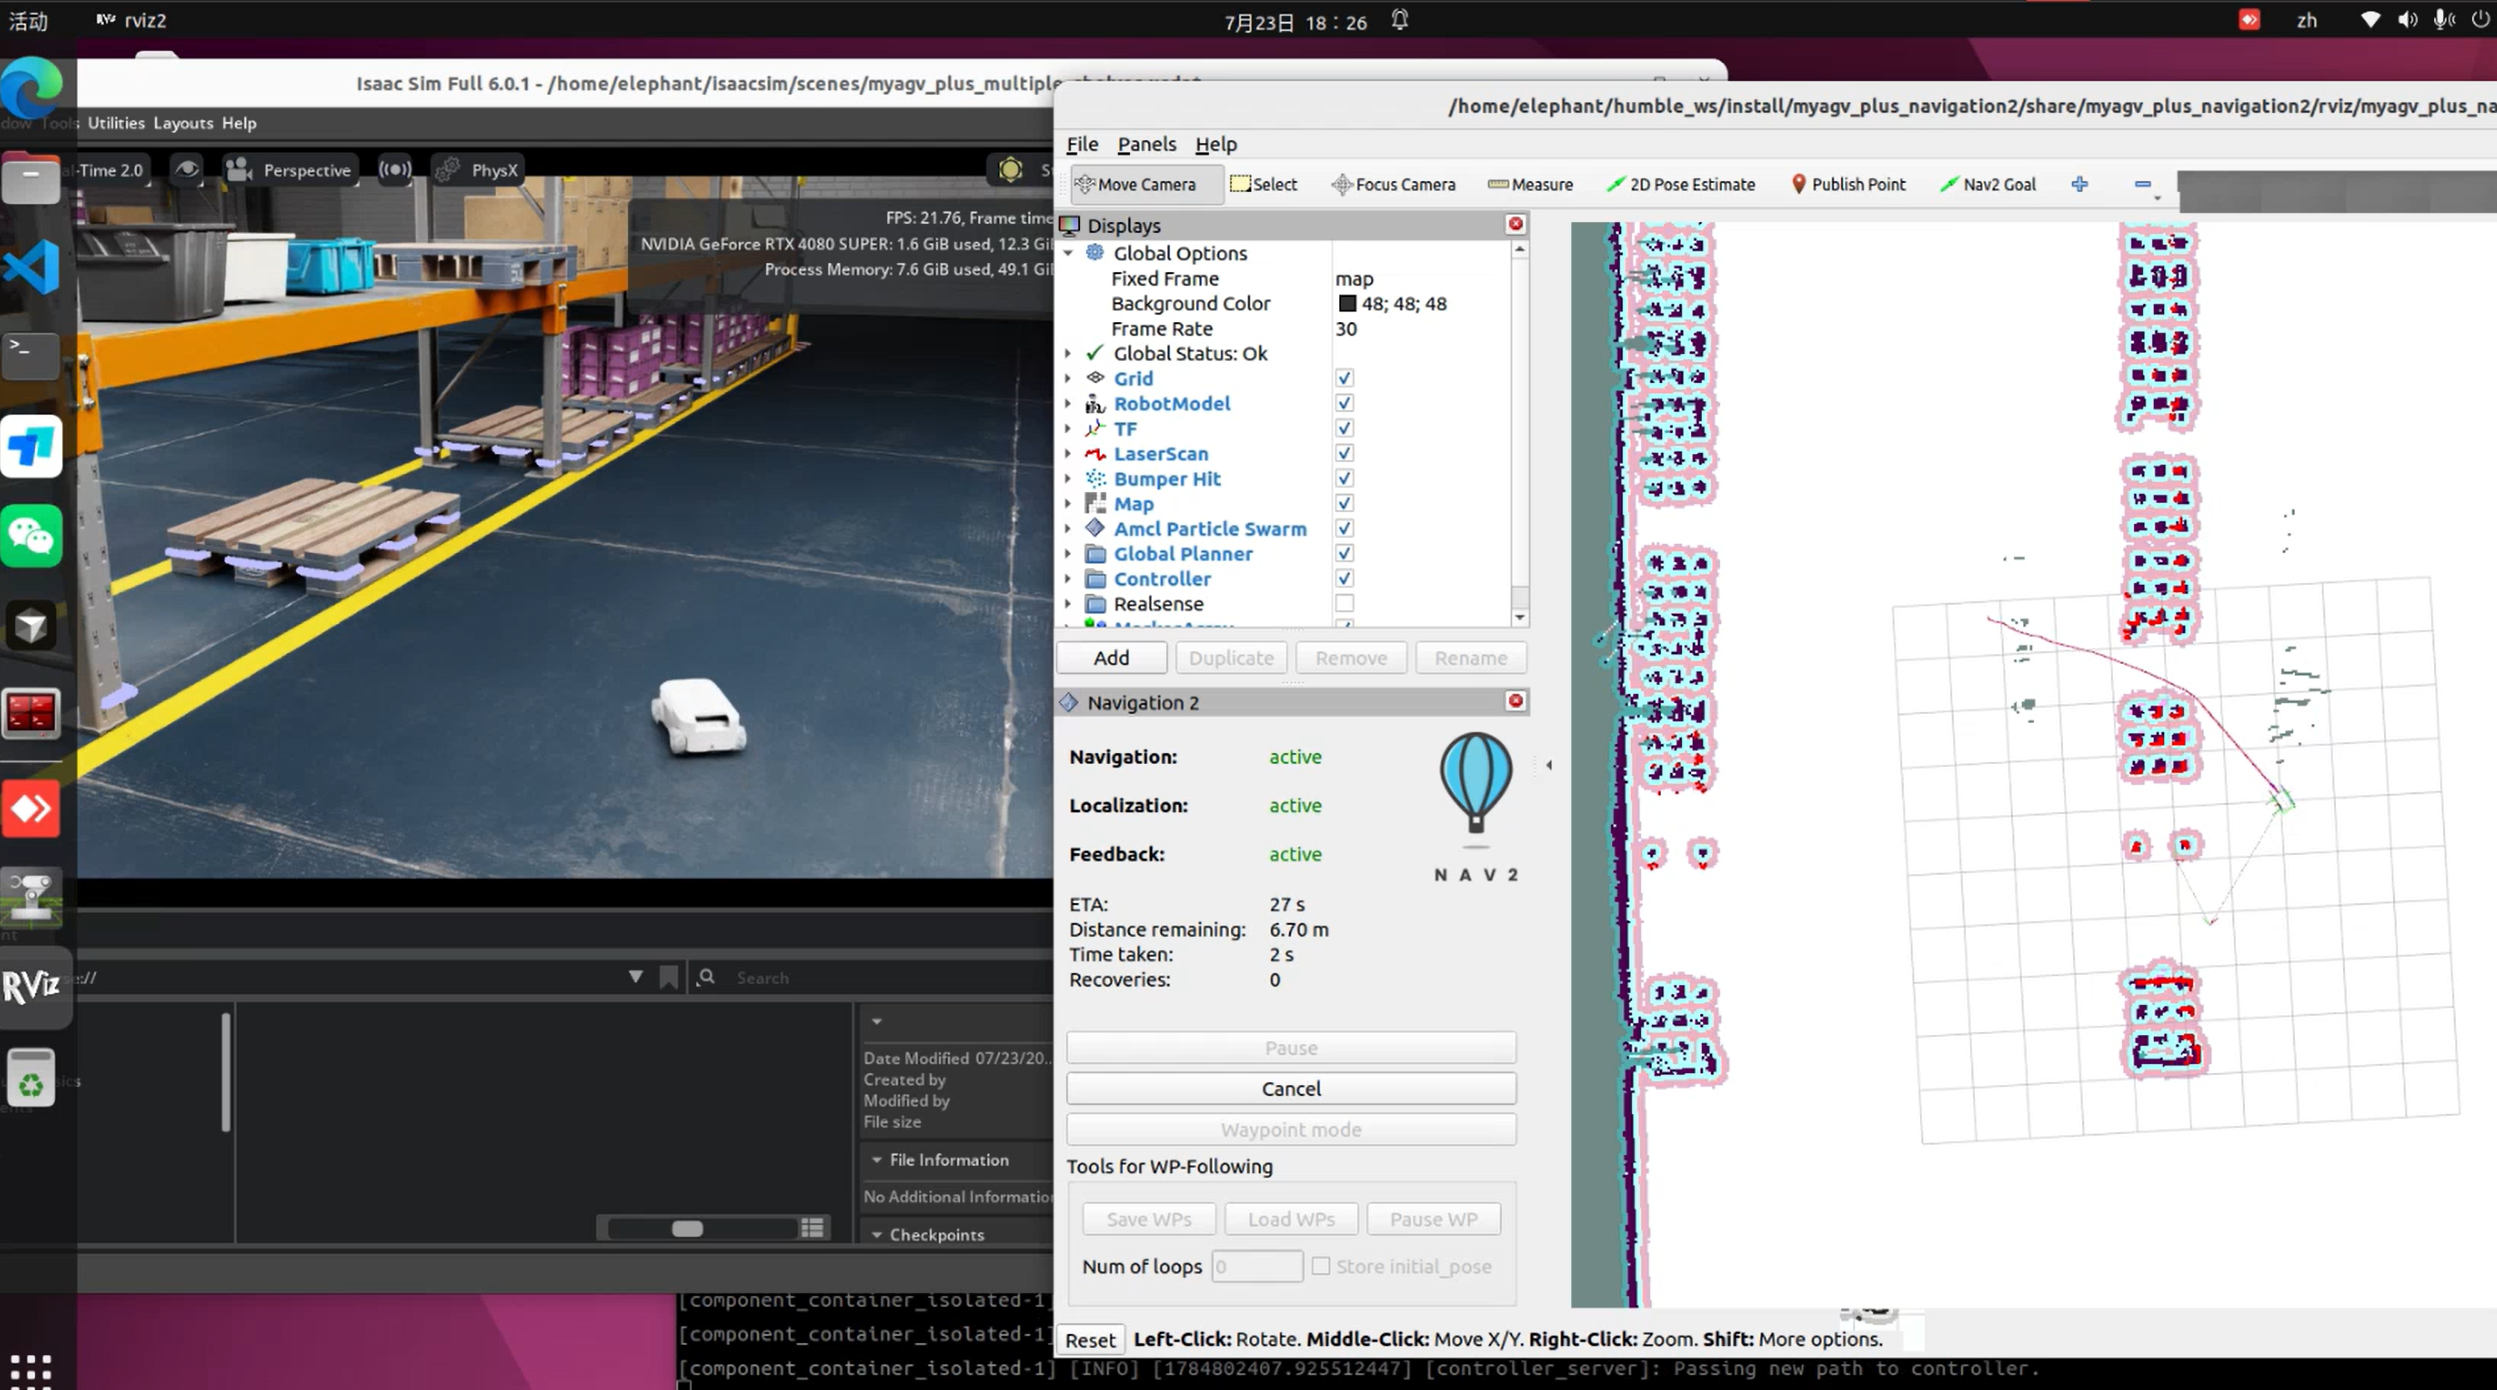
myAGV Plus Isaac Sim simulation test manual
Test Environment: No real vehicle content, standalone desktop, NVIDIA RTX 4080 or higher GPU, Isaac Sim 6.0.1, Ubuntu 22.04 + ROS2 Humble.
This manual is divided into two chapters according to the control stack: 1. The built-in control stack of Isaac Sim; 2. The ros2_control route (the same control stack as the real car). Each chapter lists the launch commands and operating steps item by item.
General Preparation (Run this before executing any ROS2 commands in each newly opened terminal):
source /home/elephant/humble_ws/install/setup.bash
- Isaac must be started from the terminal that has already sourced the above line (
~/isaacsim/isaac-sim.shorros2 launch isaacsim_bringup ...), otherwise it won't be able to find the custom packages in this repo (likeisaacsim_bringup,myagv_plus_navigation2, etc.).
Scene file directory:
~/humble_ws/src/myagv_plus_isaac_description/urdf/myagv_plus_isaac_rollers/
1. Isaac Sim comes with its own control stack
Not using ros2_control, just drive the chassis directly with Isaac's built-in HolonomicController to test if the mecanum wheel model, ROS2 bridge, and RTX Lidar can work.
1.1 Node graph control test (myagv_plus_isaac_rollers.usda)
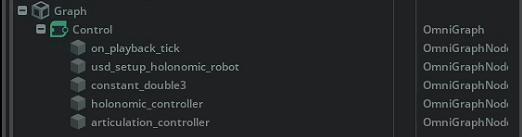
Not using ROS2, directly giving chassis speed with Isaac node graph to test if the mecanum wheel model can move on its own.
Node diagram:
Terminal 1 —— Start Isaac:
~/isaacsim/isaac-sim.sh
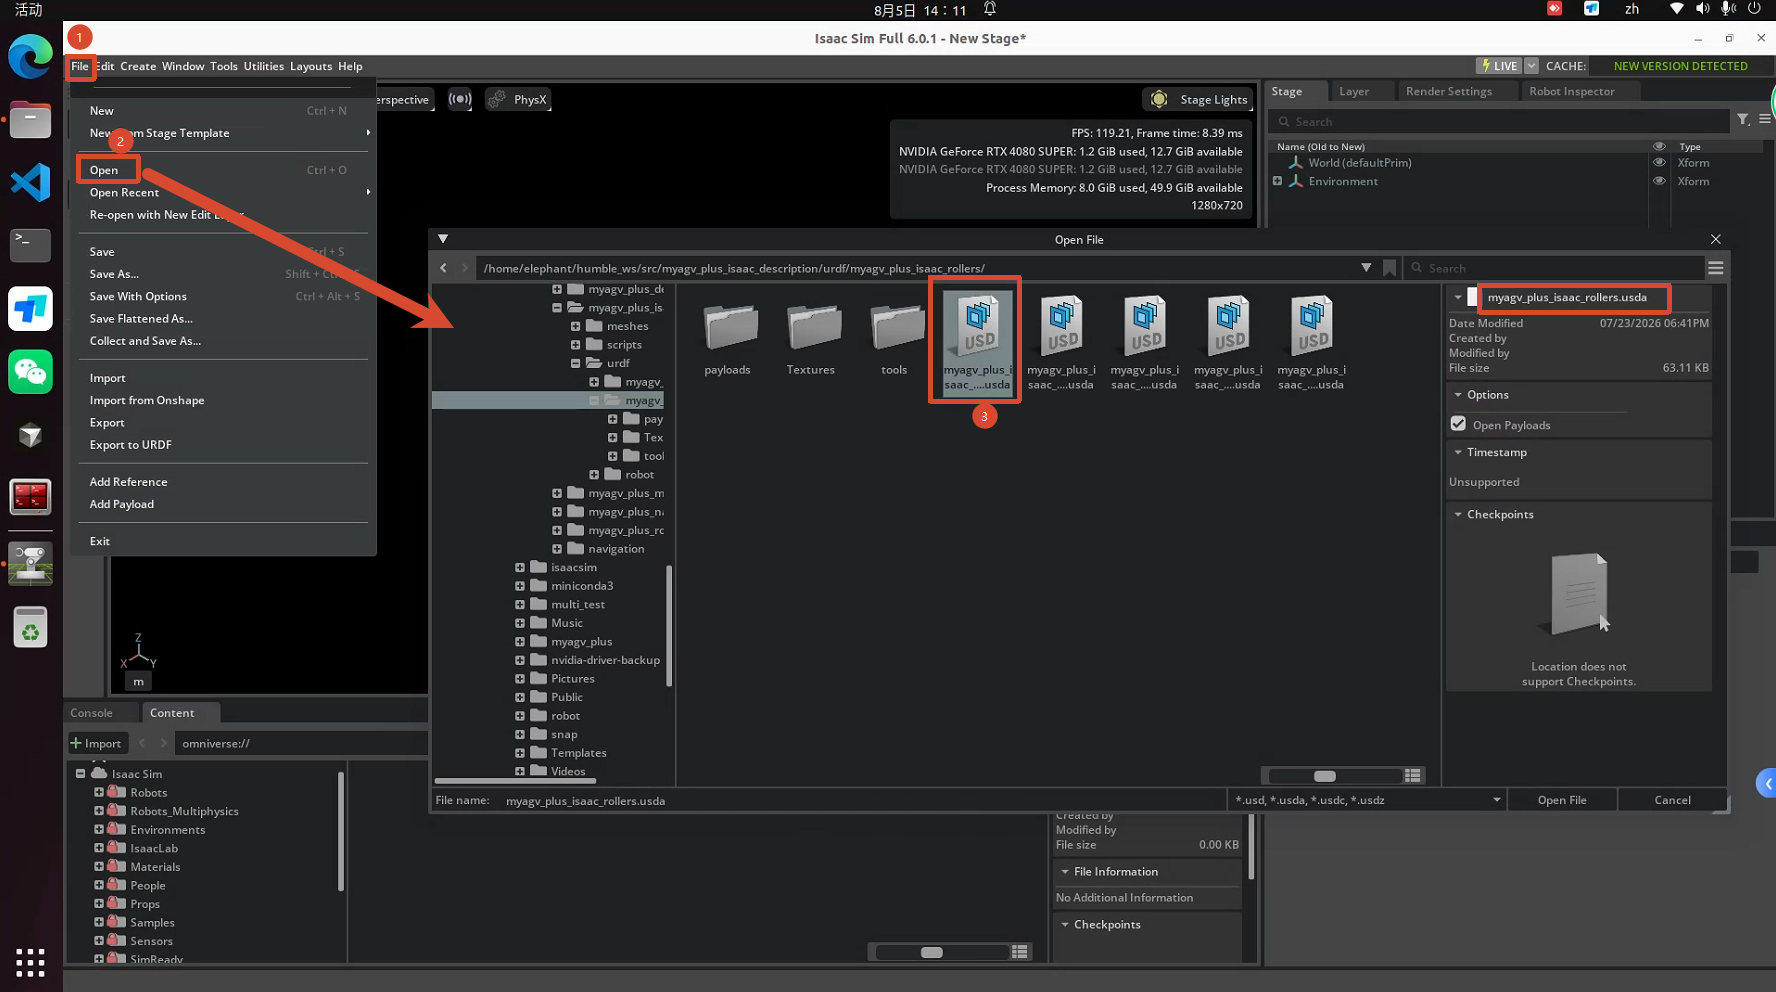
Open the scene (Within the Isaac graphical interface, not a terminal command):
In the GUI, go to File → Open and double-click:
~/humble_ws/src/myagv_plus_isaac_description/urdf/myagv_plus_isaac_rollers/myagv_plus_isaac_rollers.usda
Click Don't Save
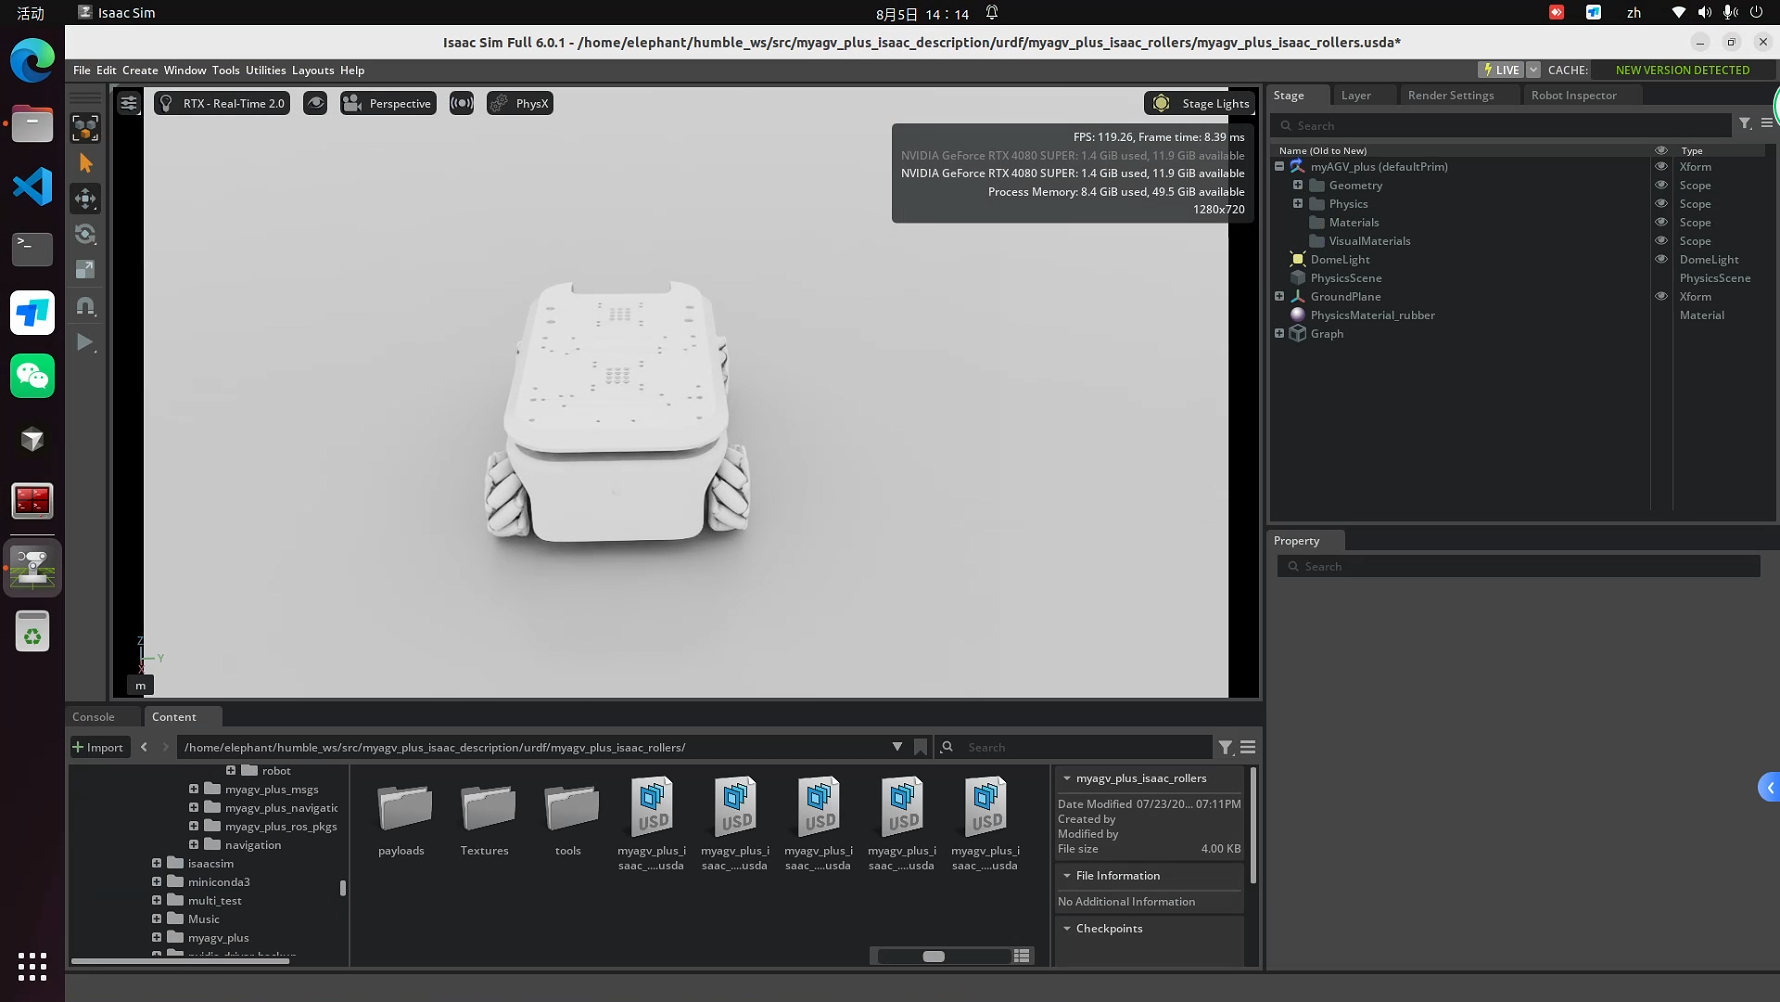
Open the control chart:
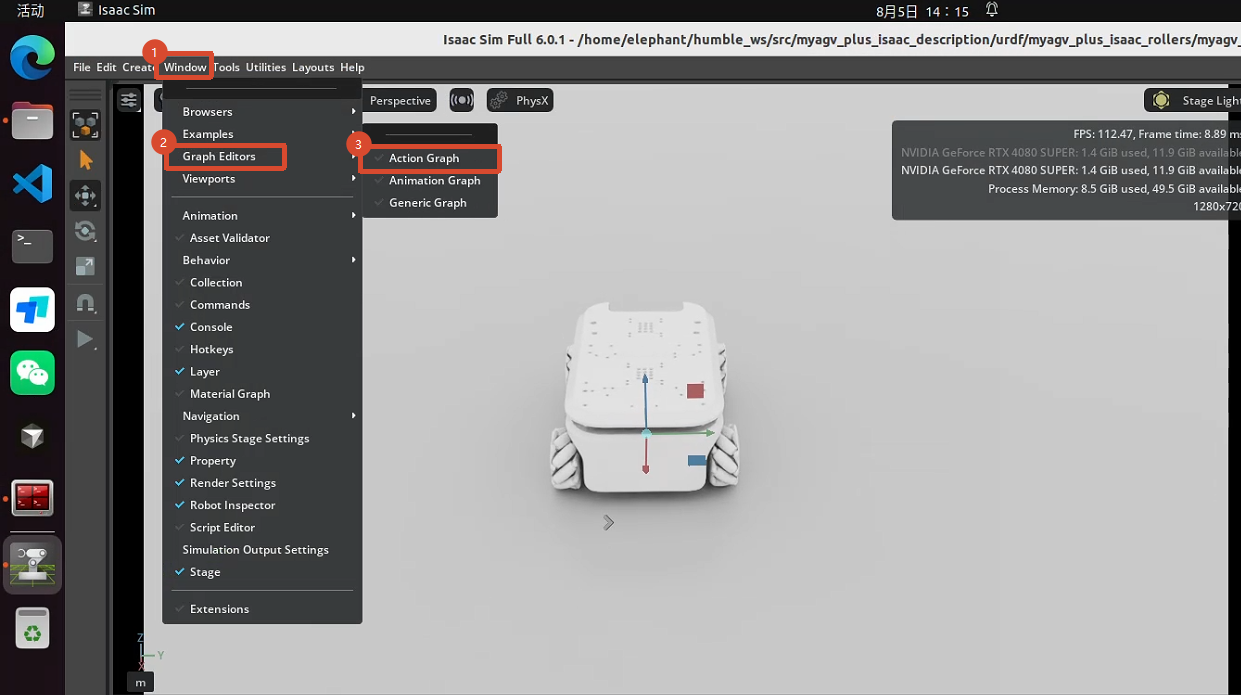
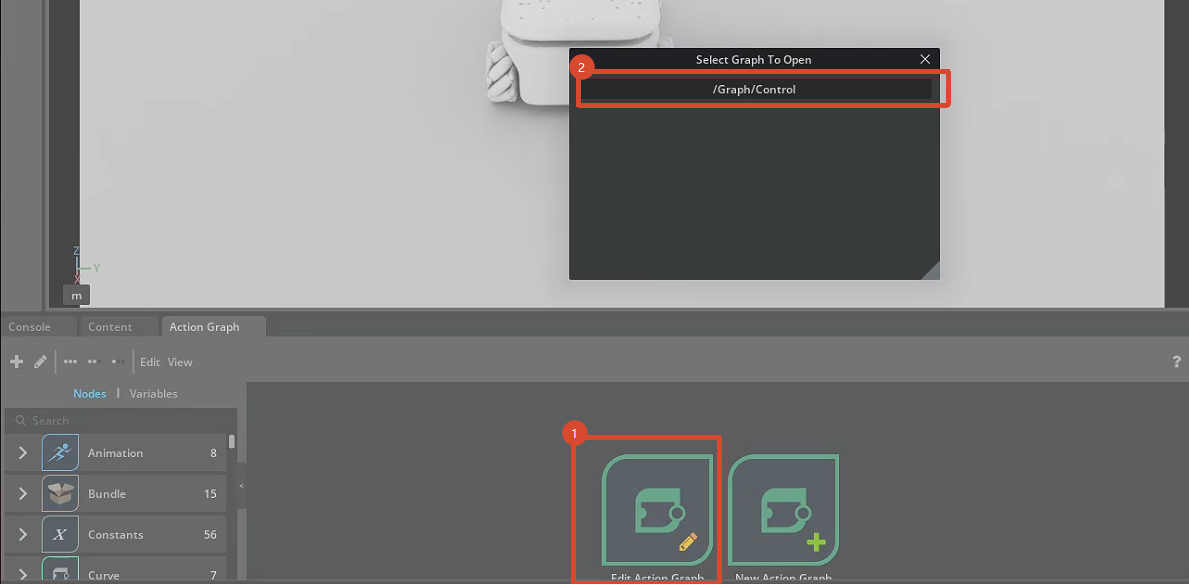
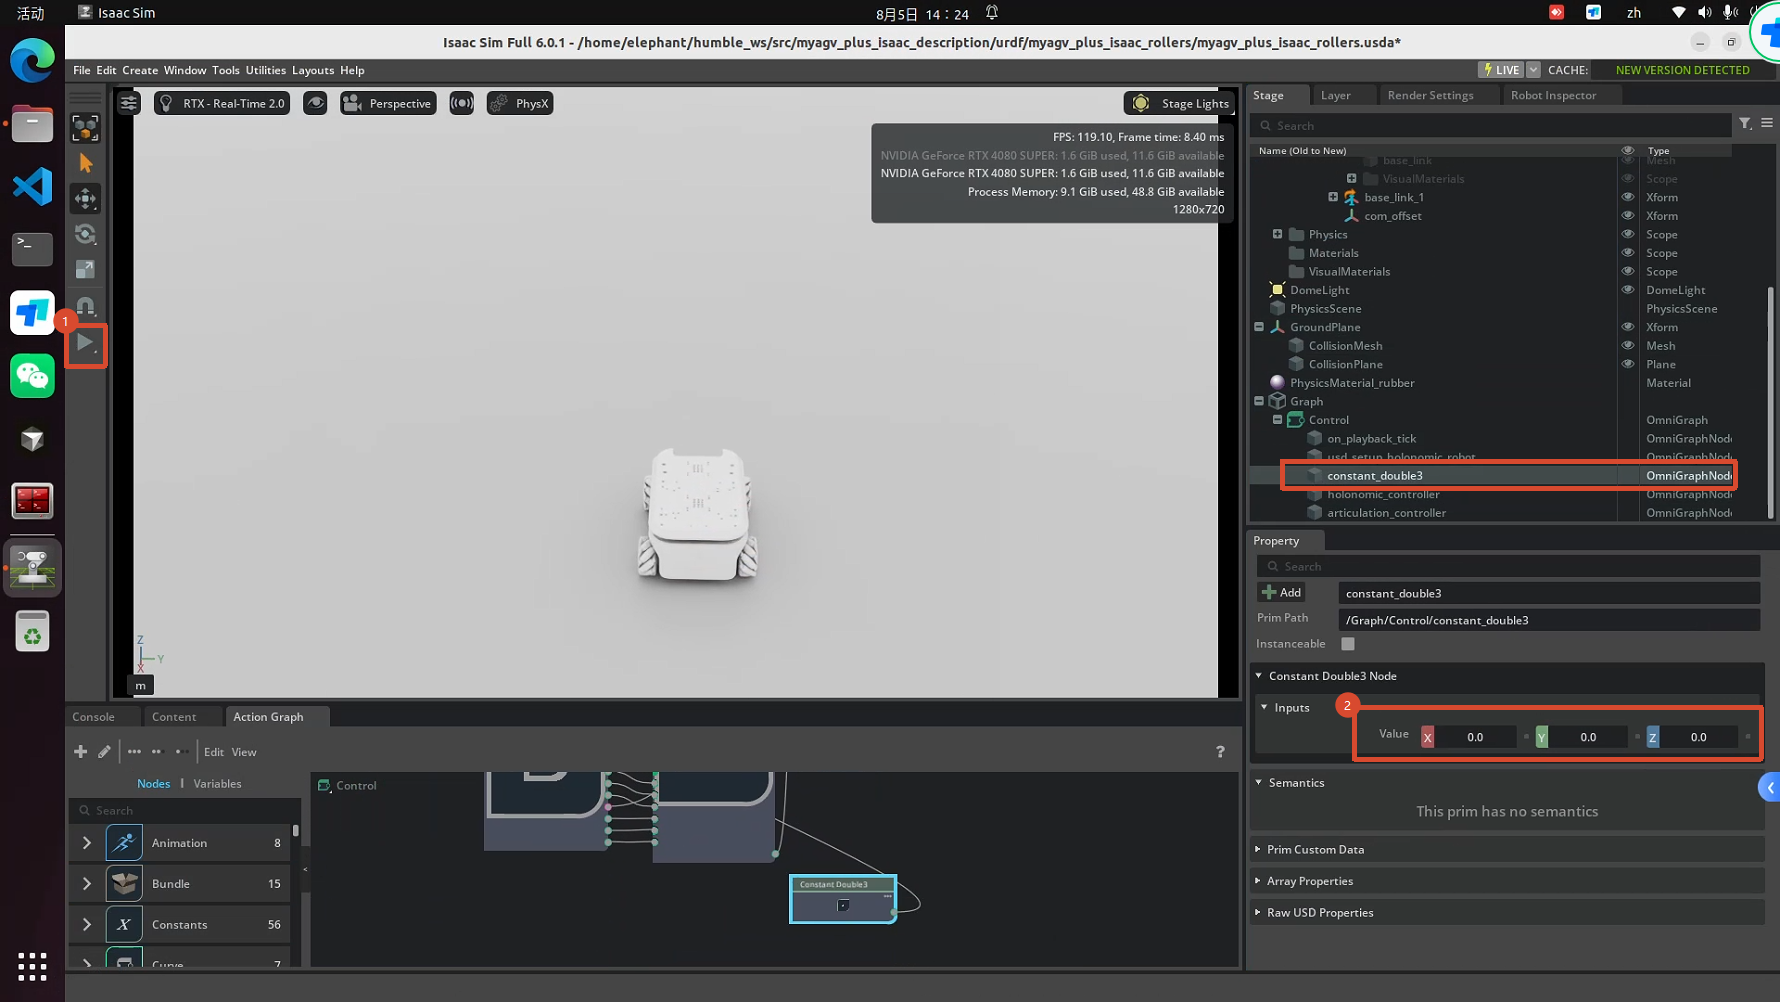
Window → Graph Editors → Action Graph, select the Constant Double3 node, and change the Value in the Property panel on the right.
Test:
Click the Play(▶) button on the left toolbar, then modify Constant Double3 Node.inputs in order (sequence = [Forward vx, Lateral vy, Rotation wz])
| Value | Expected action |
|---|---|
(0.3, 0, 0) |
Go straight |
(0, 0.3, 0) |
Move sideways |
(0, 0, 1.0) |
Spin in place |
(0, 0, 0) |
Stop |
1.2 ROS2 control test (myagv_plus_isaac_rollers_ros2.usda)
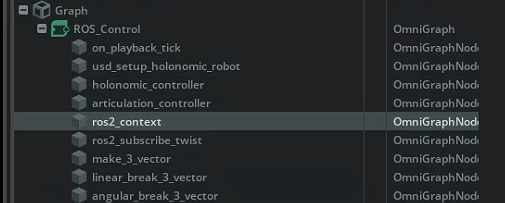
Connect to /cmd_vel based on scenario one.
Node diagram:
Terminal 1 —— Start Isaac:
~/isaacsim/isaac-sim.sh
Open the scene and Play (within the Isaac GUI, not a terminal command):
File → Open to open:
~/humble_ws/src/myagv_plus_isaac_description/urdf/myagv_plus_isaac_rollers/myagv_plus_isaac_rollers_ros2.usda
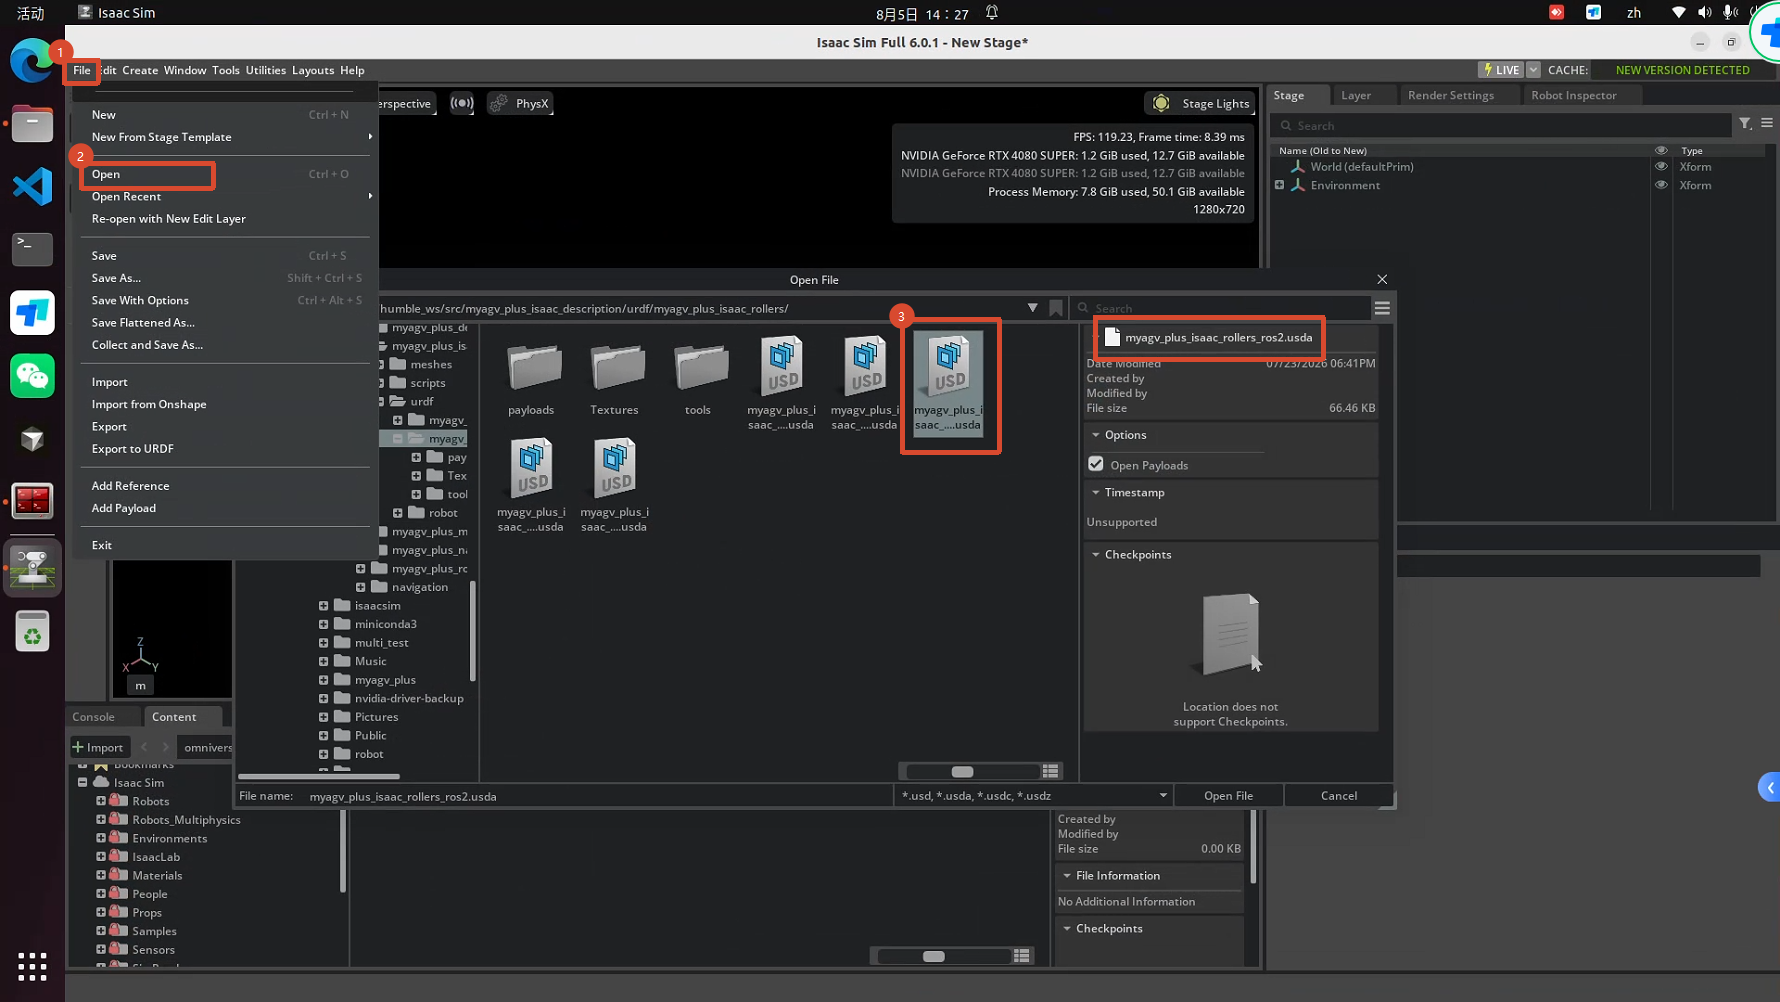
Click Play(▶).
Terminal 2 — Keyboard Remote:
ros2 run teleop_twist_keyboard teleop_twist_keyboard --ros-args -p stamped:=false
You have to include stamped:=false—teleop_twist_keyboard publishes TwistStamped by default, but the ROS2 Subscribe Twist node in this scenario only receives regular Twist. Without this parameter, keyboard control won't work and the model can't be moved.
Move forward/backward i/, , turn j/l; hold Shift to strafe, J/L to shift left and right (specific to Maiwheel).
Expected result: /cmd_vel can drive the chassis forward, backward, sideways, and rotate.
1.3 RTX Lidar Radar Simulation Test (myagv_plus_isaac_rollers_ros2_lidar.usda)
On top of scenario 1.2, add radar to get /scan and /point_cloud.
Node diagram:
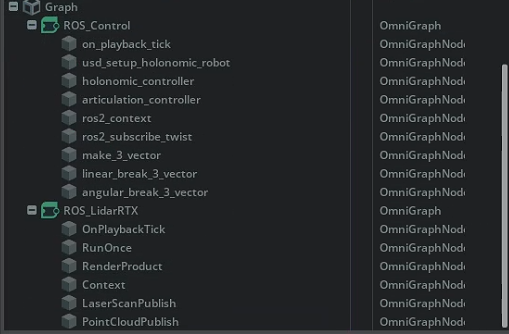
Terminal 1 —— Start Isaac:
~/isaacsim/isaac-sim.sh
Open the scene and Play (within the Isaac GUI, not a terminal command):
File → Open to open:
~/humble_ws/src/myagv_plus_isaac_description/urdf/myagv_plus_isaac_rollers/myagv_plus_isaac_rollers_ros2_lidar.usda
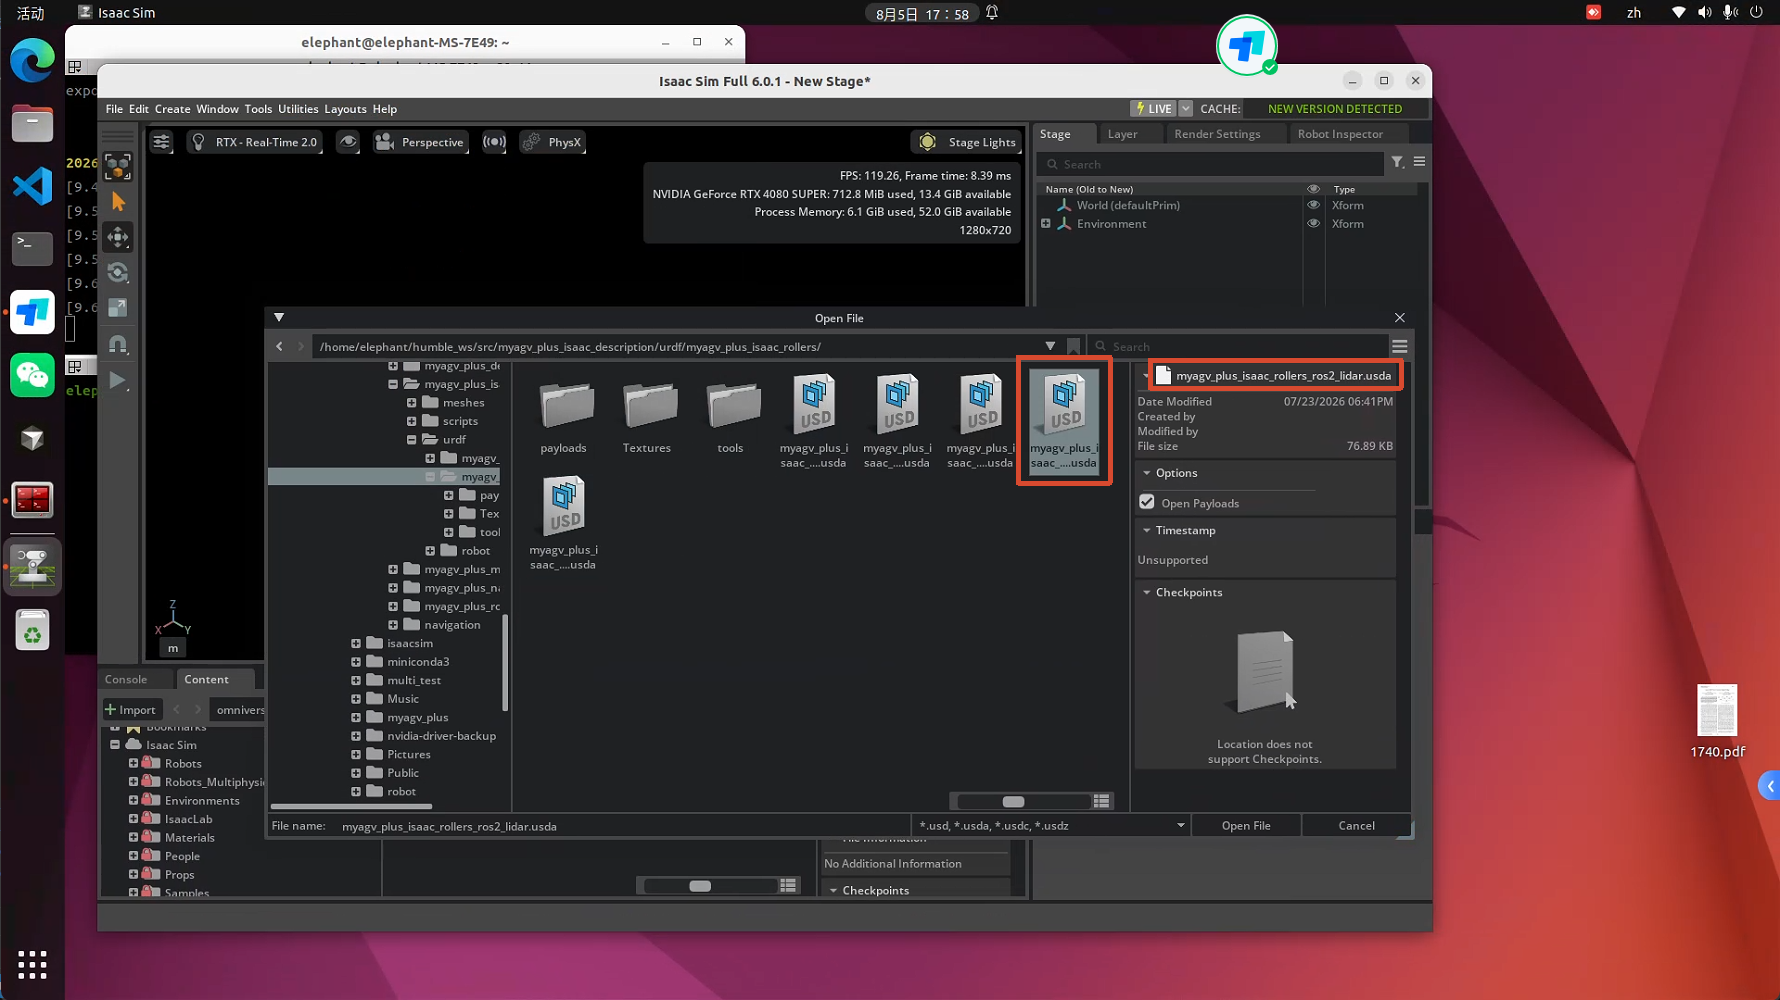
Click Play(▶).
Terminal 2 — Keyboard Remote:
ros2 run teleop_twist_keyboard teleop_twist_keyboard --ros-args -p stamped:=false
Move forward/backward with i/, , turn with j/l; hold Shift to strafe, use J/L to move left and right (exclusive to Maiwheel).
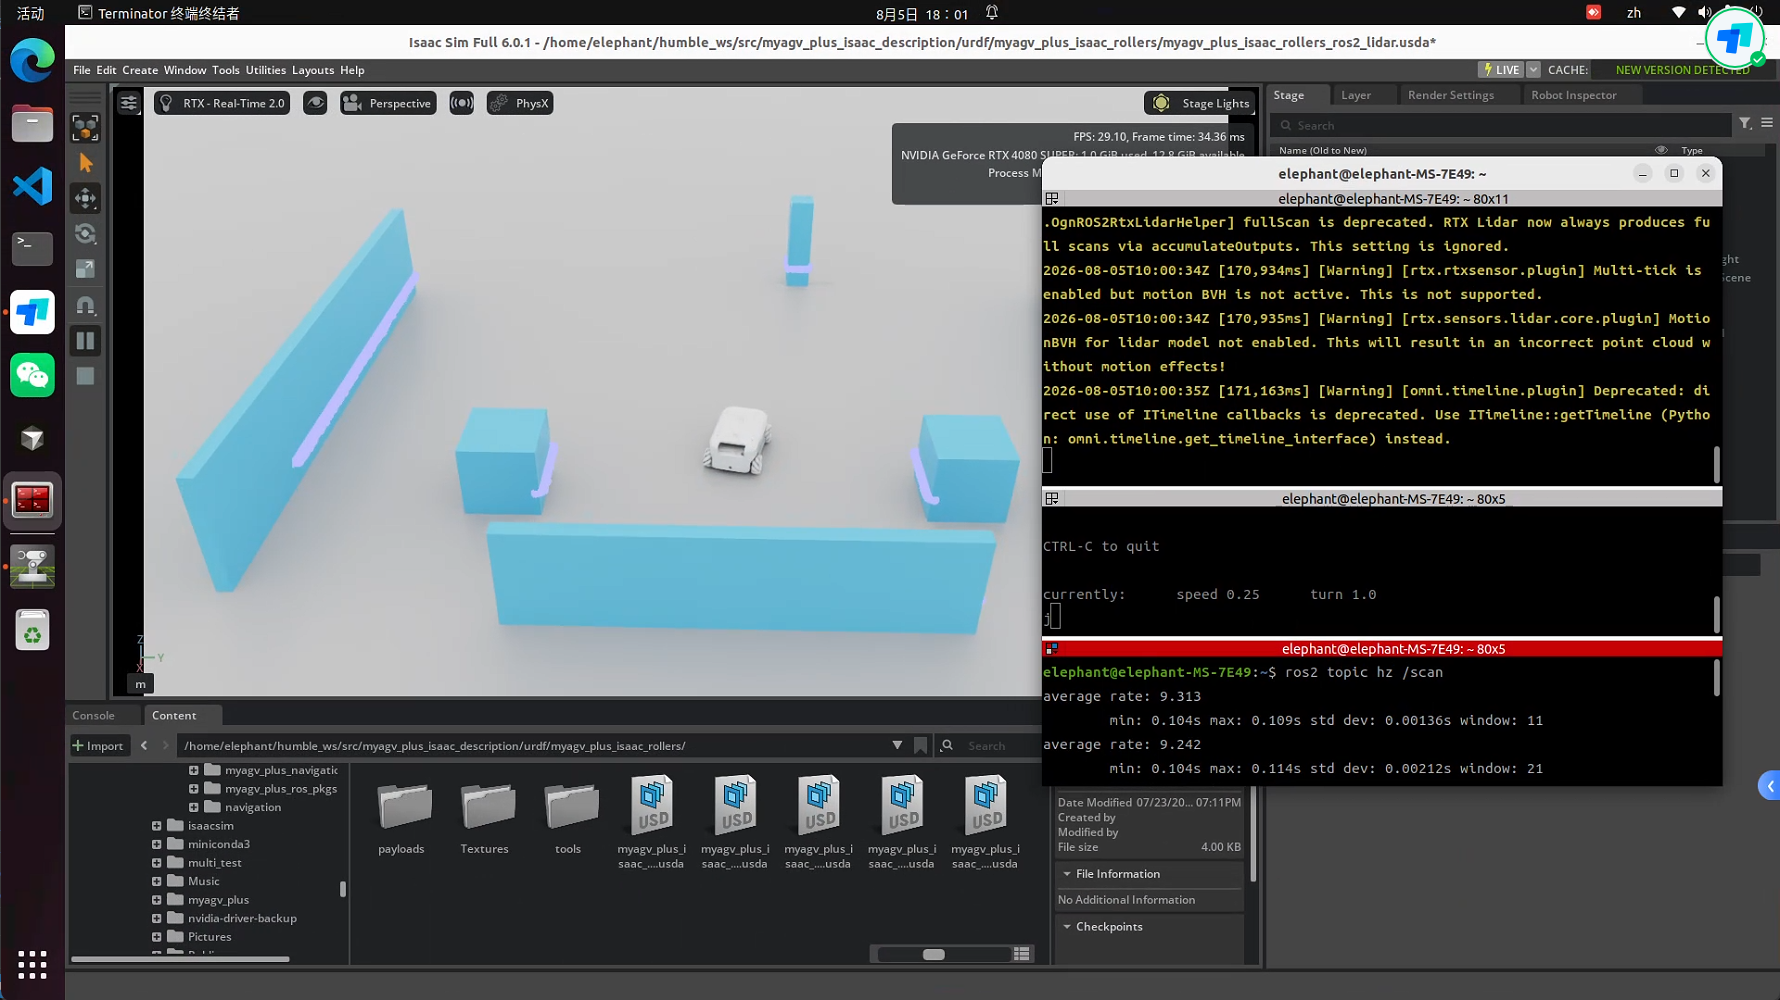
Terminal 3 — Testing /scan:
ros2 topic hz /scan
Expected result: /scan keeps publishing at nearly 10 Hz. The radar point cloud changes as the chassis is moved with the keyboard remote.
2. ros2_control route (real car control stack)
Switch to the real car control stack controller_manager + mecanum_drive_controller, the parameters calibrated in simulation can be directly used on the real car.
2.1 ros2_control control chain test (myagv_plus_isaac_rollers_sim.usda)
/cmd_vel changed to TwistStamped; /odom is derived from wheel speed, so slipping in Mecanum wheels will cause real drift, just like in a real car (not a bug).
Terminal 1 —— Start Isaac, load the scene and auto Play:
ros2 launch isaacsim_bringup run_isaacsim.launch.py play_sim_on_start:=true \
  gui:=$HOME/humble_ws/src/myagv_plus_isaac_description/urdf/myagv_plus_isaac_rollers/myagv_plus_isaac_rollers_sim.usda
Terminal 2 — After confirming /clock keeps outputting, start the control stack + RViz:
ros2 topic hz /clock
# After seeing continuous output, press Ctrl+C, then run:
ros2 launch isaacsim_bringup sim_bringup.launch.py use_rviz:=true
Terminal 3 —— Keyboard control (/cmd_vel is TwistStamped):
ros2 run teleop_twist_keyboard teleop_twist_keyboard
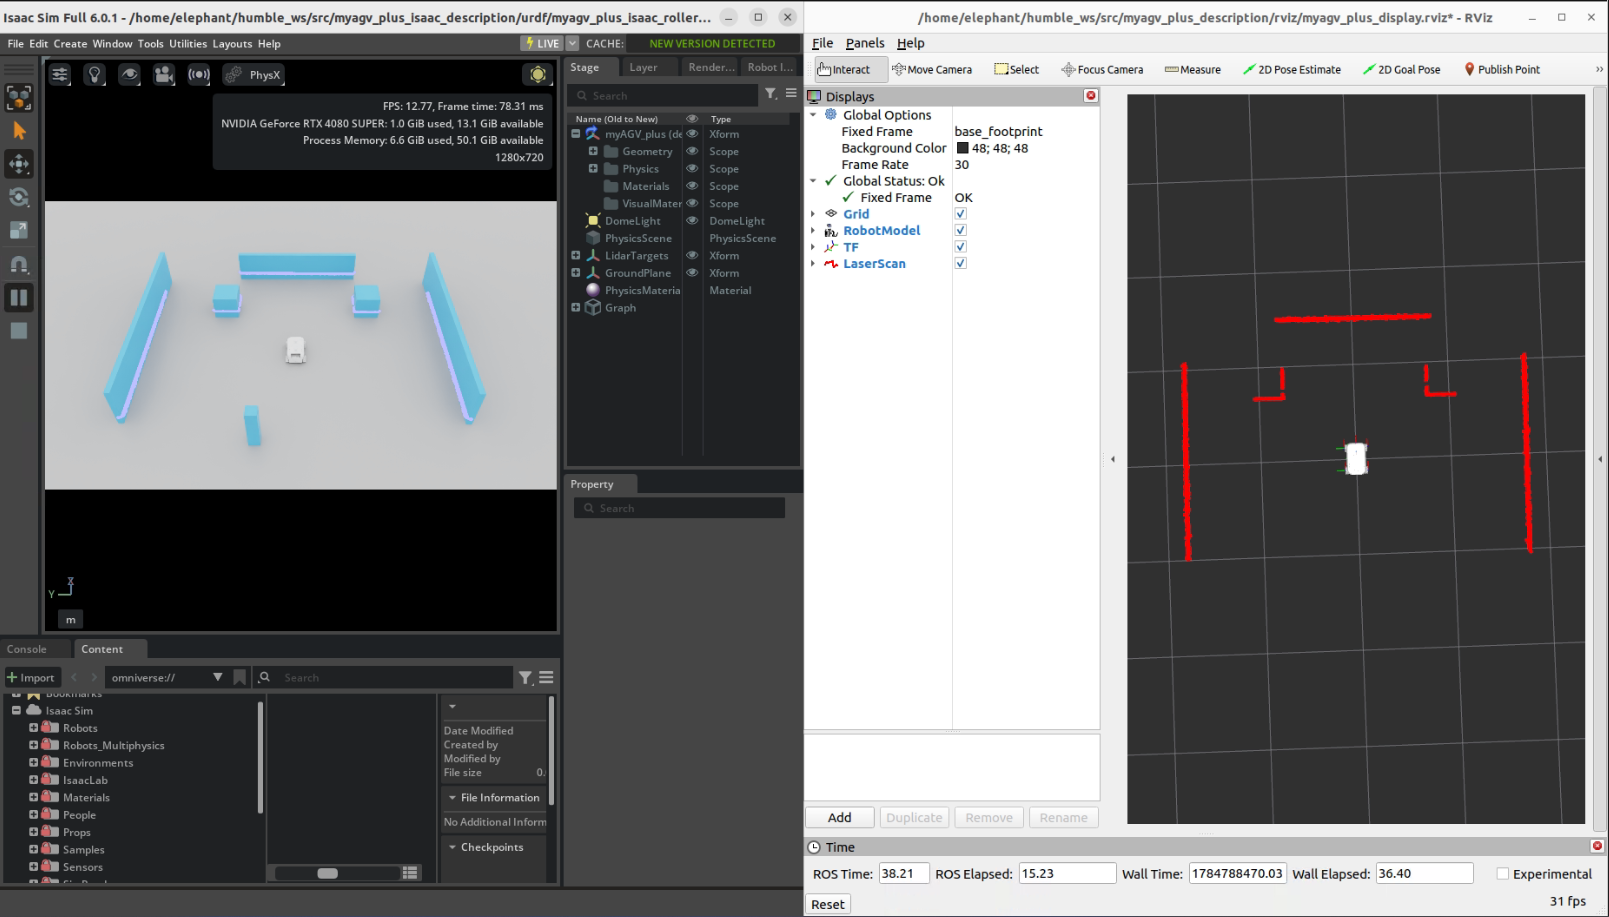
Expected result: The radar point cloud changes as the chassis moves with the keyboard remote.
2.2 Simulation Mapping Test
You can pick any one of the four official scenes, all the files are in ~/isaacsim/scenes/
| Scene | Filename |
|---|---|
| lighten the position | myagv_plus_warehouse.usda |
| Multiple shelves | myagv_plus_multiple_shelves.usda |
| Okura | myagv_plus_full_warehouse.usda |
| Office | myagv_plus_office.usda |
For example, in a multi-shelf scenario, all terminals need to first carry out the previous 'general setup'.
Terminal 1 —— Start Isaac, load the scene and auto Play:
ros2 launch isaacsim_bringup run_isaacsim.launch.py \
  gui:=$HOME/isaacsim/scenes/myagv_plus_multiple_shelves.usda \
  play_sim_on_start:=true
Terminal 2 — After confirming /clock keeps outputting, start the ros2_control chassis:
ros2 topic hz /clock
# After seeing continuous output, press Ctrl+C, then execute:
ros2 launch isaacsim_bringup sim_bringup.launch.py use_rviz:=false
Terminal 3 —— Starting gmapping:
ros2 launch slam_gmapping slam_gmapping.launch.py use_sim_time:=true
Terminal 4 — Keyboard Remote Collection:
ros2 run teleop_twist_keyboard teleop_twist_keyboard
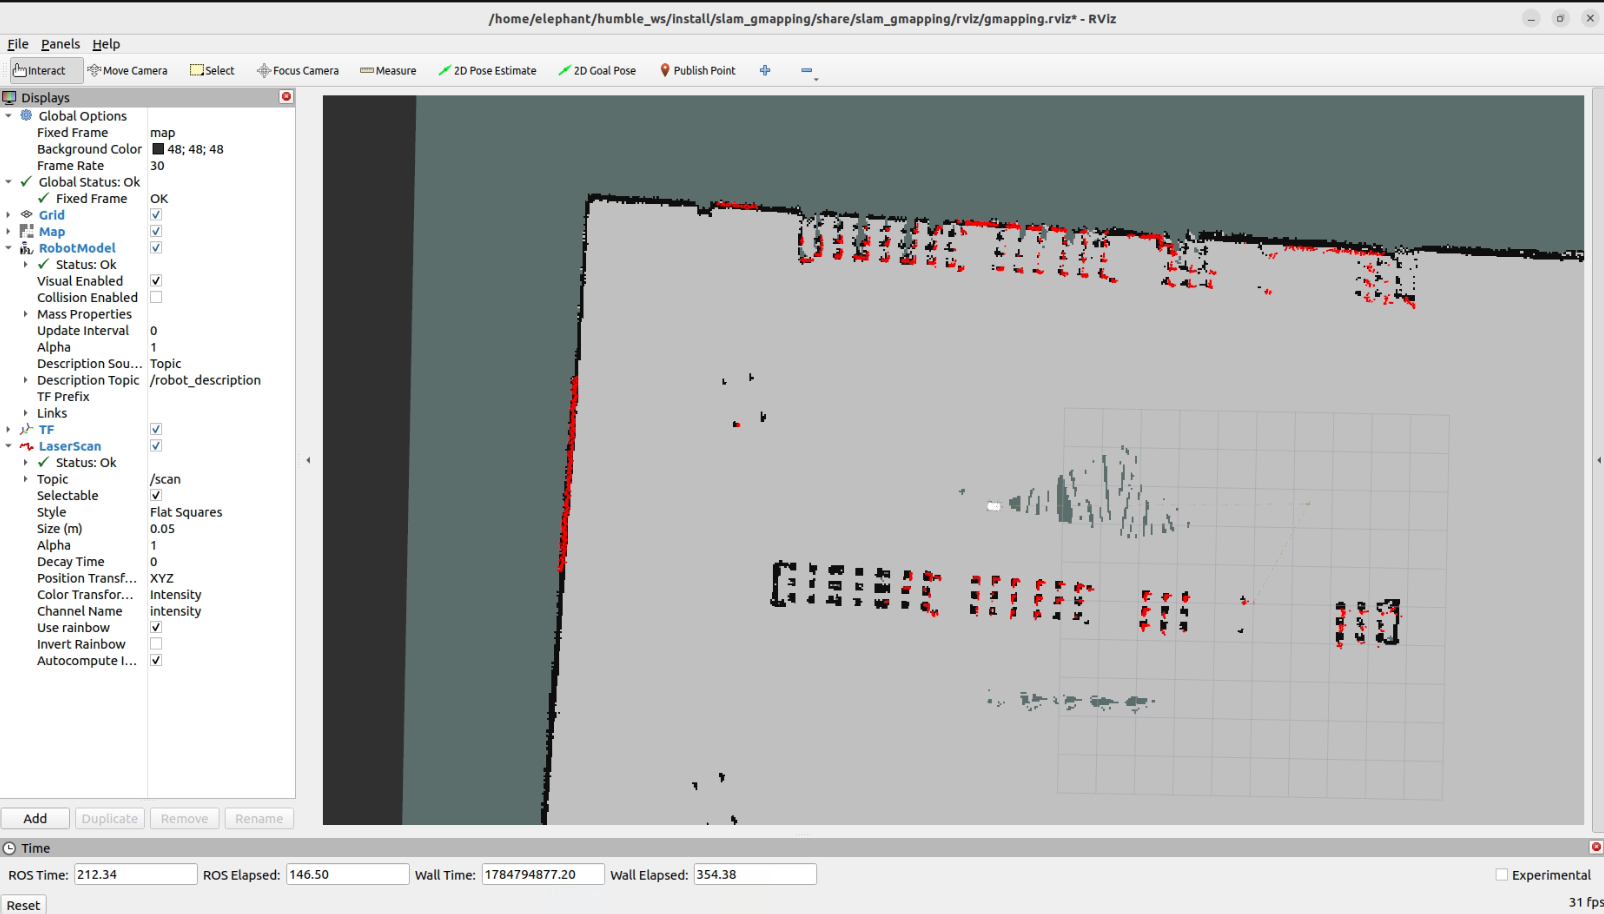
Move slowly and rotate, sweep the entire scene boundaries and aisle shelves, and finally return near the mapping starting point to form a loop, then save the map once it stabilises in RViz.
Terminal 5 — Save Map:
ros2 run nav2_map_server map_saver_cli \
  -f ~/humble_ws/src/myagv_plus_navigation2/map/map \
  --ros-args -p use_sim_time:=true
Expected result: map.pgm / map.yaml saved in myagv_plus_navigation2/map/, the map shape in RViz matches the scene
2.3 Simulated navigation test
Based on the map saved from '2.2 Simulation Mapping Test', the scene needs to match what was used during mapping.
Terminal 1 —— Start Isaac, load the scene and auto Play:
ros2 launch isaacsim_bringup run_isaacsim.launch.py \
  gui:=$HOME/isaacsim/scenes/myagv_plus_multiple_shelves.usda \
  play_sim_on_start:=true
Terminal 2 — After confirming that /clock keeps outputting, start the control stack (without RViz):
ros2 topic hz /clock
# After seeing continuous output, press Ctrl+C, then execute:
ros2 launch isaacsim_bringup sim_bringup.launch.py use_rviz:=false
Terminal 3 — Start navigating:
ros2 launch myagv_plus_navigation2 navigation2_active.launch.py use_sim_time:=true
RViz Operation:
- 2D Pose Estimate: Click on the actual position of the car on the map (near the mapping start point), wait for the AMCL particle cloud to converge and for
map → odomto align. You can't localise without an initial pose. - Nav2 Goal: Click on a target point in the open area and watch the car plan its path and move.
Expected result: Successful localisation, laser basically matches the map; able to issue target points and plan a route to reach them, can navigate around obstacles.