Block Programming
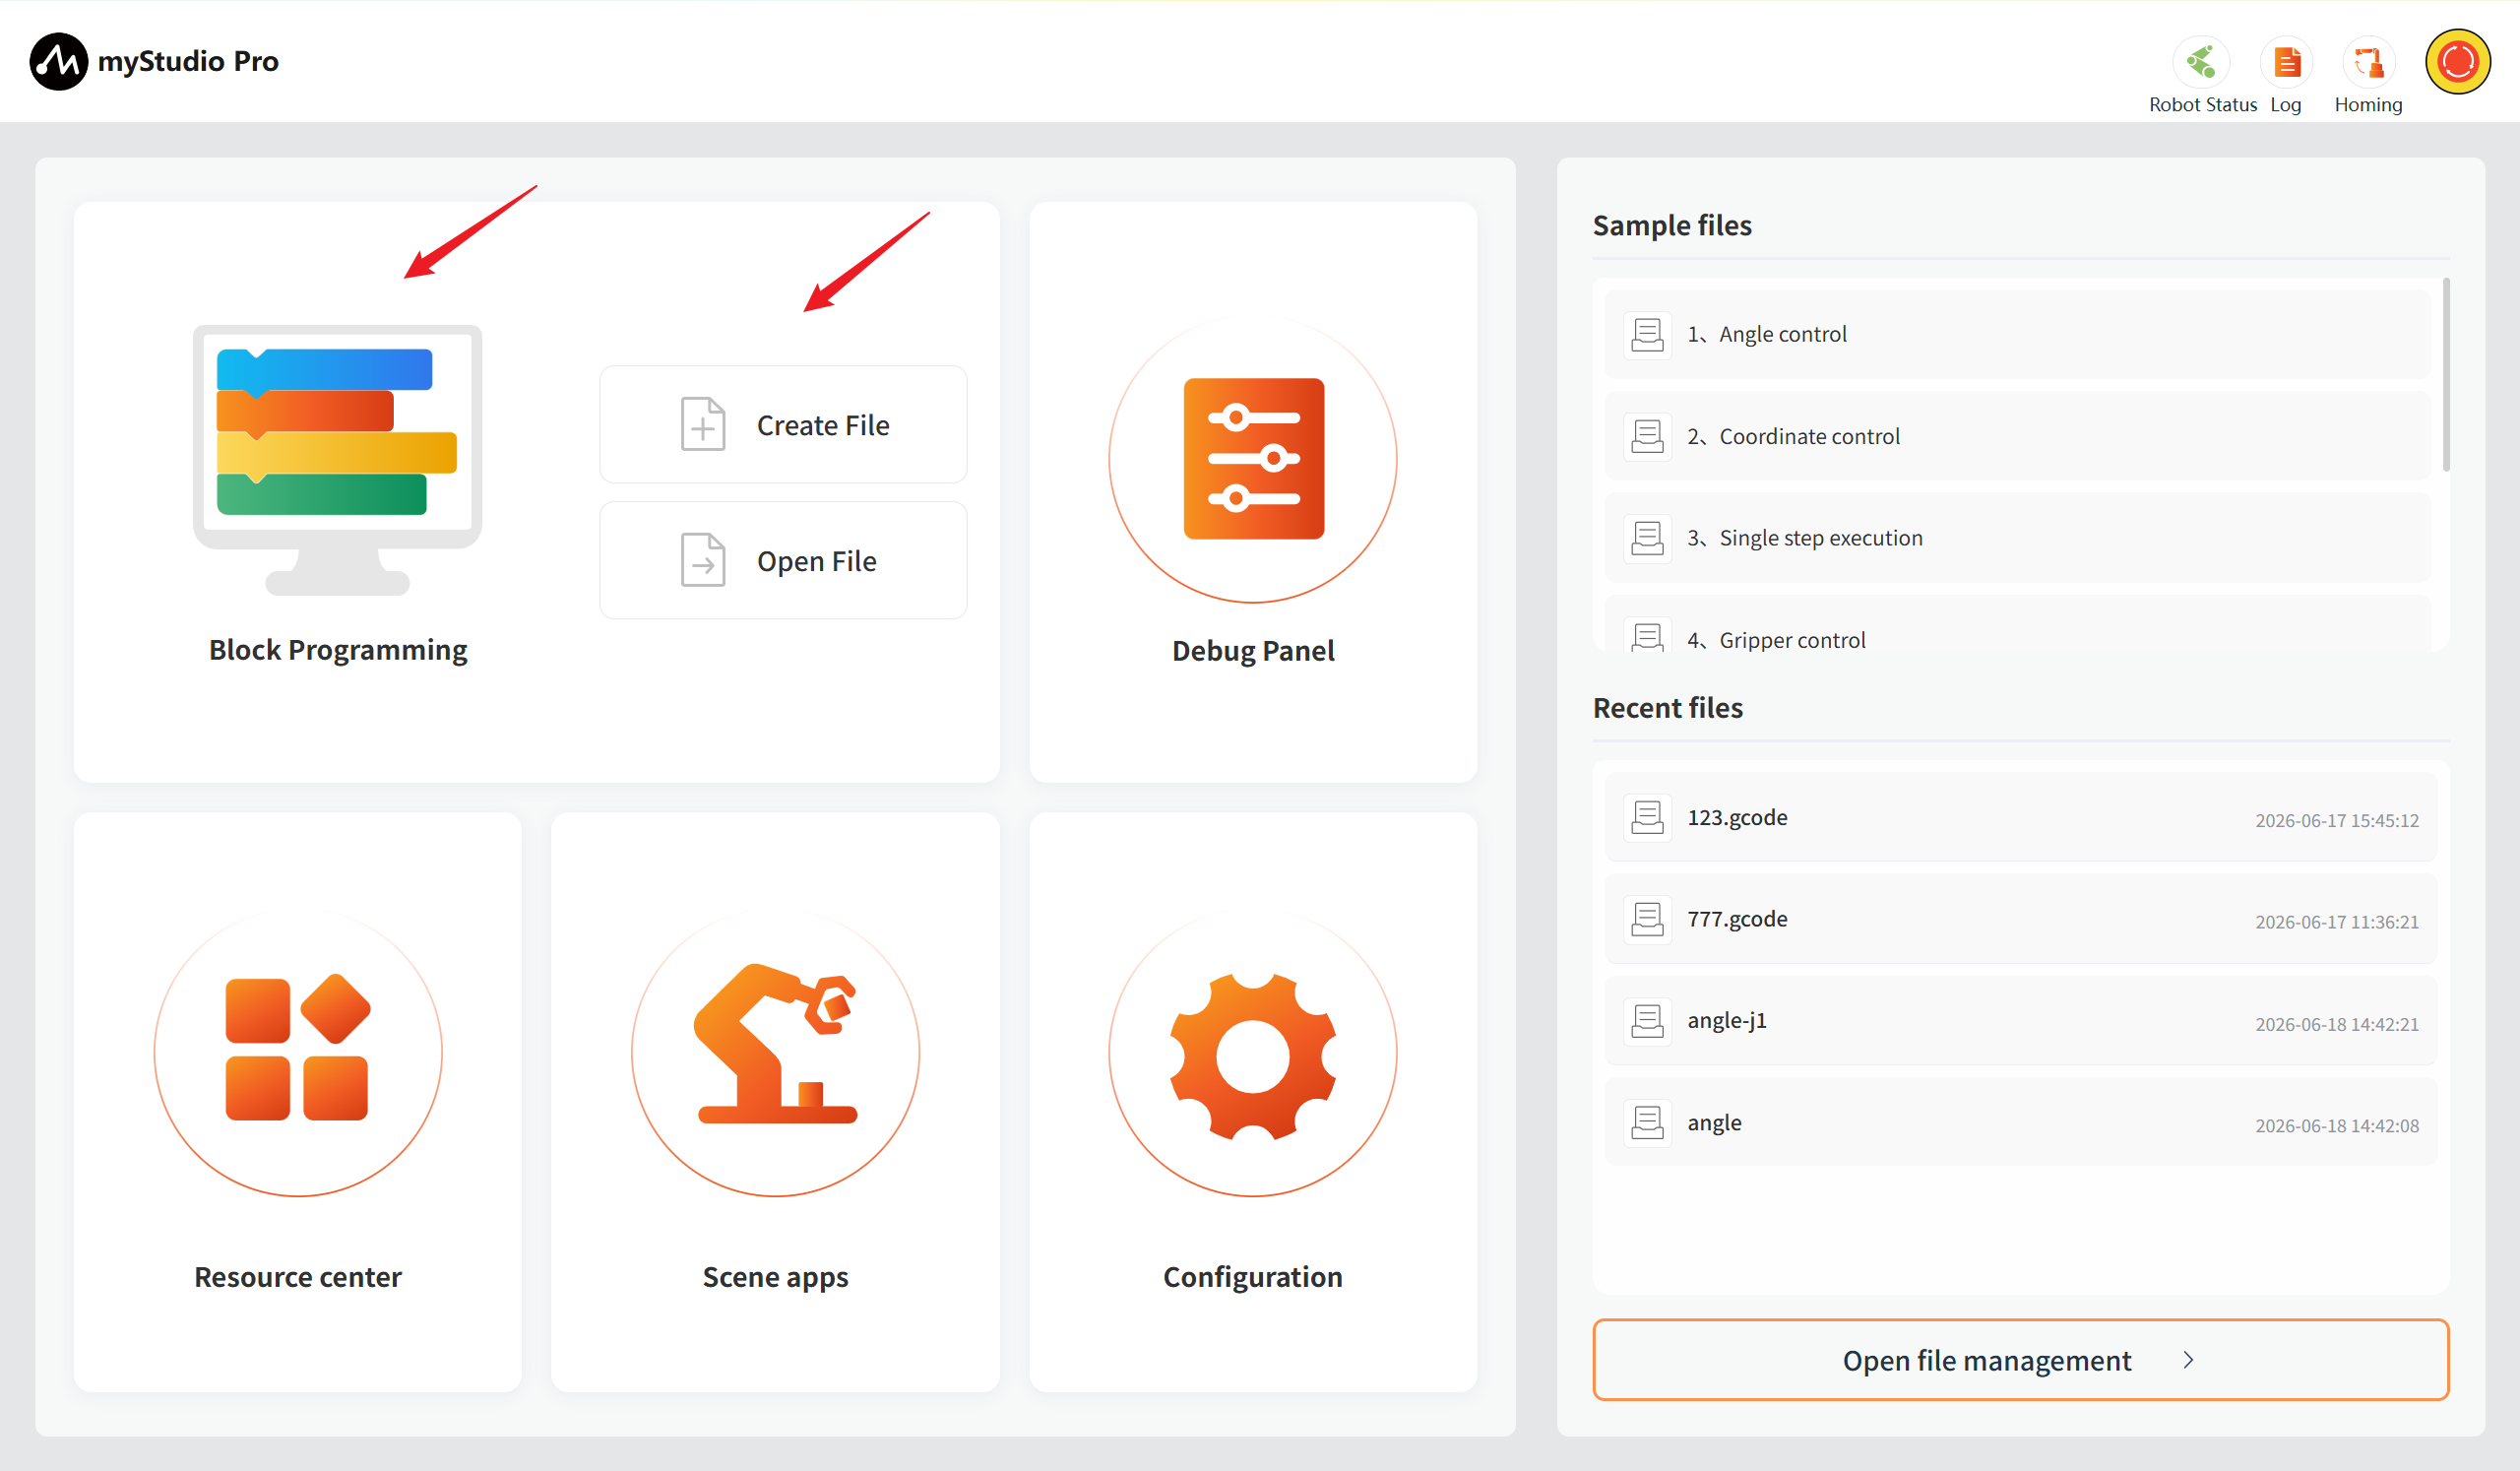
You can click the Block Programming icon, or click the "Create File" button to enter the Block Programming page.
Sure, if you also choose to click the "Open File" button, it will automatically navigate to the block programming page and load the content of the file you have saved, including the workspace, waypoints, and trajectory files (for more information on how to save the workspace, please click here)
The operation of clicking the block programming icon and the "Create File" button to enter the block programming page here is equivalent to creating a new workspace.
The Block Programming page is shown as follows:
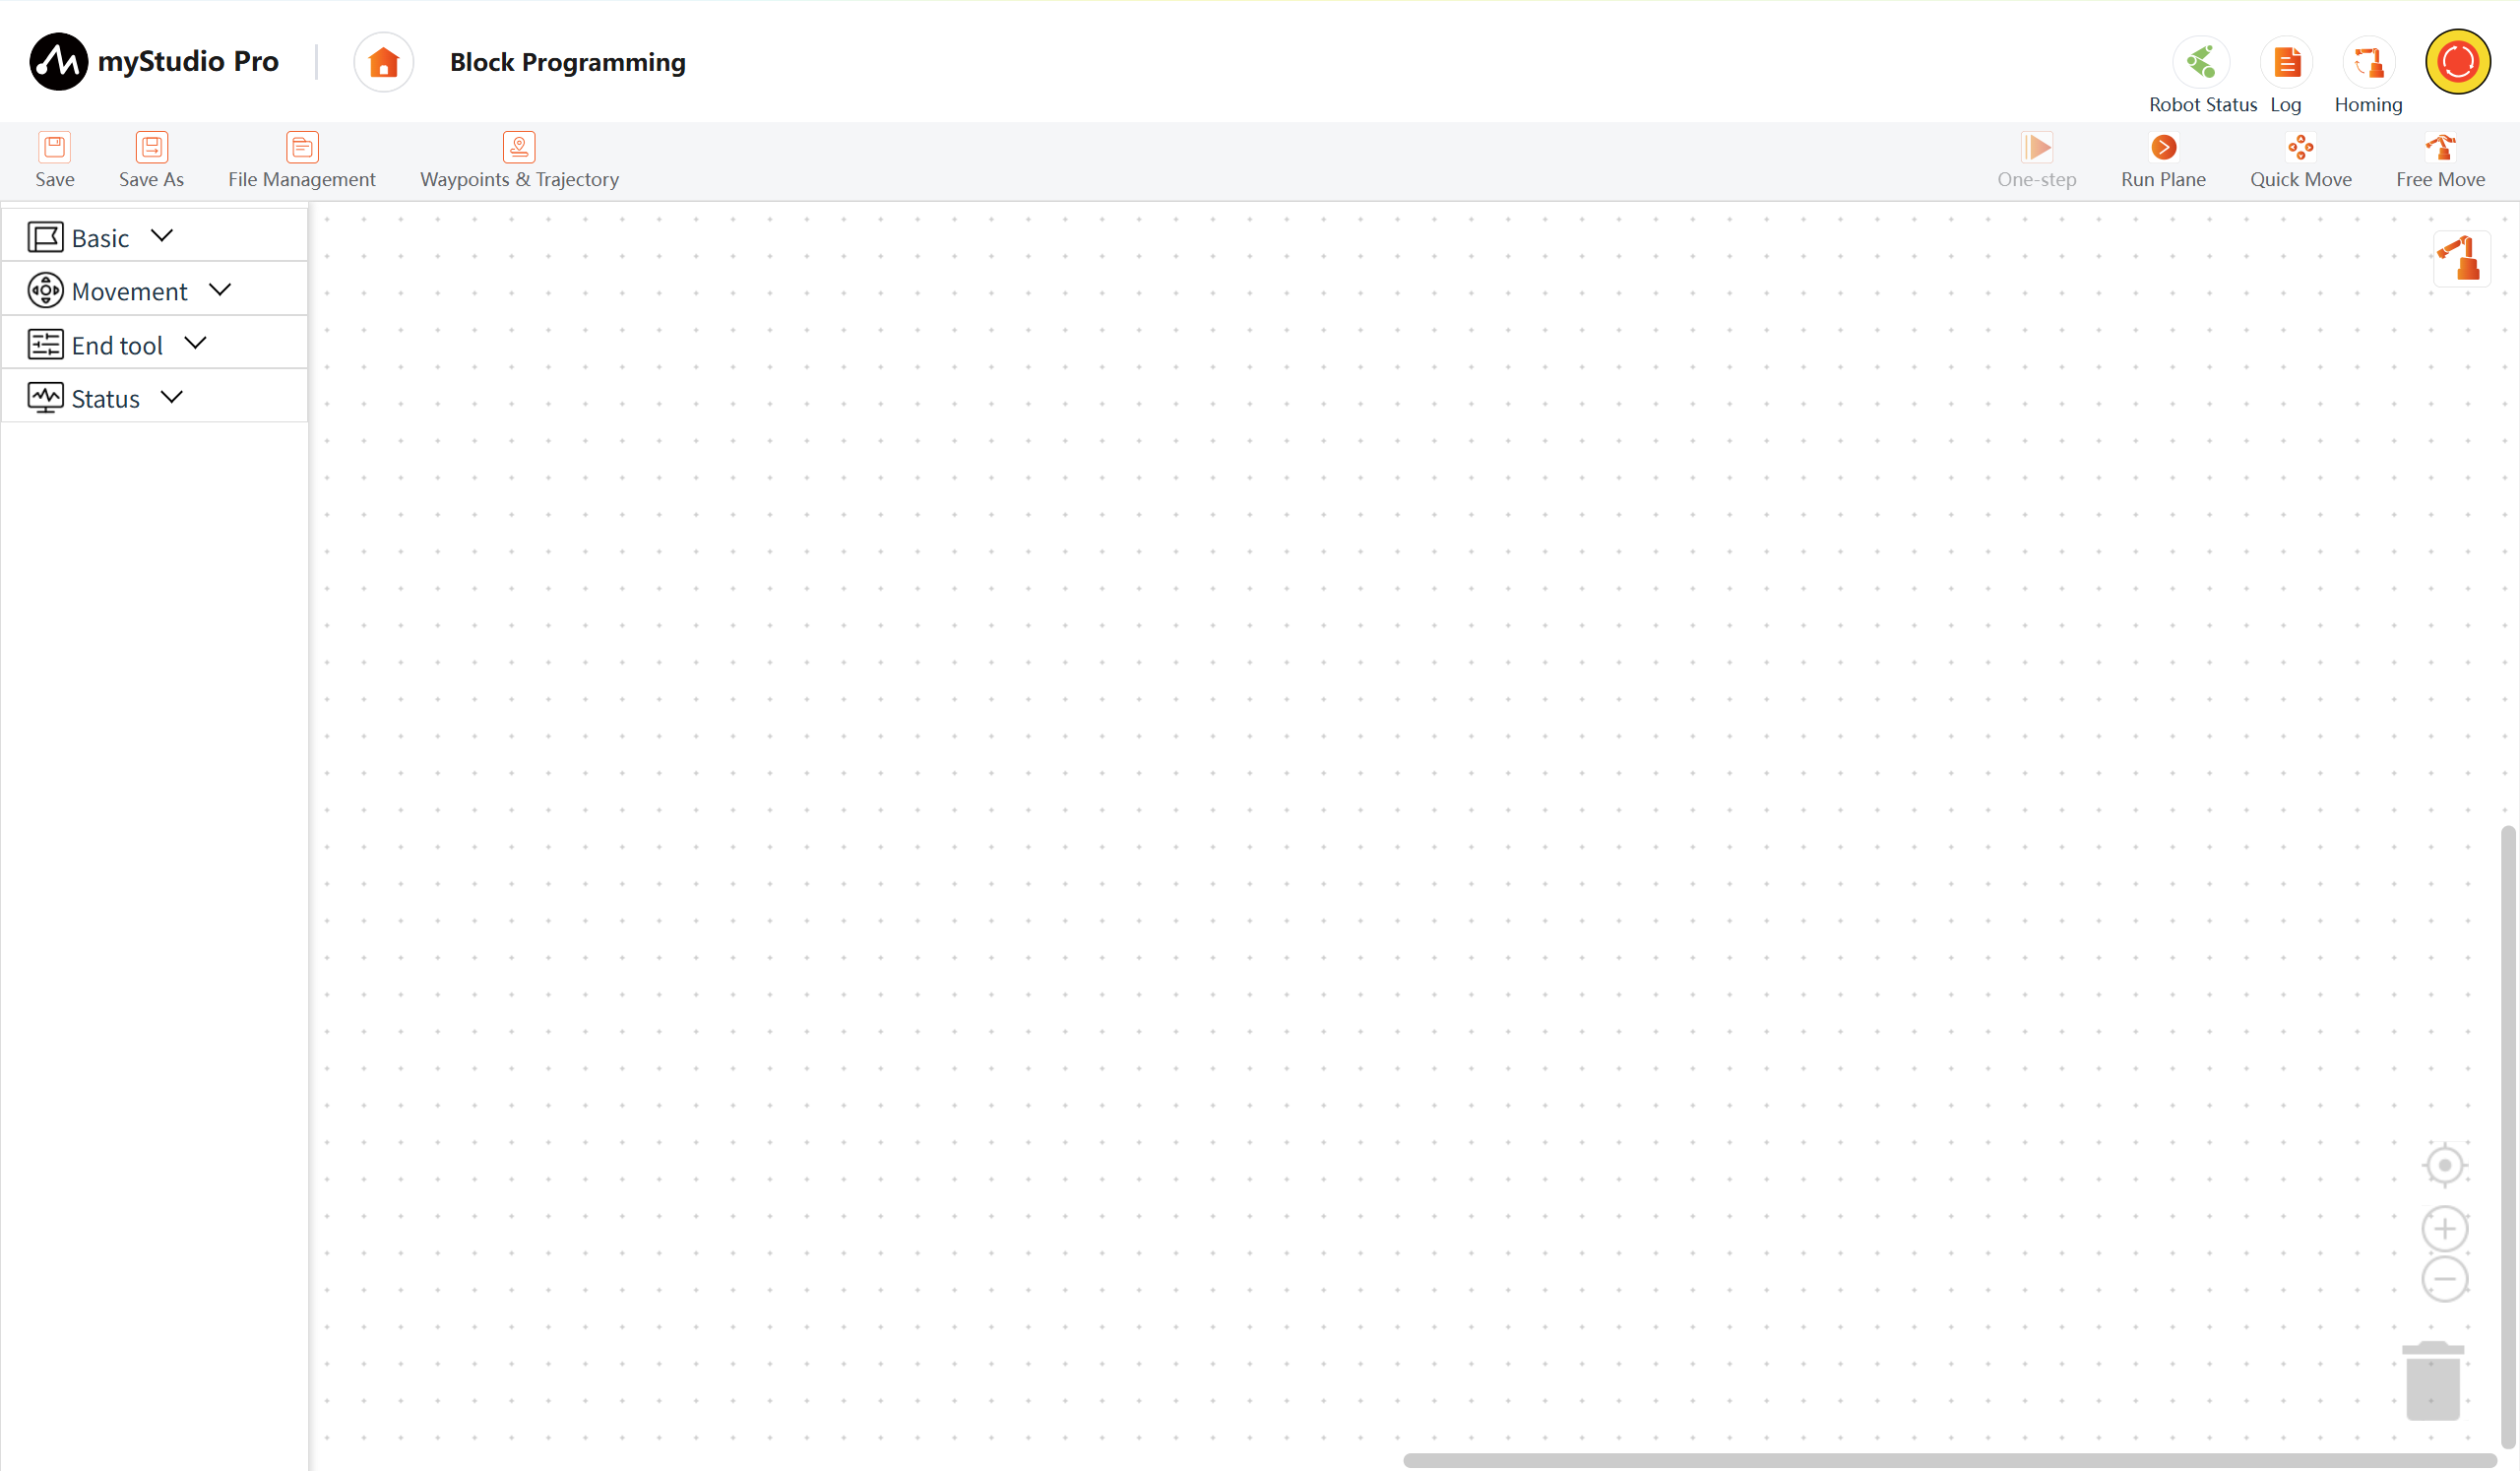
1 Introduction to the Block Programming Main Interface
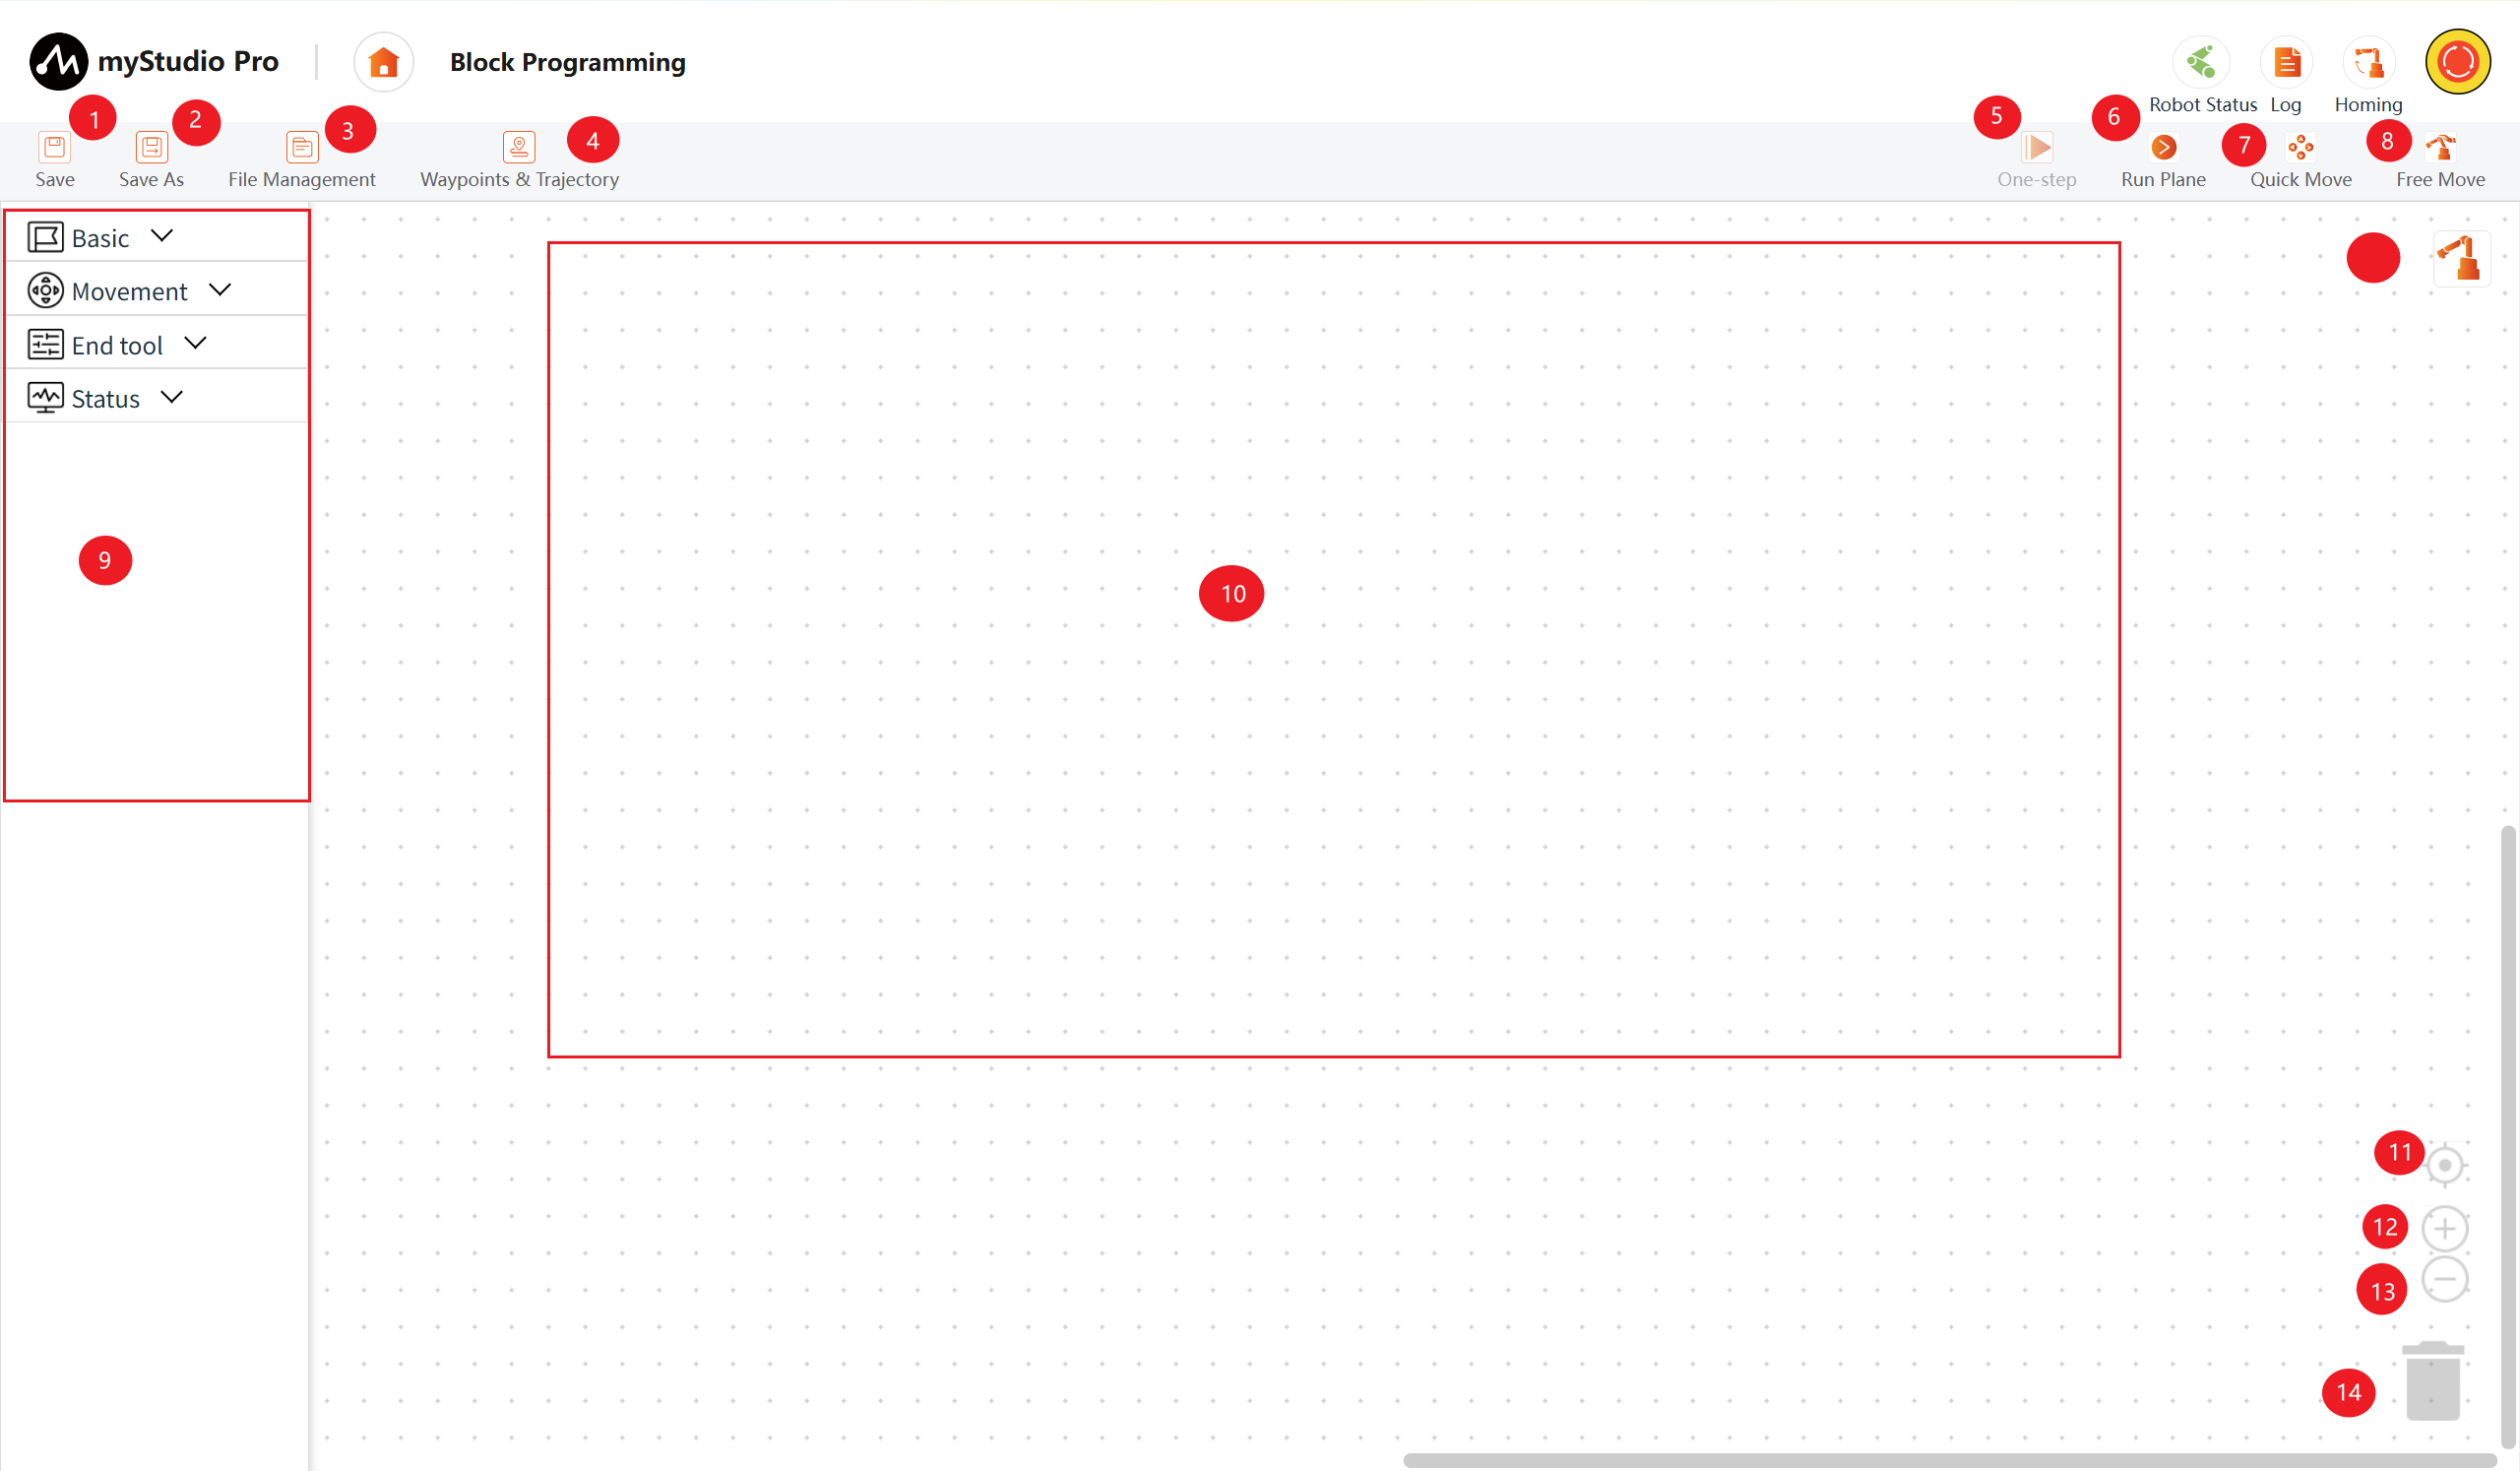
| Serial Number | Function Description |
|---|---|
| 1 | Save: This option allows for the saving of block program files. By default, the files are saved in the File Management - Test File Space. |
| 2 | Save As: Save the file to a local computer directory outside the file management - test file space; |
| 3 | File Management: By opening the file list panel, you can perform operations such as editing, deleting, and other related actions for the block program files; |
| 4 | Waypoints & Trajectory: Quickly create teaching points and run them, as well as record the trajectory and reproduce it; |
| 5 | One-step execution: Select a certain block, and you can click this button to execute only the current selected block; |
| 6 | Run Plane: Open the run panel. In this panel, you can run and debug the code in the workspace; |
| 7 | Quick Move: Used for quickly controlling the movement of the robotic arm; |
| 8 | Free Move: The free movement mode can be enabled and disabled. |
| 9 | Toolbox: Provides pre-assembled building blocks for users to use; |
| 10 | Workspace:: Blocks from the toolbox can be dragged here for programming; |
| 11 | Posture: When you open the posture page, you can see the real-time simulation movement posture of the 3D model; |
| 12 | Workspace Calibration: After clicking, the work area (workspace) will return to its original position; |
| 13 | Zoom In: Zoom in on the workspace; |
| 14 | Zoom Out: Zoom out on the workspace; |
| 15 | Trash Can: Blocks in the workspace can be dragged here to delete them, and deleted blocks can also be retrieved from here; |
2 Basic Function Usage
Let's write a small case study to introduce the basic usage of Block Programming
Case Description: Control the robotic arm to return to zero, then control one joint to move to a 20-degree position, and then return to zero.
Step 1: First, click the Posture button to open the attitude view, where you can see the current attitude of the simulated robotic arm.
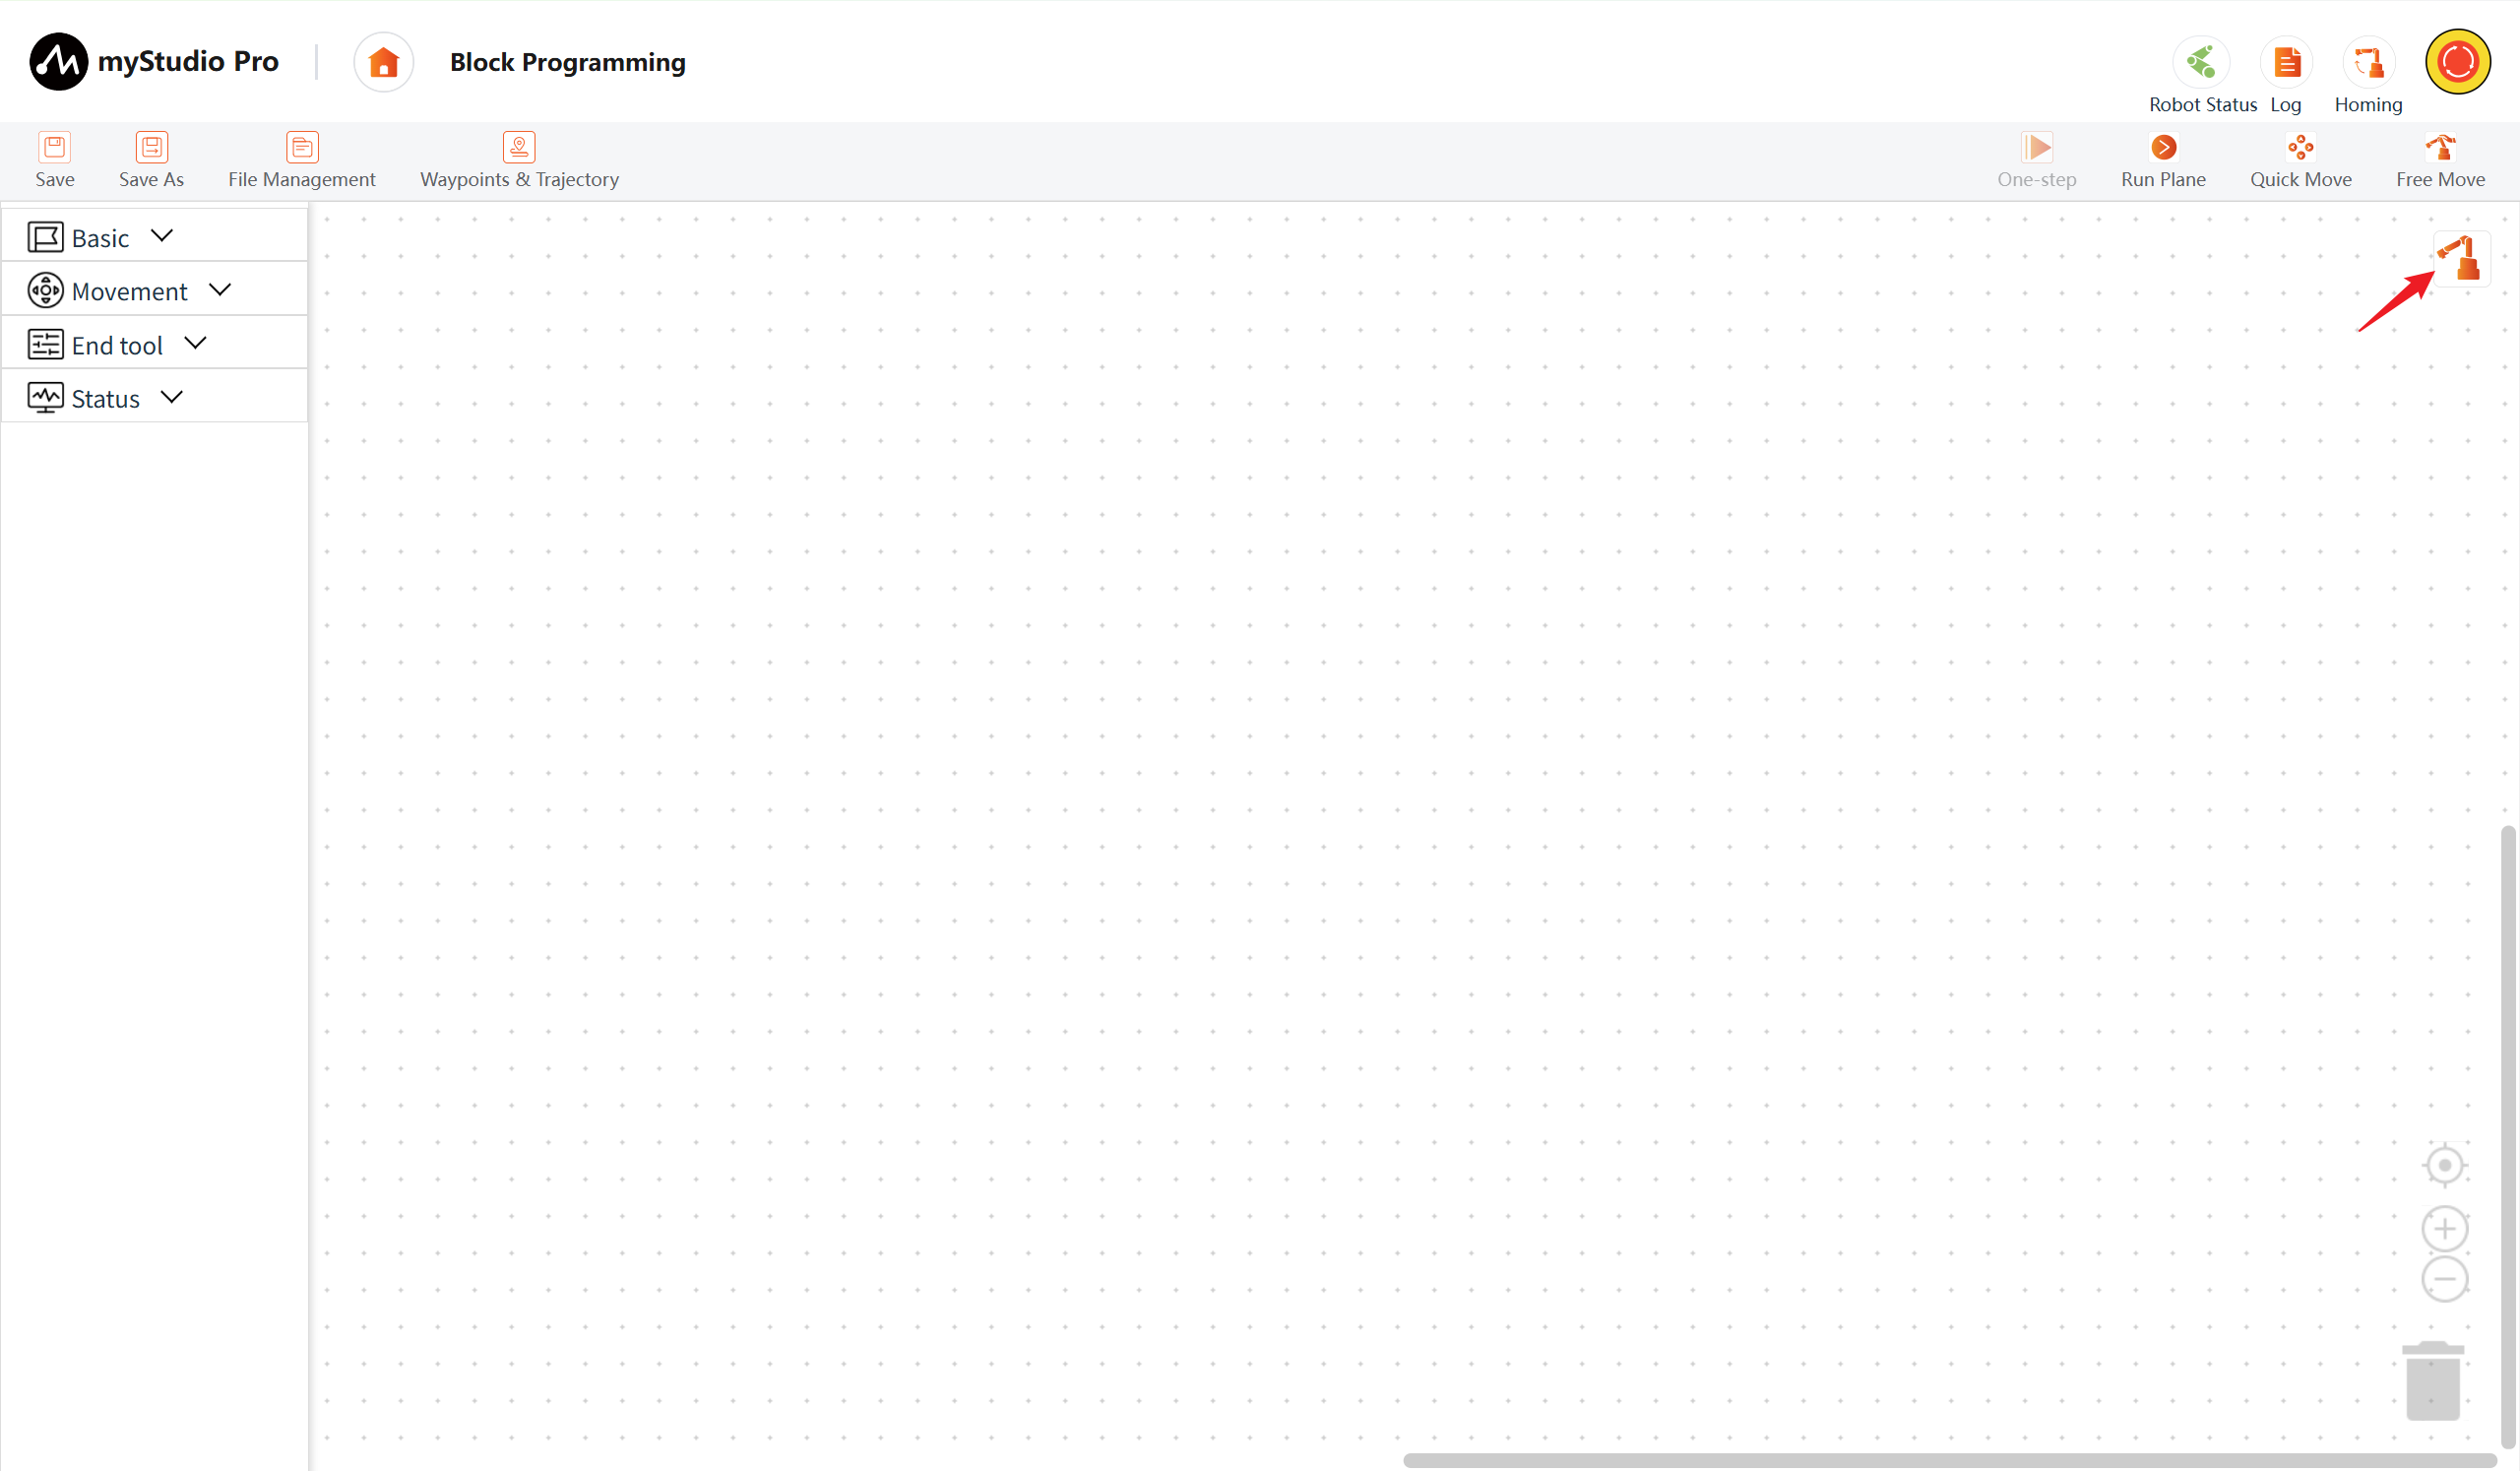
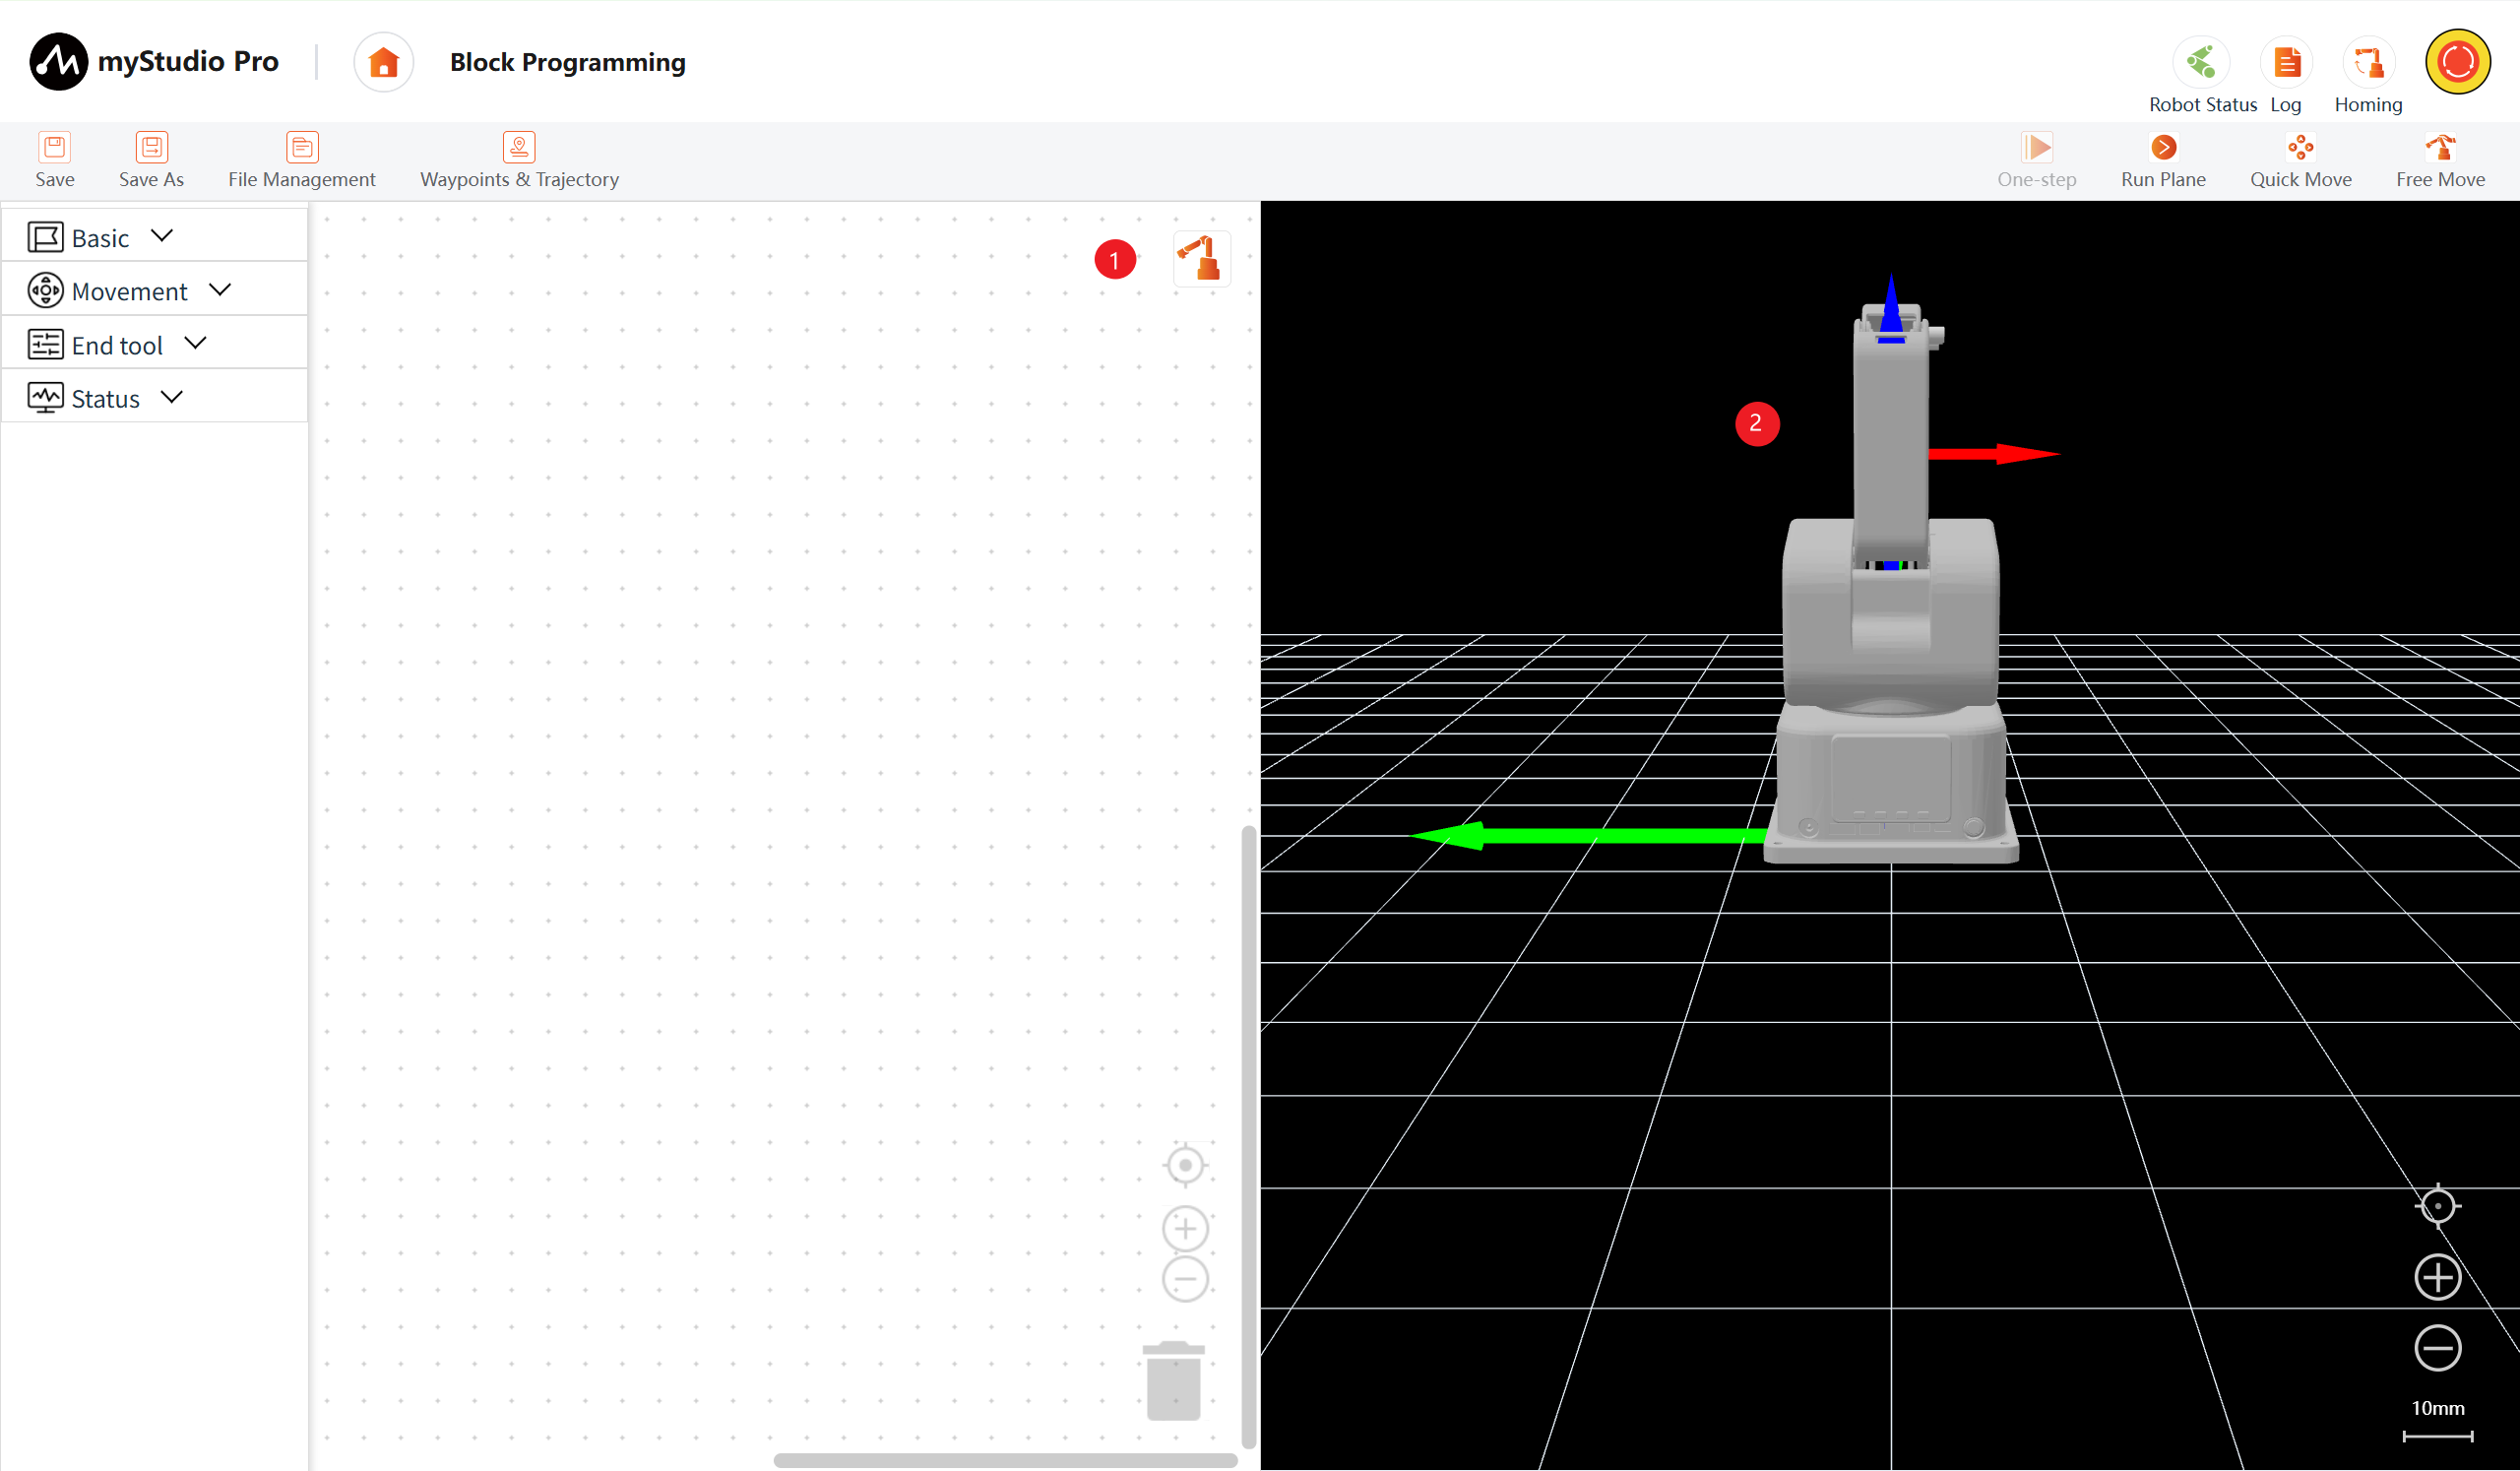
1: Switch the posture panel: Click to show when the posture panel is hidden, and click to collapse when it is hidden.
2: Robotic arm simulation model, which can simulate motion in real time based on the current actual angle.
Step Two: Start Programming
Open the toolbox, first-level category Movement, select the second-level category Angle & Coord, and drag the Set Angles block to the workspace.
This block is used to control the movement of each joint of the robotic arm to a given angle. The default movement speed is 20.
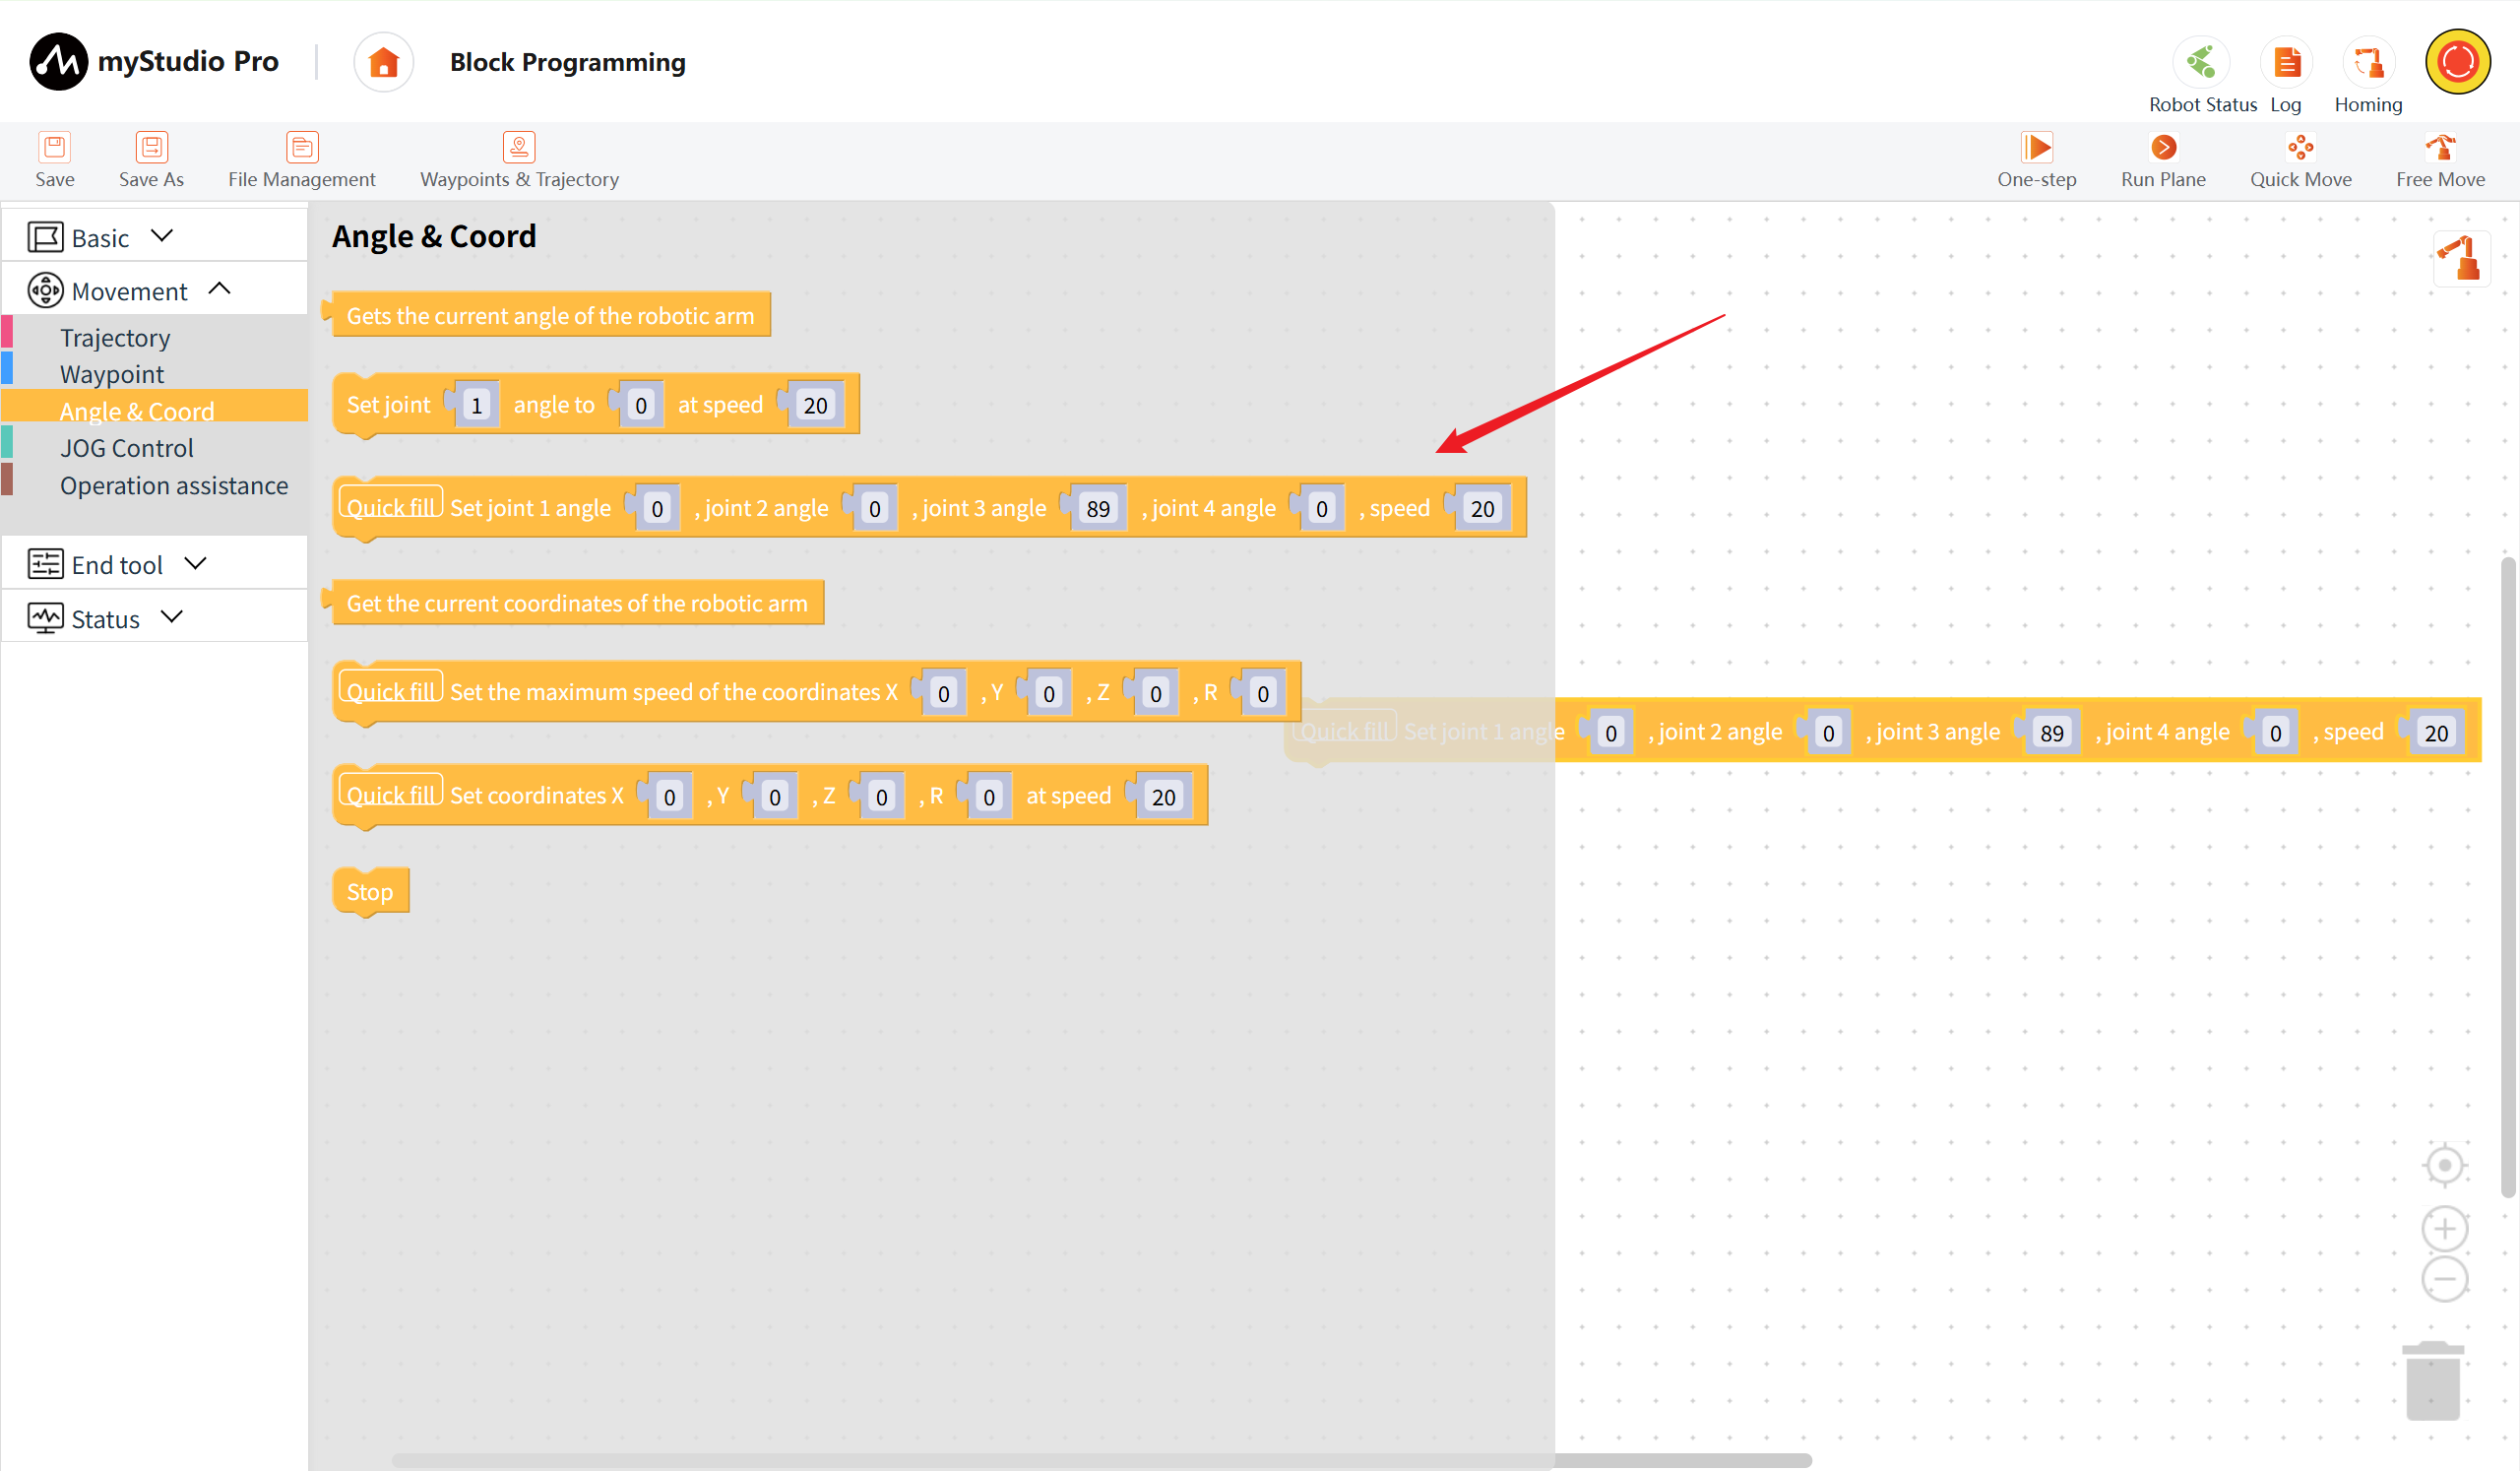
Open the toolbox's primary category Basic, select the secondary category Time, drag the Sleep block to the workspace, and set the sleep time to 3 seconds.
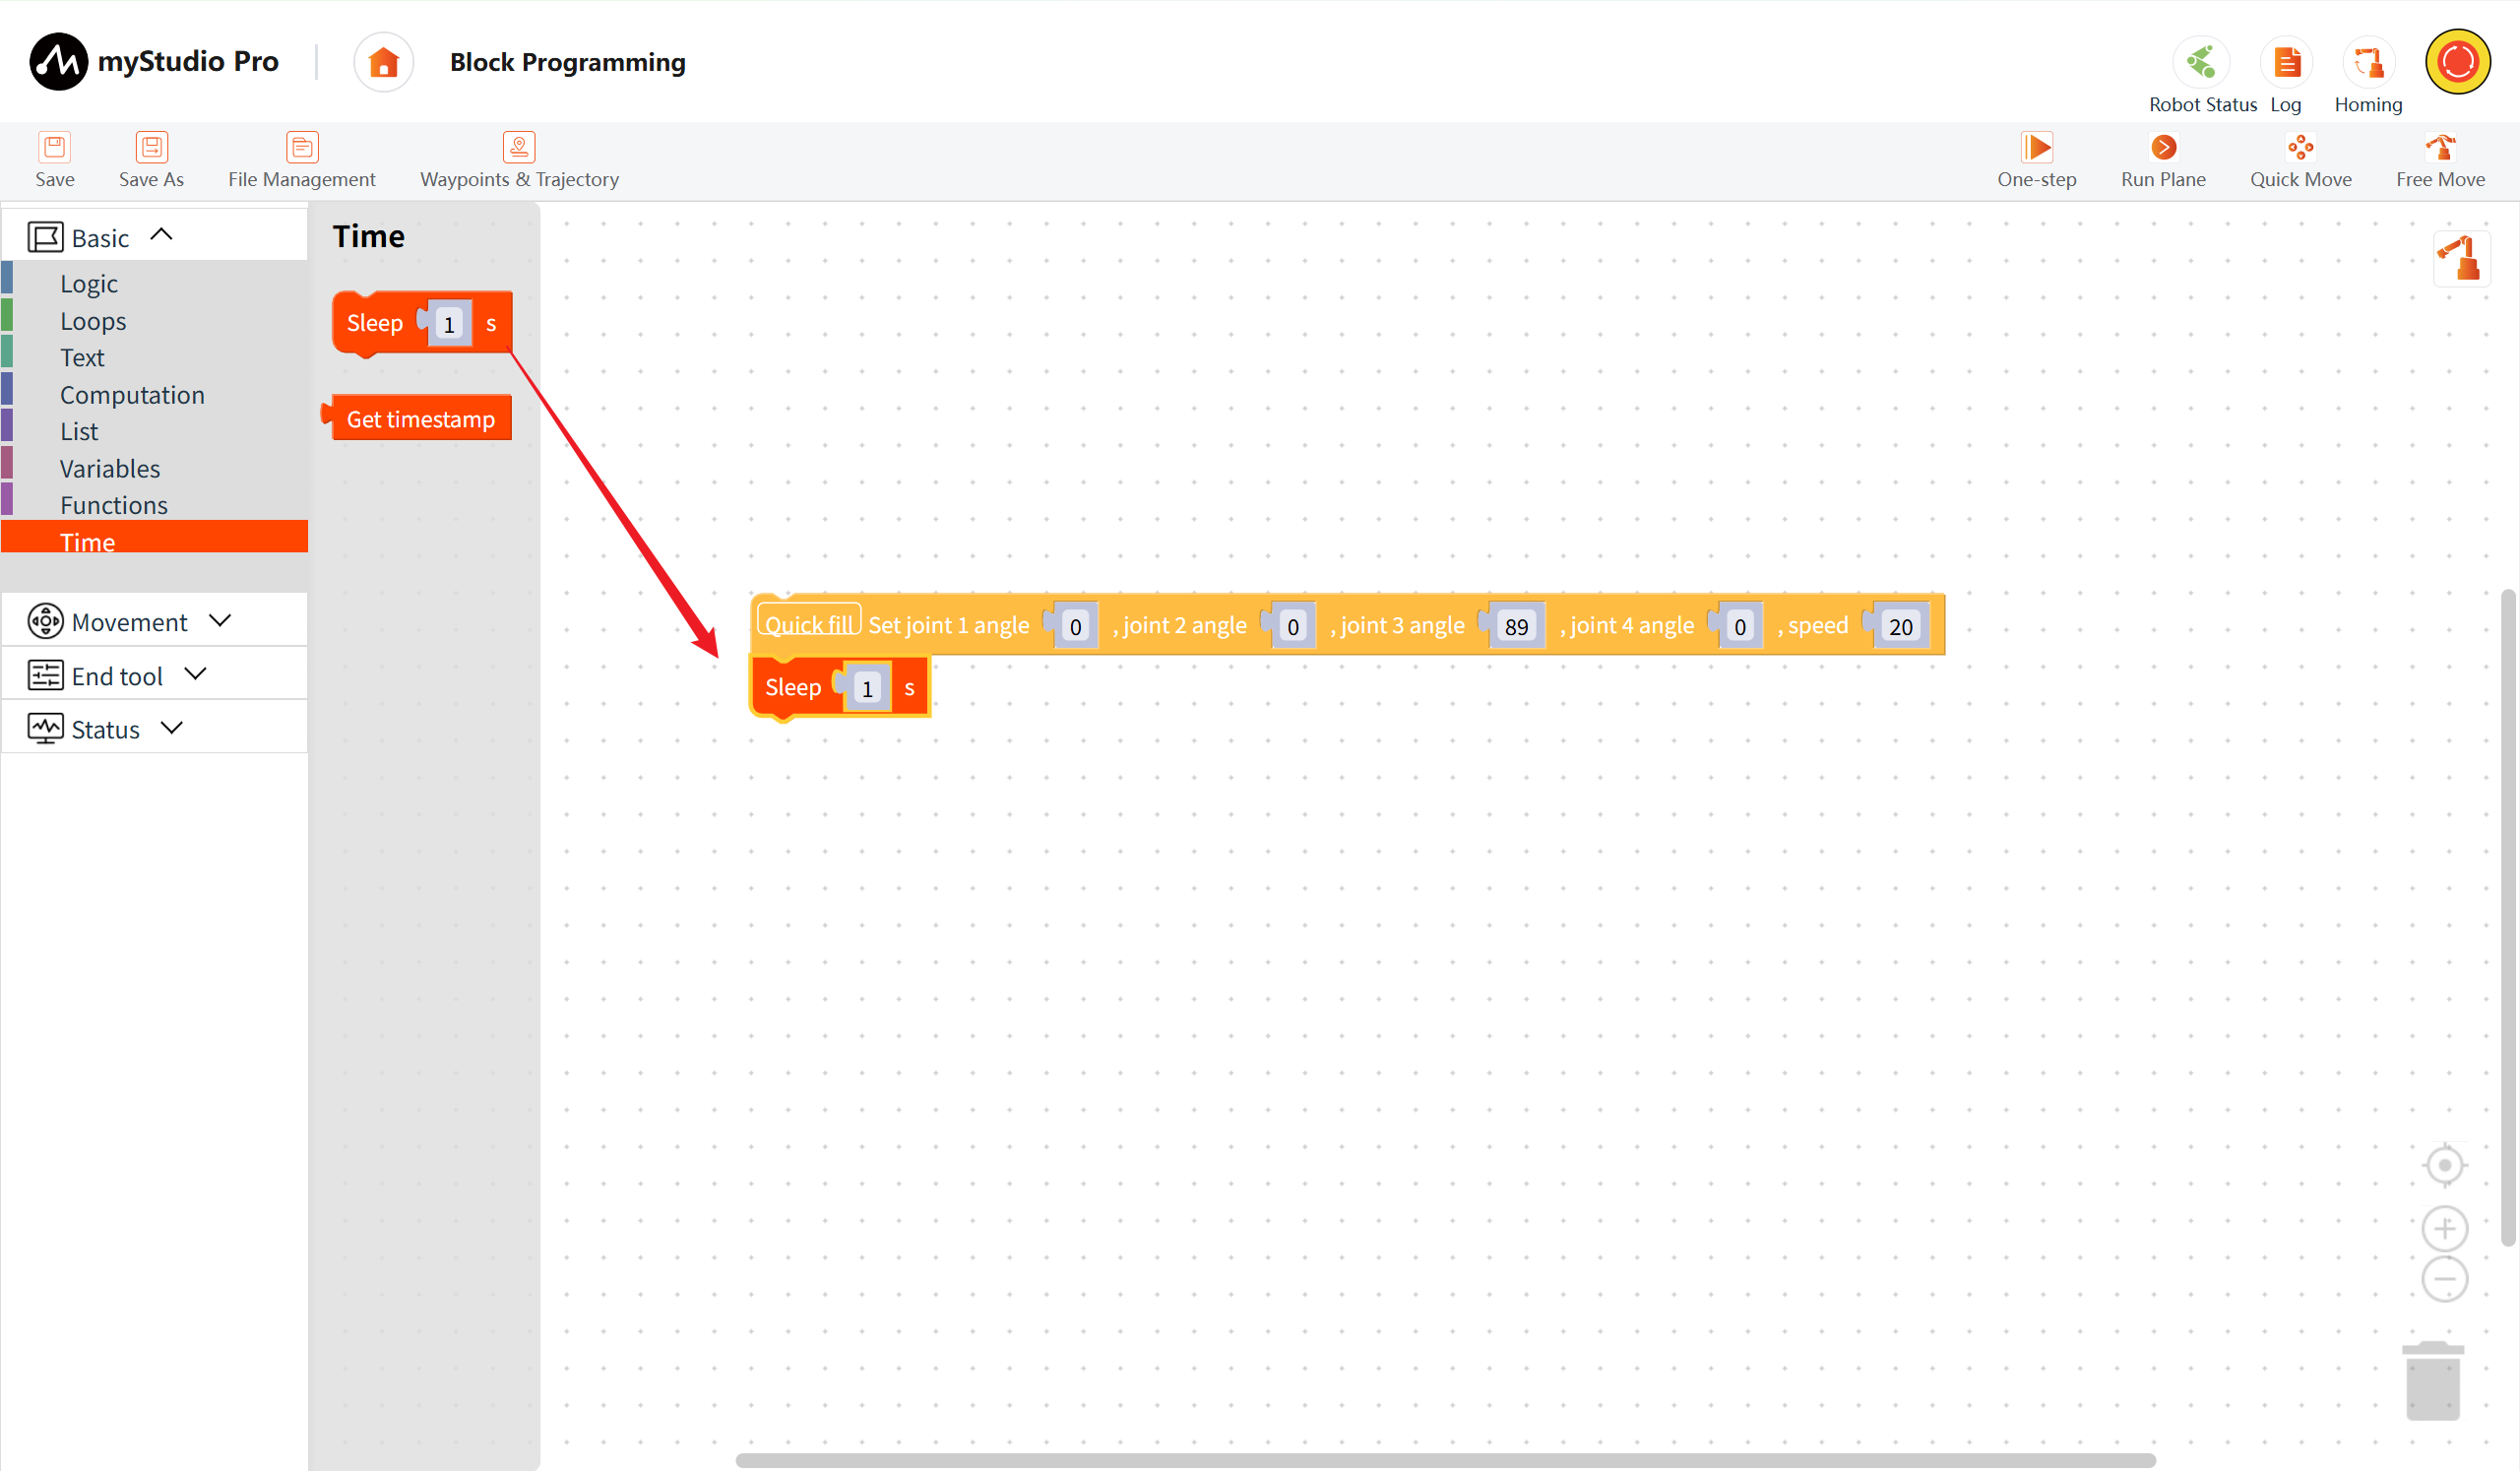
Copy the Set Angles block and modify the J 1 angle to 20:
Click to select the
Set Anglesblock in the workspace;Press Ctrl + C to copy the
Set Anglesblock;Press Ctrl + V to paste the
Set Anglesblock;Modify the
J 1angle of the new block to 20;Drag the block to connect it to the
Sleepblock;
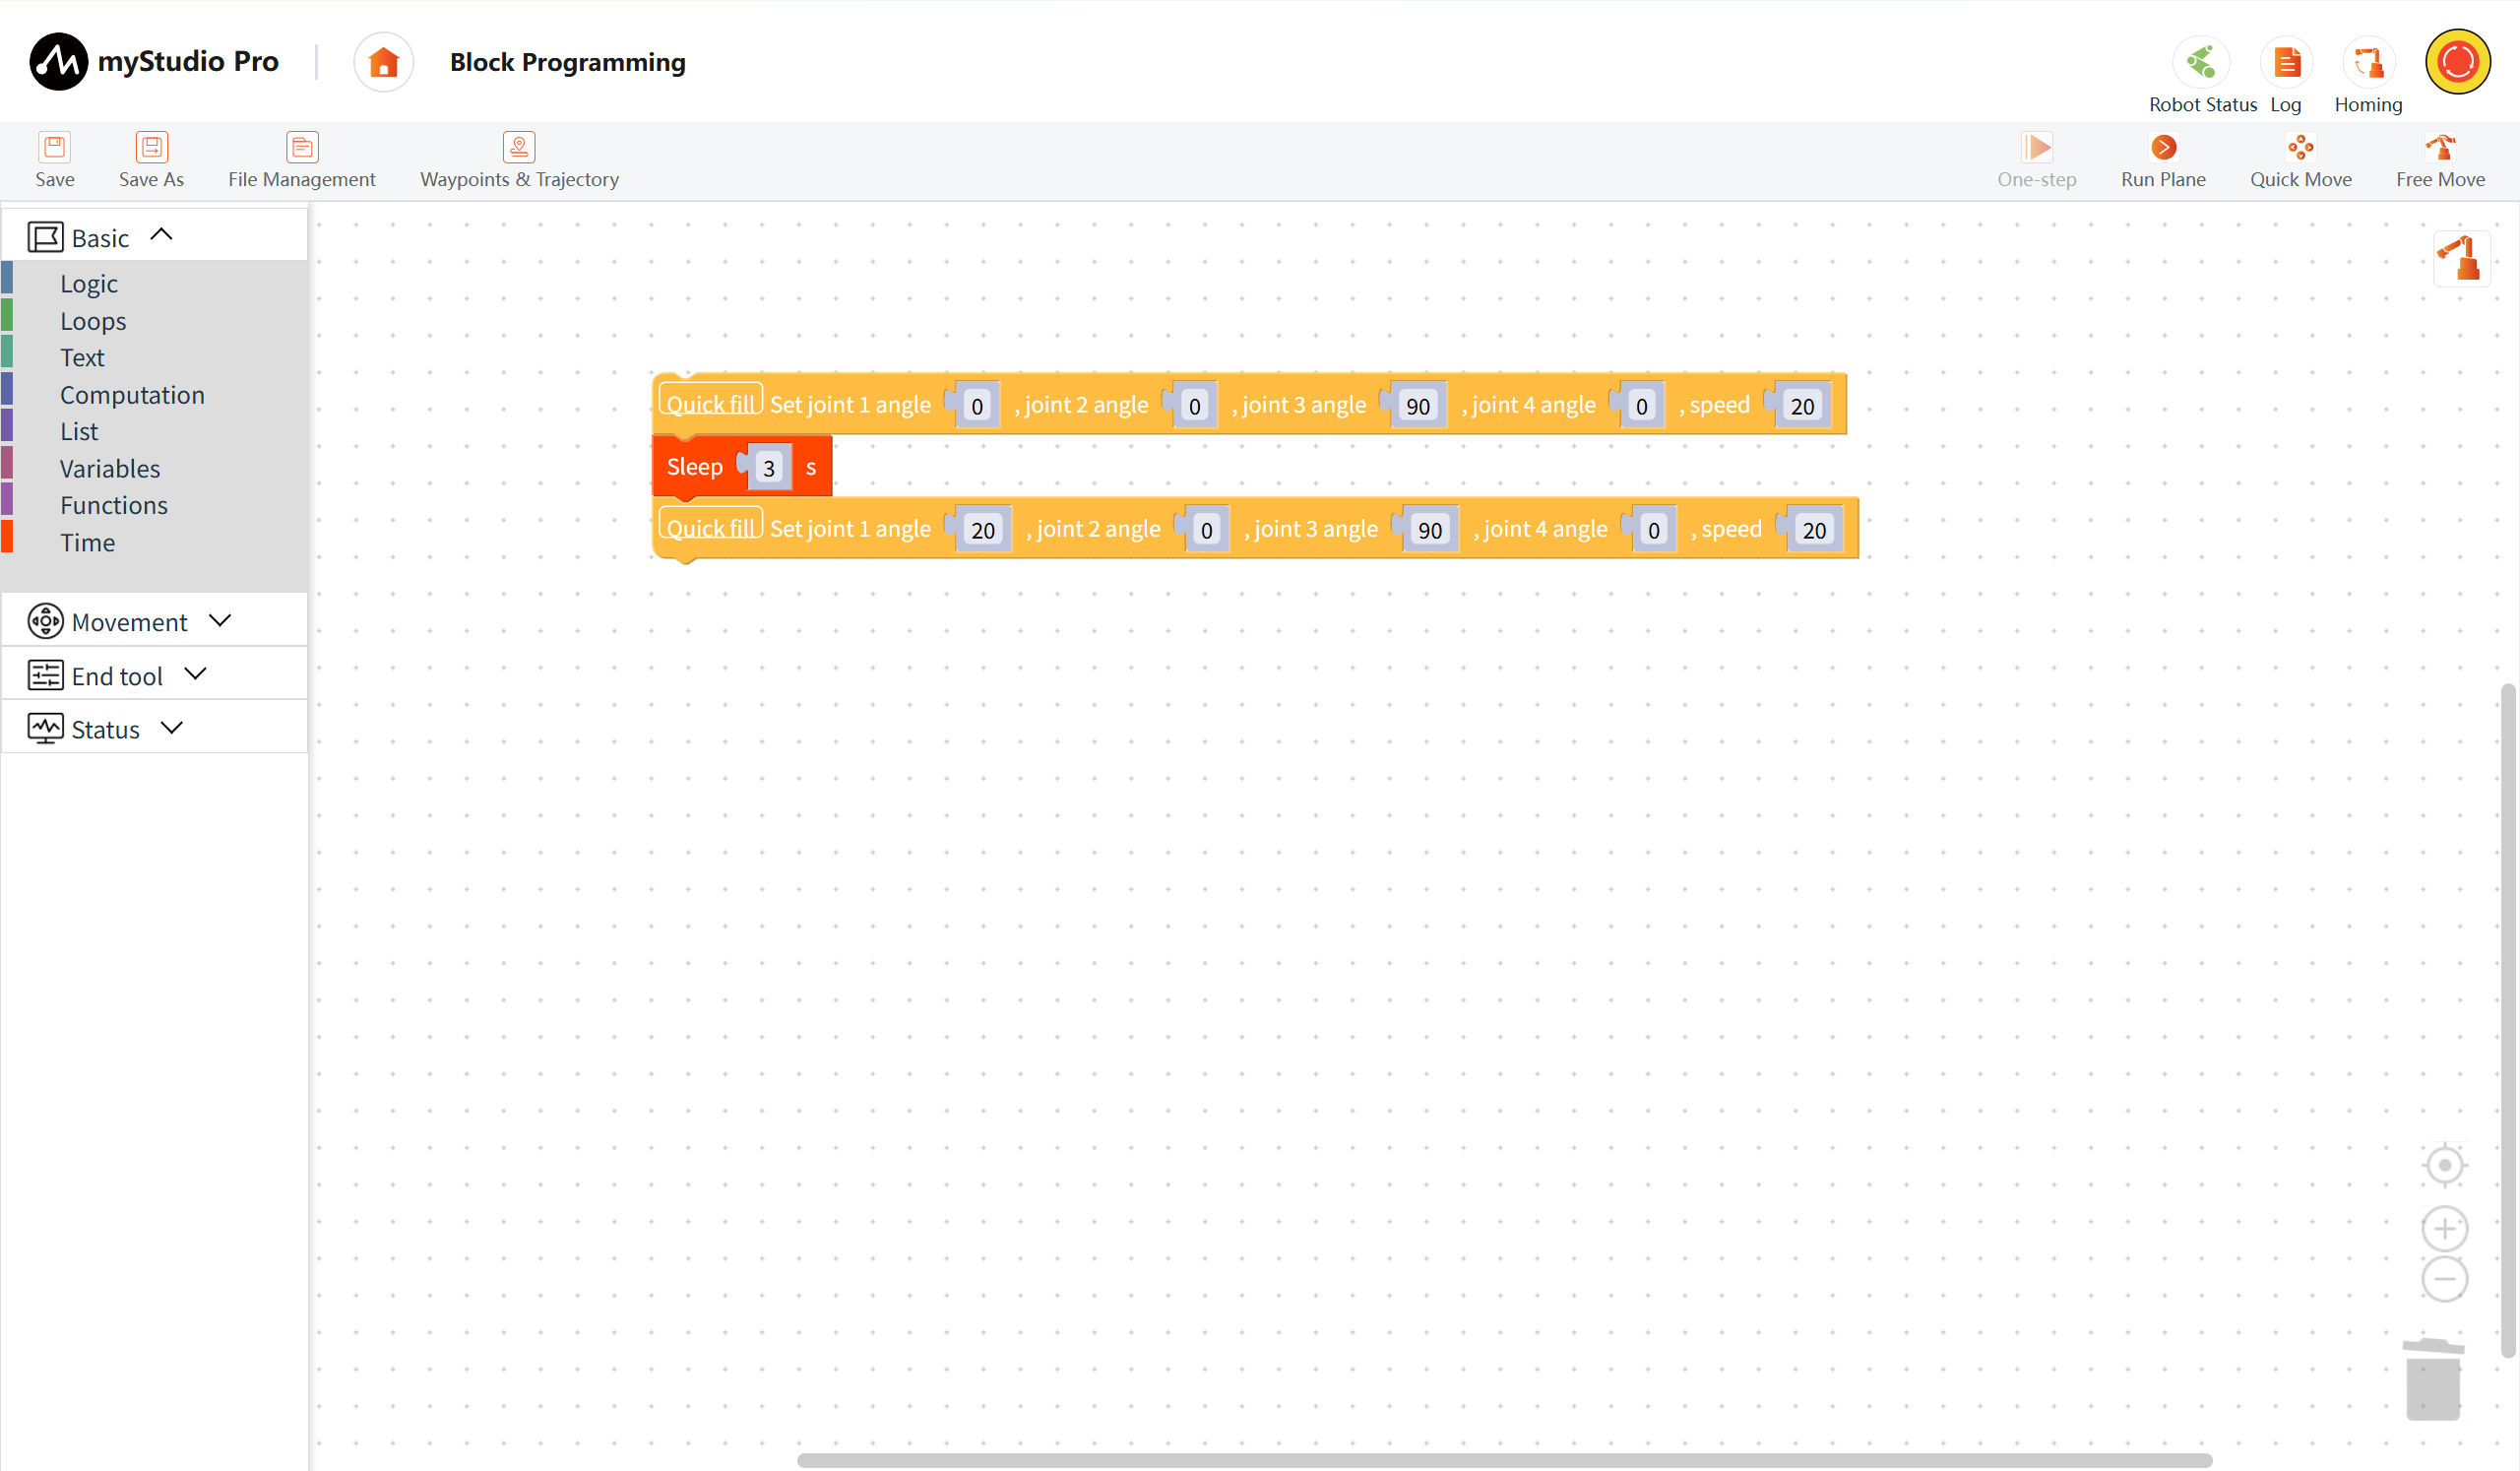
Similarly, copy the Sleep block and set the sleep time to 3. Seconds;
Copy the first Set Angles block in the workspace again;
The complete code is as follows:
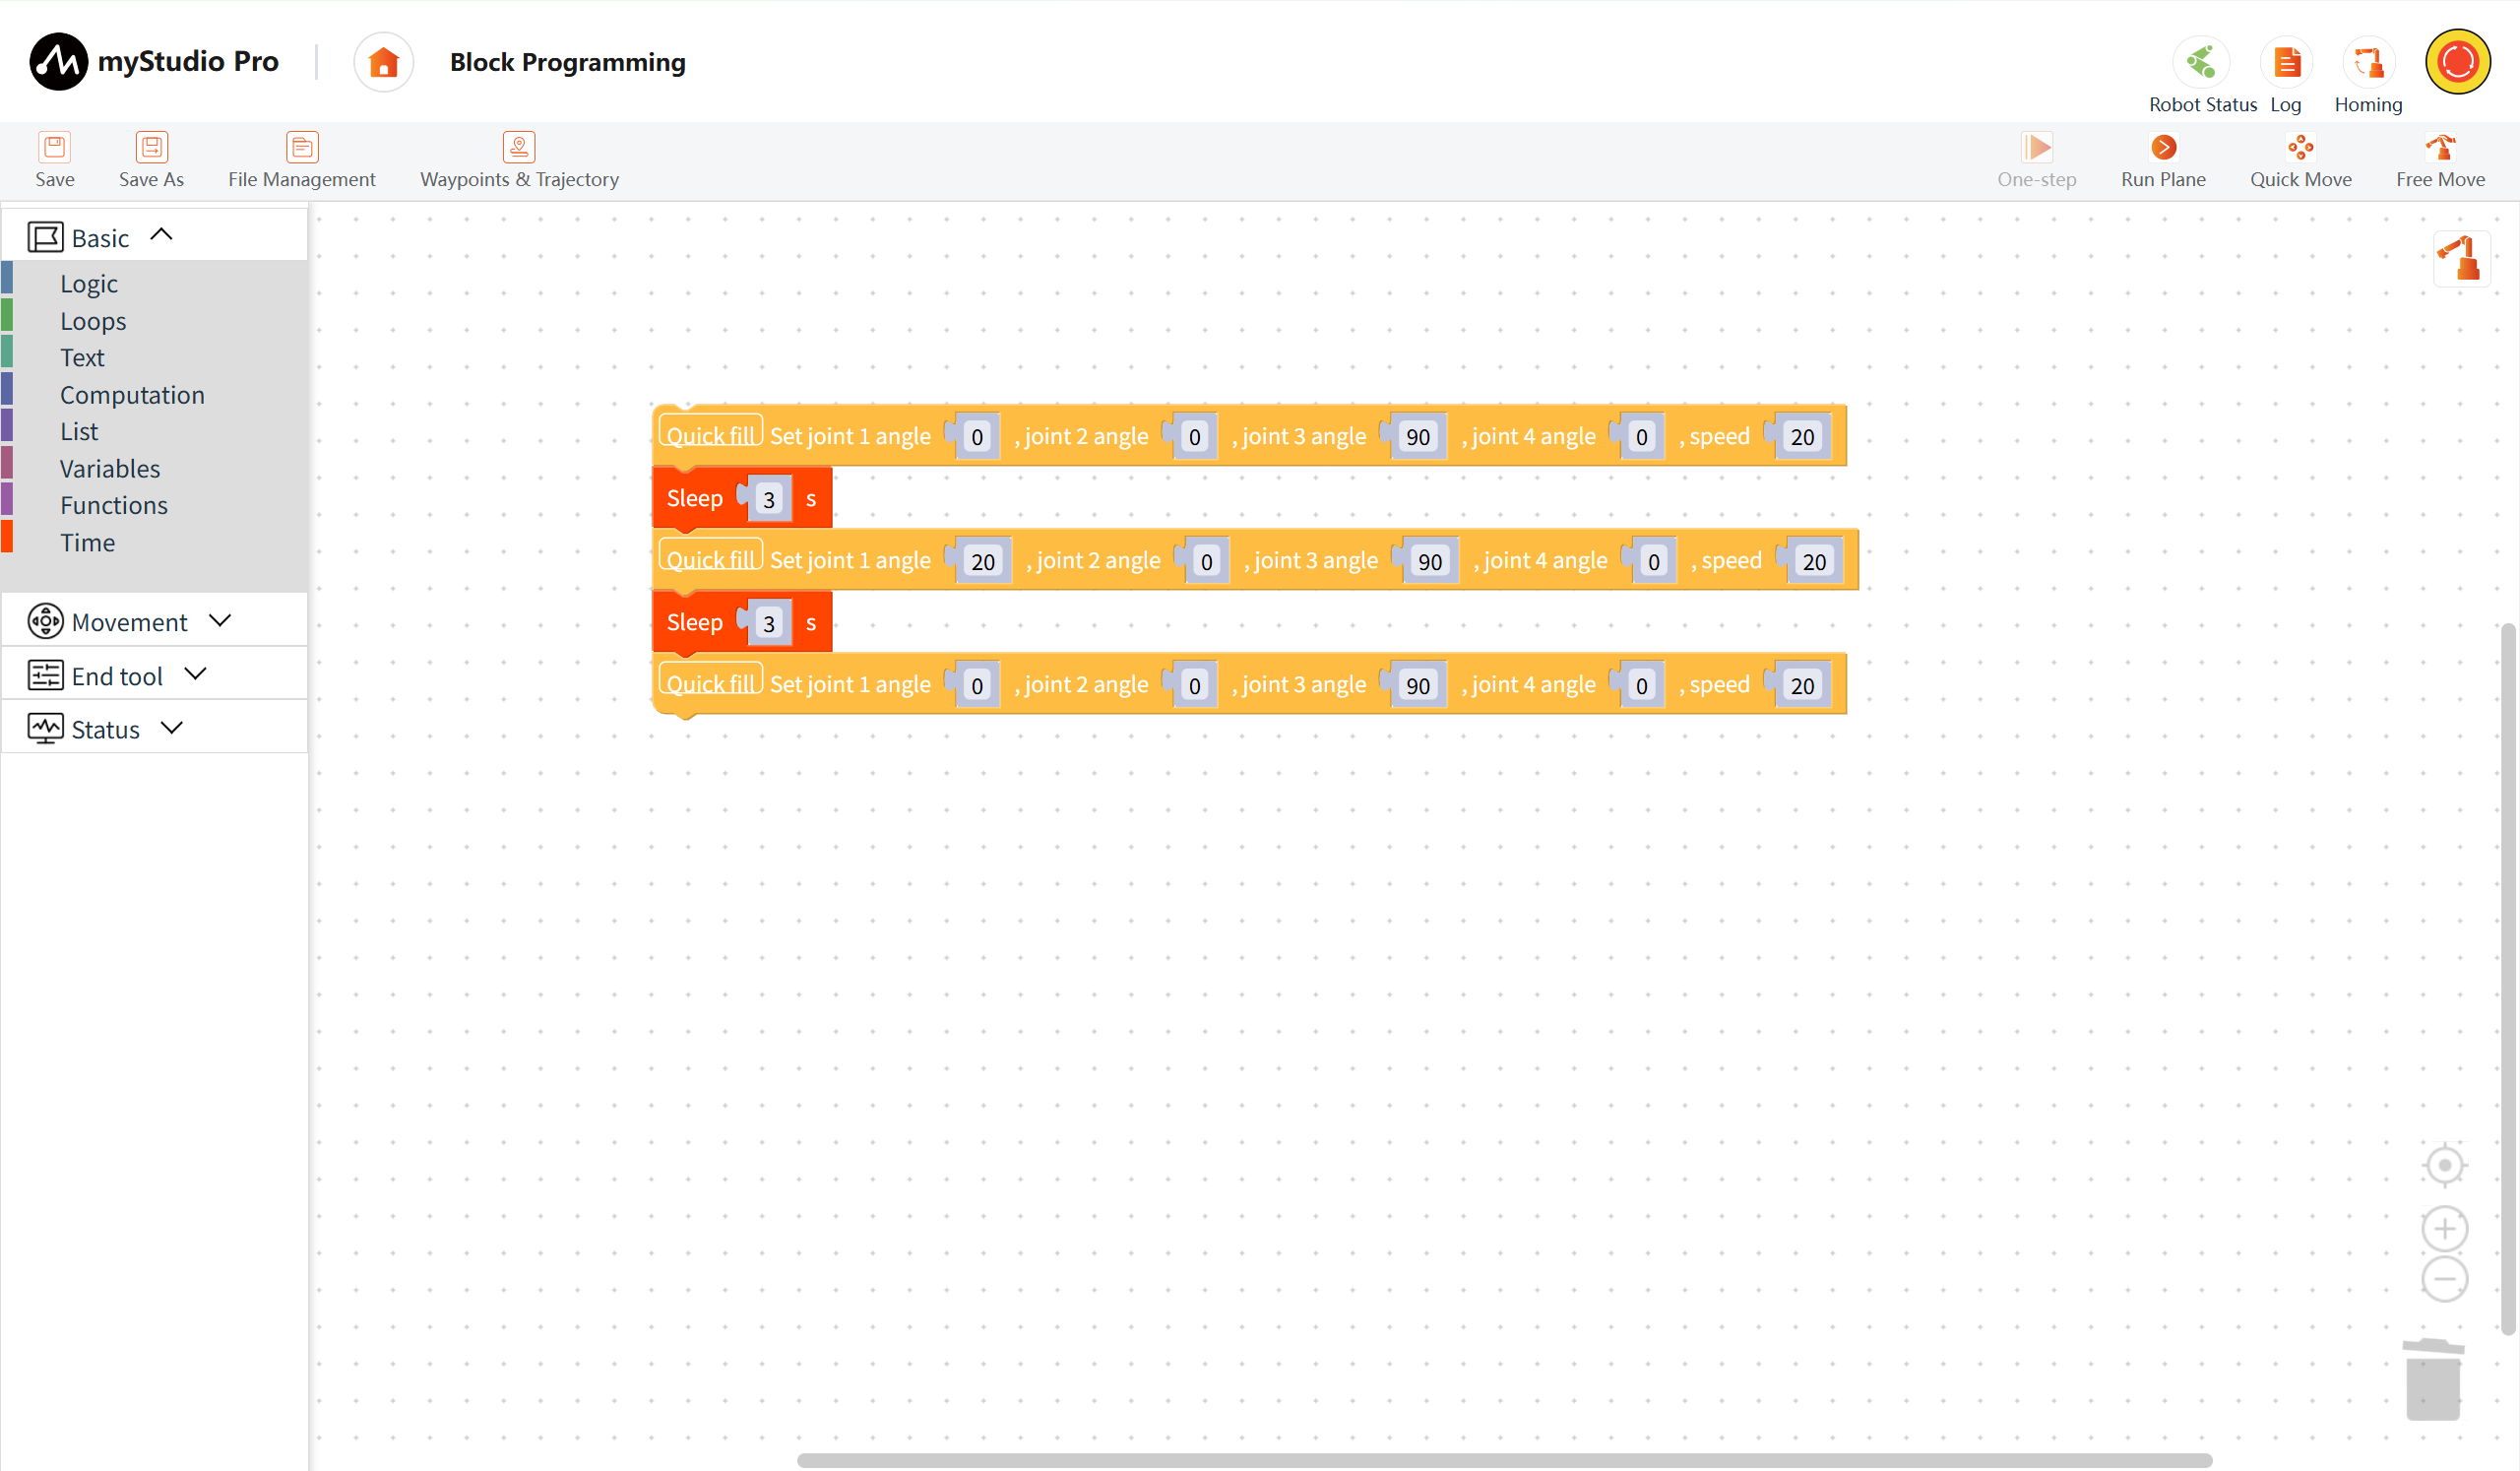
This code means:
>
- Control the robotic arm to return to the zero point
Wait 3 seconds
Move one joint (J1) to a 20-degree position
Wait 3 seconds
Control the robotic arm to return to the zero point
Finally, click the Run Panel button. After opening the panel, click the Run All button to start executing the code. The right side of the Run Plane will display the joint and angle coordinates in real time, and the 3D model will also simulate motion.
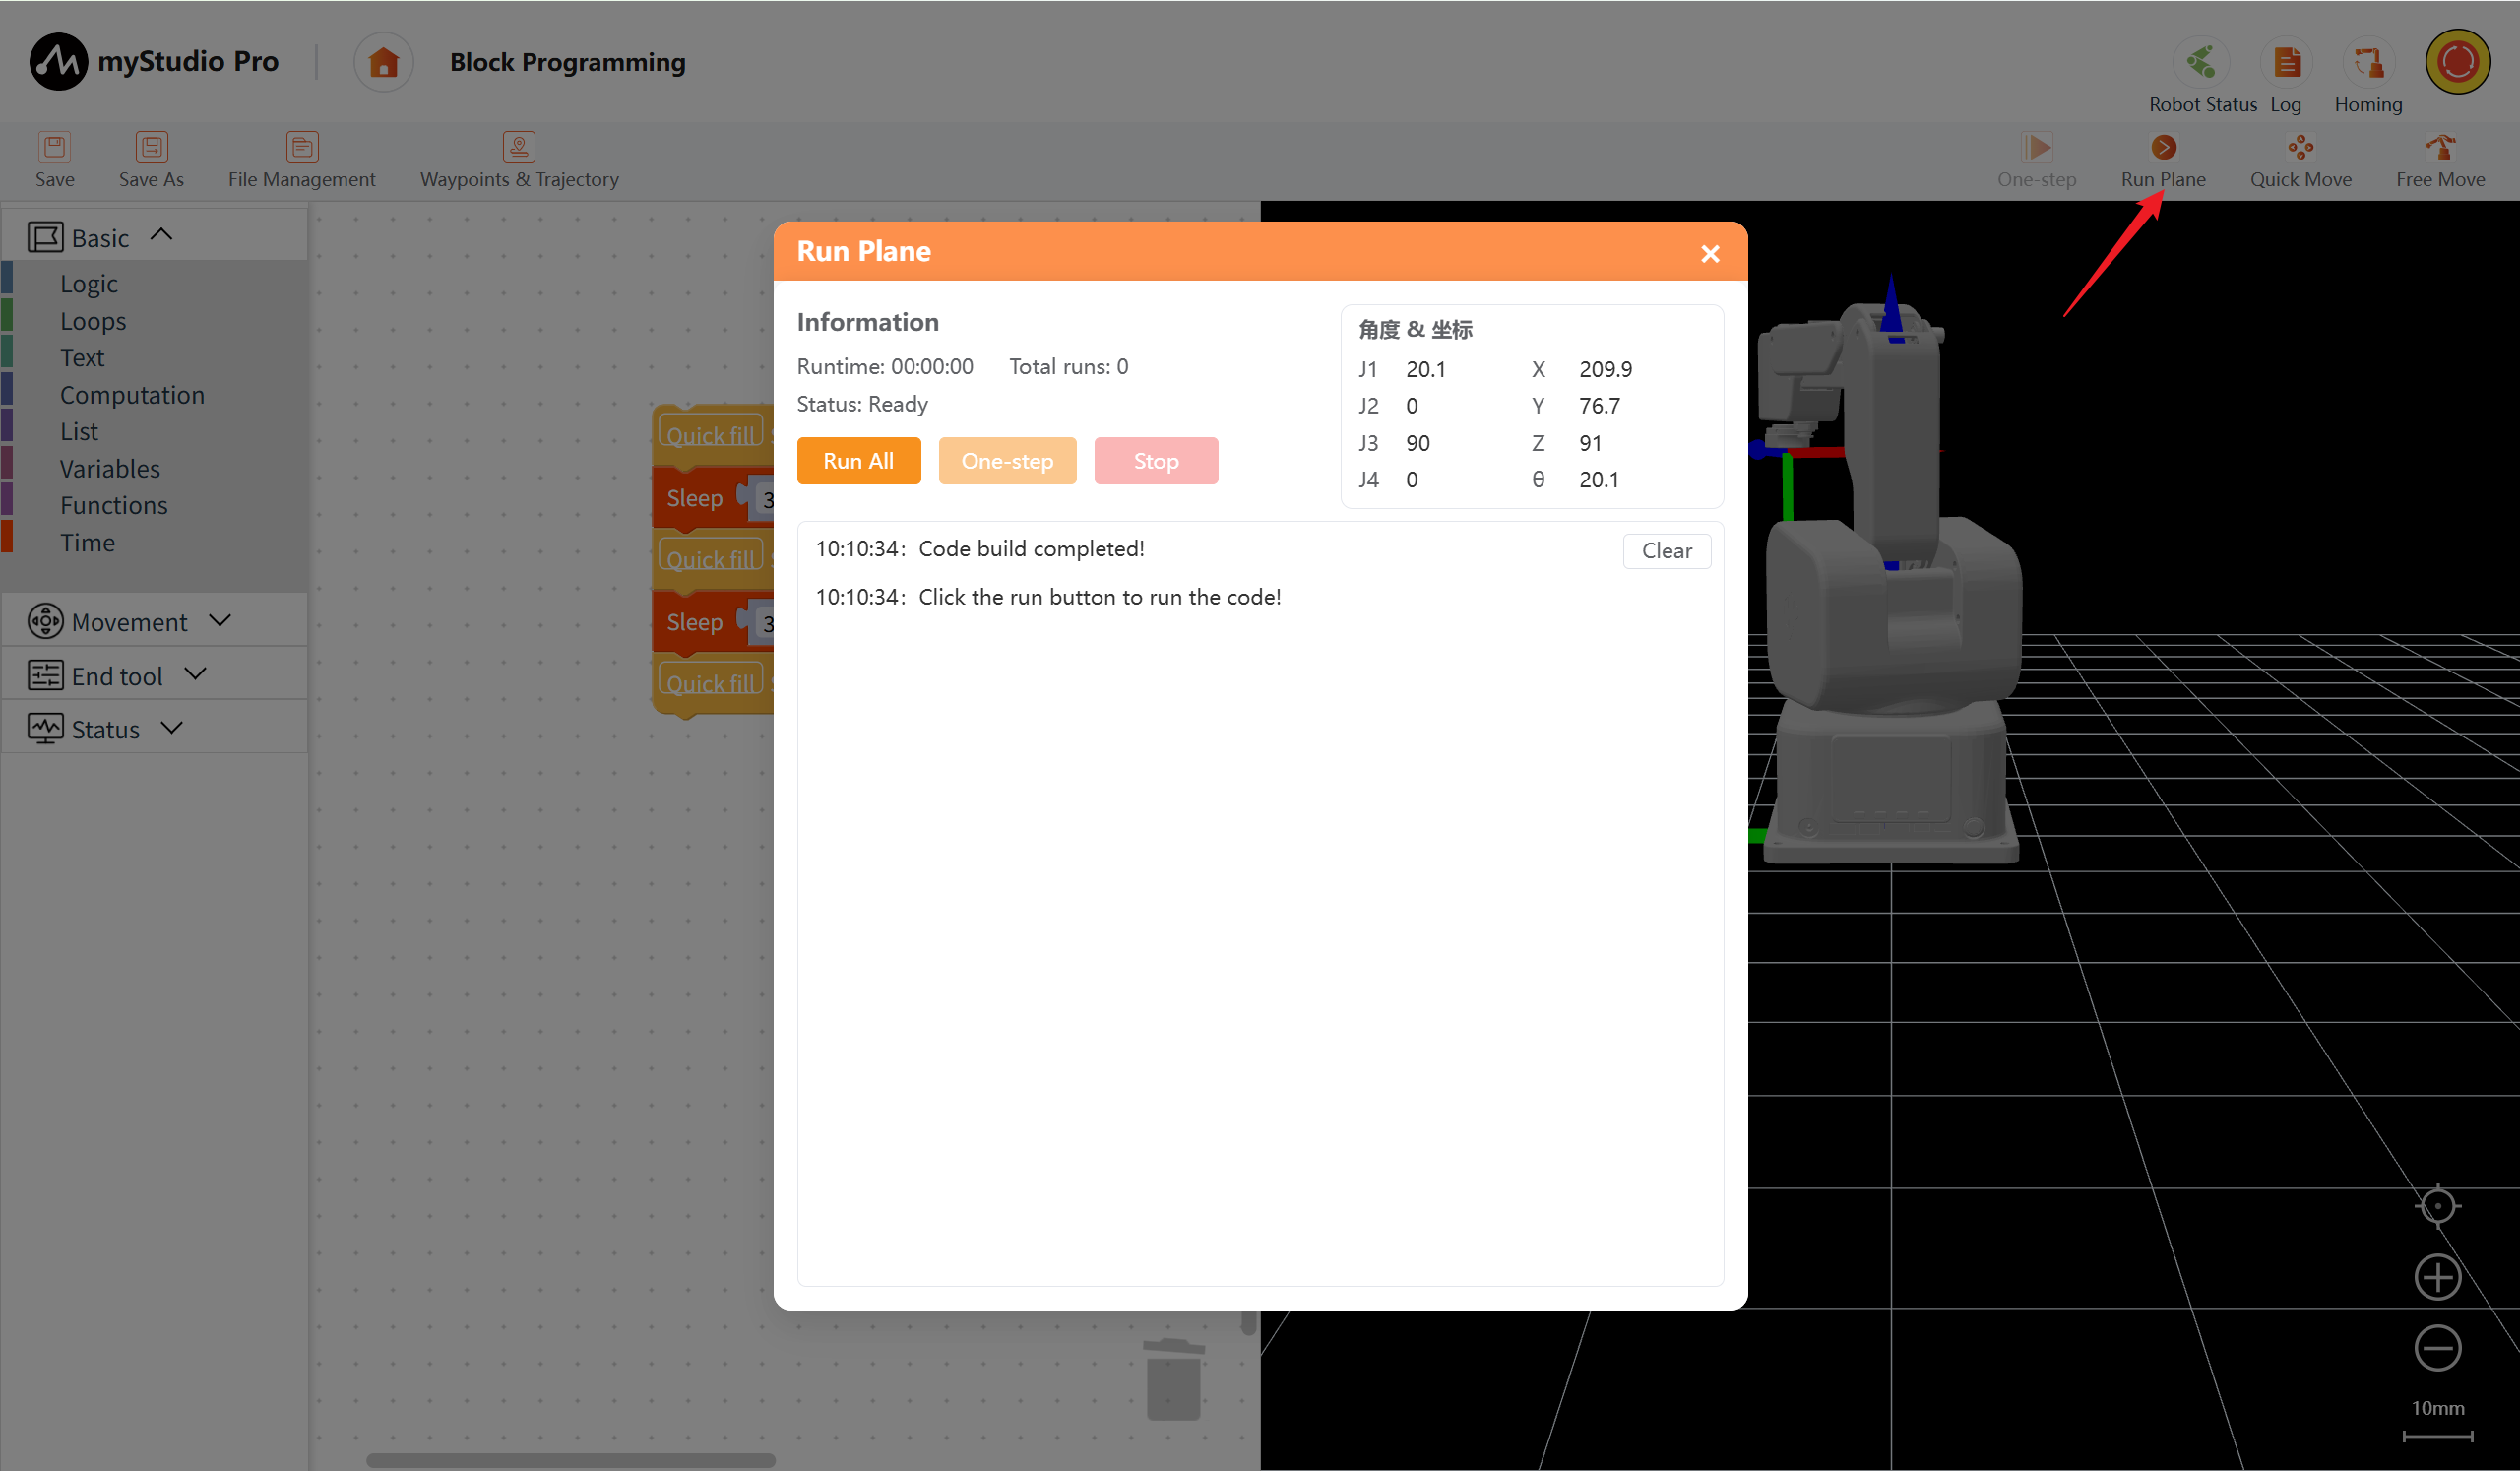
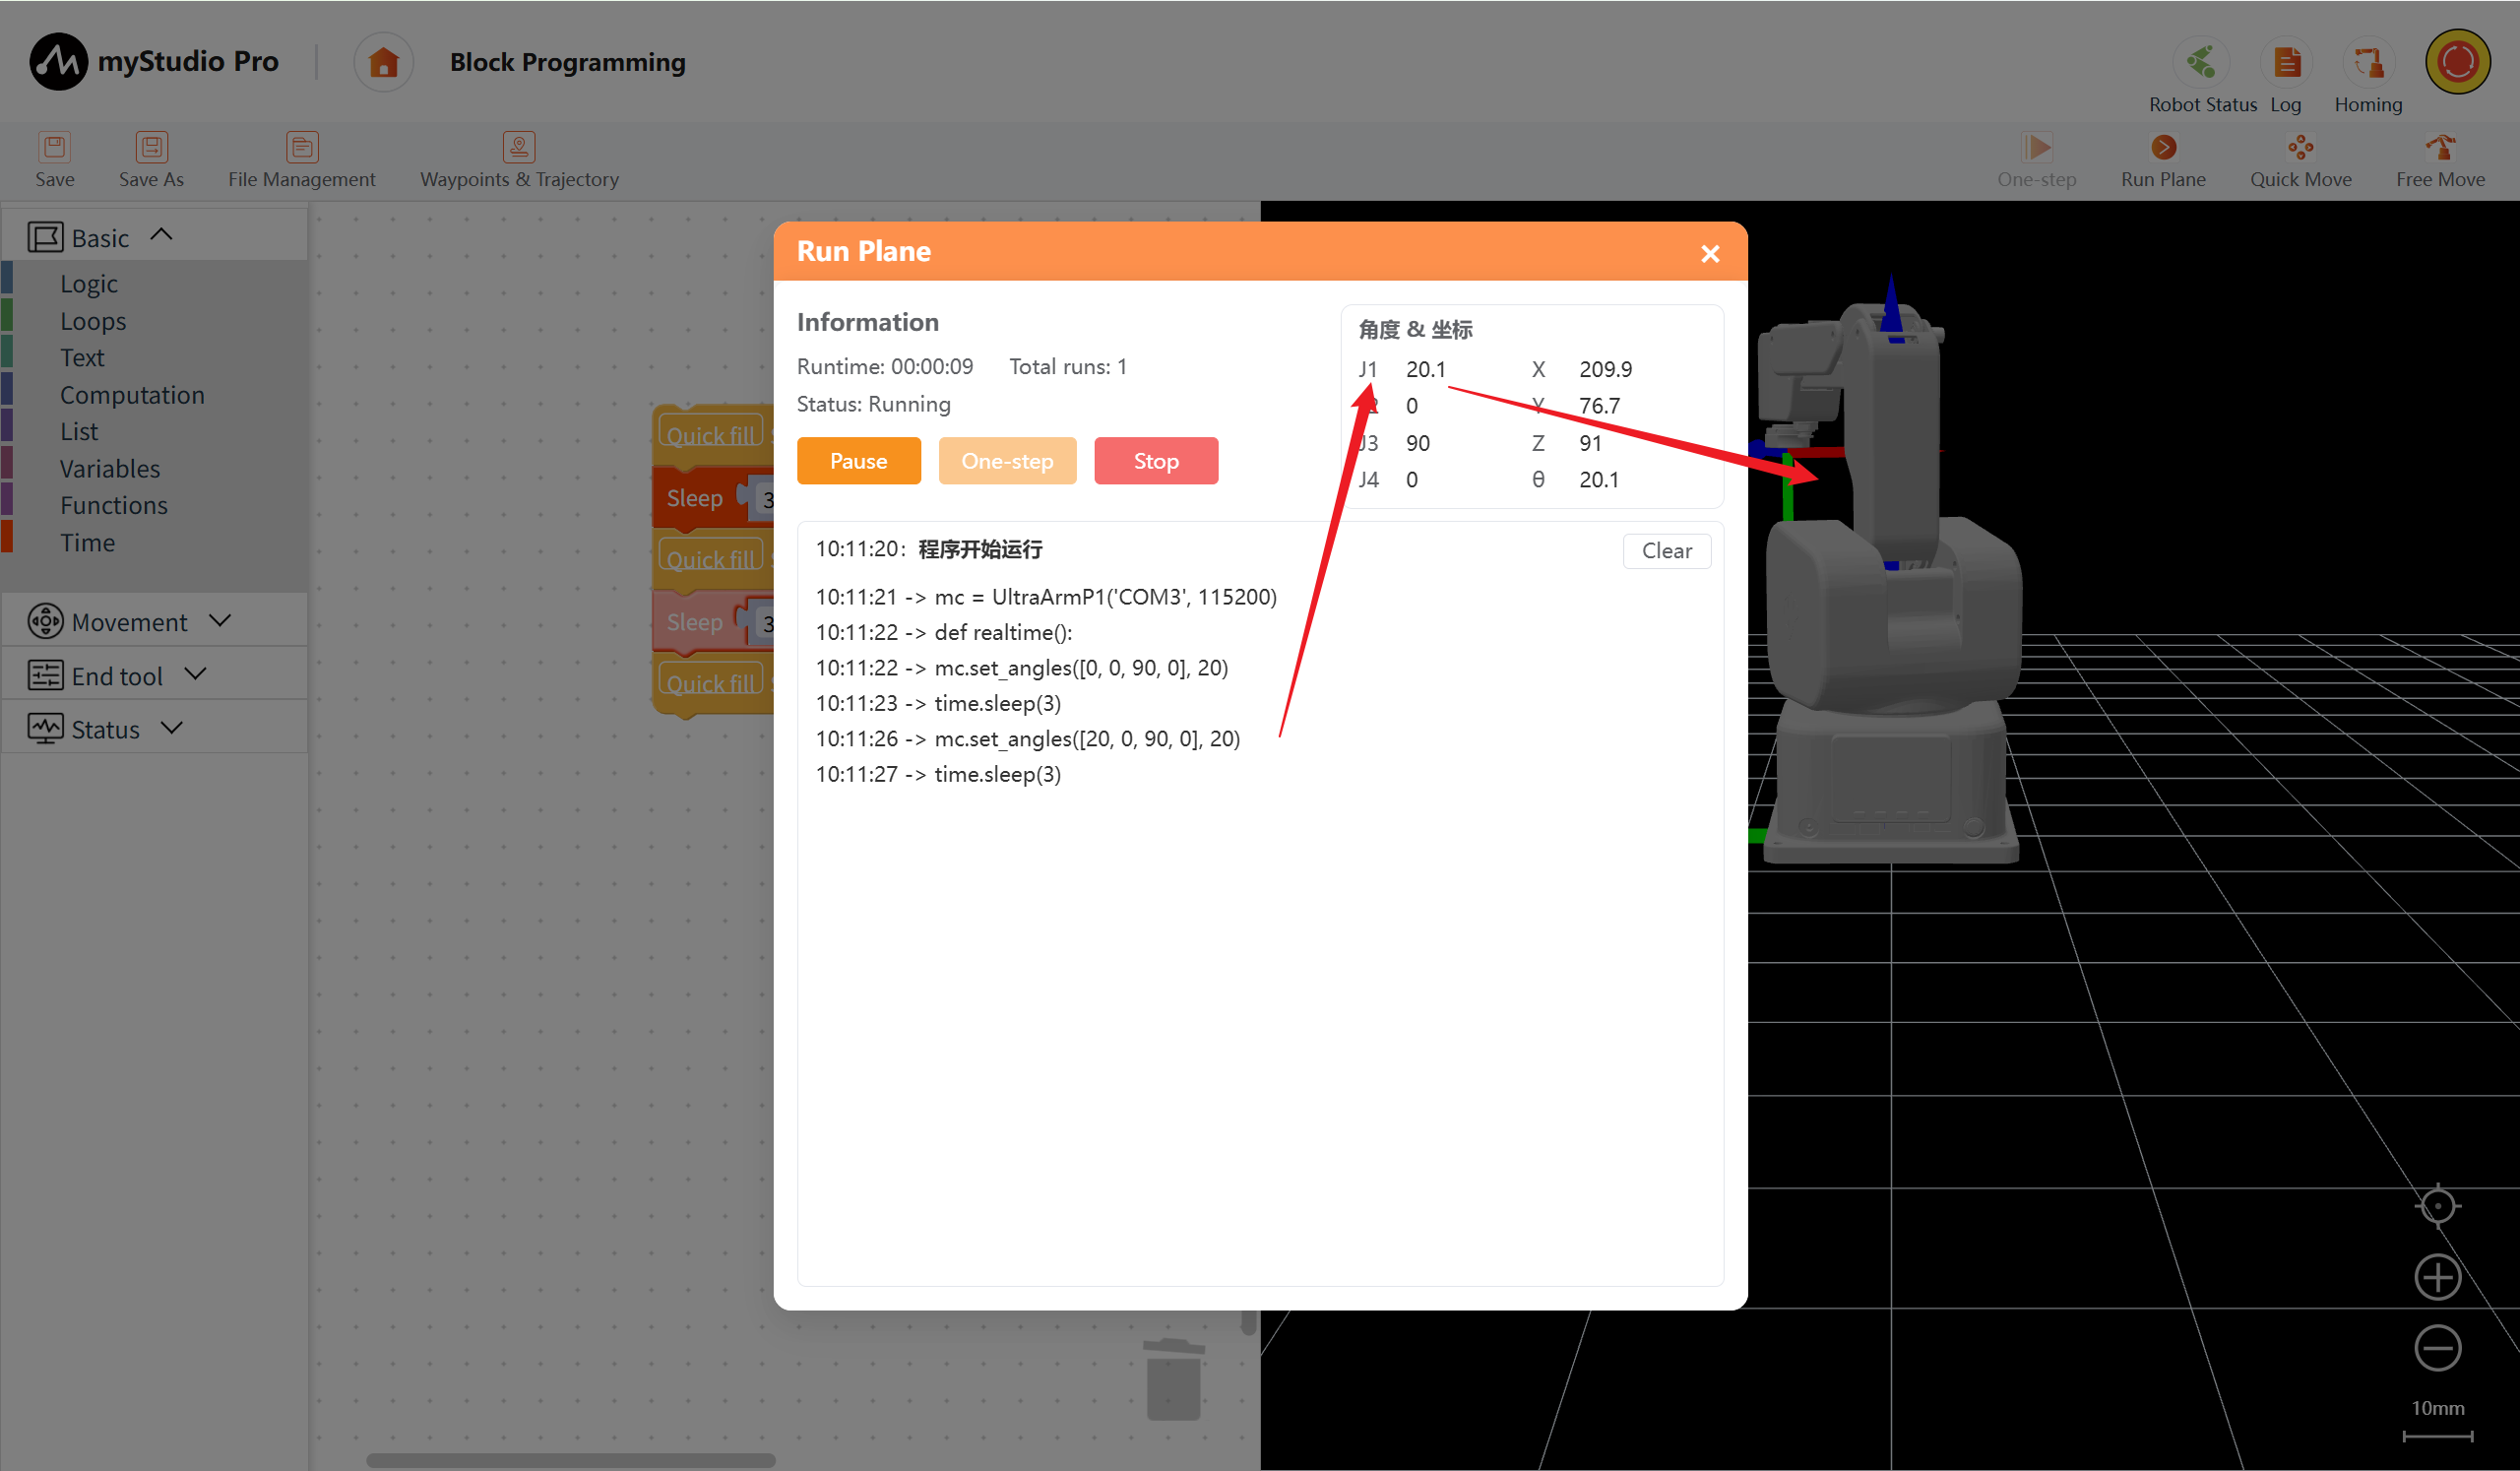
The code has finished running. Click the X on the panel to close it.
Step 3: Saving and Loading Files (or Saving and Loading the Workspace)
Block Programming supports saving and loading the workspace.
Clicking the Save button will display a file naming modal window. Enter a custom name and click Confirm to save (defaulting to saving in the draft space). The saving result will be displayed in a message prompt at the lower left corner.
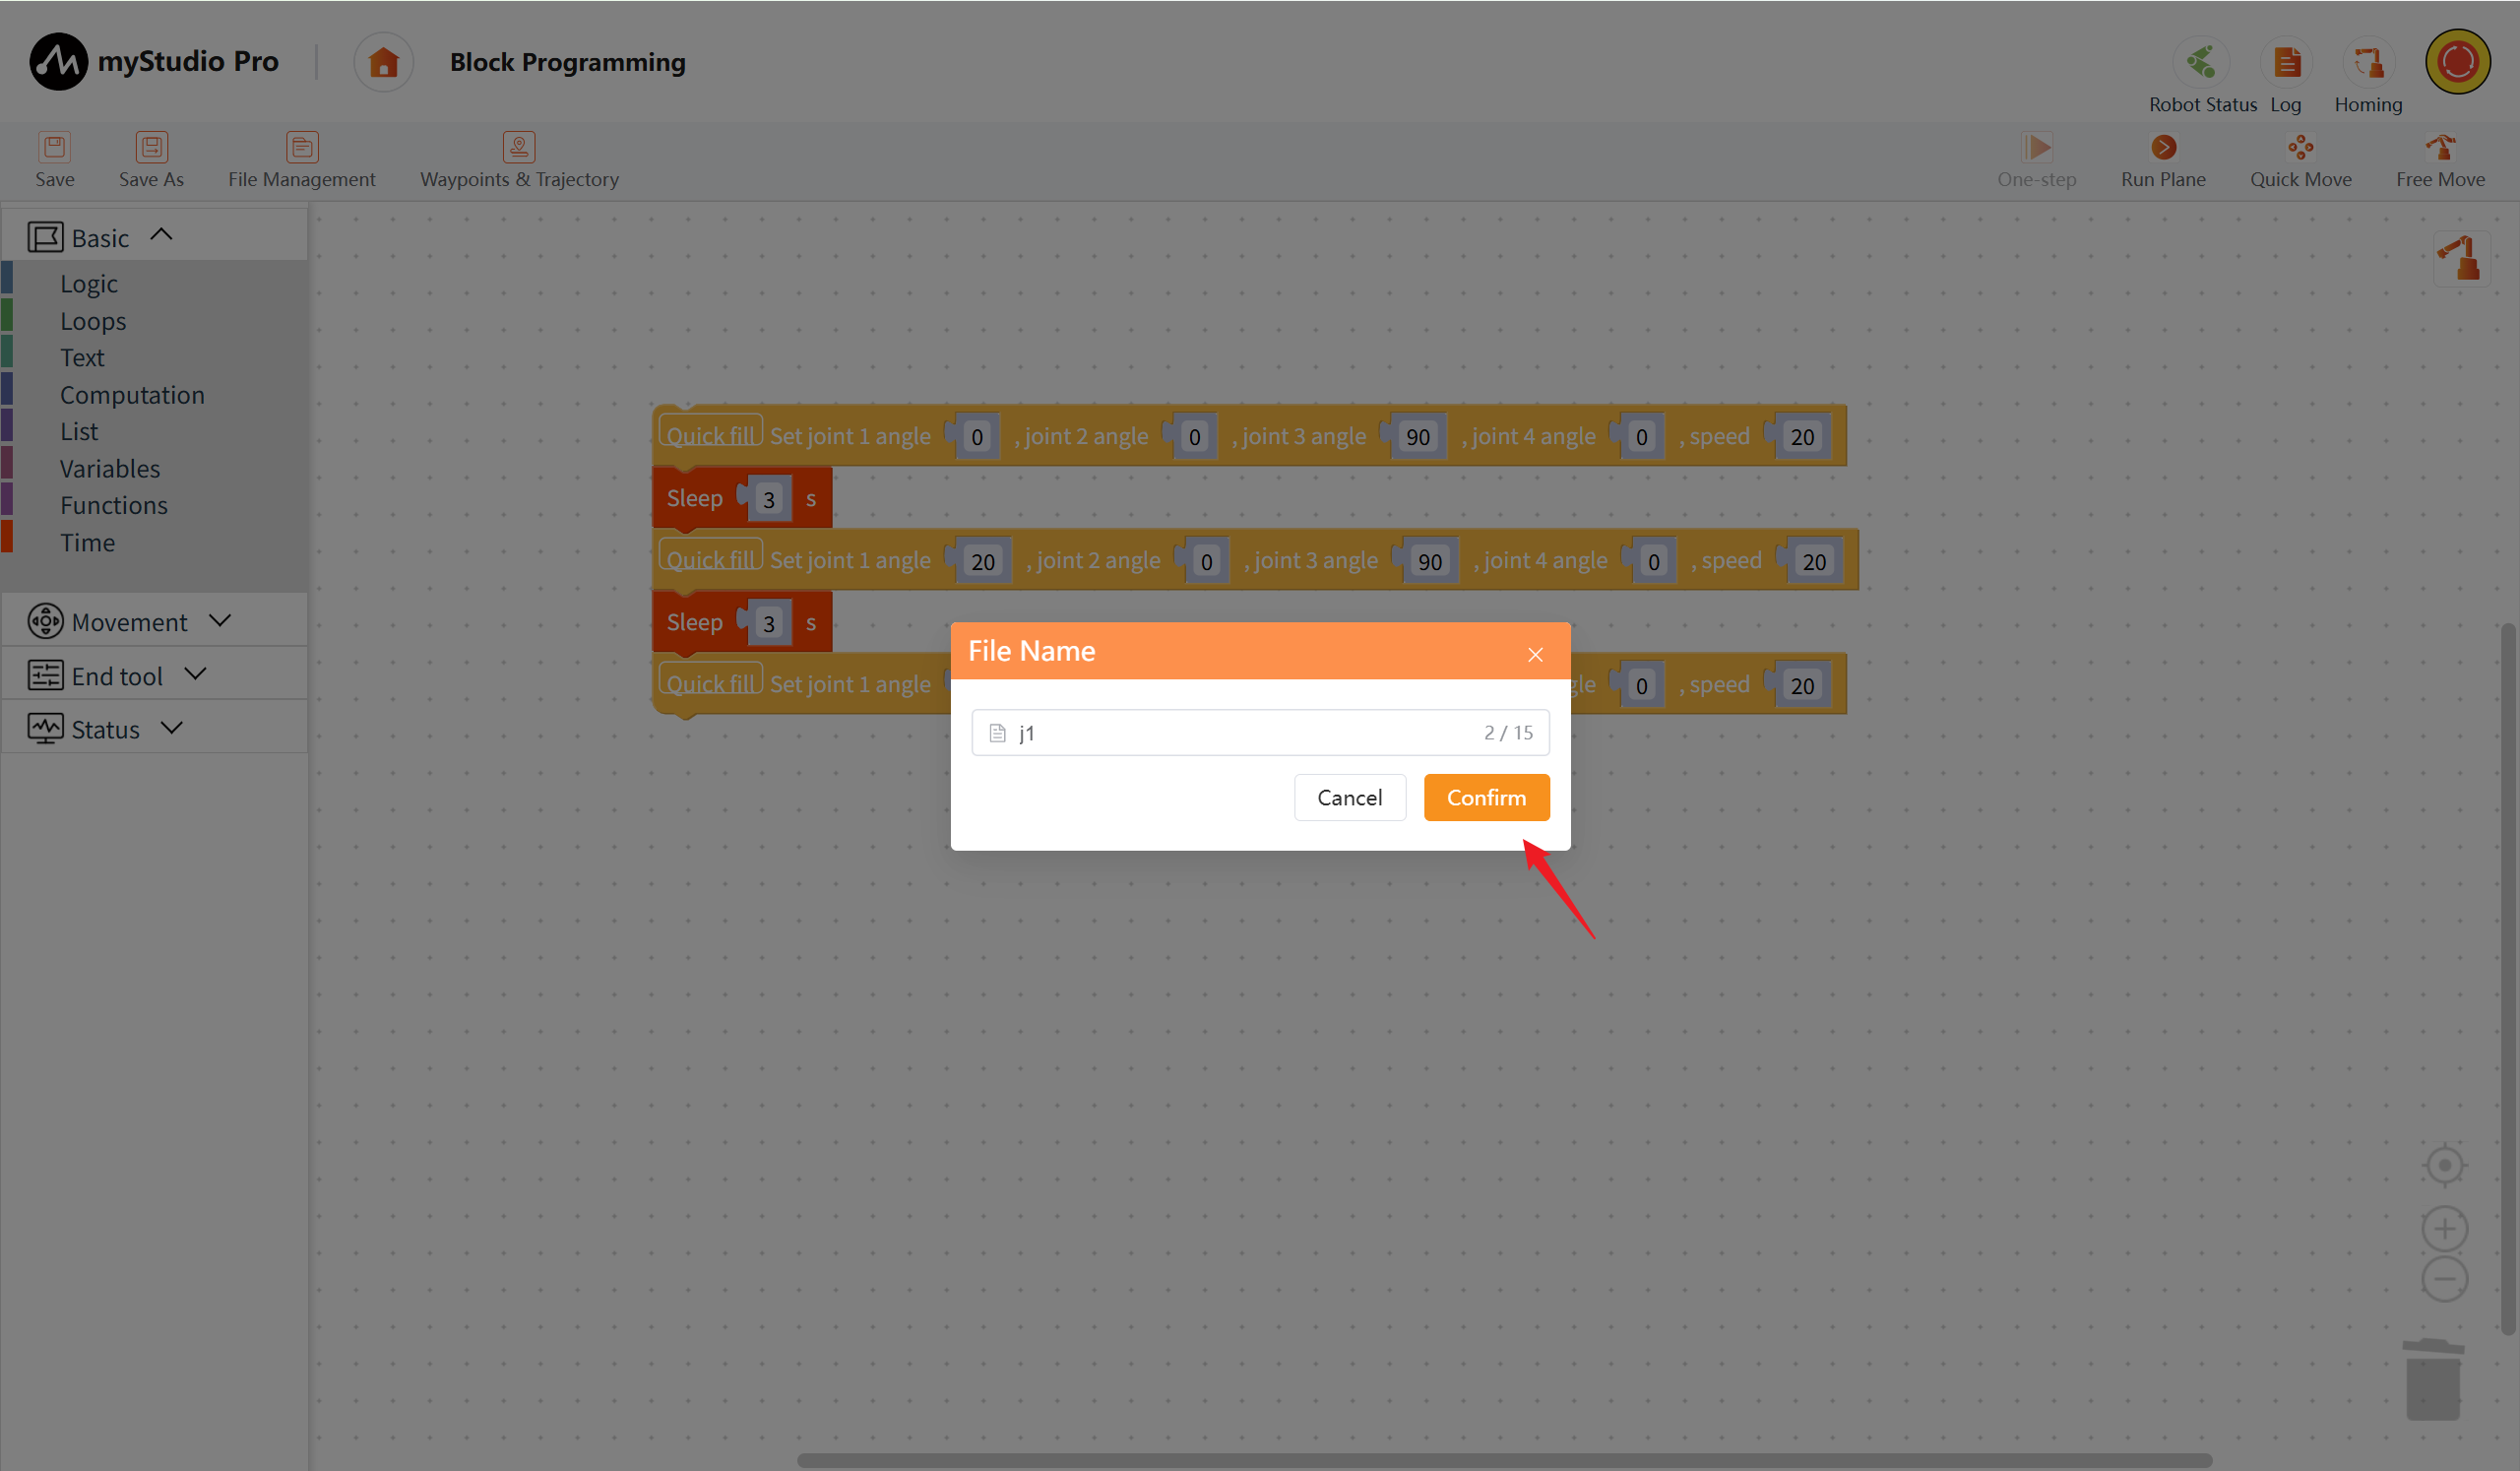
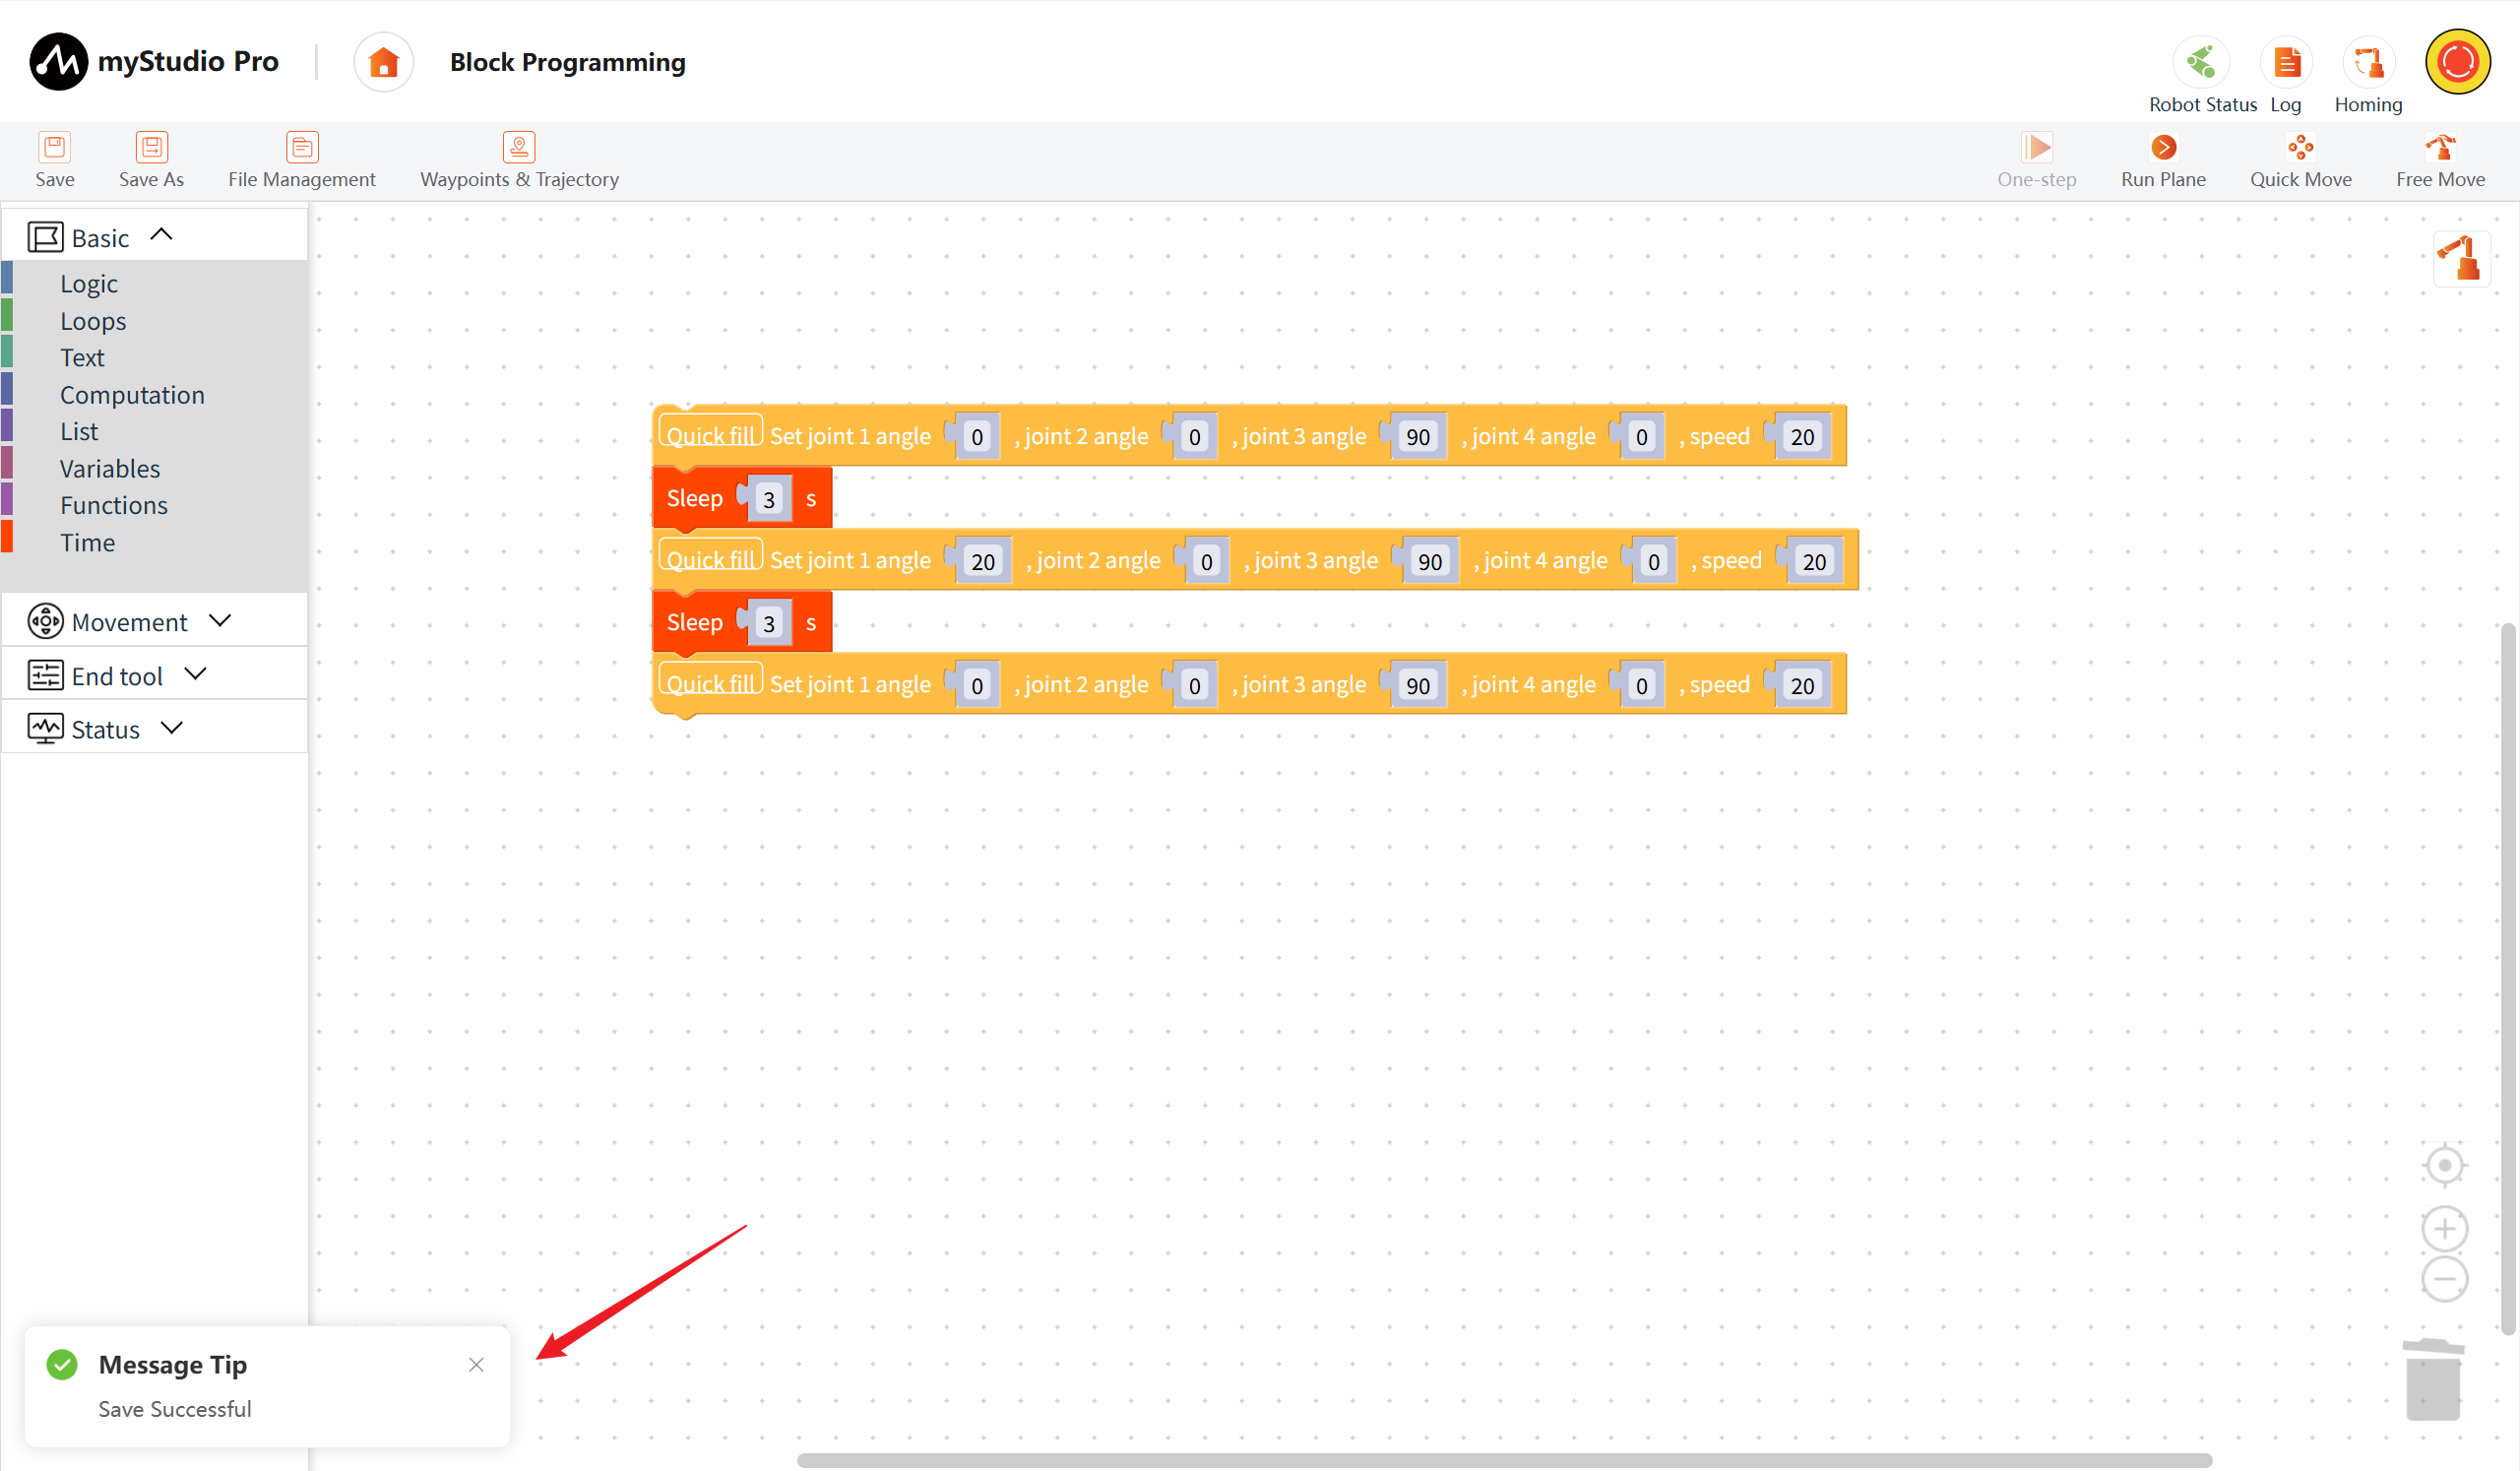
第四步: Perform the operation and load the workspace file we previously saved.
Click the File Management button, and a list of saved files will be displayed. Select the file you want to load, and the Edit button in the operation column can be used to load the file into the workspace.
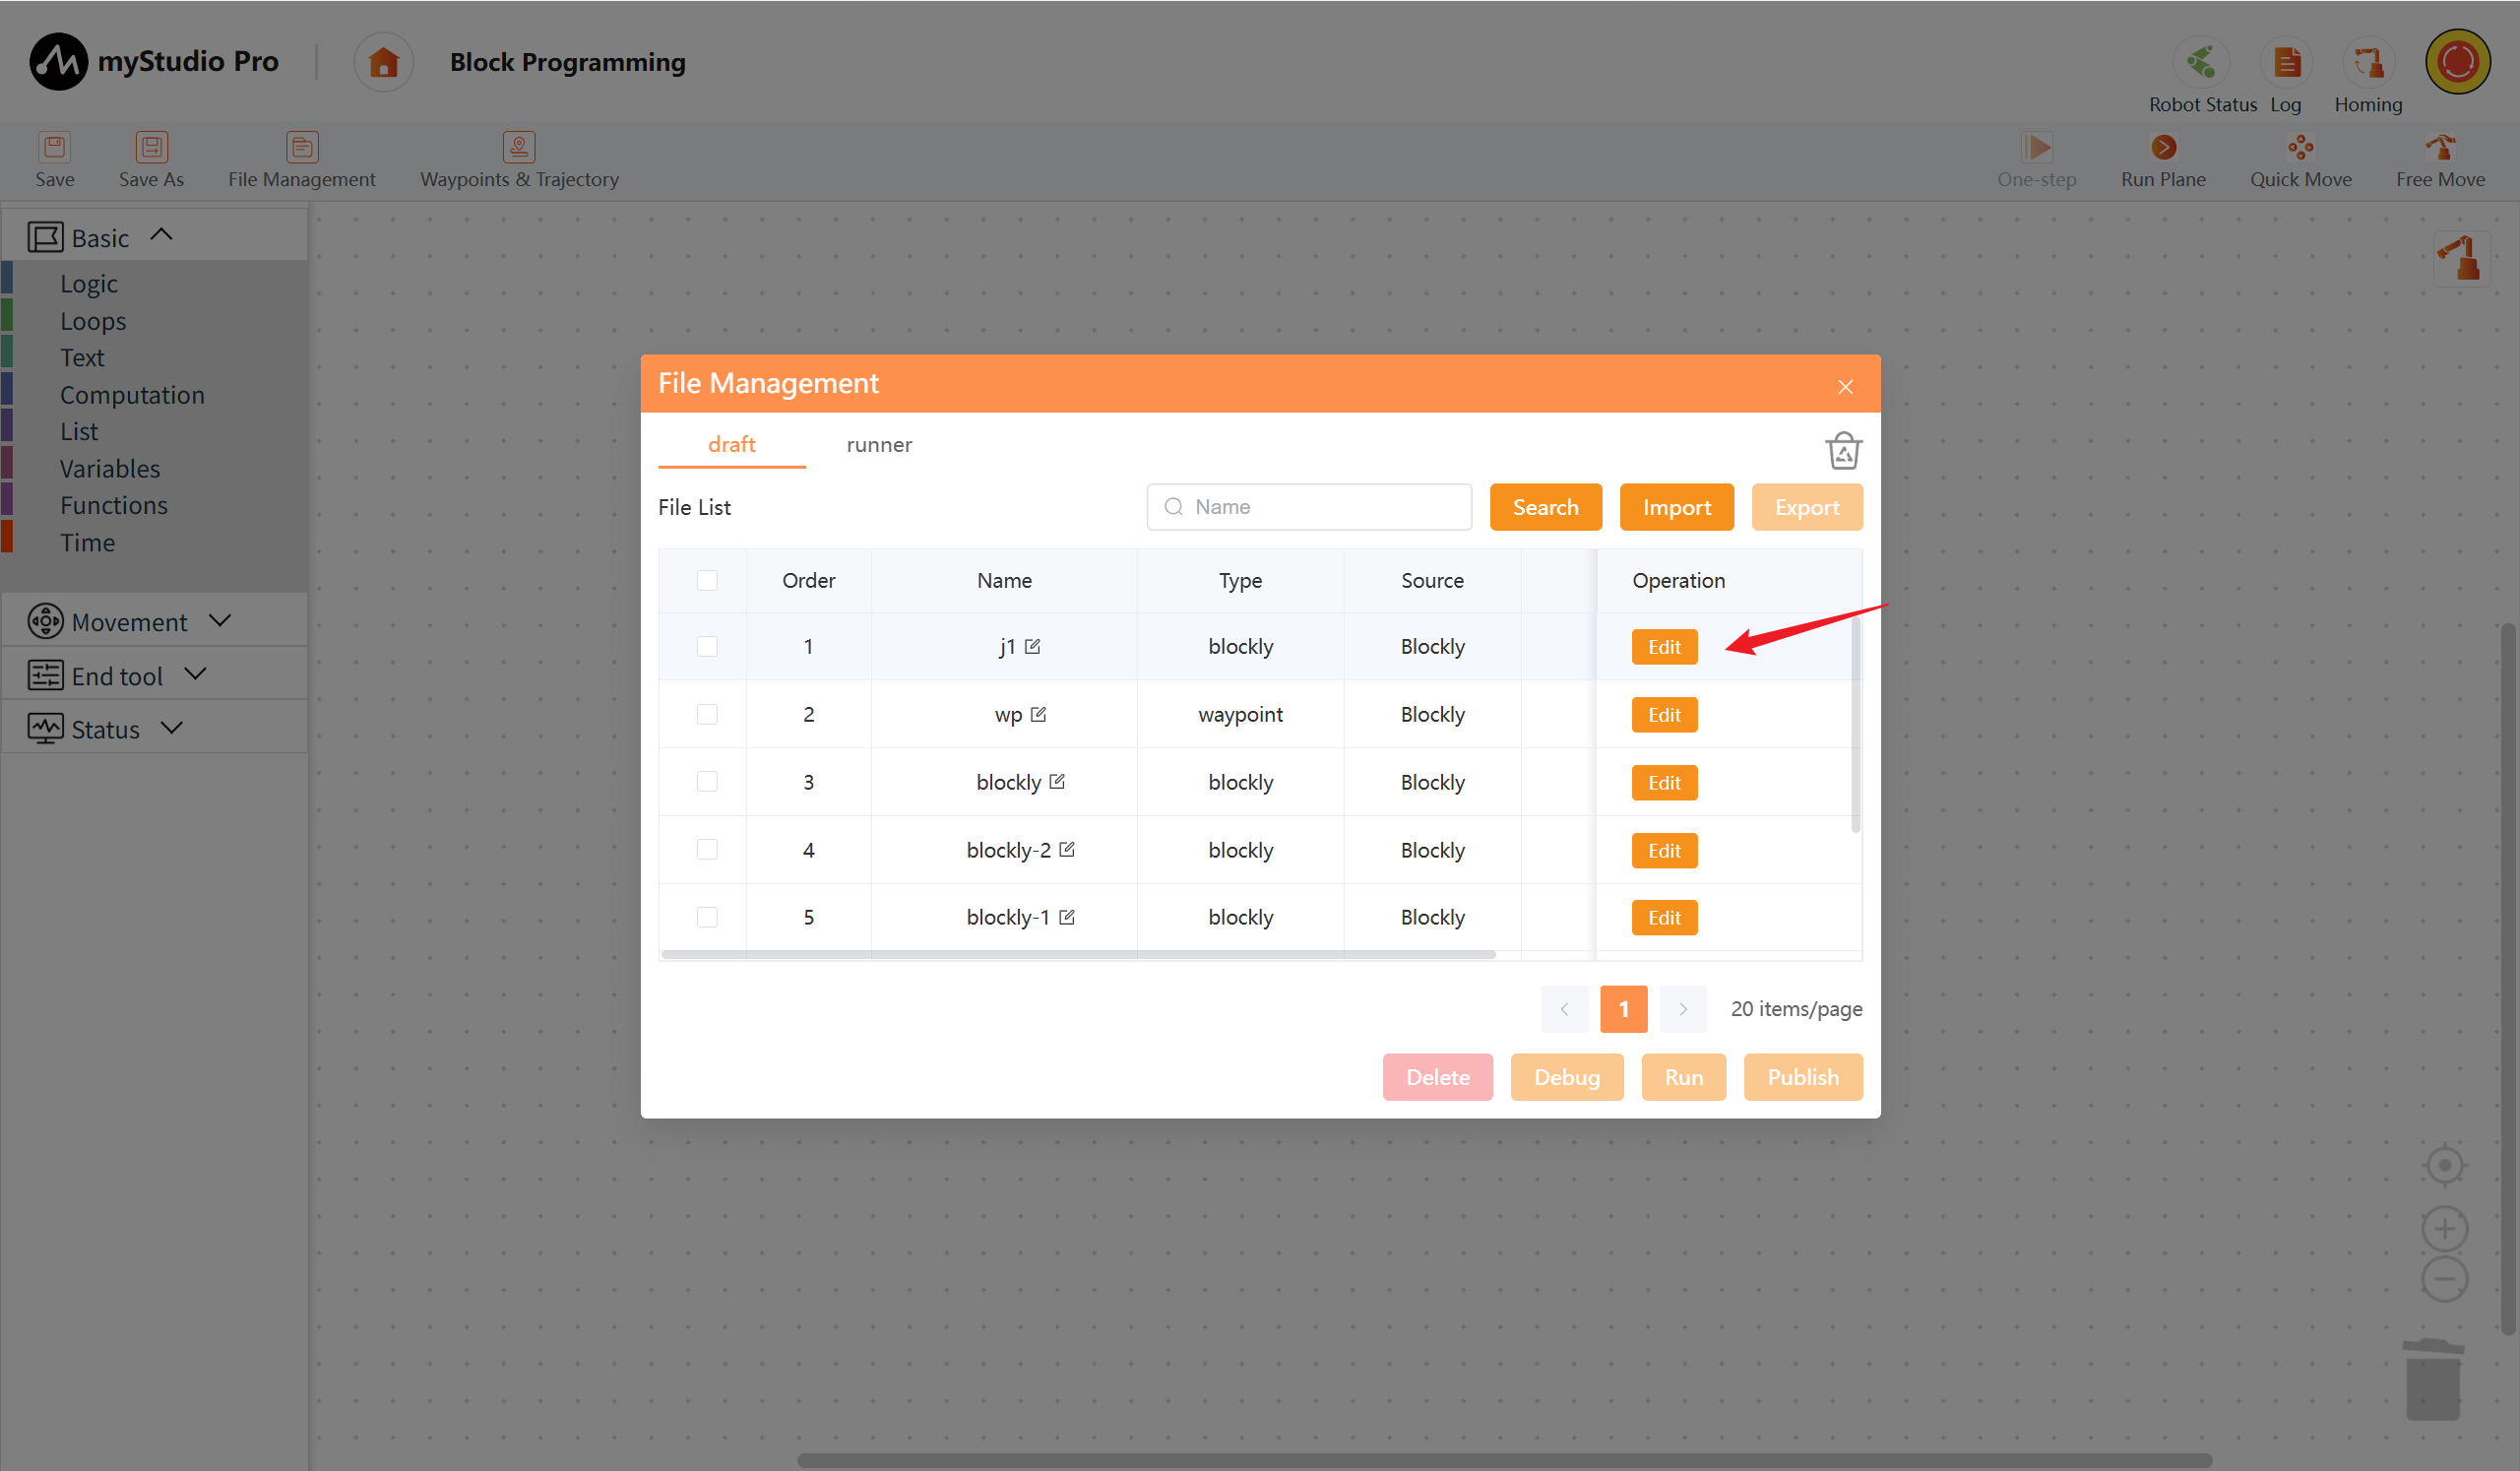
Loading completed.
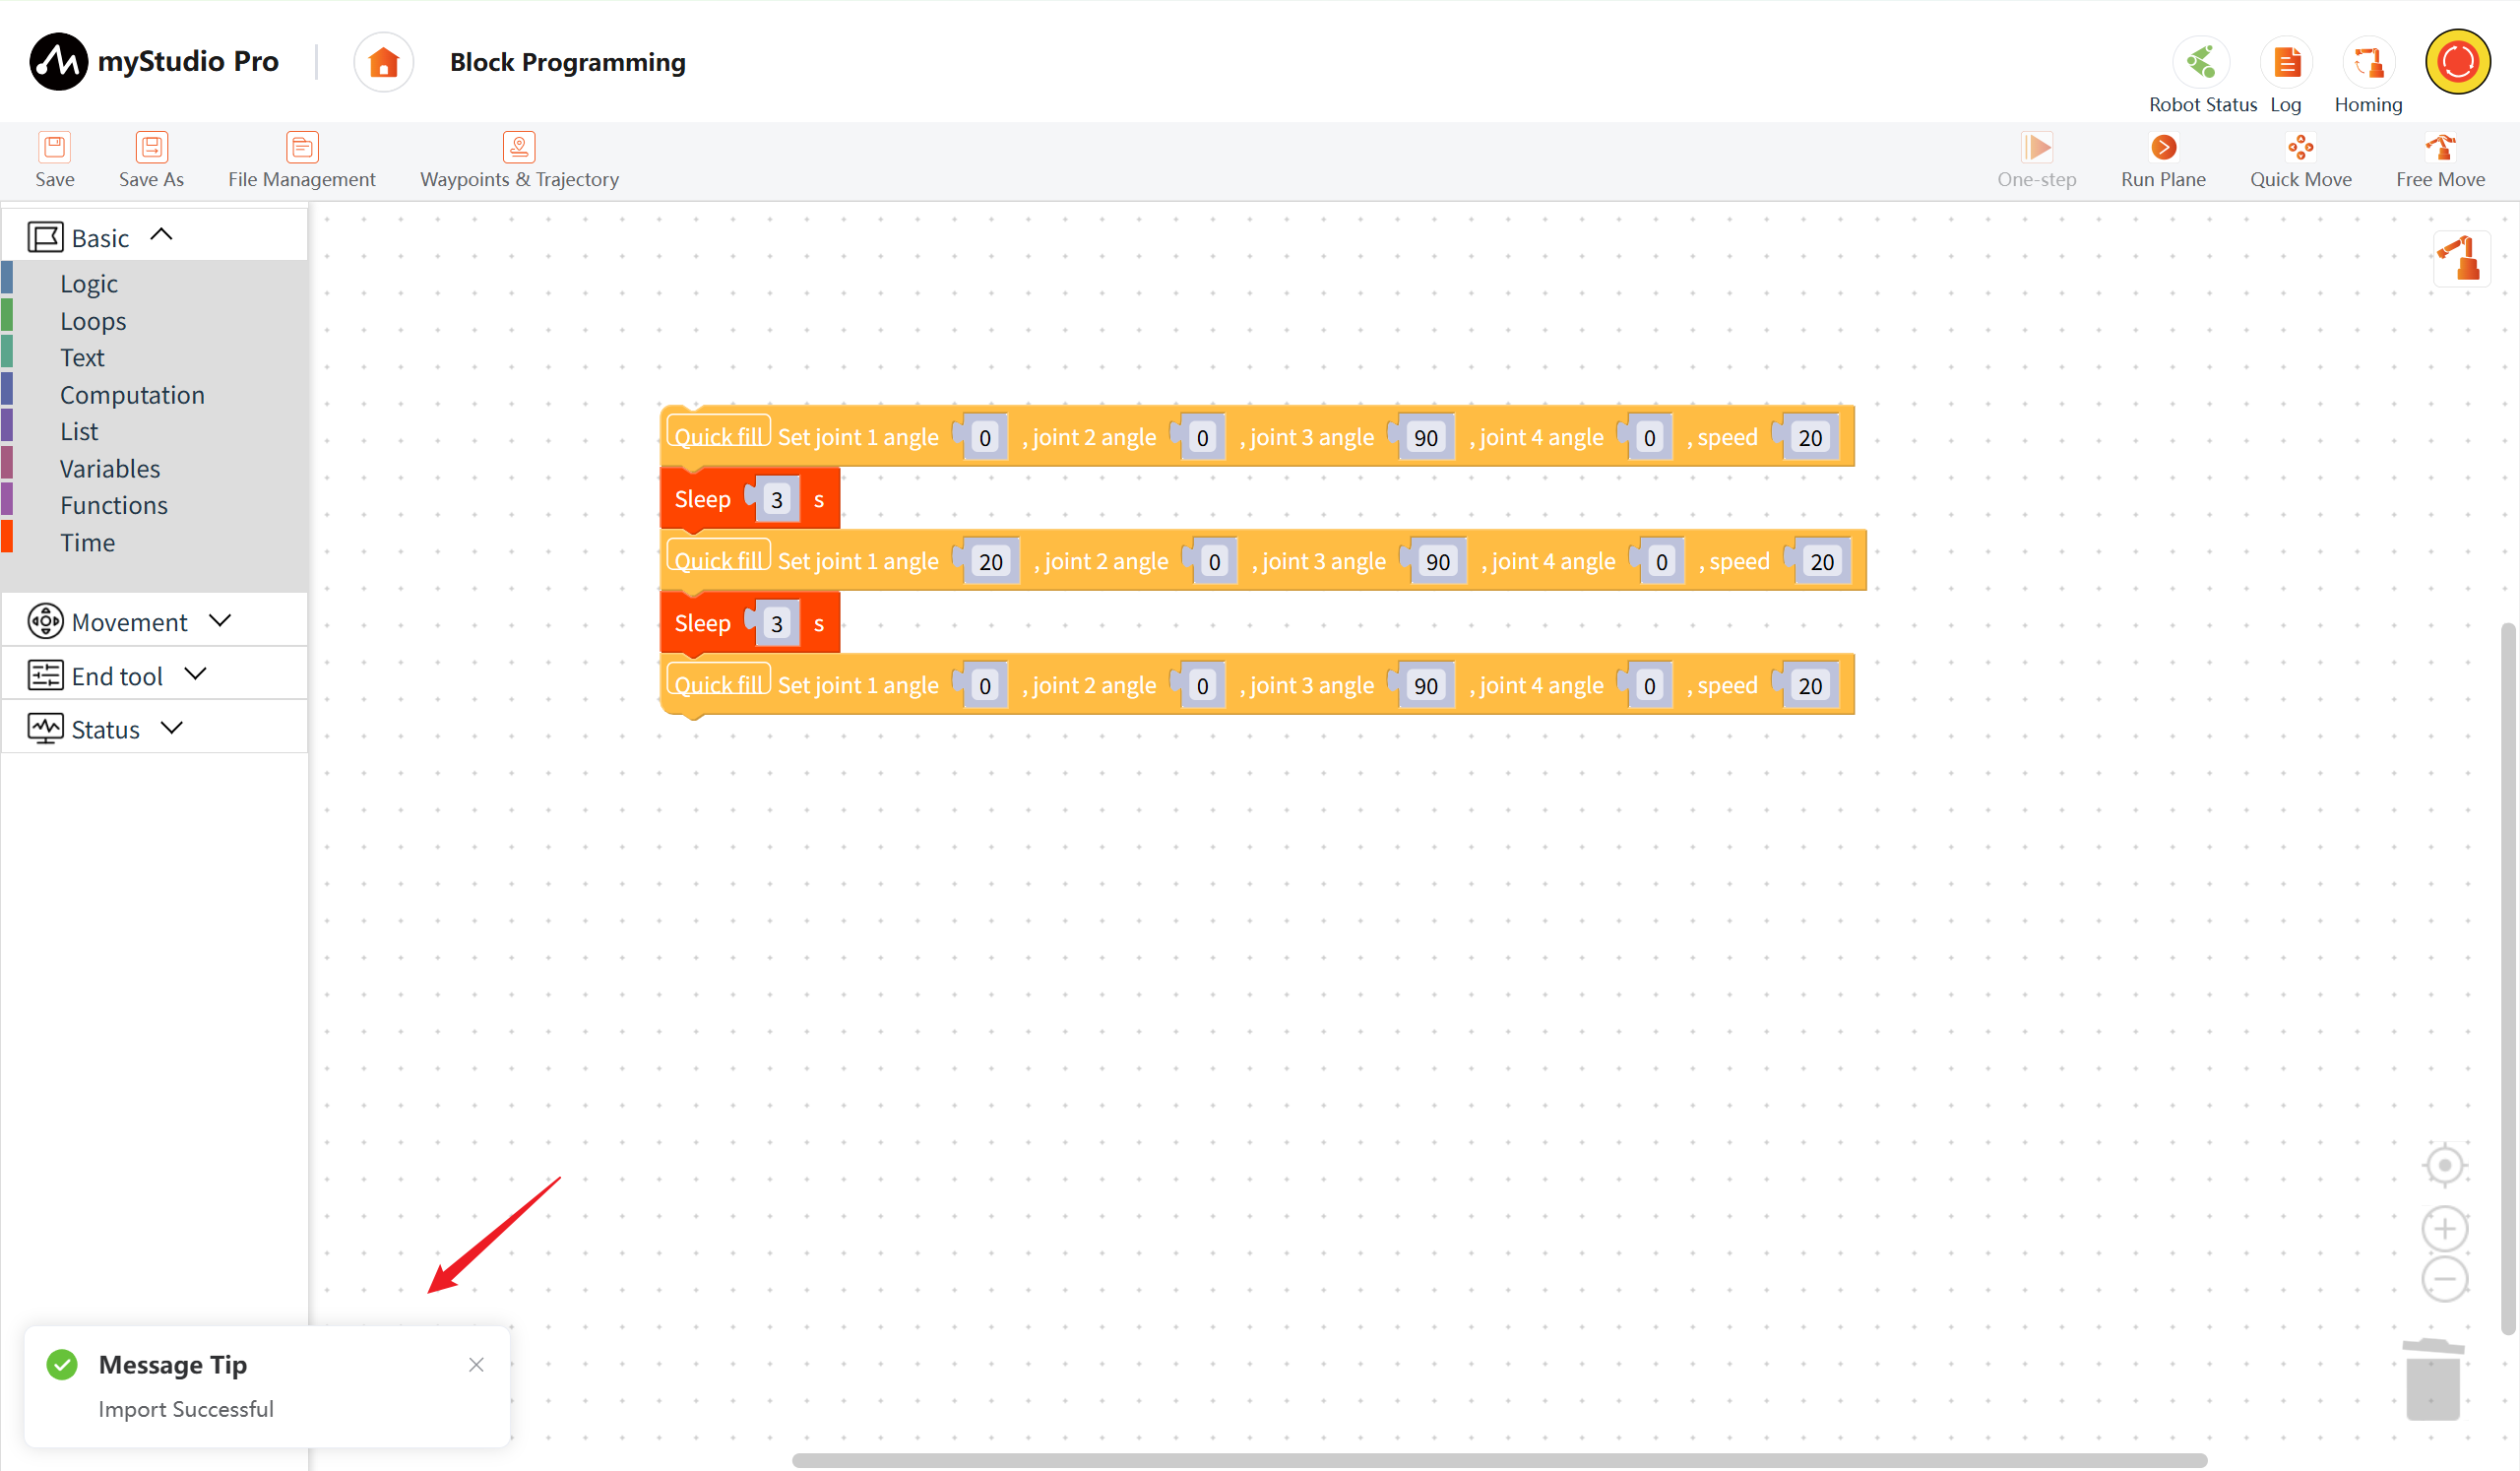
Of course, you can also use the Save As function to save the building block programming file to the path you specify.
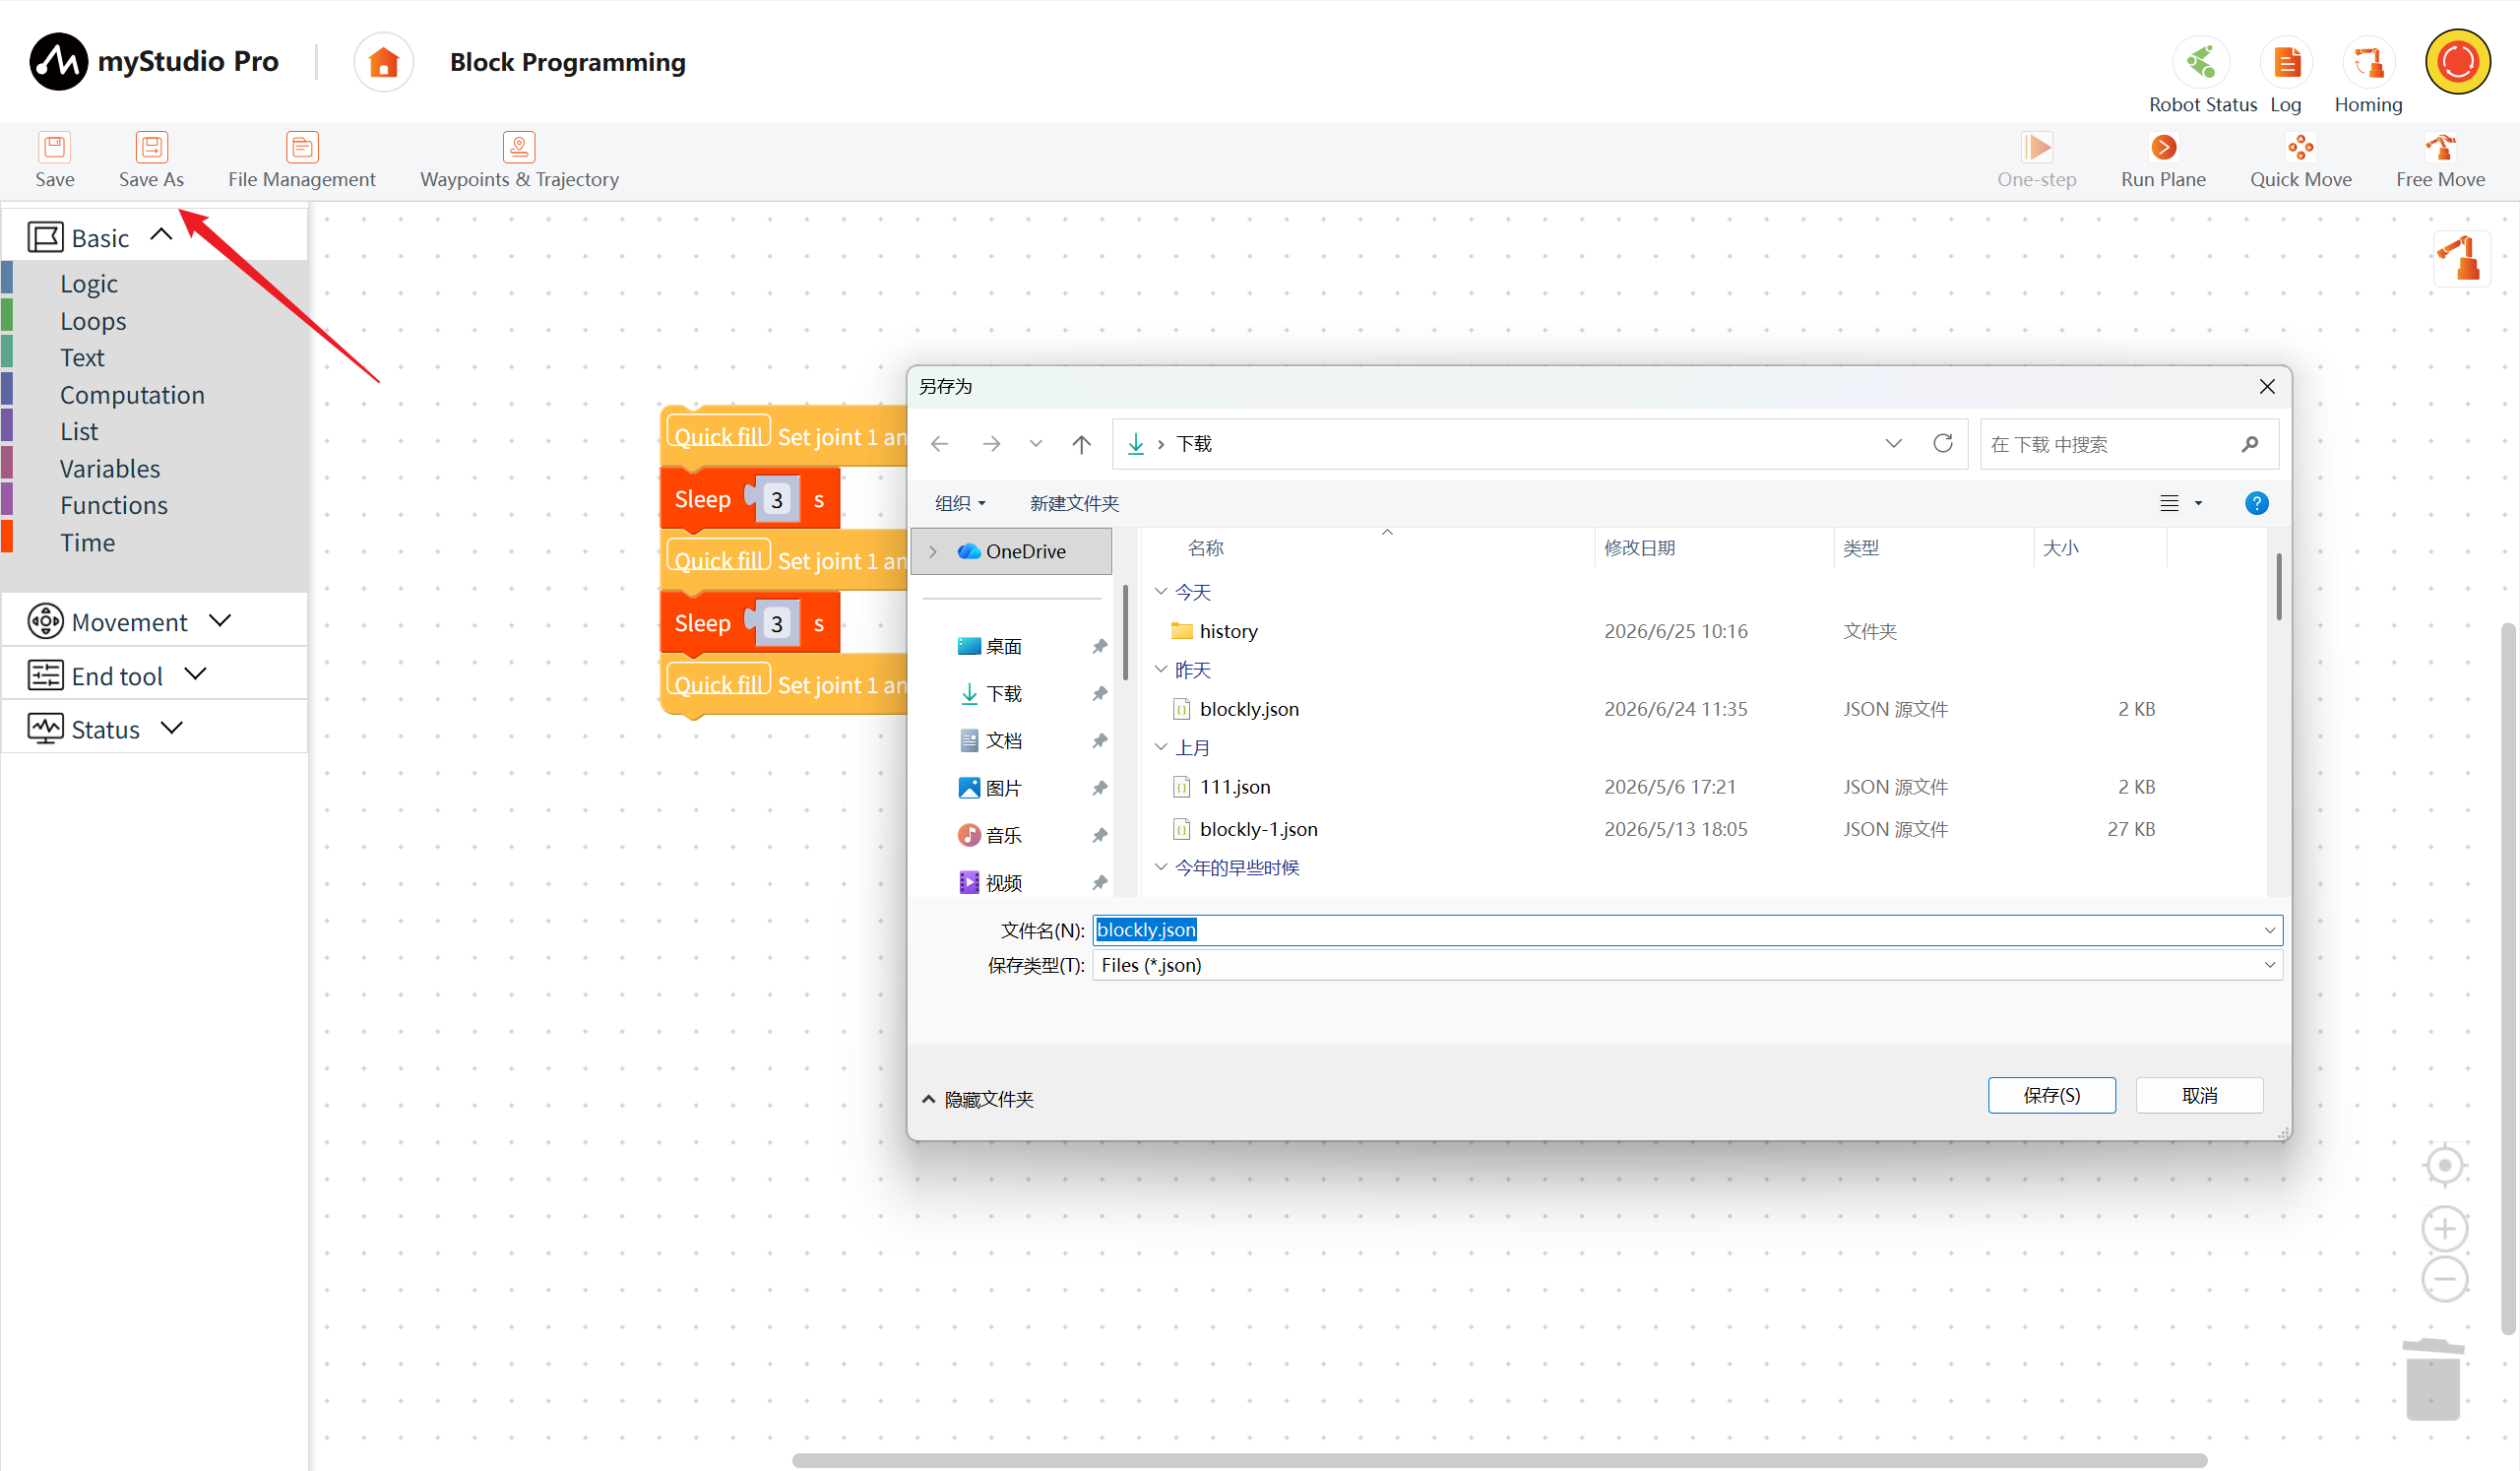
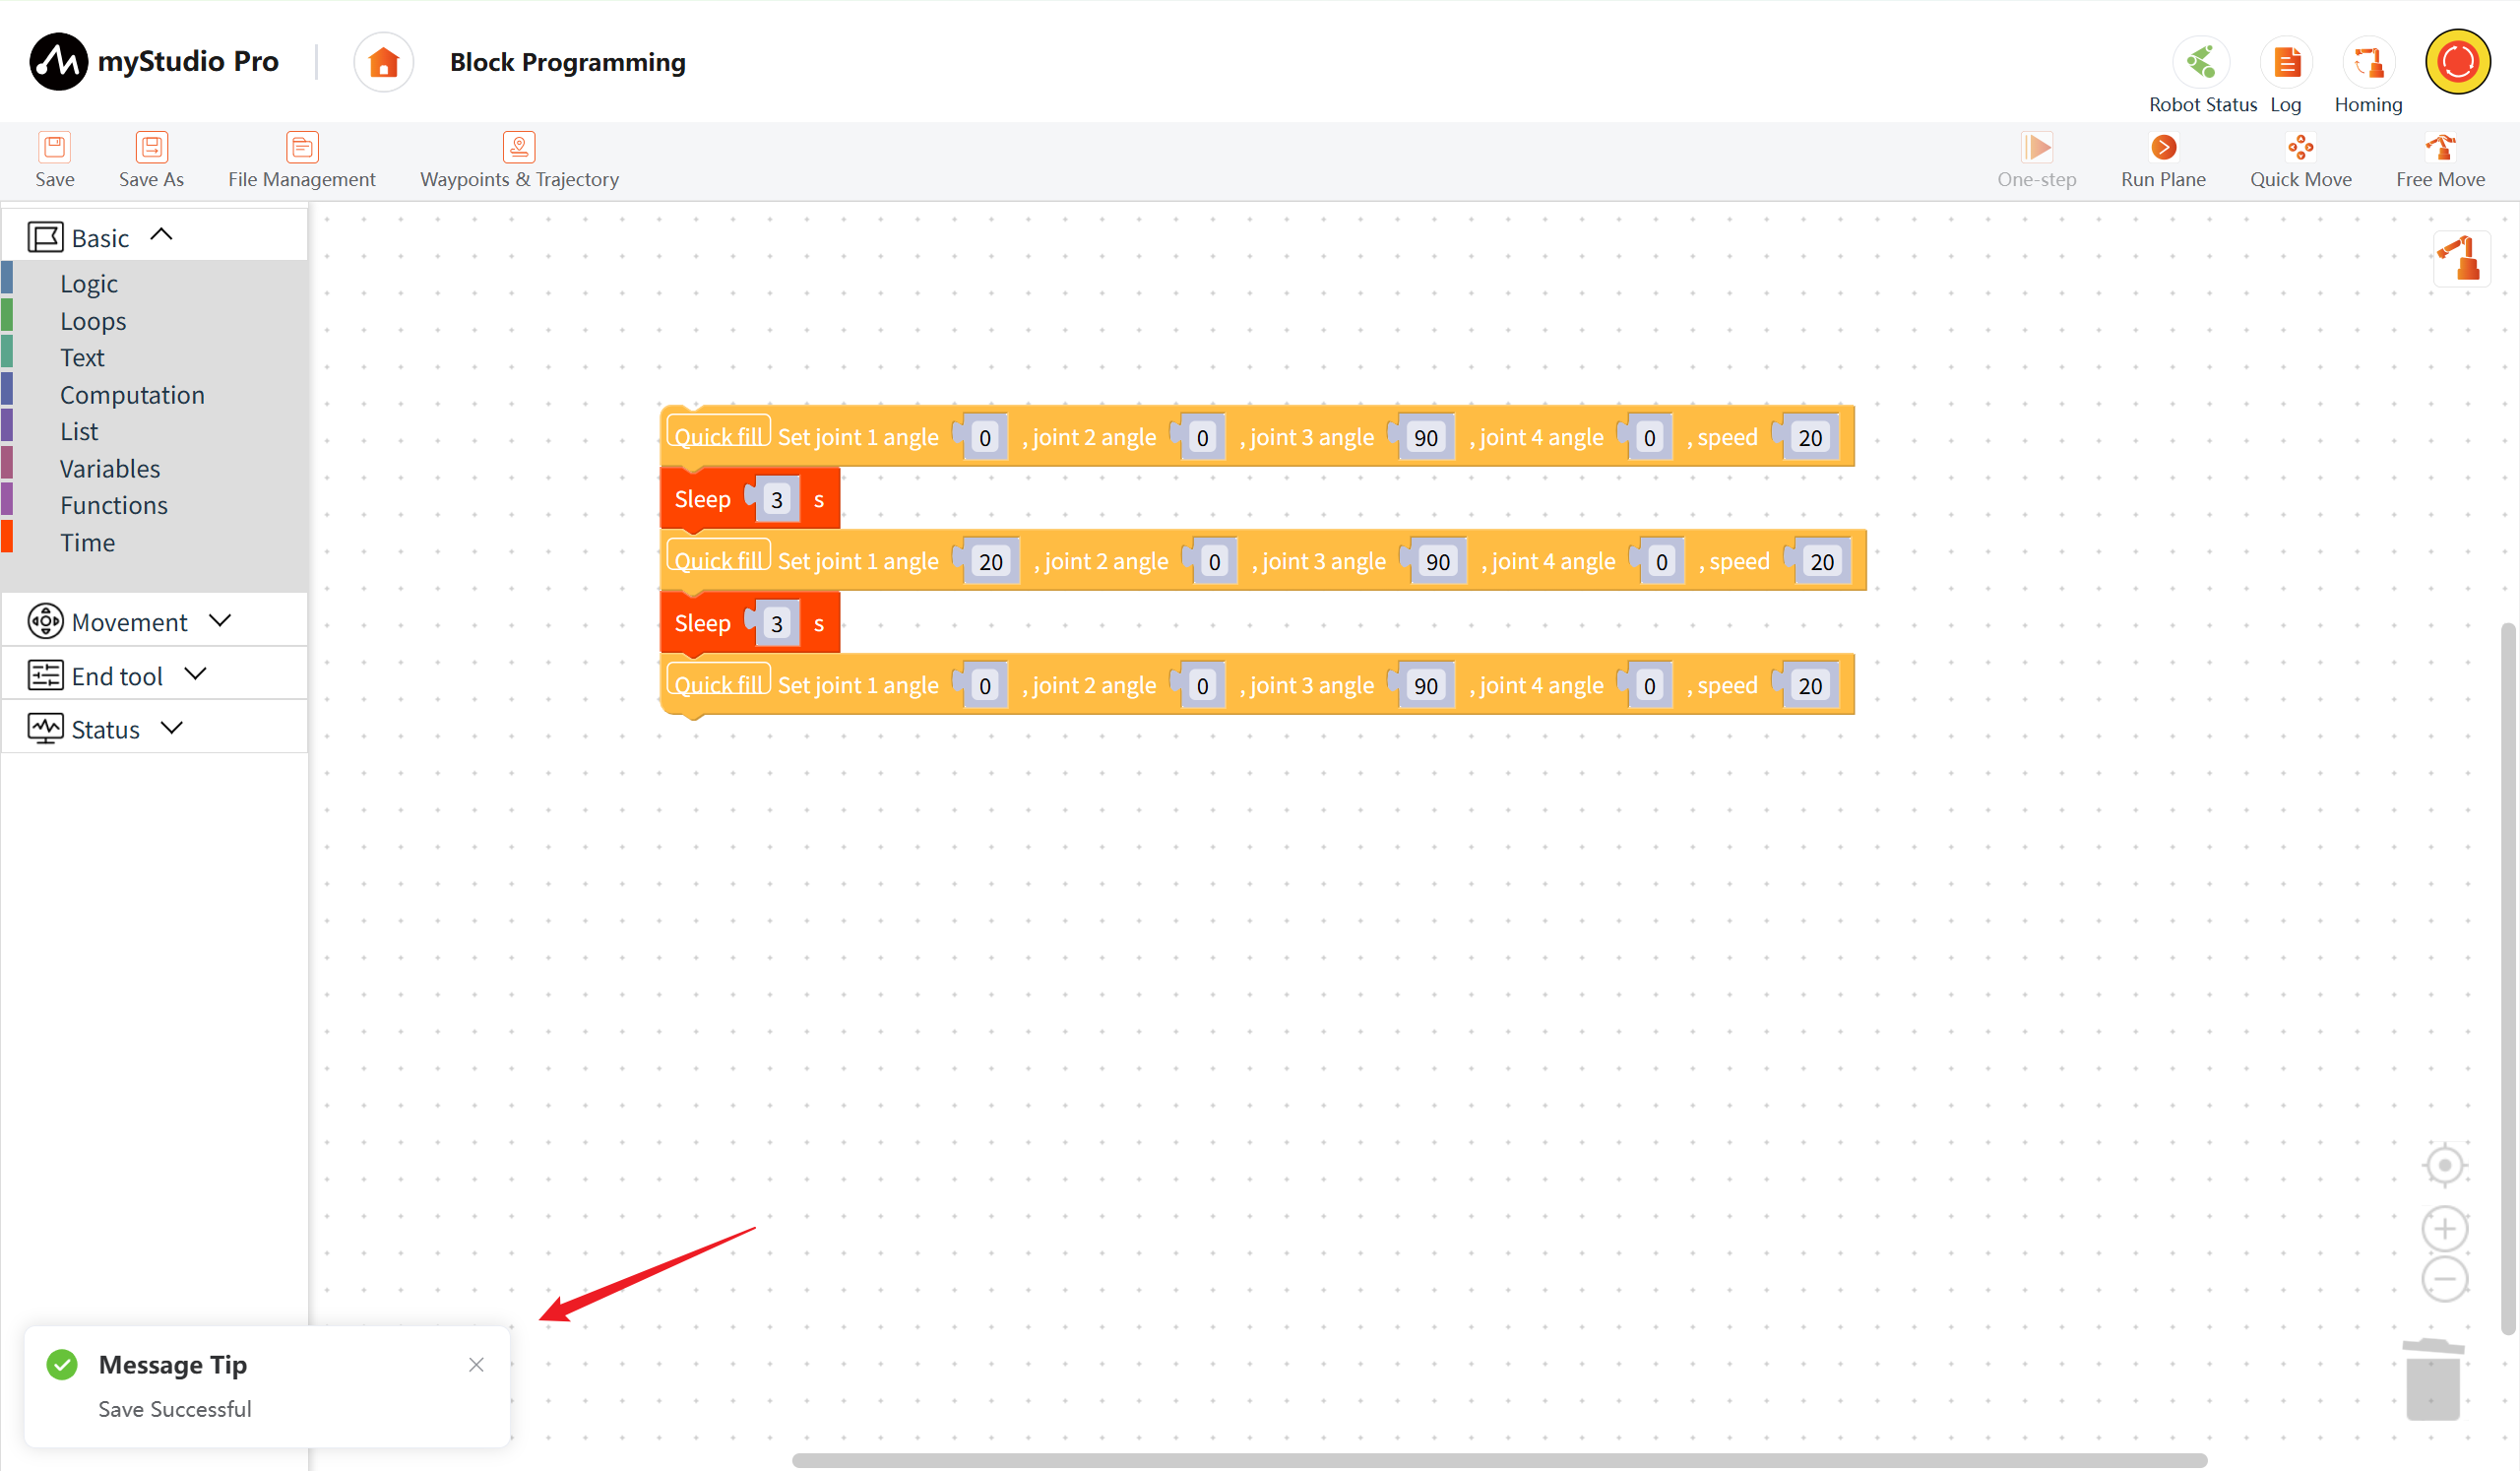
If you need to load the saved block programming file into the workspace, you can refer to the File Managementfor the Import and Edit functions.
3 Quick Fill
This chapter introduces the Quick Fill function in the block.
When a block has too many data items, filling them one by one is too tedious. Therefore, for blocks with too many data items, we can use the Quick Fill function.
Quick Fill Source: Angle or coordinate data of the current robotic arm posture.
The following blocks currently support quick fill:
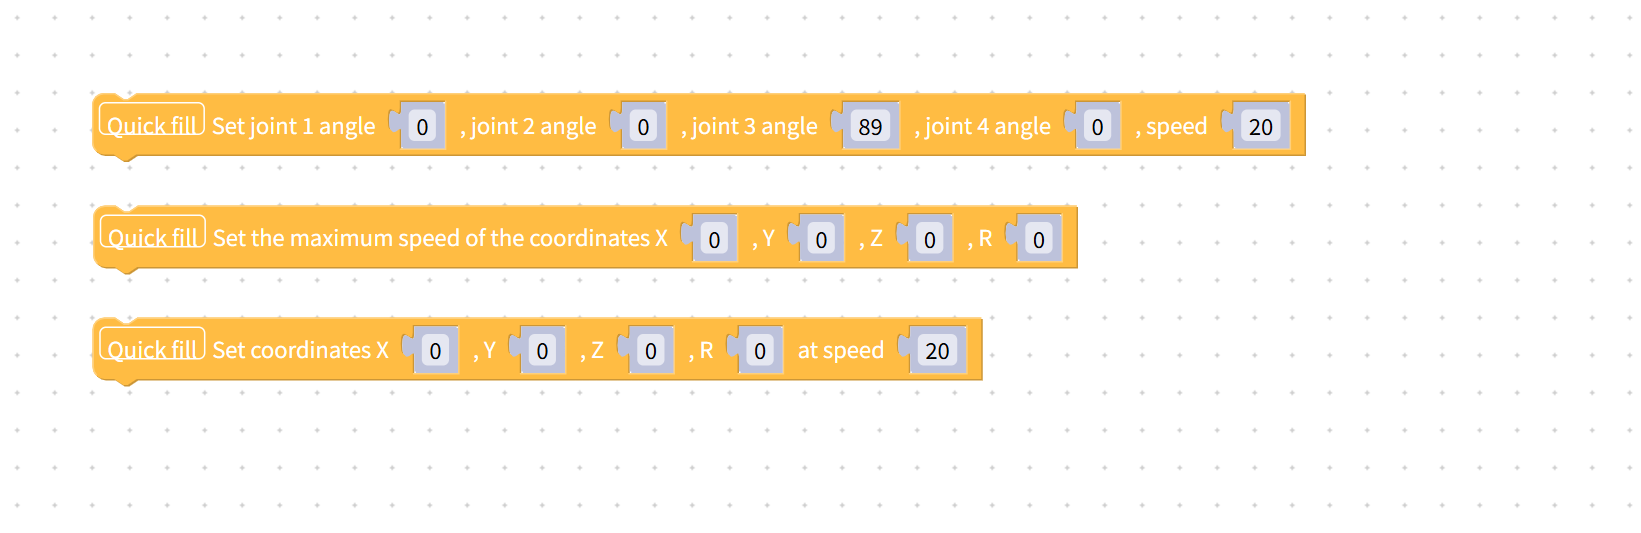
How to Use Quick Fill
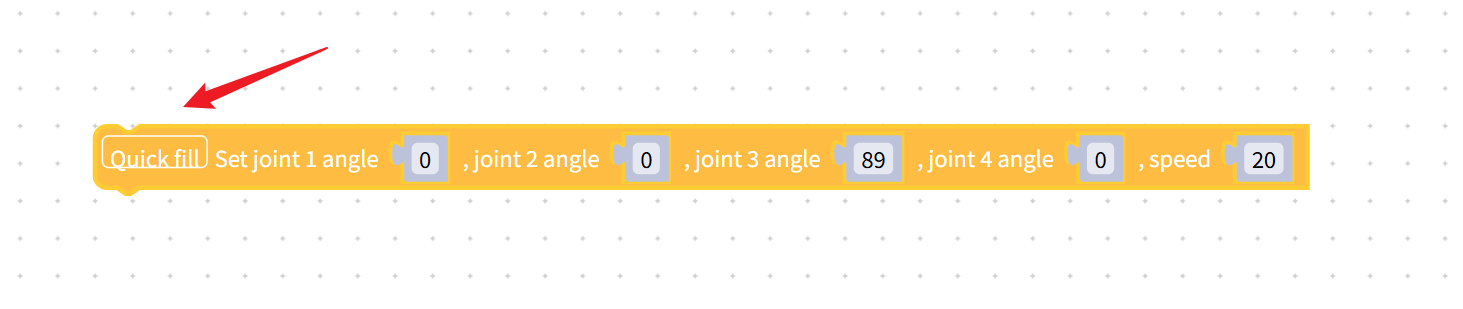
Taking the Set Angles block as an example, first select the block, then click the Quick Fill button within it.
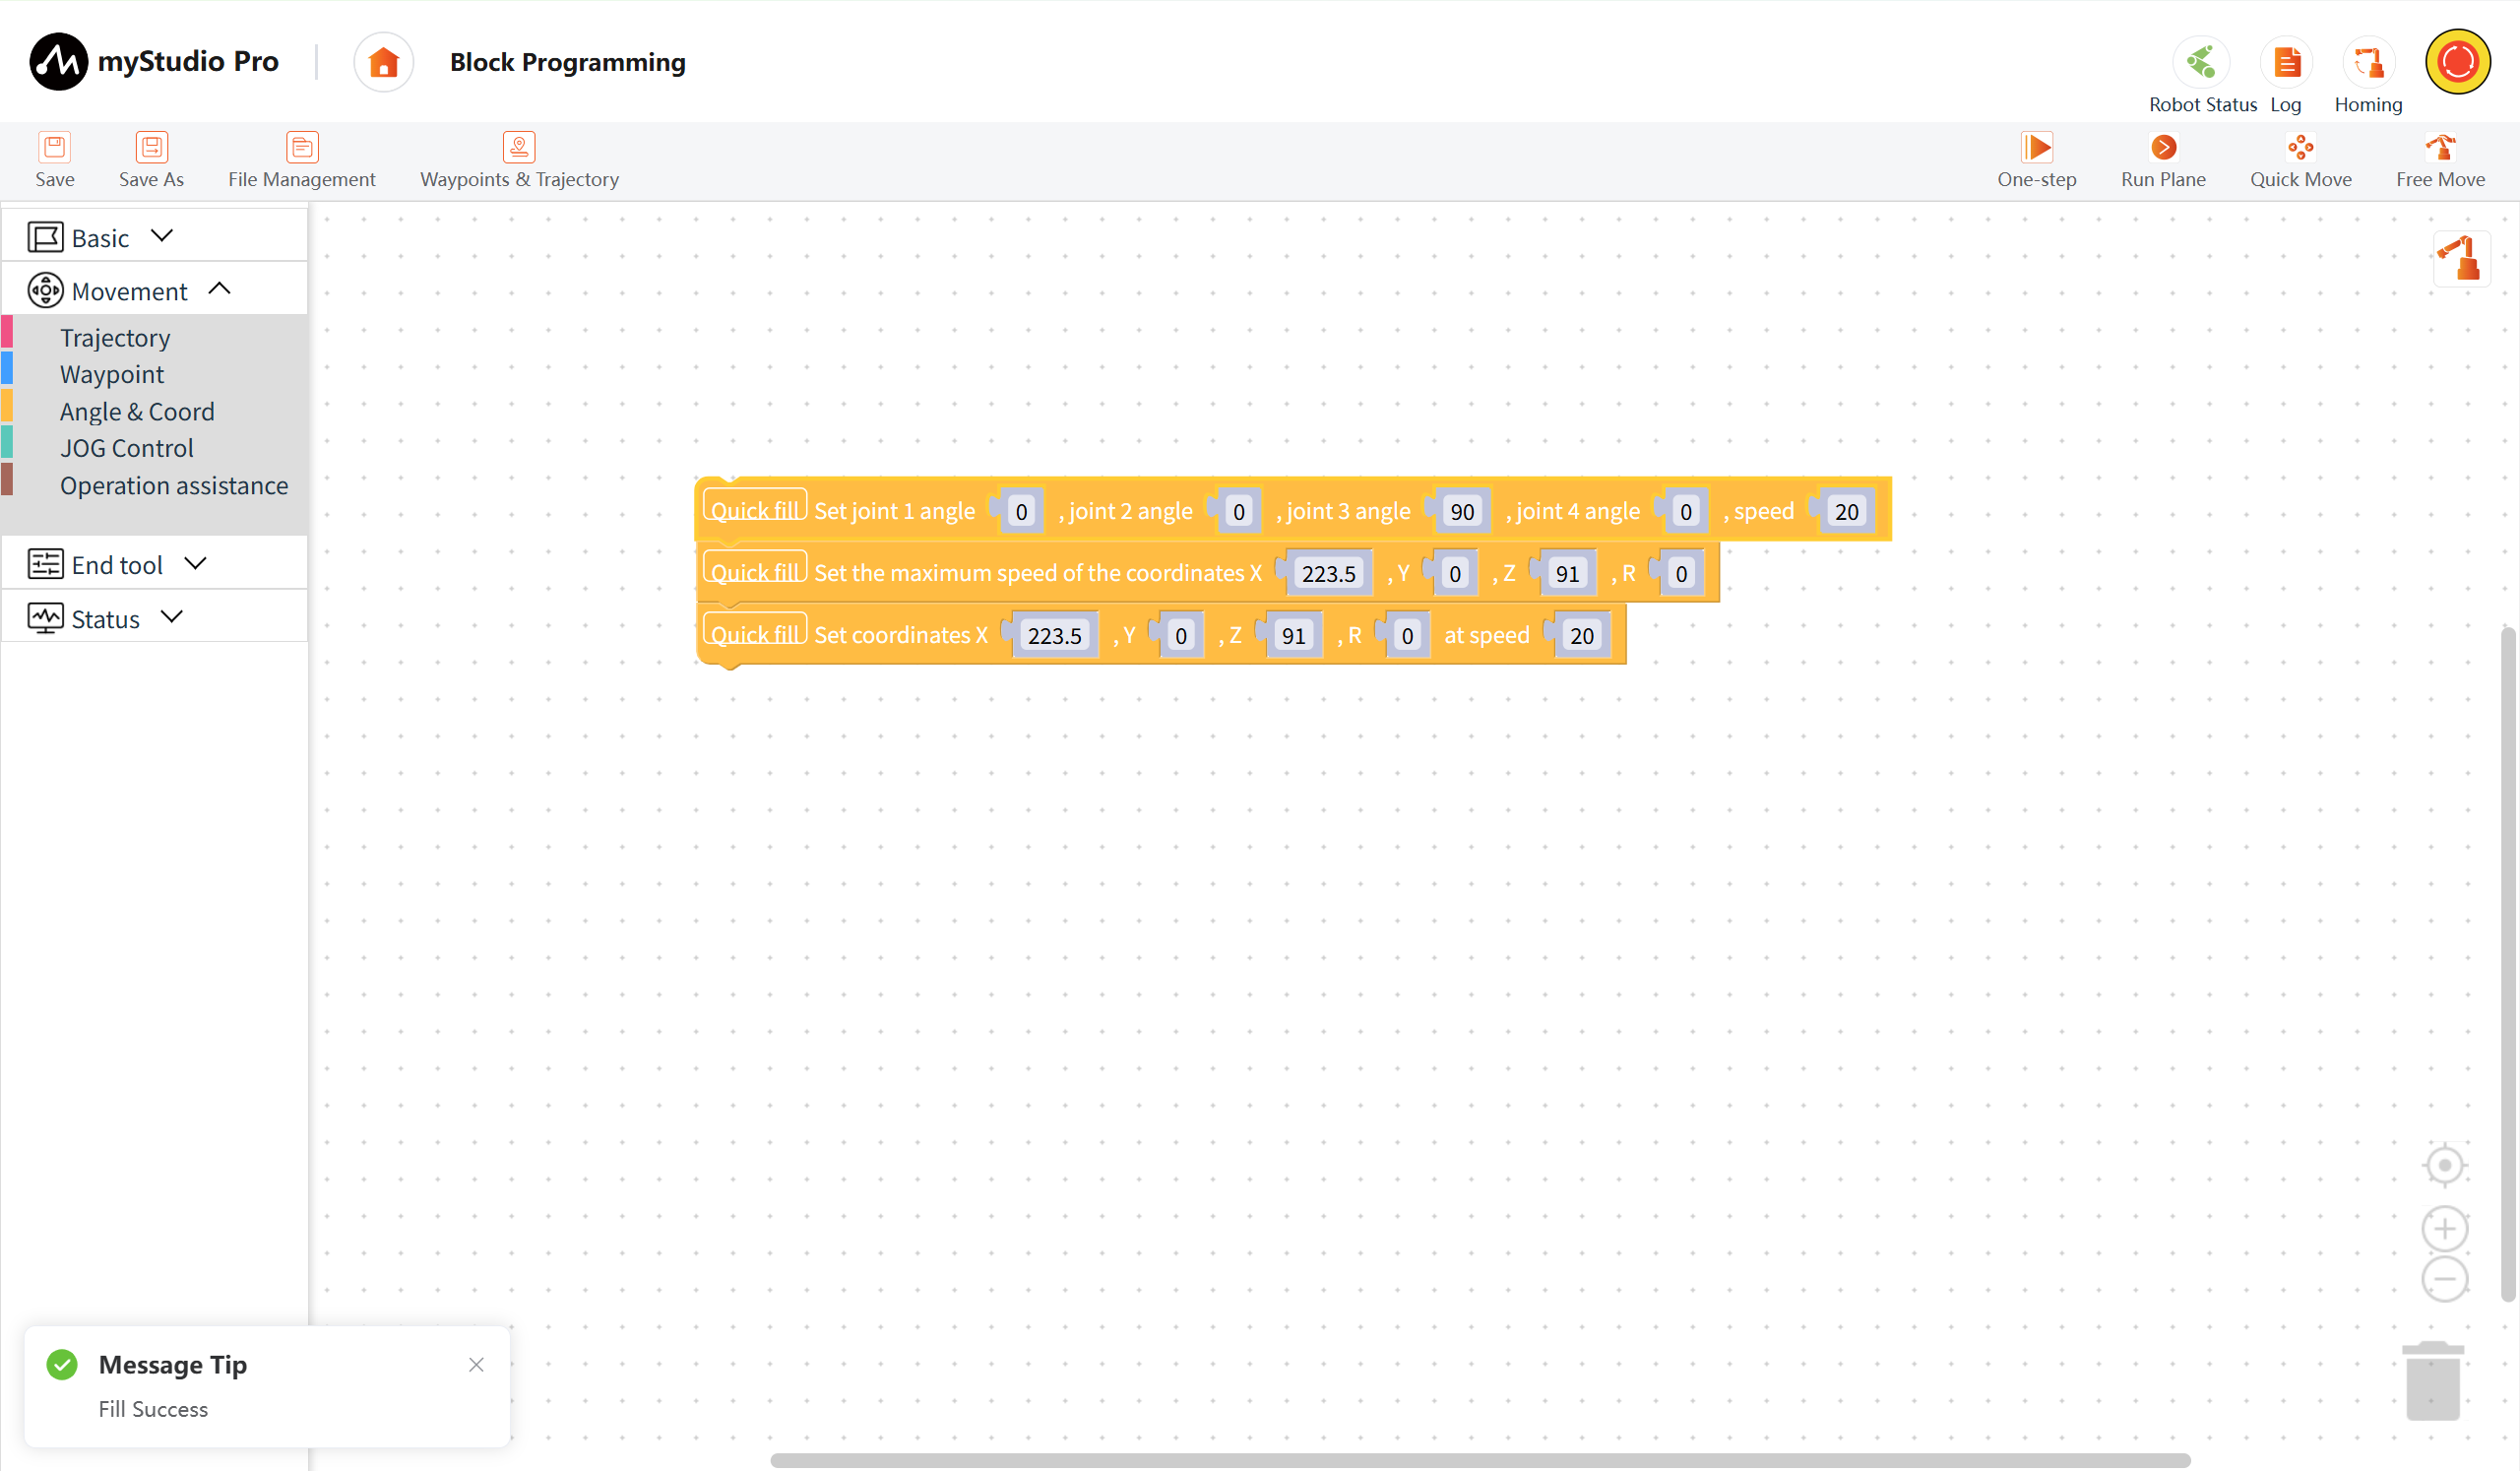
When the following prompt box appears on the page, the fill was successful.
4 Quick Move
What is Quick Move? Simply put, it's controlling the robot's movement quickly with just mouse clicks, without any programming.
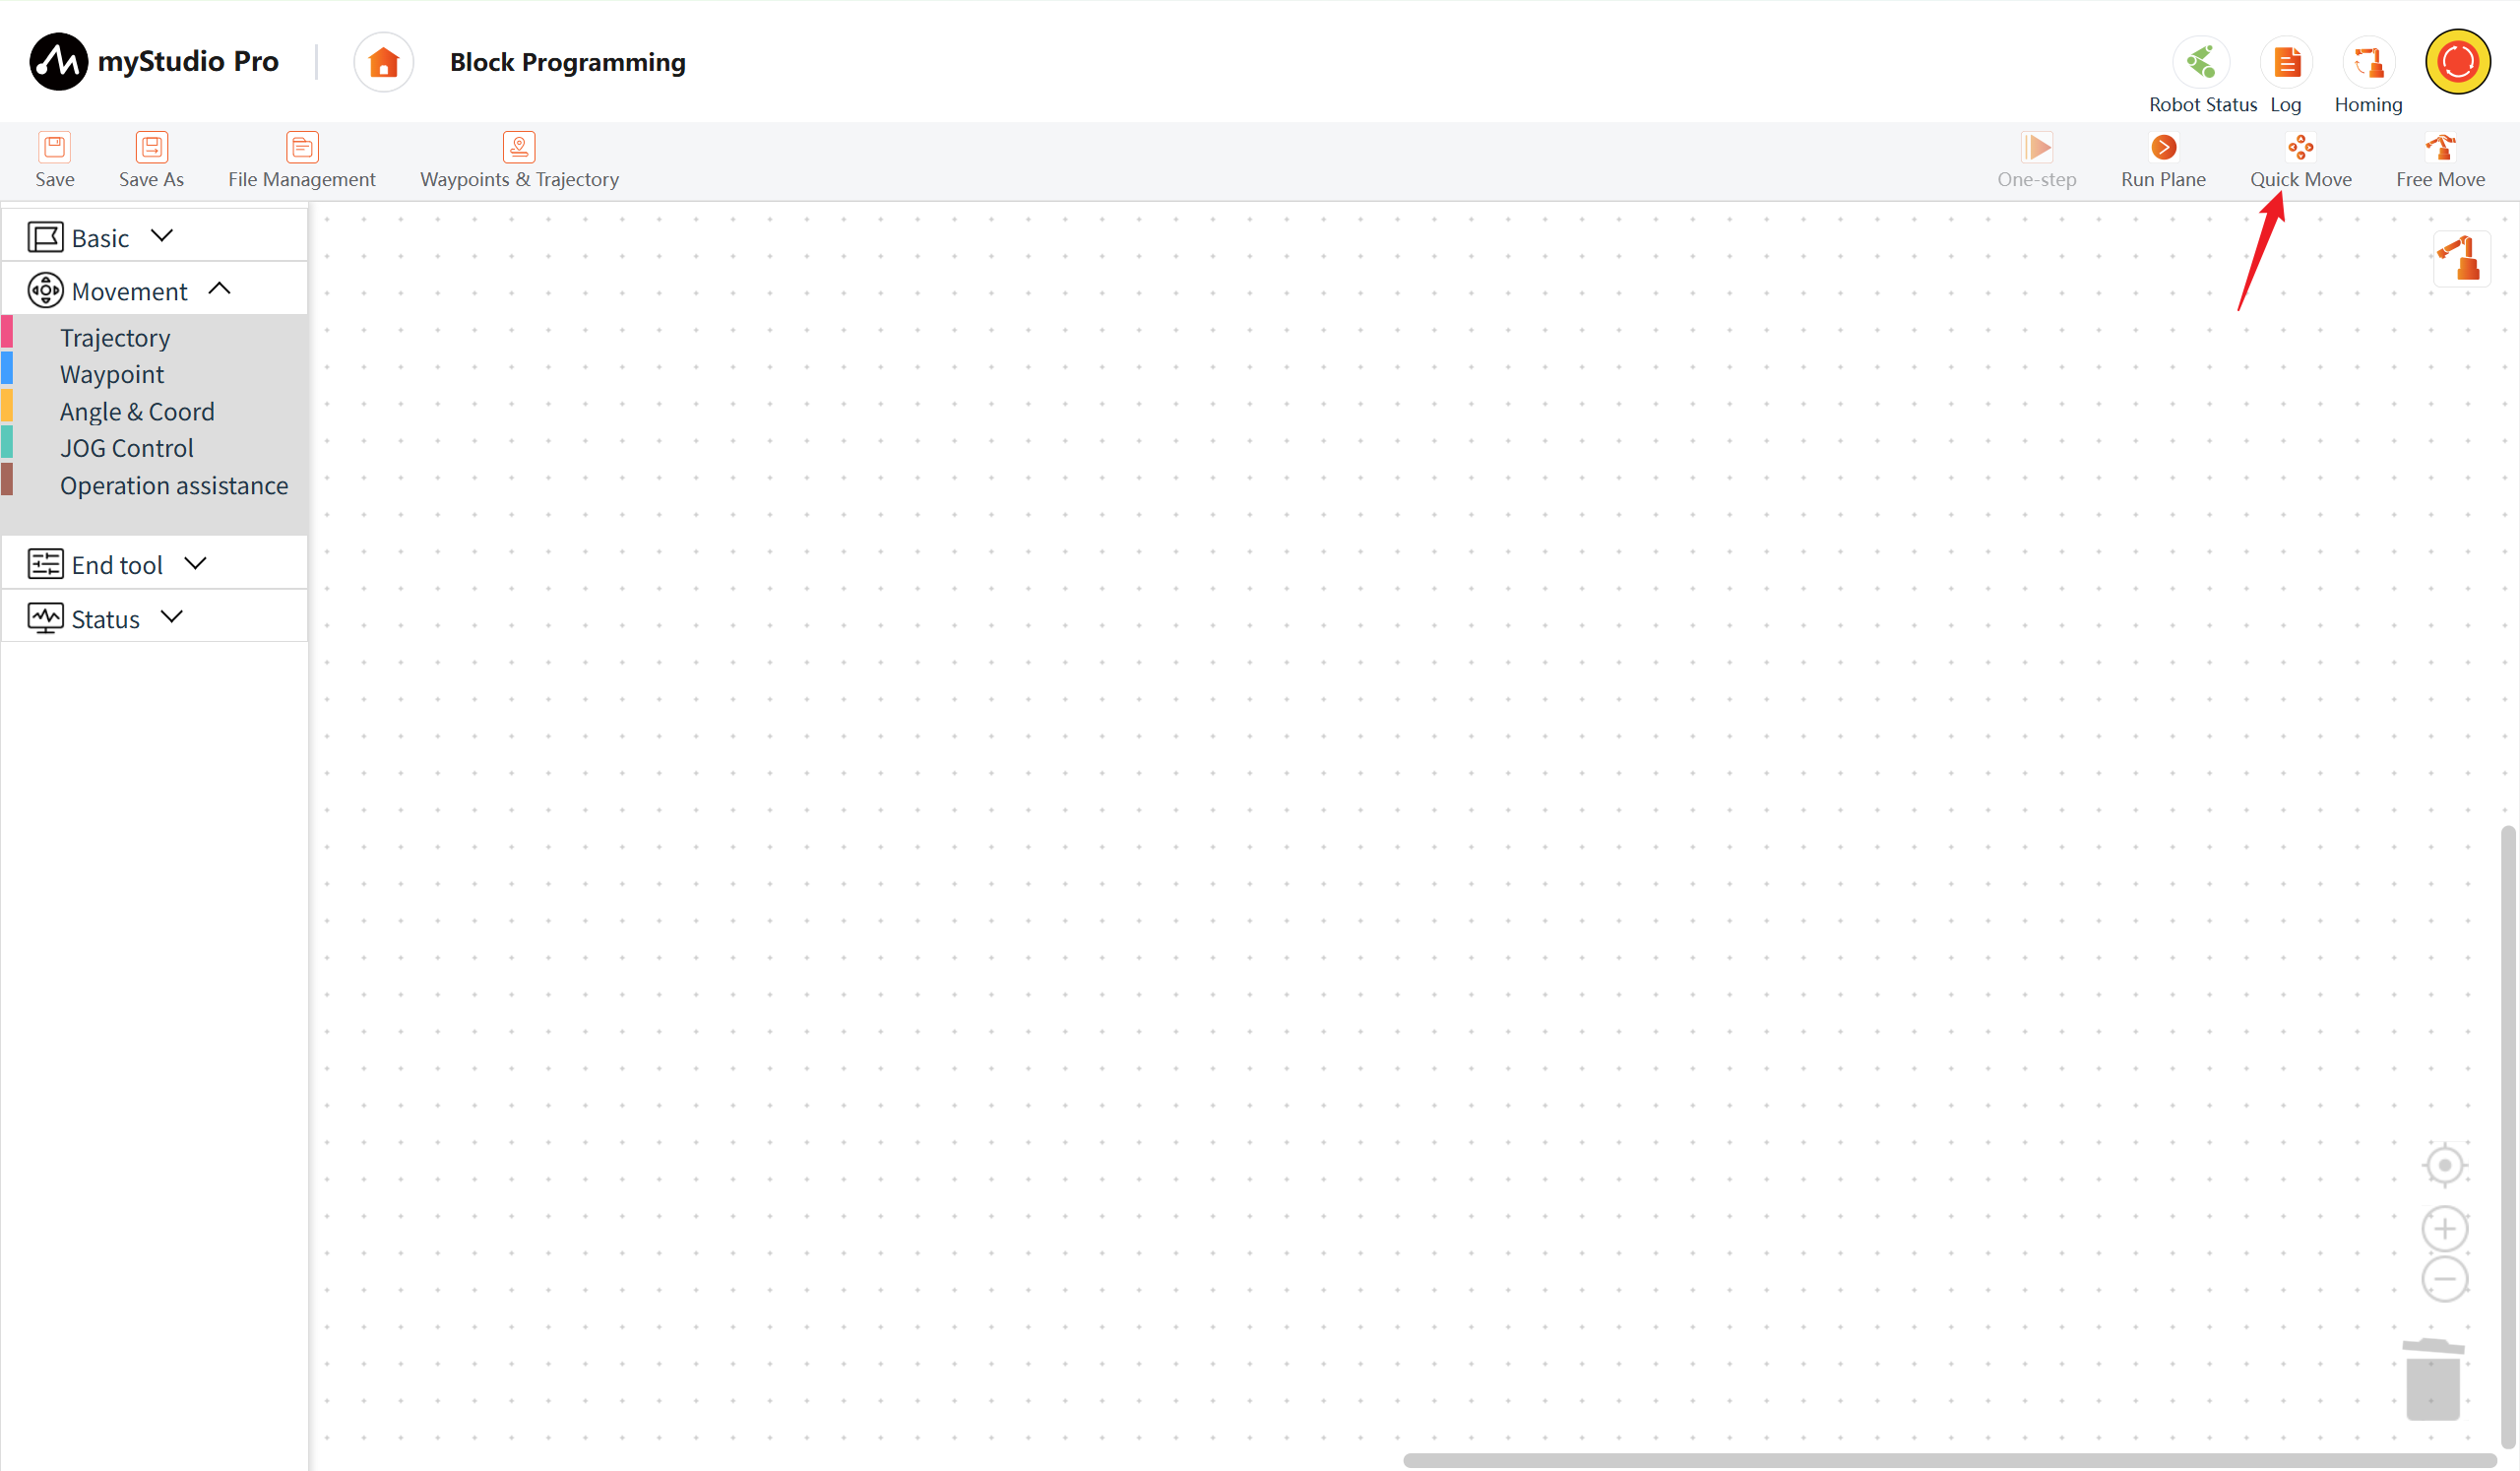
Step 1: Click the Quick Move button to open the Quick Move panel and wait for the robot data to return.
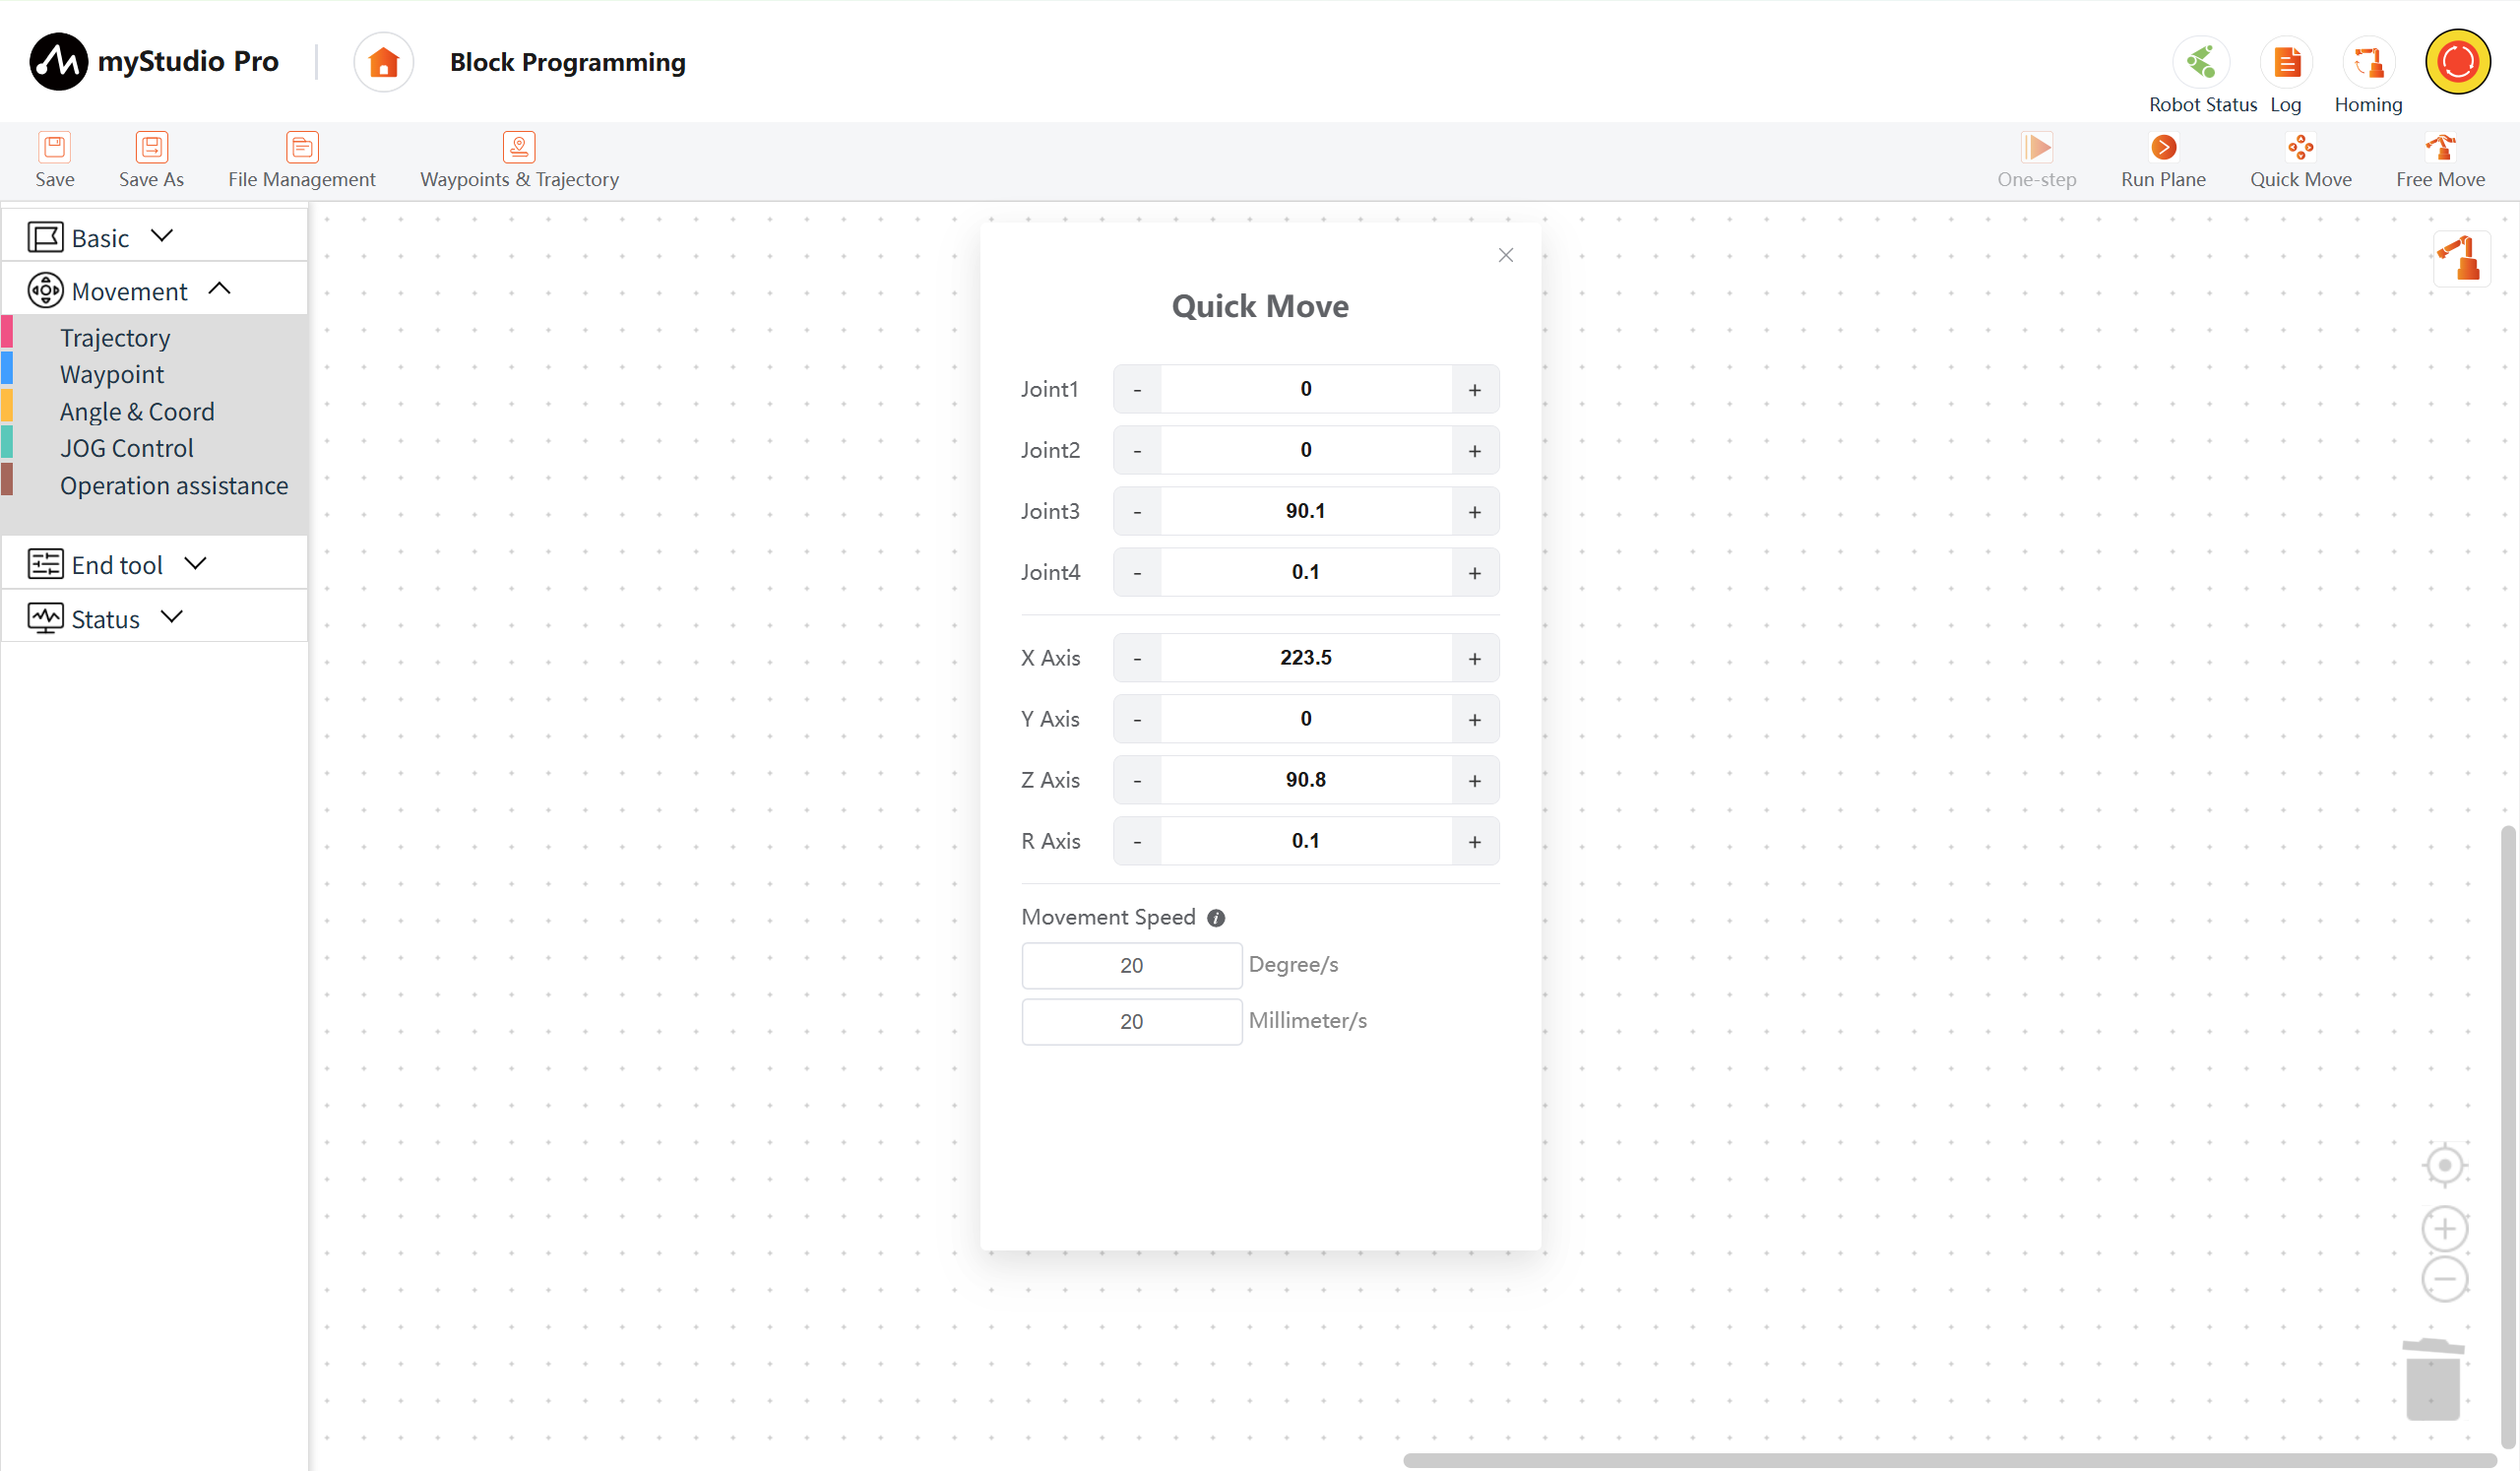
If all data is zero, please check if the robotic arm is connected and if it is functioning correctly.
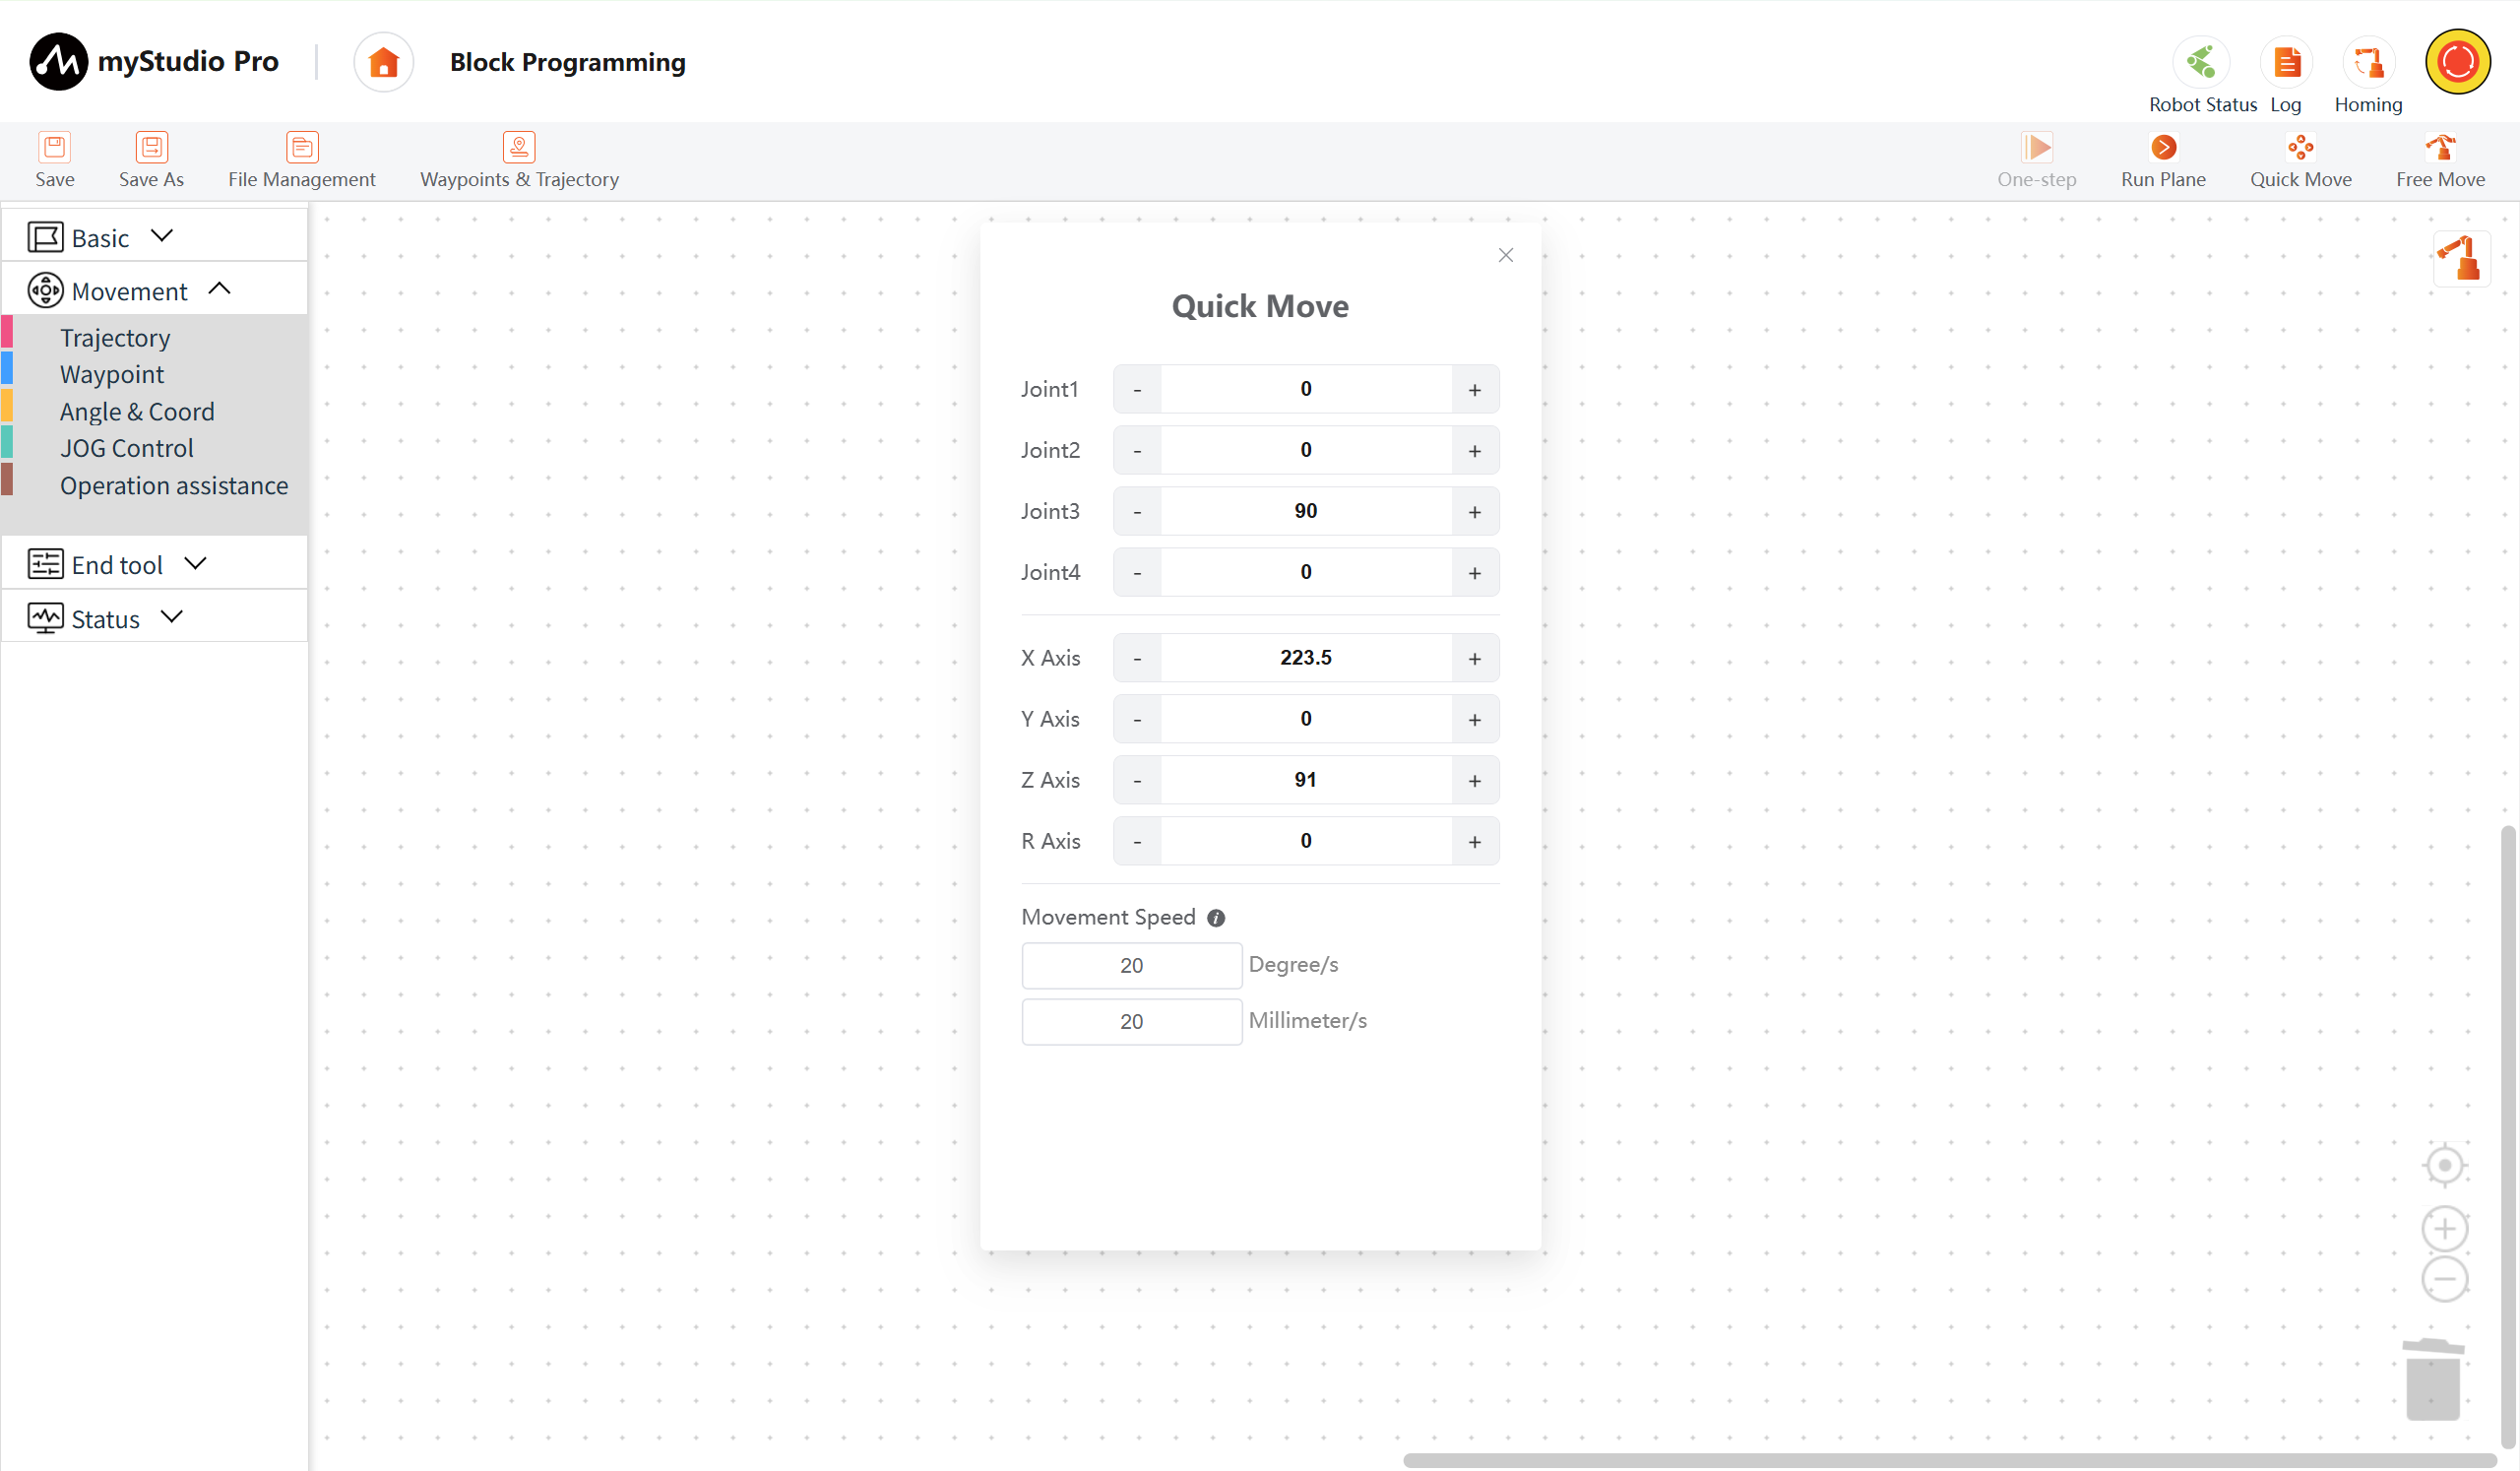
Step 2: Use the - and + buttons to control different joints of the robotic arm. Single-point movement, long-press for continuous movement, and direct modification of angles and coordinates followed by pressing Enter are supported.
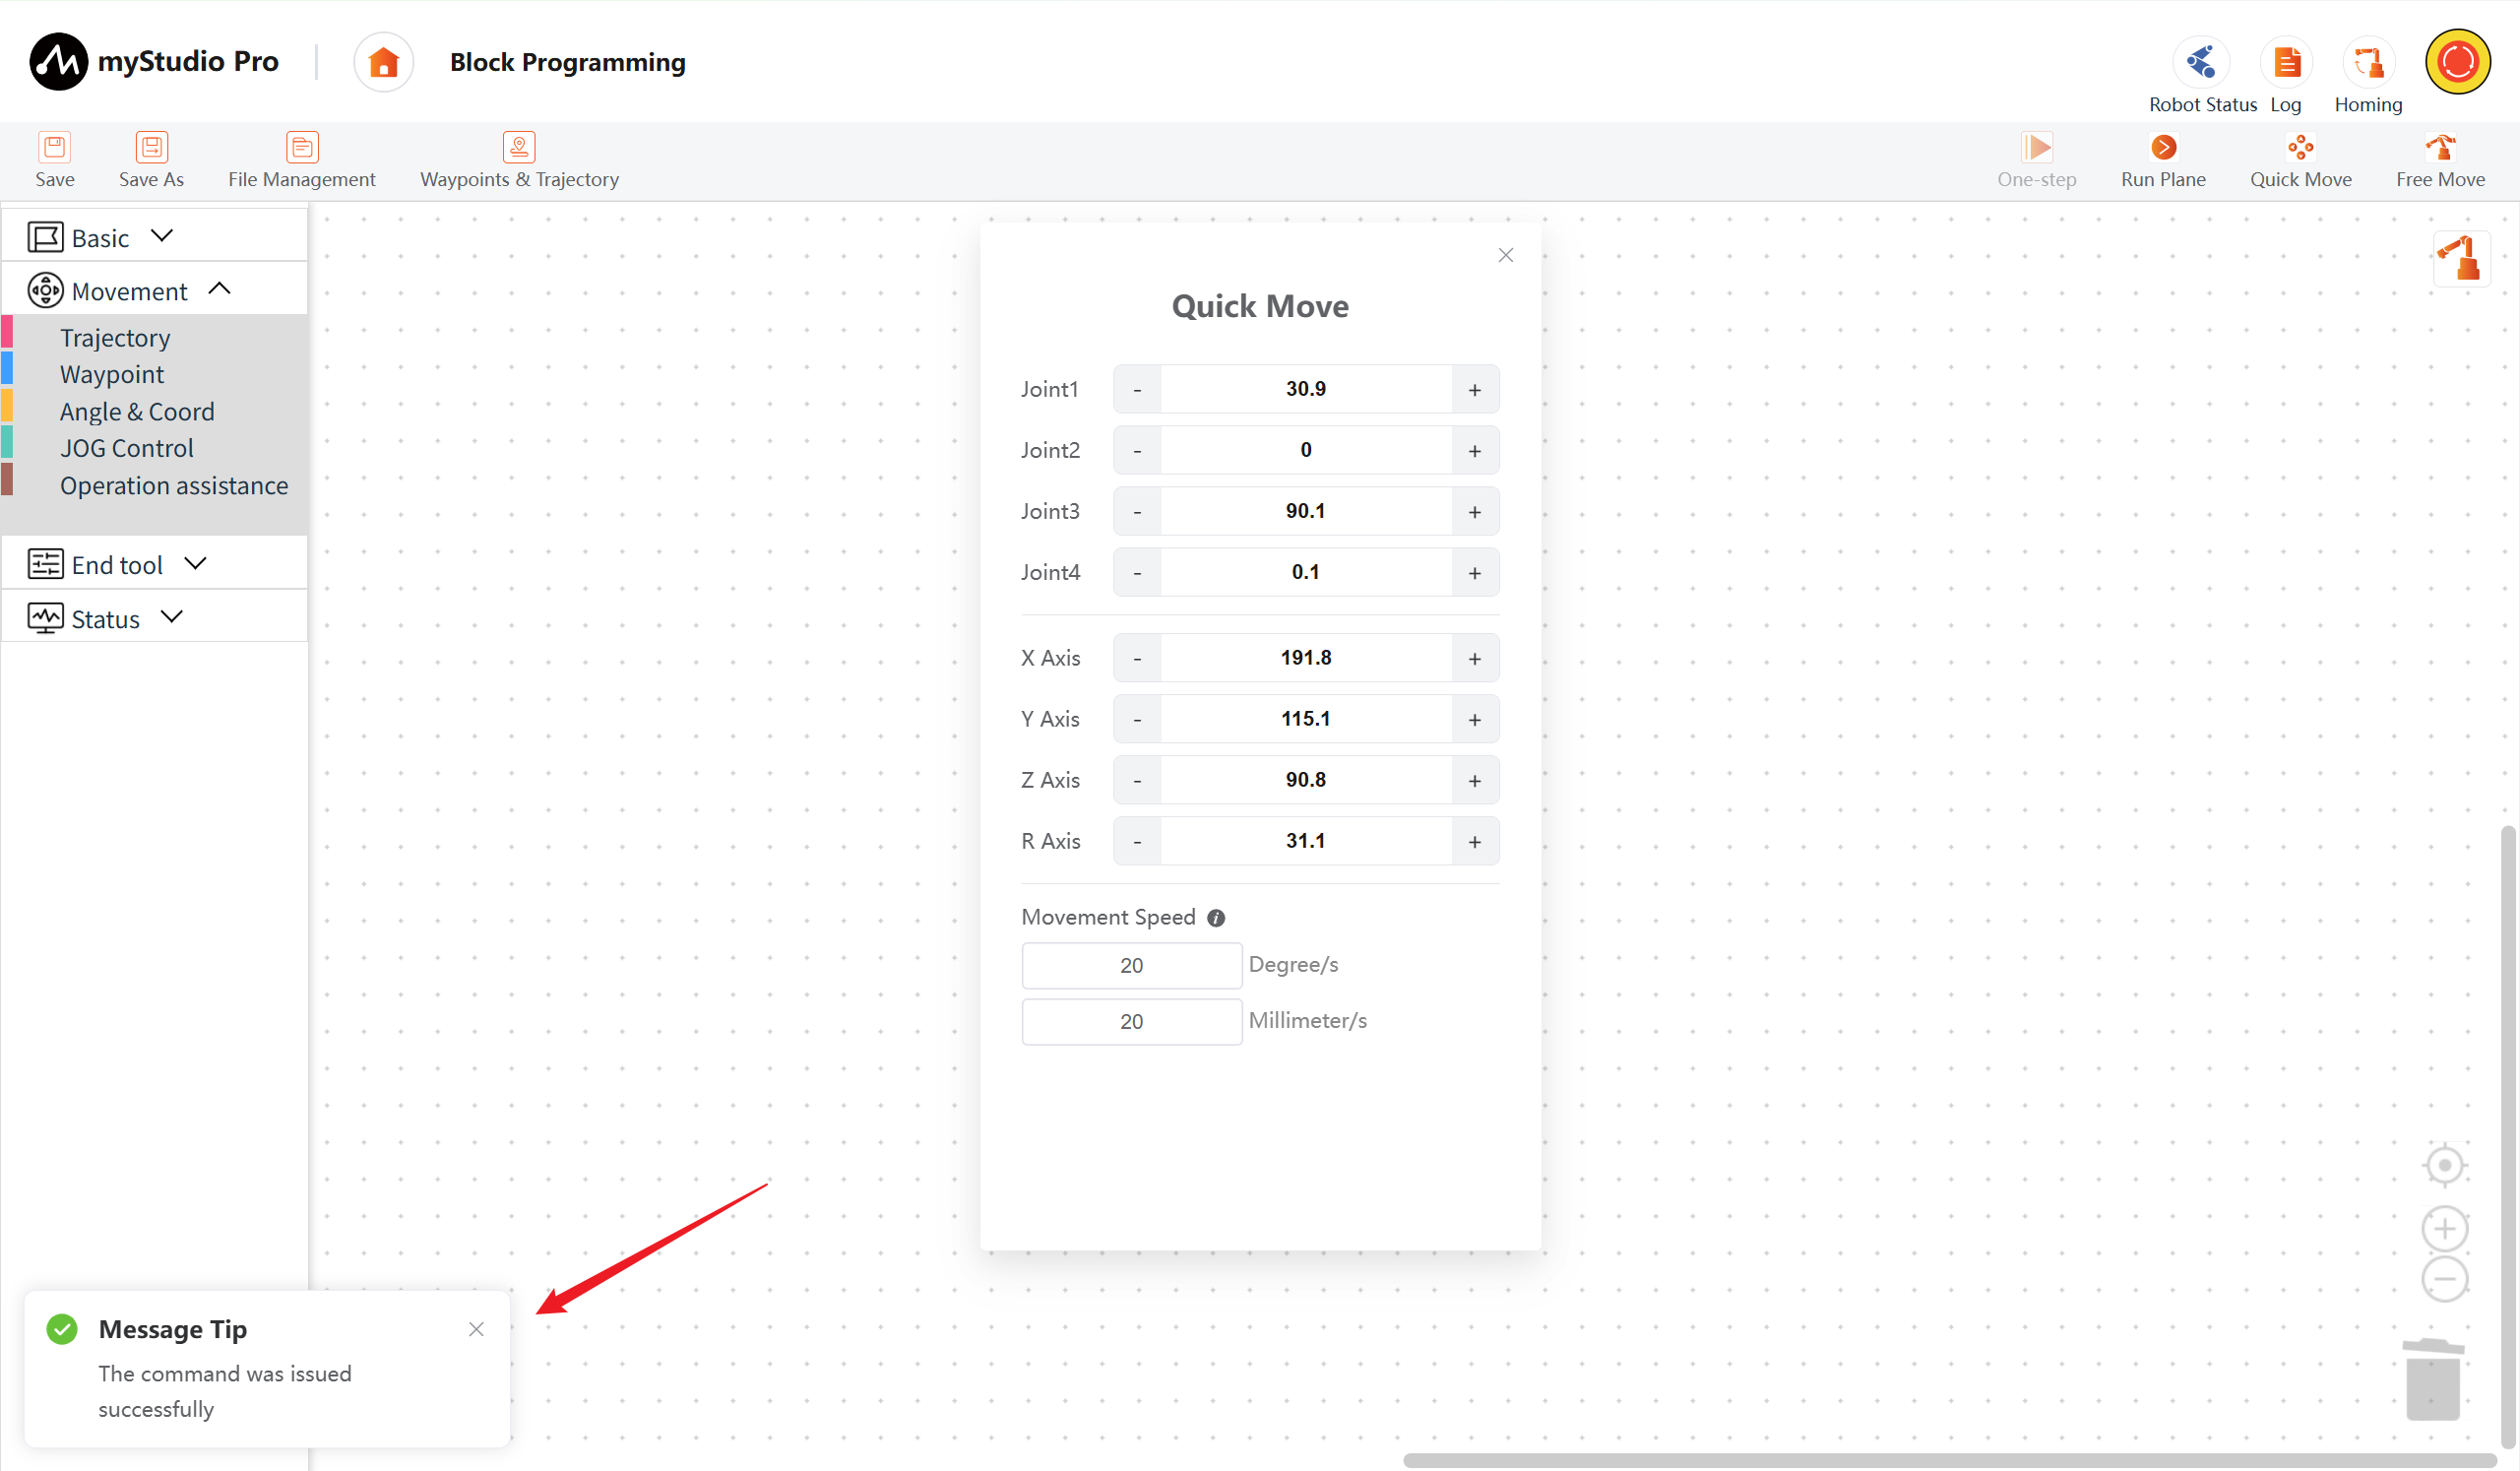
First, the robotic arm needs to be returned to the zero position, as shown in the picture below. Or press the zero return button on the upper right corner for a long time until the robotic arm completes the zero return process.
For other functions, please refer to Debug Panel
5 Learning to Use Coordinate Control
Main APIs Involved:
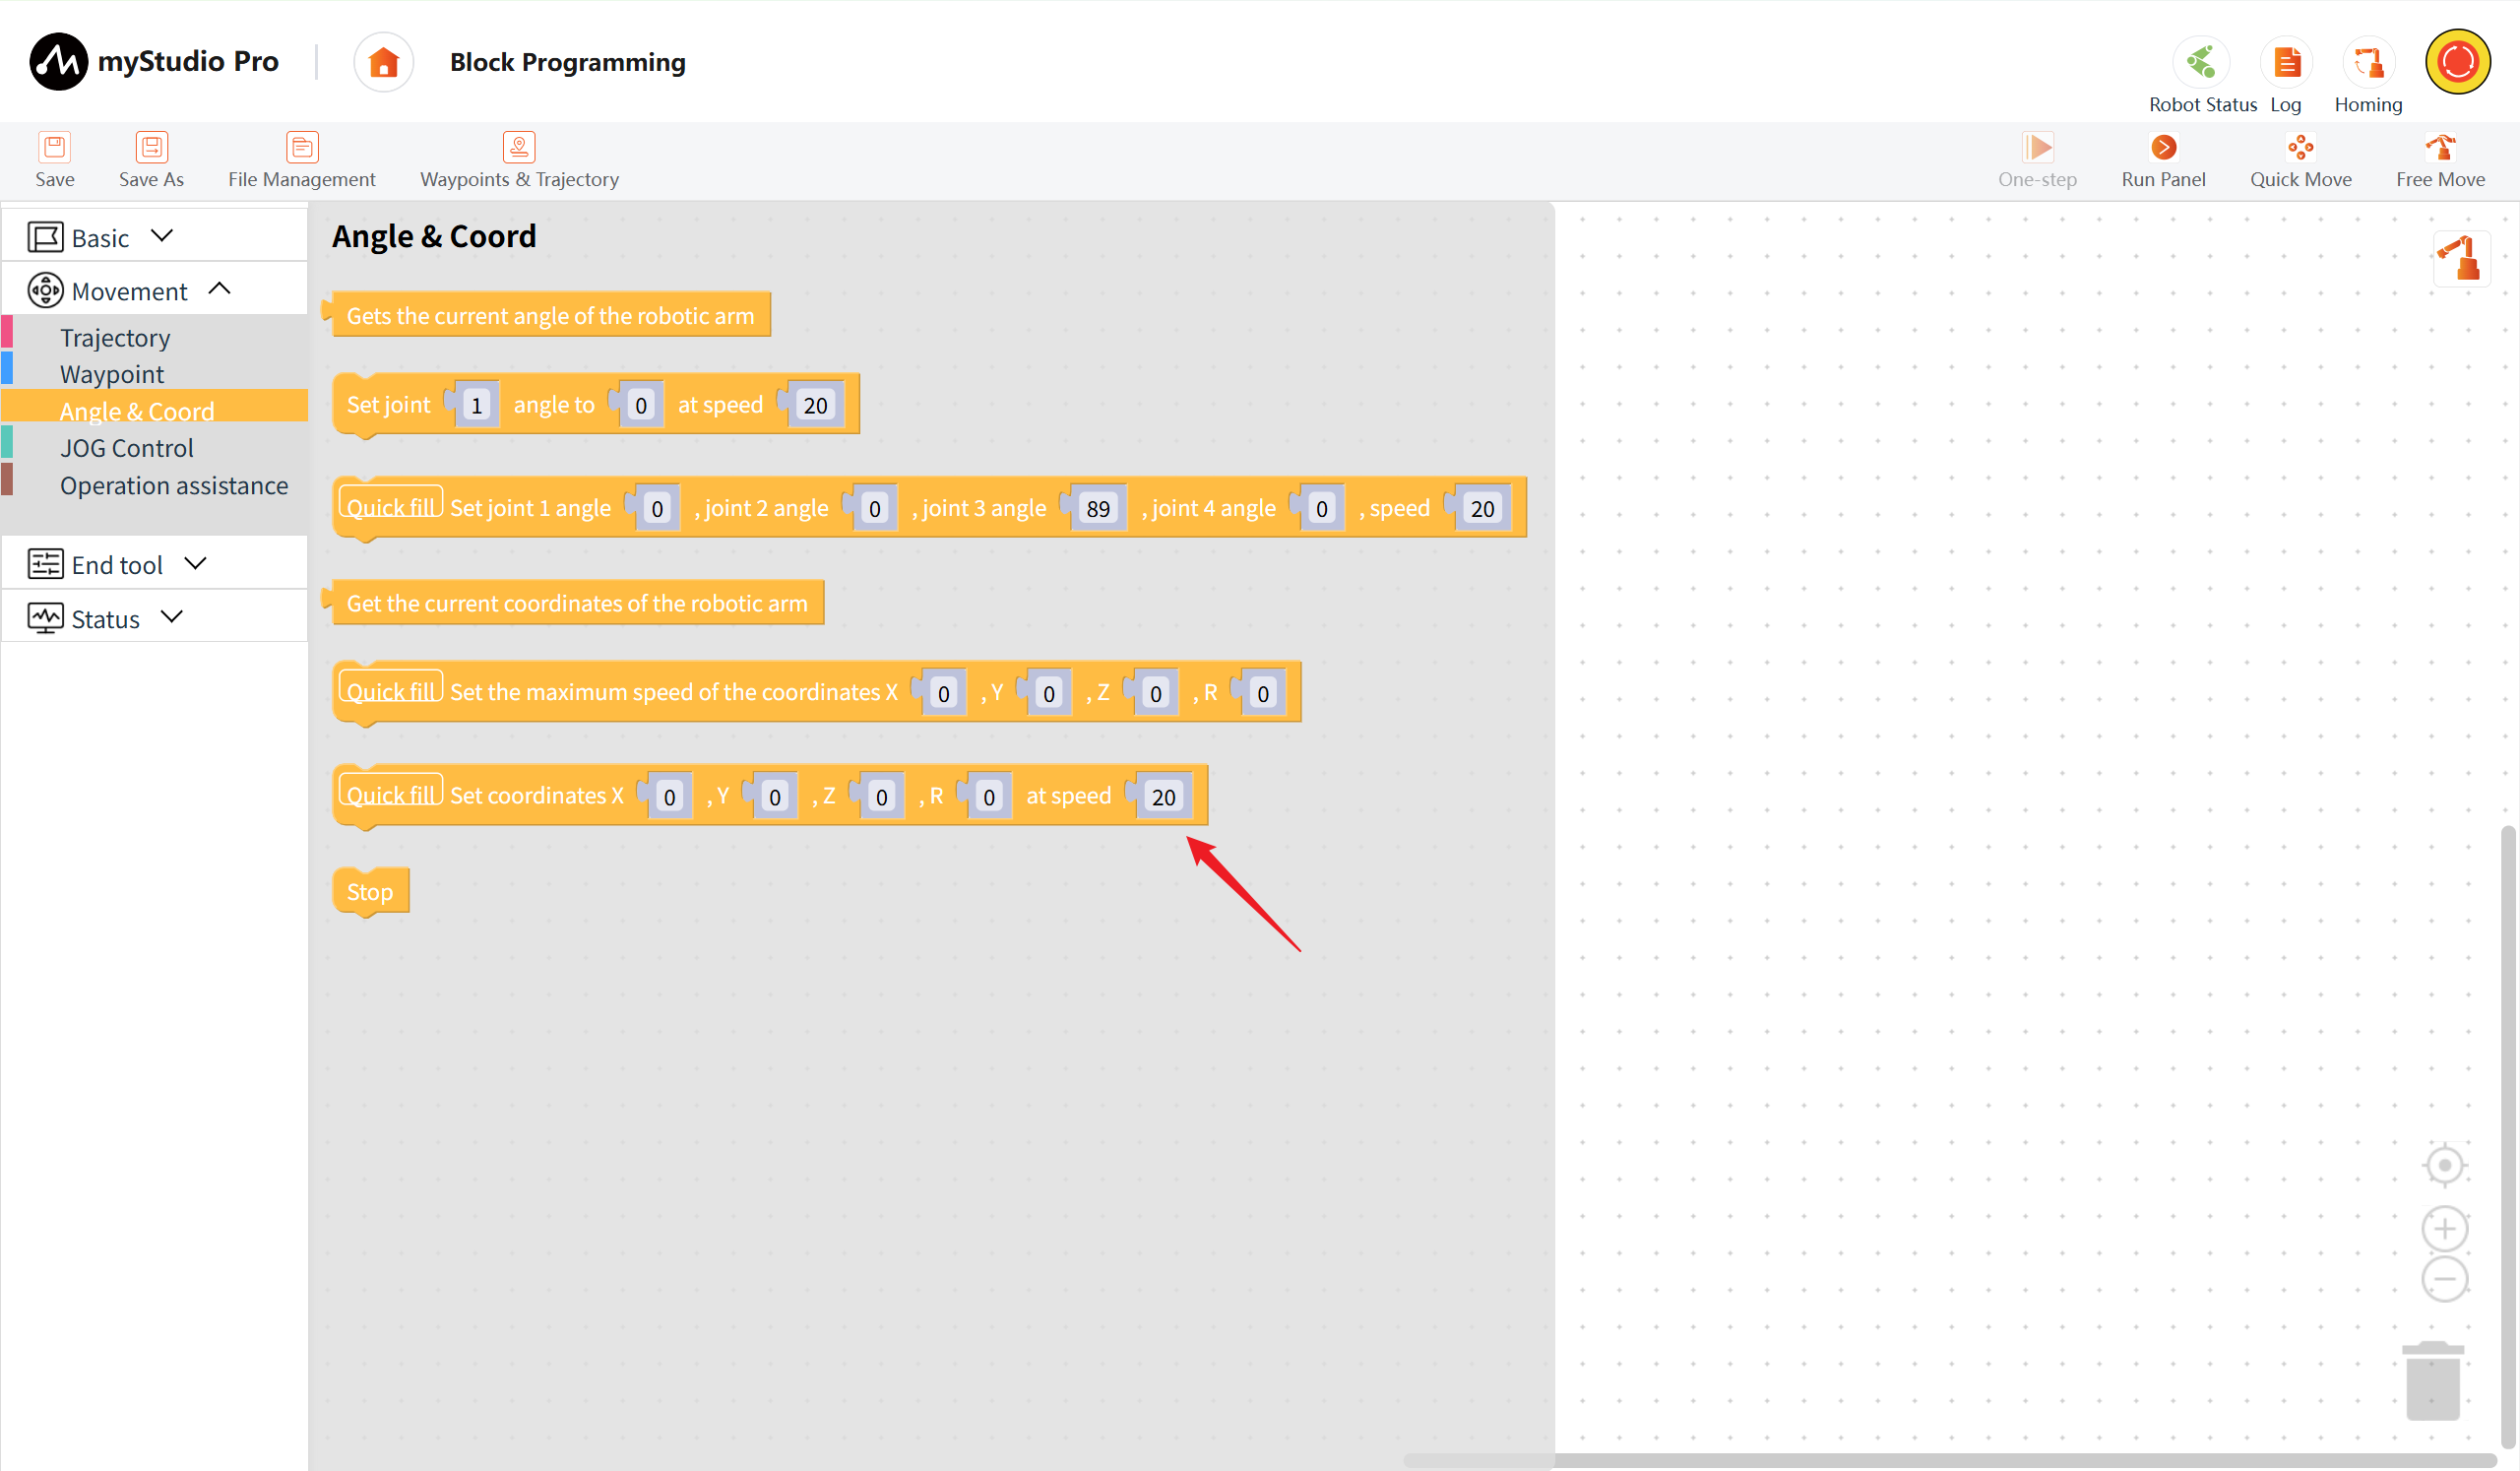
Set Coord
Prototype:
send_coords(values,speed)Interface Description: Sets multiple coordinates for the robotic arm
Parameters:
values: [X,Y,Z,R]
speed: Speed, range 1-100
Small Case
Before performing the coordinate movement, please ensure that the robotic arm is at the zero position.
Coordinate Movement
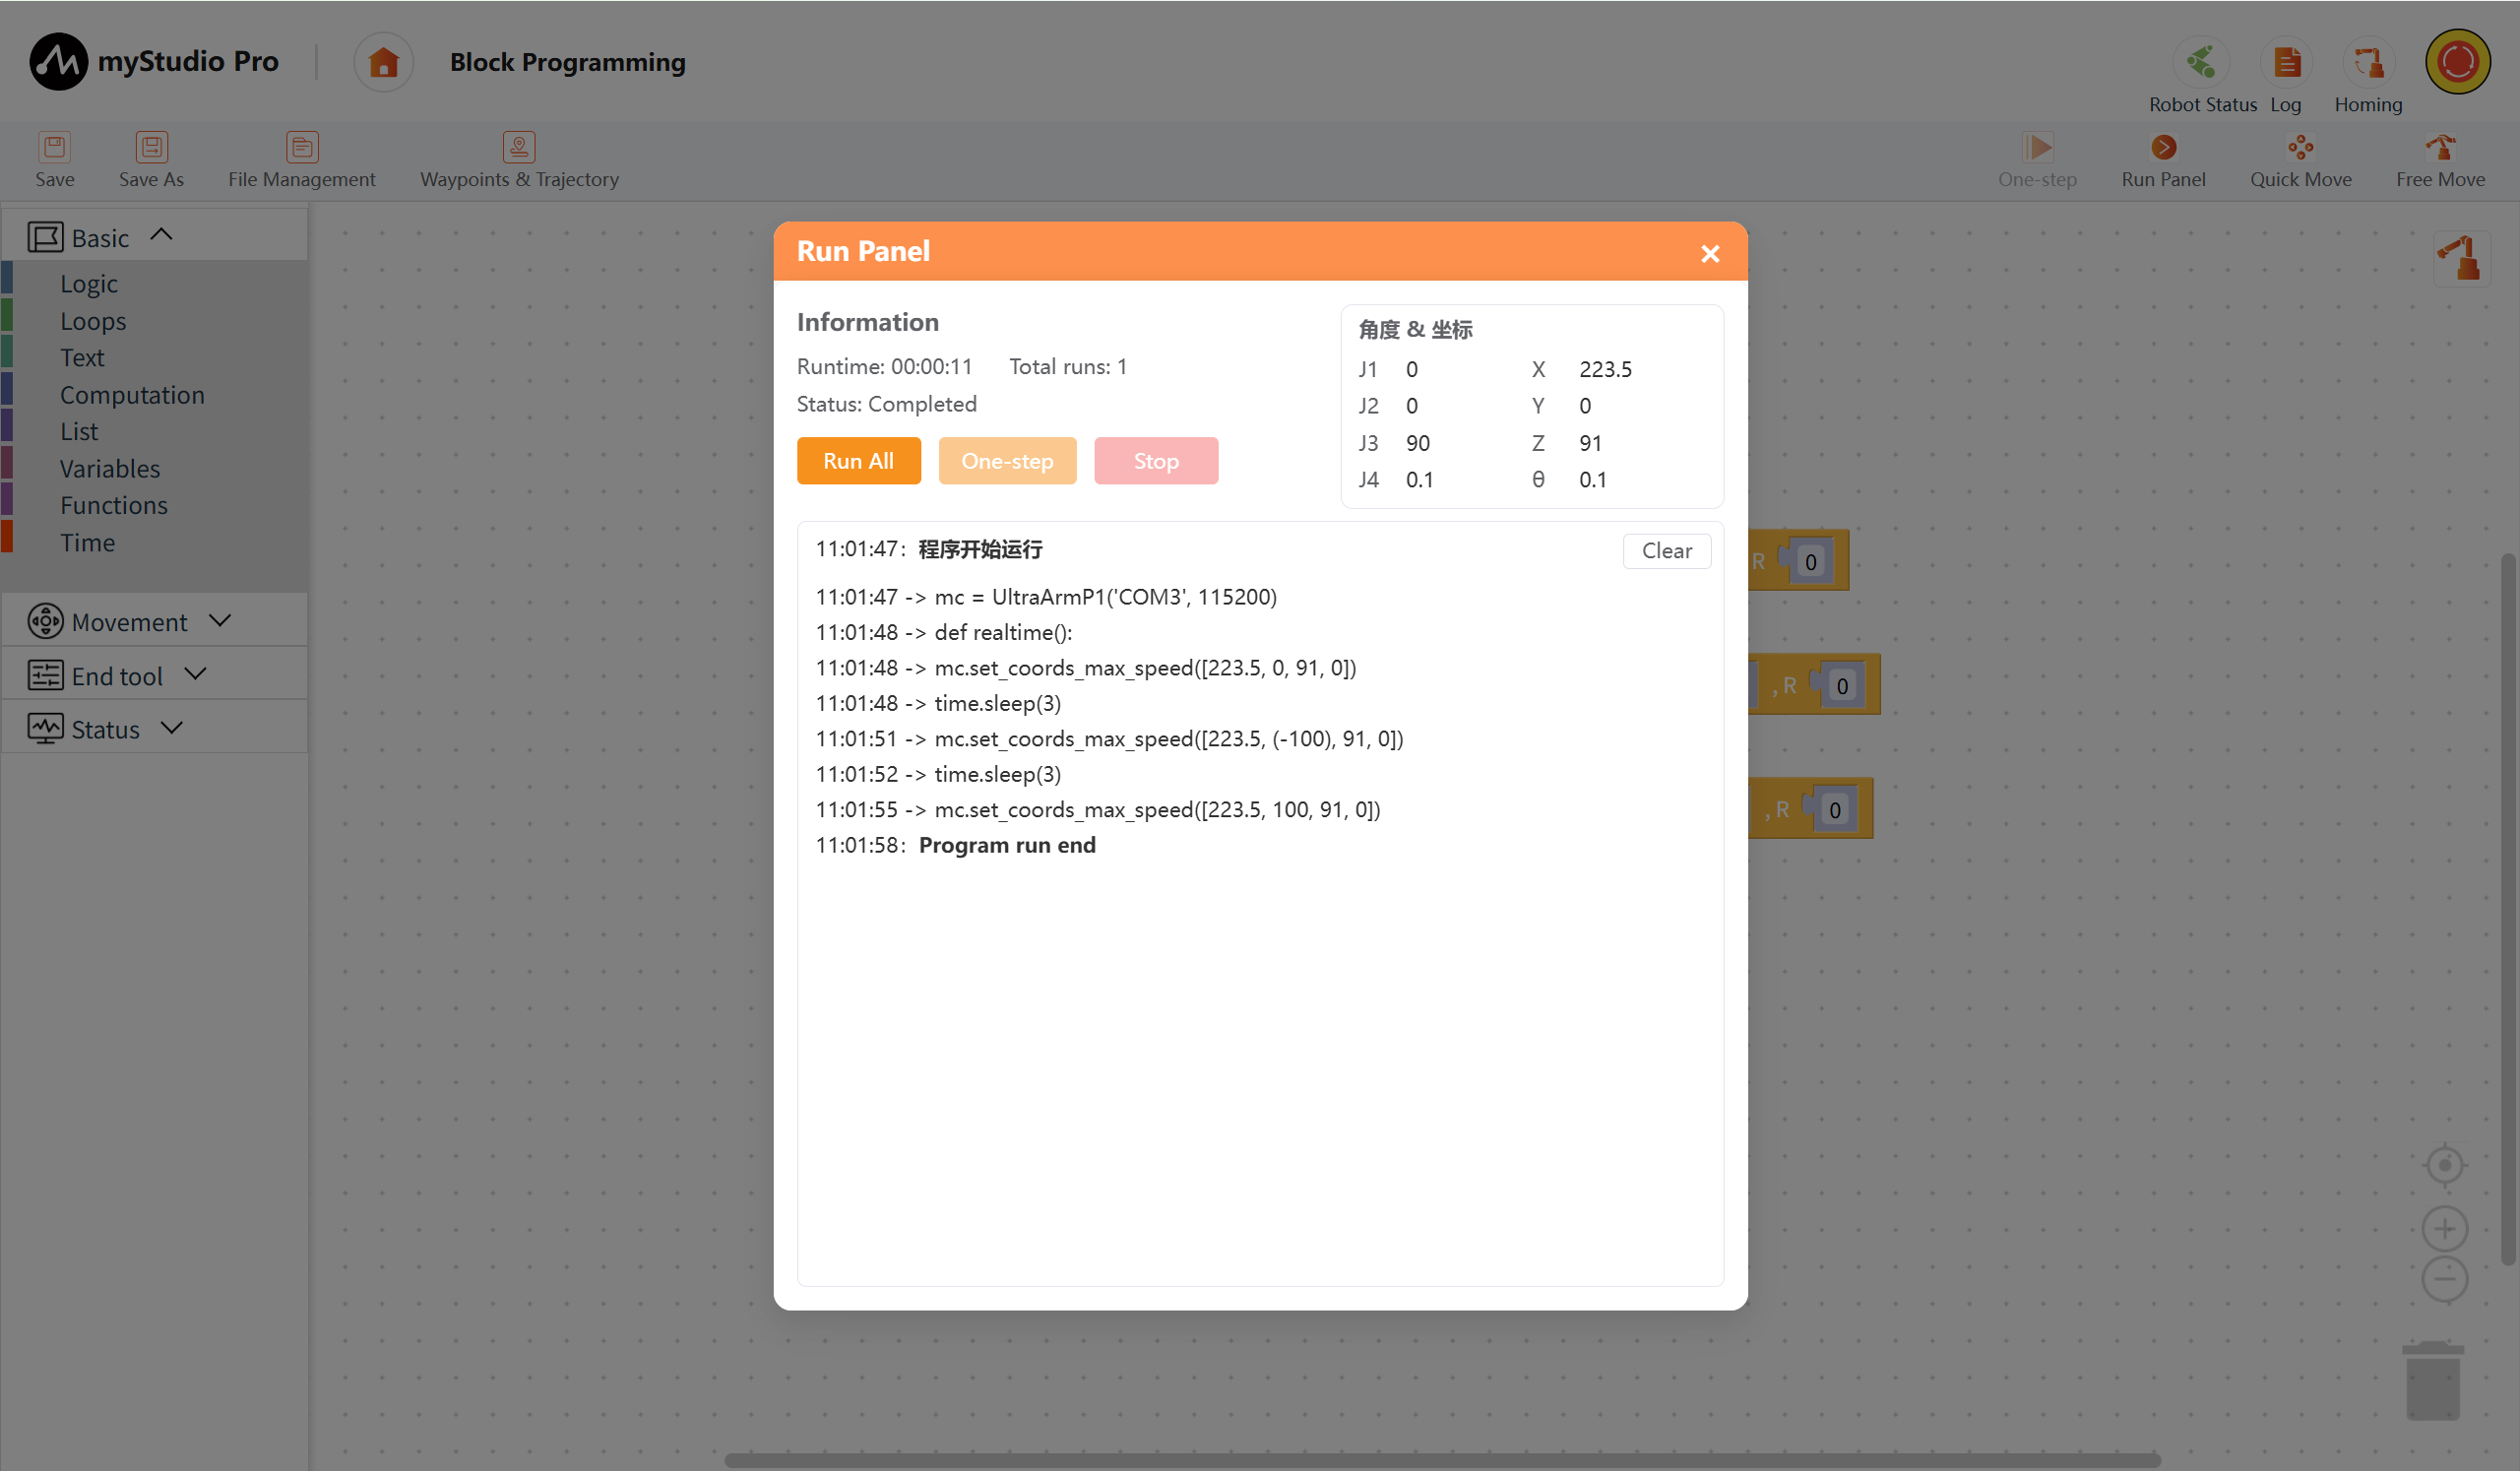
Drag a Set Coords block to the workspace, click the Quick Fill button on the block to input the data, and modify the Y axis data to 100.
The complete code is as follows:
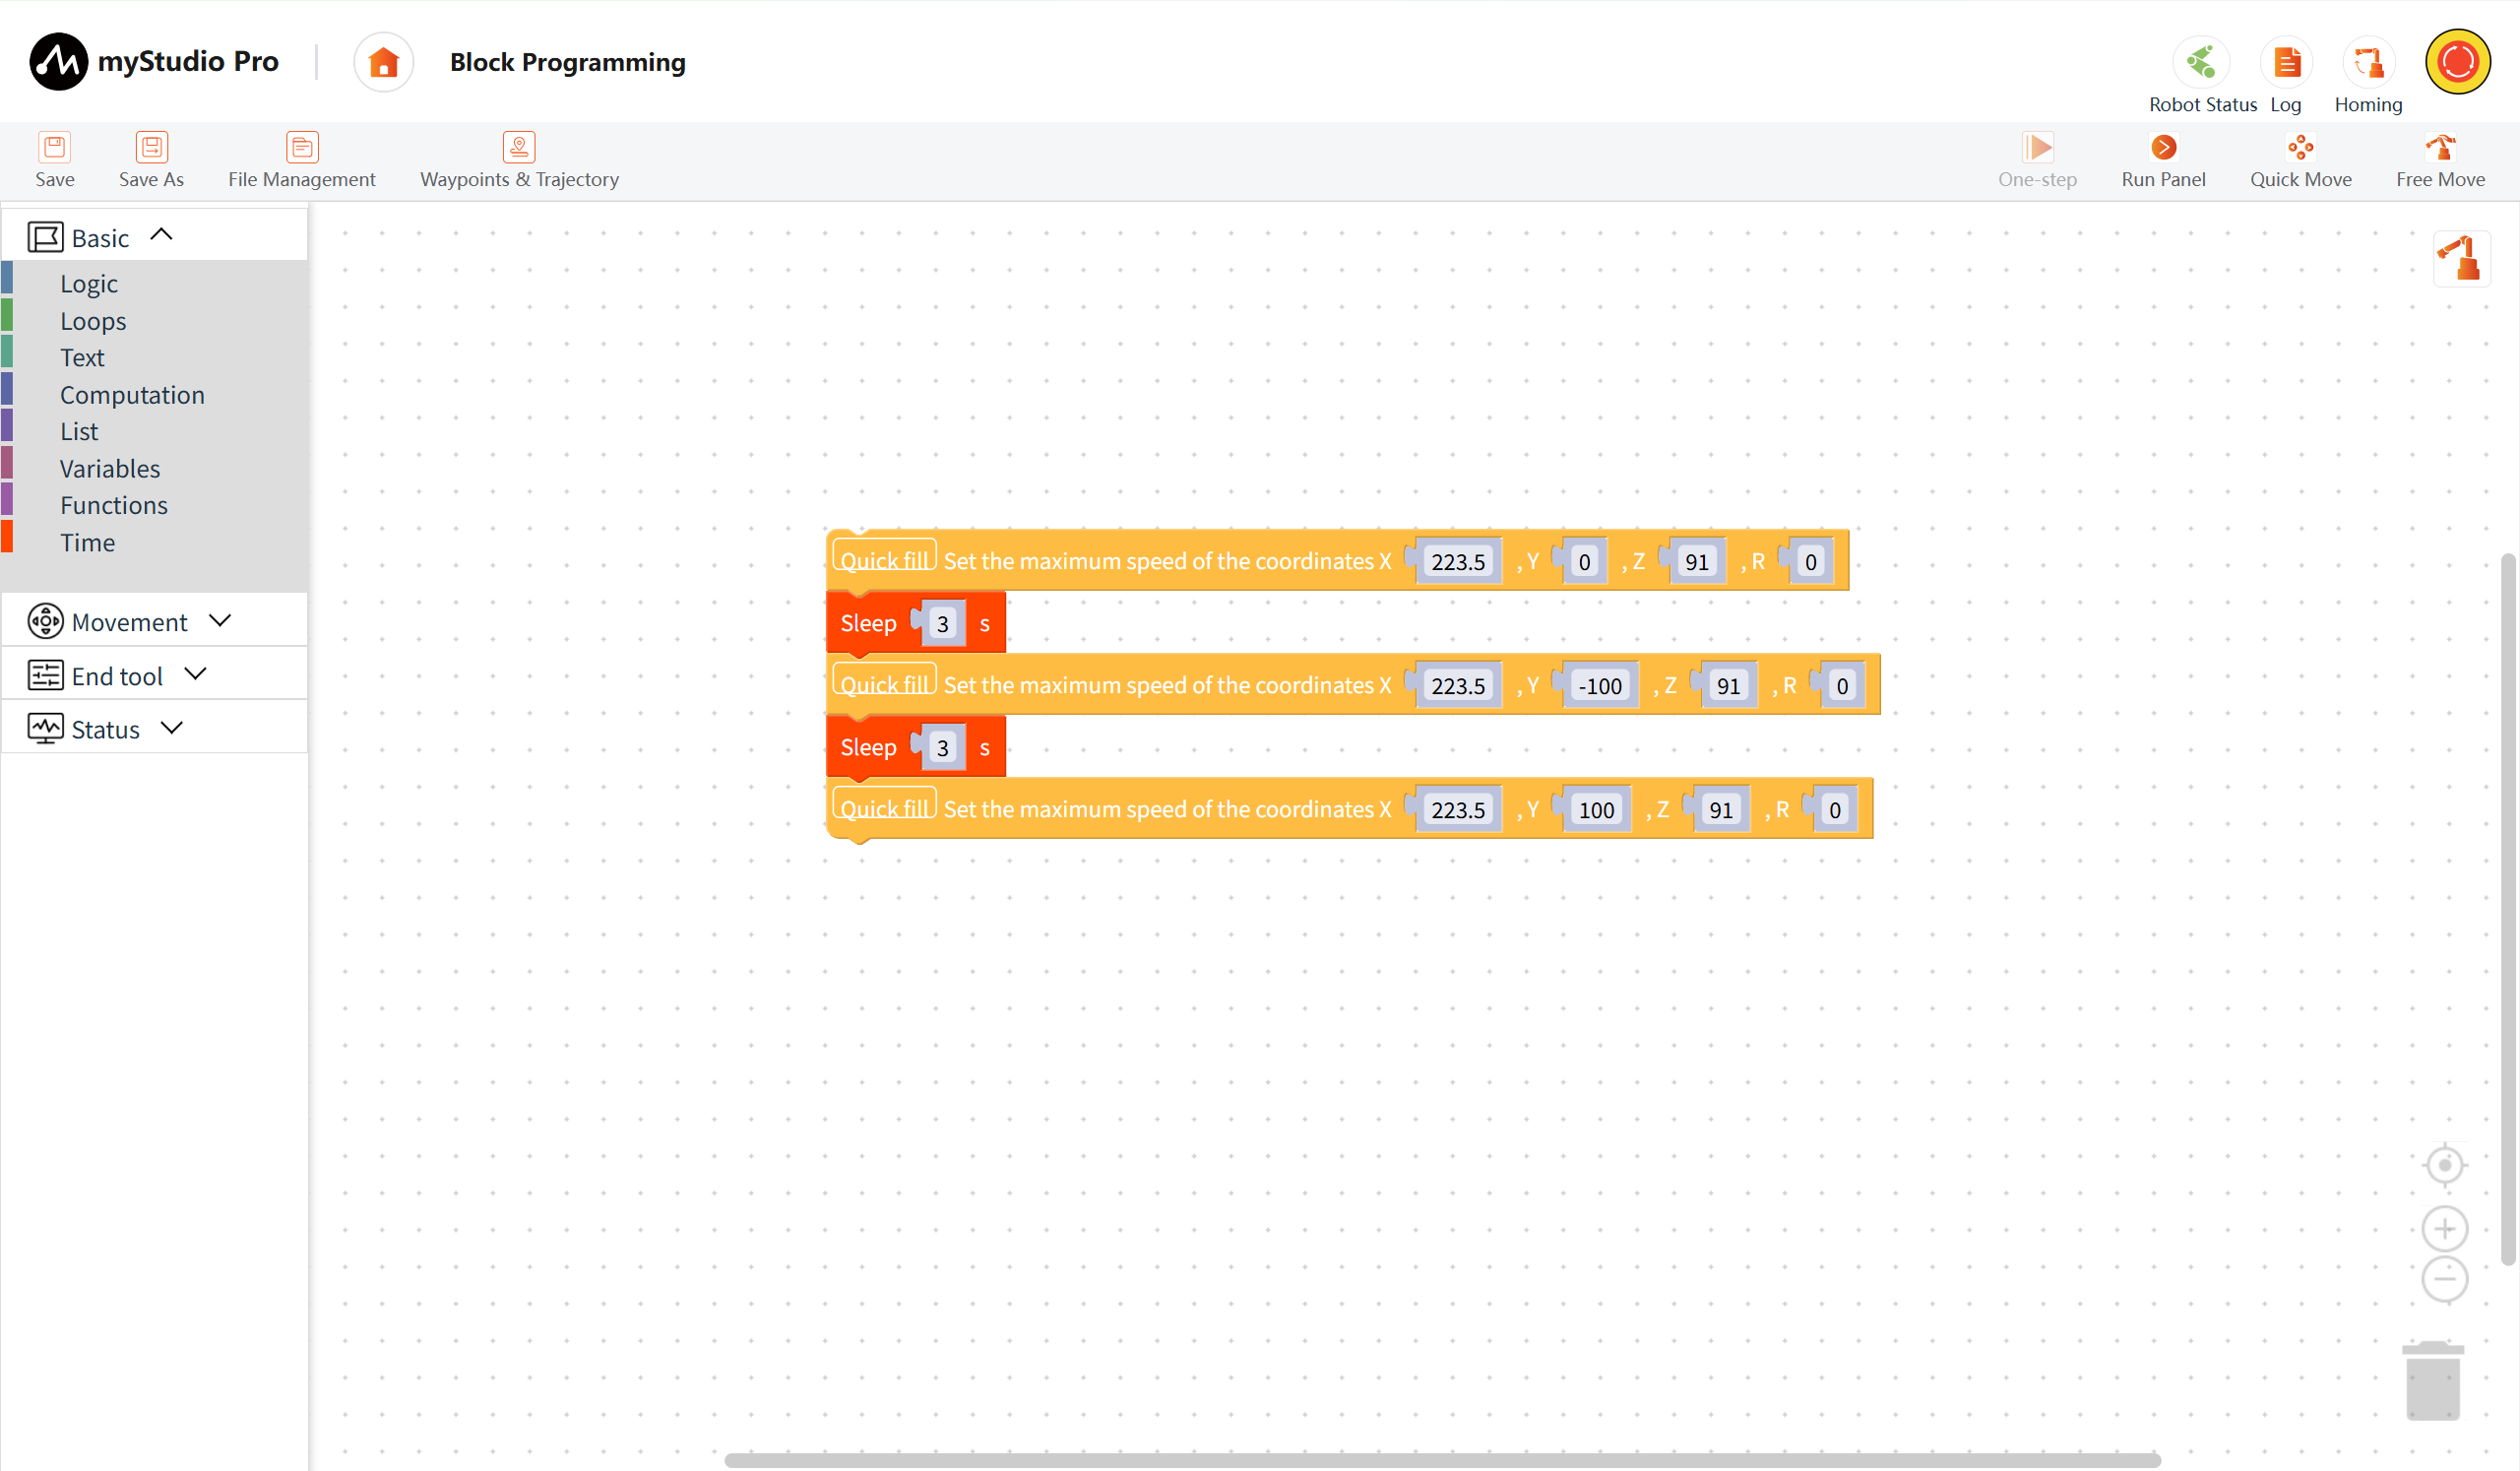
Execute the code. Throughout the process, it was observed that the robotic arm was moving left and right.
6 One-step
One-step execution refers to executing one block at a time. When there are many blocks in the workspace, I only want to execute one block to see the effect. This is where you can use the One-step button.
The One-step button is disabled by default and cannot be clicked.
Step 1: Drag several joint setting blocks into the workspace.
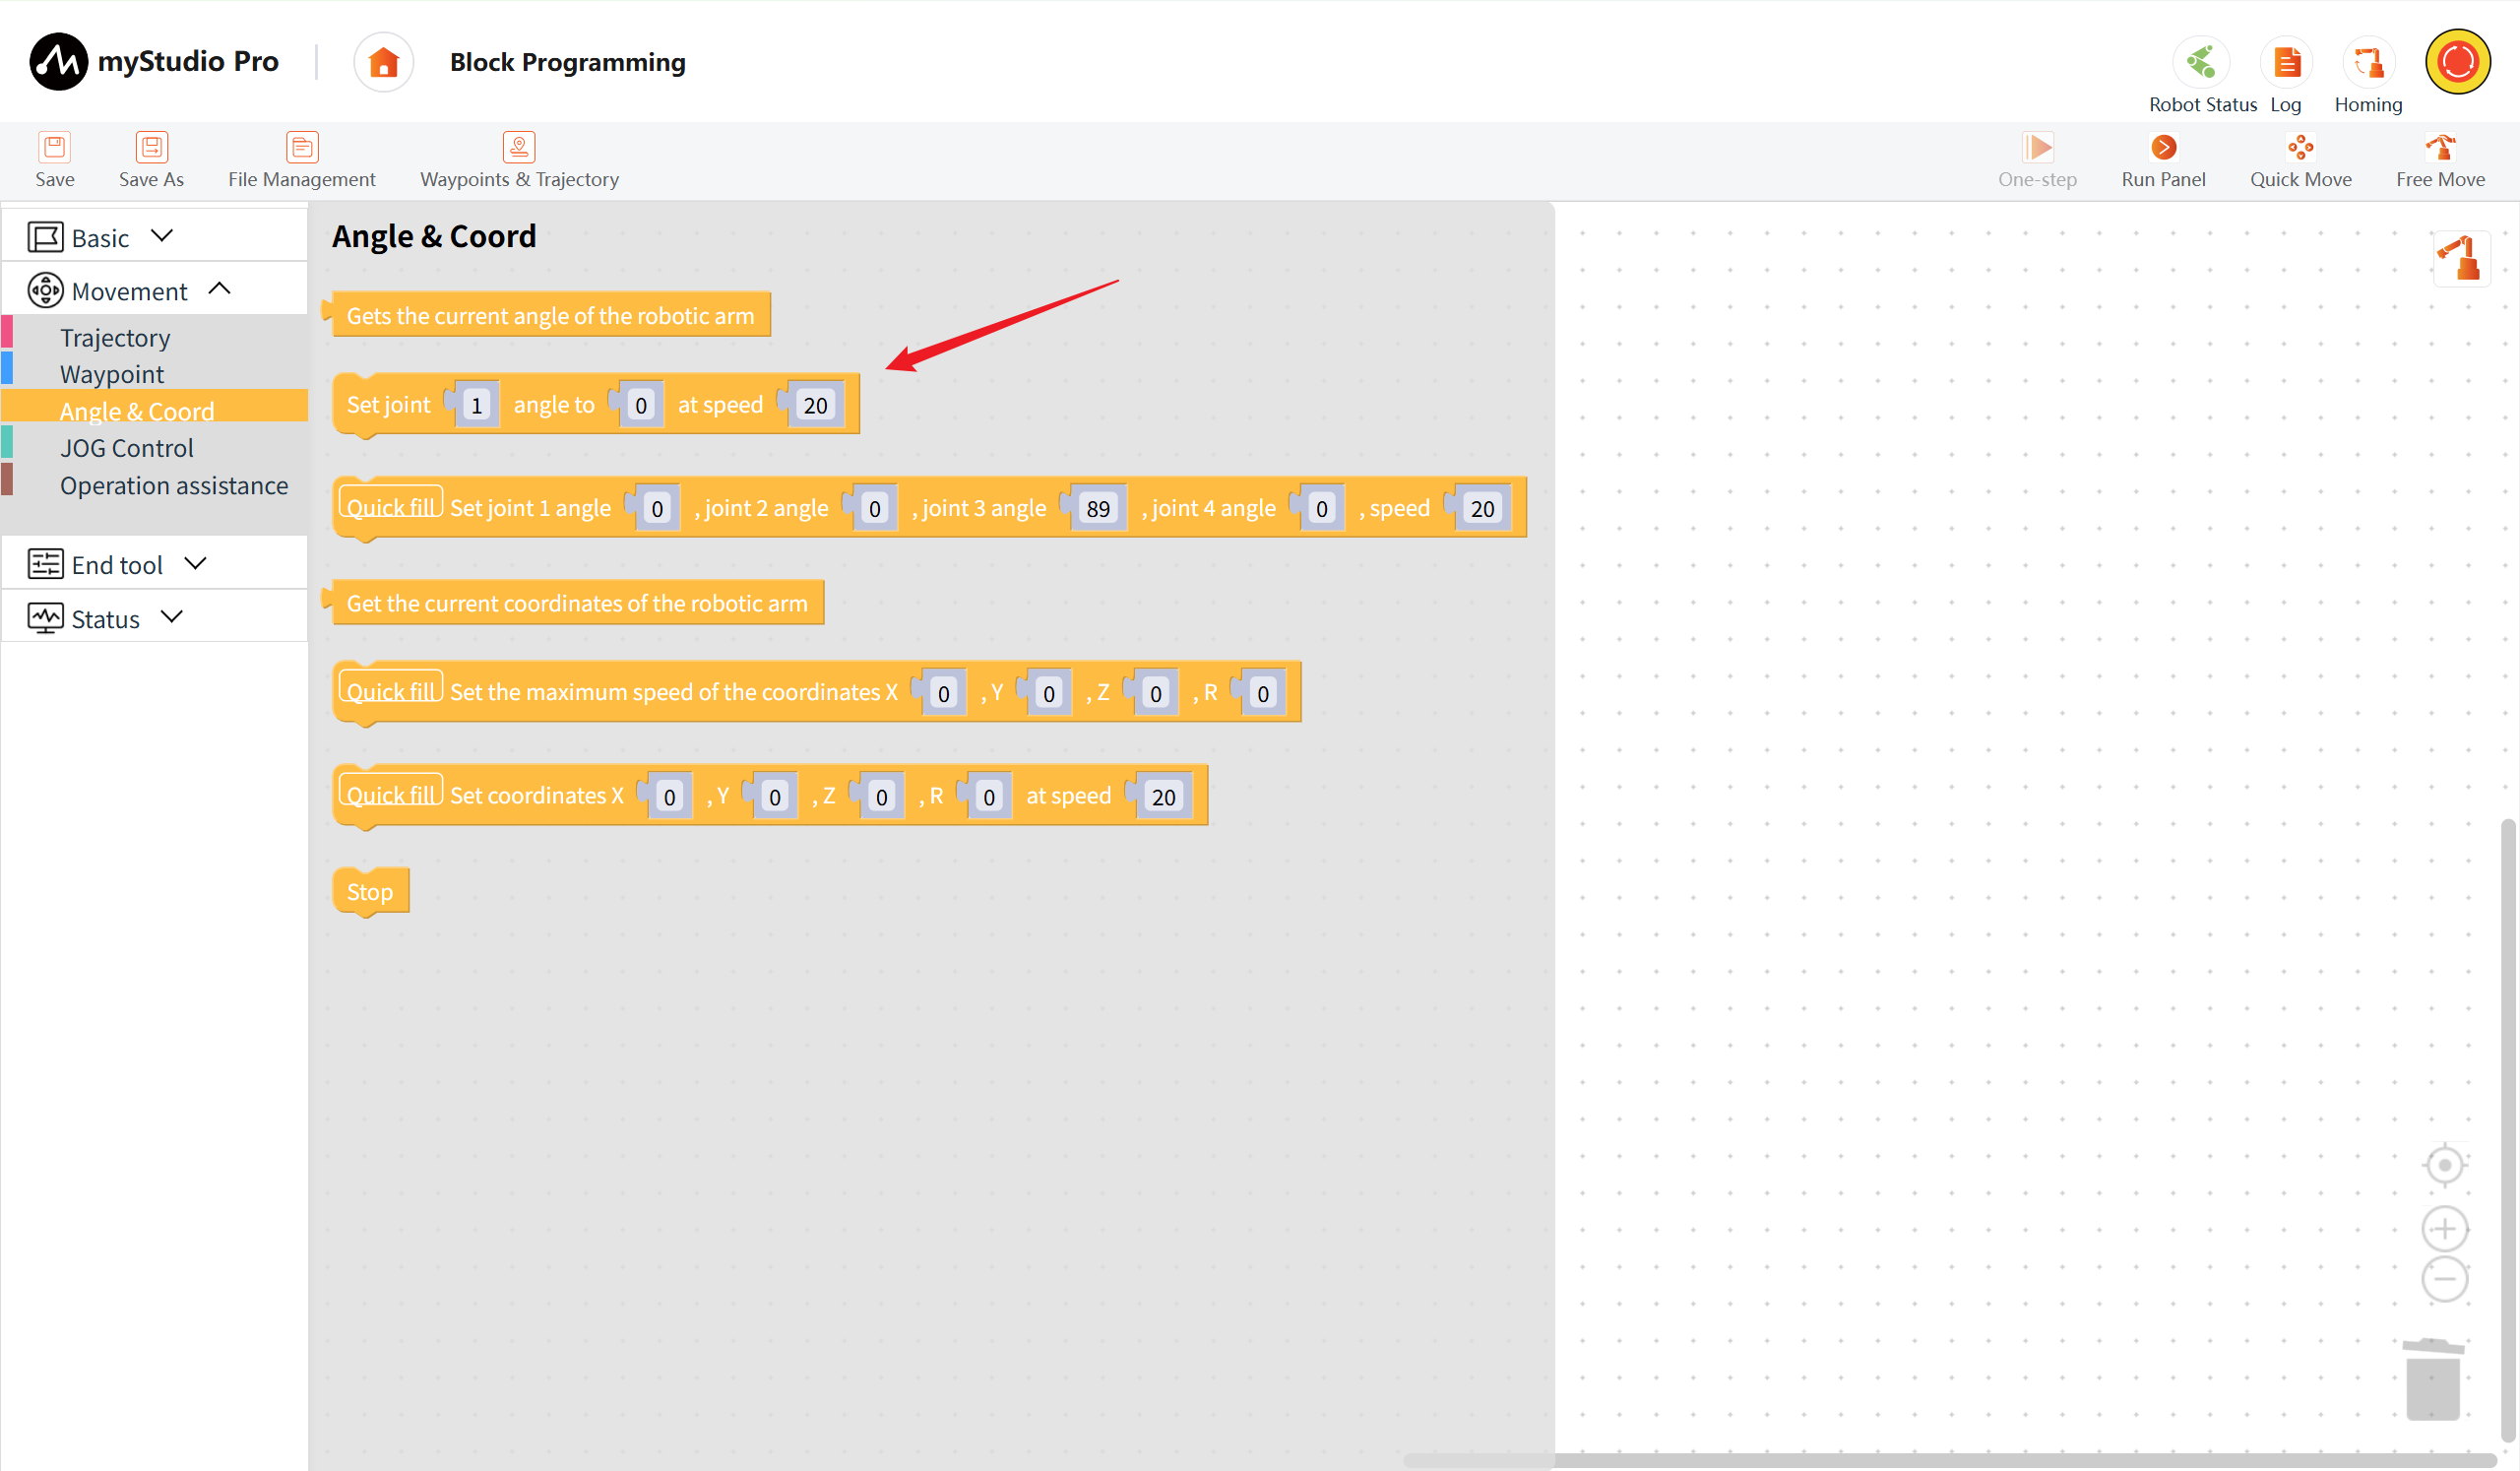
Step 2: Select the Set Joint block. You will observe that the One-step button has been unlocked (its color has changed to a darker shade).
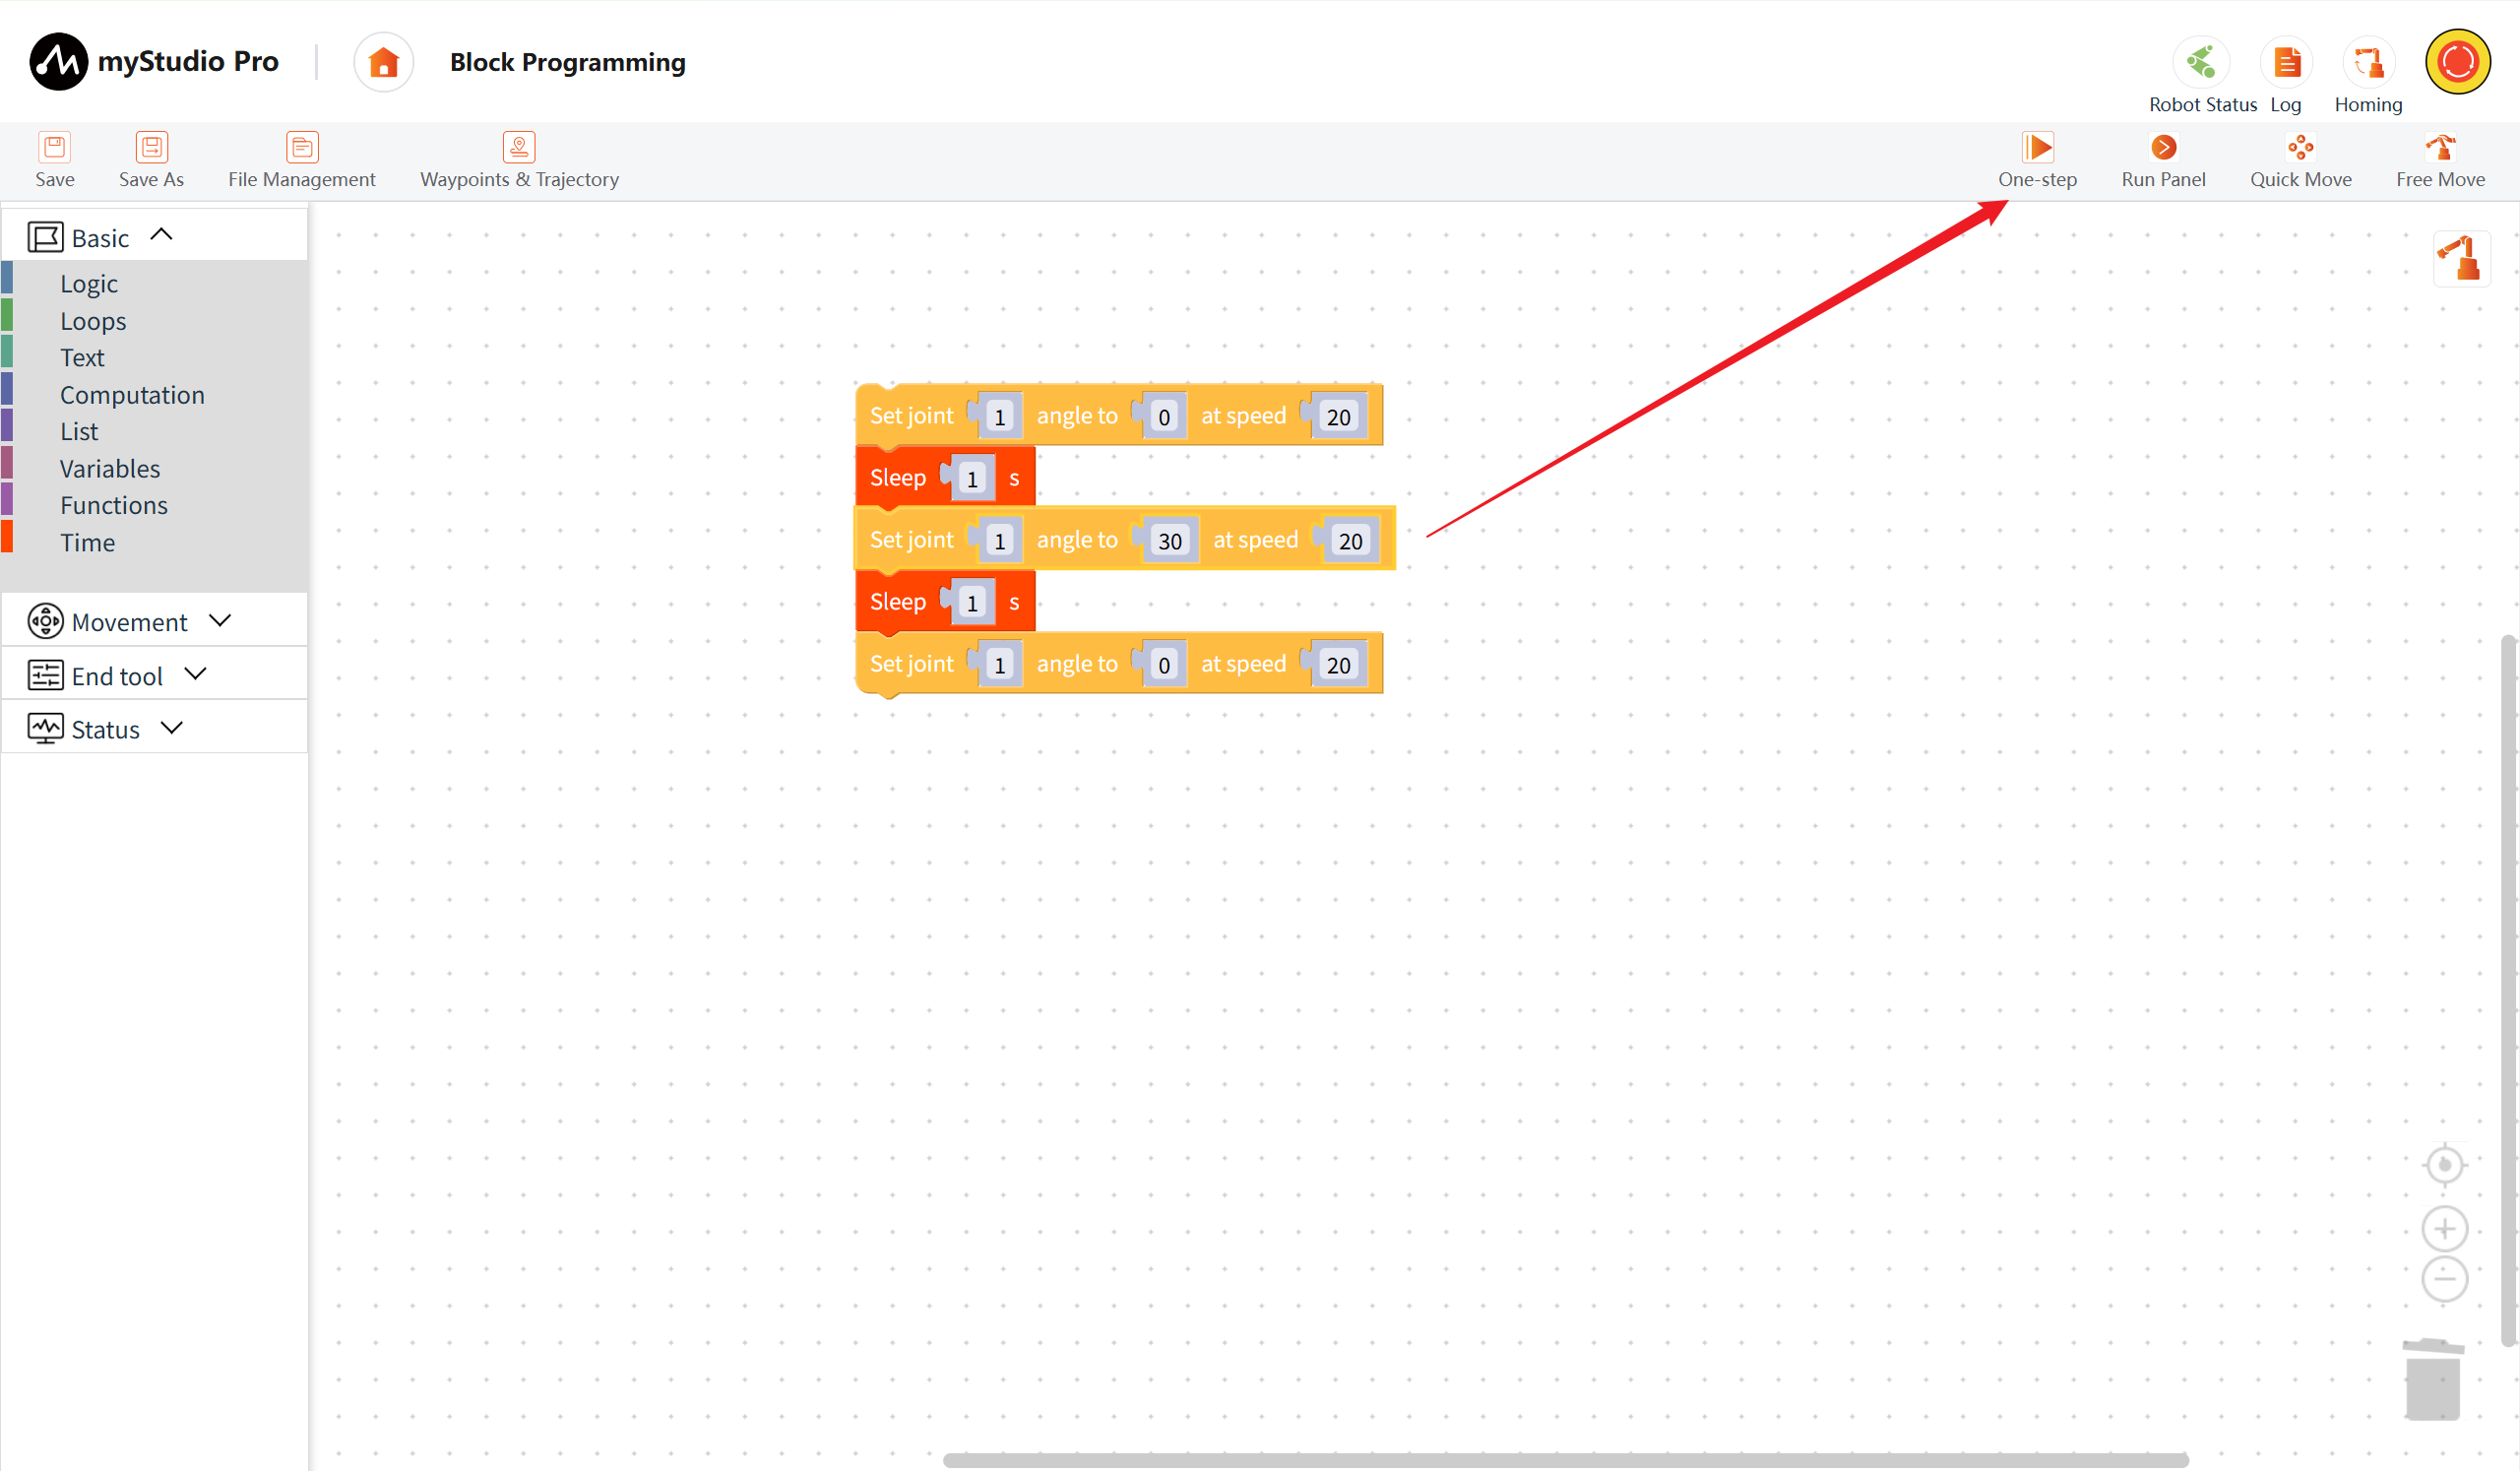
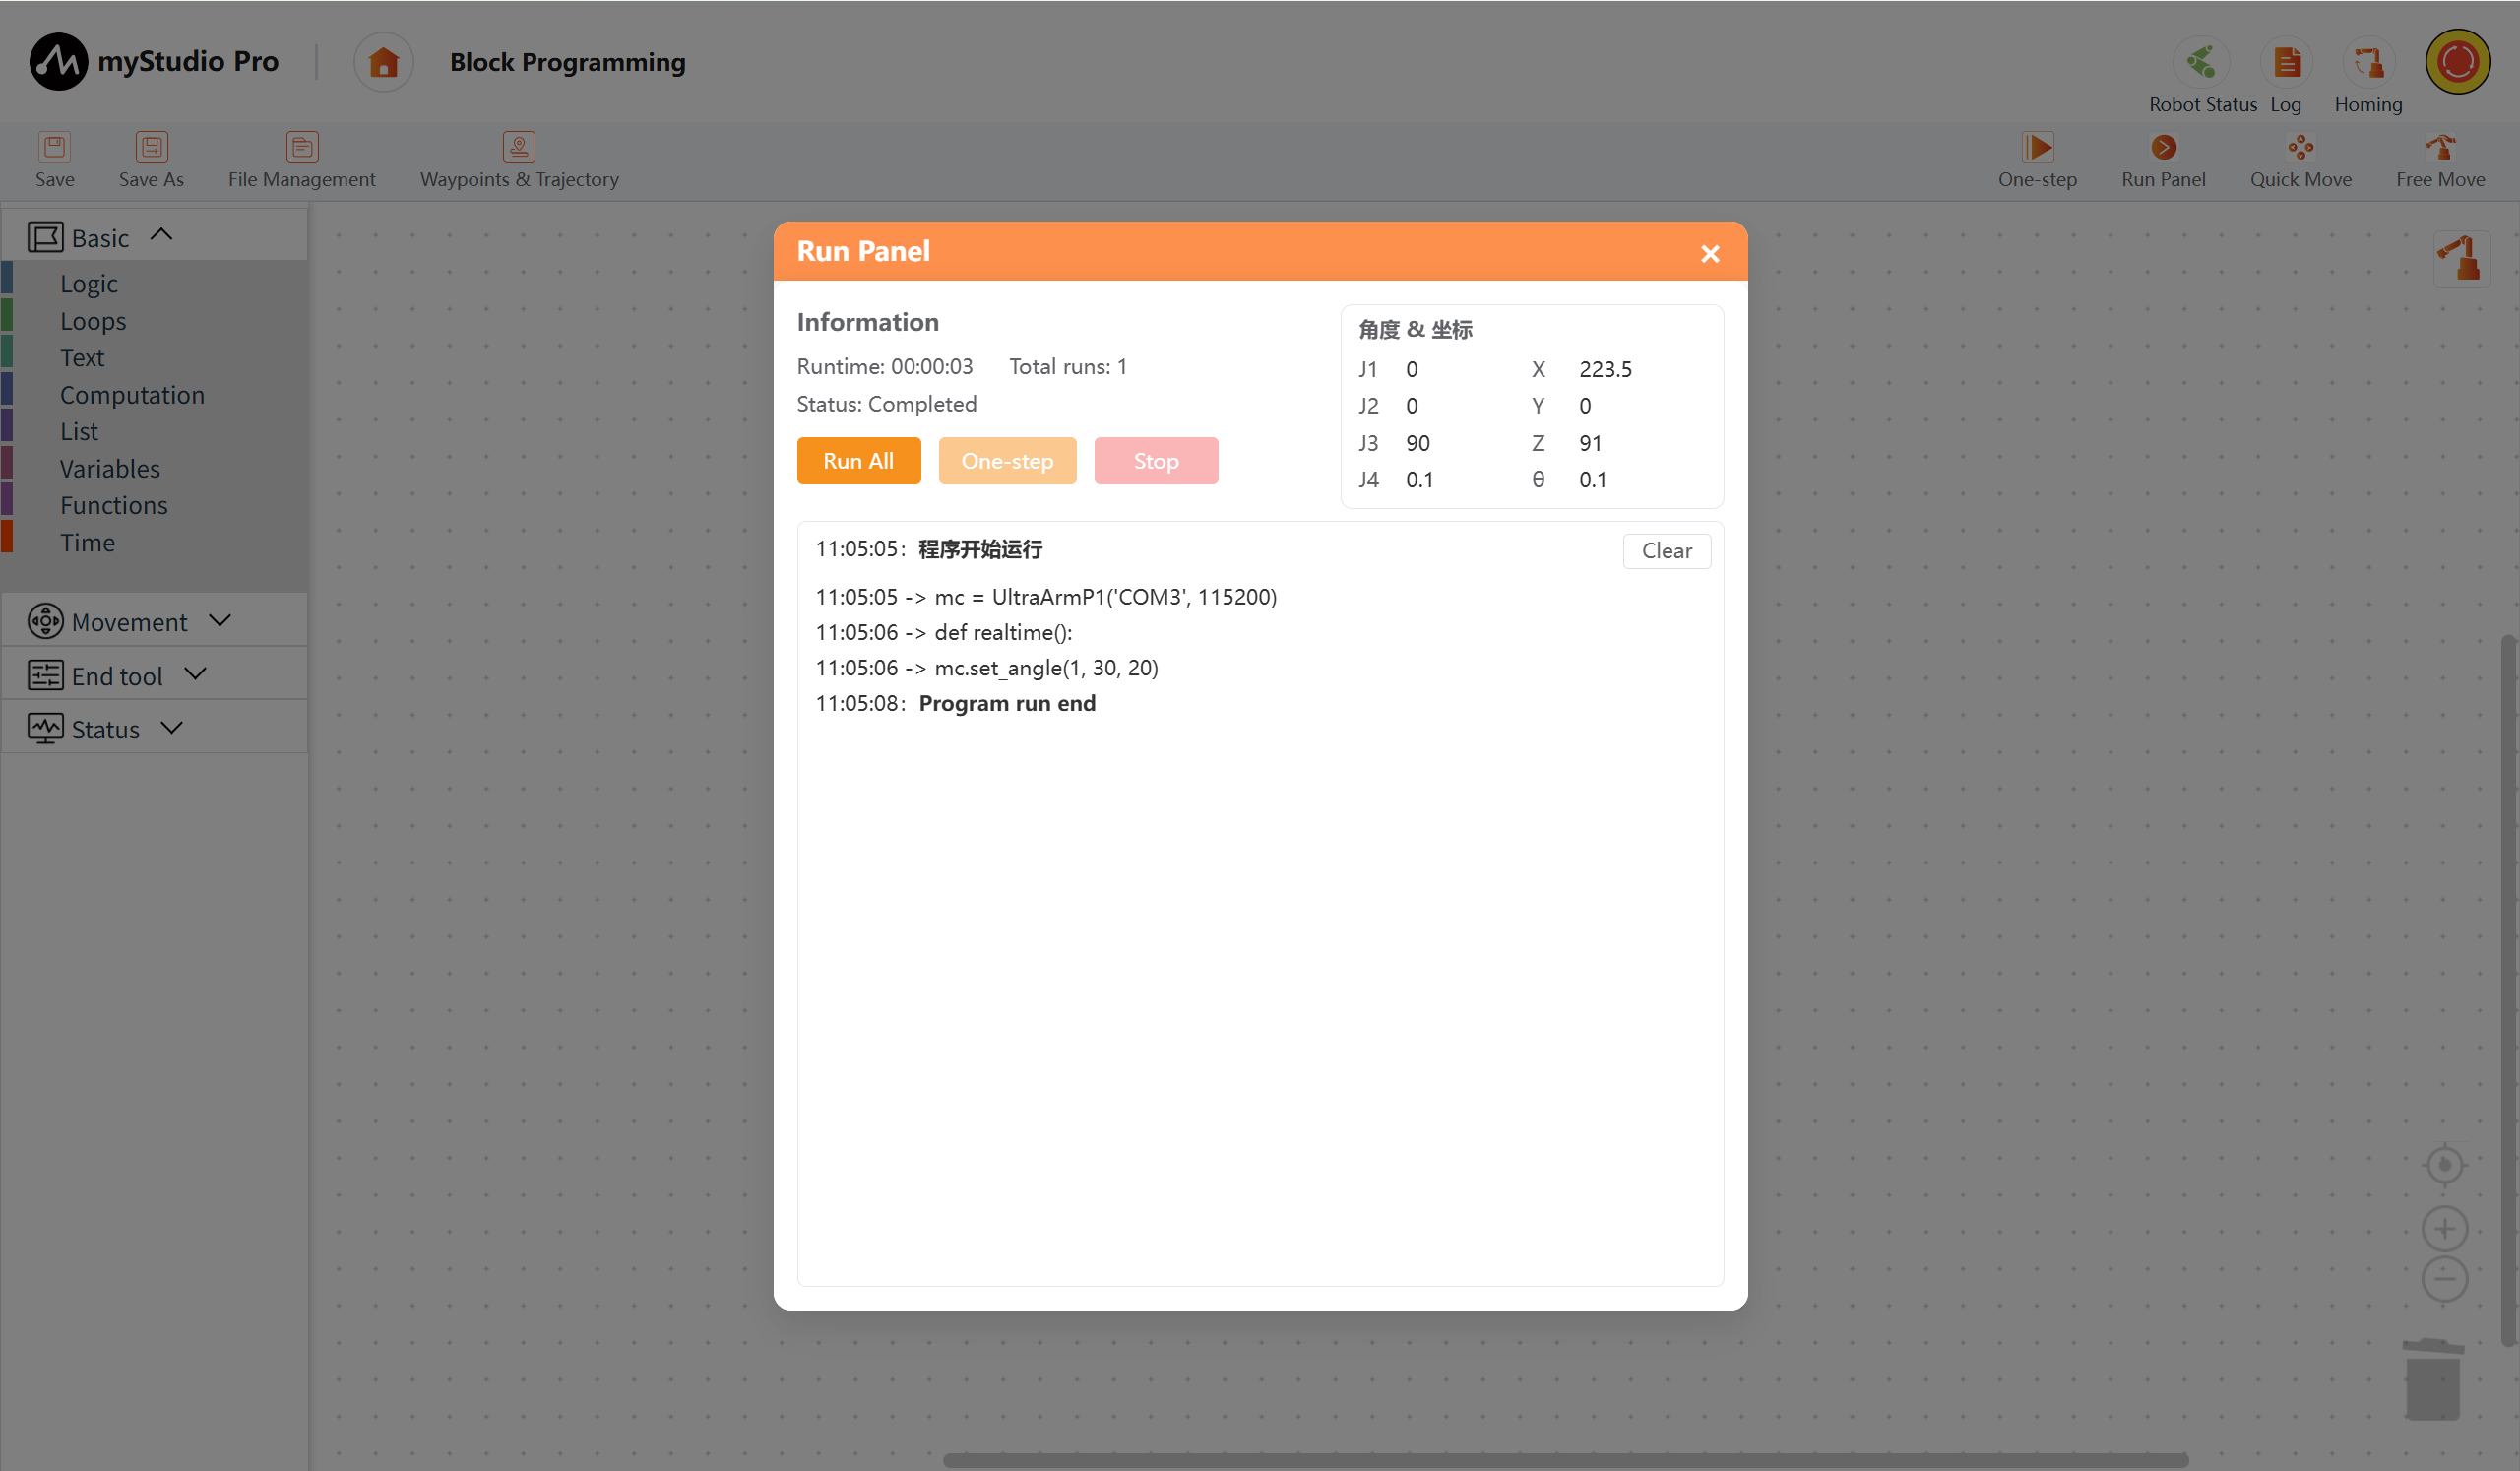
Step 3: Click the One-step button. This will automatically open the run panel and begin executing the code. Simultaneously, observe the changes in the robotic arm's movement. (Single-step execution sets joint 1 to 30°)
7 Program Control
Introduces how to debug block code using the Run Panel , enabling program Pause, Recover, One-step, and Stop.
Edit a program to control the movement of joint 1 of the robotic arm.
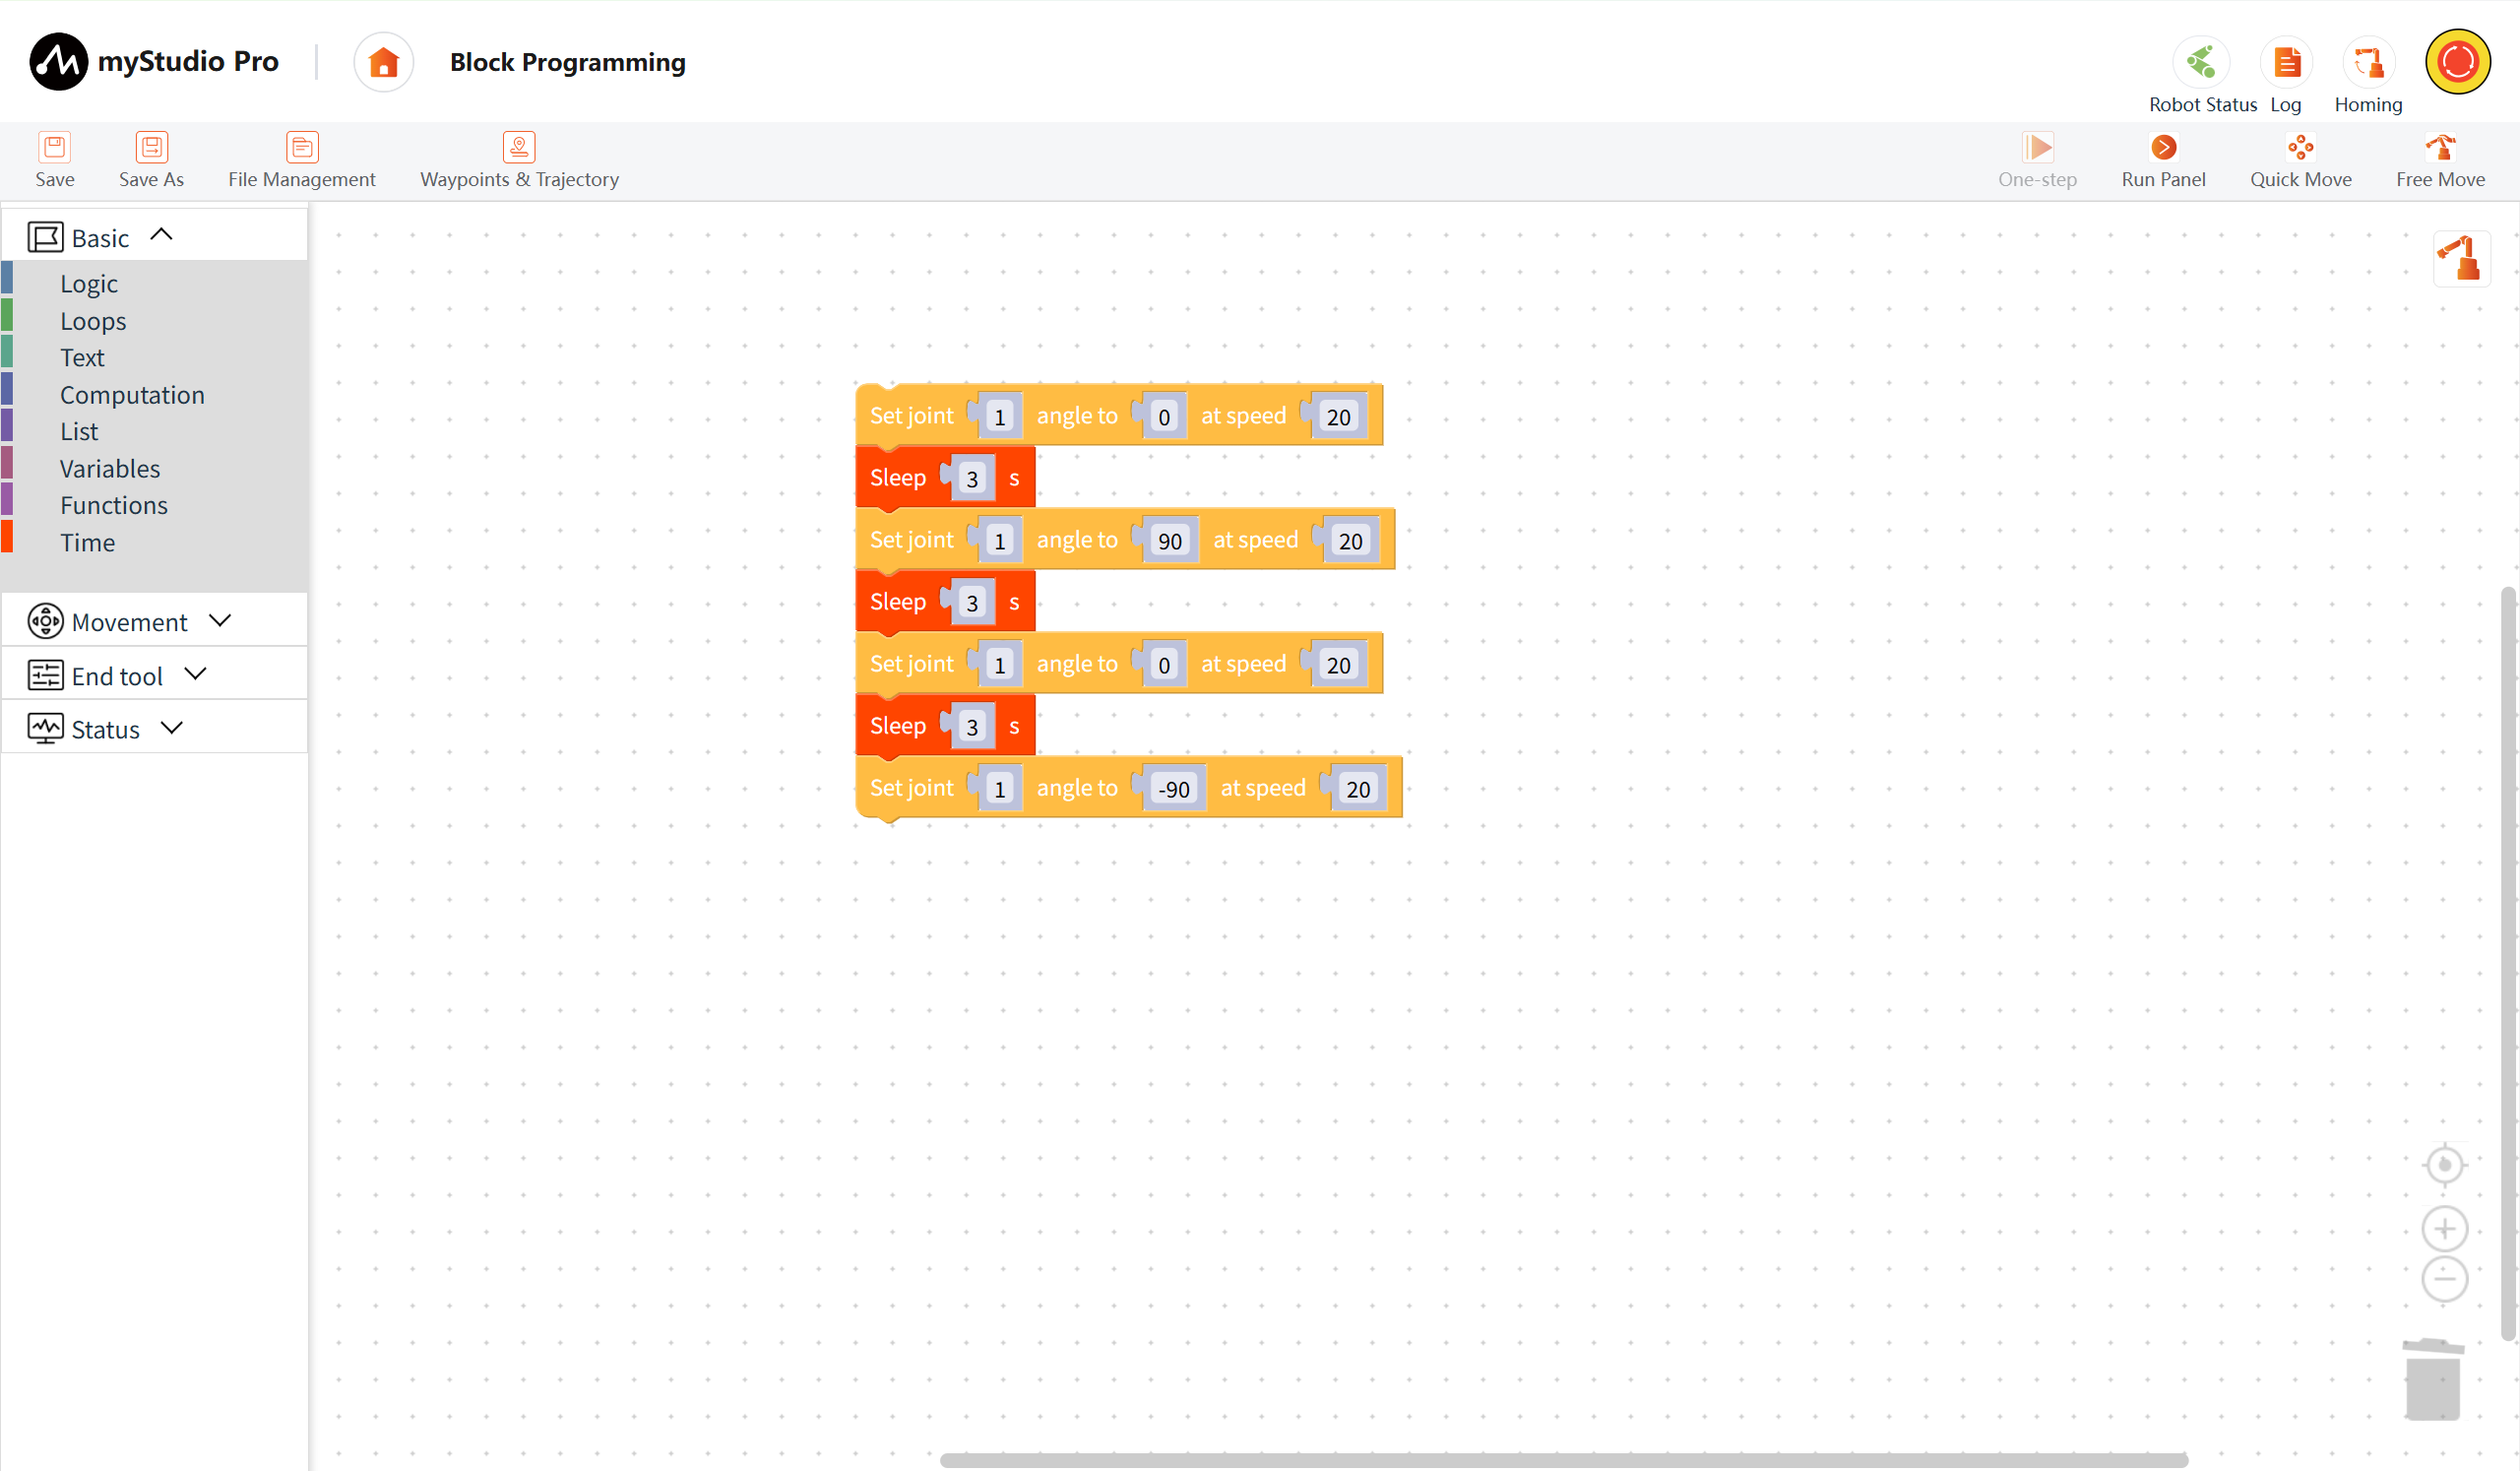
Click the Run Panel button. When the Run Plane pops up, click Run All, and immediately click the Pause button. The program will pause after executing the first instruction mc.send_angle(1,0,20).
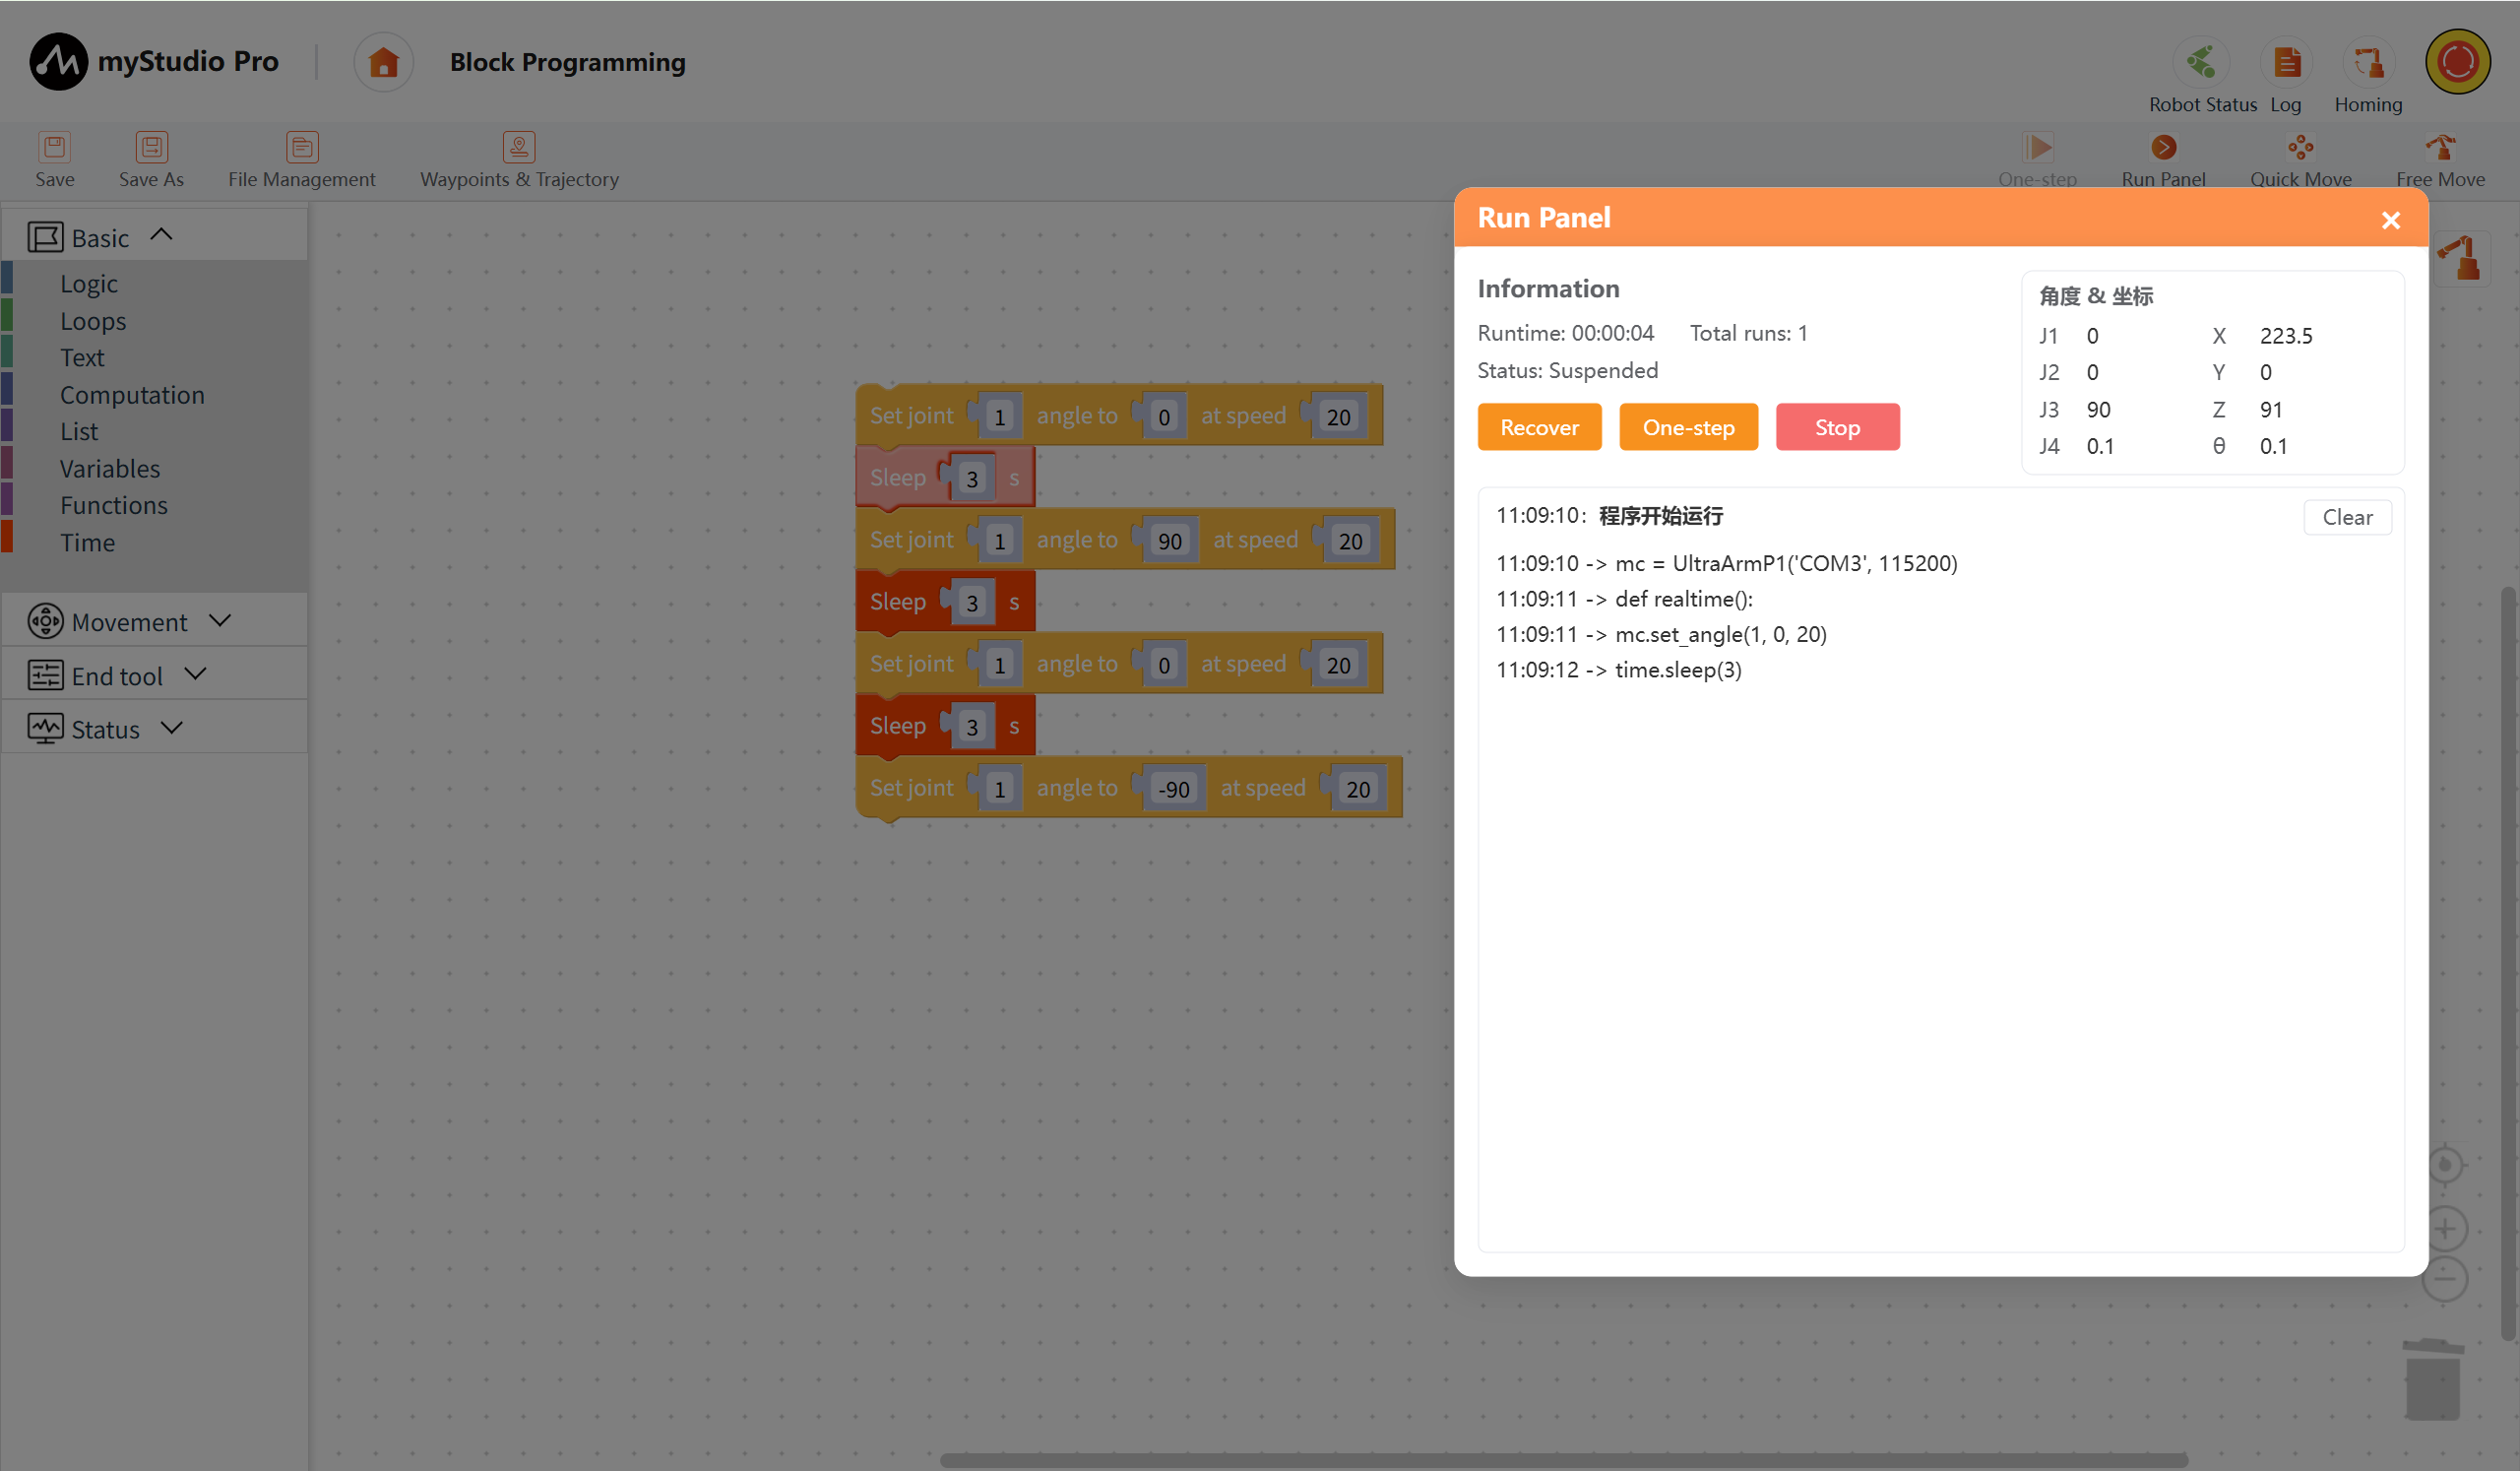
The program is paused. The next instruction to be executed, time.sleep(3), appears.
At this point:
If you click the
Recoverbutton, the program will automatically continue execution;If you click the
One-stepbutton, The program will execute thetime.sleep(3)instruction. WhenOne-stepis clicked again, the program will execute the next instruction, namelymc.send_angle(1,-90,20);If you click the
Stopbutton, the program will be terminated;
What happens next is up to you!
8 Using the Gripper
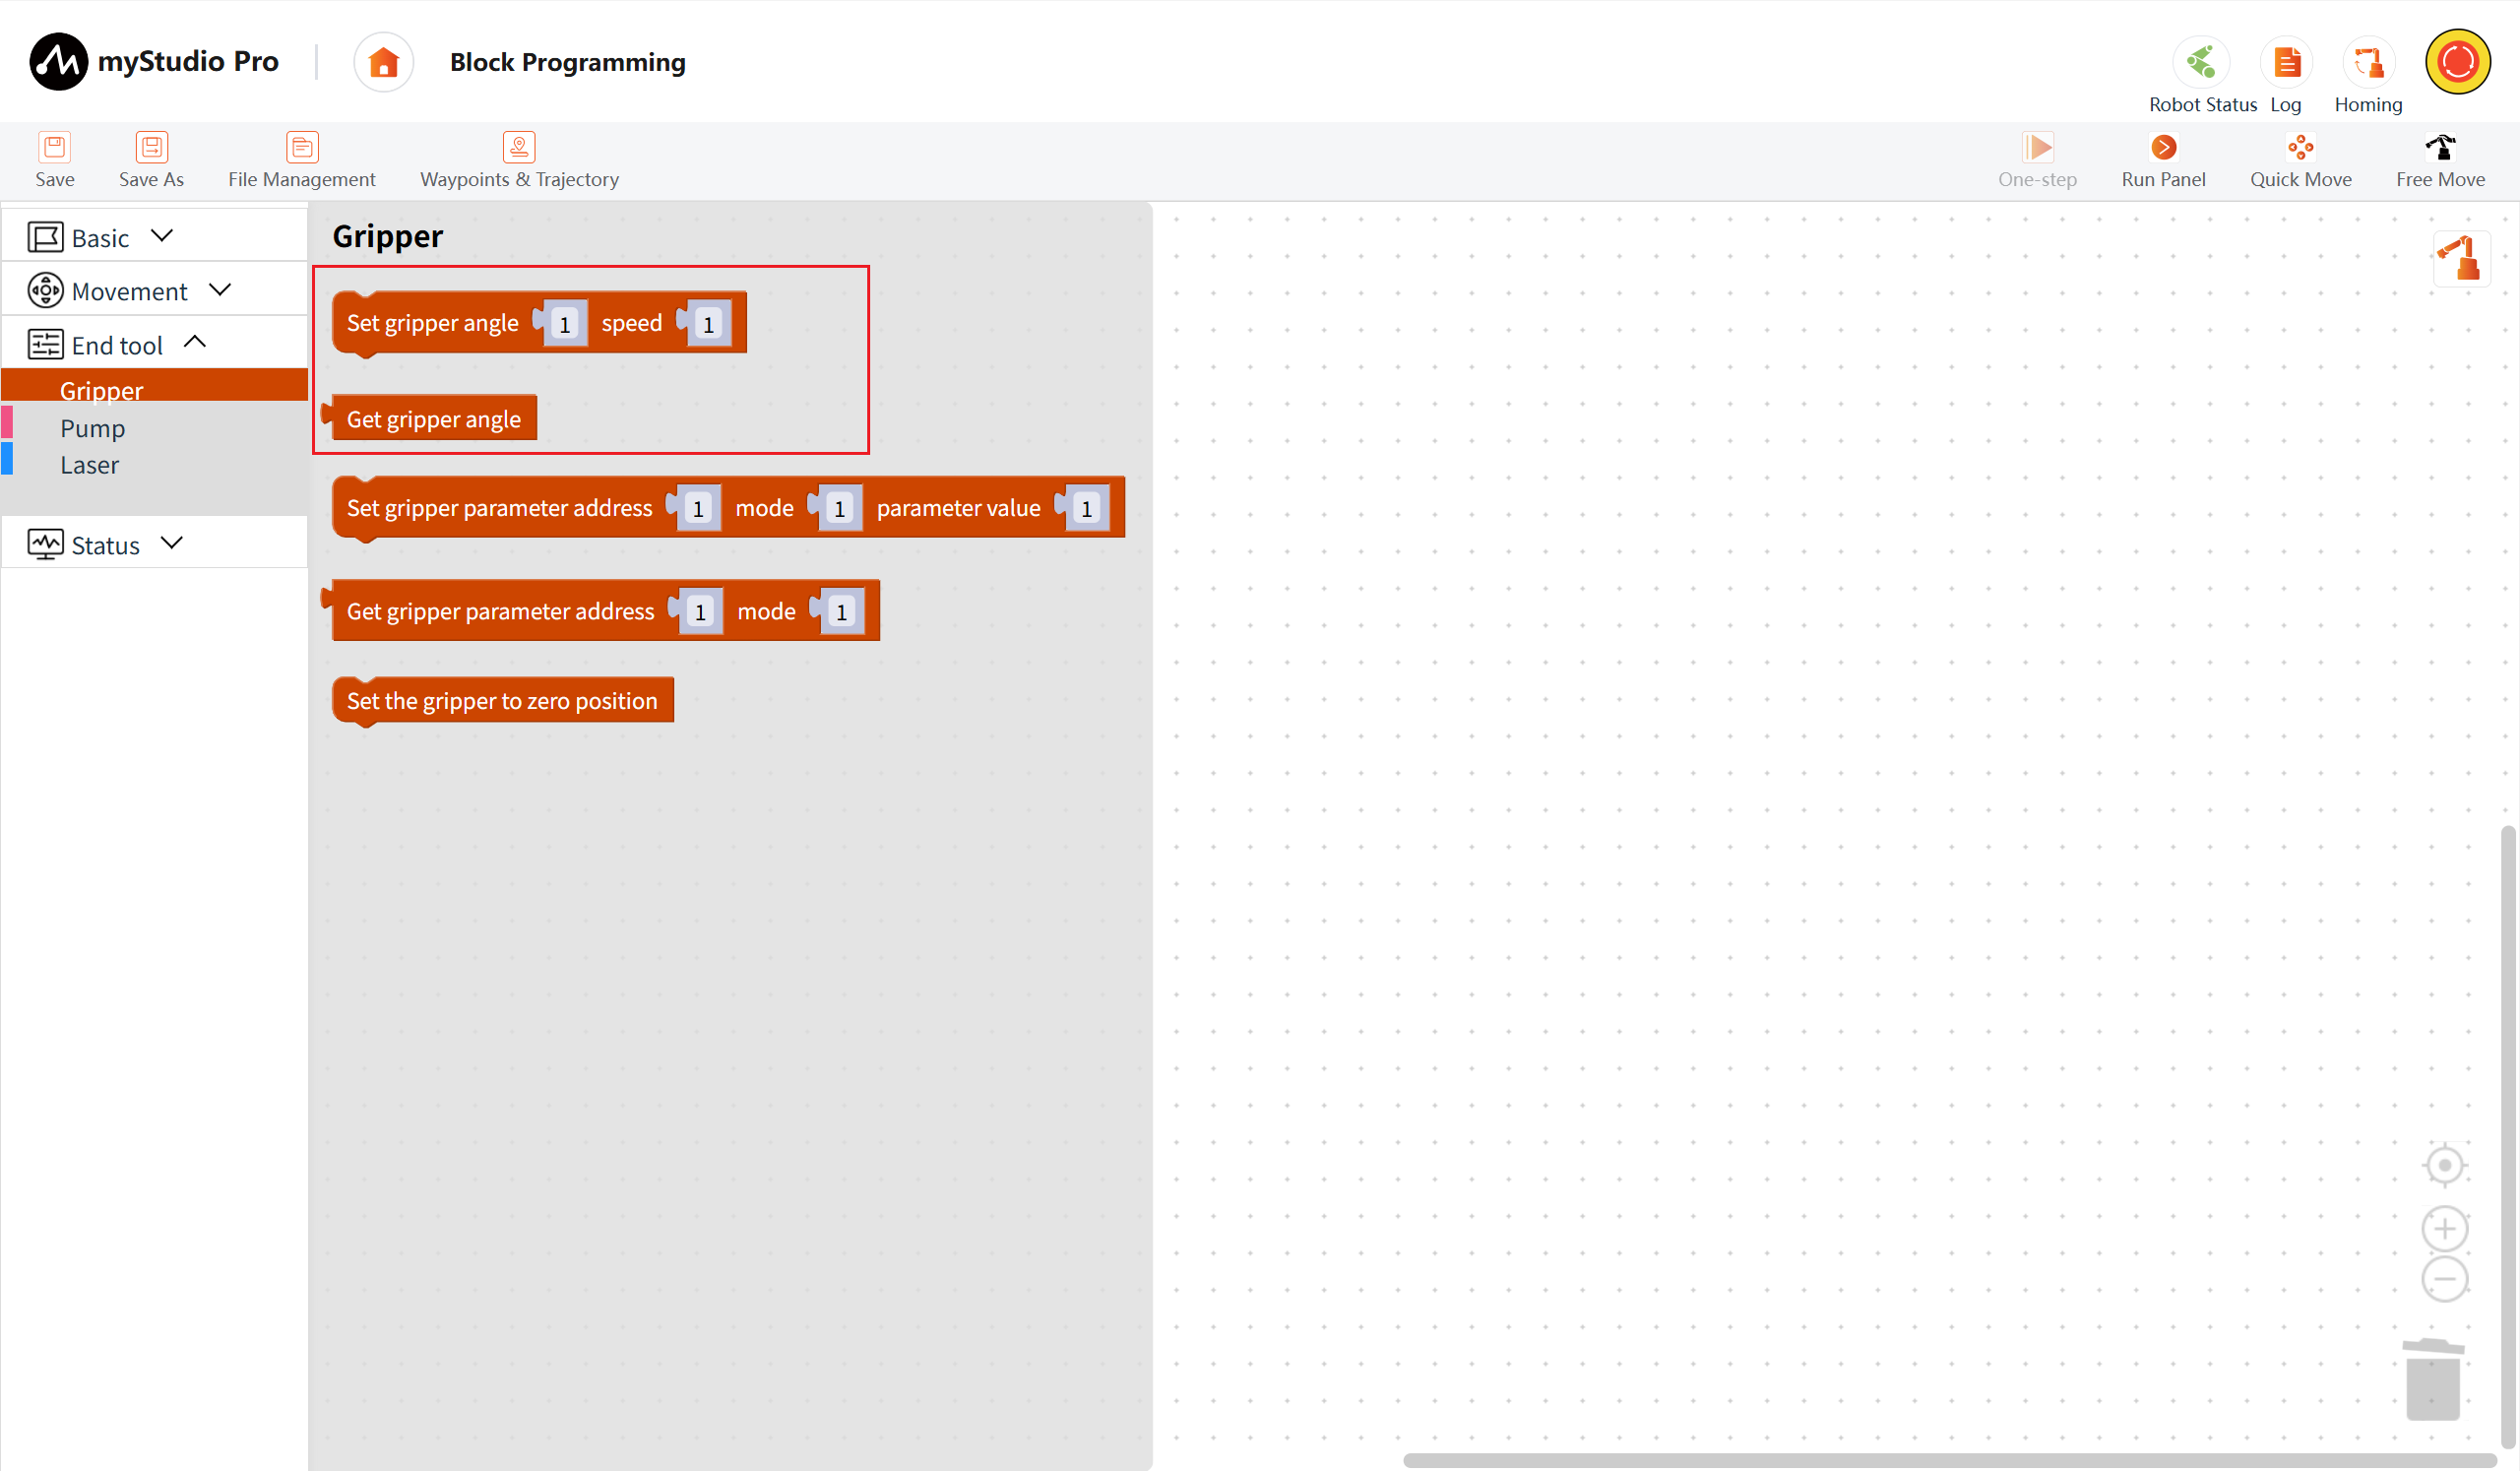
This chapter introduces how to use myBlockly to control the F100 force control gripper connected to a robotic arm.
Please ensure that the robotic arm has been properly connected to the gripper.
API Display
Small Case Study
The complete code is as follows:
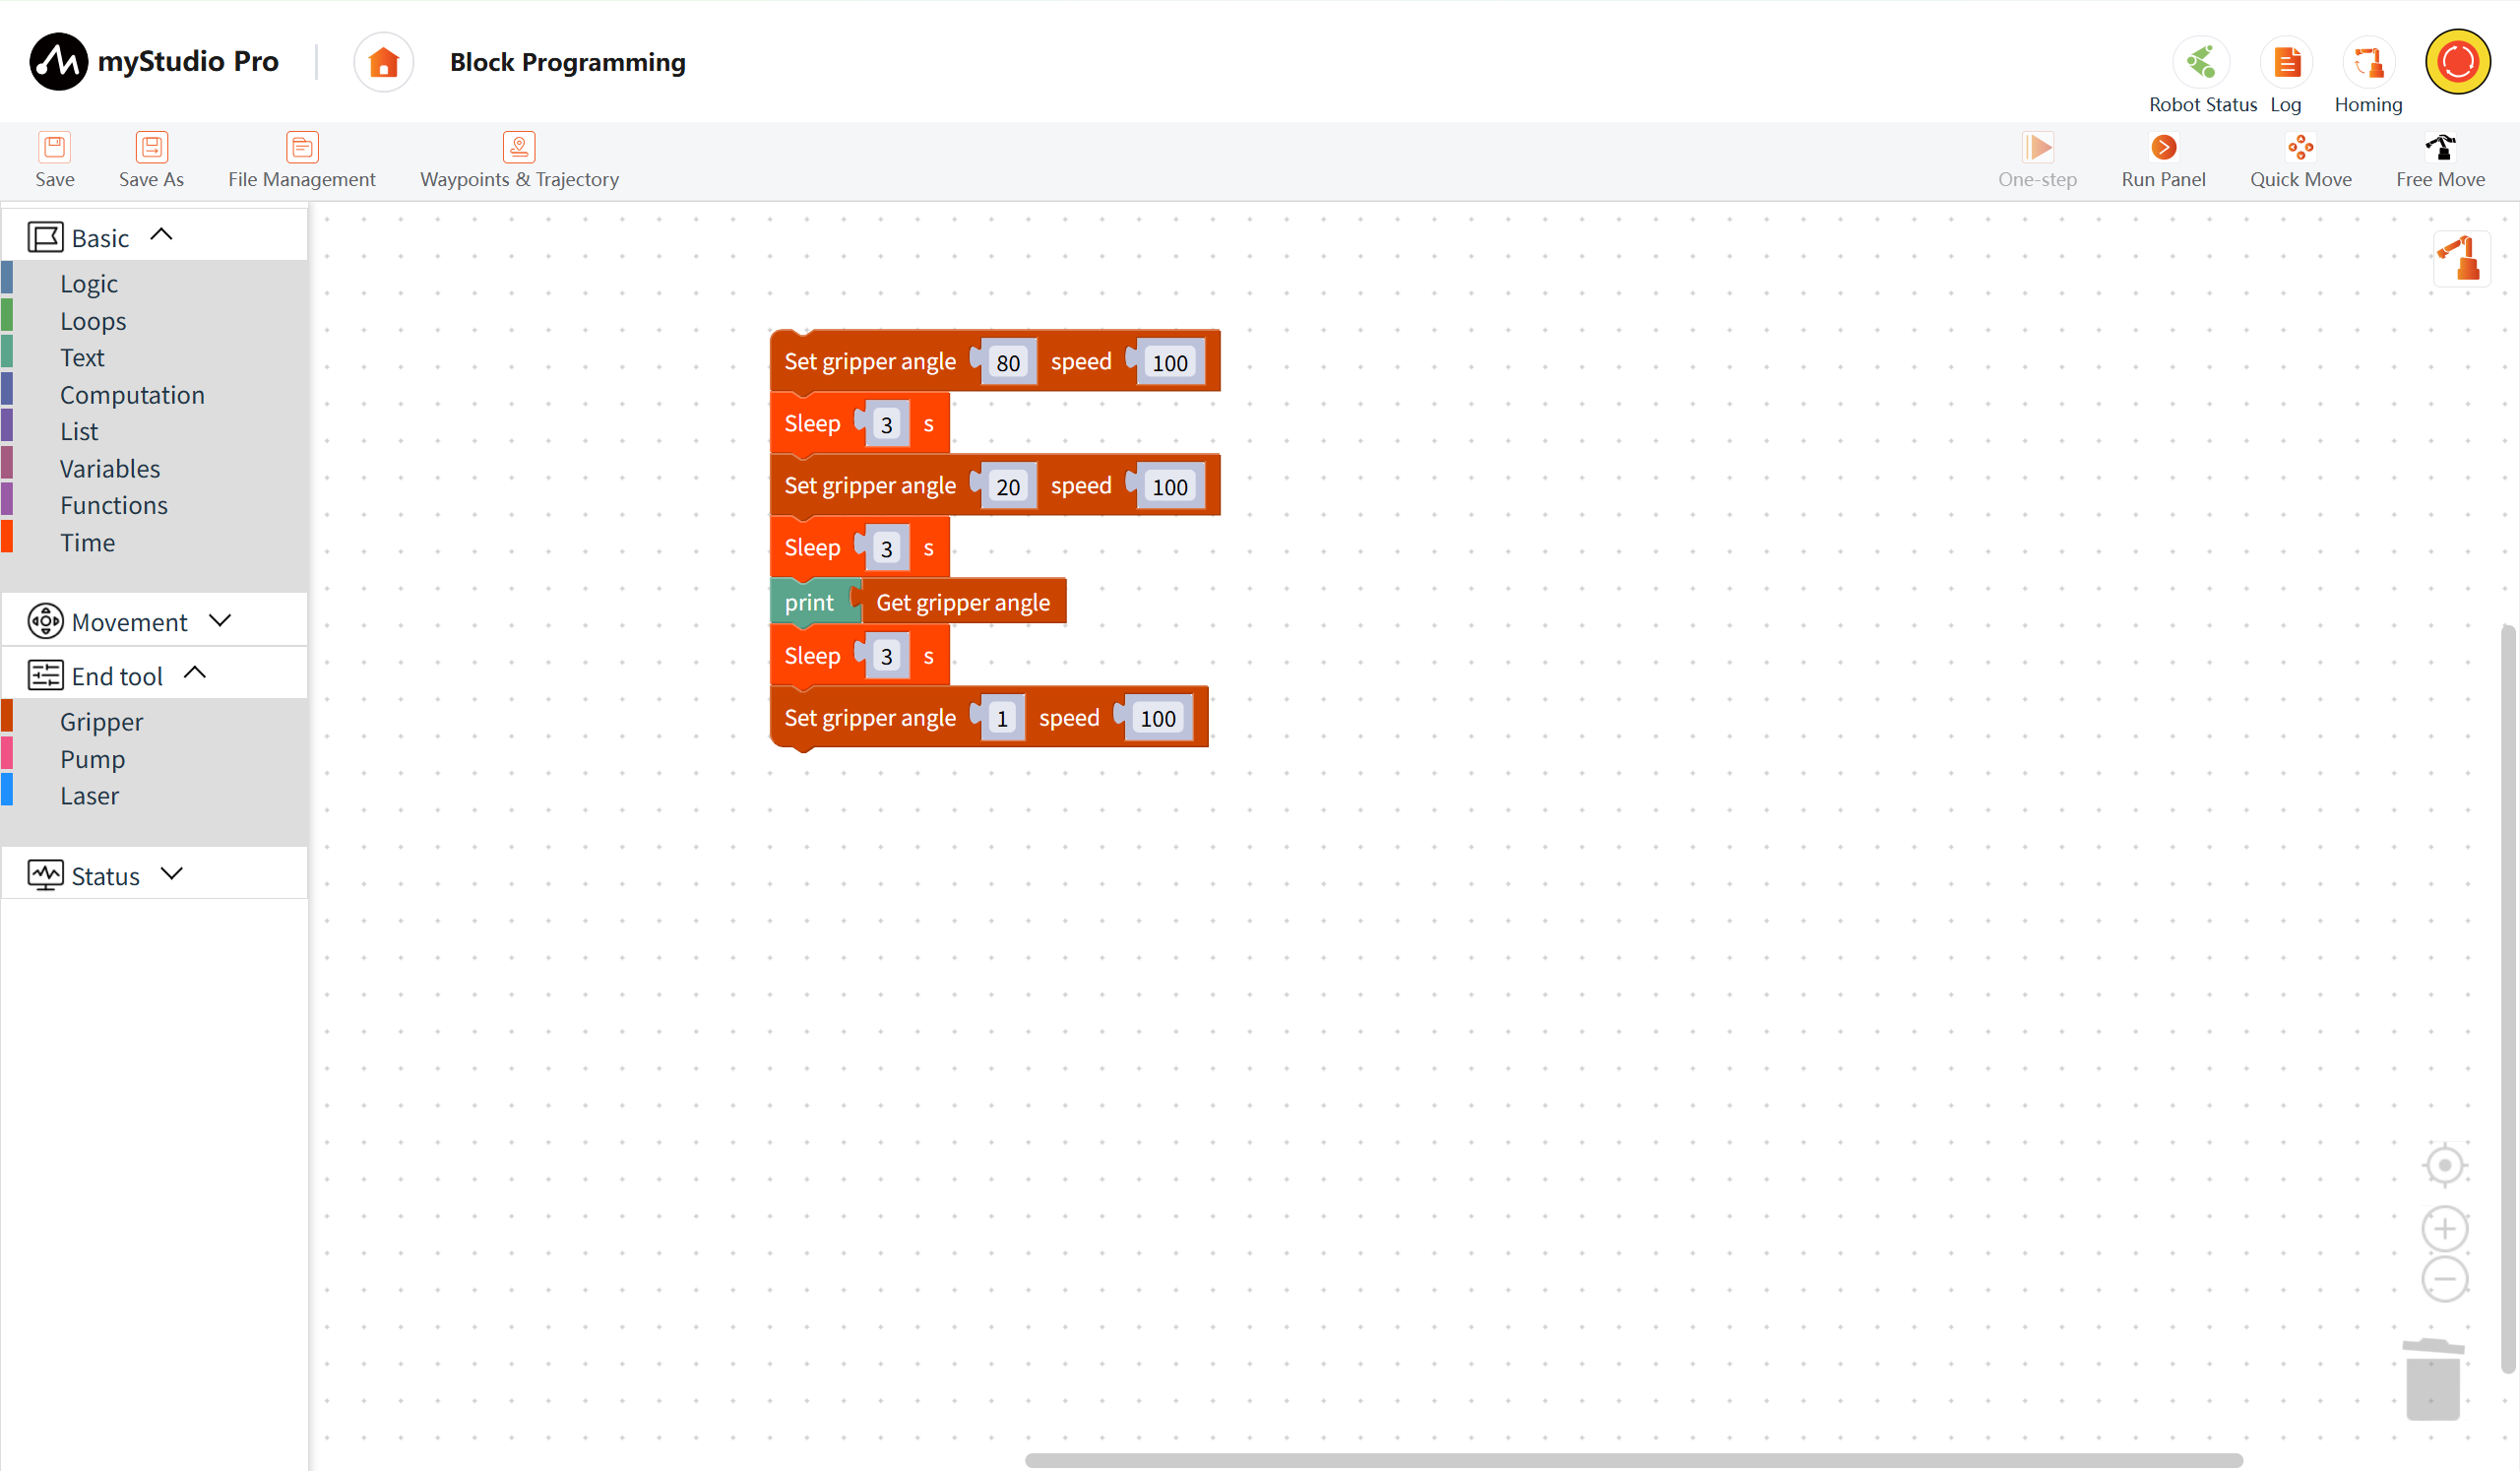
- Execution effect of the code:
- Control the gripper to reach the position with a value of 80 at a speed of 100
- Wait for 3 seconds
- Control the gripper to reach the position with a value of 20 at a speed of 100
- Wait for 3 seconds
- Read the angle value of the gripper
- Wait for 3 seconds
- Control the gripper to reach the position with a value of 0 at a speed of 10
9 Waypoints
This chapter introduces how to use the waypoint function to control a robotic arm.
Function Description: By inputting multiple waypoint data (robotic arm joints and coordinates), you can quickly control the robotic arm to reach the position of each waypoint. Open the waypoint list page, long press the end effector button, release the robotic arm, manually adjust the robotic arm's posture, and click Add a new Point to add a waypoint data entry.
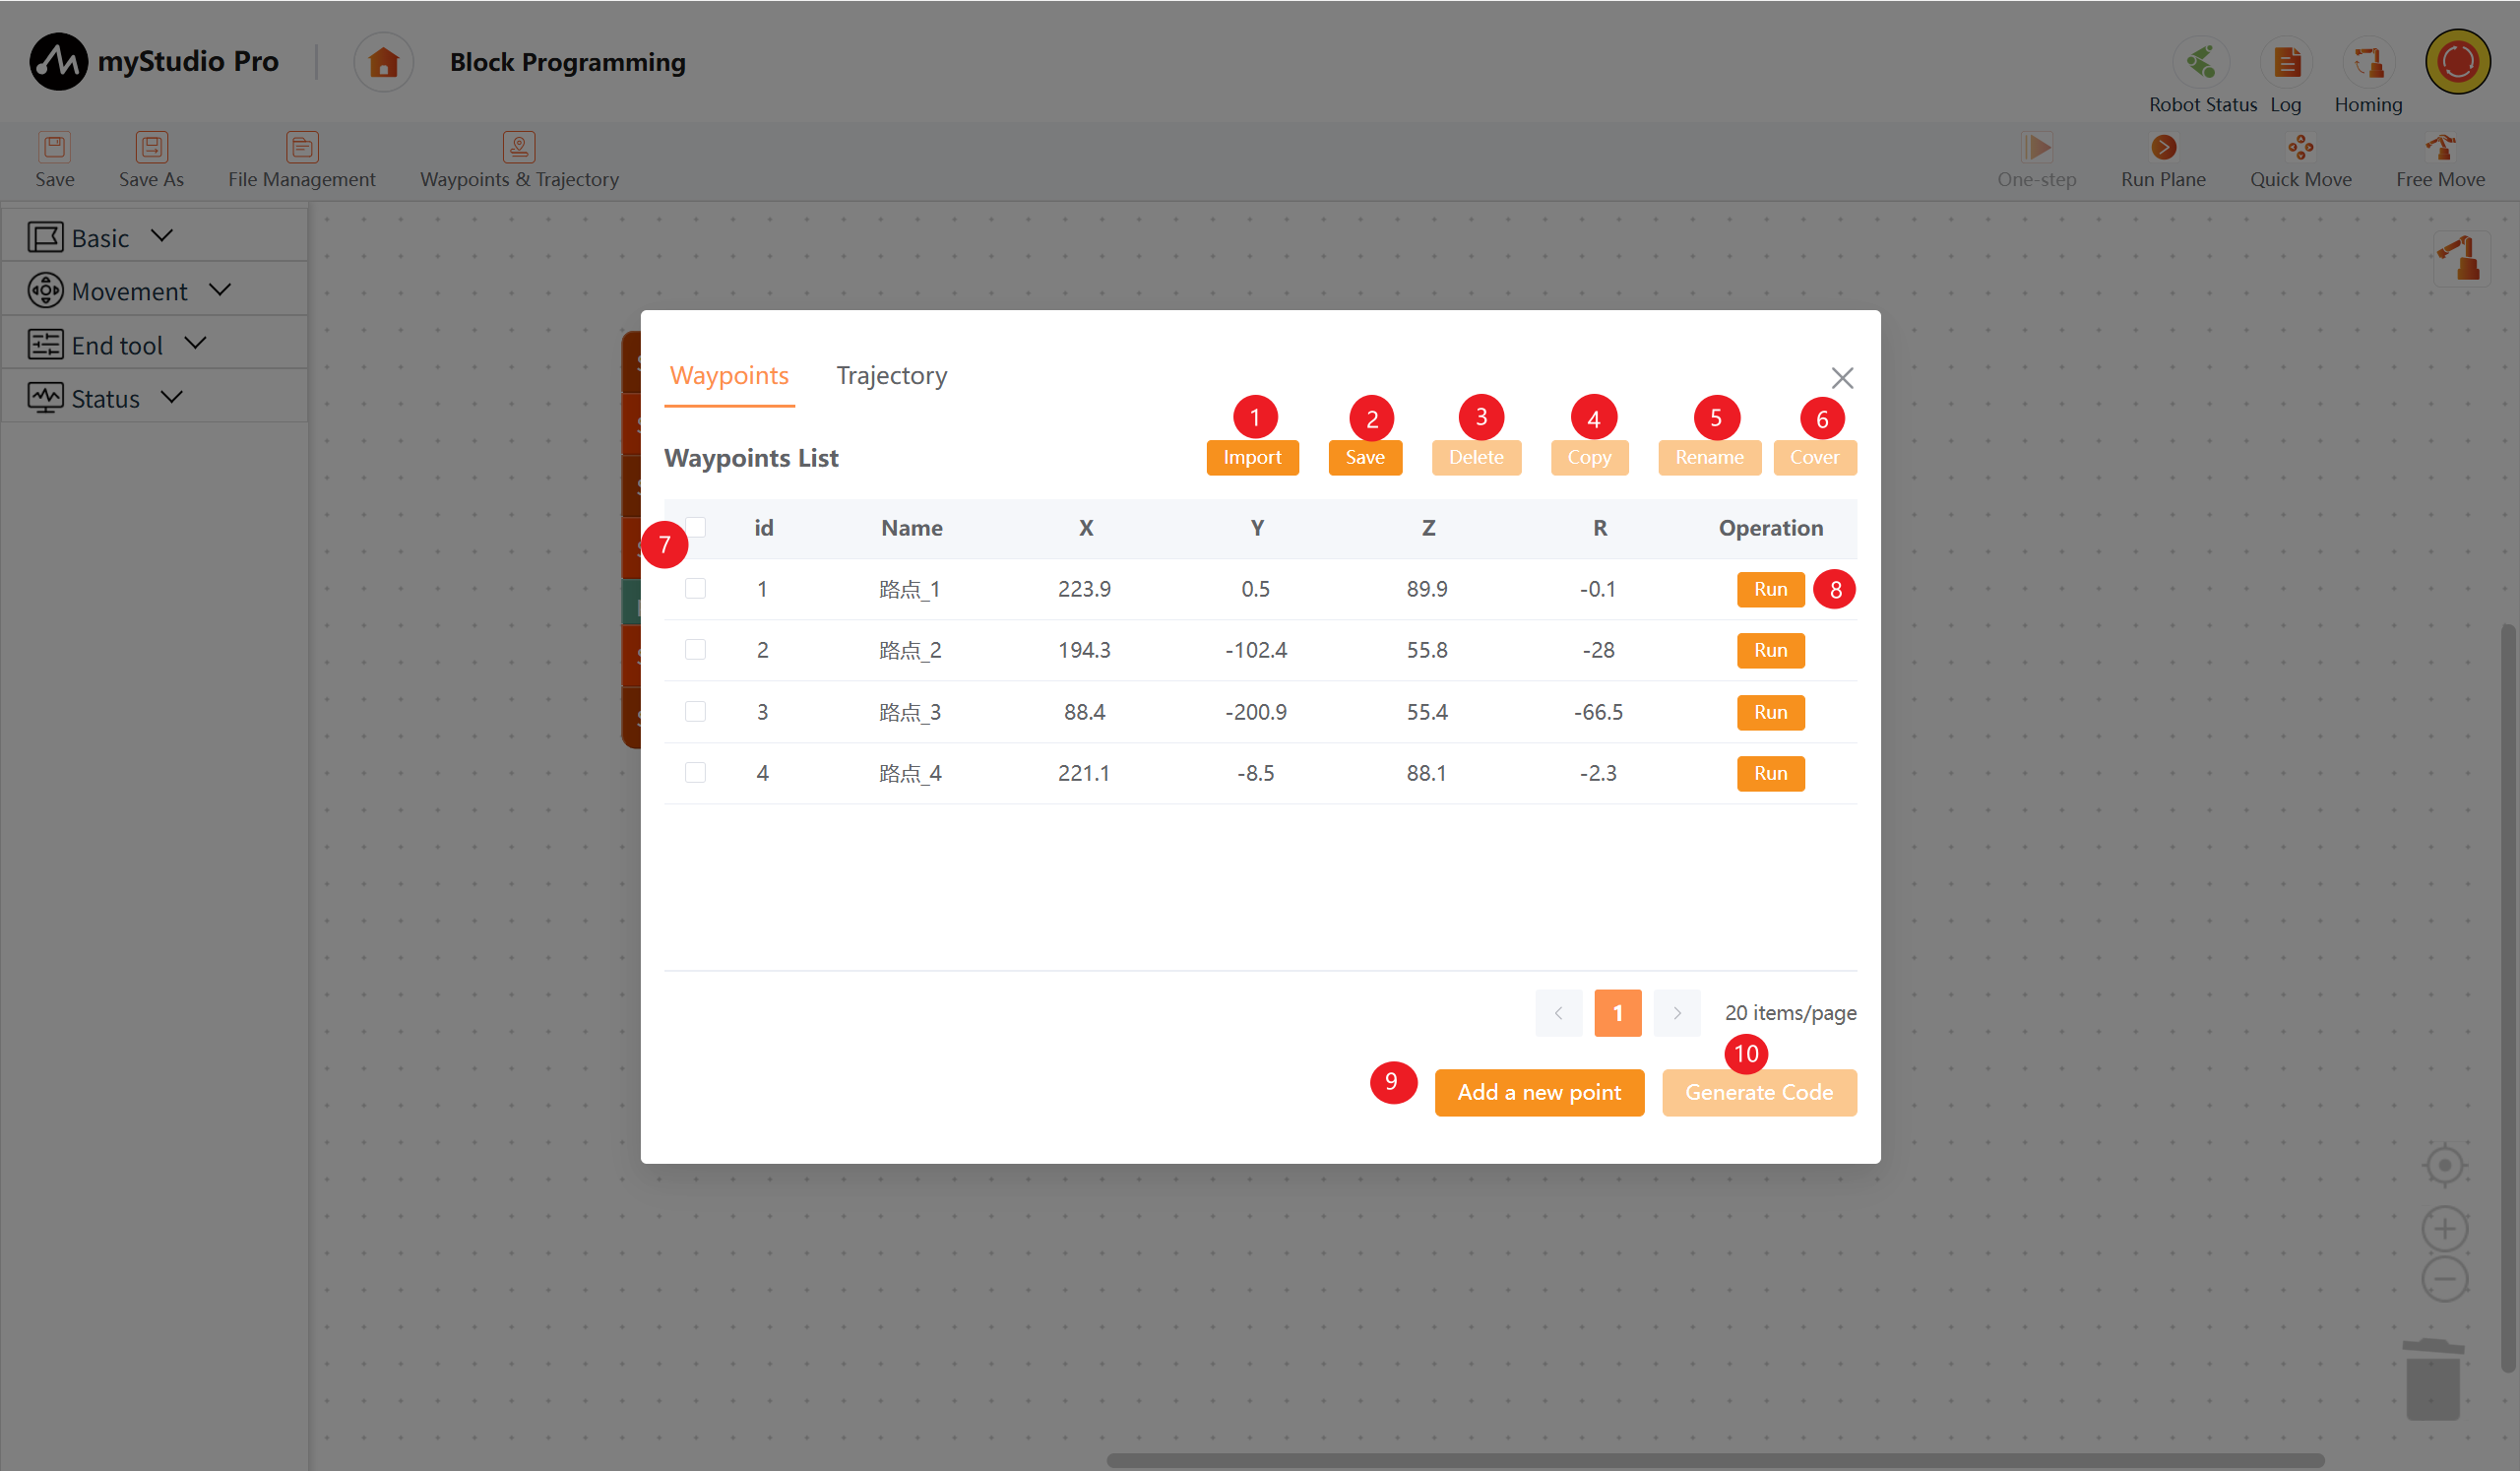
| Number | Description |
|---|---|
| 1 | Clicking the "Import" button imports a previously saved waypoint information JSON file. |
| 2 | Clicking the "Save" button exports all waypoint information into a single JSON file. |
| 3 | Clicking the "Delete" button deletes all selected waypoints in the current waypoint list. |
| 4 | Clicking the "Copy" button copies the coordinate information of all currently selected waypoints. |
| 5 | Clicking the "Rename" button renames all currently selected waypoints. |
| 6 | Clicking the "Cover current point" button quickly overwrites the coordinate information of all selected waypoints with the current robot arm coordinates. |
| 7 | Selecting columns in the list data is a prerequisite for functions 3-6. |
| 8 | Clicking the "Run" button moves the robot arm to the currently recorded waypoint position. |
| 9 | Clicking the "Add a new Point" button records the current robot arm coordinates. |
| 10 | Clicking the "Generate Code" button quickly generates waypoint blocks in the Blockly program coding area. |
In Block Programming, select the "Point" block and add it to the program coding area. Alternatively, you can use the "Generate Code" button in the point list, and the generated point block will be concatenated onto the last block in the workspace.
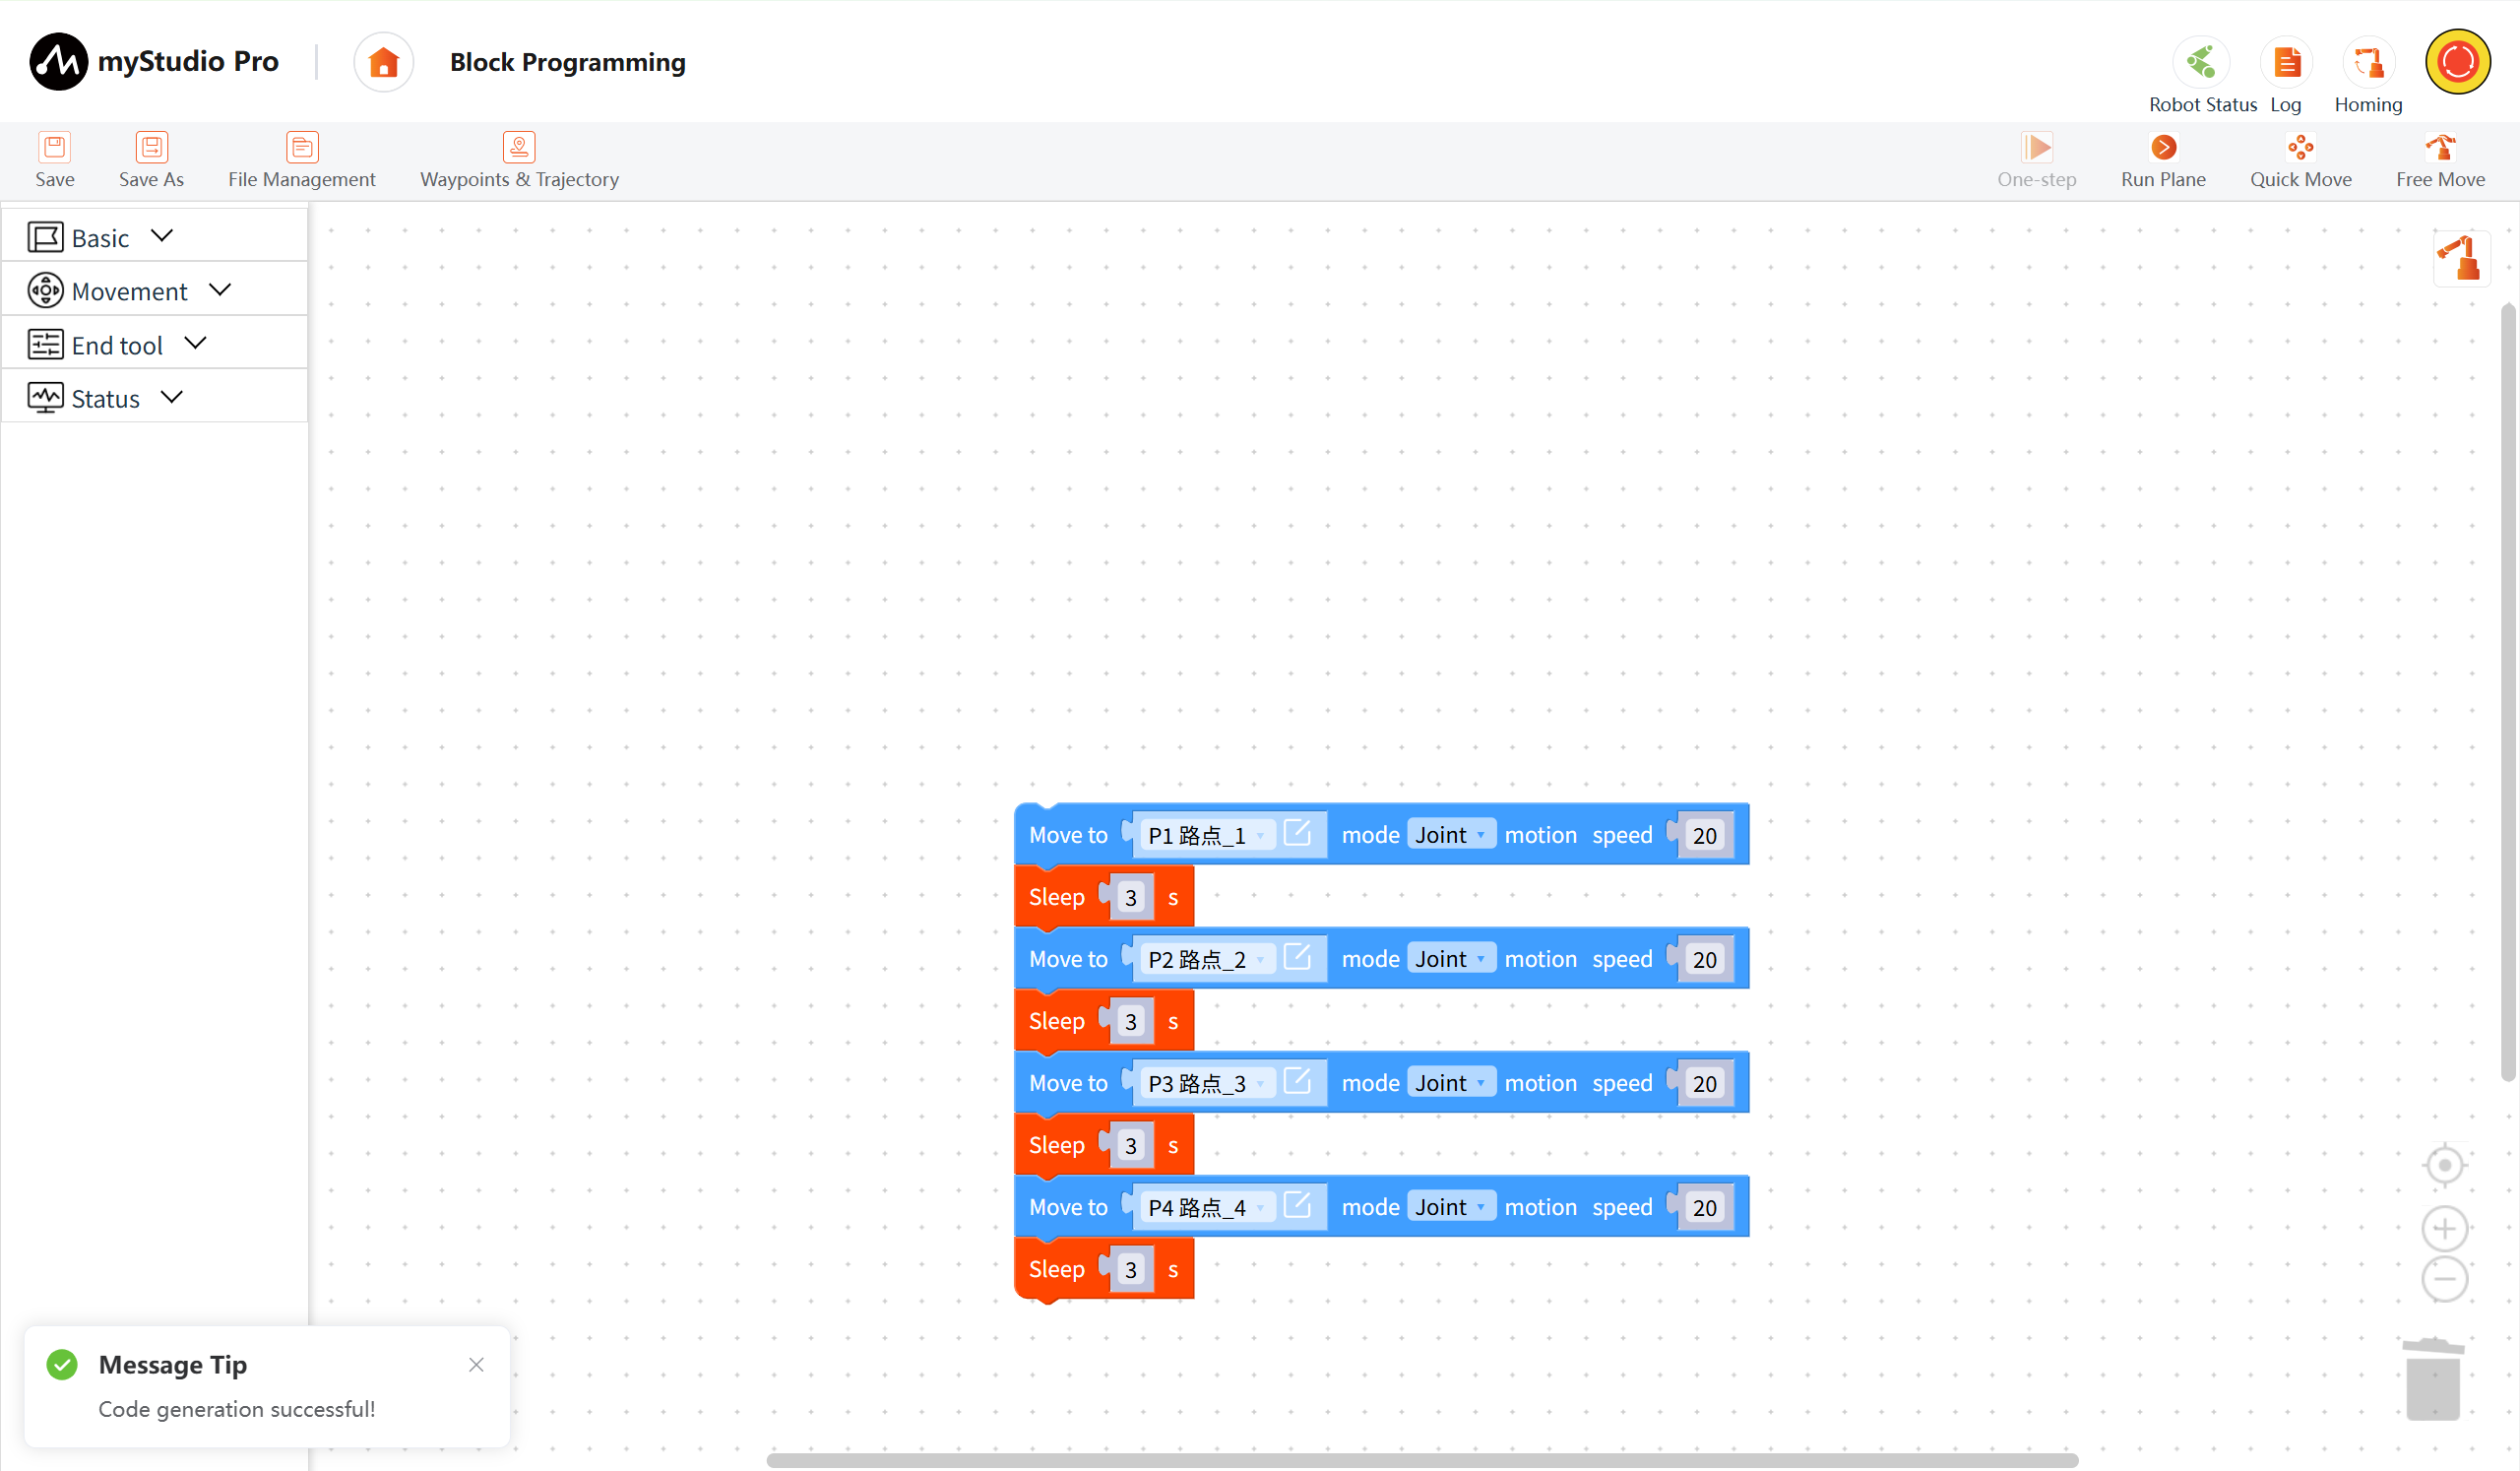
The waypoint block associates data from the waypoint list. Select any waypoint in the list to associate.
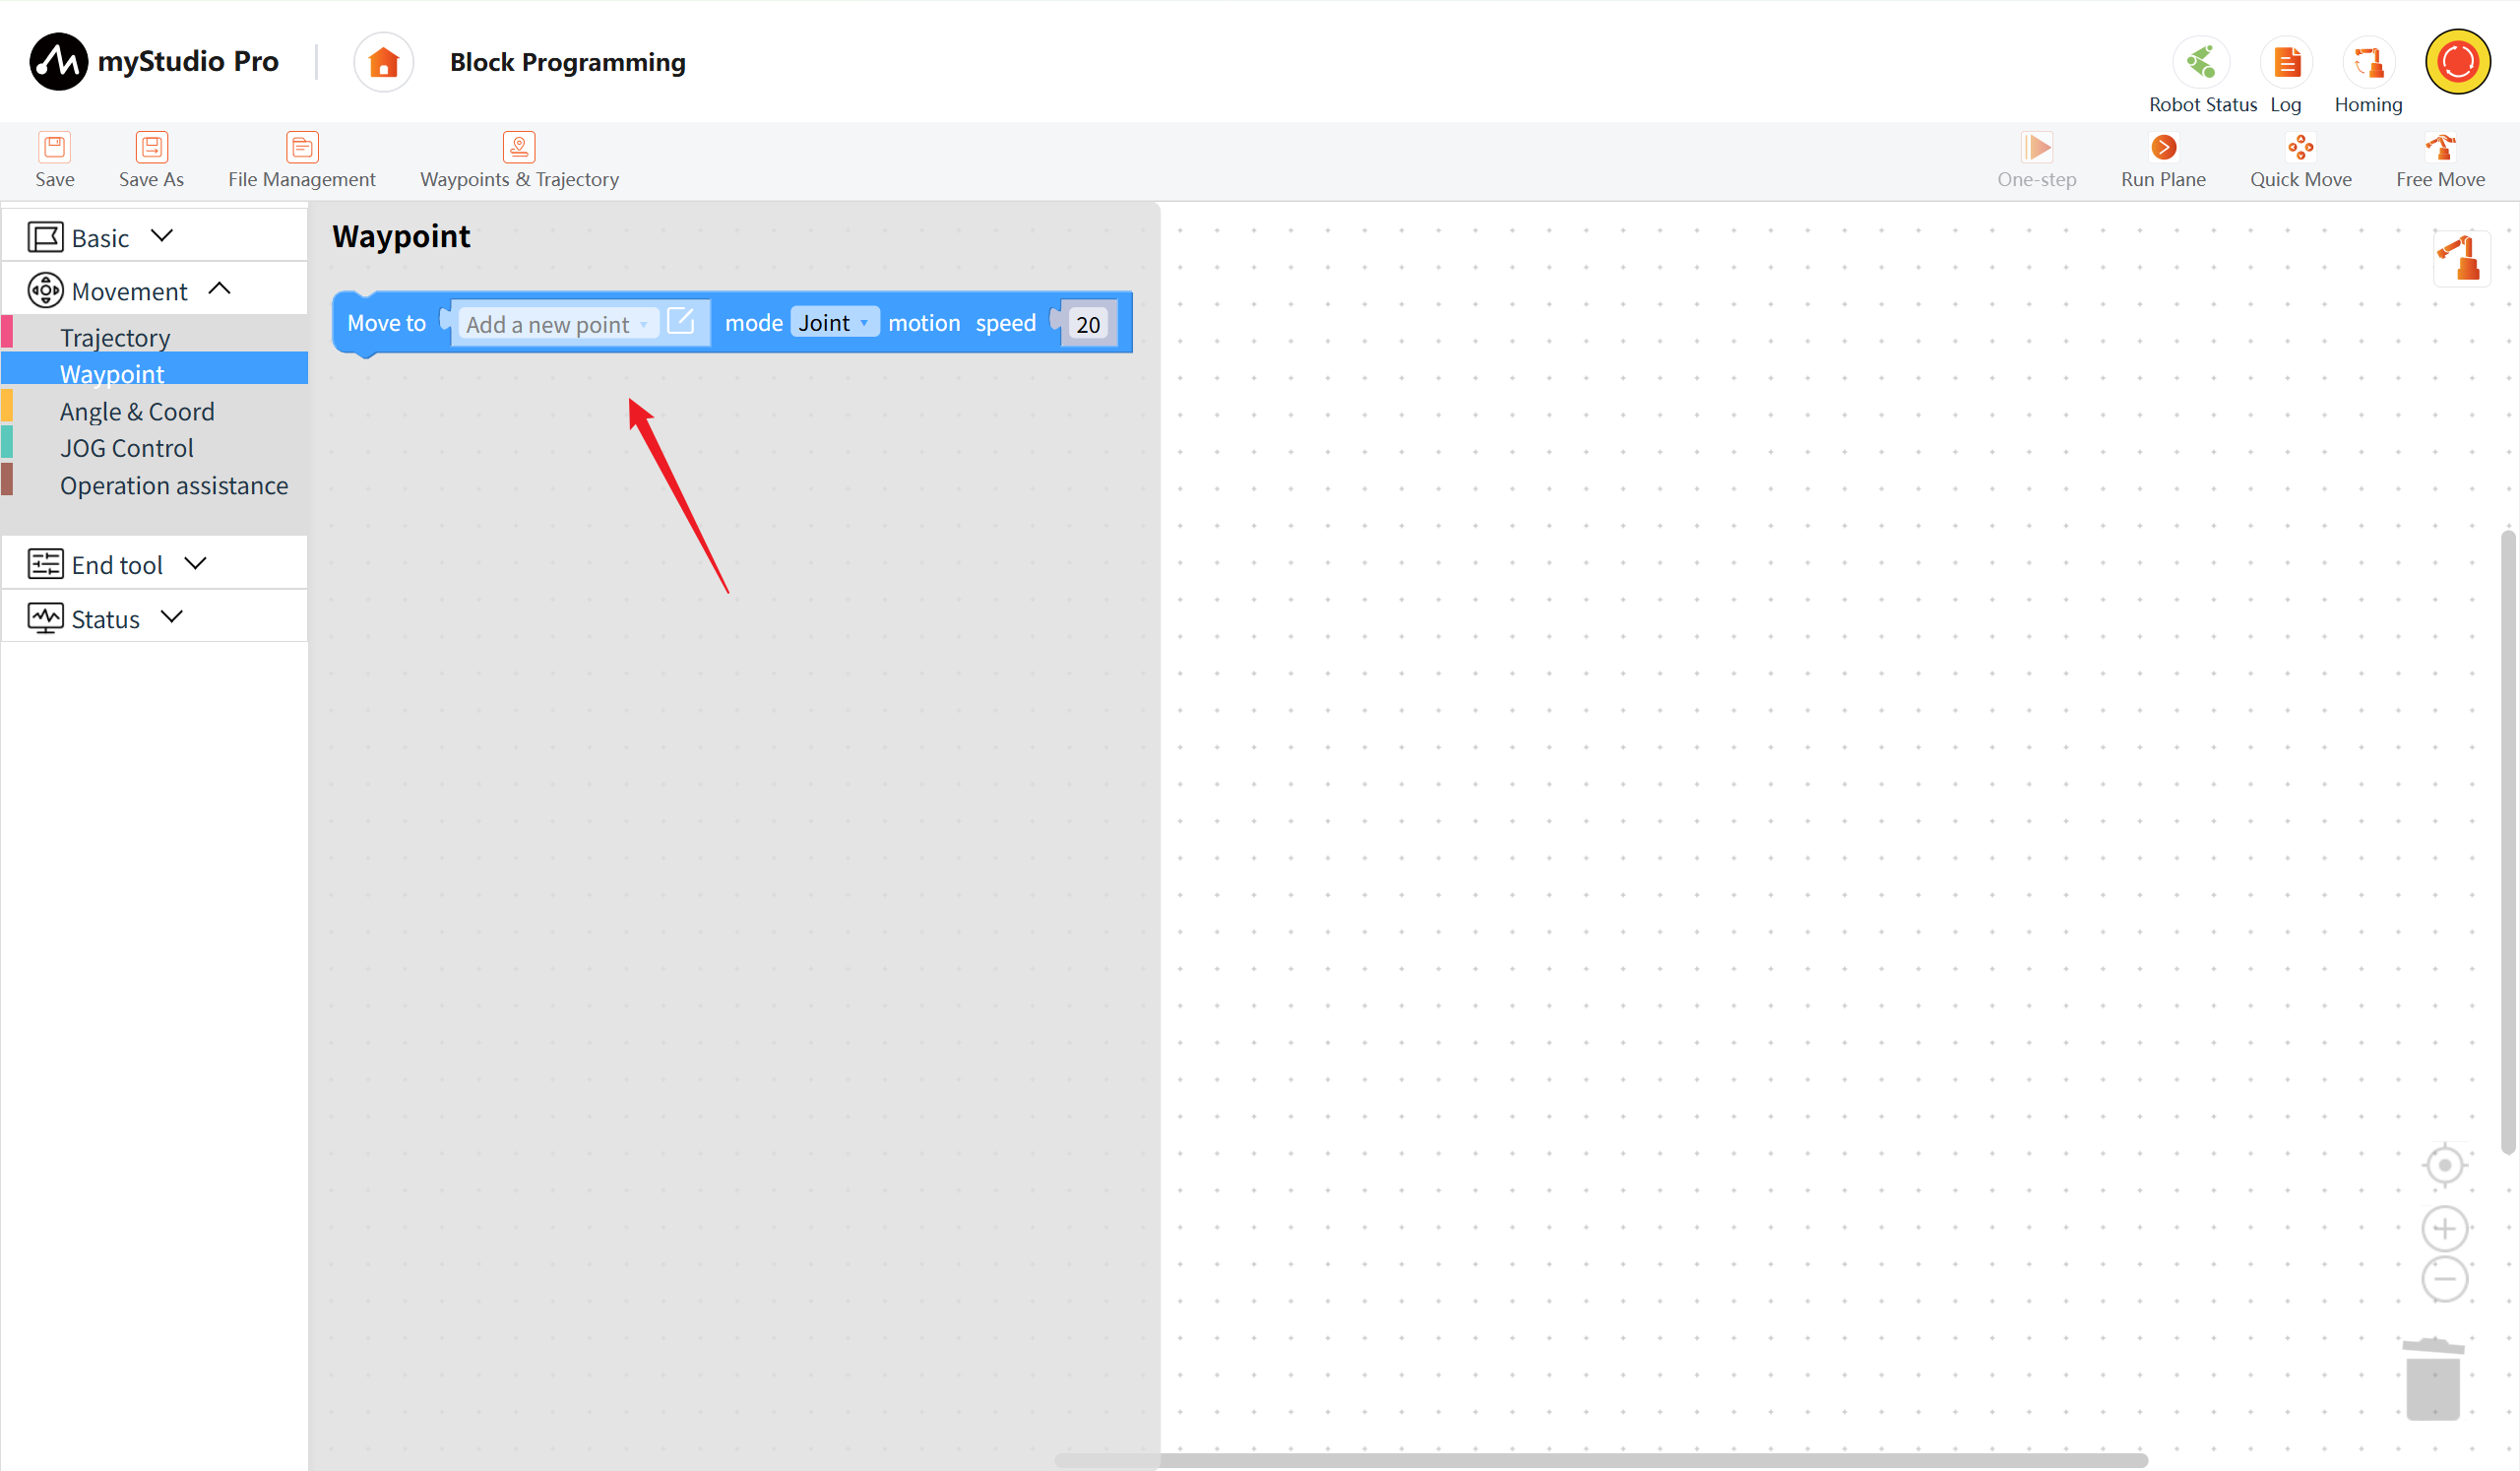
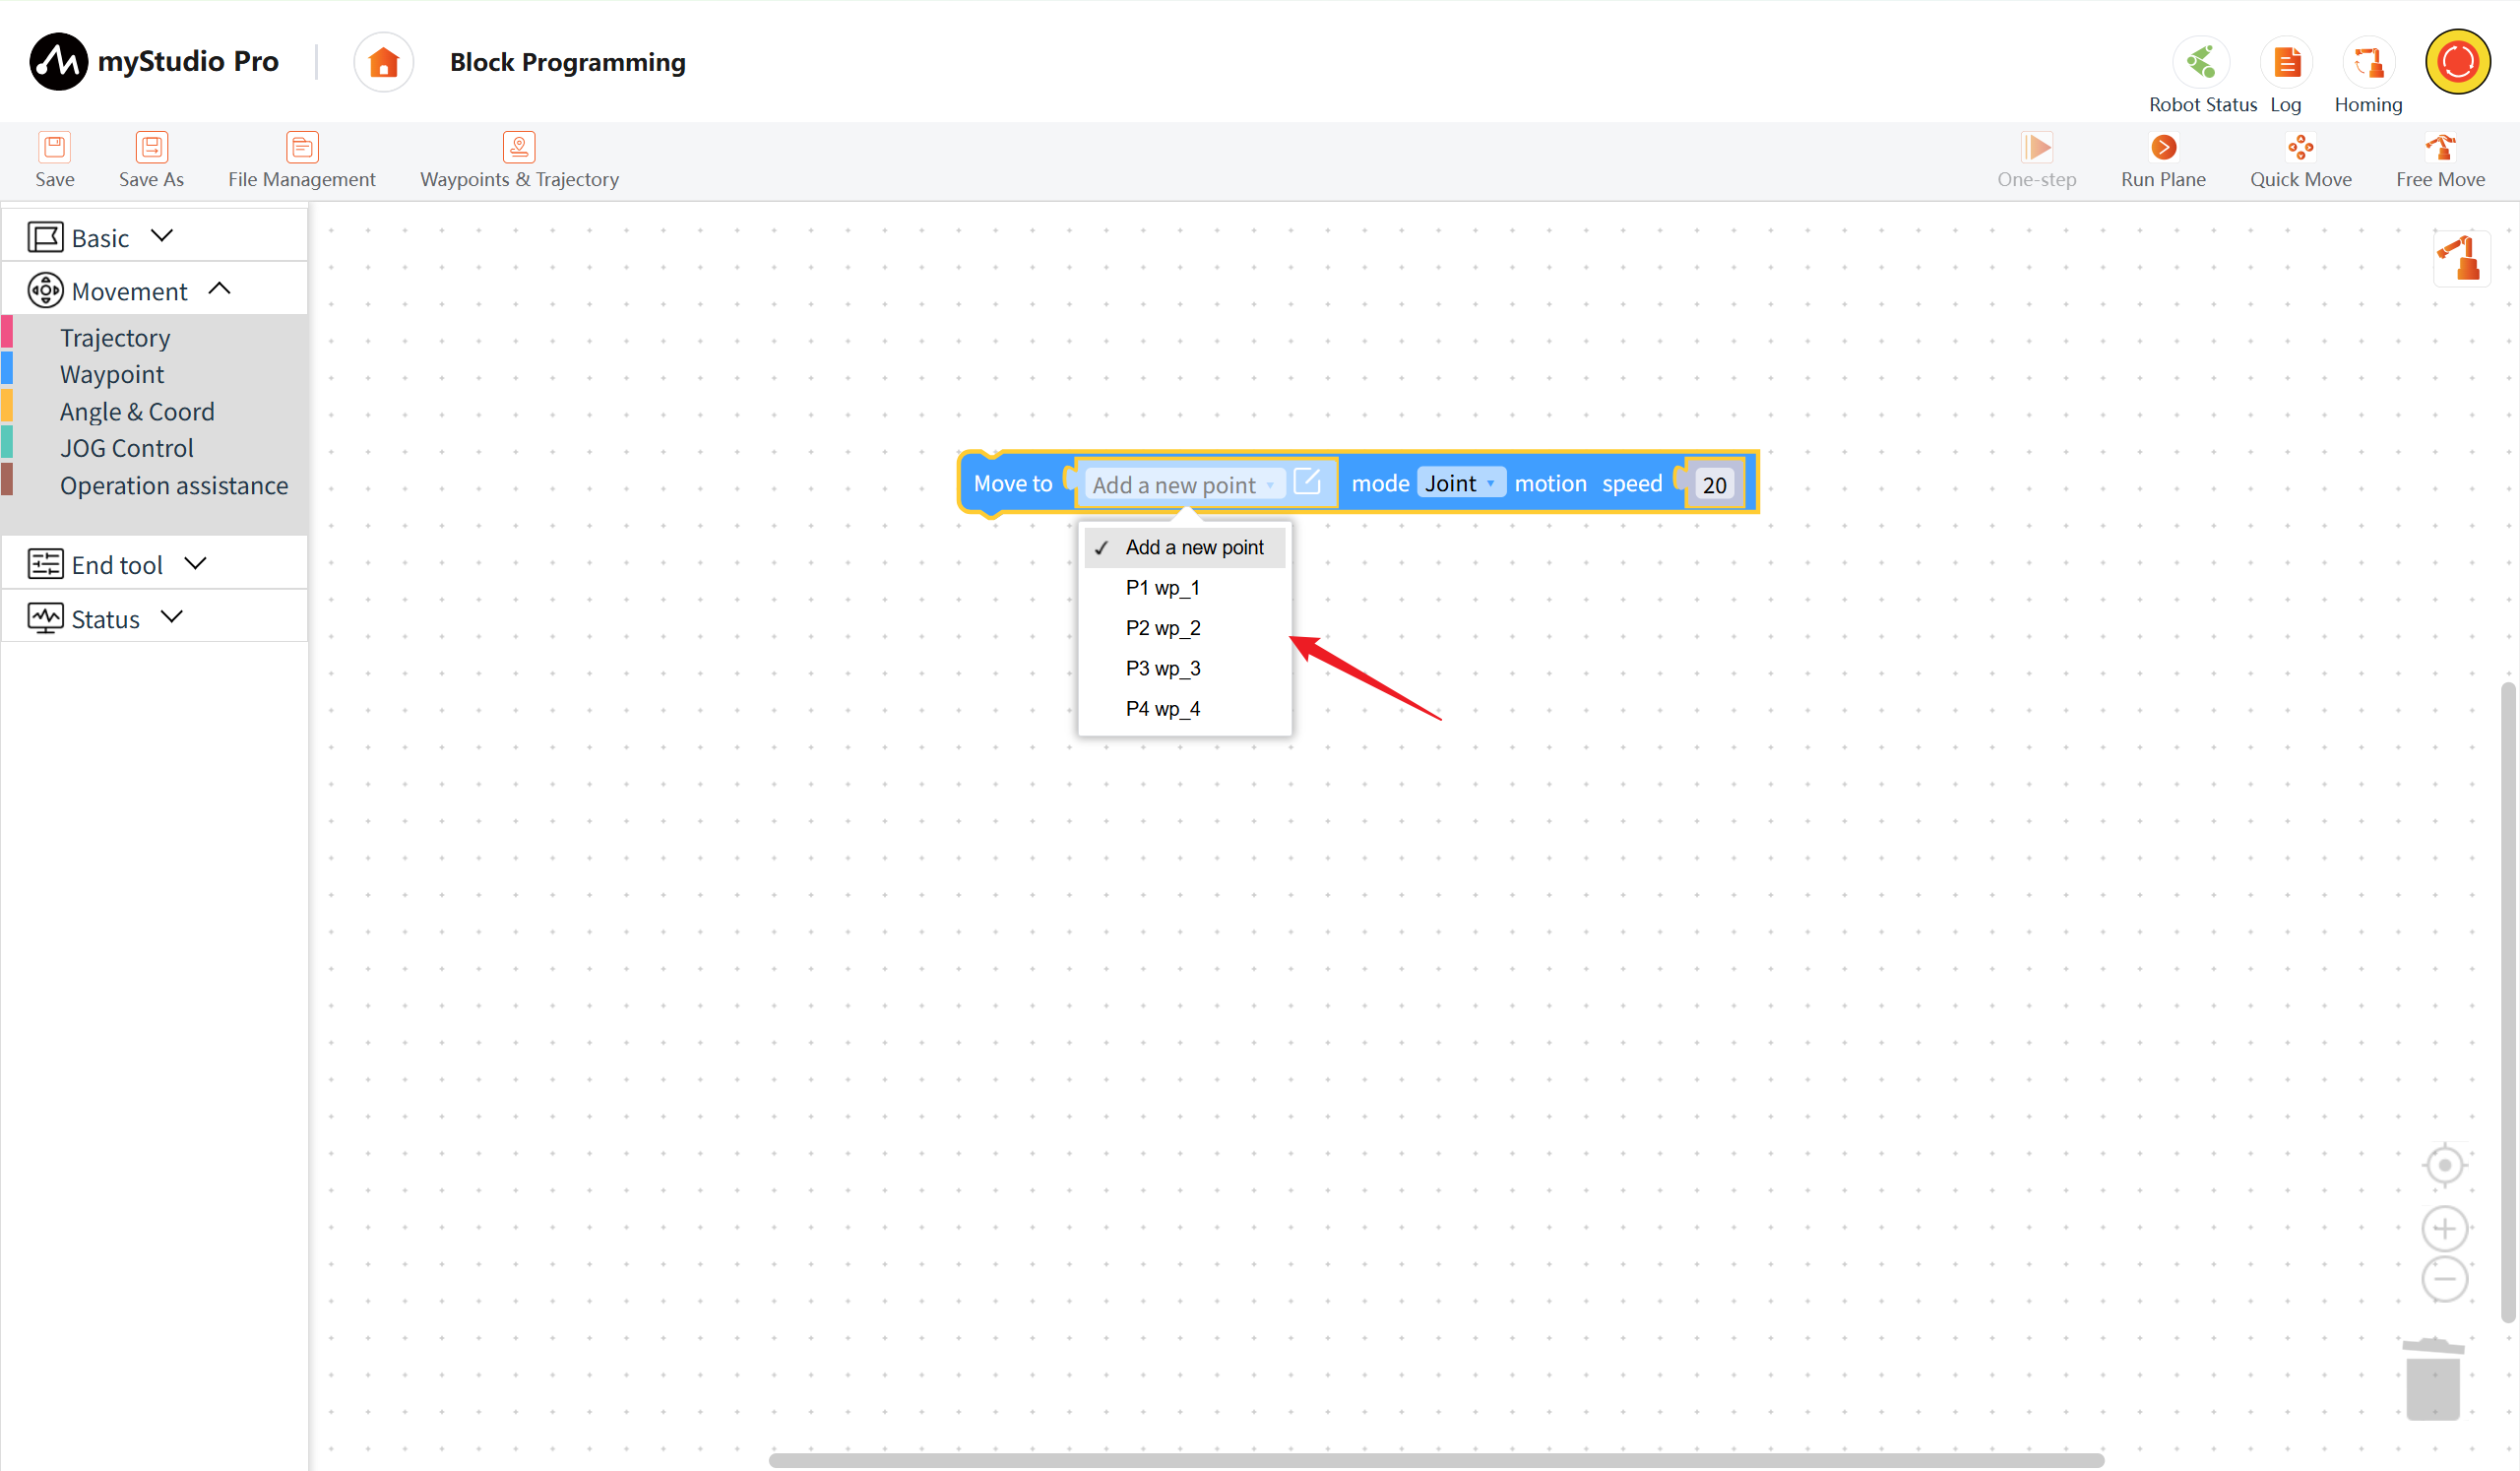
Adds point information to the waypoint block. Select "Add Waypoint," click the "Edit" icon to open the "Add Waypoint" pop-up. The default waypoint name will be displayed. Adjust the waypoint information using the "+" or "-" buttons, and then click the "Save Waypoint" button to add the waypoint data.
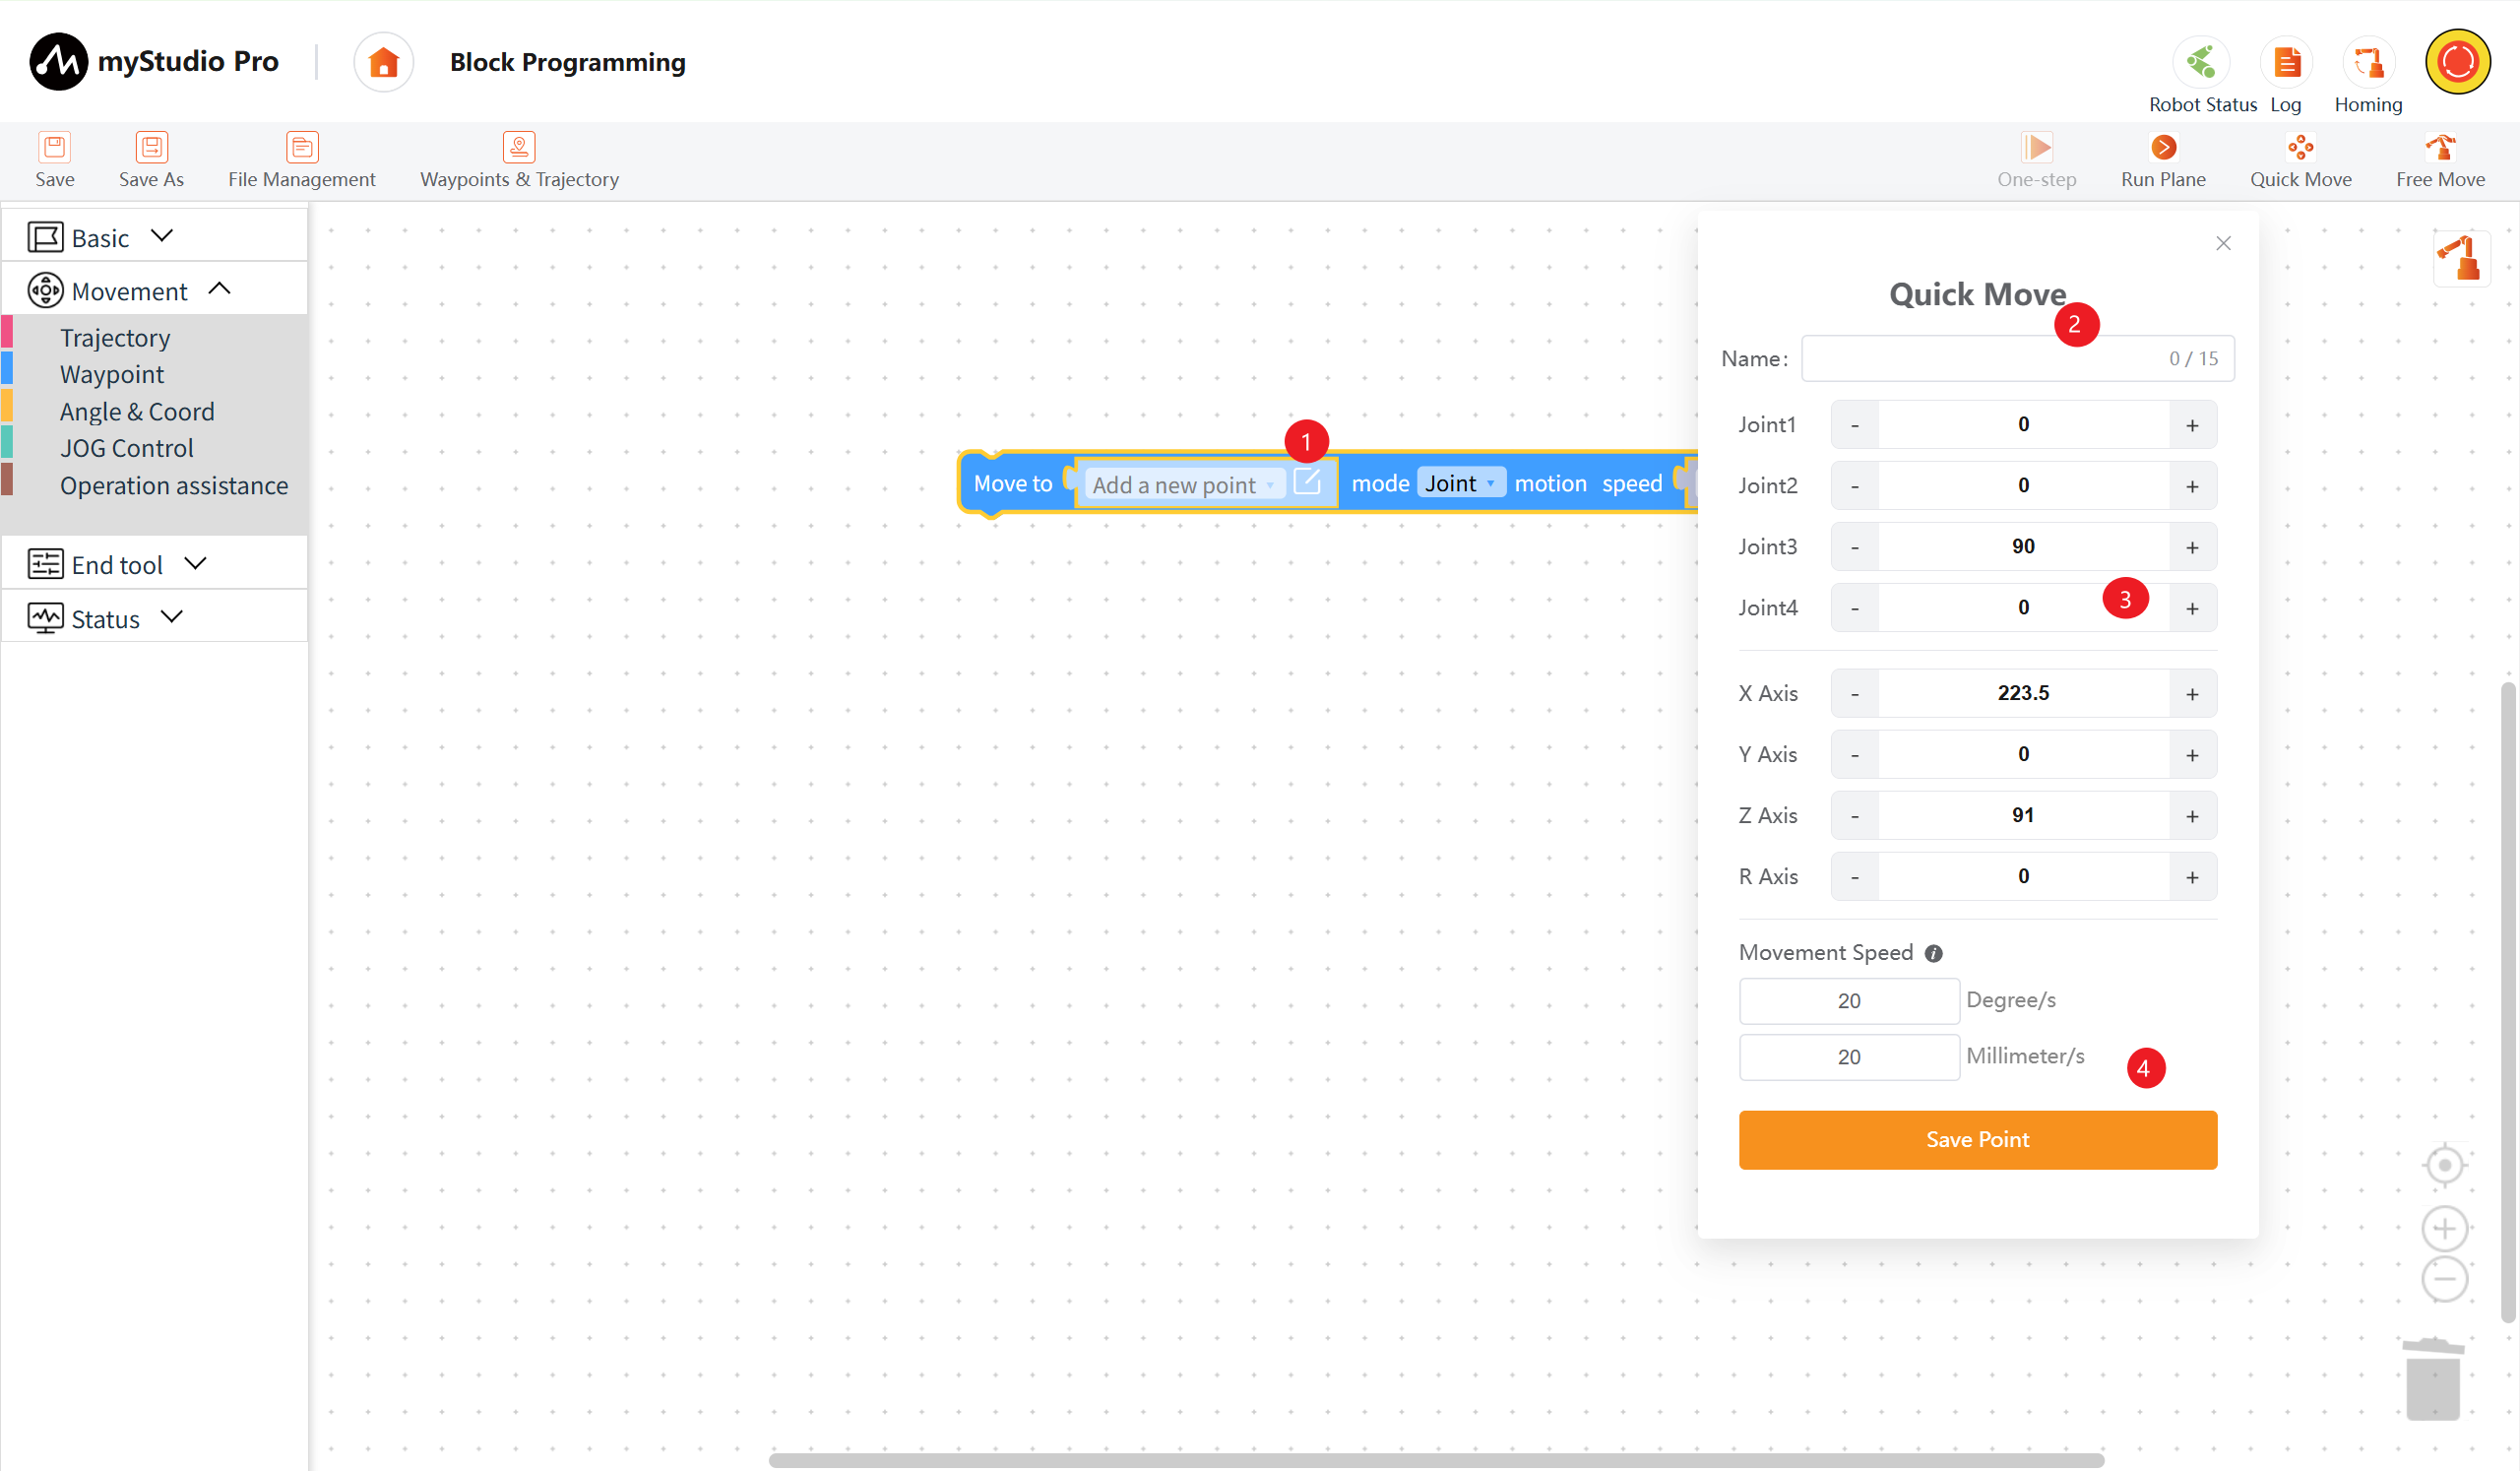
Furthermore, the waypoint blocks can have their motion modes modified: Joint Motion Mode: moves based on the joint information of the current waypoint; Linear Motion Mode: moves based on the coordinate information of the current waypoint.
| Number | Description |
|---|---|
| 1 | Select a waypoint. Clicking the edit icon will open the waypoint editing pop-up. |
| 2 | Enter the waypoint name. |
| 3 | Displays the joint and coordinate data of the robotic arm. Adjust the waypoint data using the left (-) and right (+) buttons. |
| 4 | Click "Save Point" to add or modify waypoint data. |
10 Trajectory
Introduces how to use the track function to control the robotic arm and achieve drag-and-drop teaching.
Function Description: By recording multiple track data (robotic arm joints), quickly control the robotic arm to reach each track point position. Open the track list page, click the "Record trajectory" button, the joints of the robotic arm will relax, manually drag the robotic arm to record the track, click "Stop Recording" and wait for the track to be saved. Once saved, the track recording is complete. Successfully recorded tracks will automatically generate a track type file in the "draft" (For file function related operations, please click here).
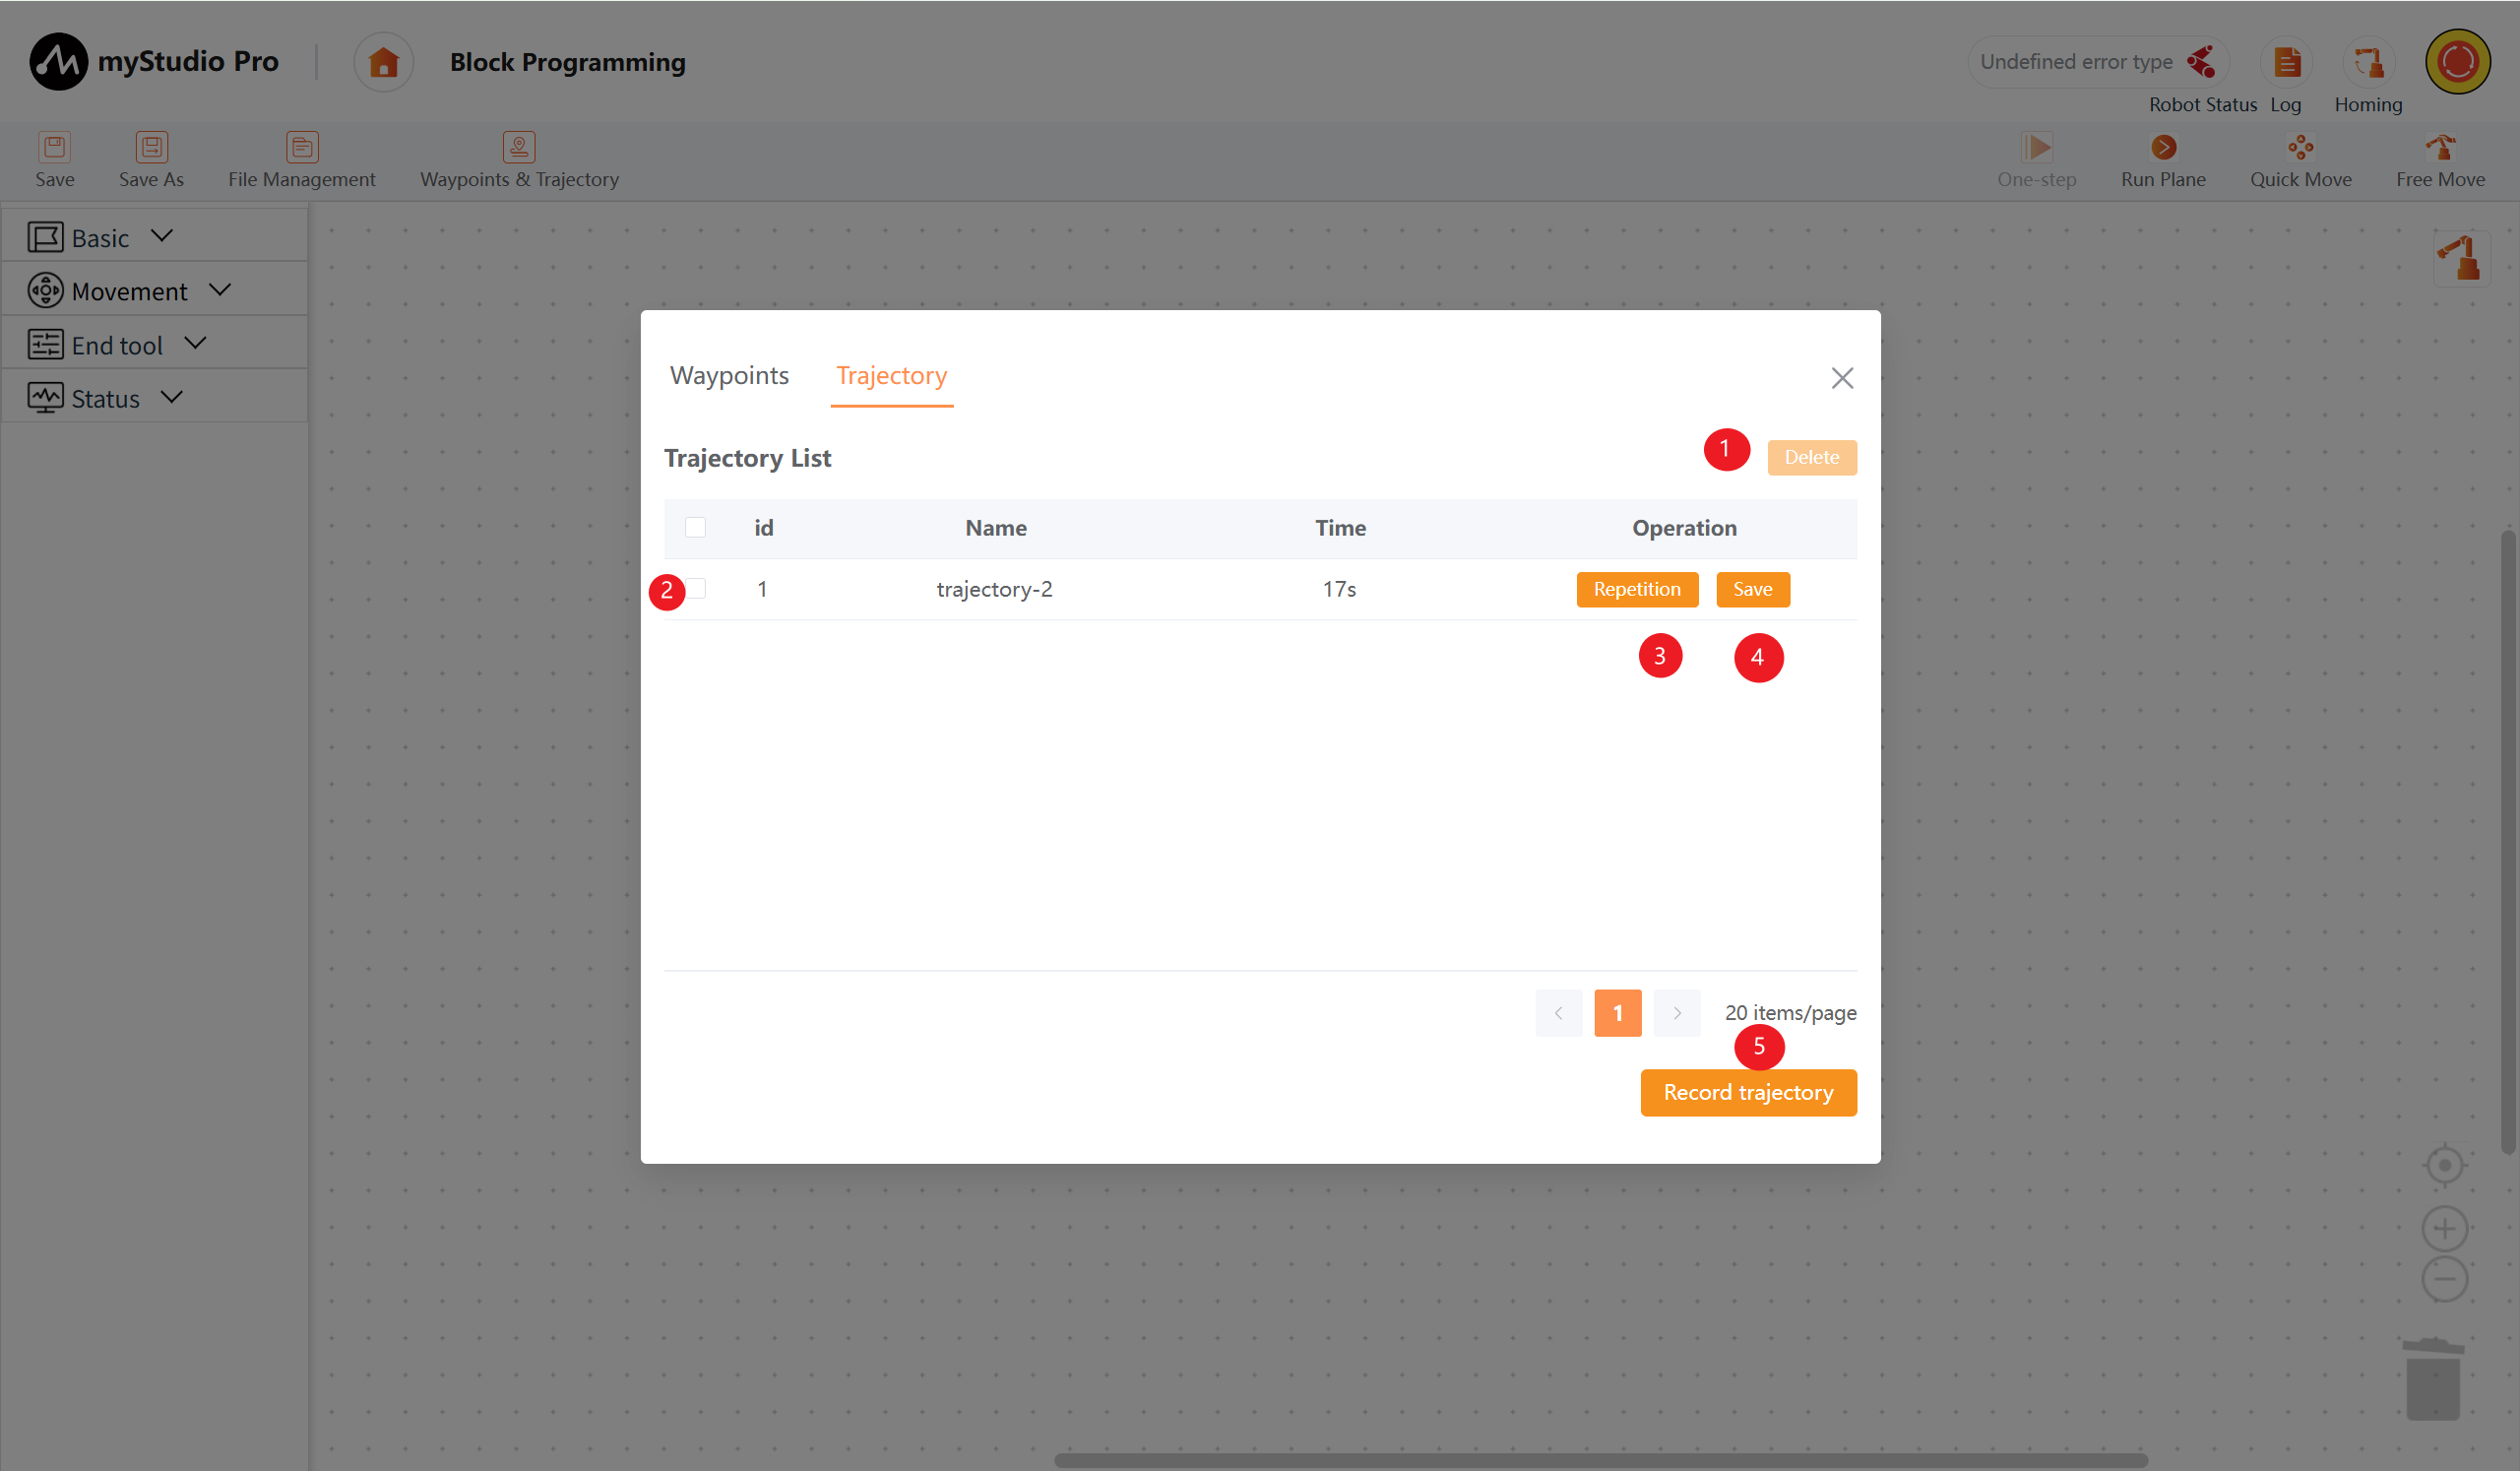
| Number | Description |
|---|---|
| 1 | First, select the trajectory to be deleted. At least one data point must be checked for the button to be available. Clicking "Delete" will delete all checked trajectories. |
| 2 | Select columns in the list data. Function 1 requires this function. |
| 3 | Clicking the "Reprtition" button allows you to reproduce the trajectory. |
| 4 | Clicking the "Save" button copies the current trajectory to the test file workspace. |
| 5 | Clicking the "Record trajectory" button will prompt the robotic arm to confirm the recording operation. After confirmation, recording will begin (maximum 120 seconds; recording will automatically stop after this time). |
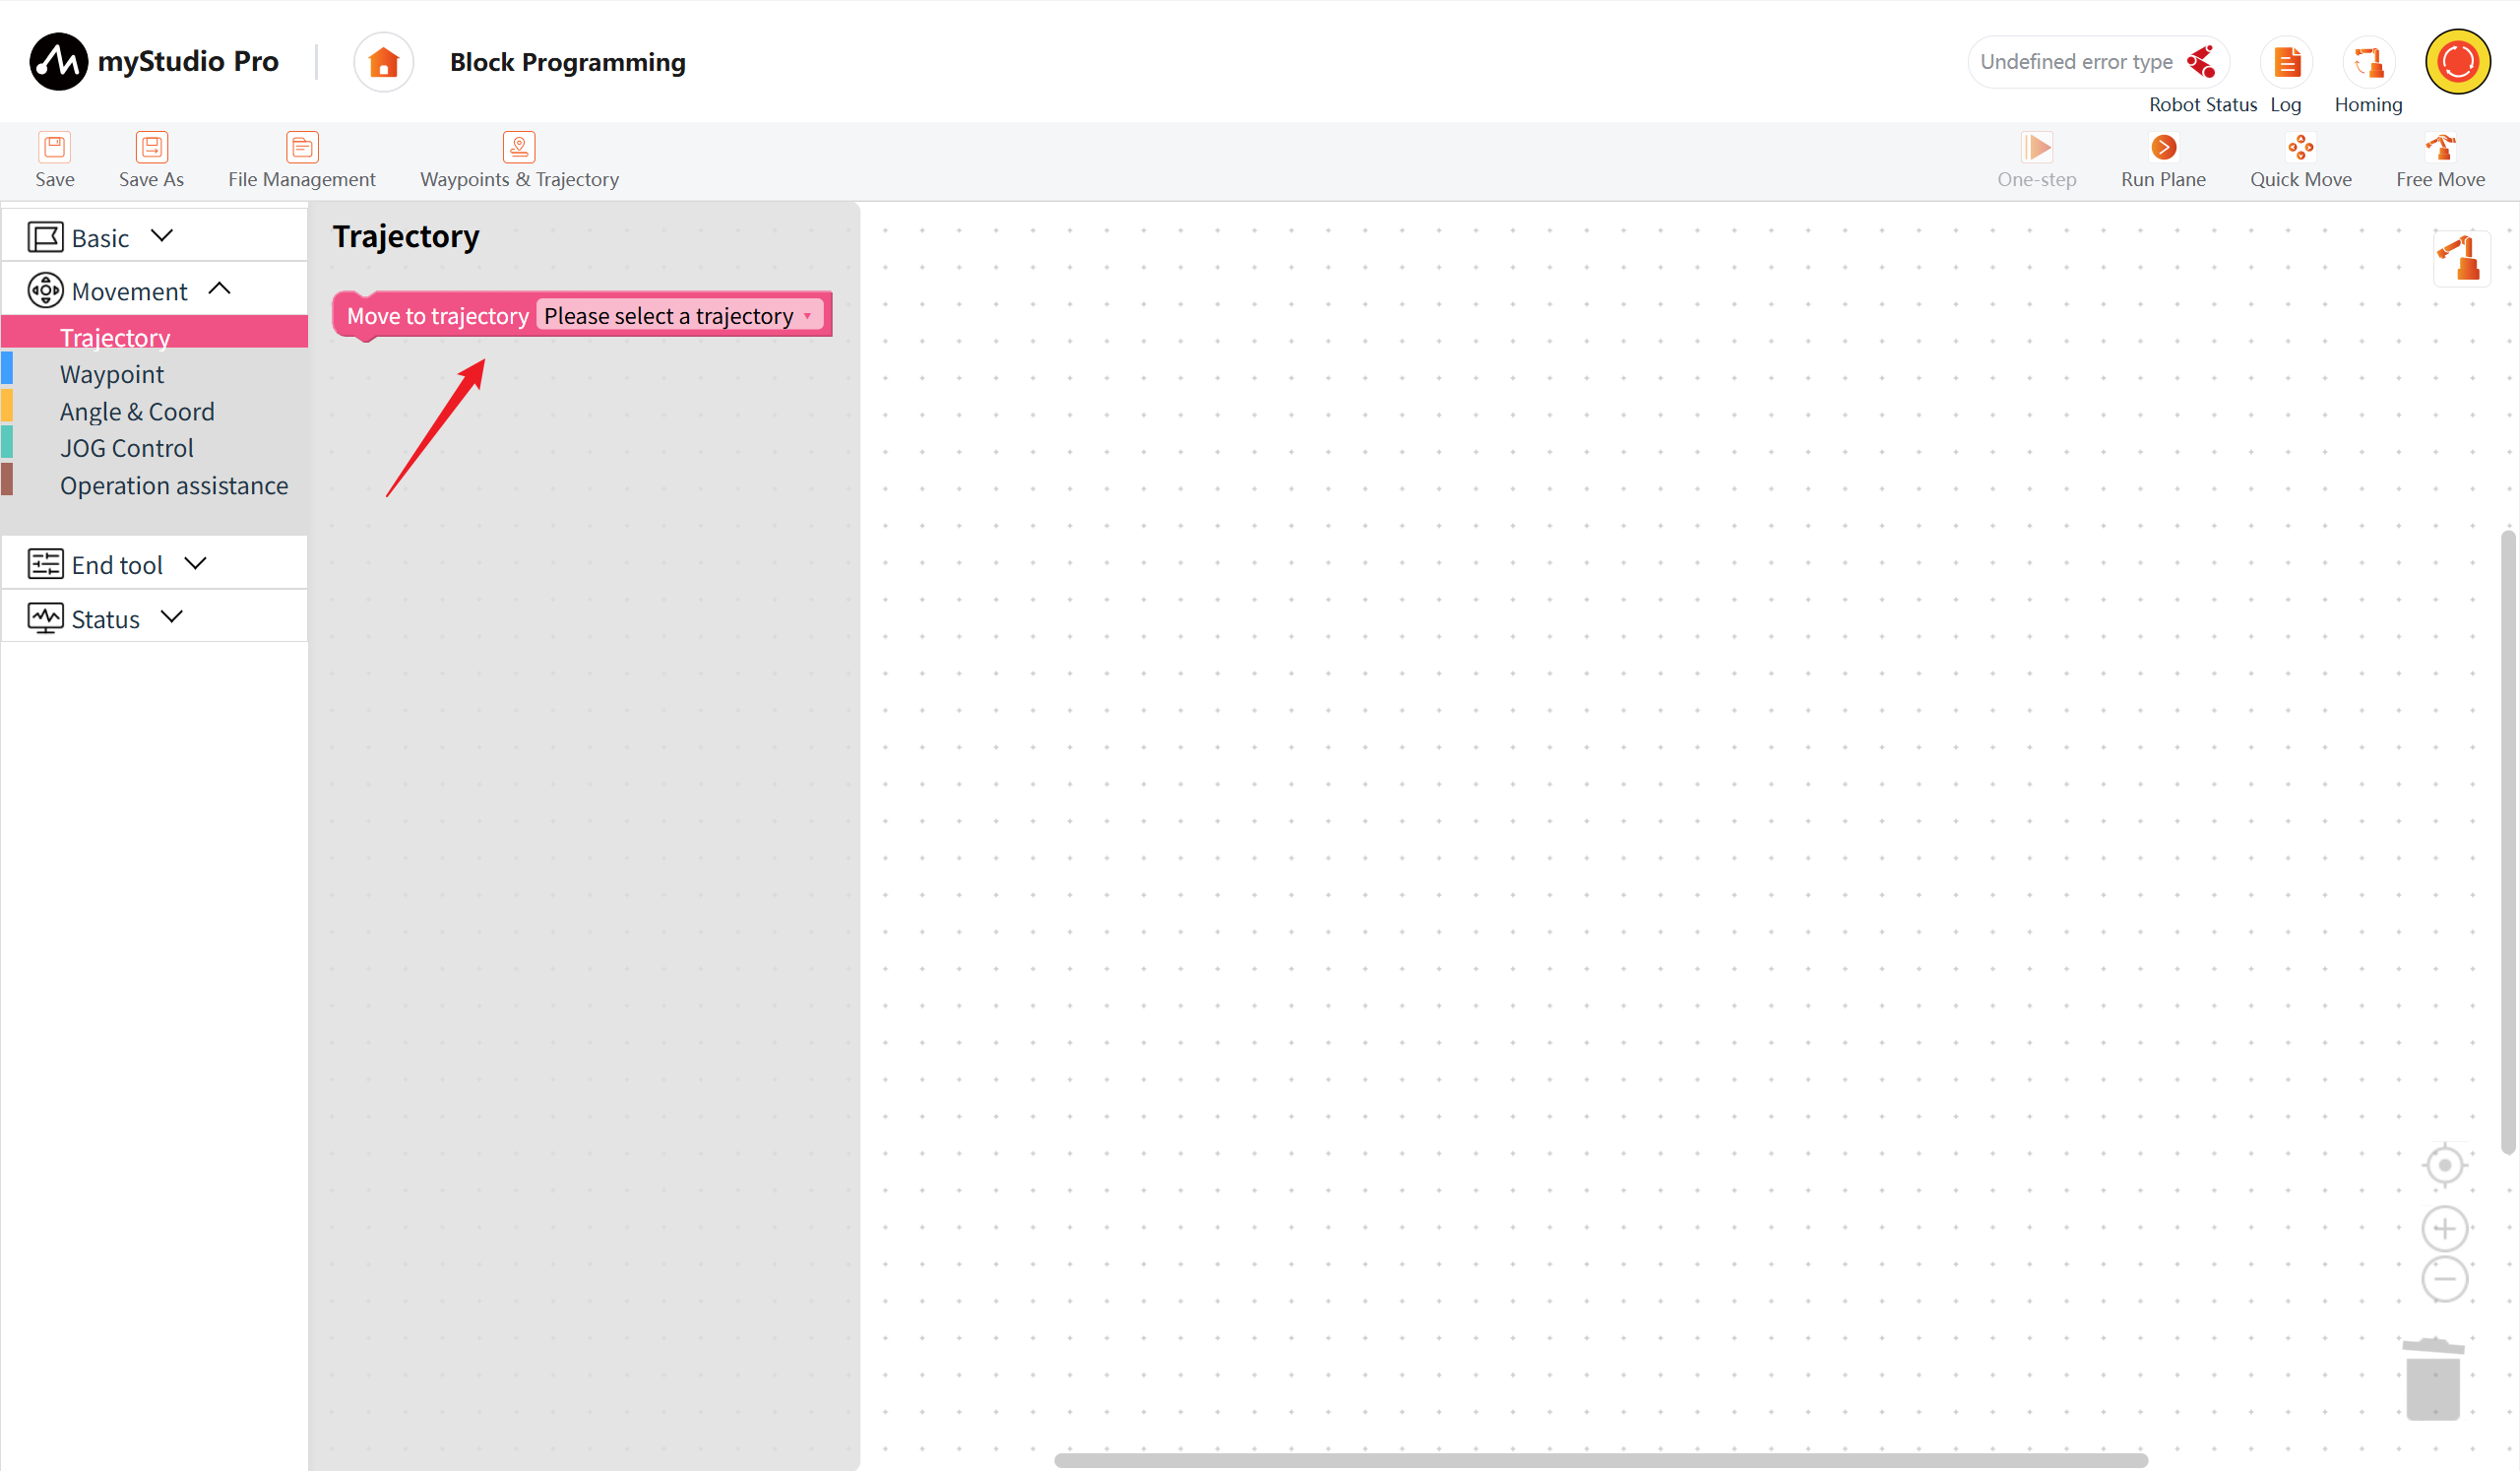
In Block Programming, select the trajectory block and add it to the program programming area. In the workspace, click the drop-down menu of the trajectory block to select the data from the current trajectory list page.
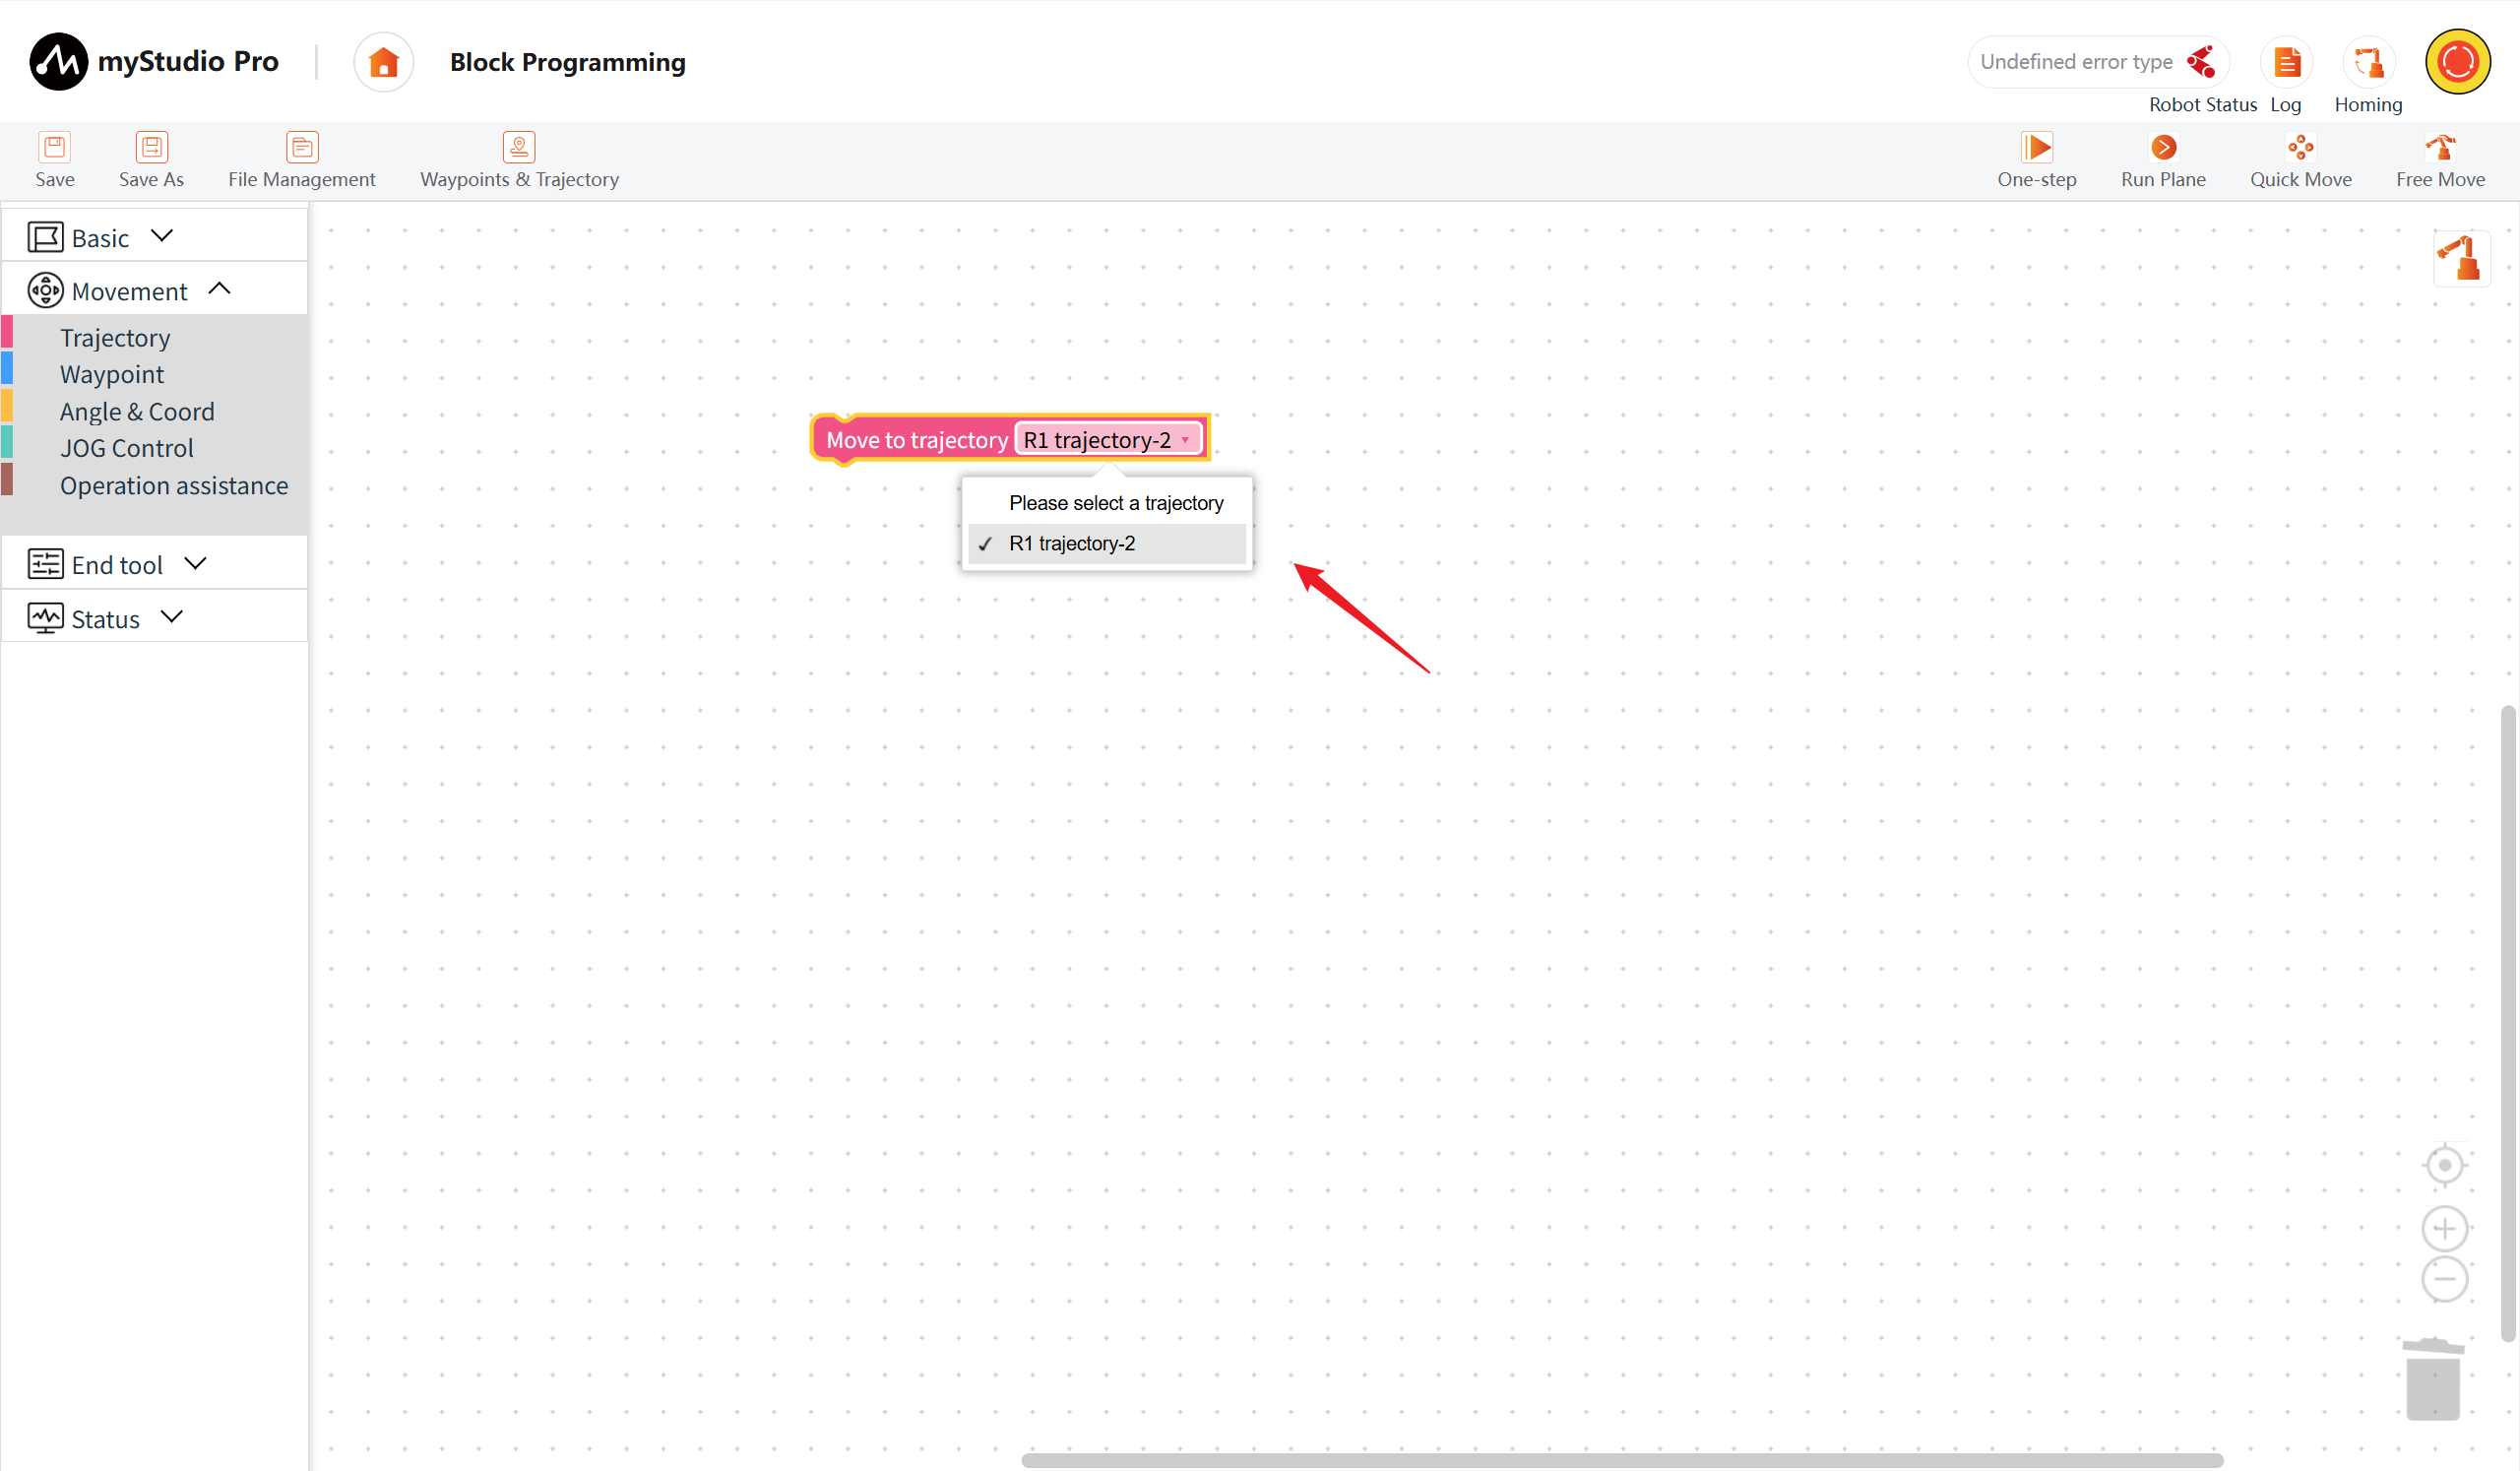
After selection, open the Run Panel and click Run All to reproduce the trajectory using the block-by-block method.
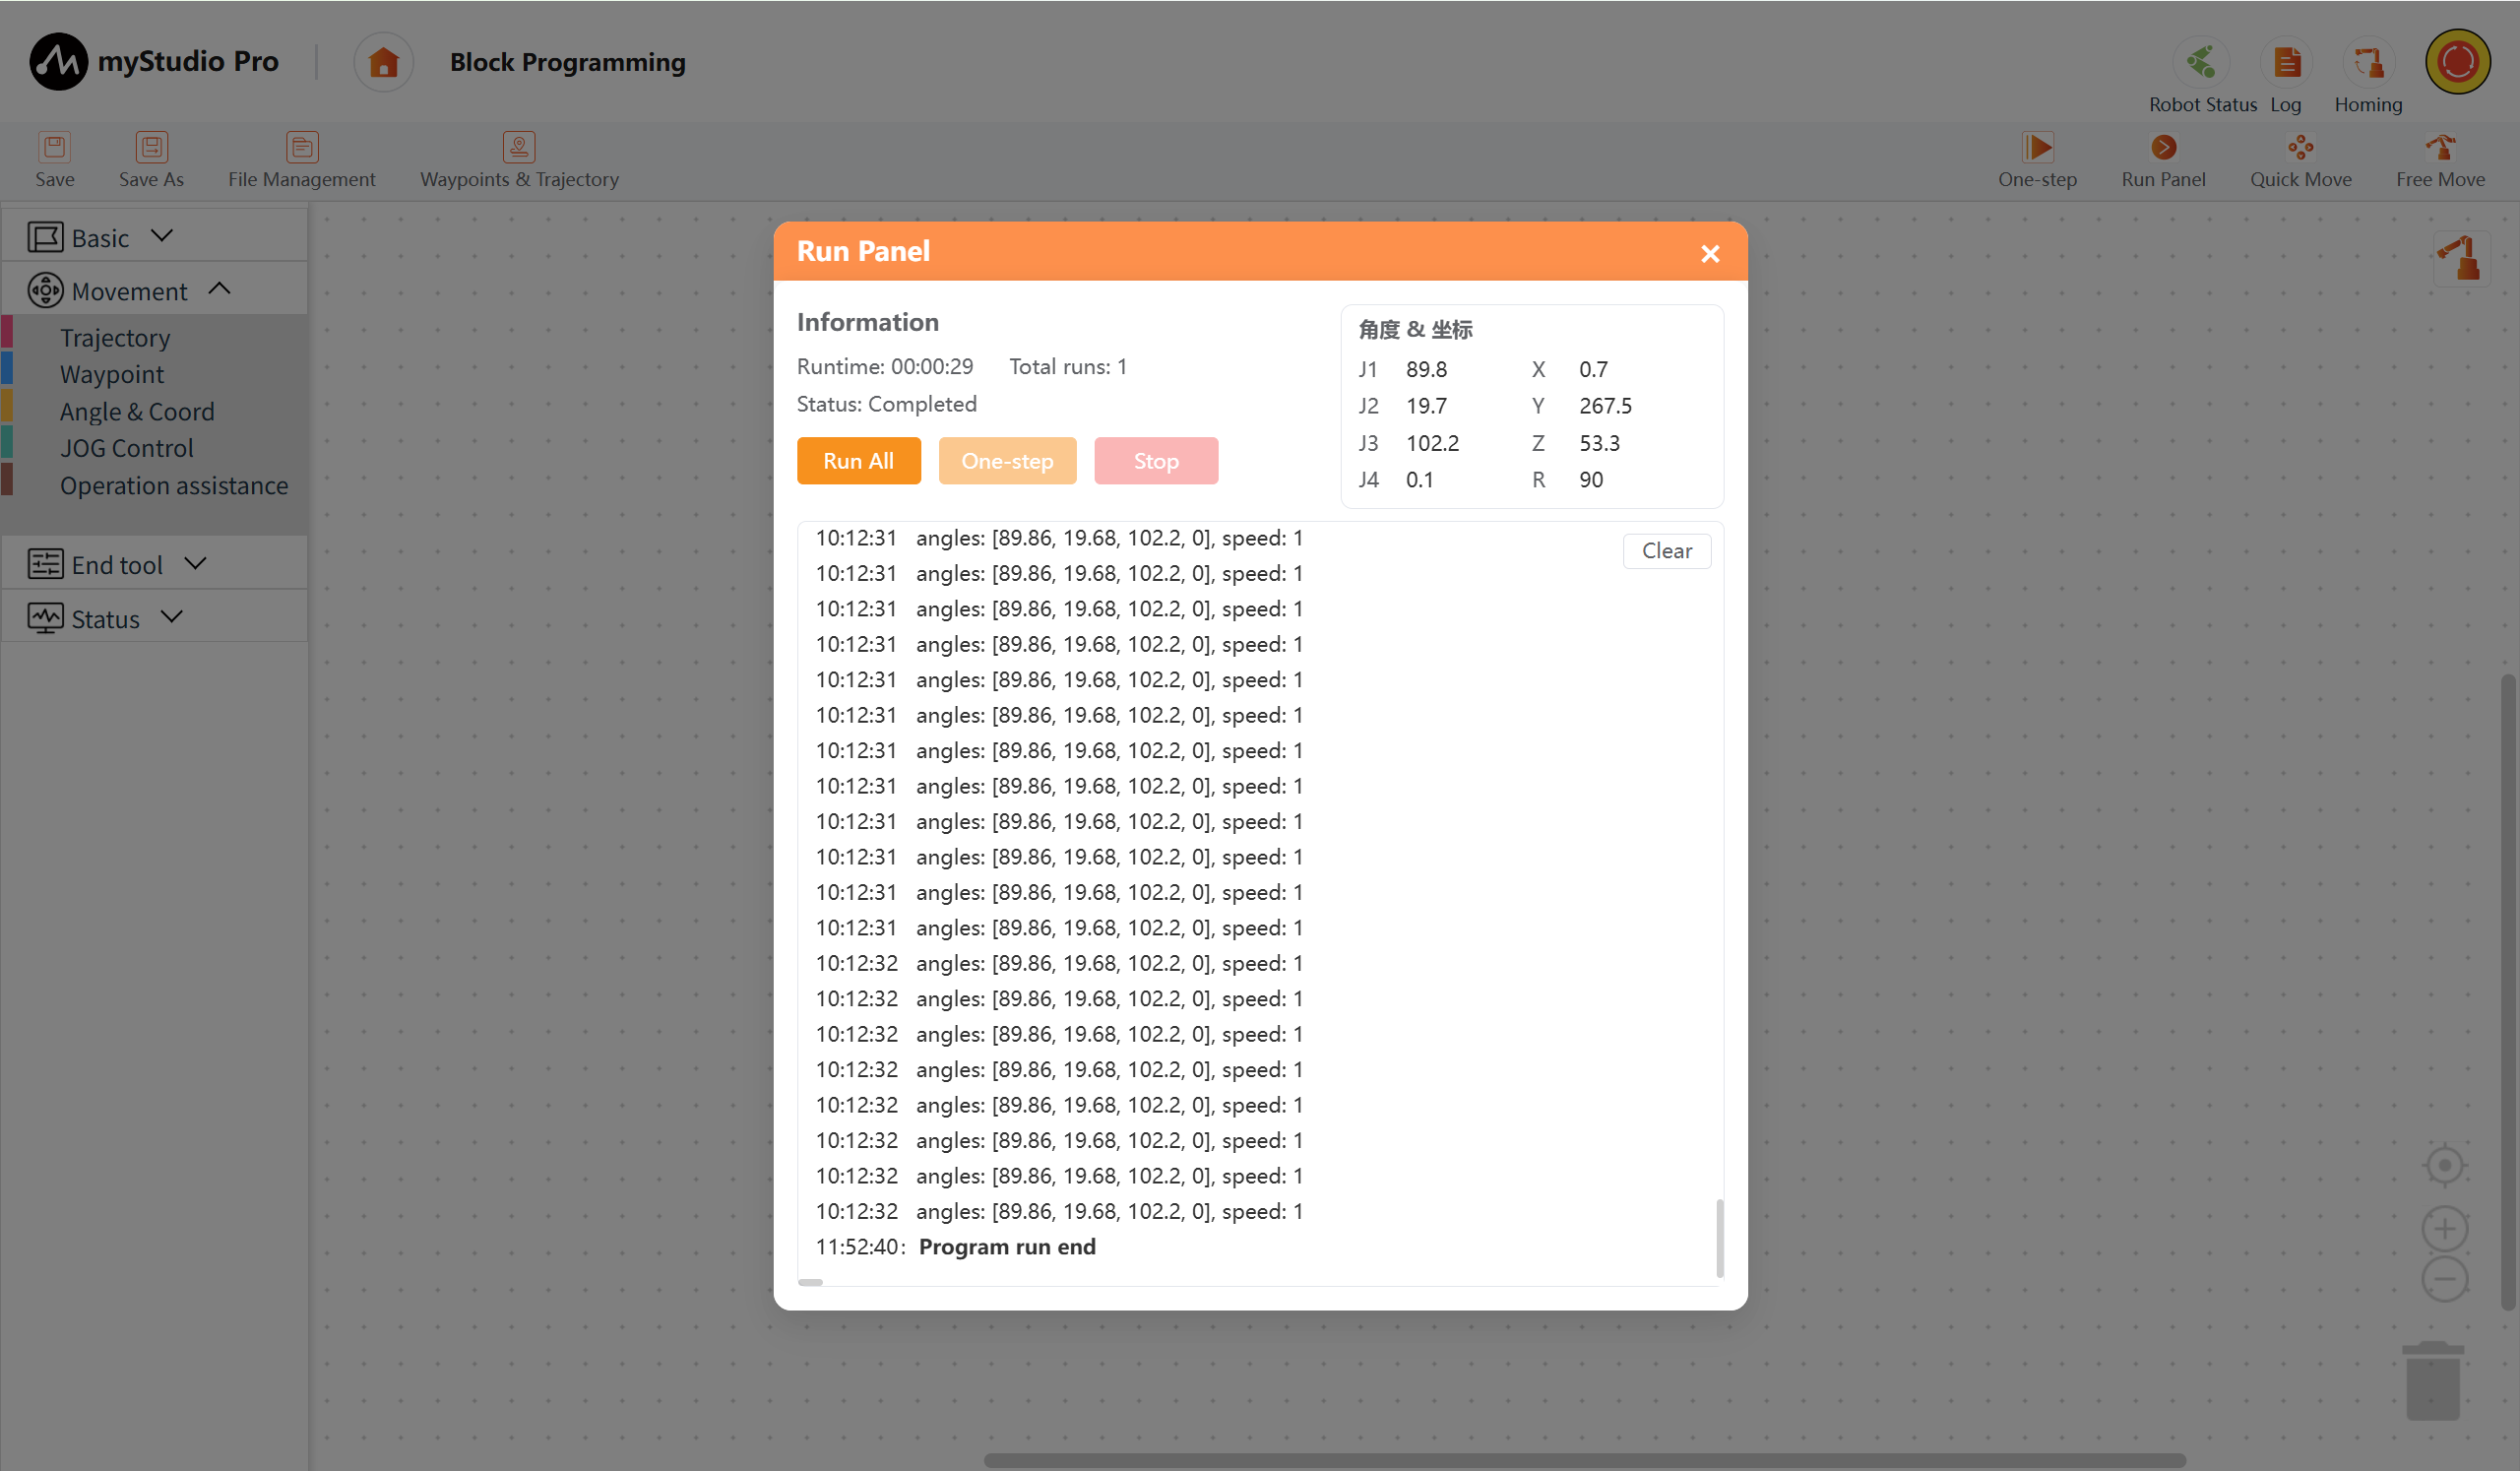
After the program runs, the trajectory is reproduced. Of course, you can also use other blocks for more complex programming.
11 File Management
Introduces how to use the file management module.
Function Description: The file management module allows for easy saving, importing, and exporting of files from different file spaces. There are two ways to open the file list: Open File from the Homepage - or Open from the file operation menu on the myBlockly page. This will open the file management list and load your saved file content, including workspaces, waypoints, and track files (for information on how to save workspaces, click here).
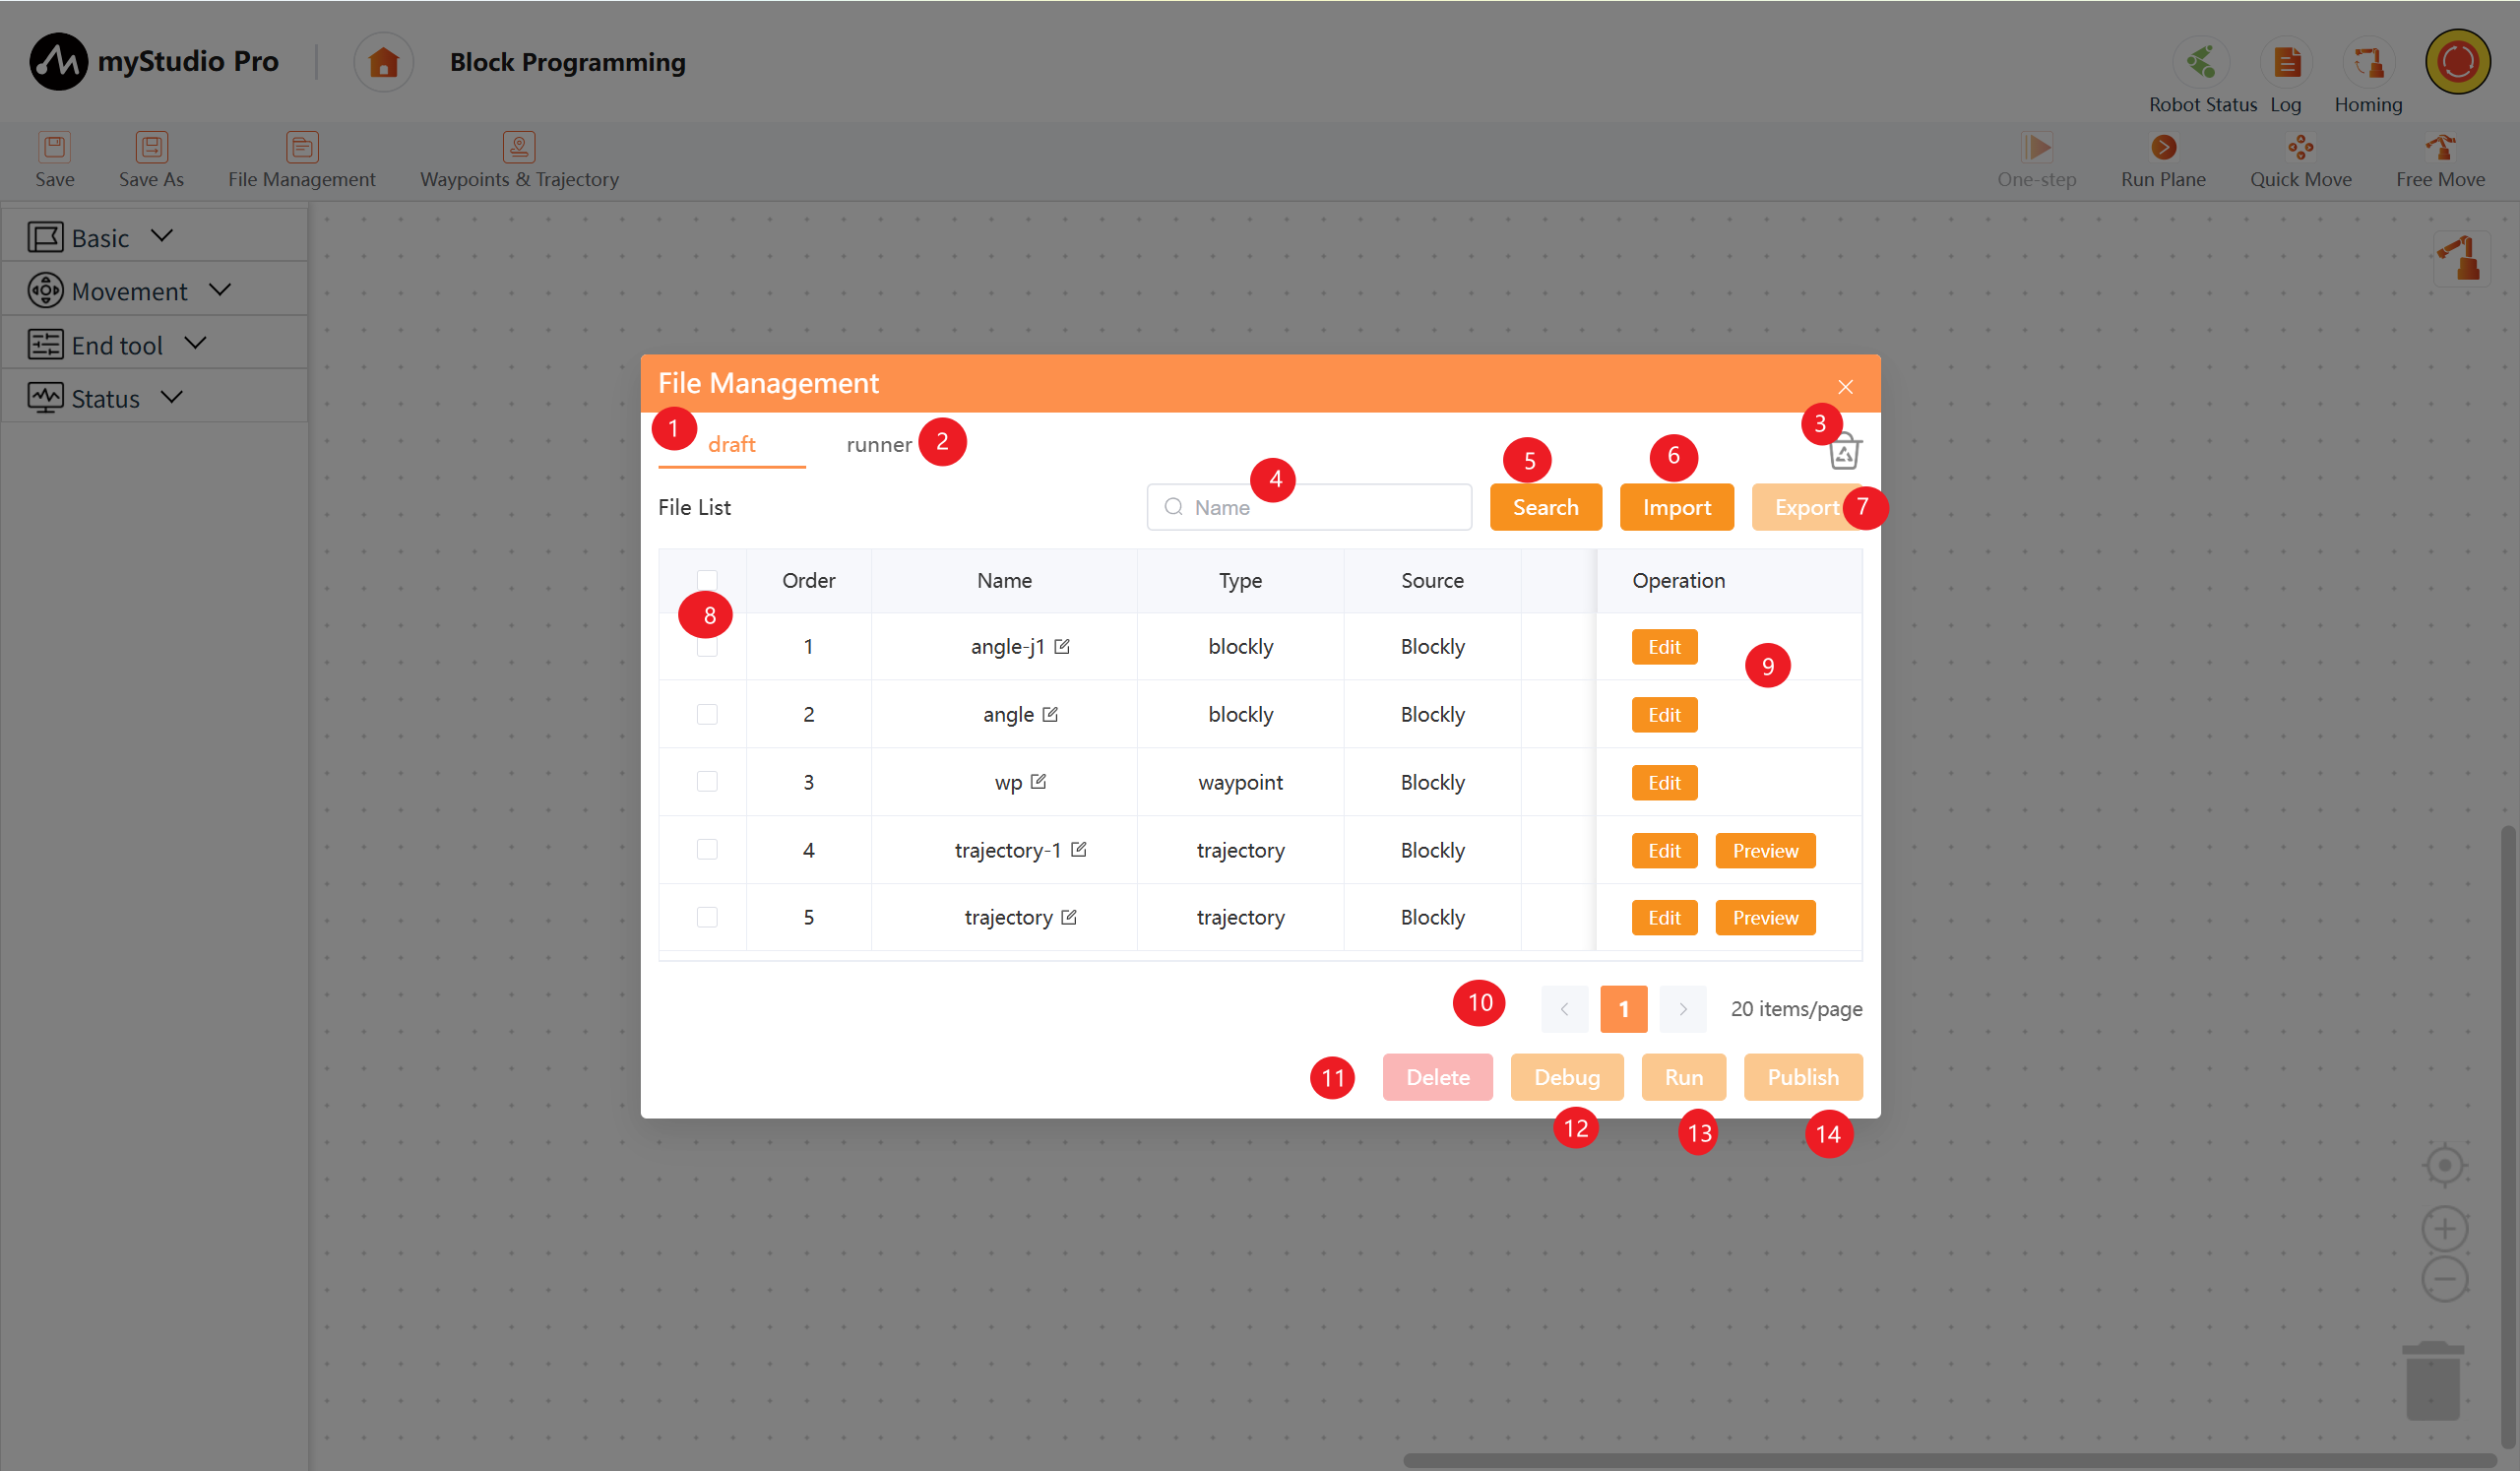
| Number | Description |
|---|---|
| 1 | draft: Switching to this option will paginate and display all draft files. |
| 2 | runner: Switching to this option will paginate and display all runner files. |
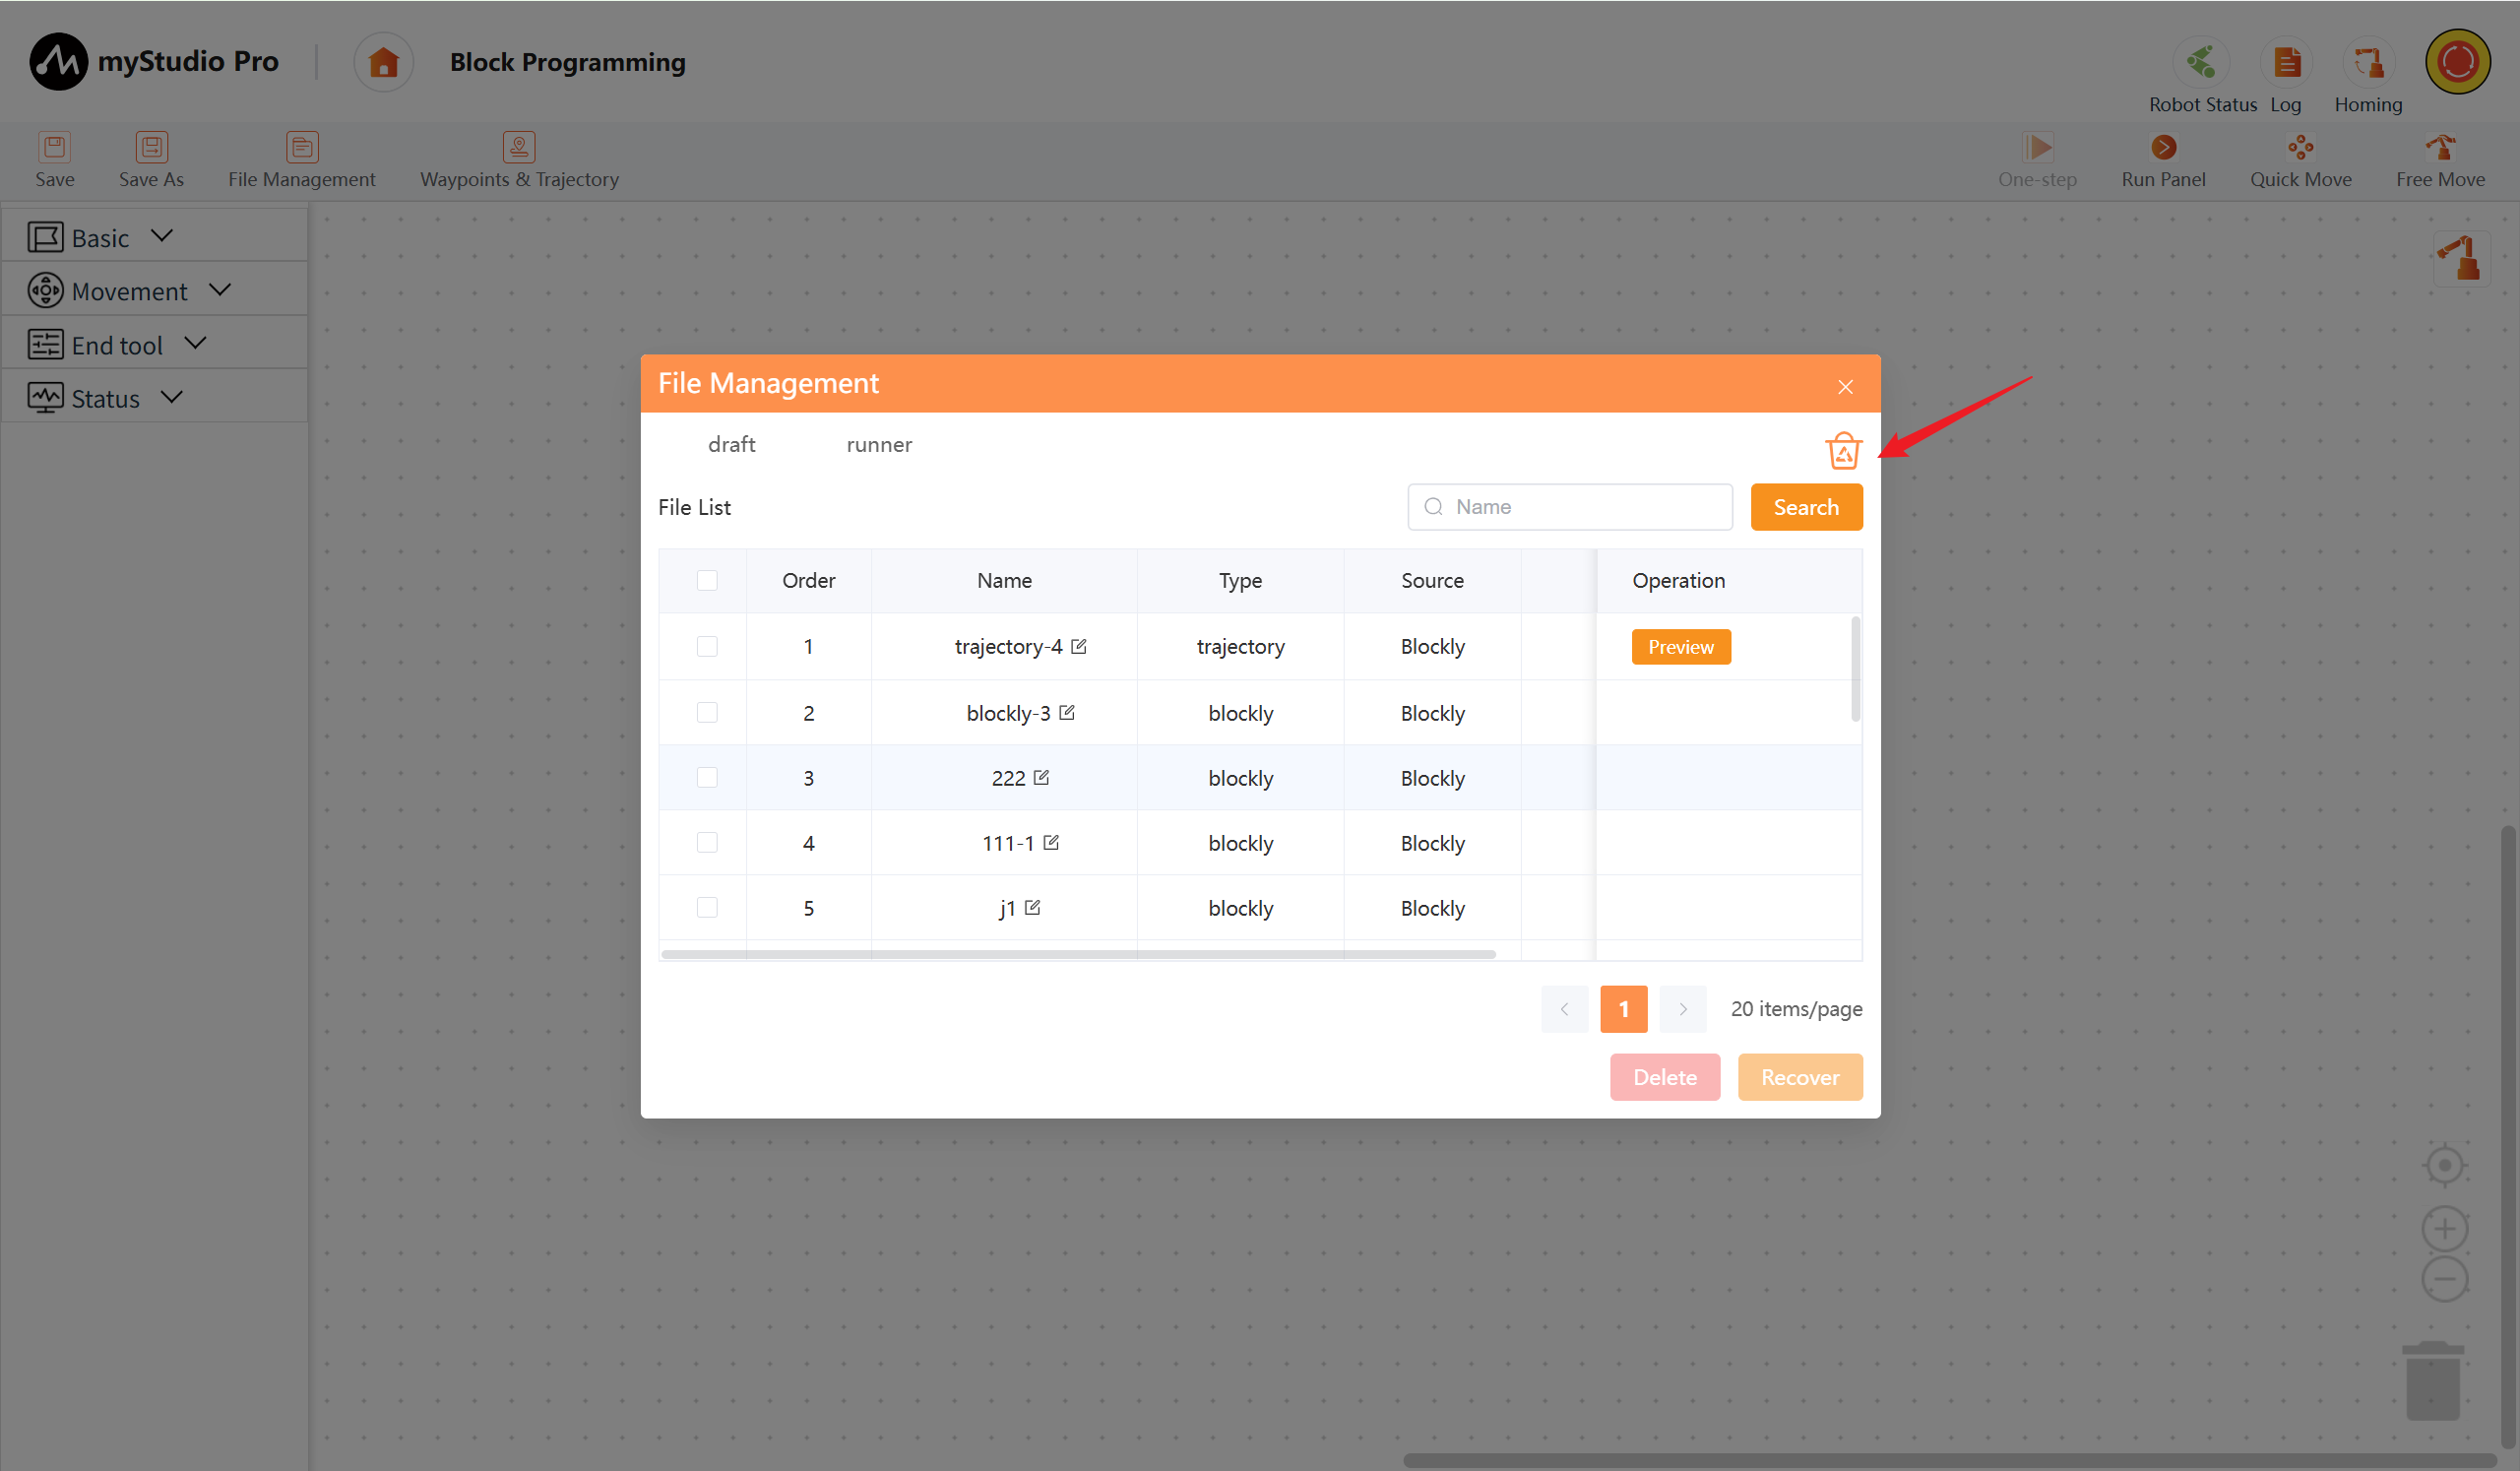
| 3 | recycle: Switching to this option will paginate and display all recycle bin files (files deleted from the draft/runner space will go to the recycle bin). |
| 4 | Search condition input box. Currently, only fuzzy search by filename is supported. You can press Enter to search directly or click the function 5 button. |
| 5 | Search button. Clicking this button allows you to perform a paginated search based on the input box content. |
| 6 | Import button. Clicking this button allows you to import files from the current device. |
| 7 | Export button. Disabled by default, enabled when a single file is selected. Clicking this button allows you to export the selected file. |
| 8 | List data selection column. Functions 7 and 11-14 require this function. |
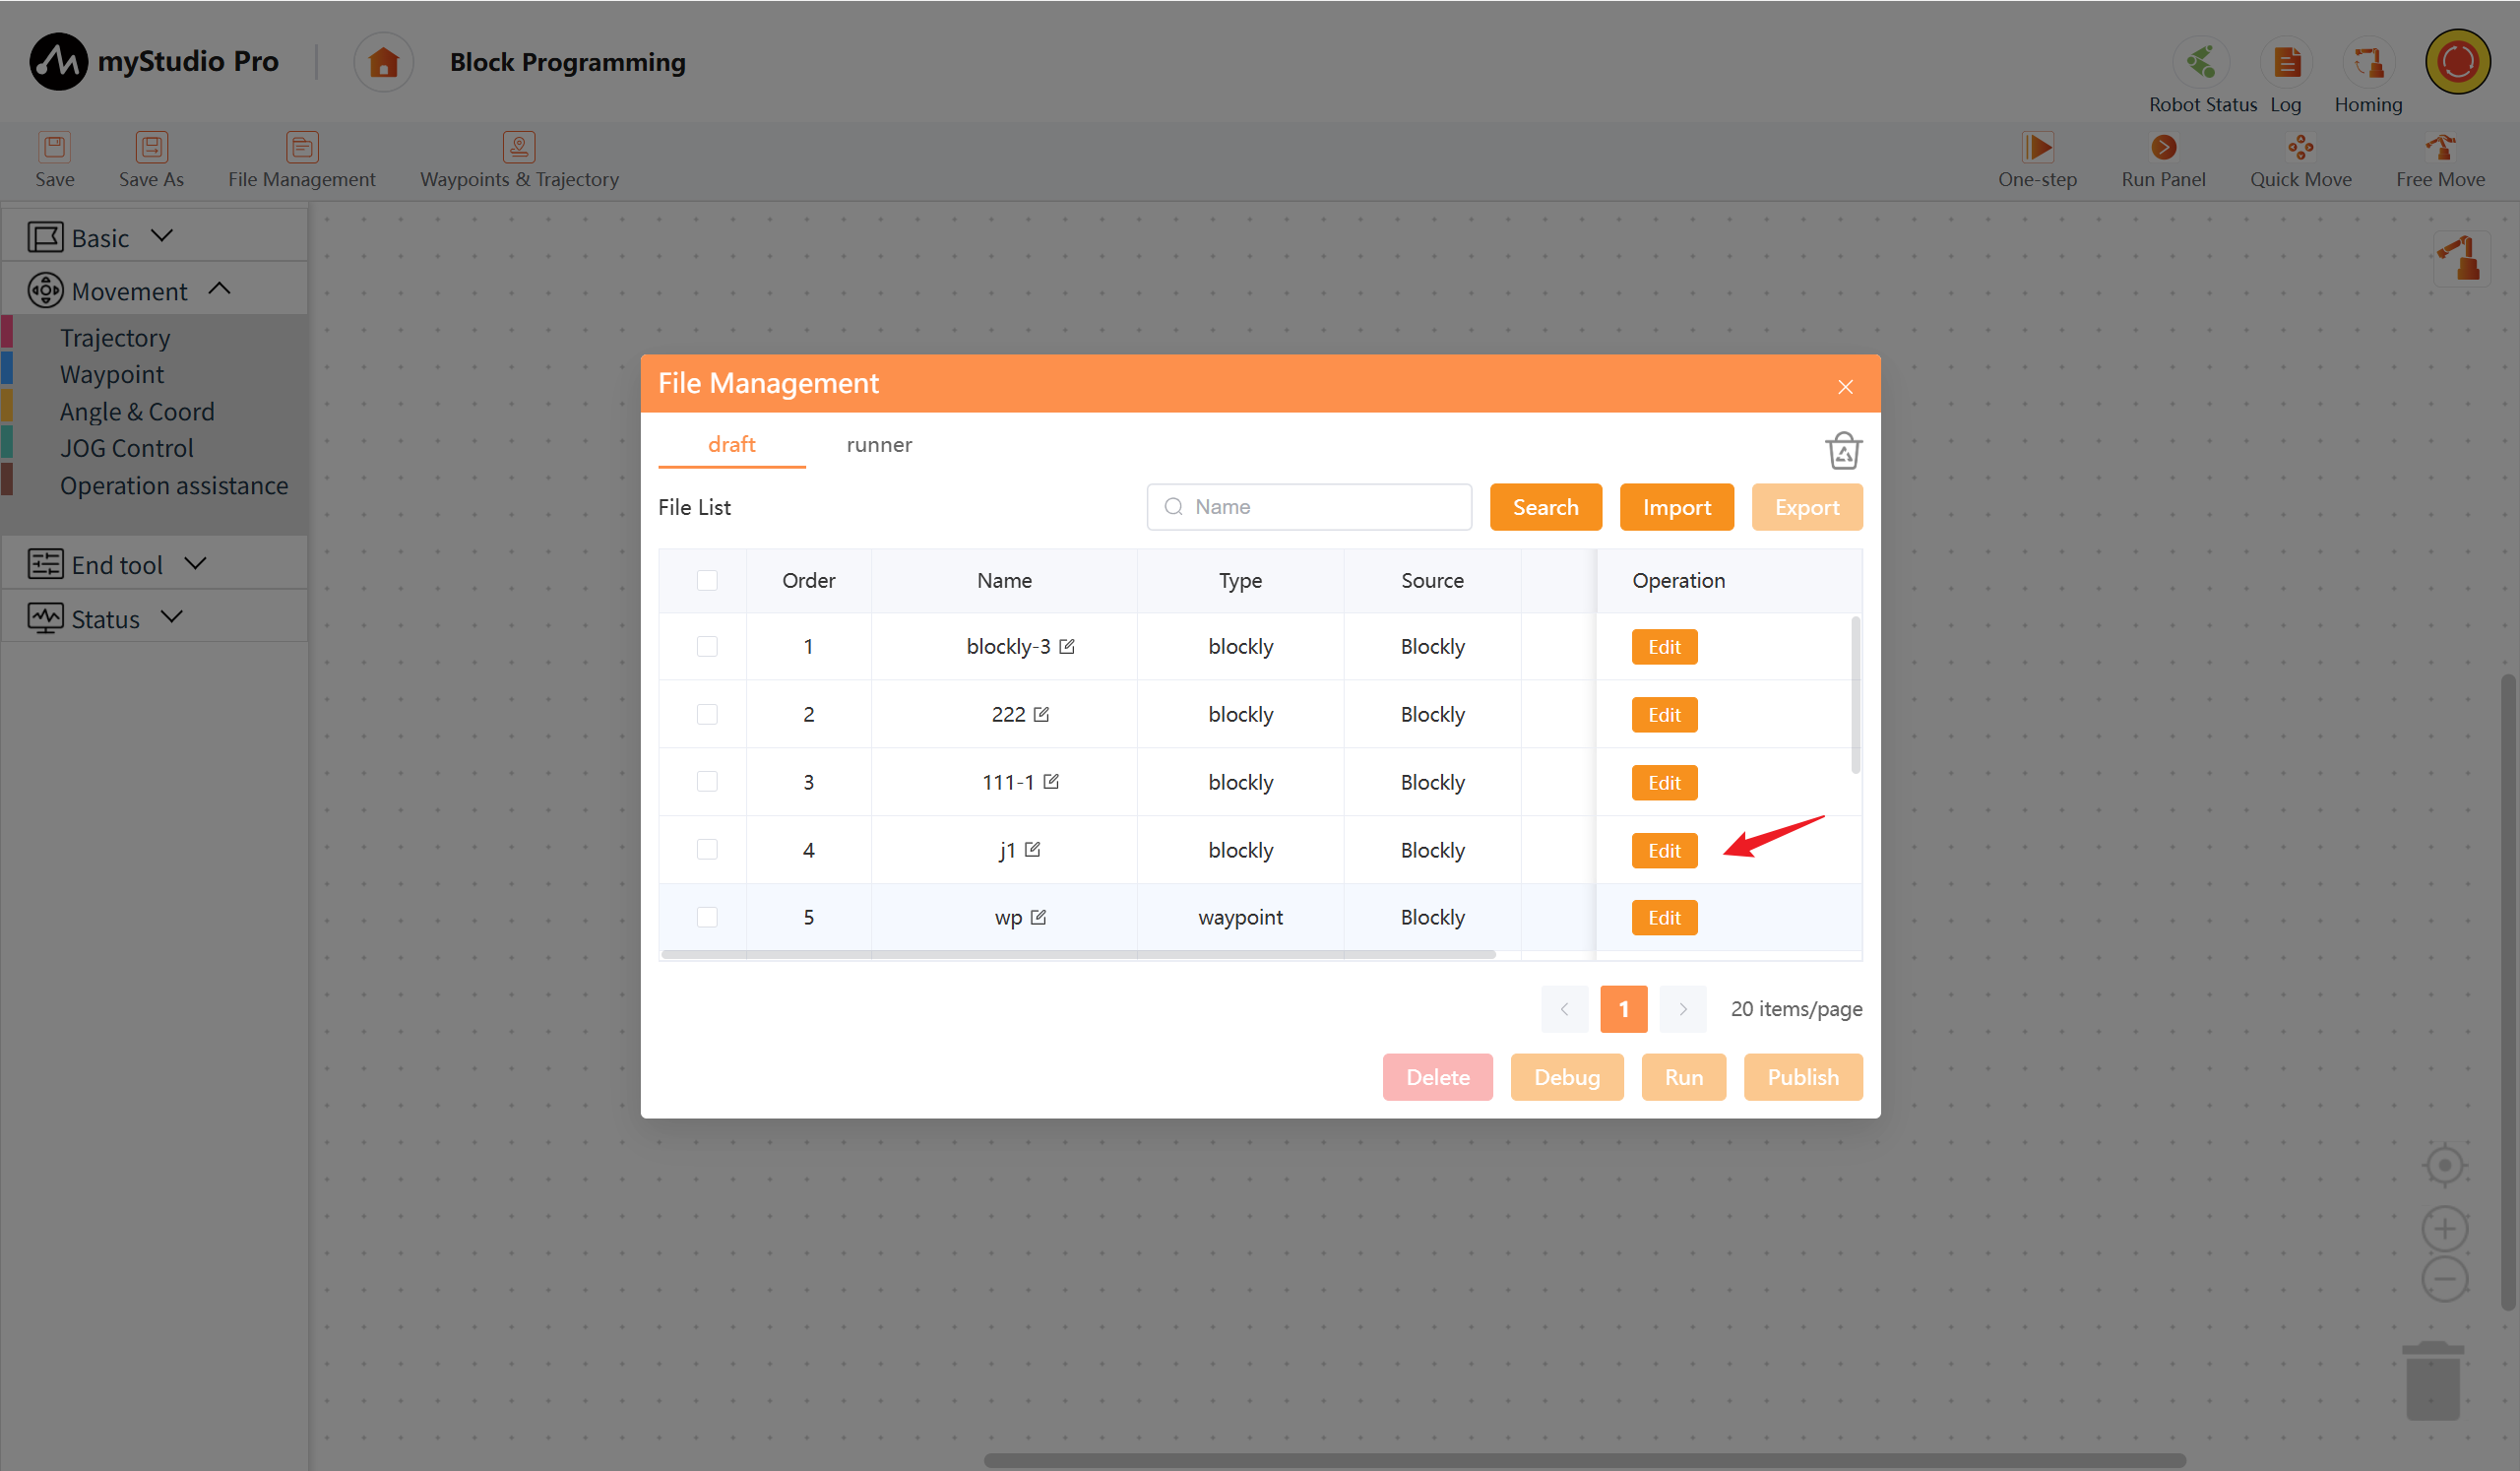
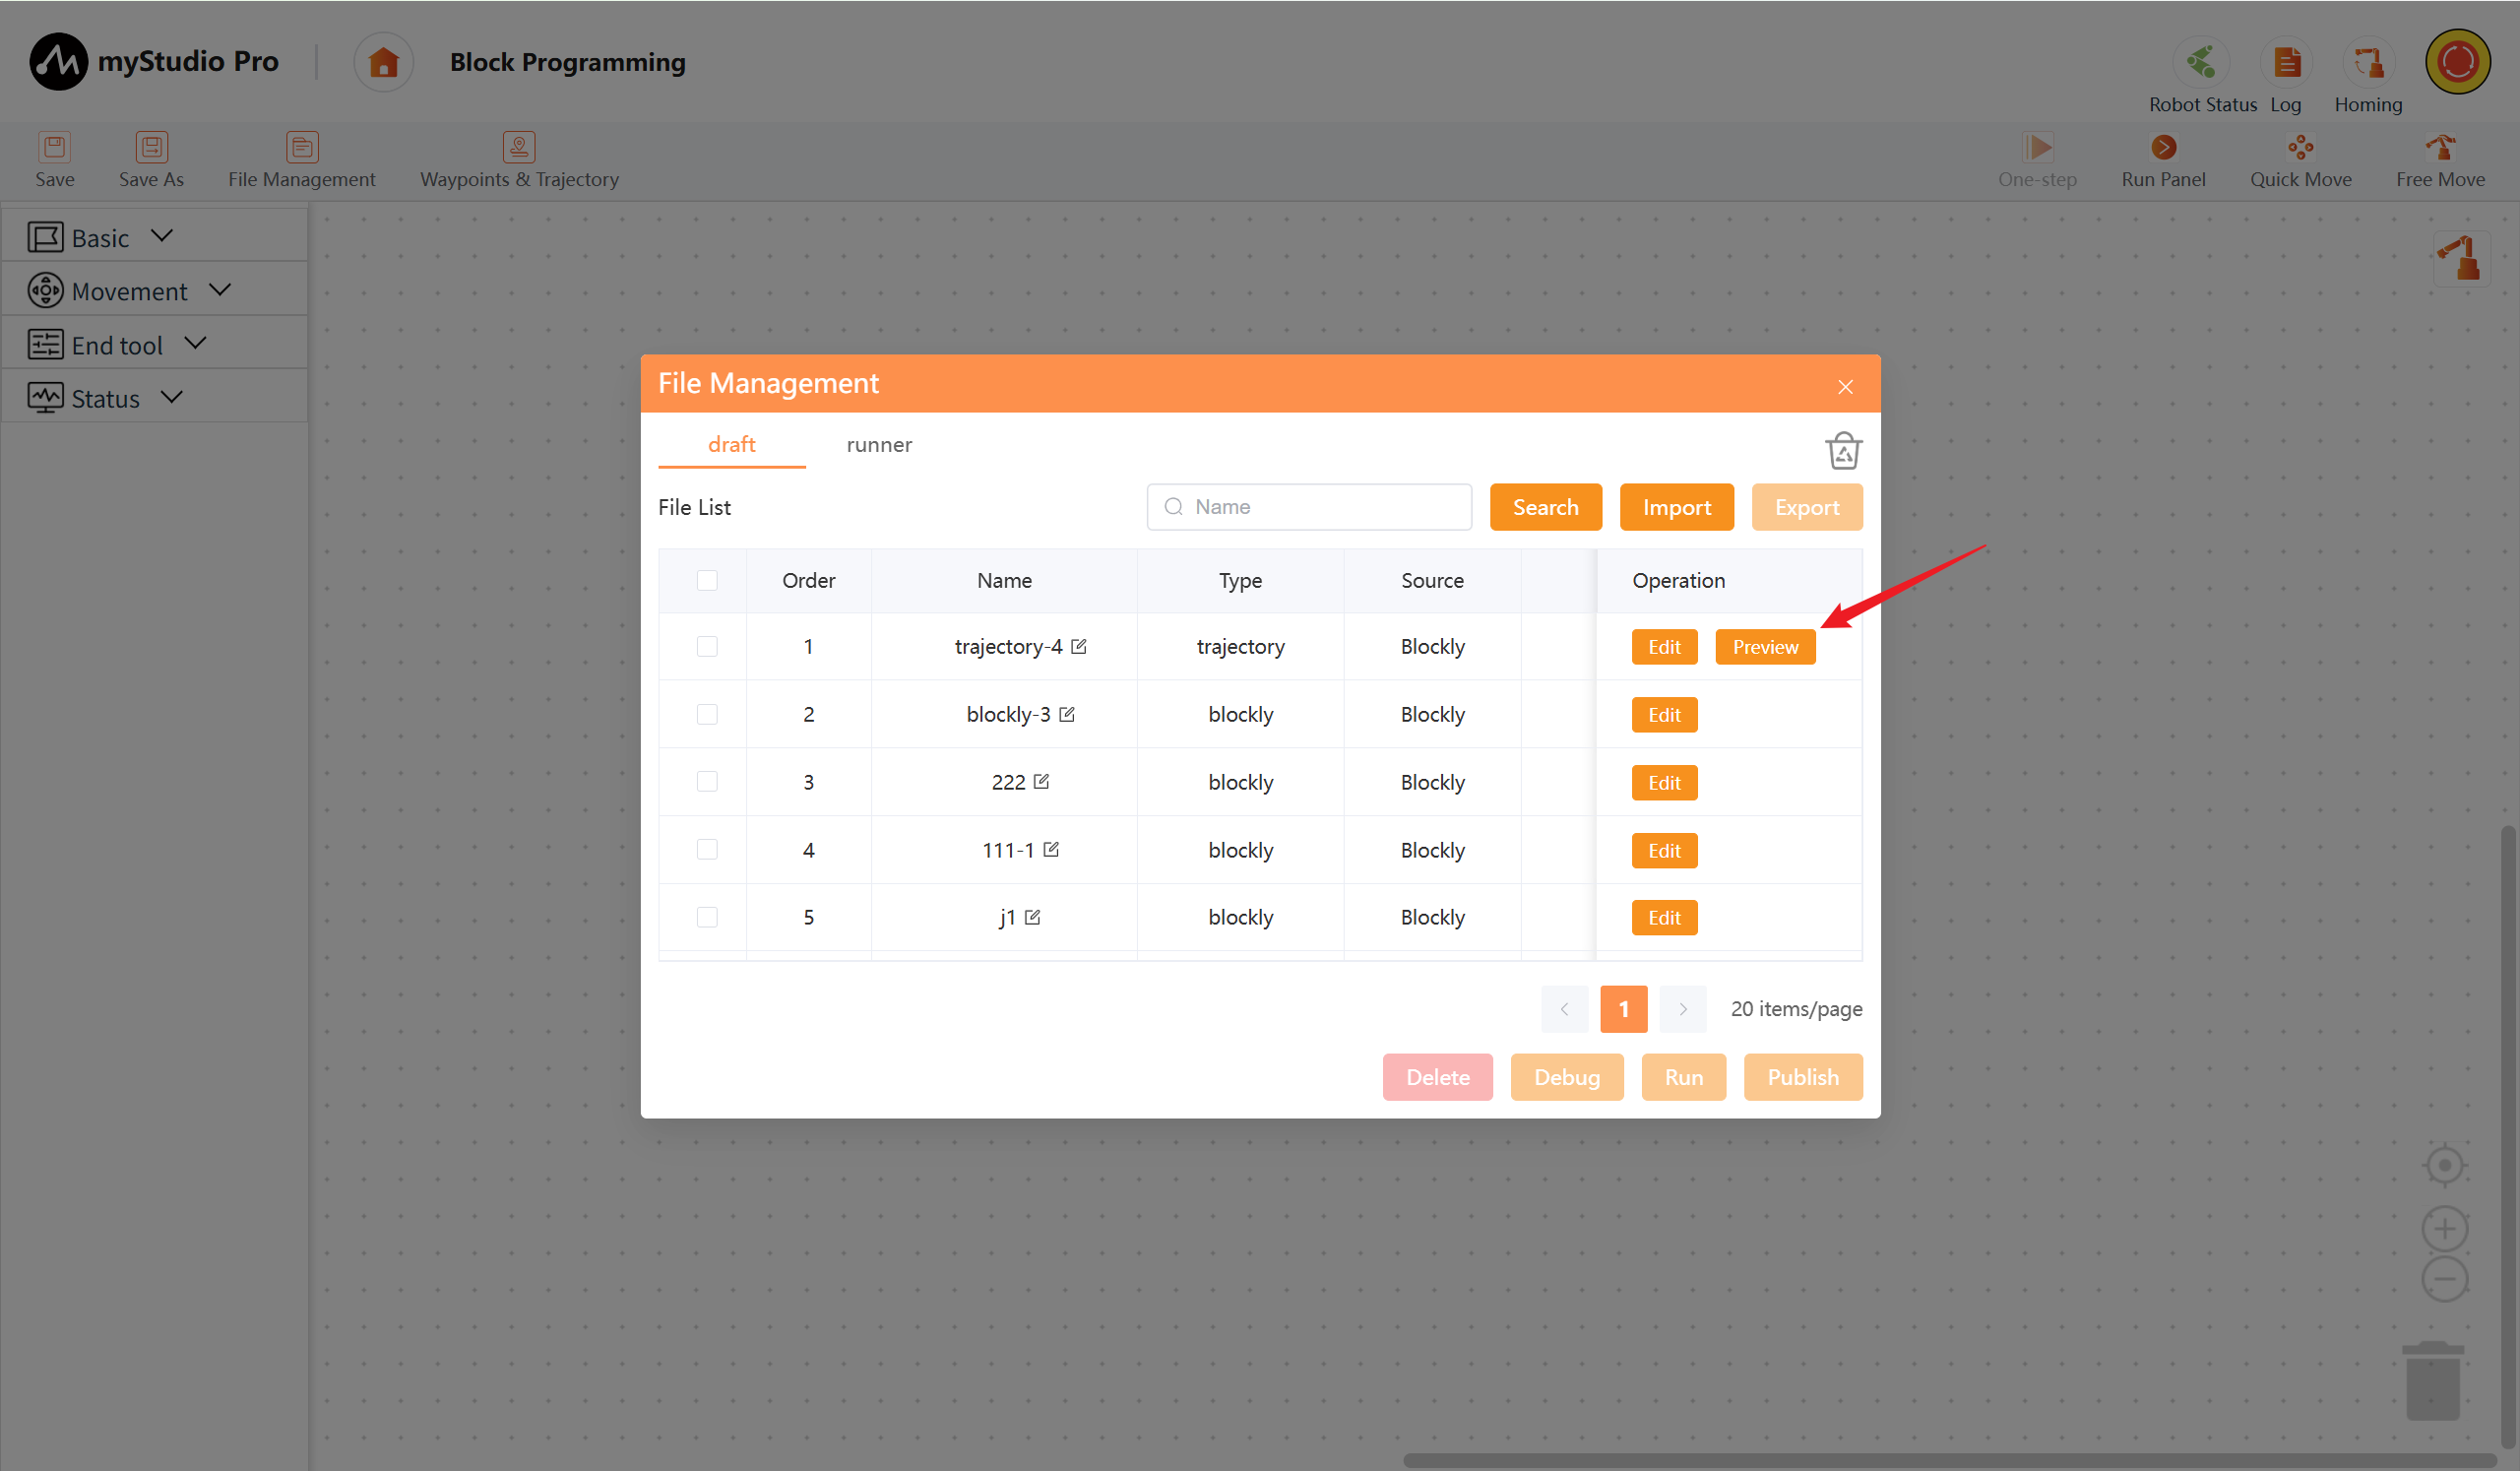
| 9 | Single file operation buttons, including the following function buttons: Edit - Loads the file content into the workspace; Preview - Only applicable to trajectory files; 3D models simulate trajectory points; |
| 10 | Pagination button: Enables pagination when the current file space exceeds the specified limit. |
11 | Batch operation button: Delete - deletes selected files to the recycle bin.|
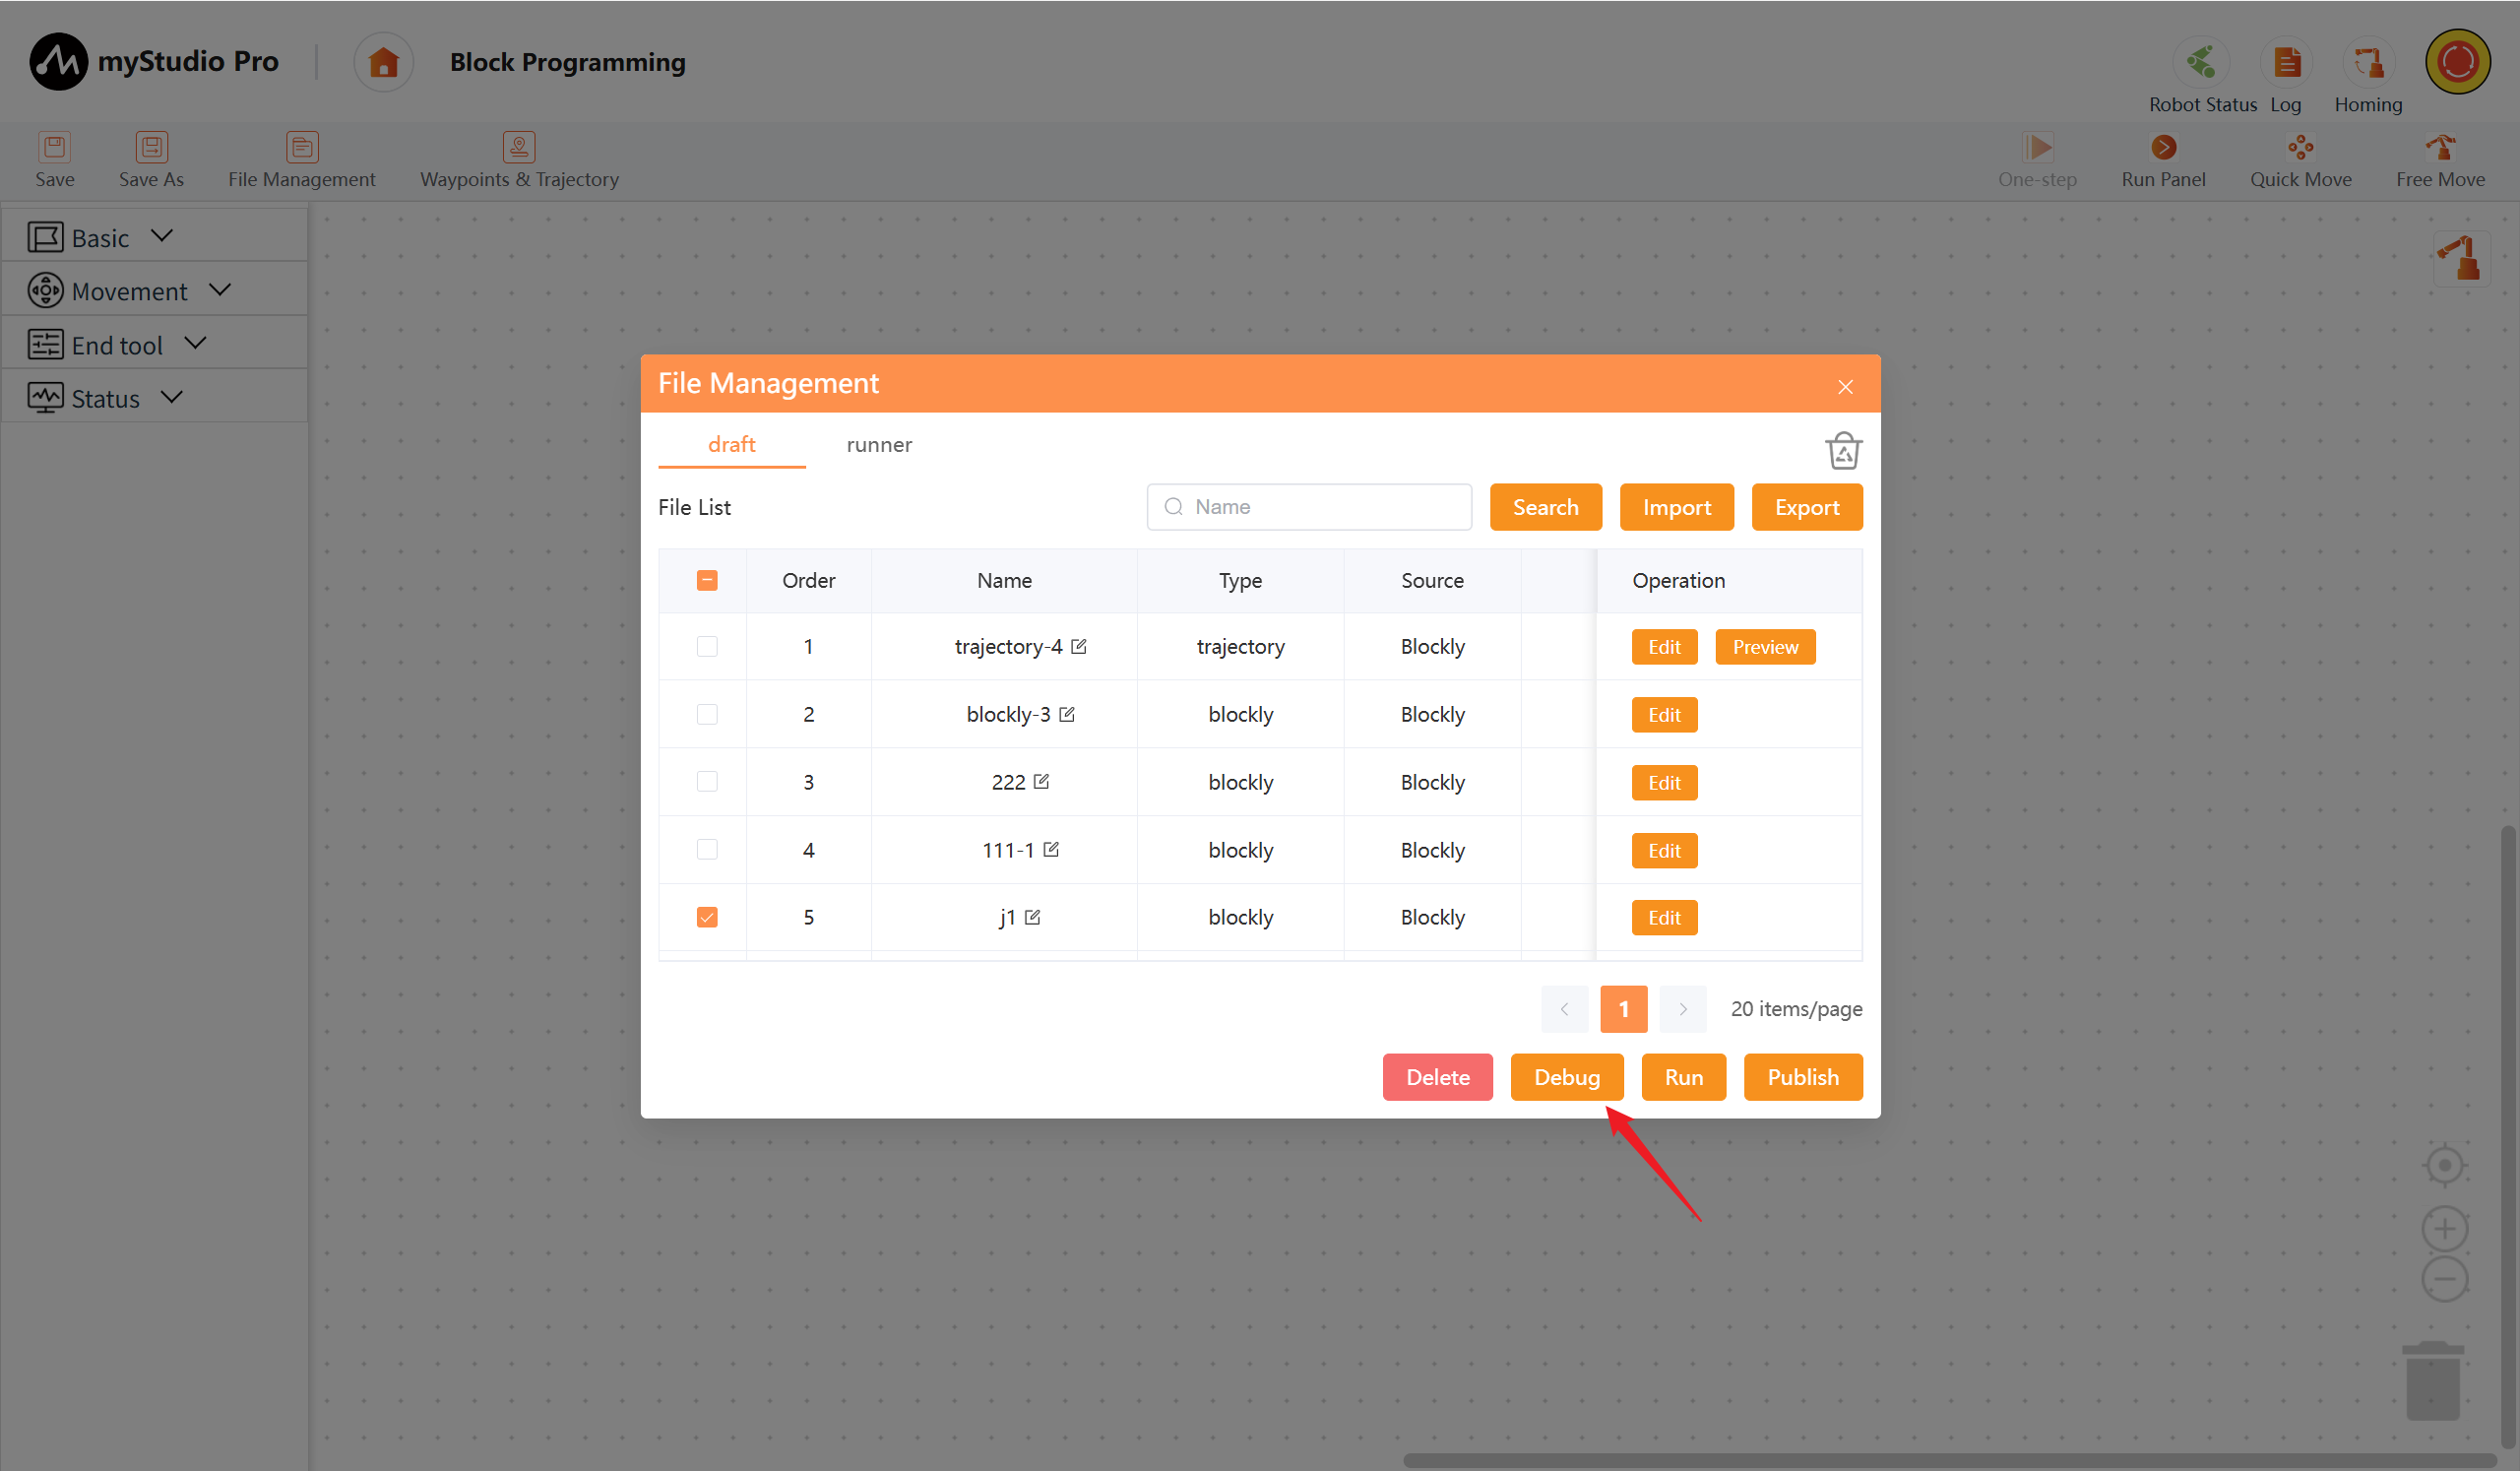
|12 | Single file operation button: Selecting a file and clicking this button loads the file's content into the workspace and automatically opens the debug panel.|
| 13 | Single file operation button: Selecting a file and clicking this button loads the file's content into the workspace and automatically opens the debug panel. The panel allows you to set the number of times the file will run – infinite loop or multiple loops.|
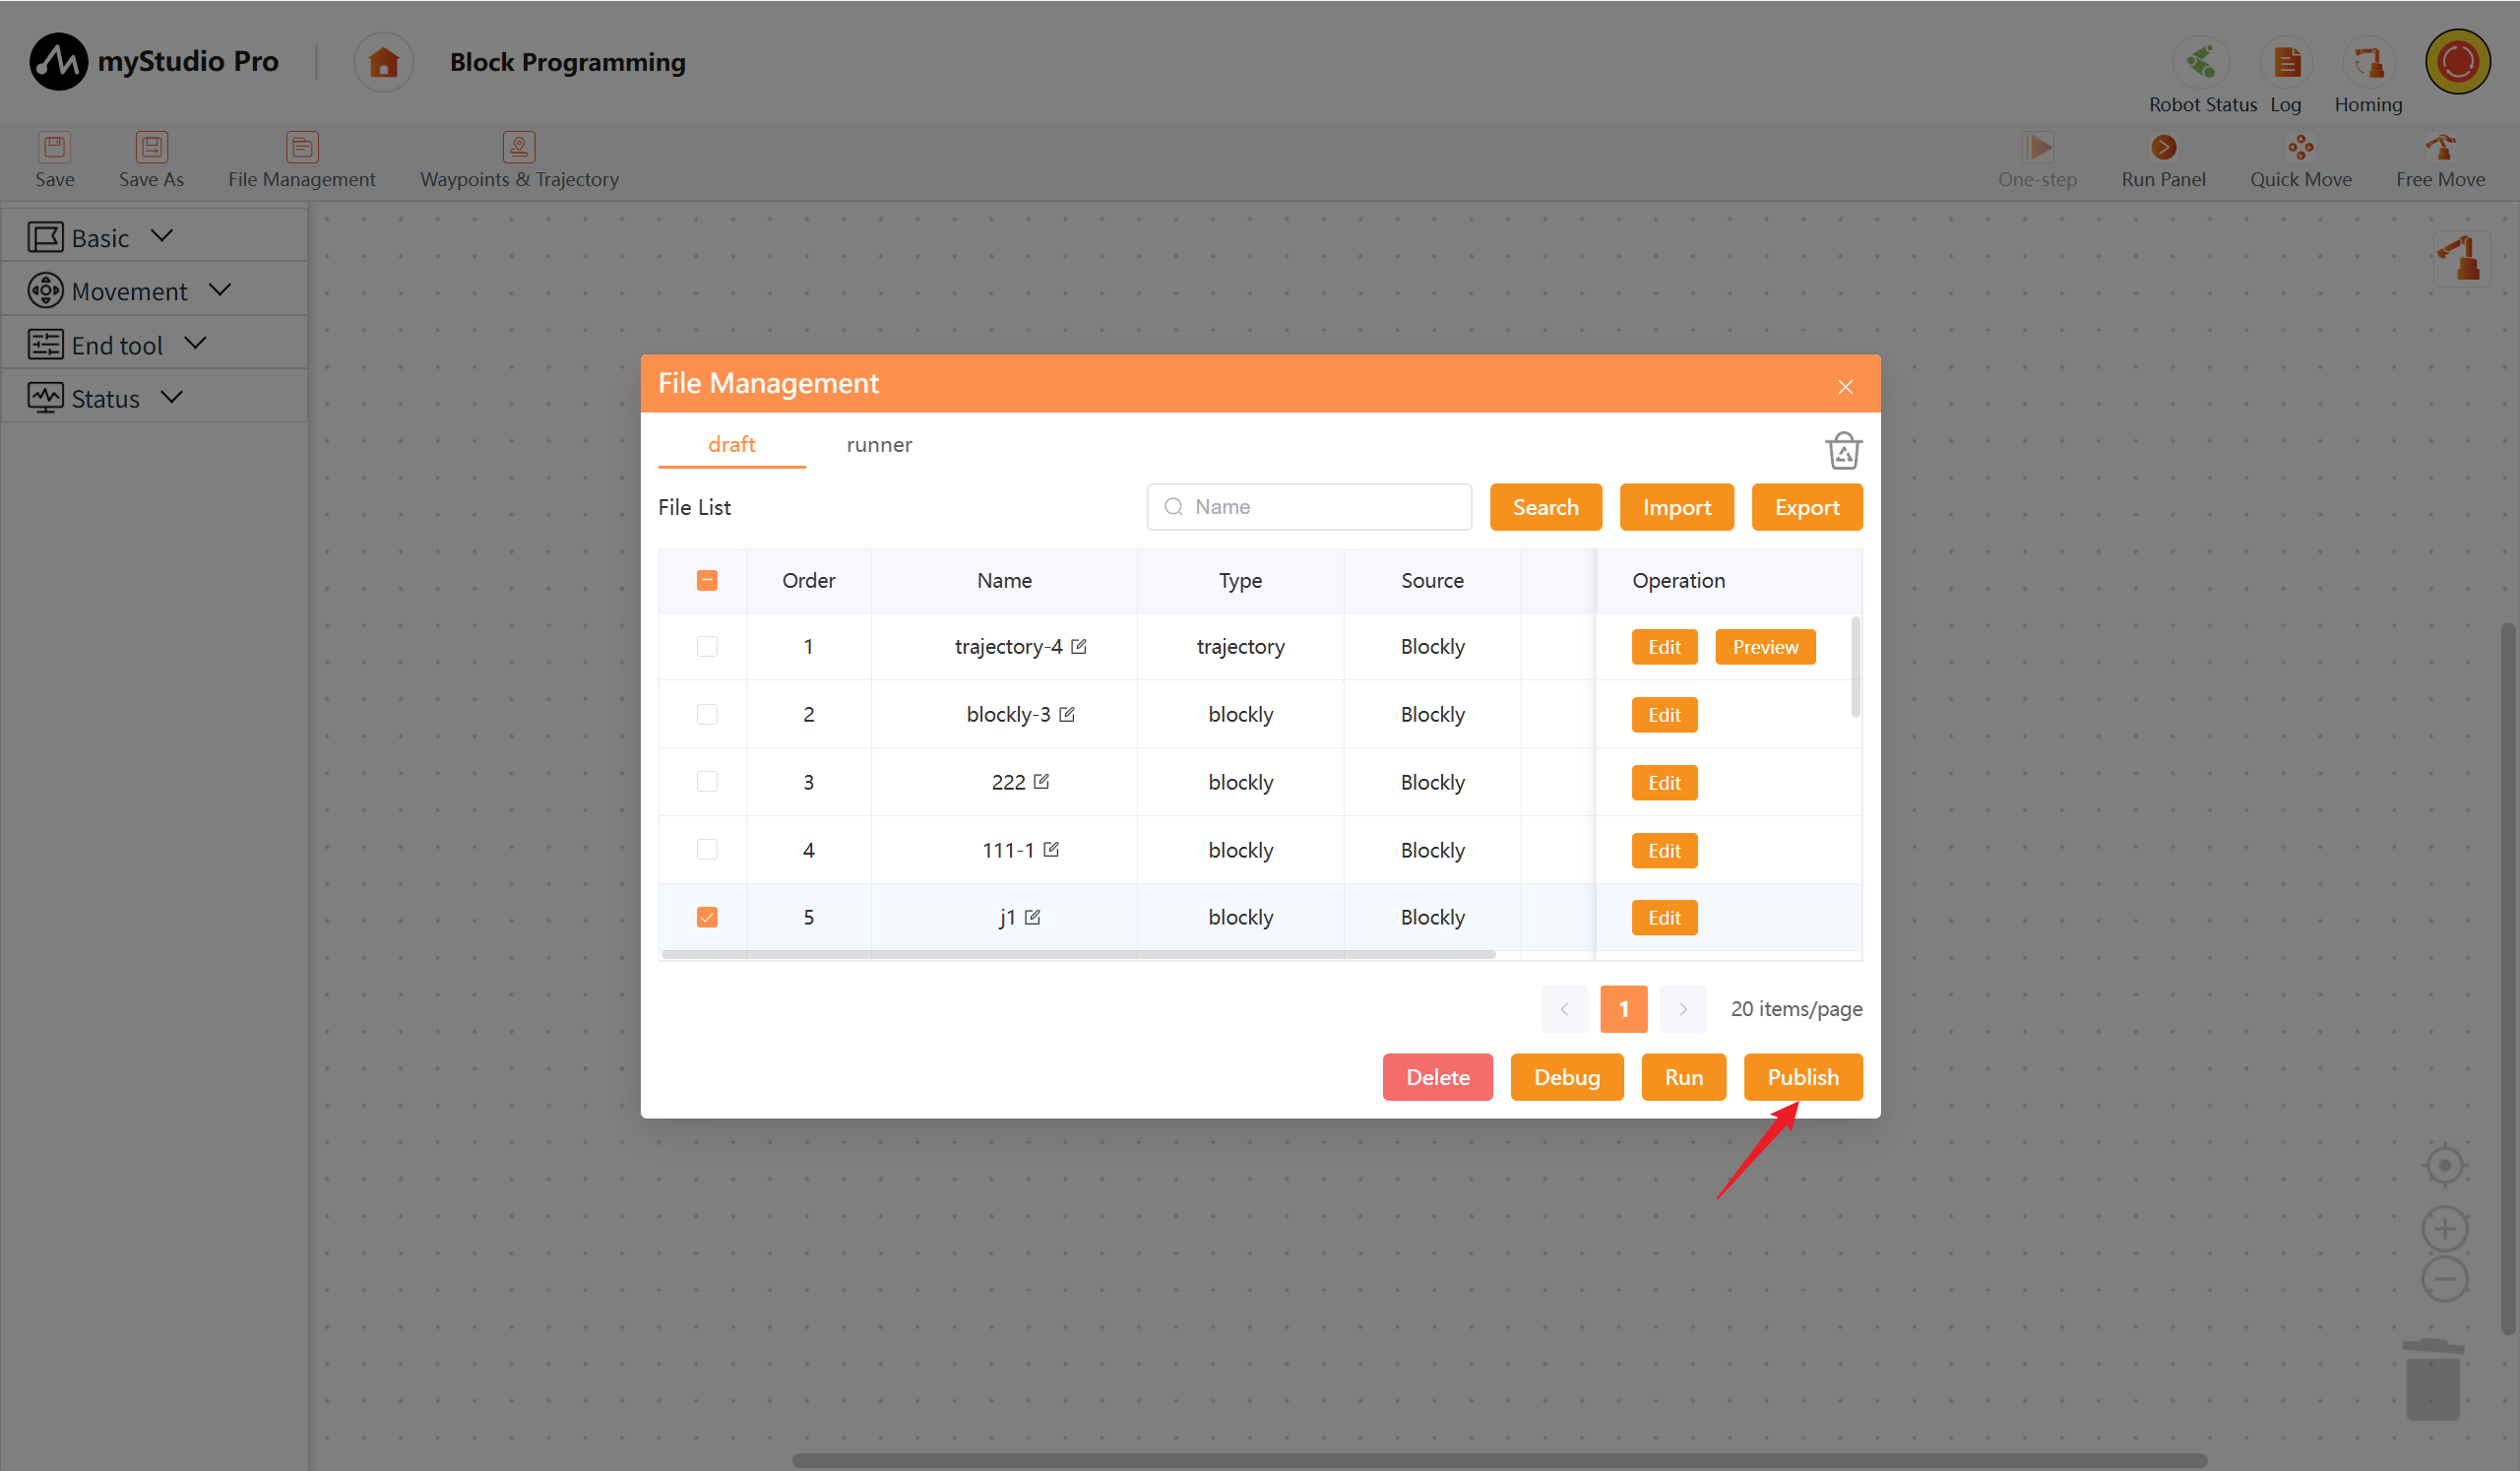
| 14 | Batch operation button, check one or more files Click this button to publish the file to runner space.|
Search
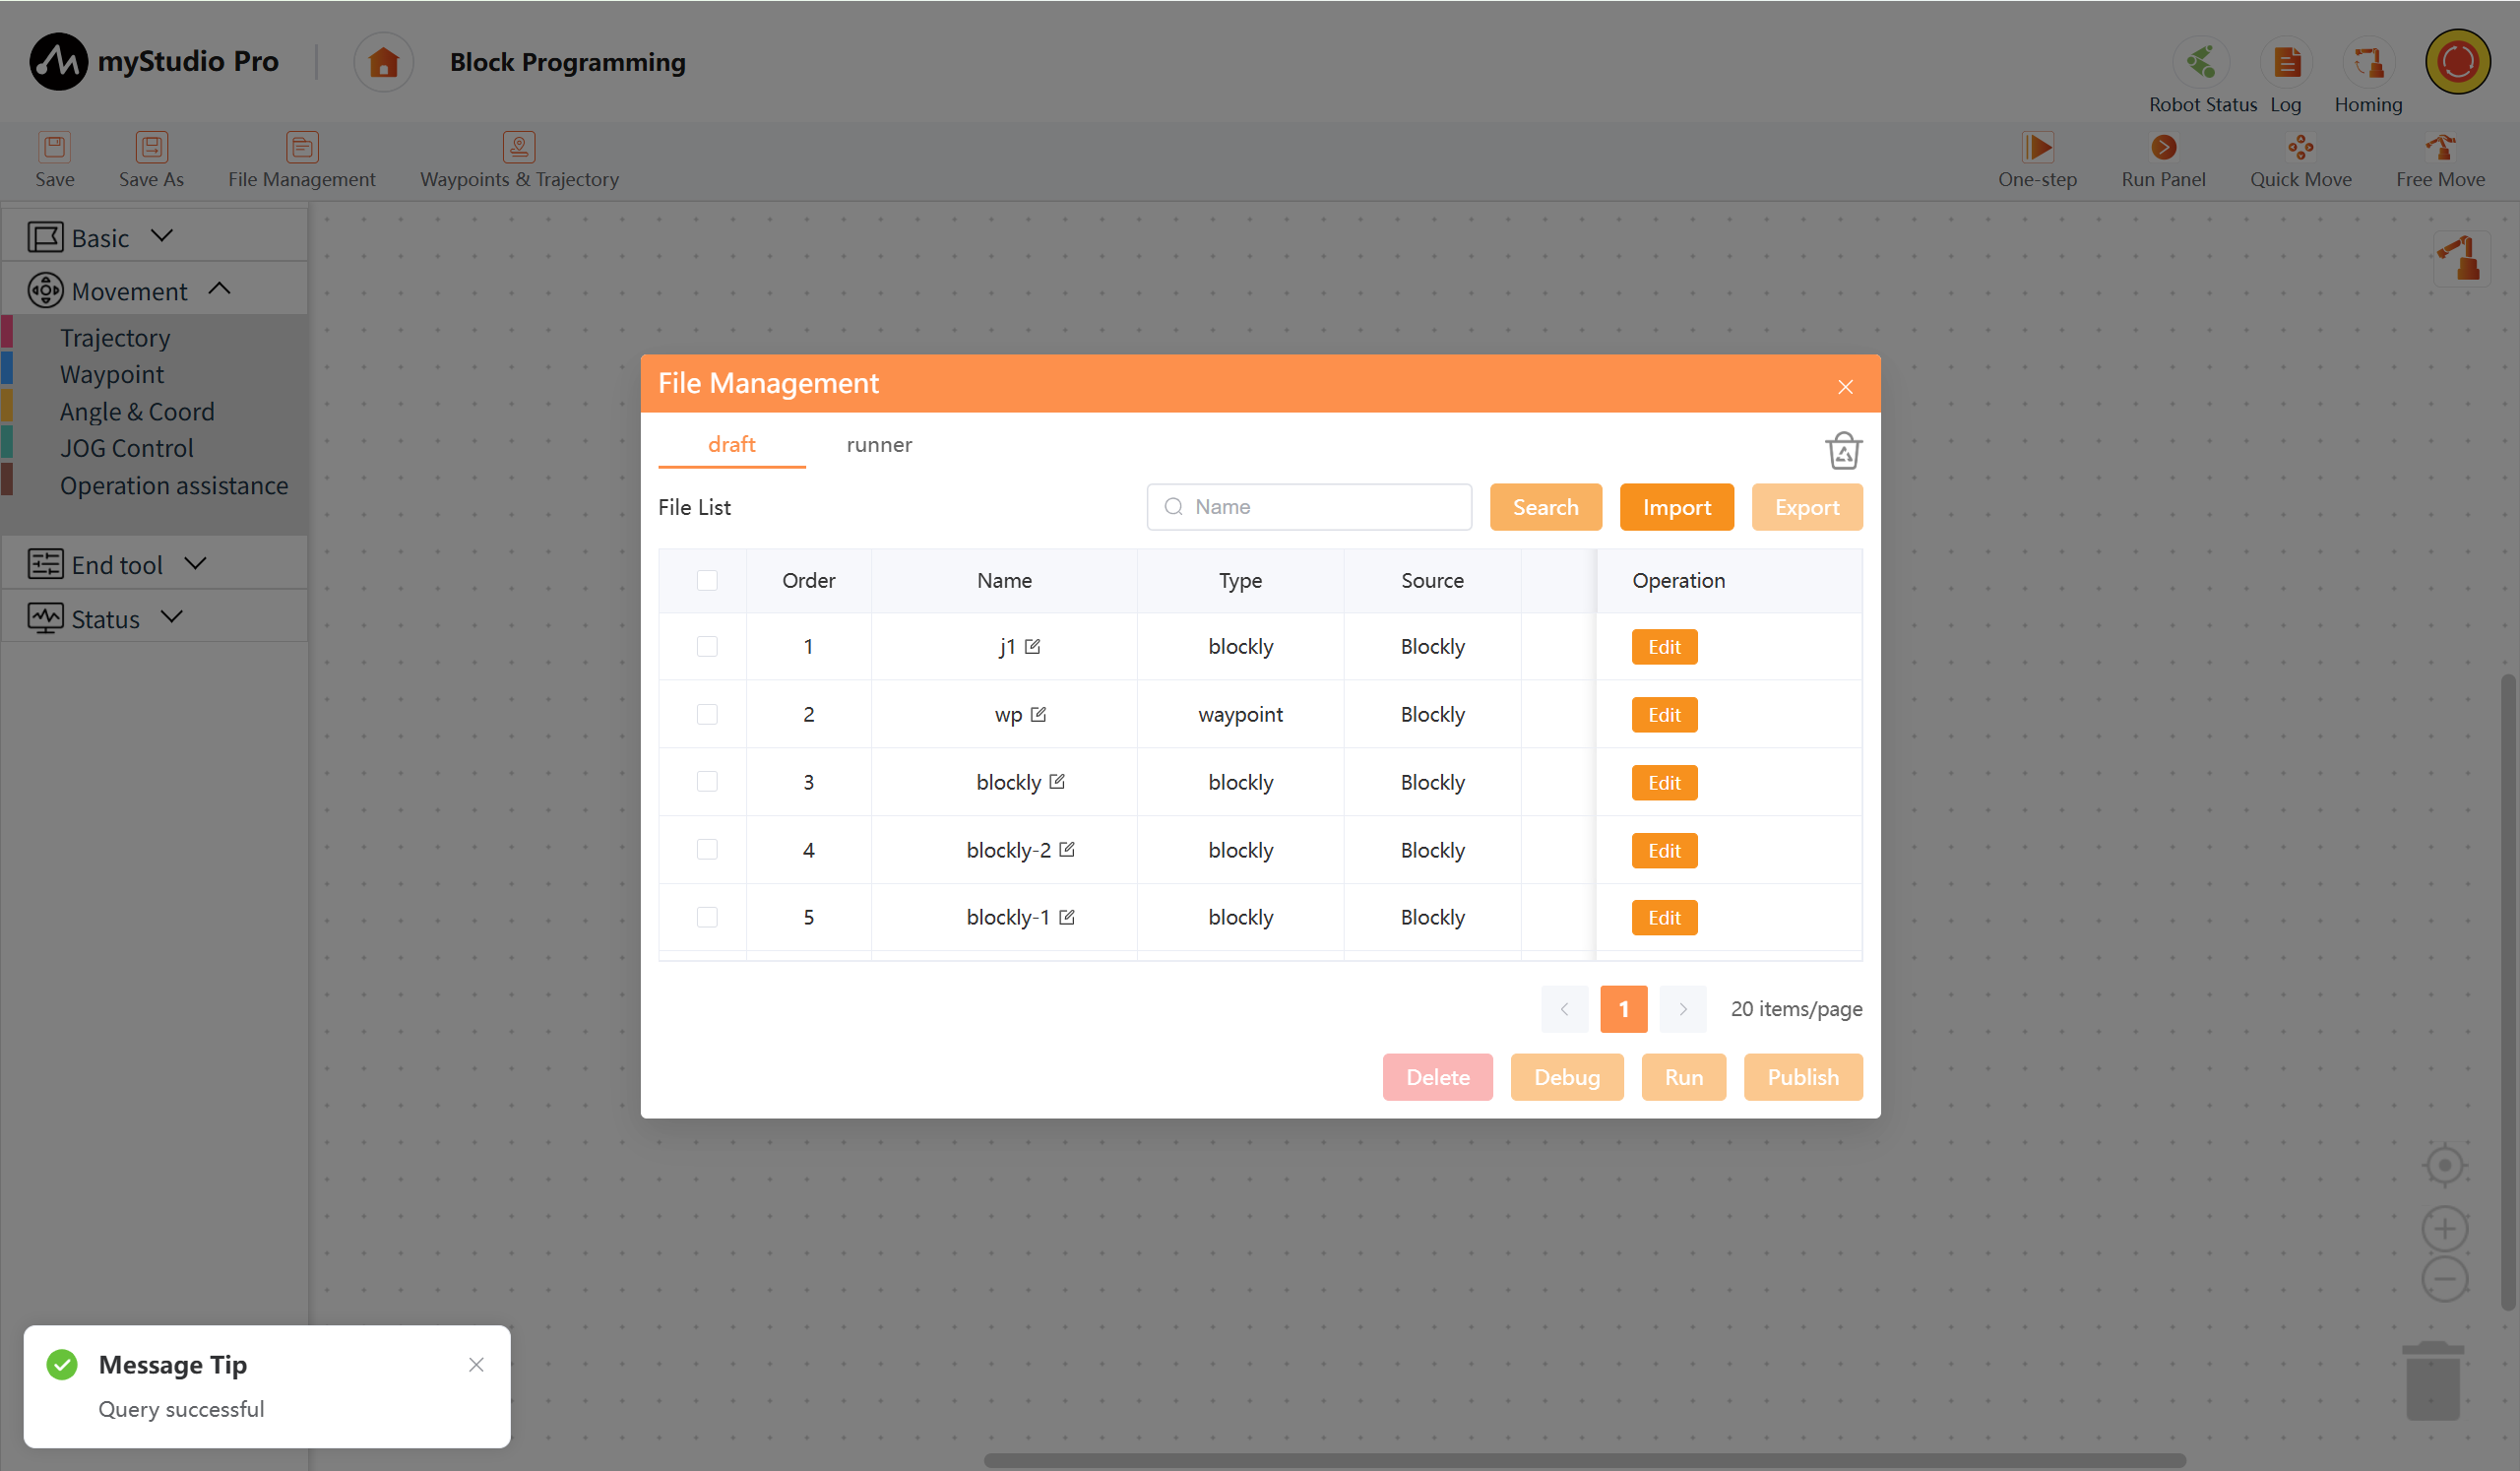
By default, queries all files. You can enter a filename for a fuzzy search. When the input box contains content, the search will be based on the current file space and the content. A successful search will display a message.
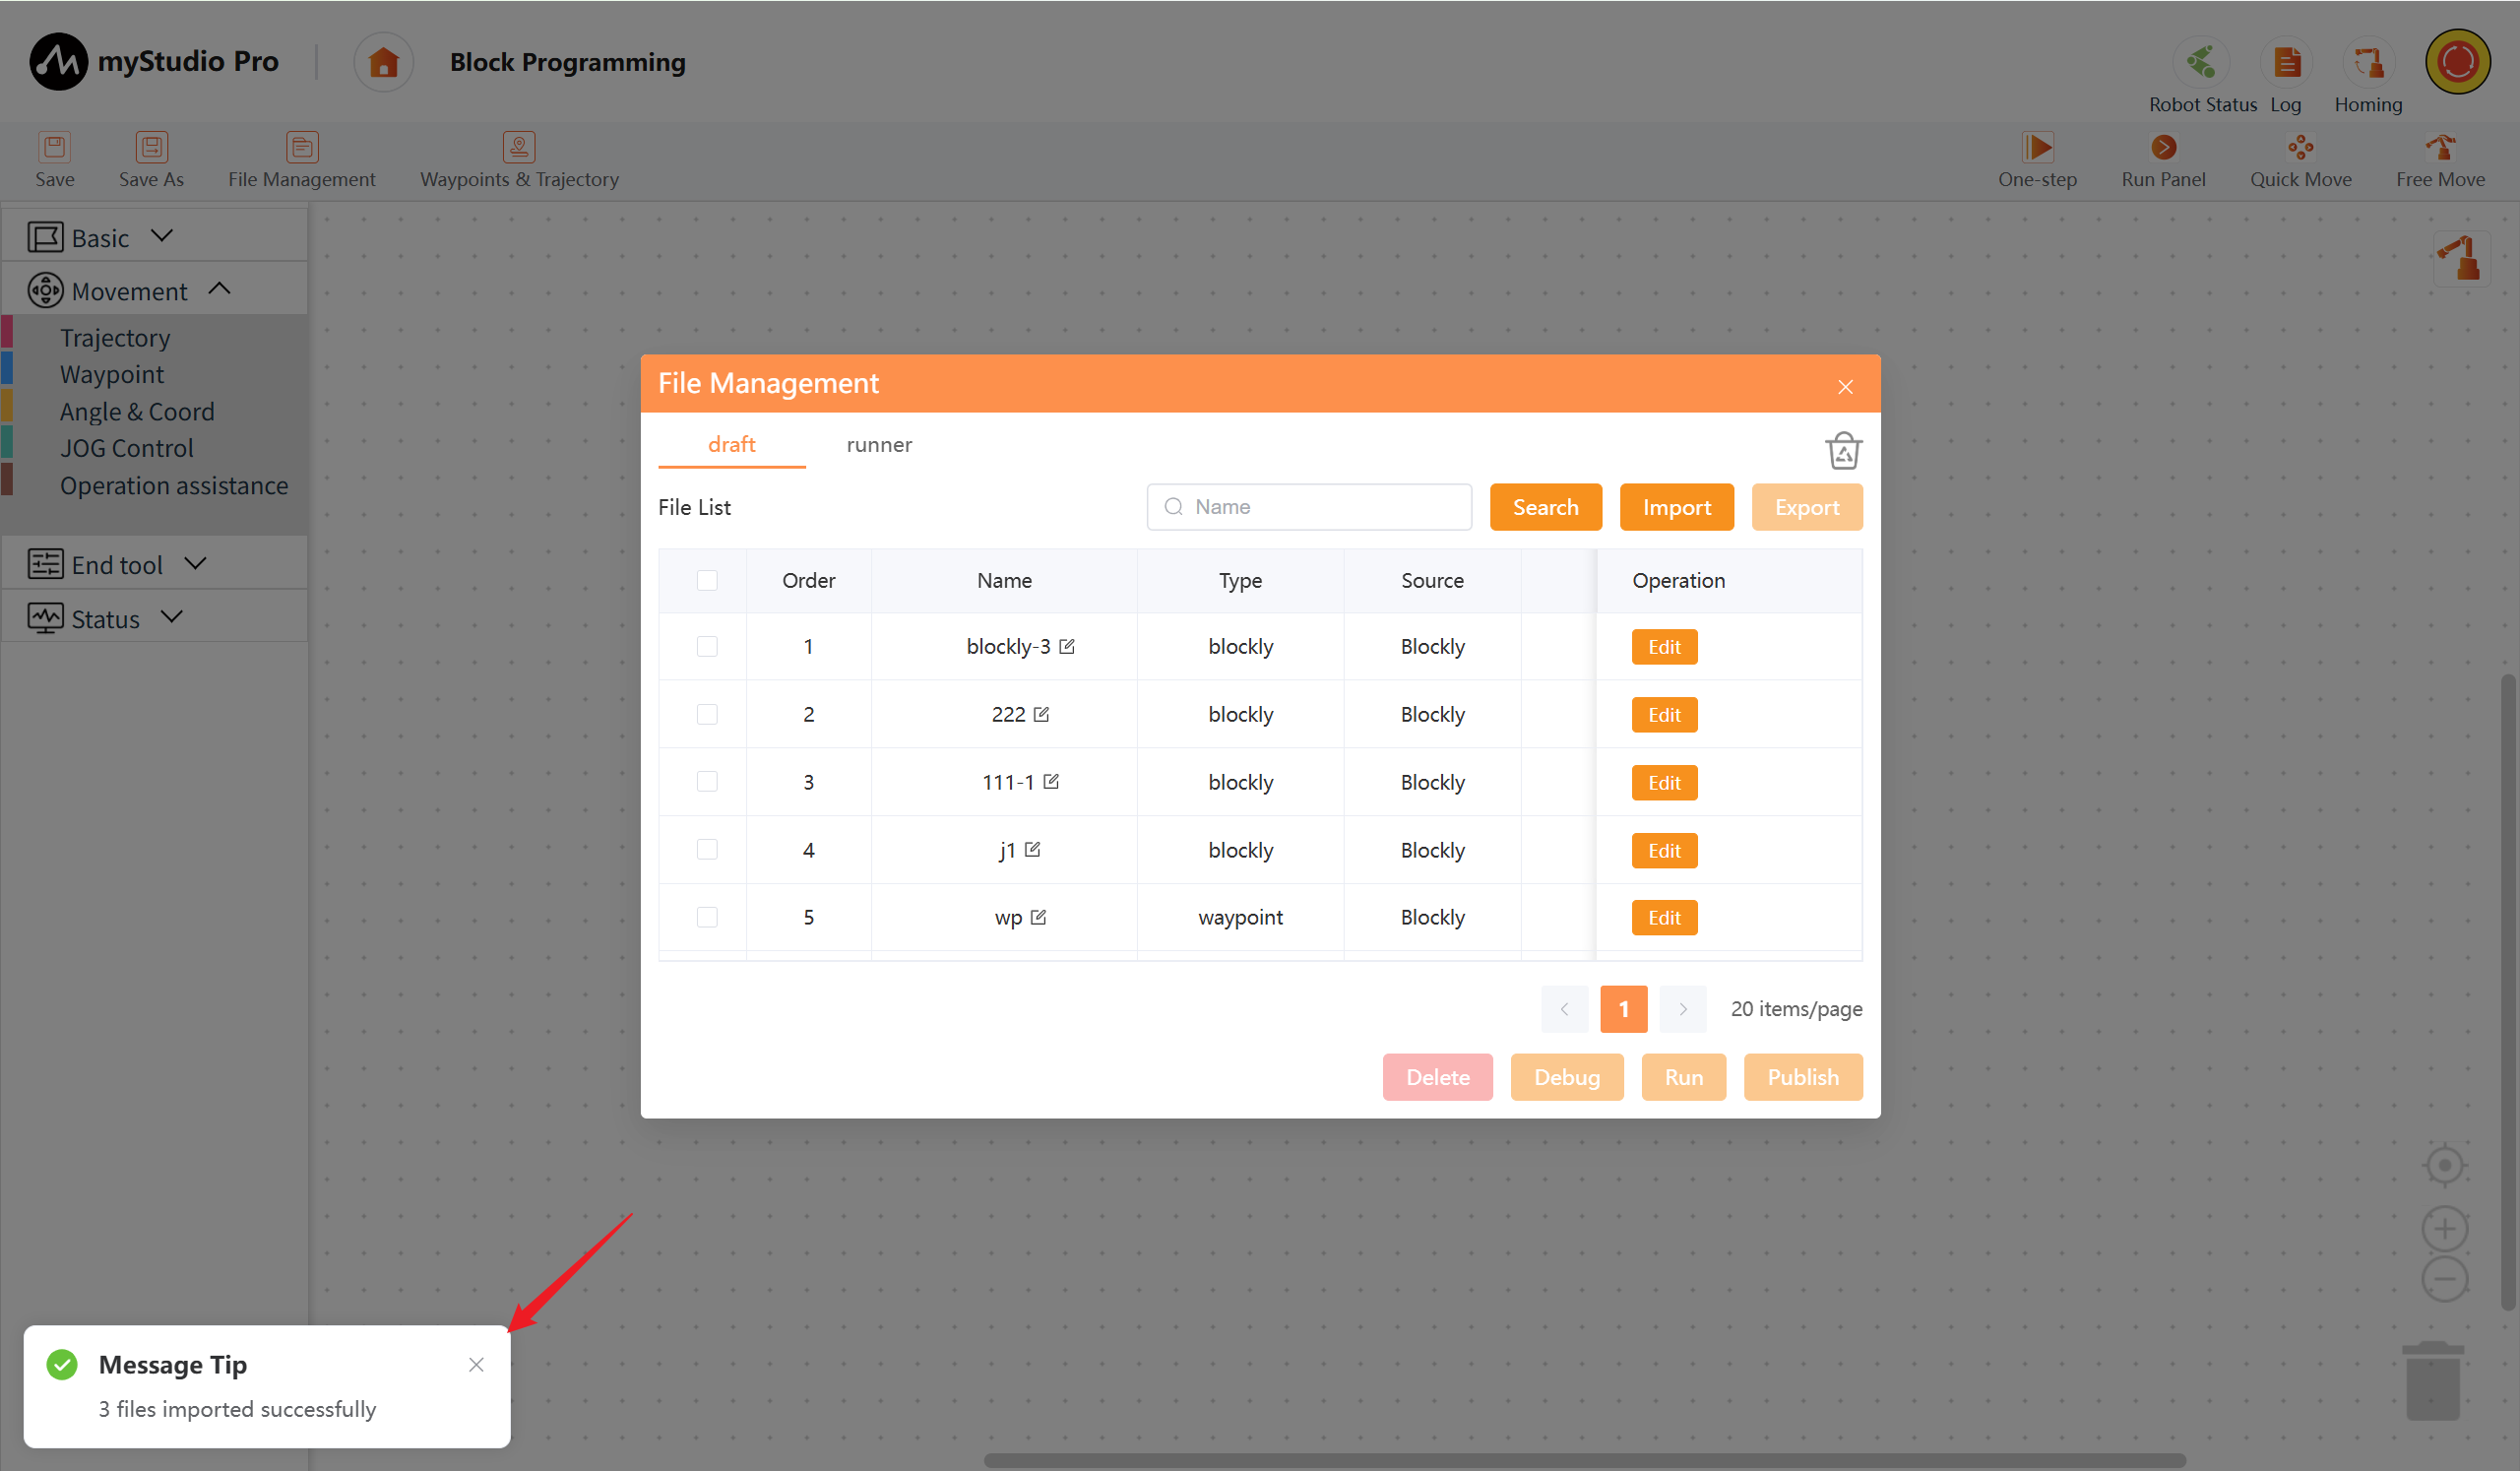
Import
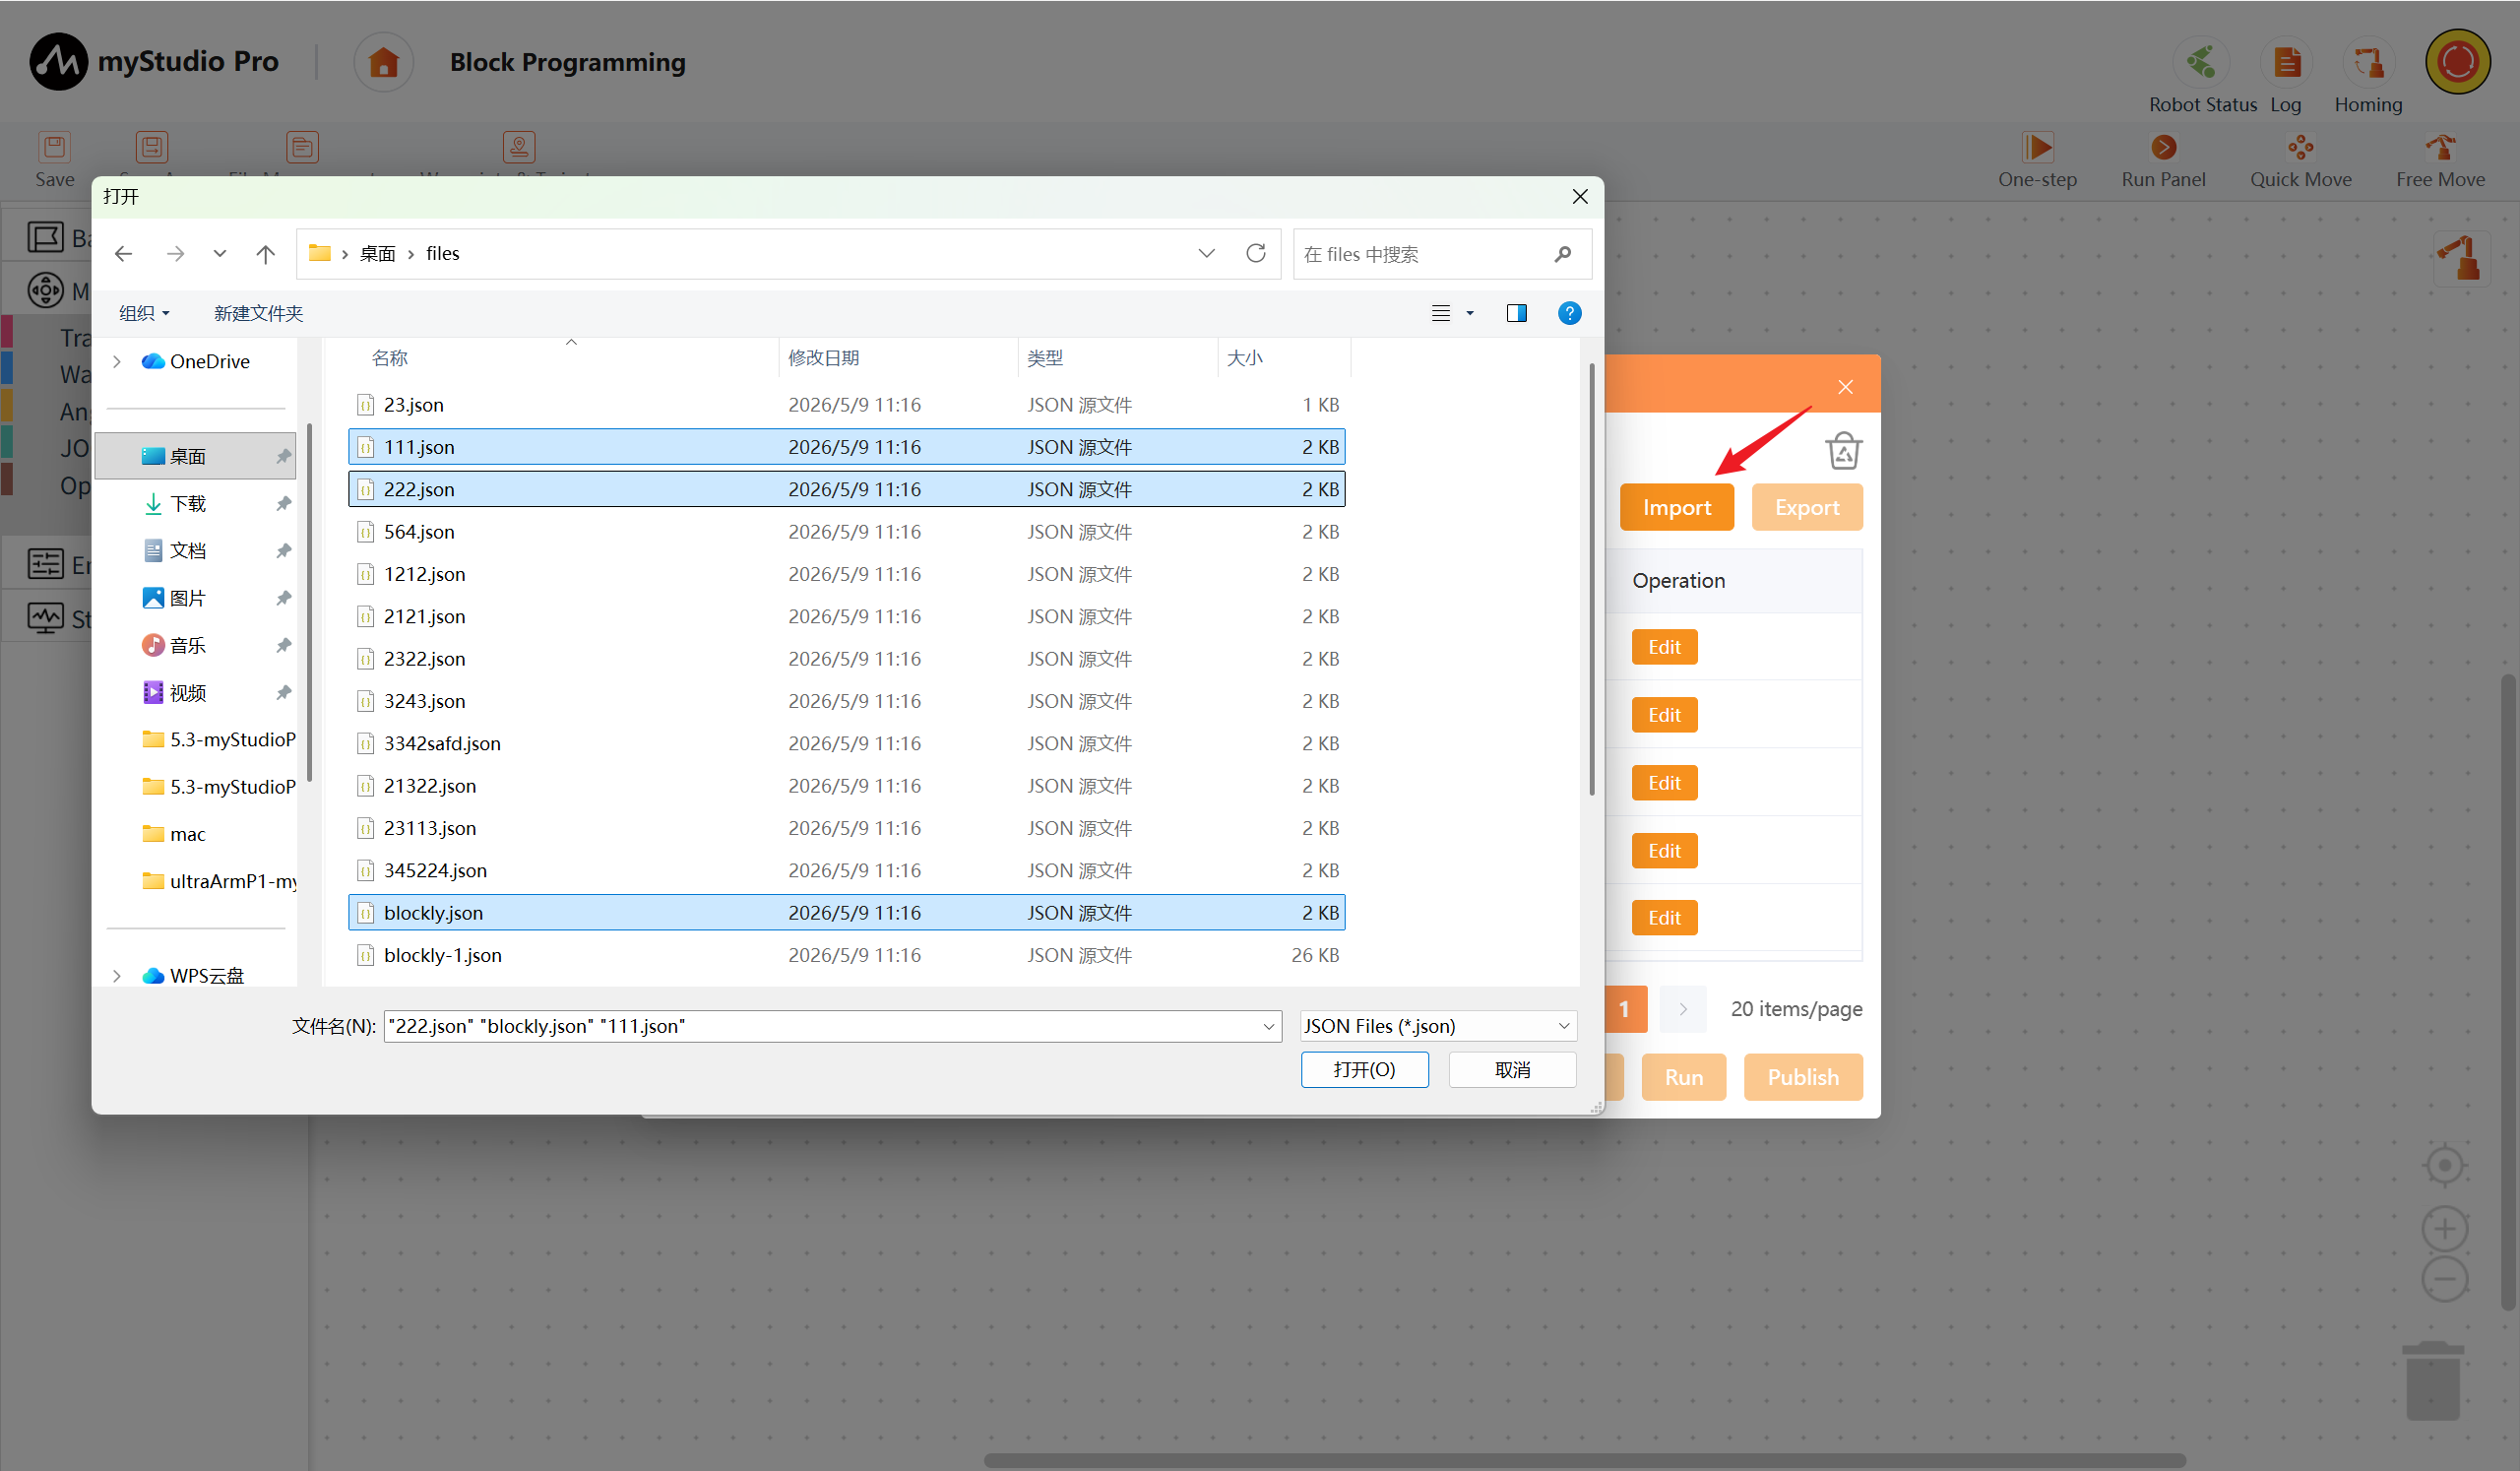
Click the Import button, select the file to import, and click OK.
Note: The file selected for import must be exported from myStudio Pro; otherwise, you will encounter an import failure or import success but "cannot be edited" error.
Click the Import button, select the file you want to import, and then click "OK". Batch import of files is supported. For Windows, pressing "Shift/Control" can batch select the files to be imported.
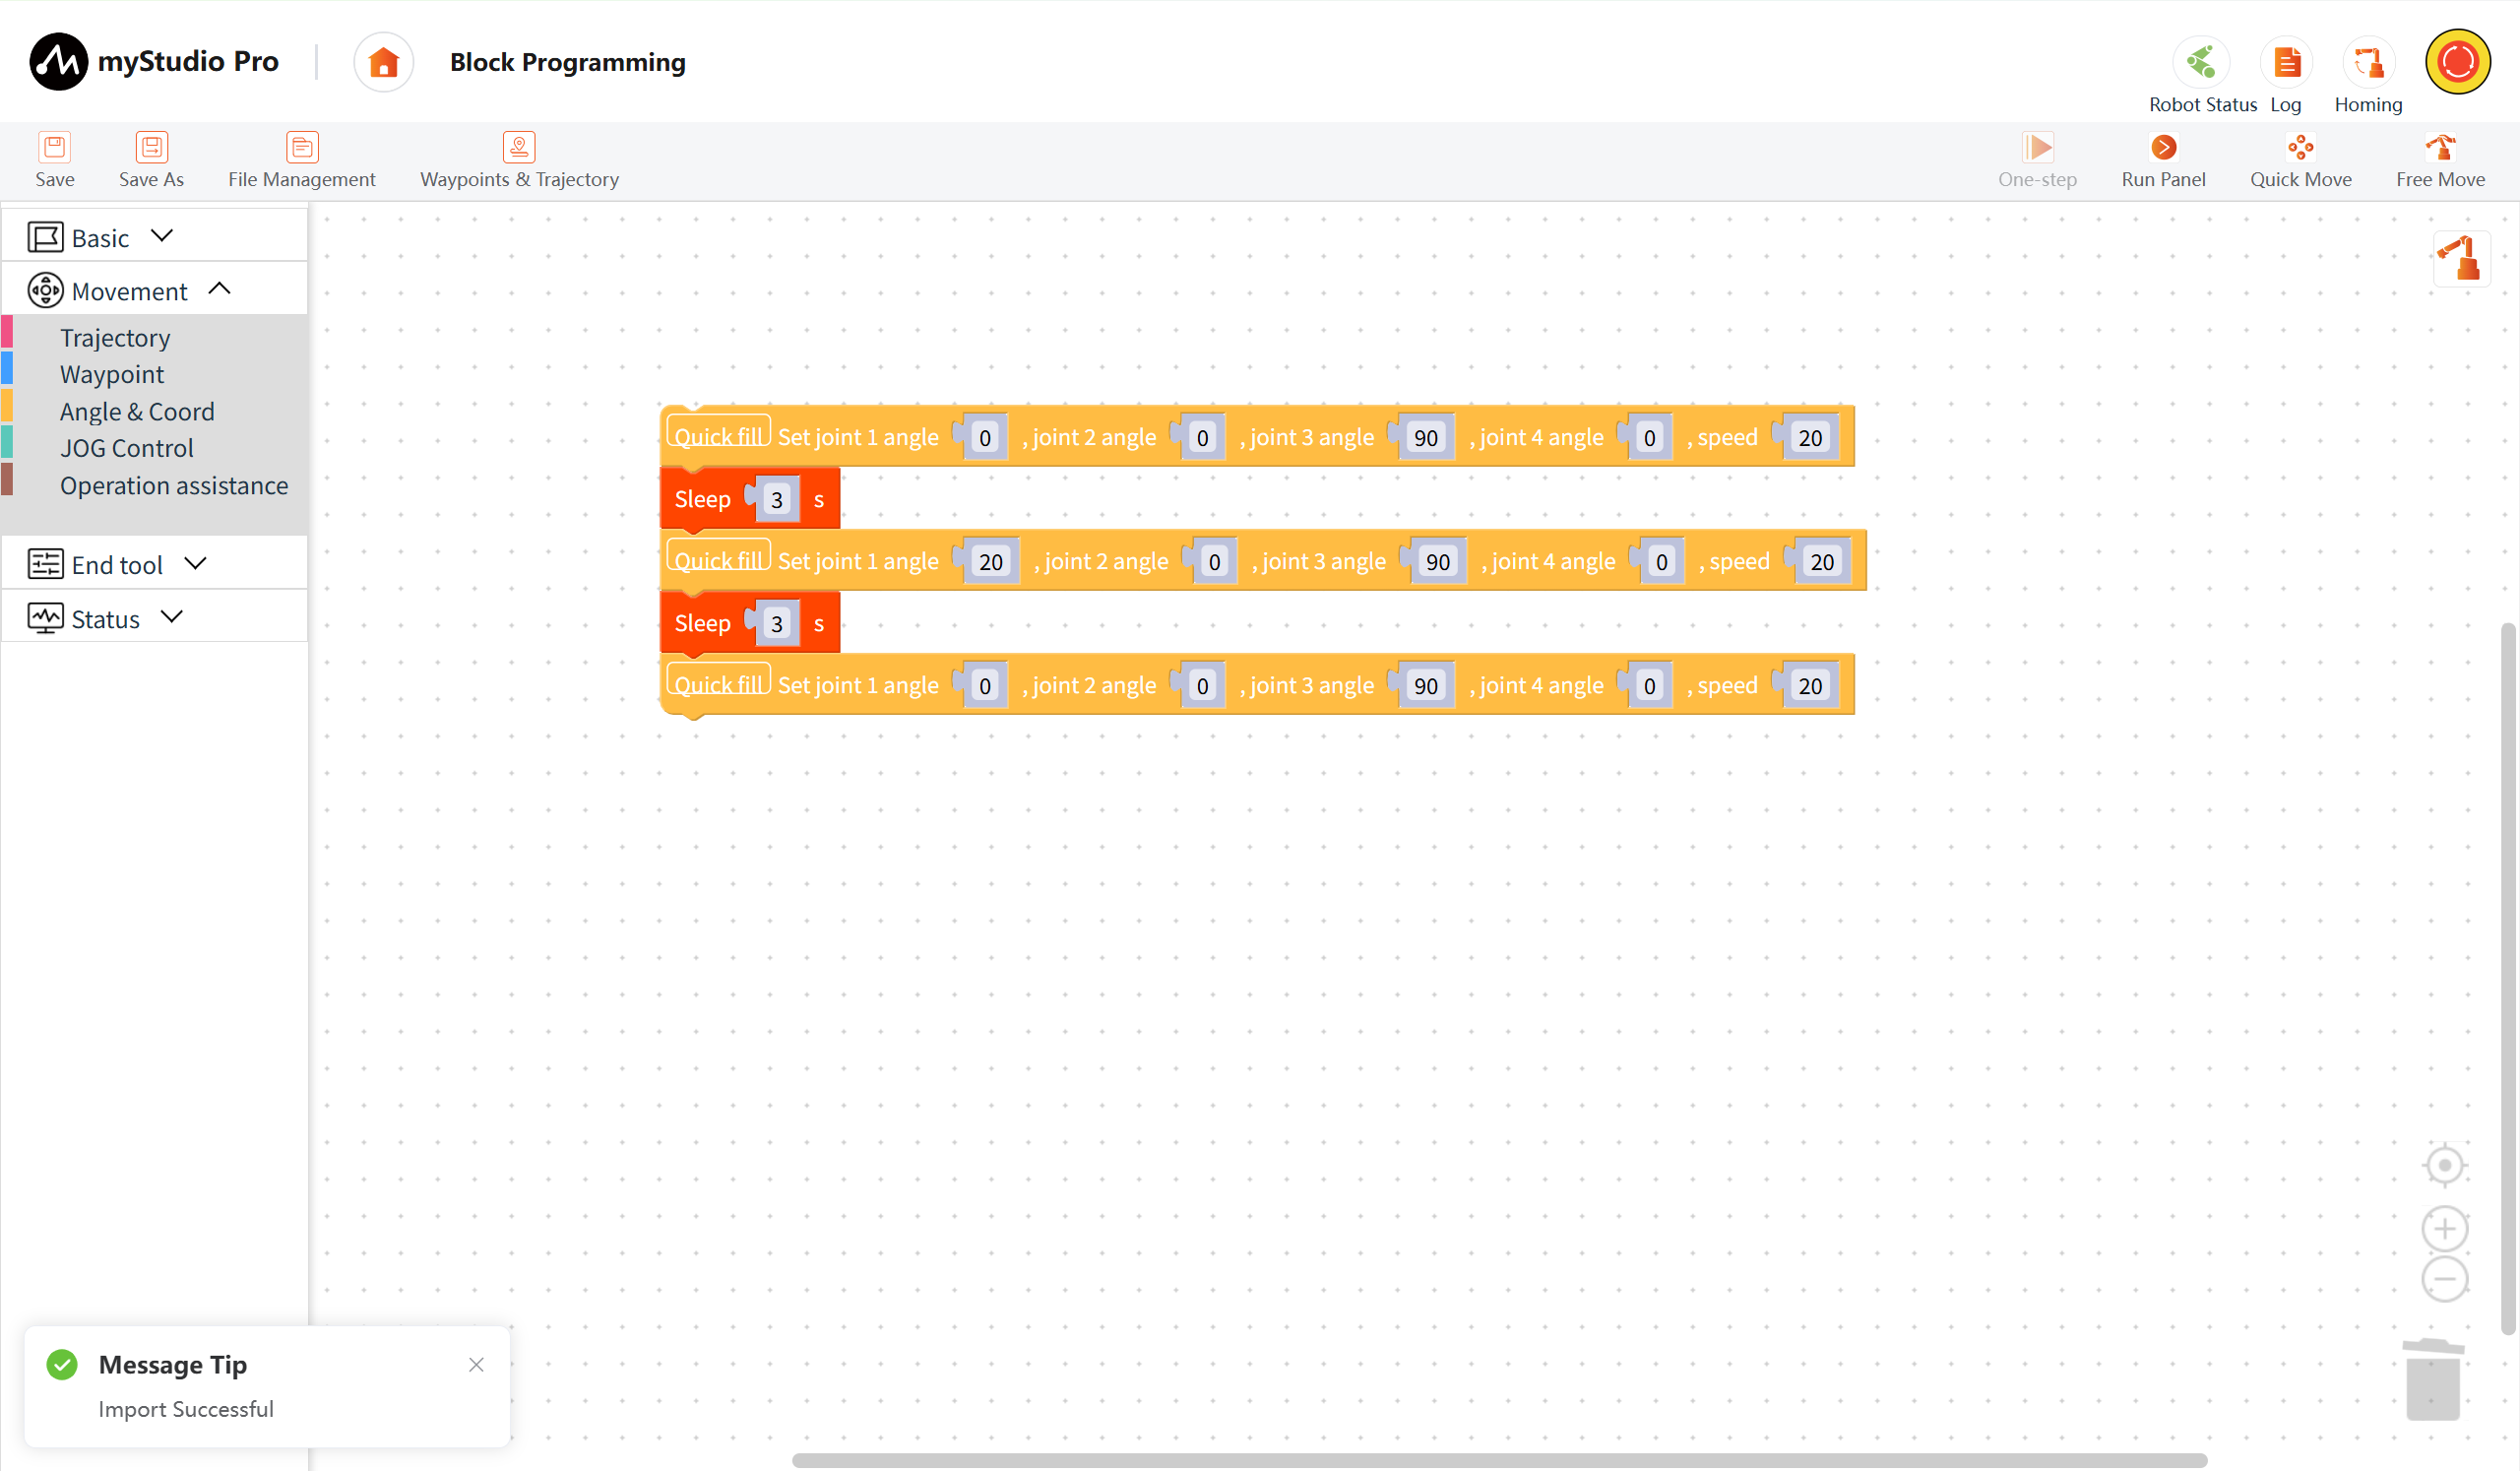
Edit
Click the Edit button to load the file content into the workspace.
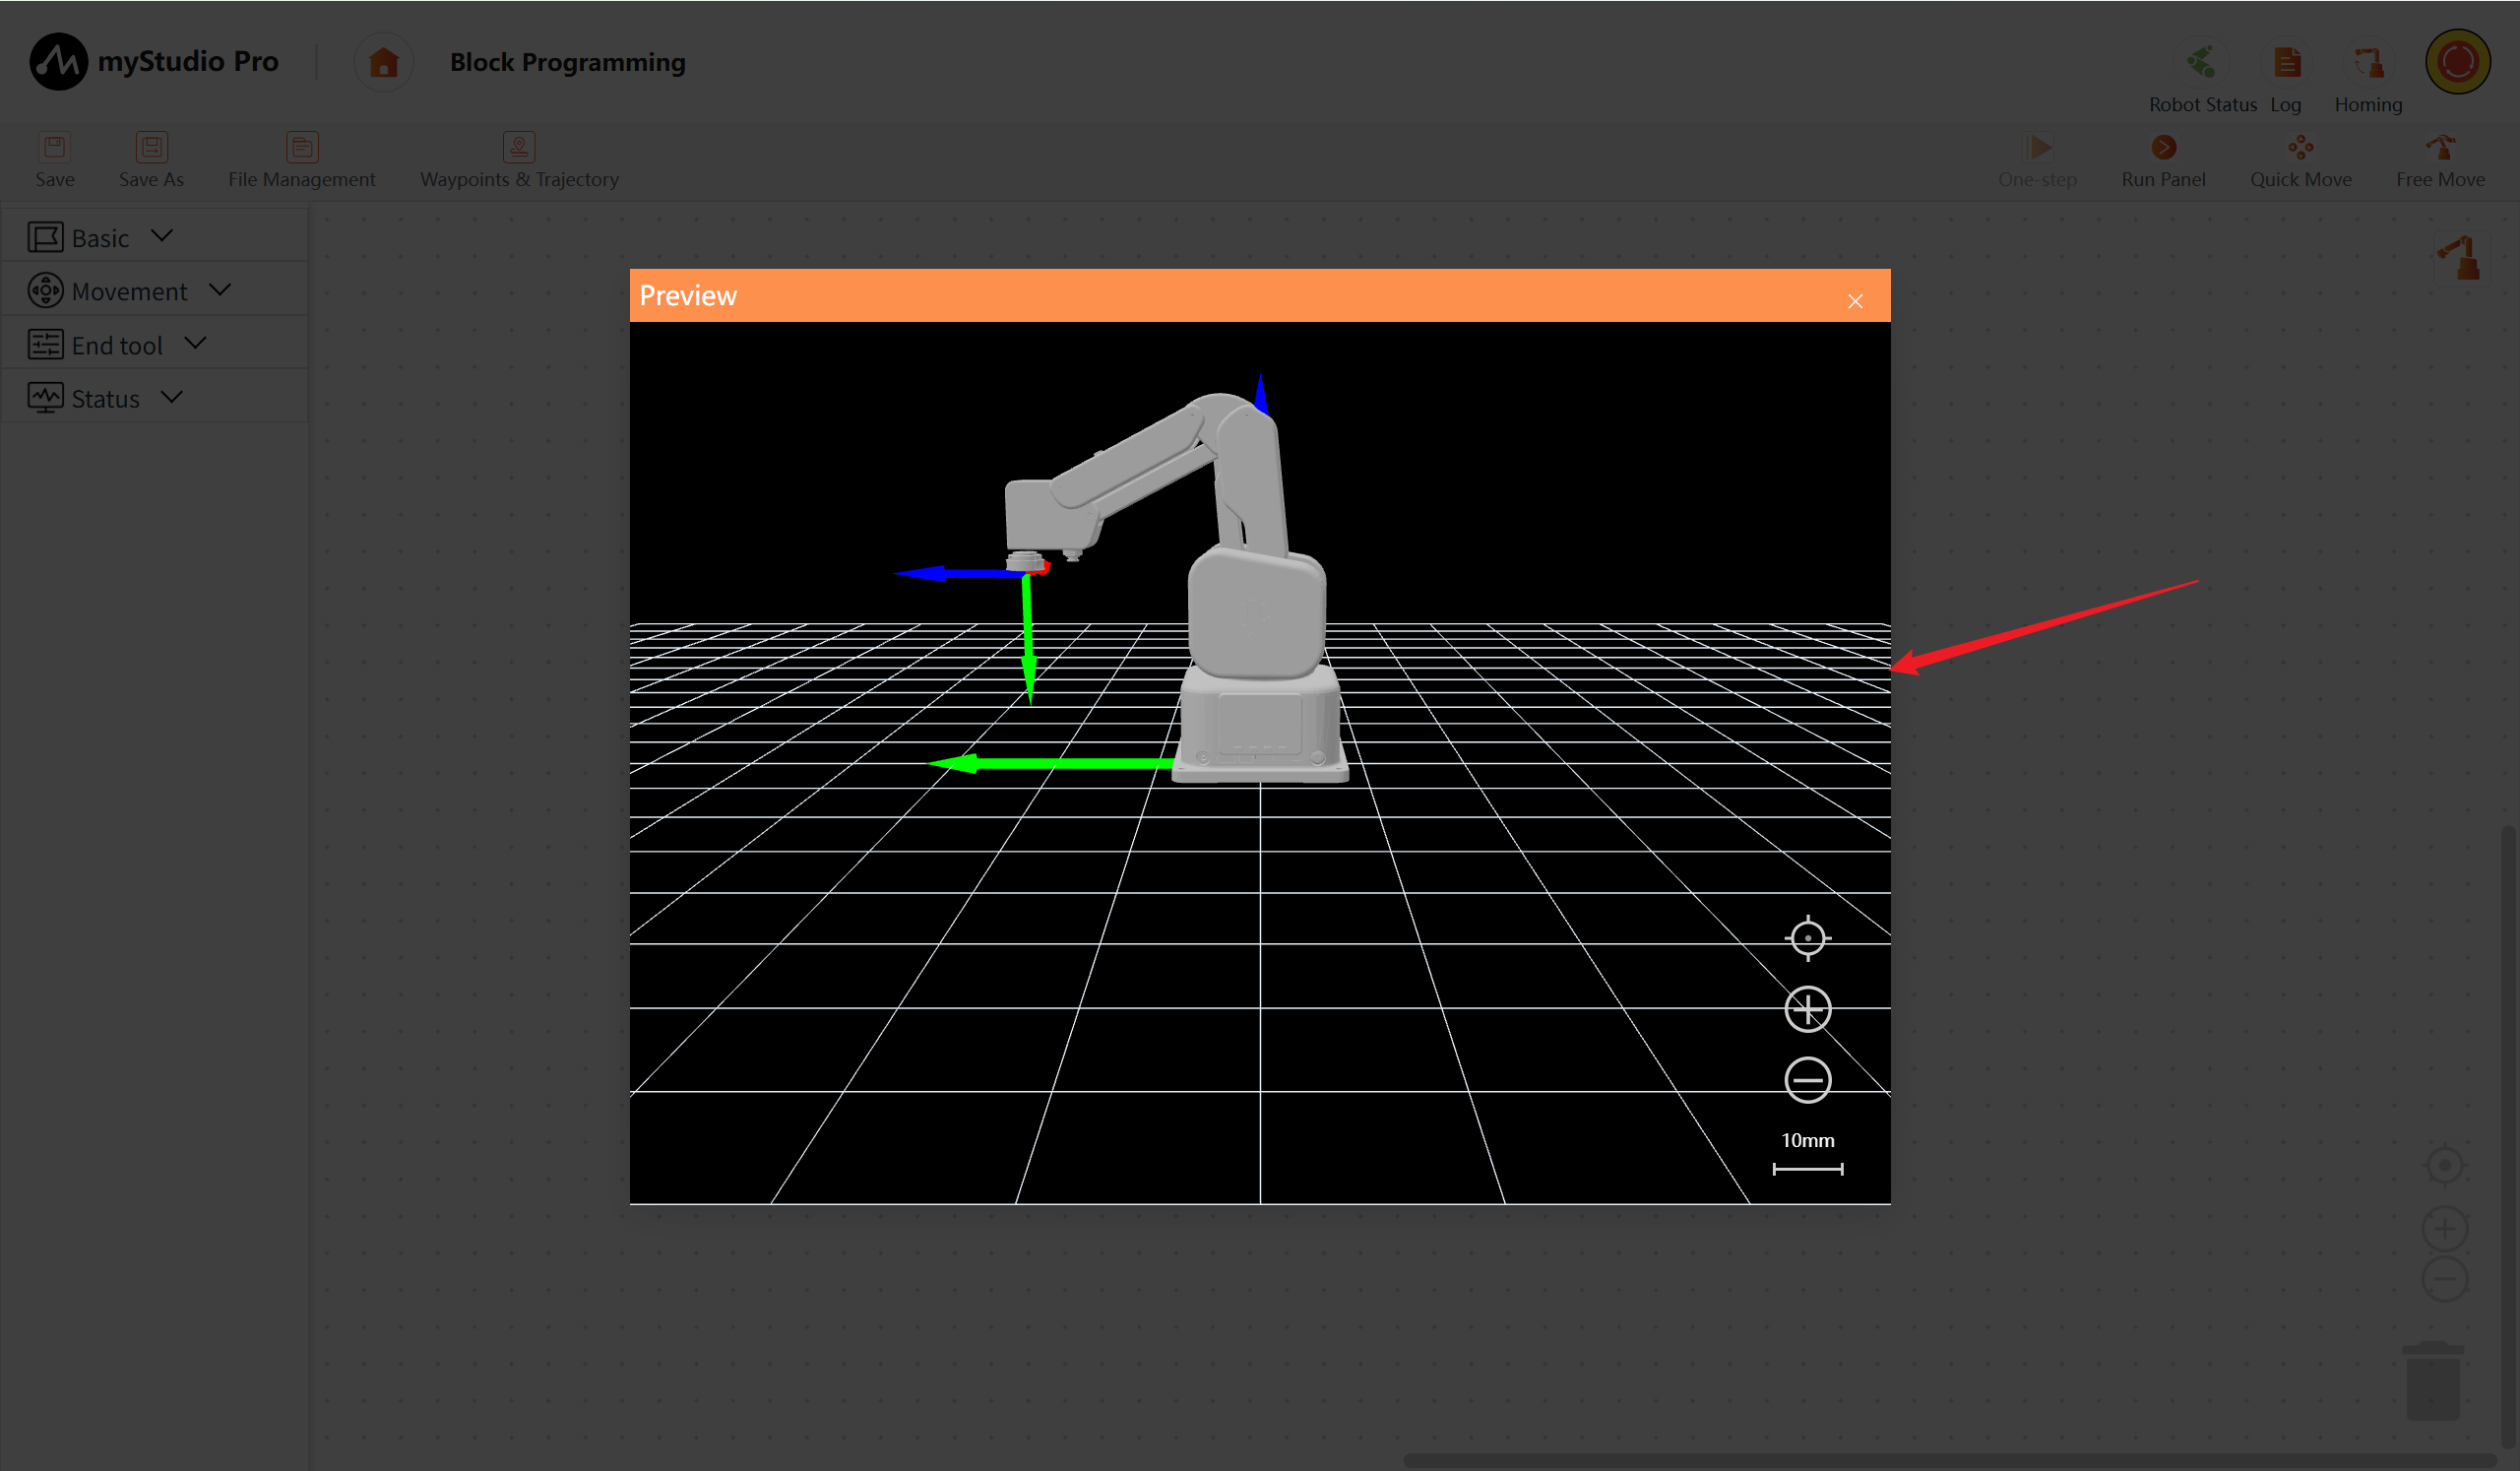
Preview
ClickThe Preview button will open the preview panel. The 3D model will simulate motion based on the actual points in the trajectory file.
Delete
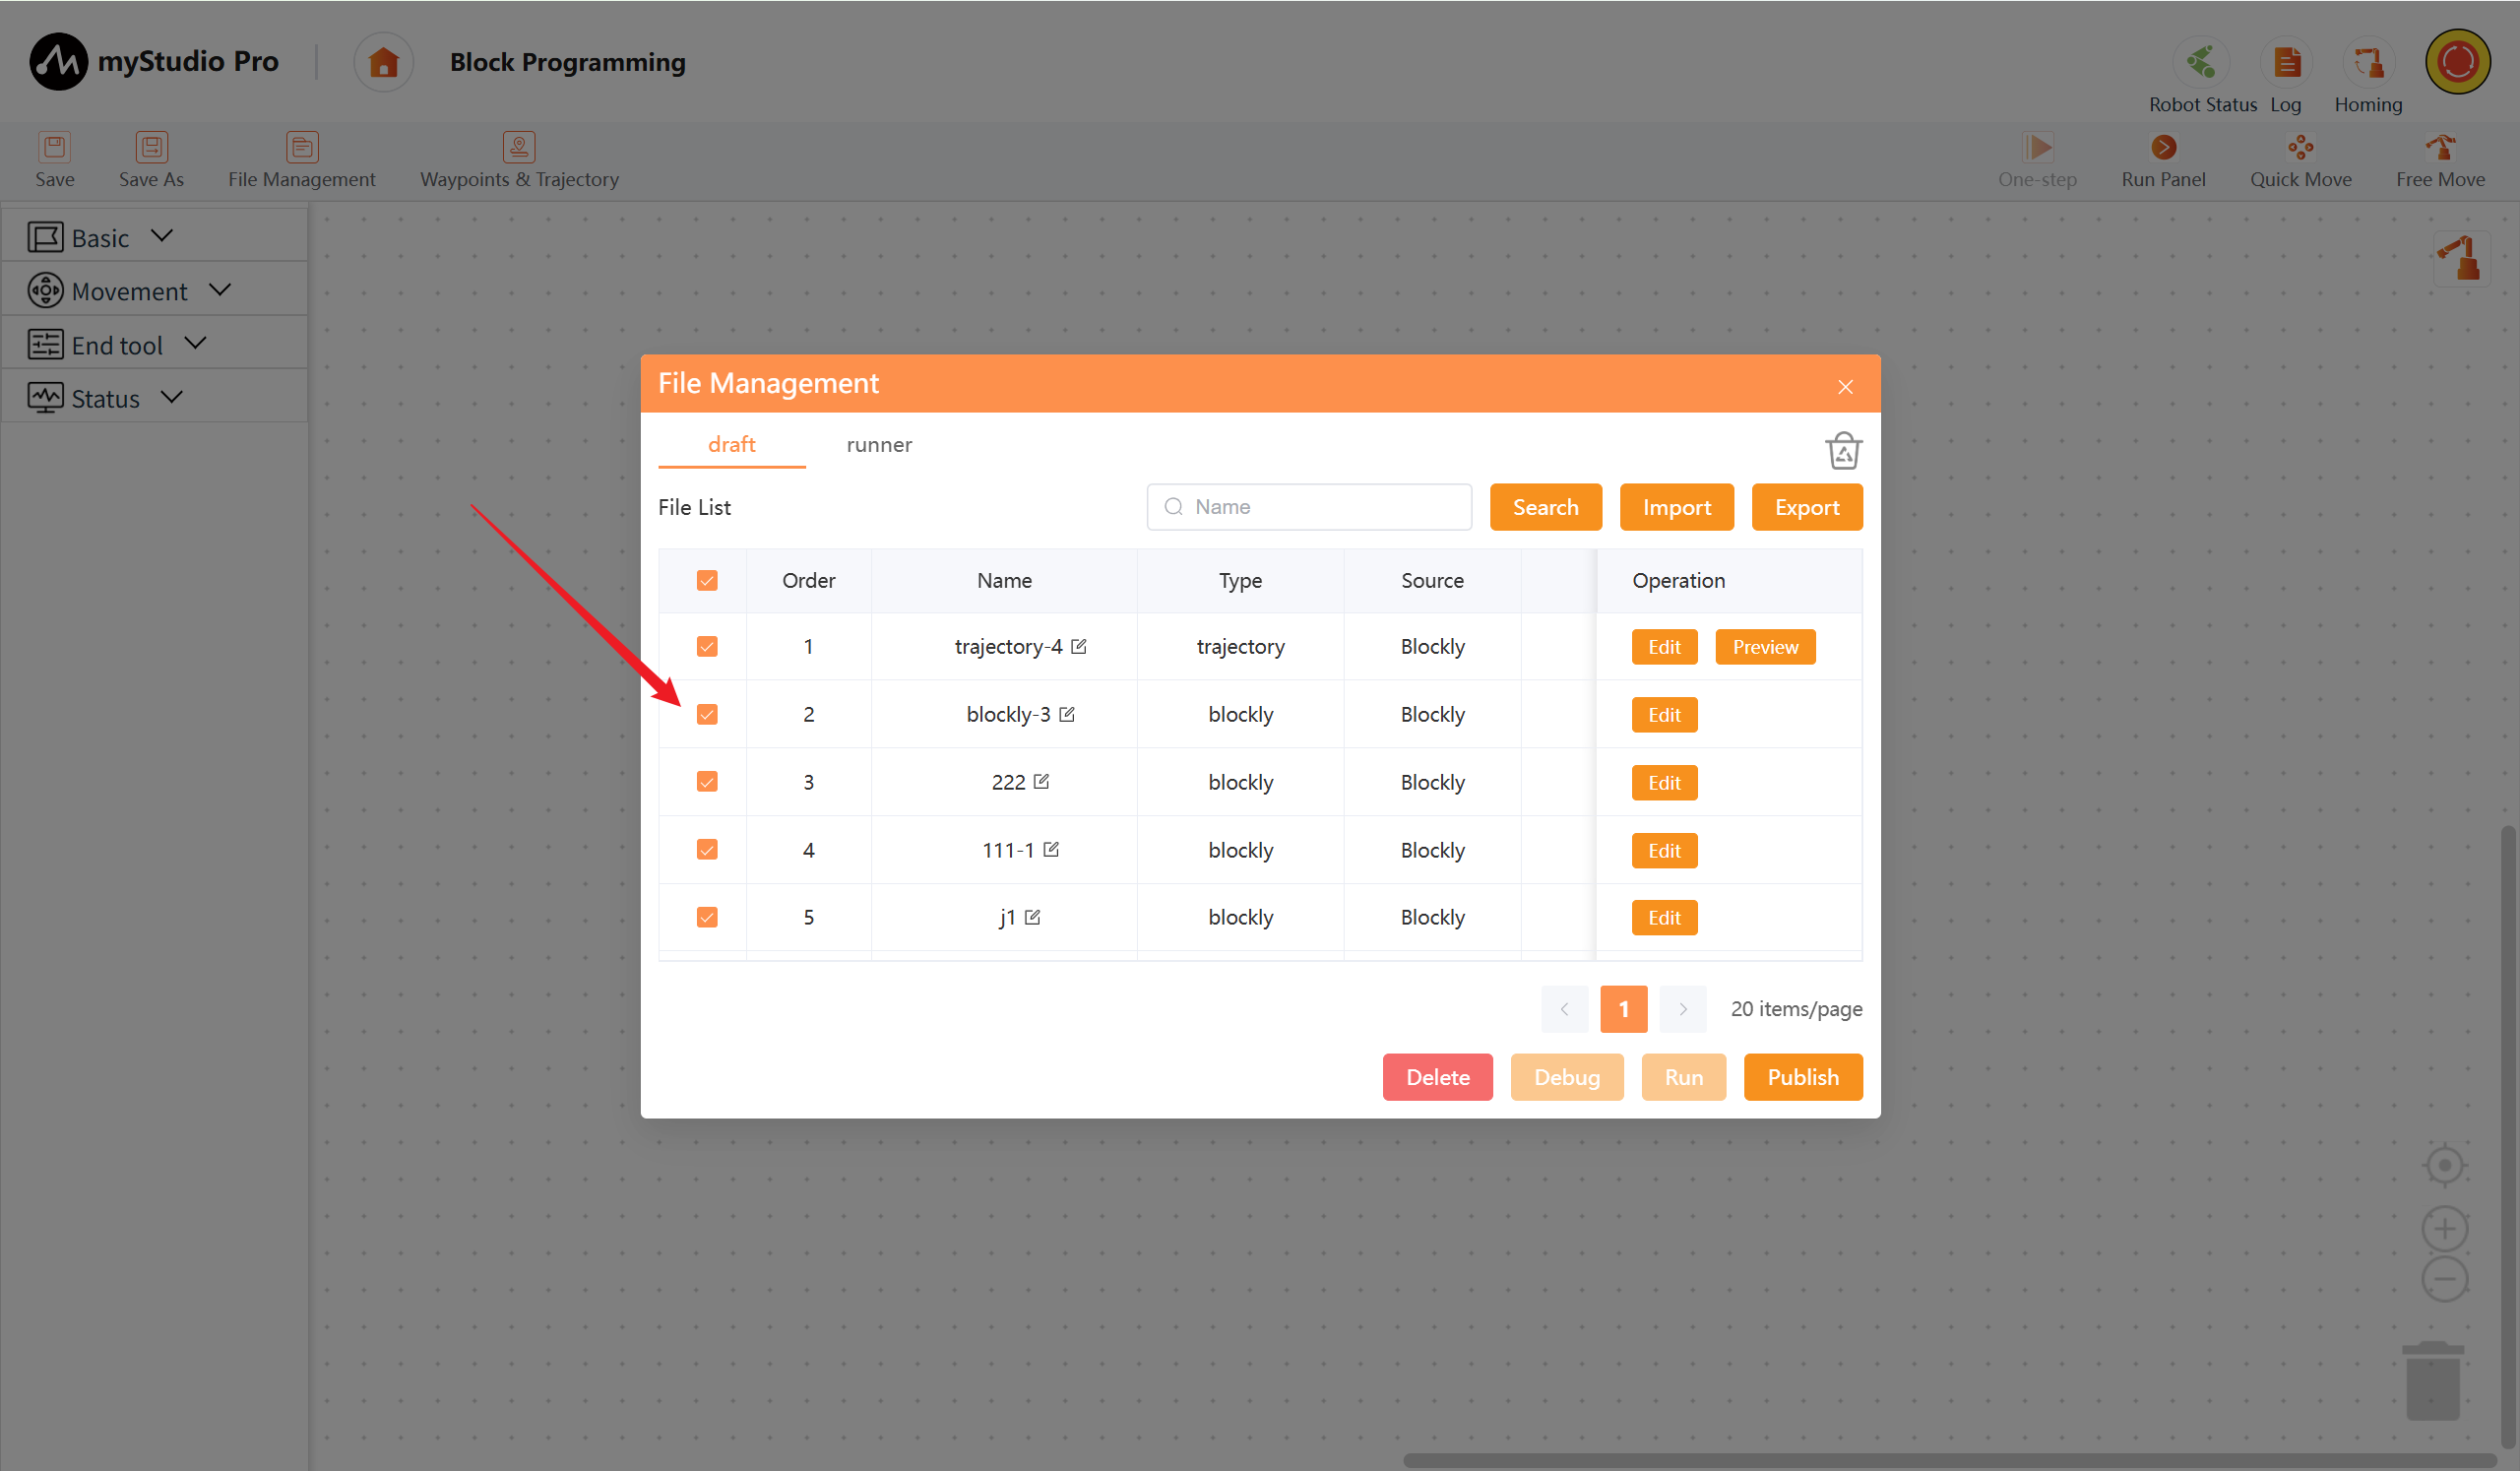
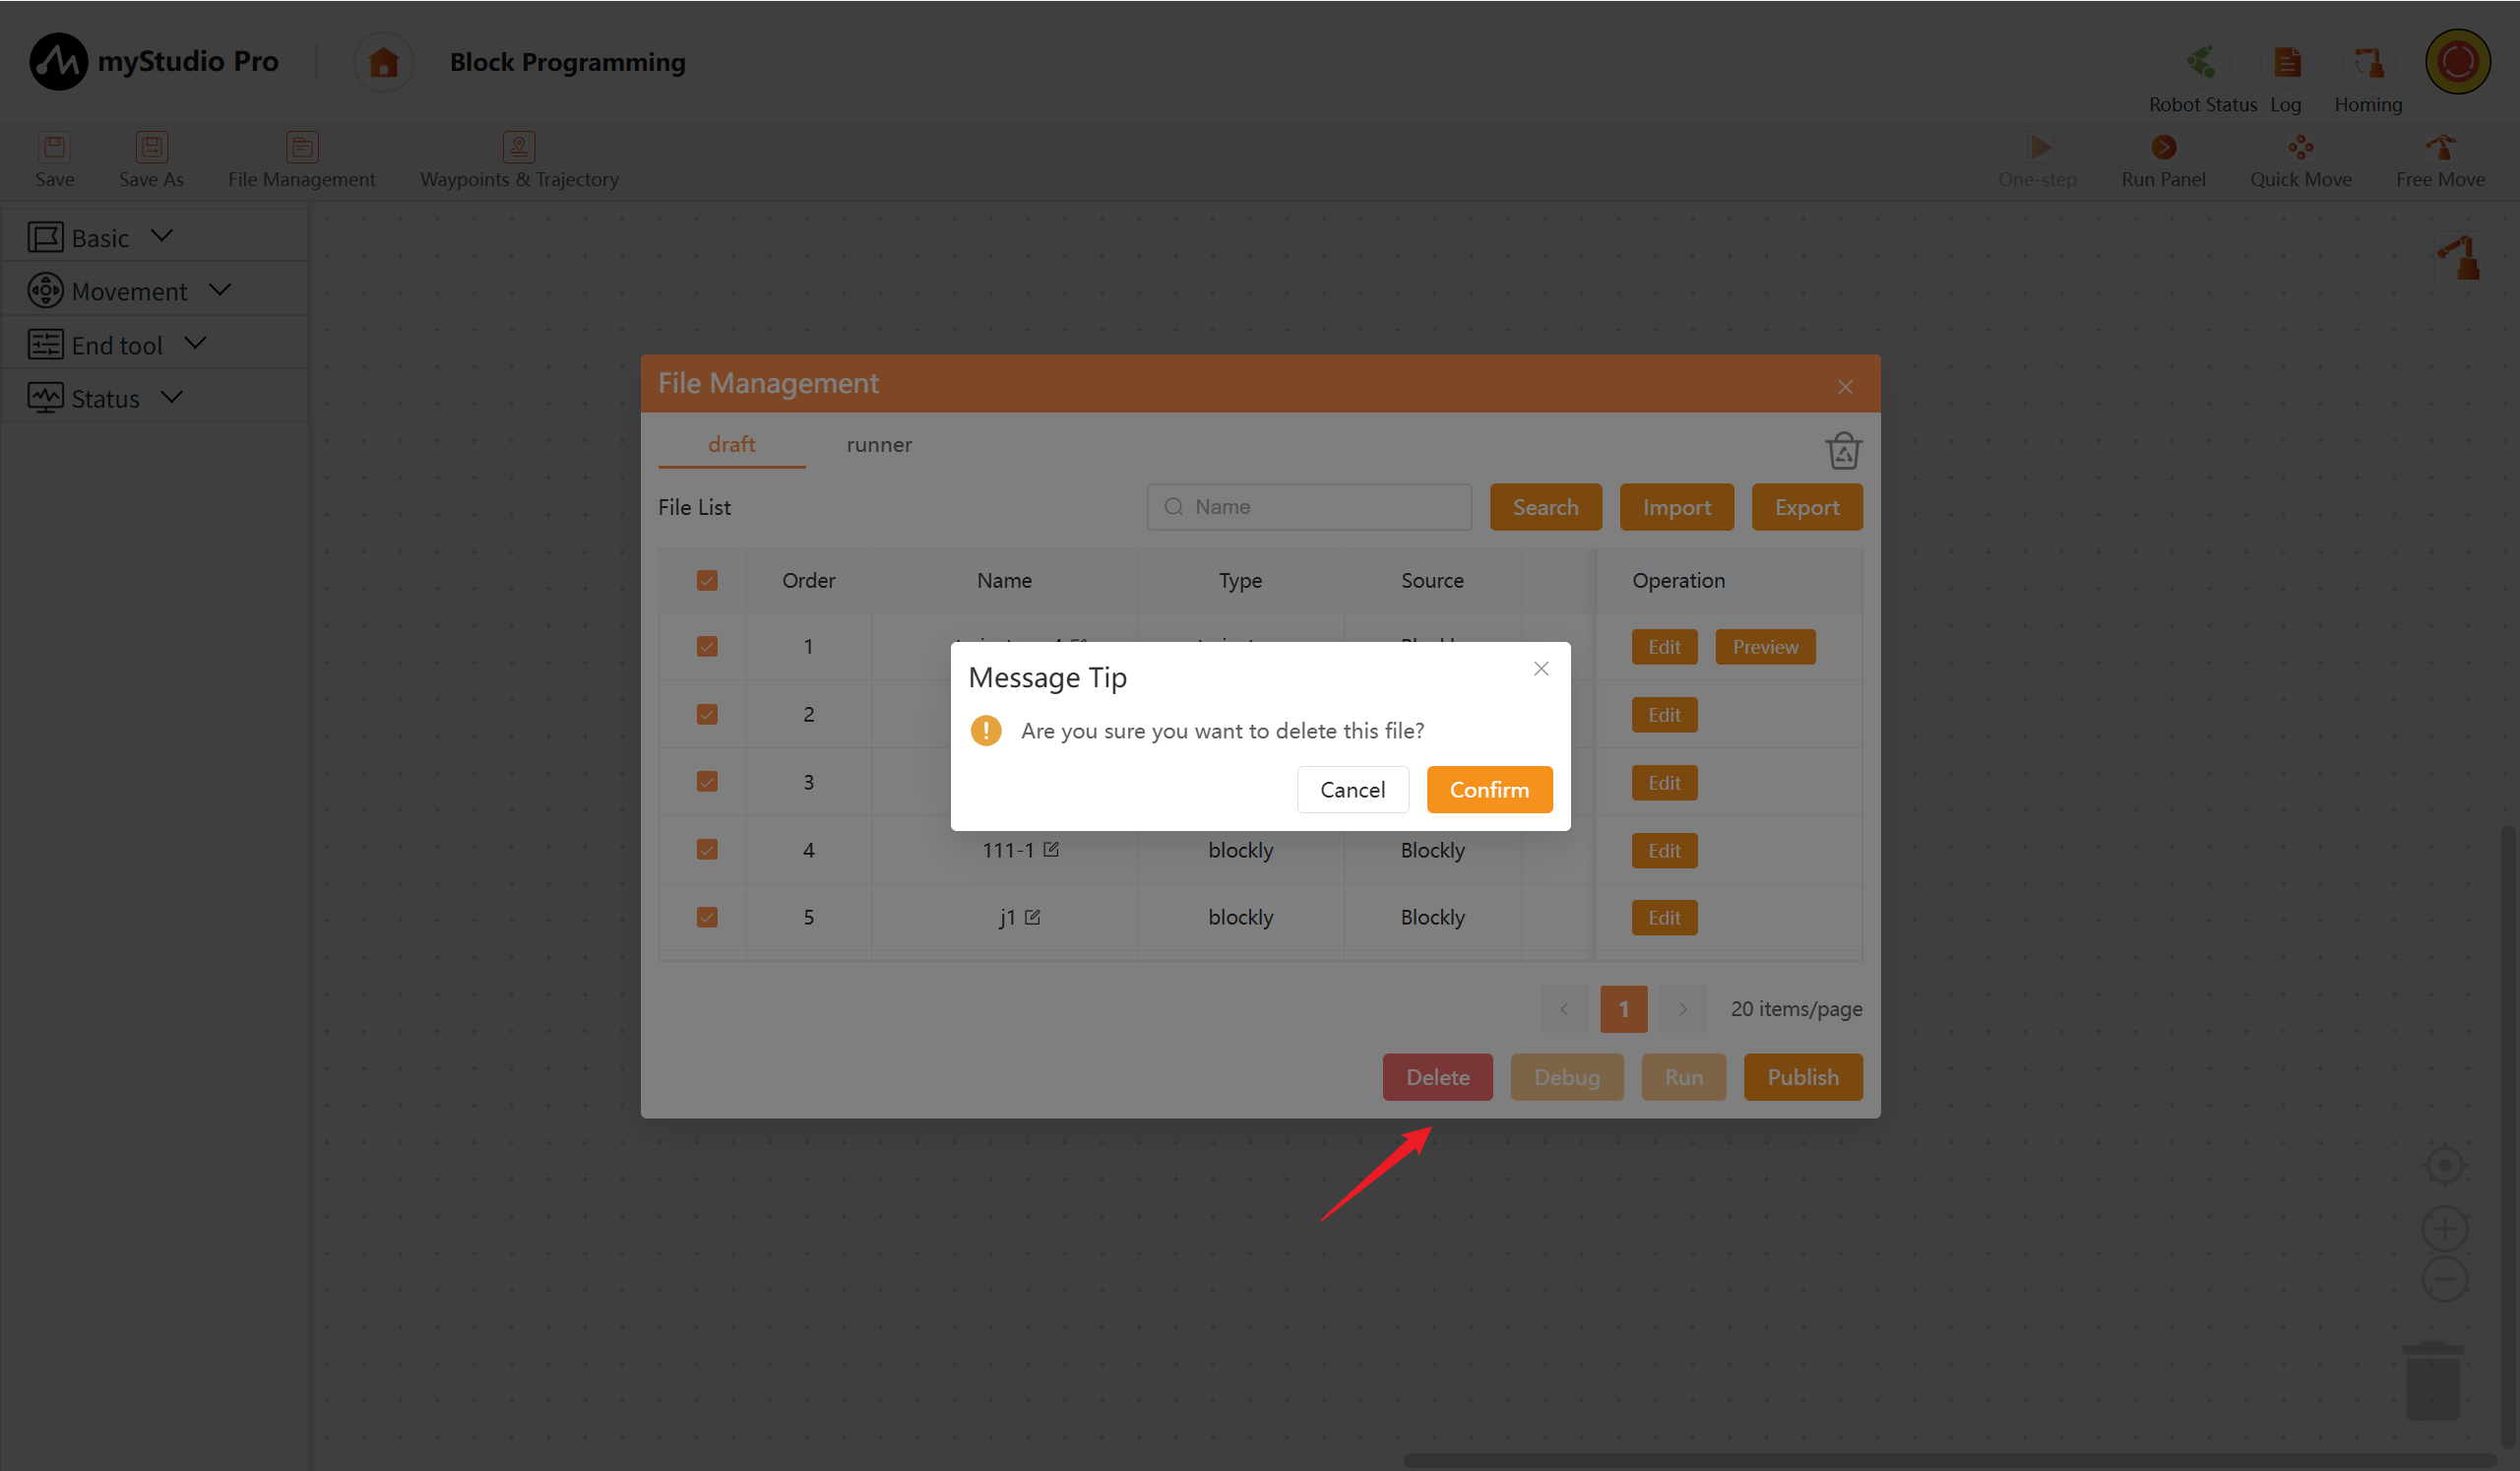
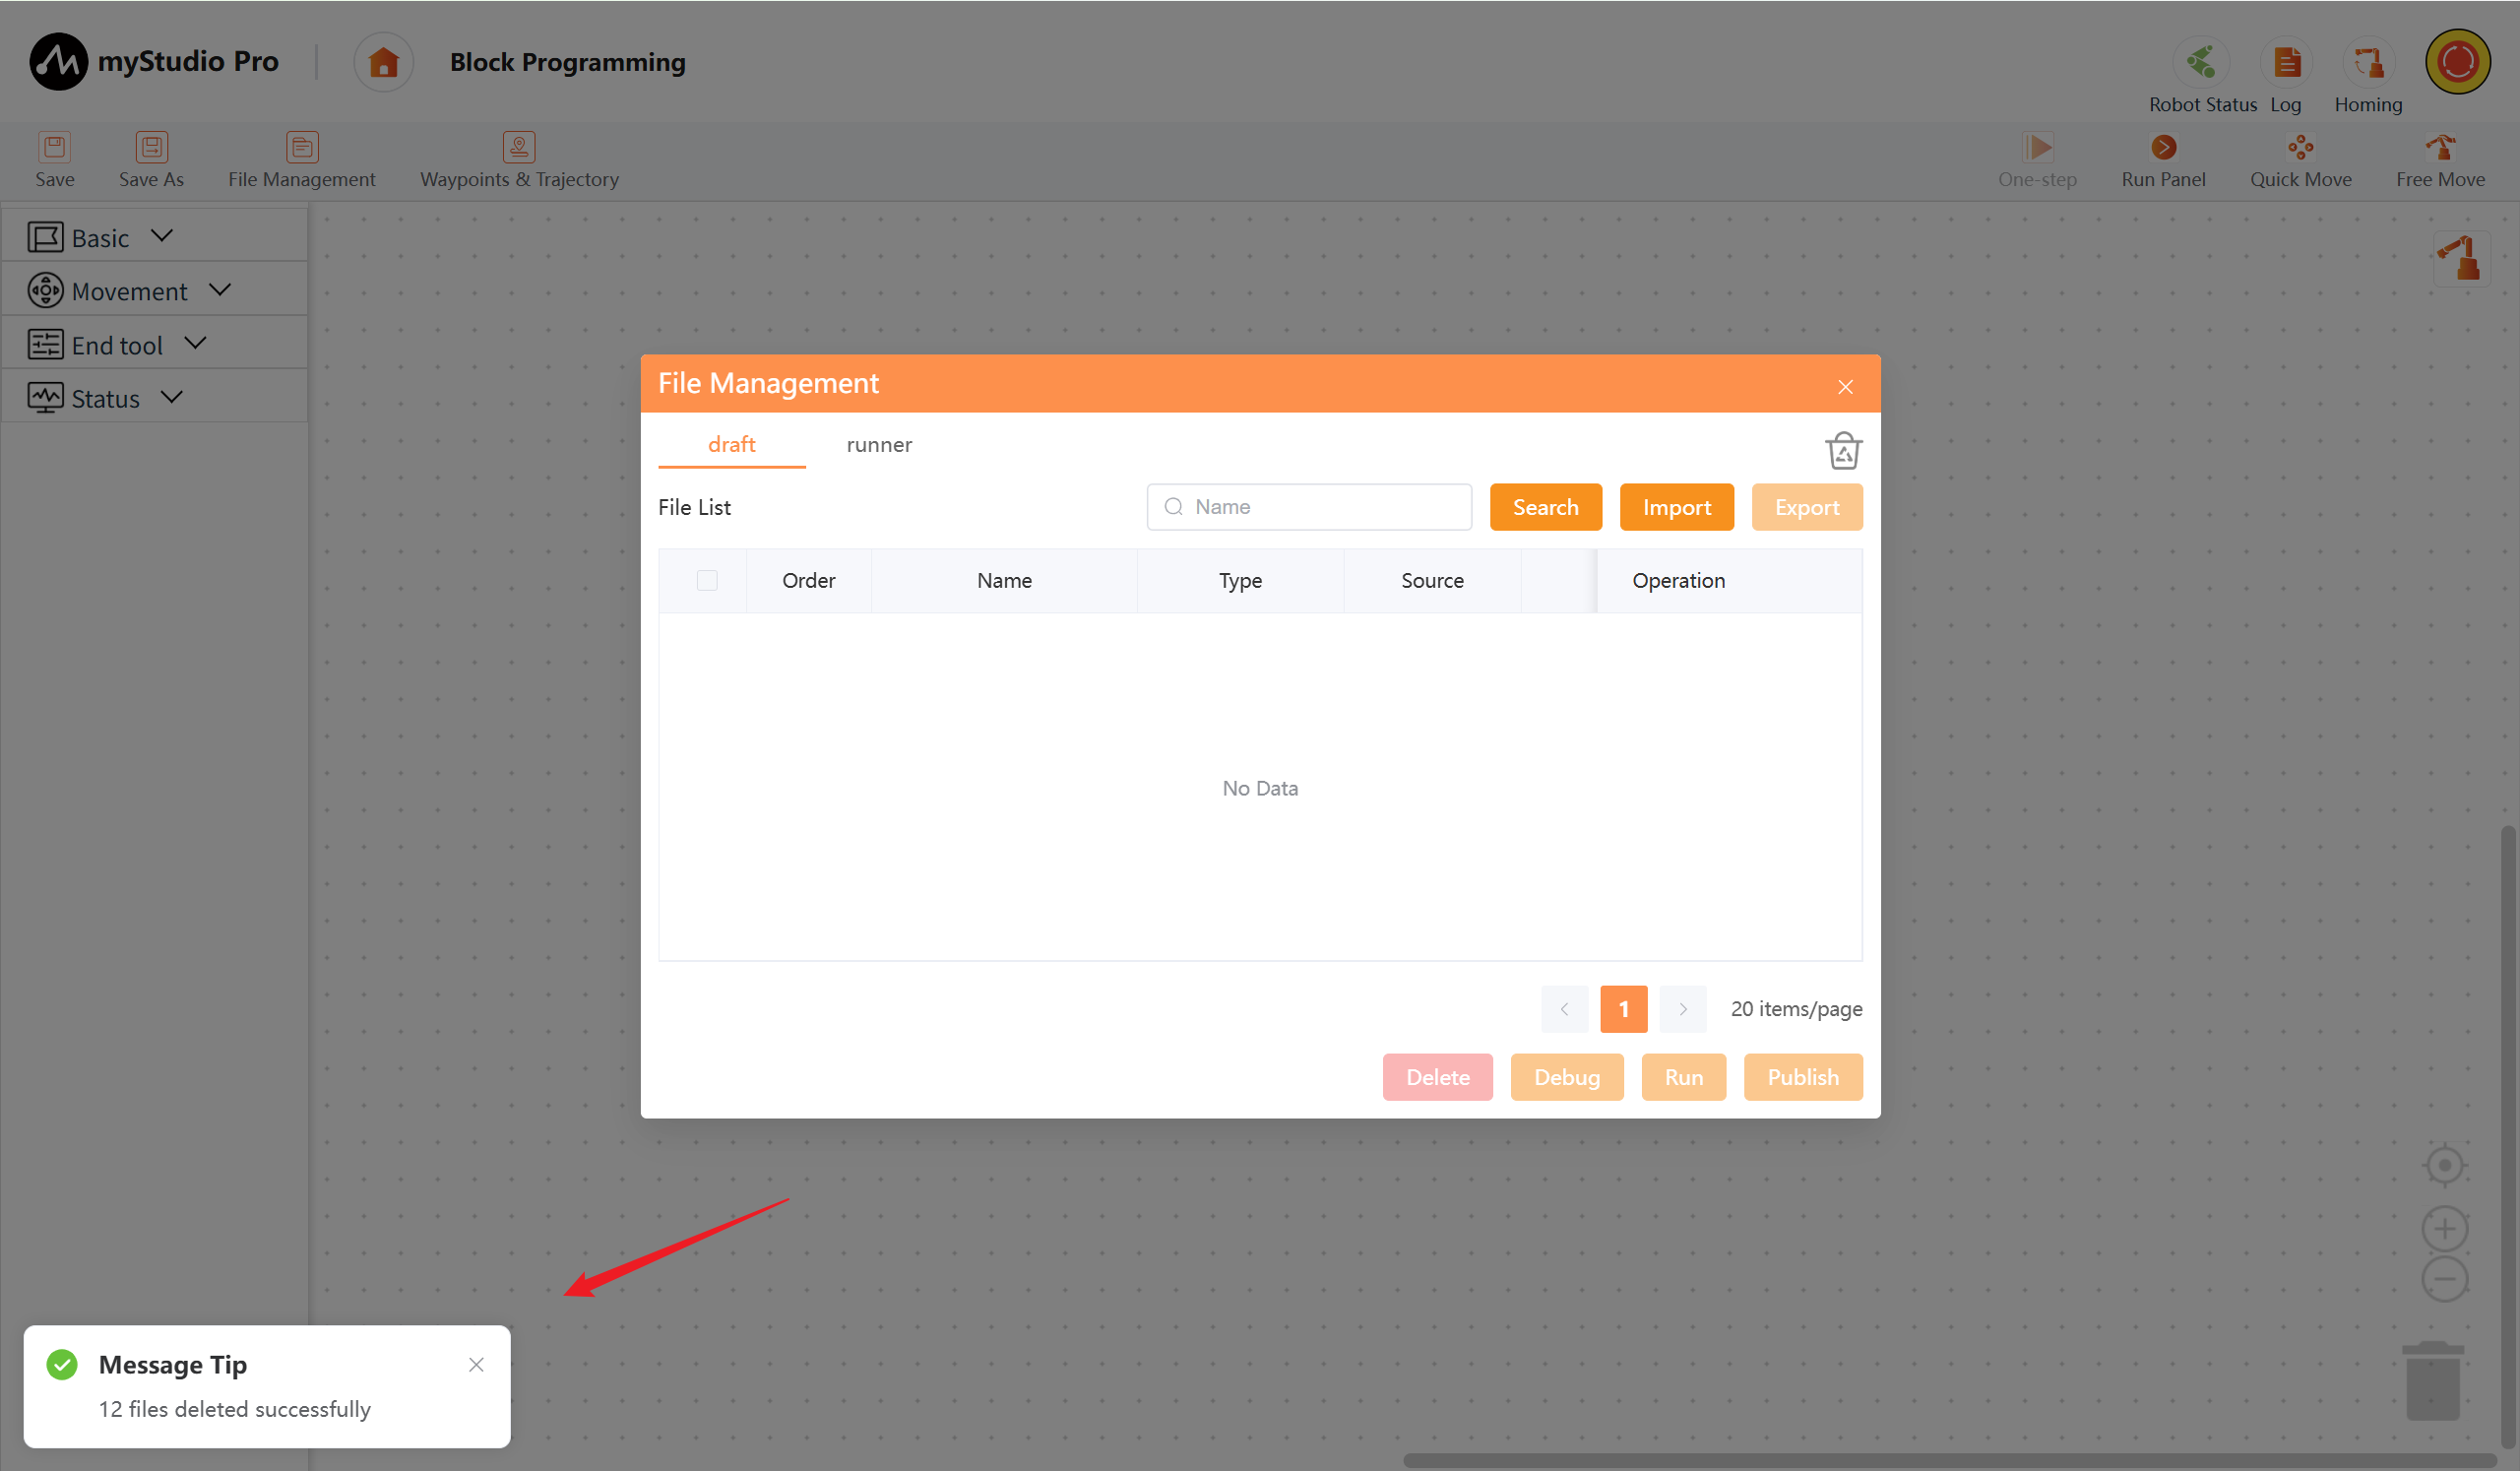
Click the Delete button to perform batch deletion. The selected files will be deleted to the Recycle Bin. If the deletion operation does not involve files in the Recycle, they will be permanently deleted and cannot be recovered.
Select the files you want to delete, then click the Delete button. After that, switch to the Recycle Bin option to view the list of deleted files.
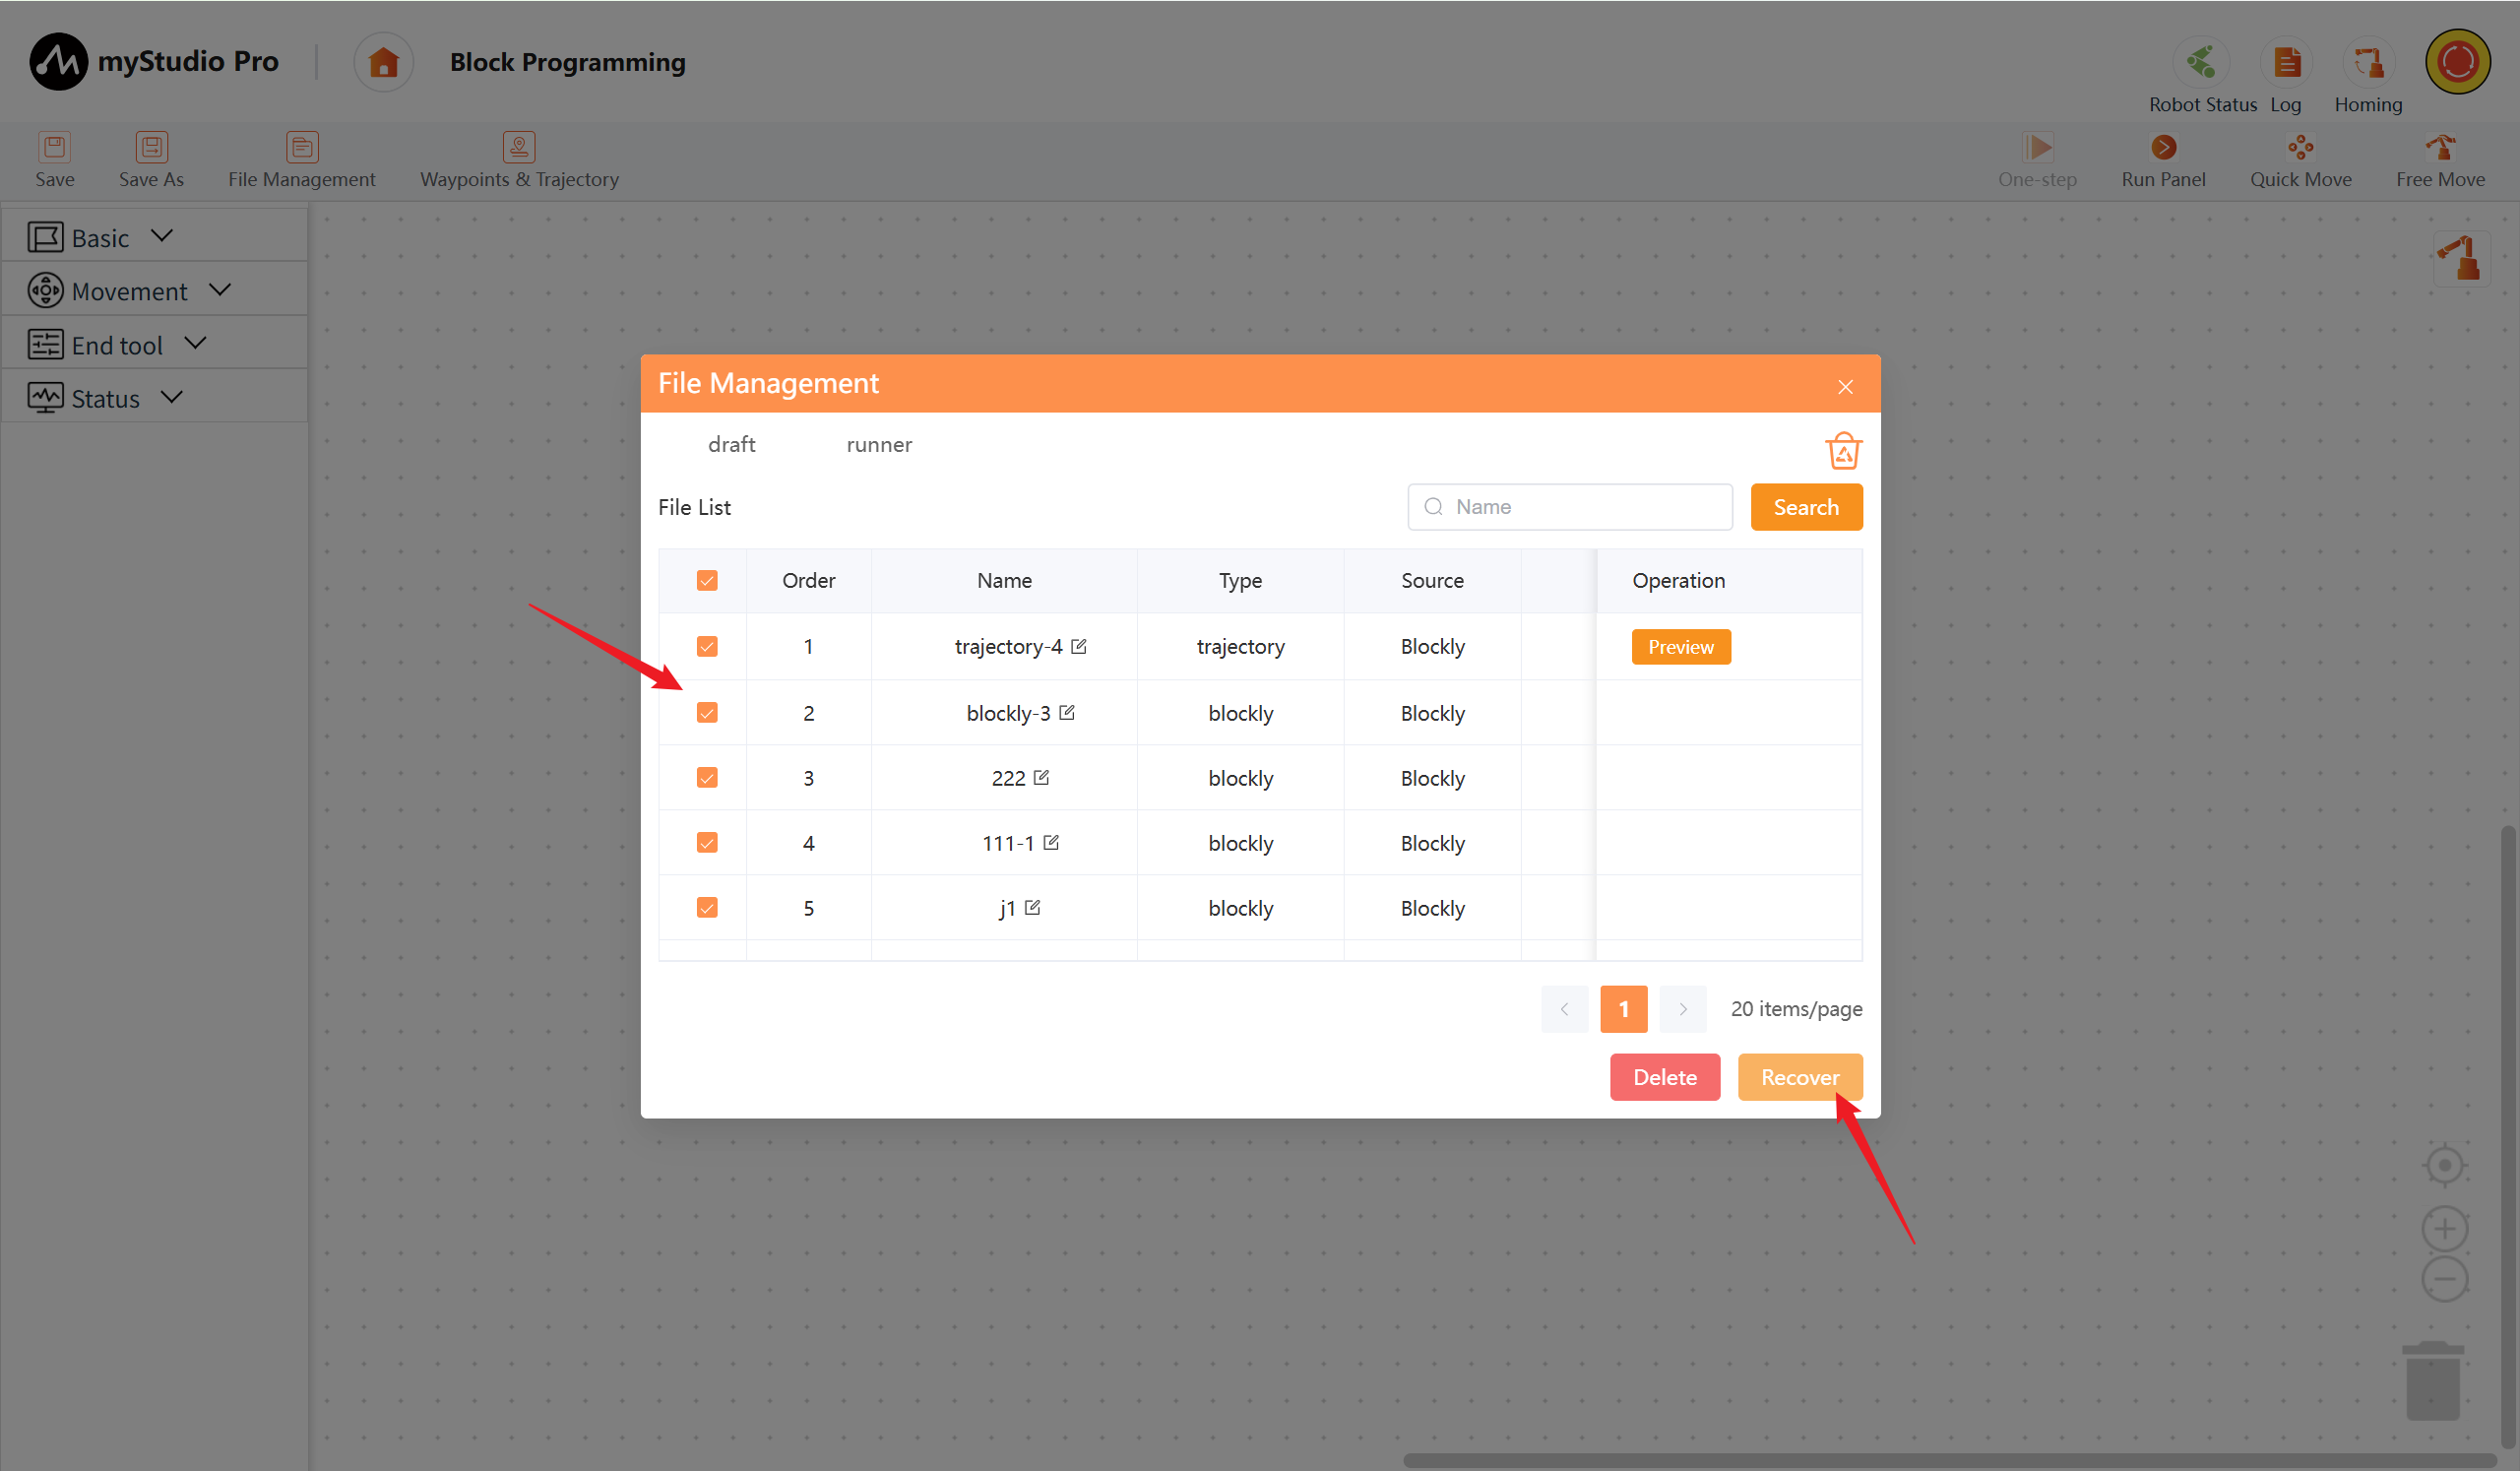
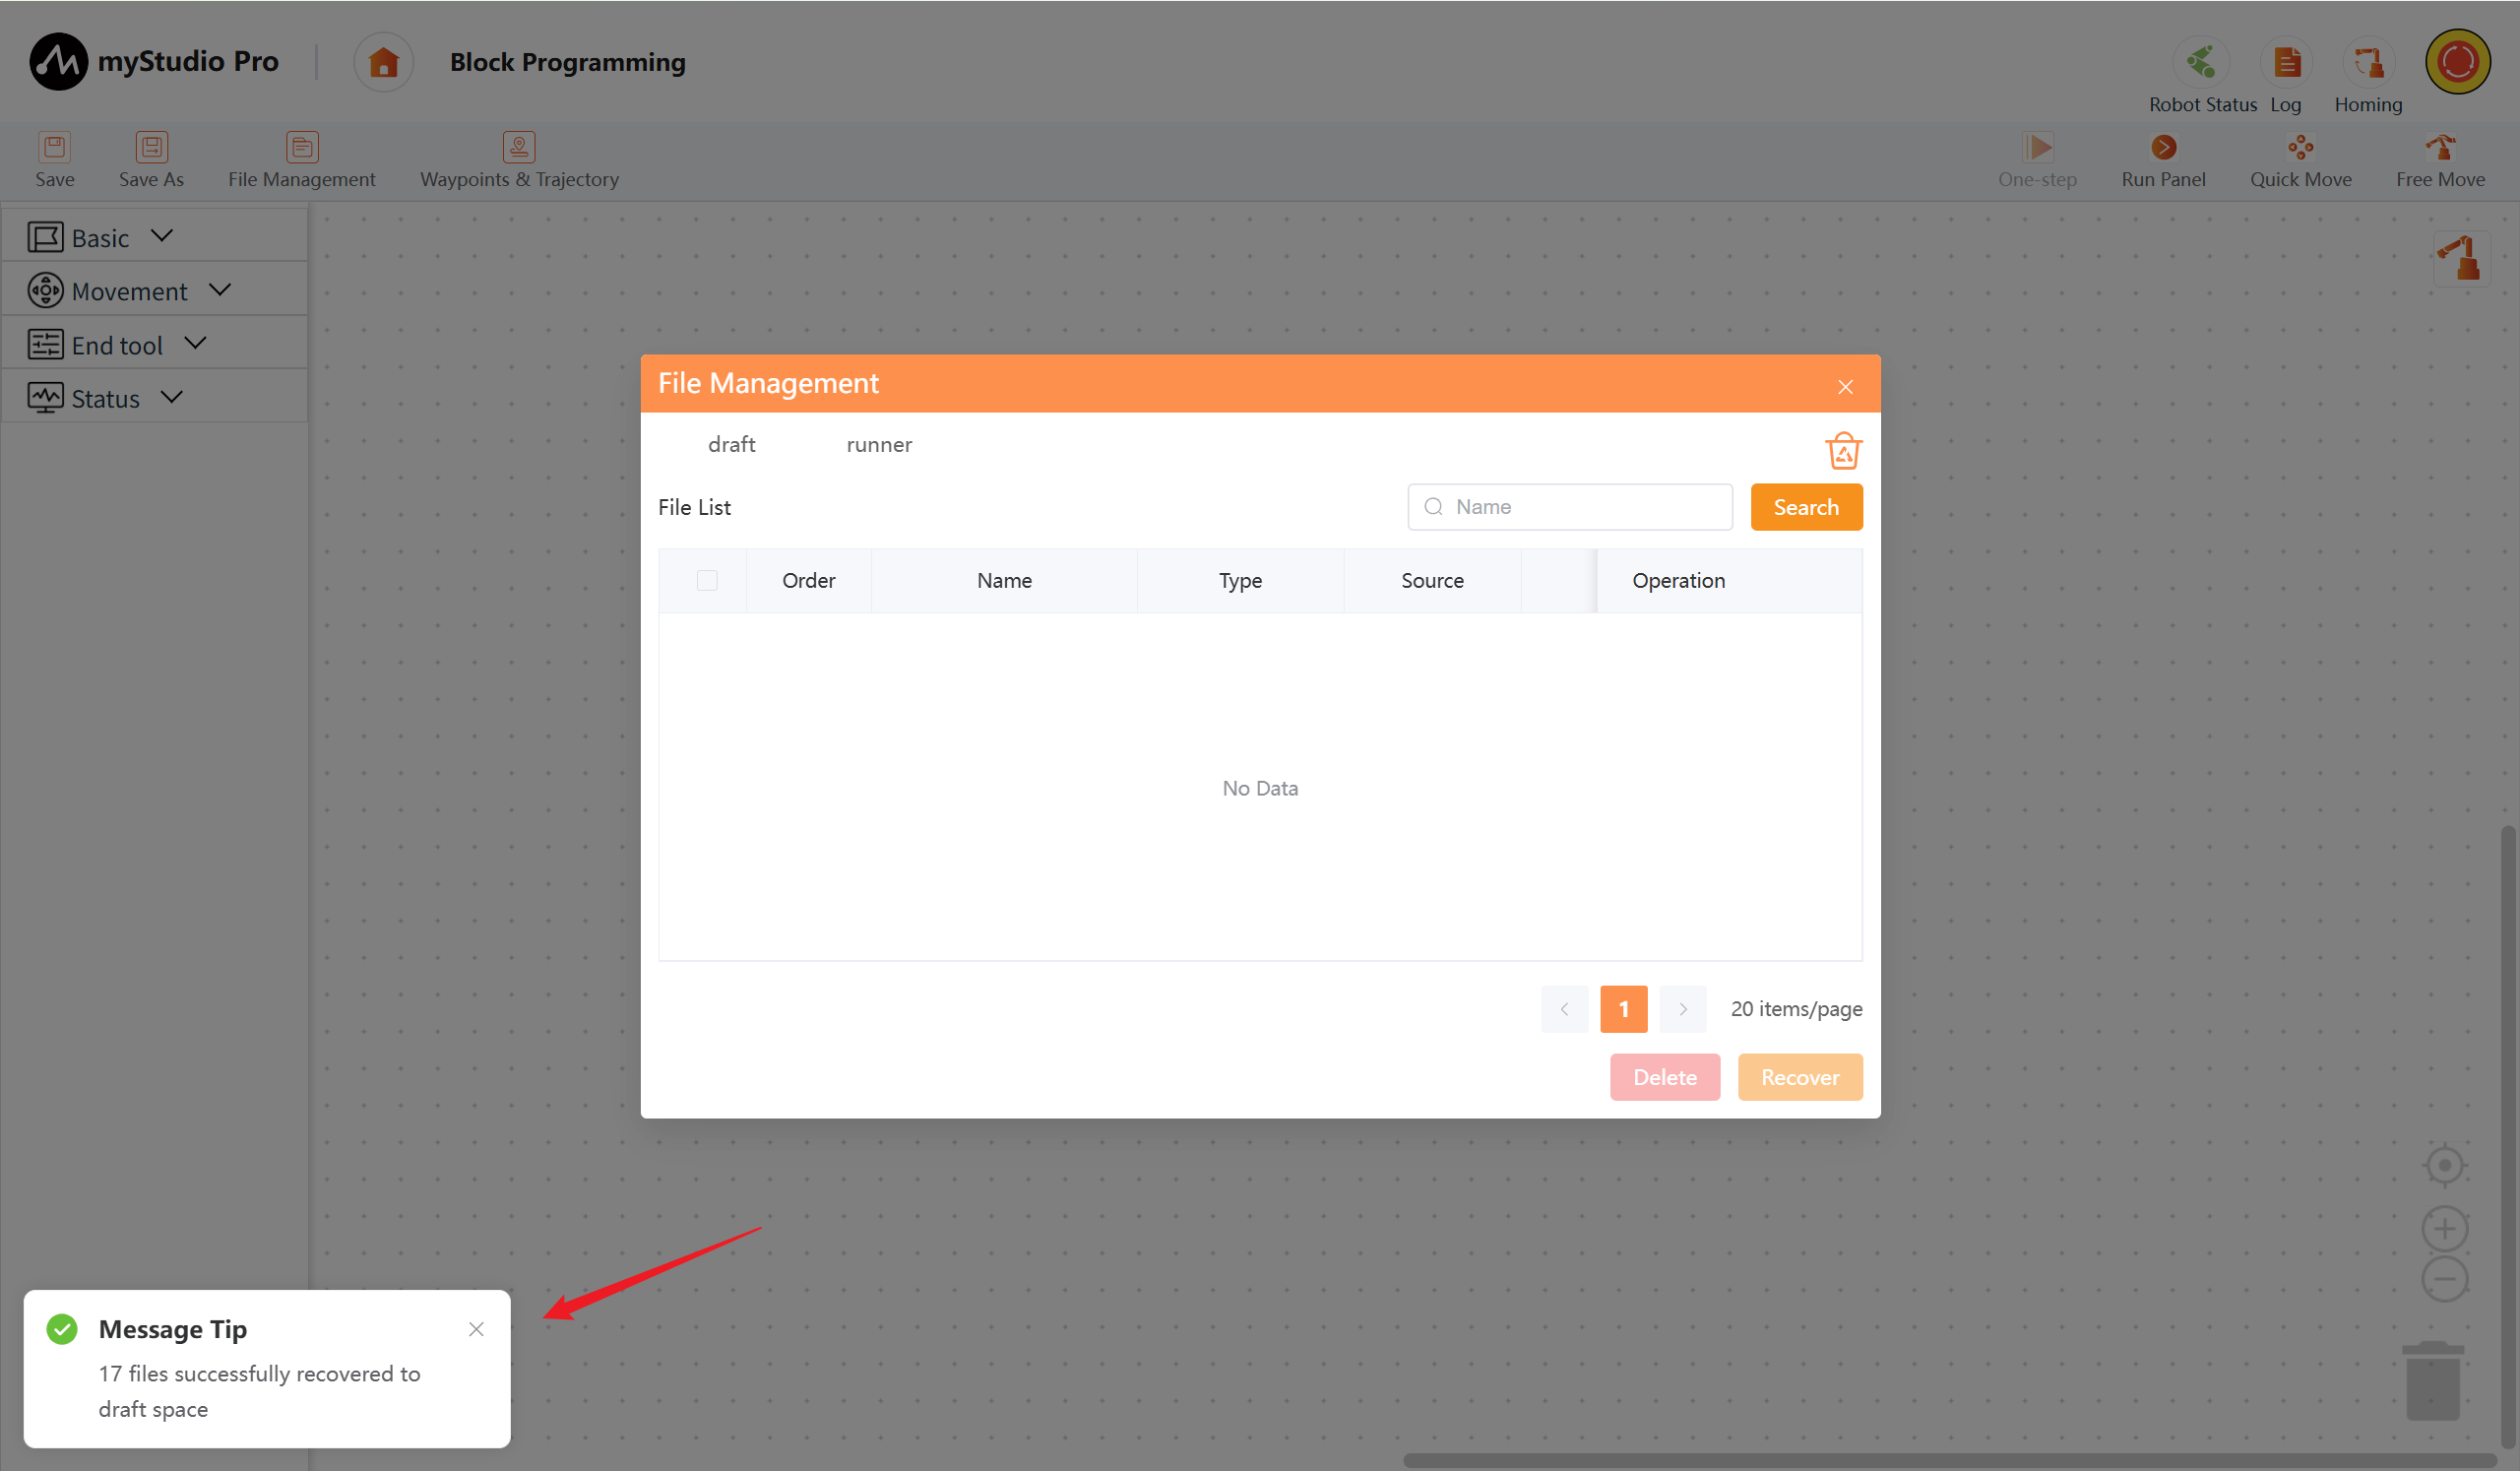
Recover
Click the Recover button to restore the file from the recycle bin to the draft space.
Debug
Select the files you want to debug, then click the Debug button. It will first check if there is any unsaved content in the workspace and prompt you. If so, a pop-up window will appear; click "Ok" to load it into the workspace. Otherwise, it will load directly and open the debug panel.
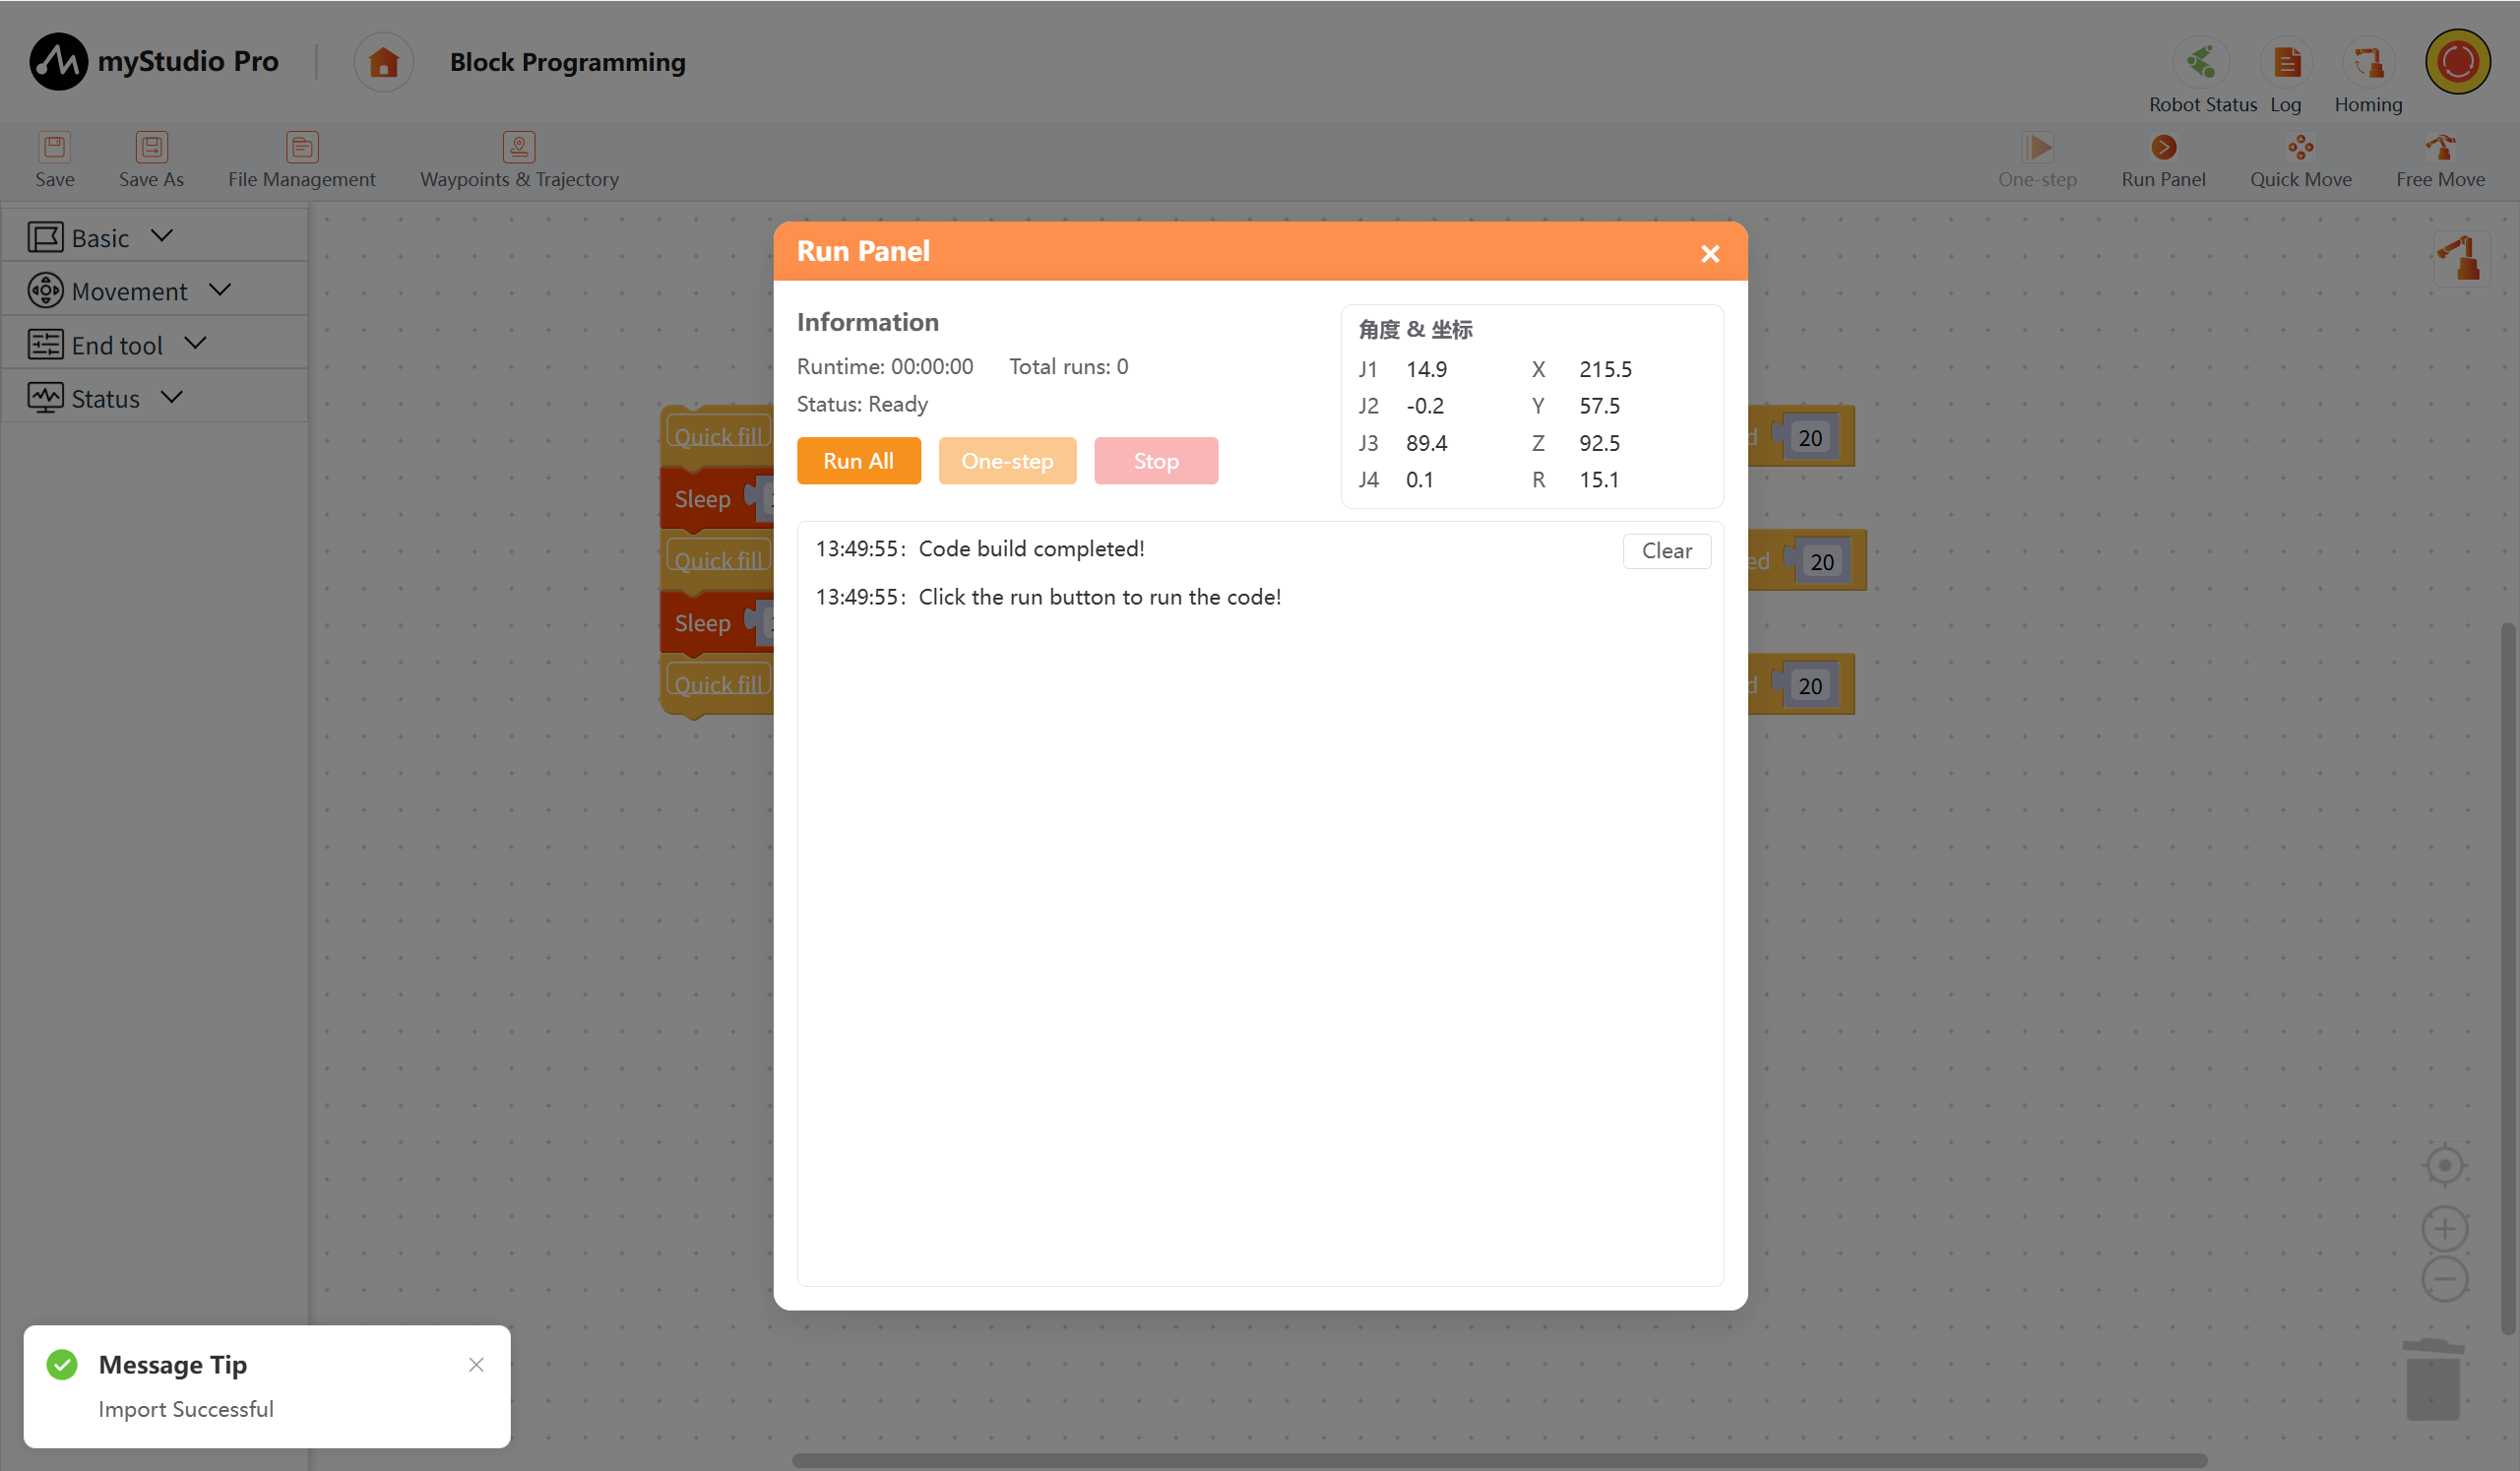
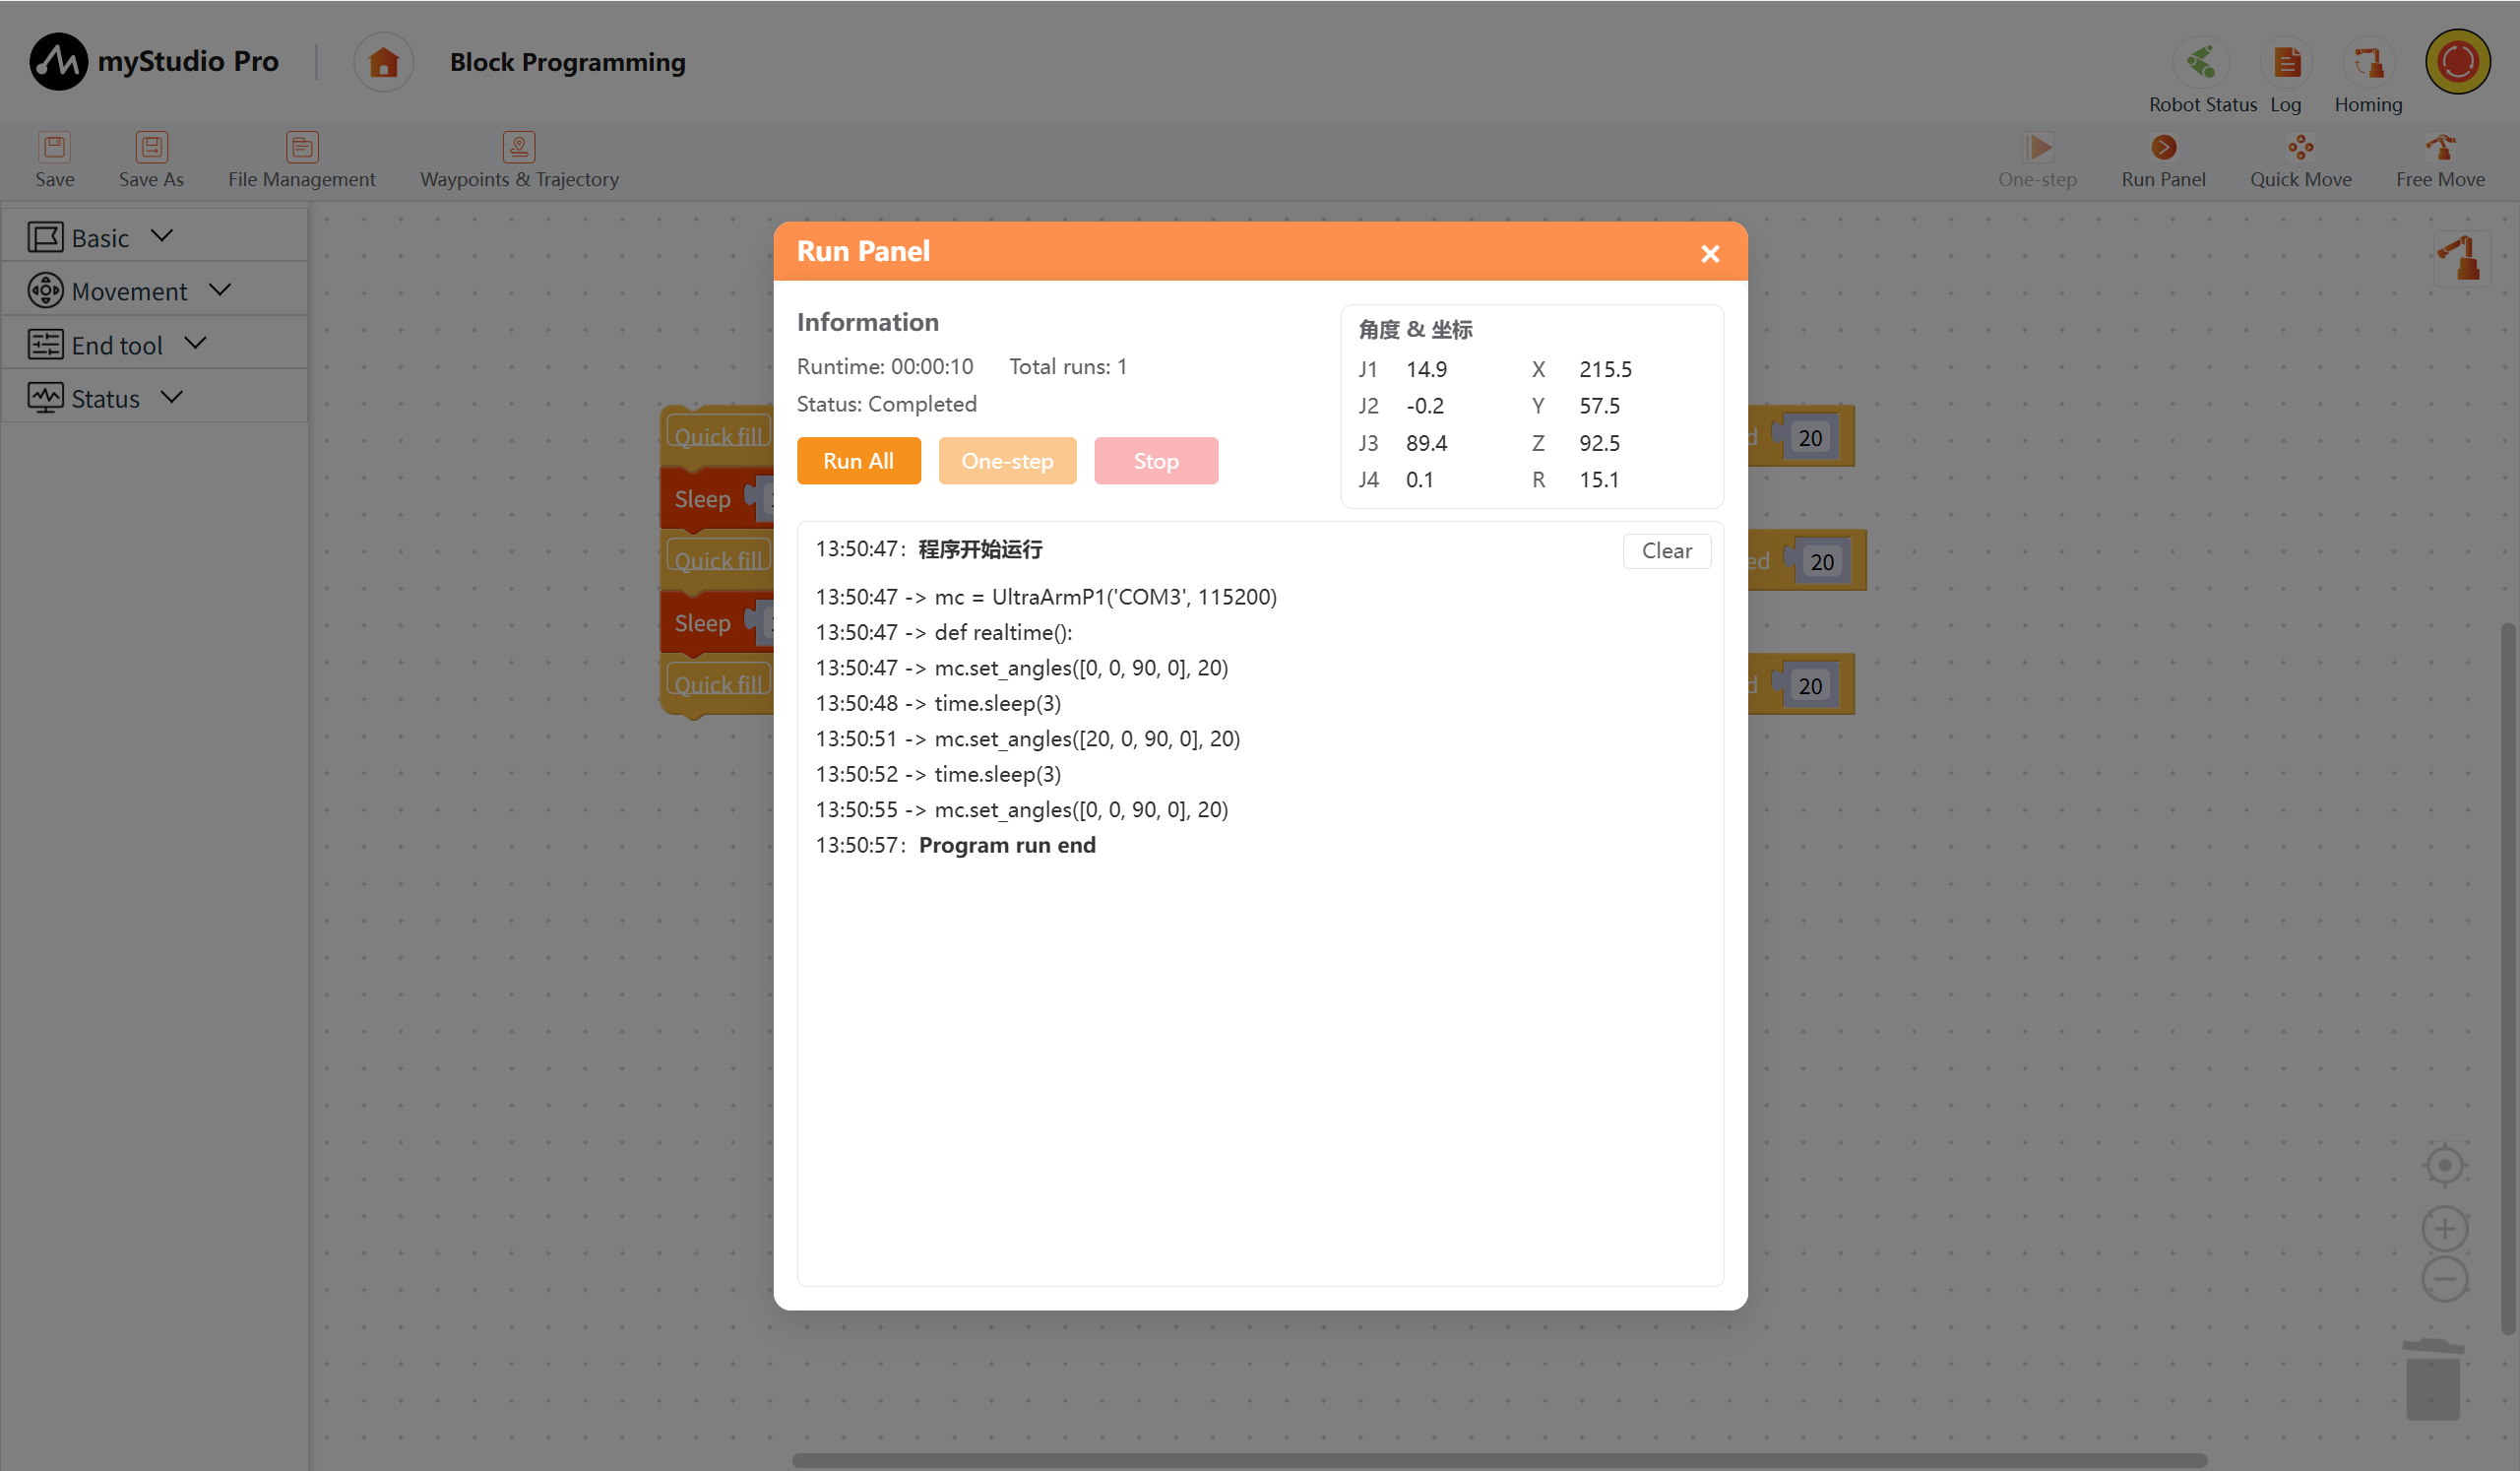
Run
Select the file you want to run, then click the Run button. First, it will check if there is any unsaved content in the workspace and prompt you. If so, a pop-up window will appear; click "Ok" to load it into the workspace. Otherwise, it will load directly, and the Run panel will open; click "Run" to run the file.
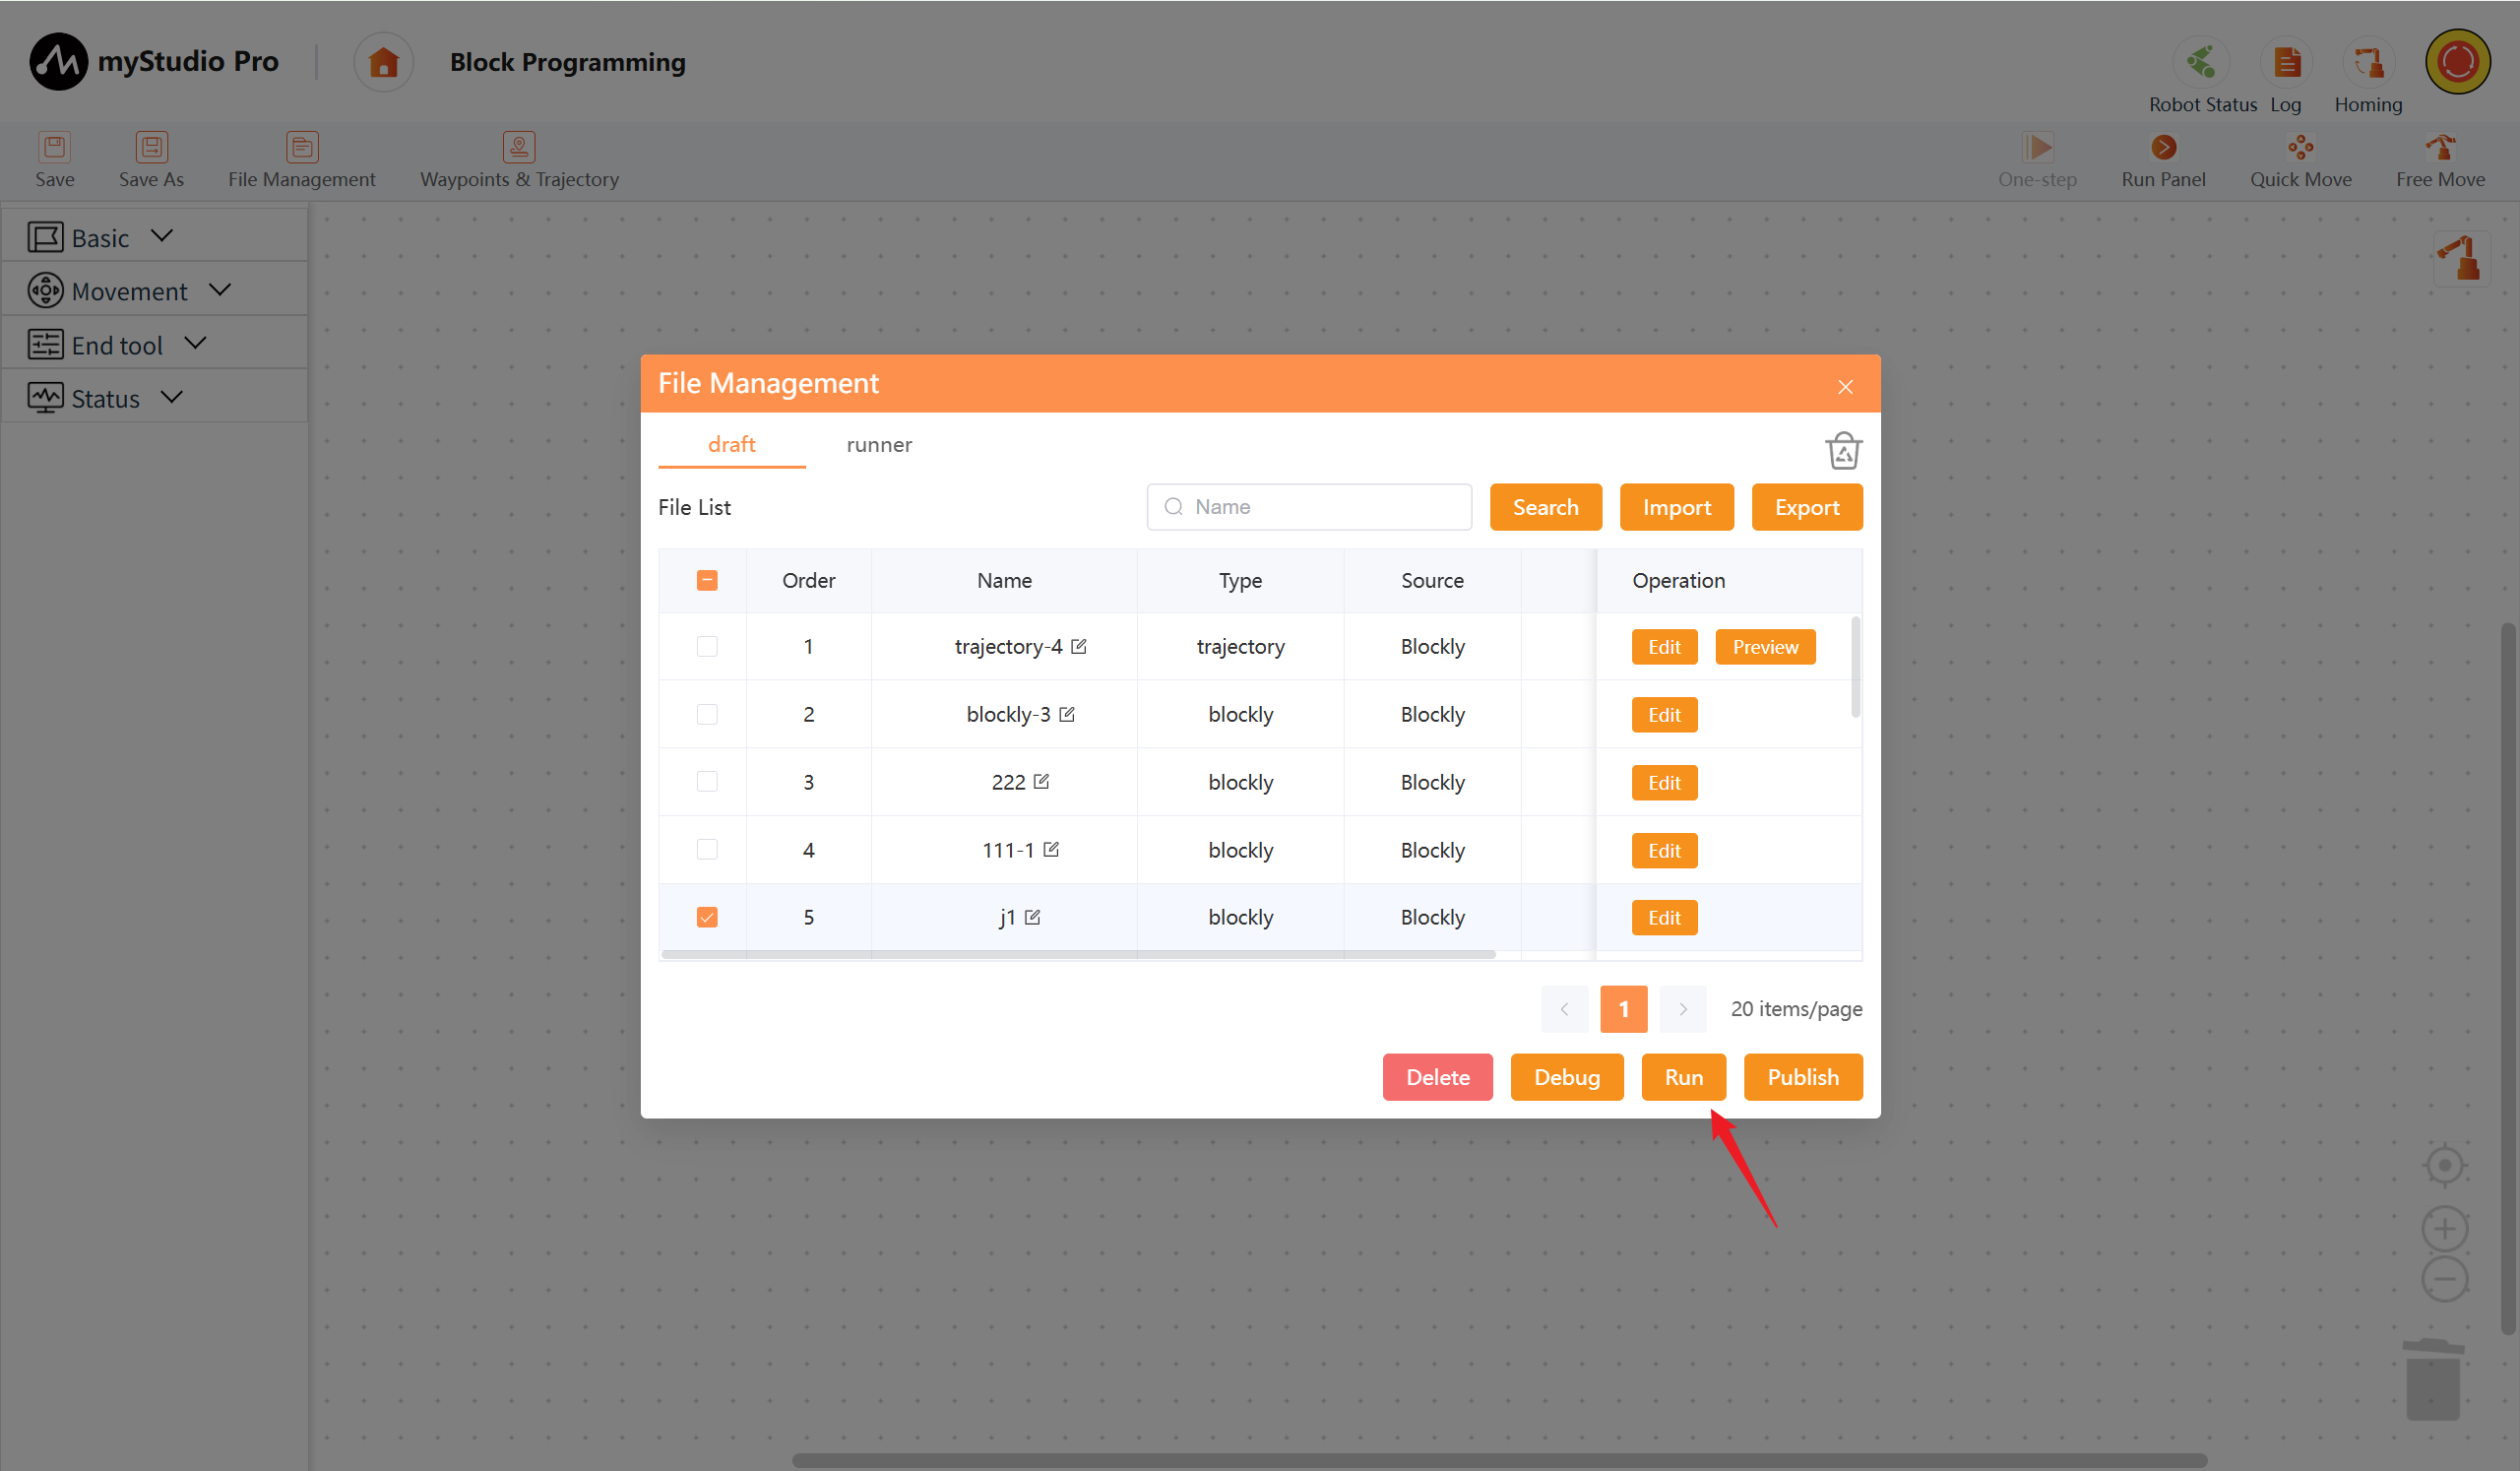
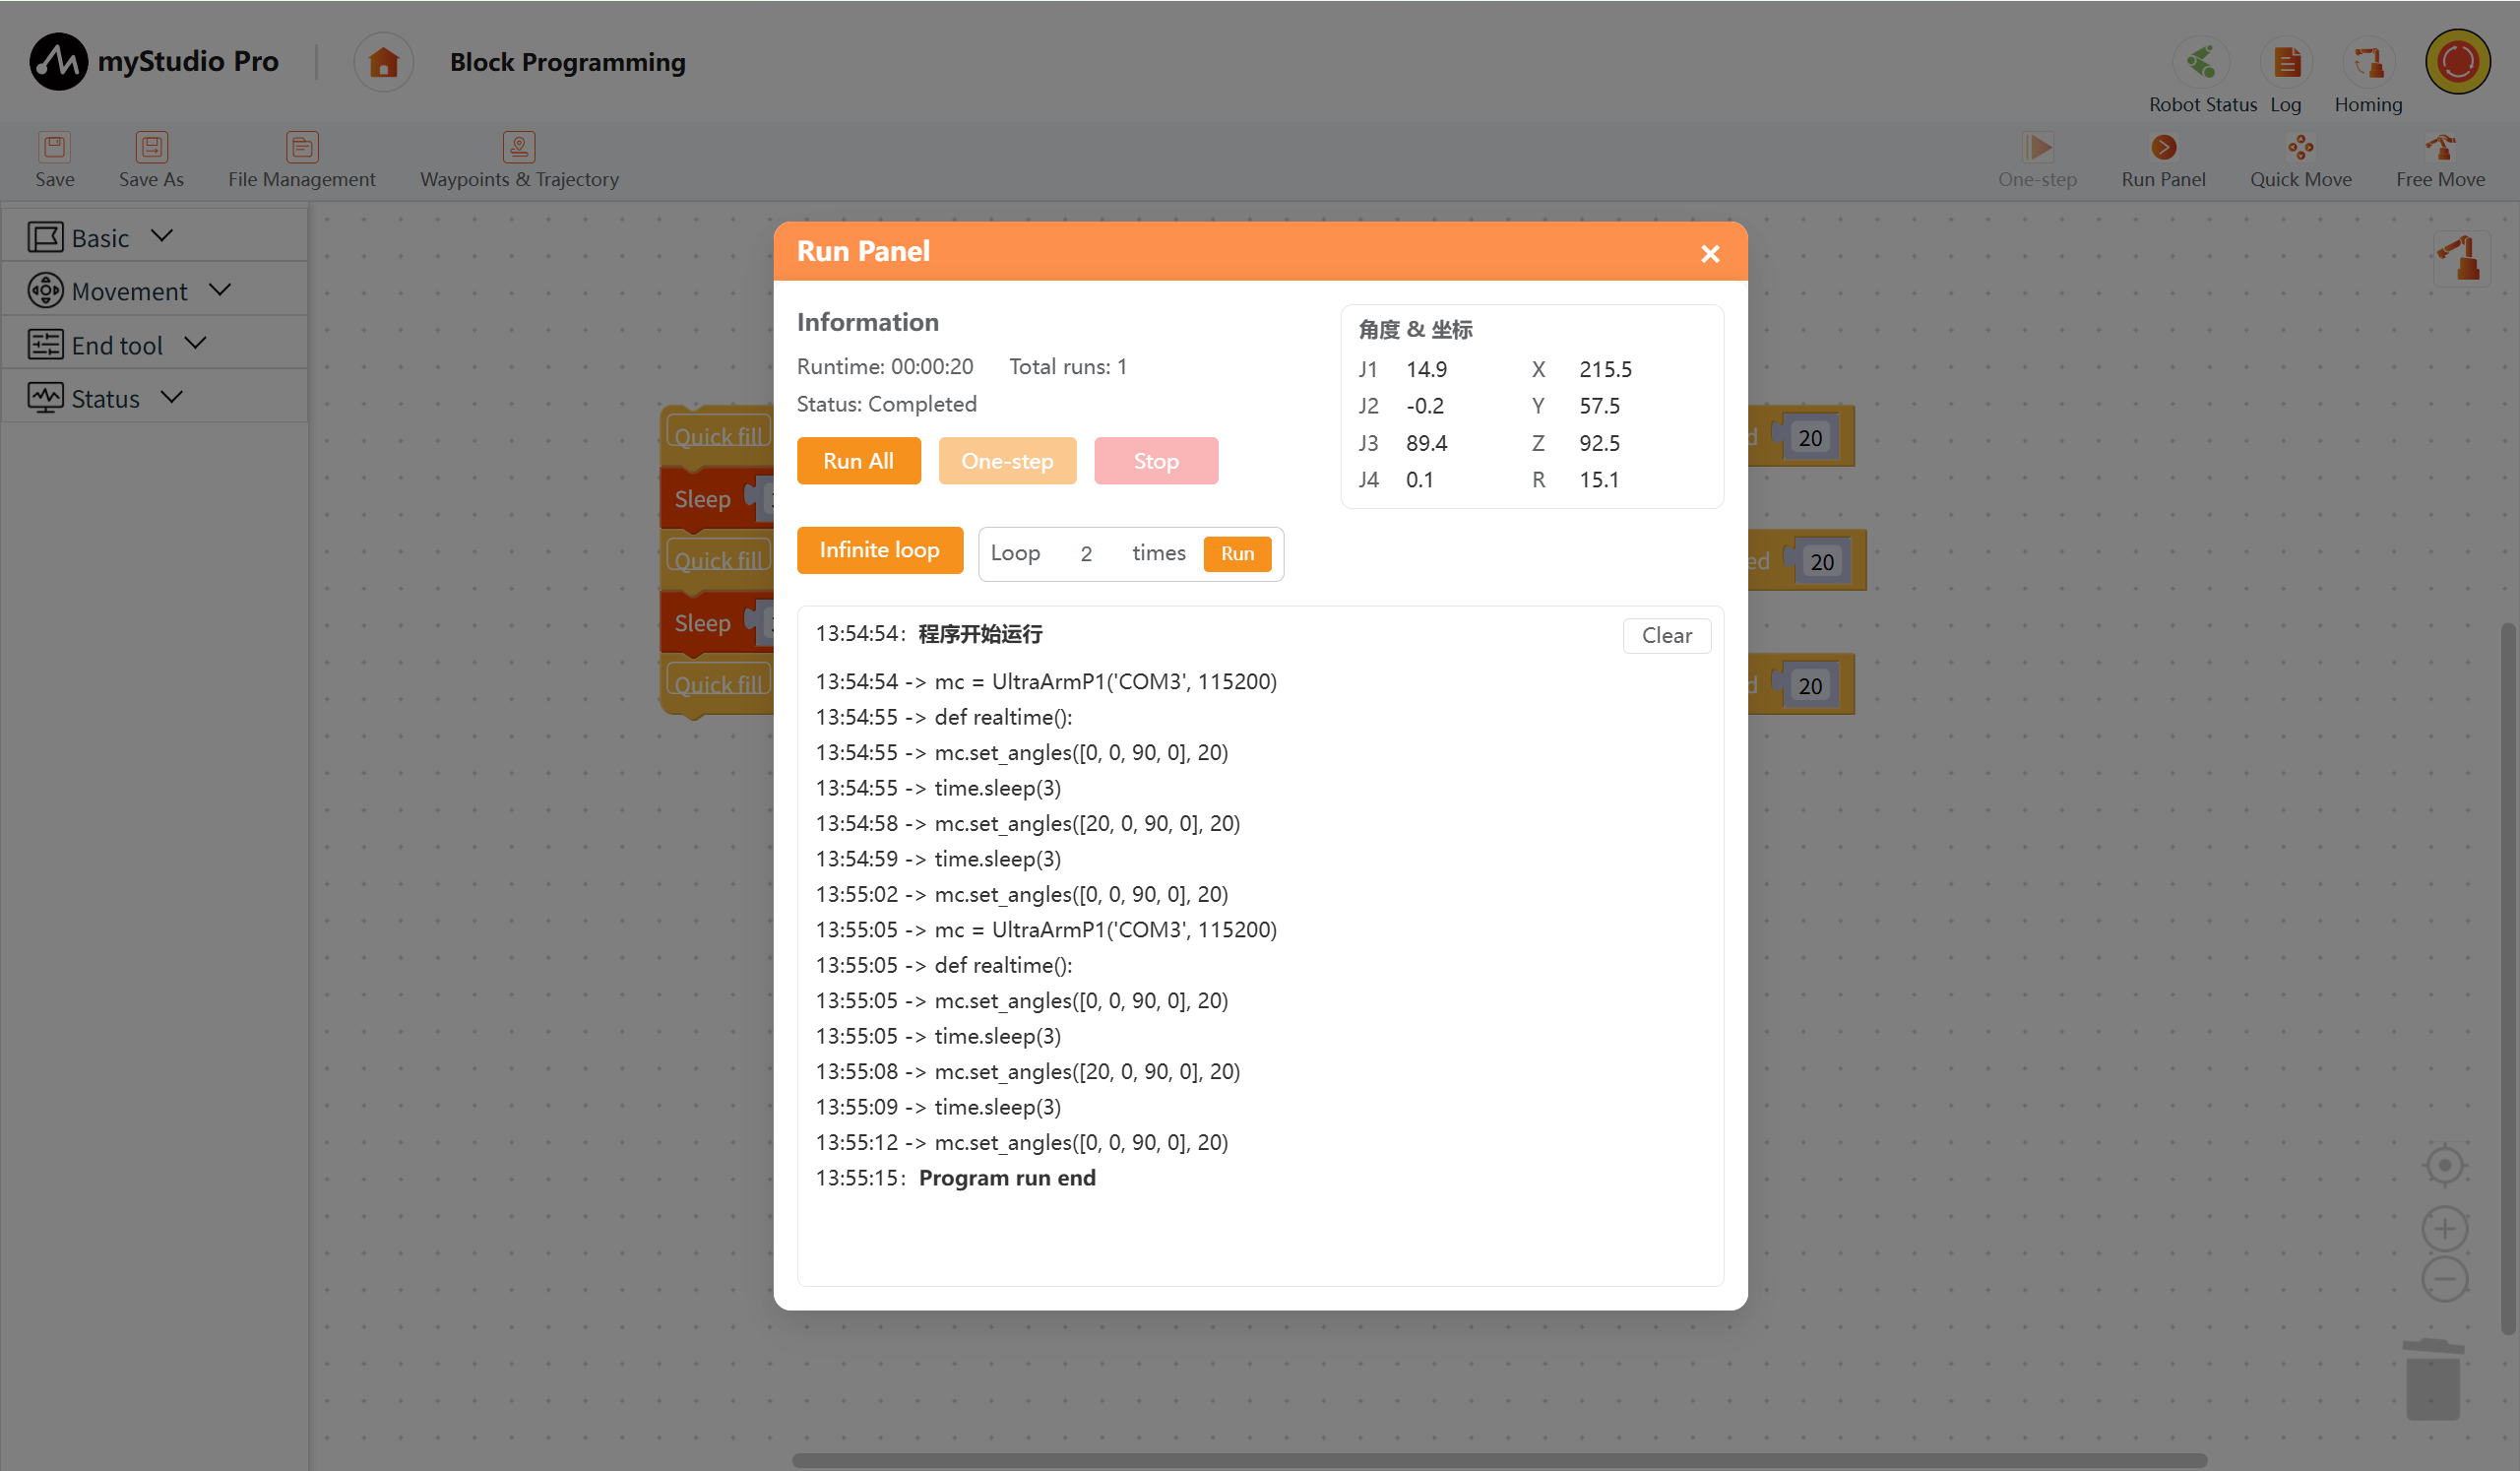
You can choose to run the file infinitely or specify the number of runs (the following explains the looping process). After setting, it will run in a loop. First, it will prompt you twice for confirmation; click "Confirm" to start the loop.
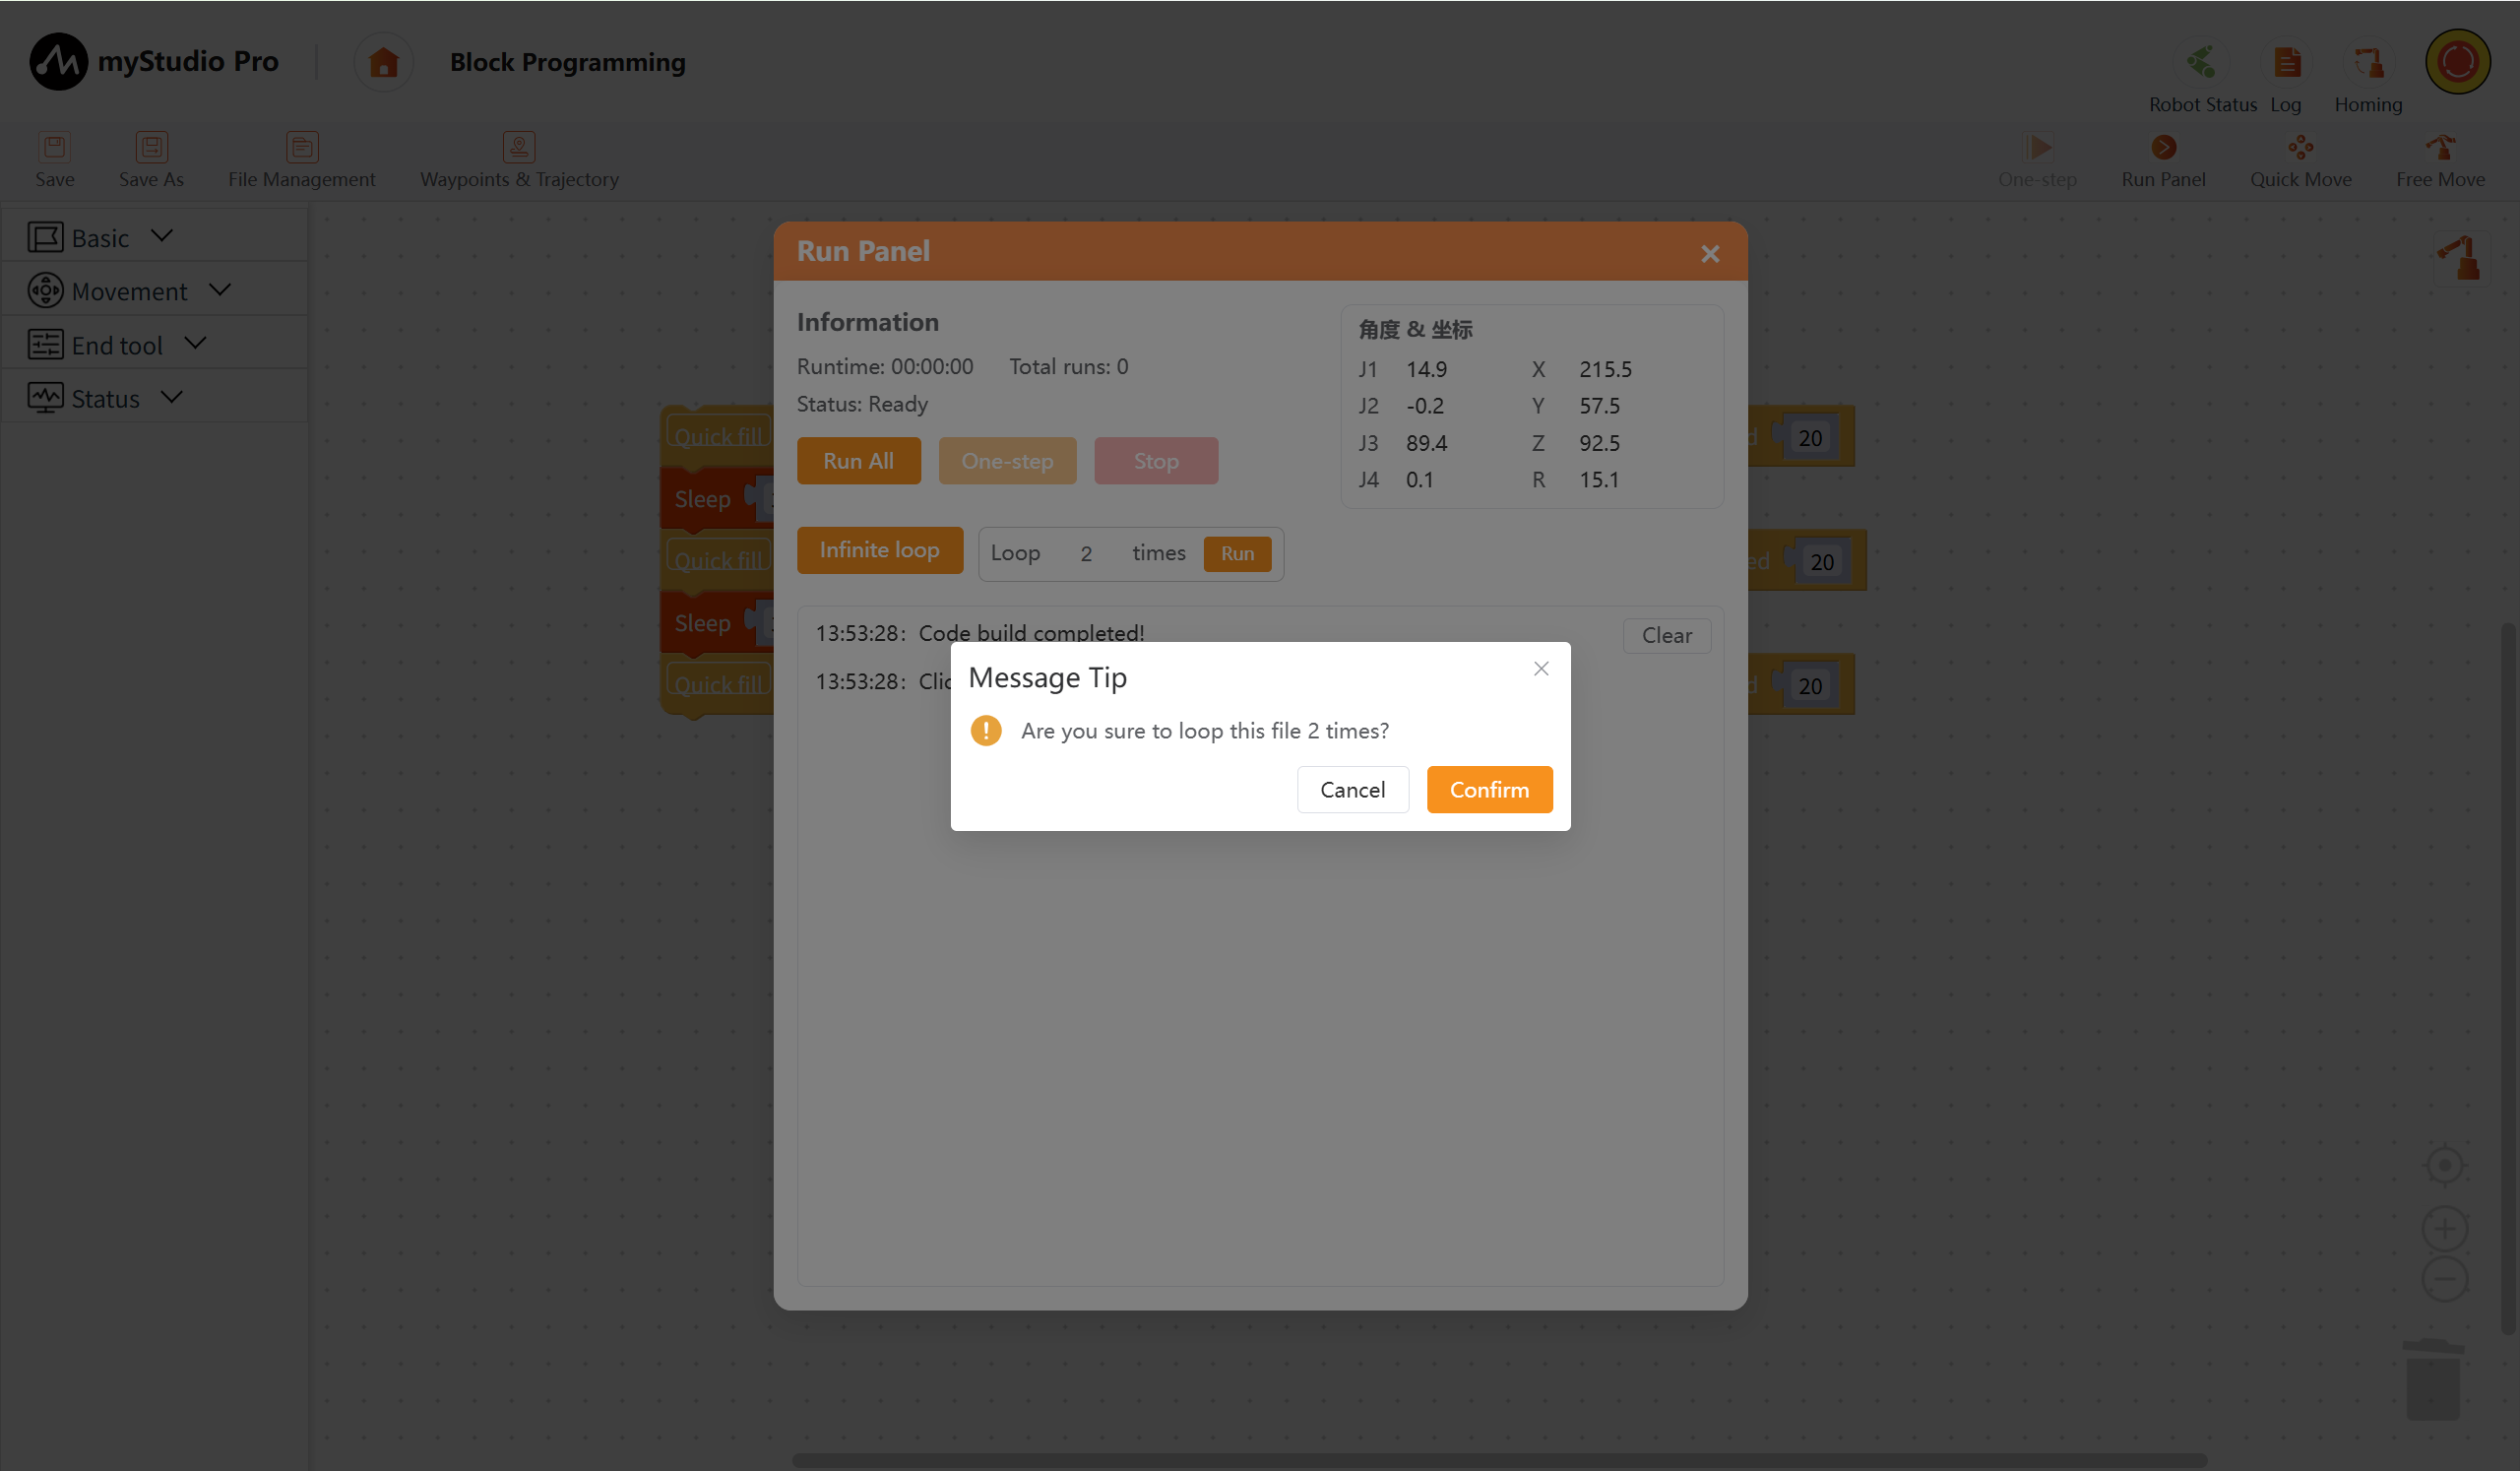
After running.
Publish
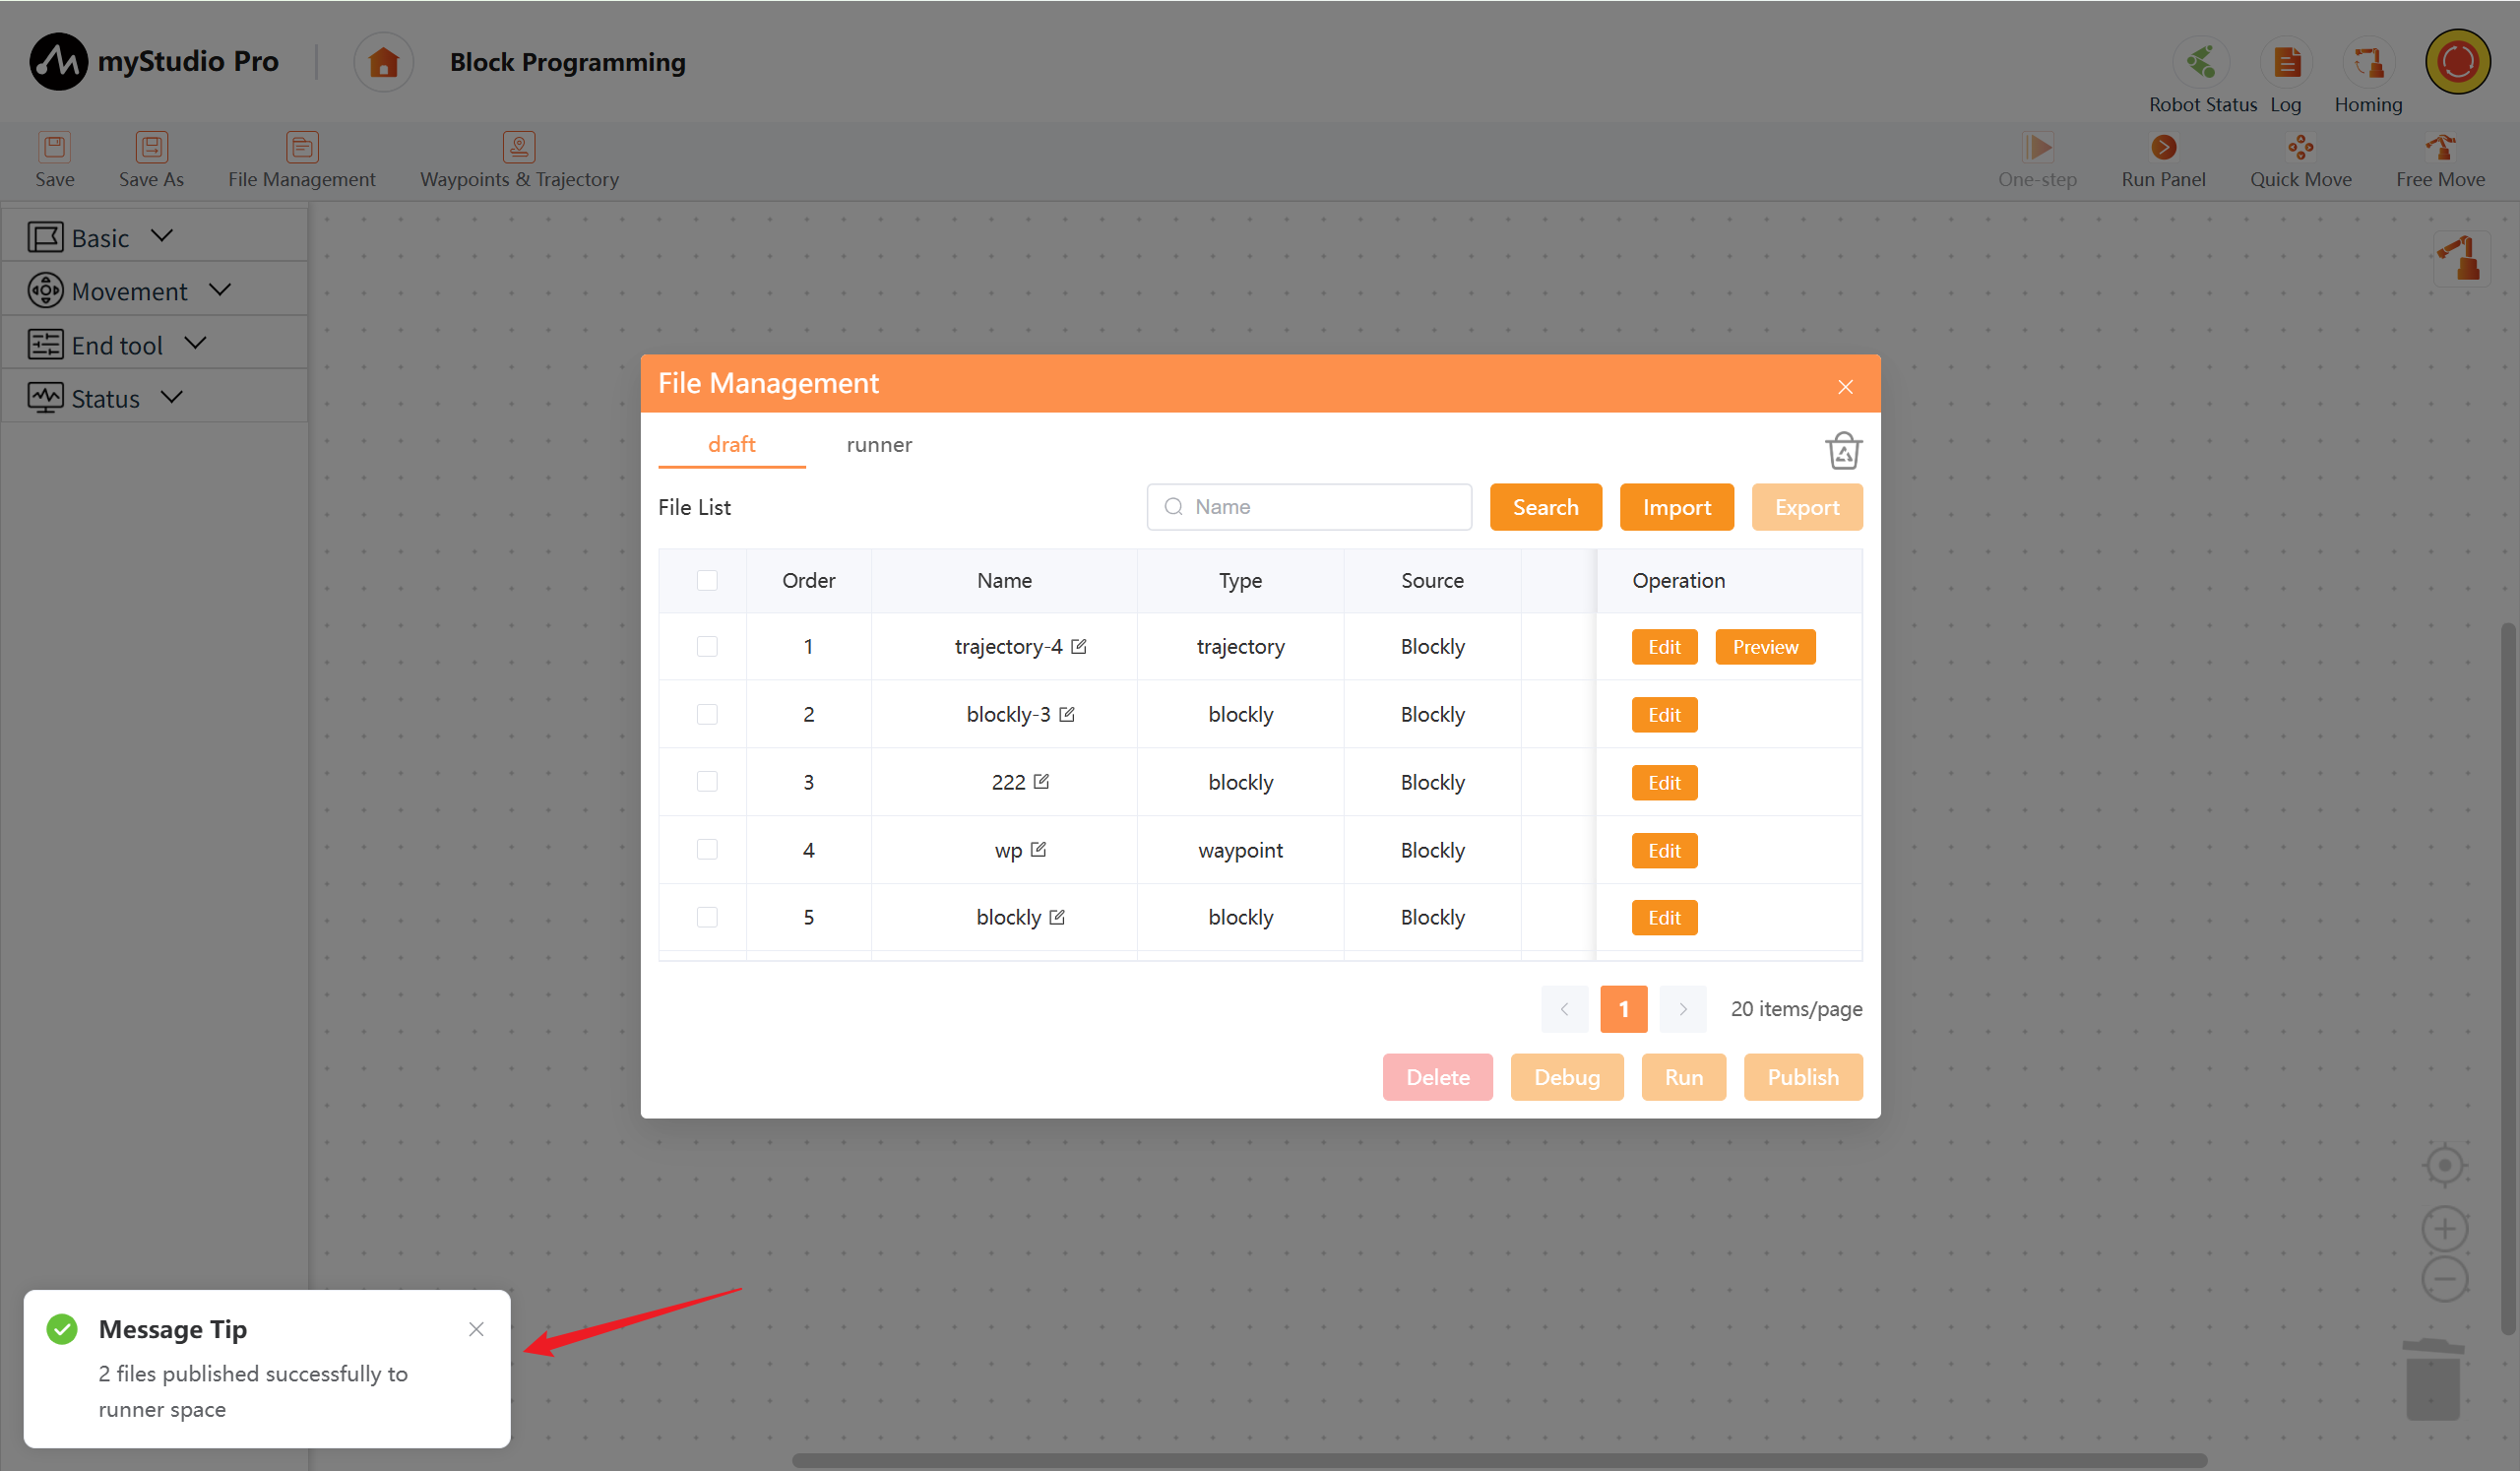
Select the files that need to be published, then click the "Publish" button. This will publish the corresponding files in the test space to the production space. Batch publishing of files is supported.
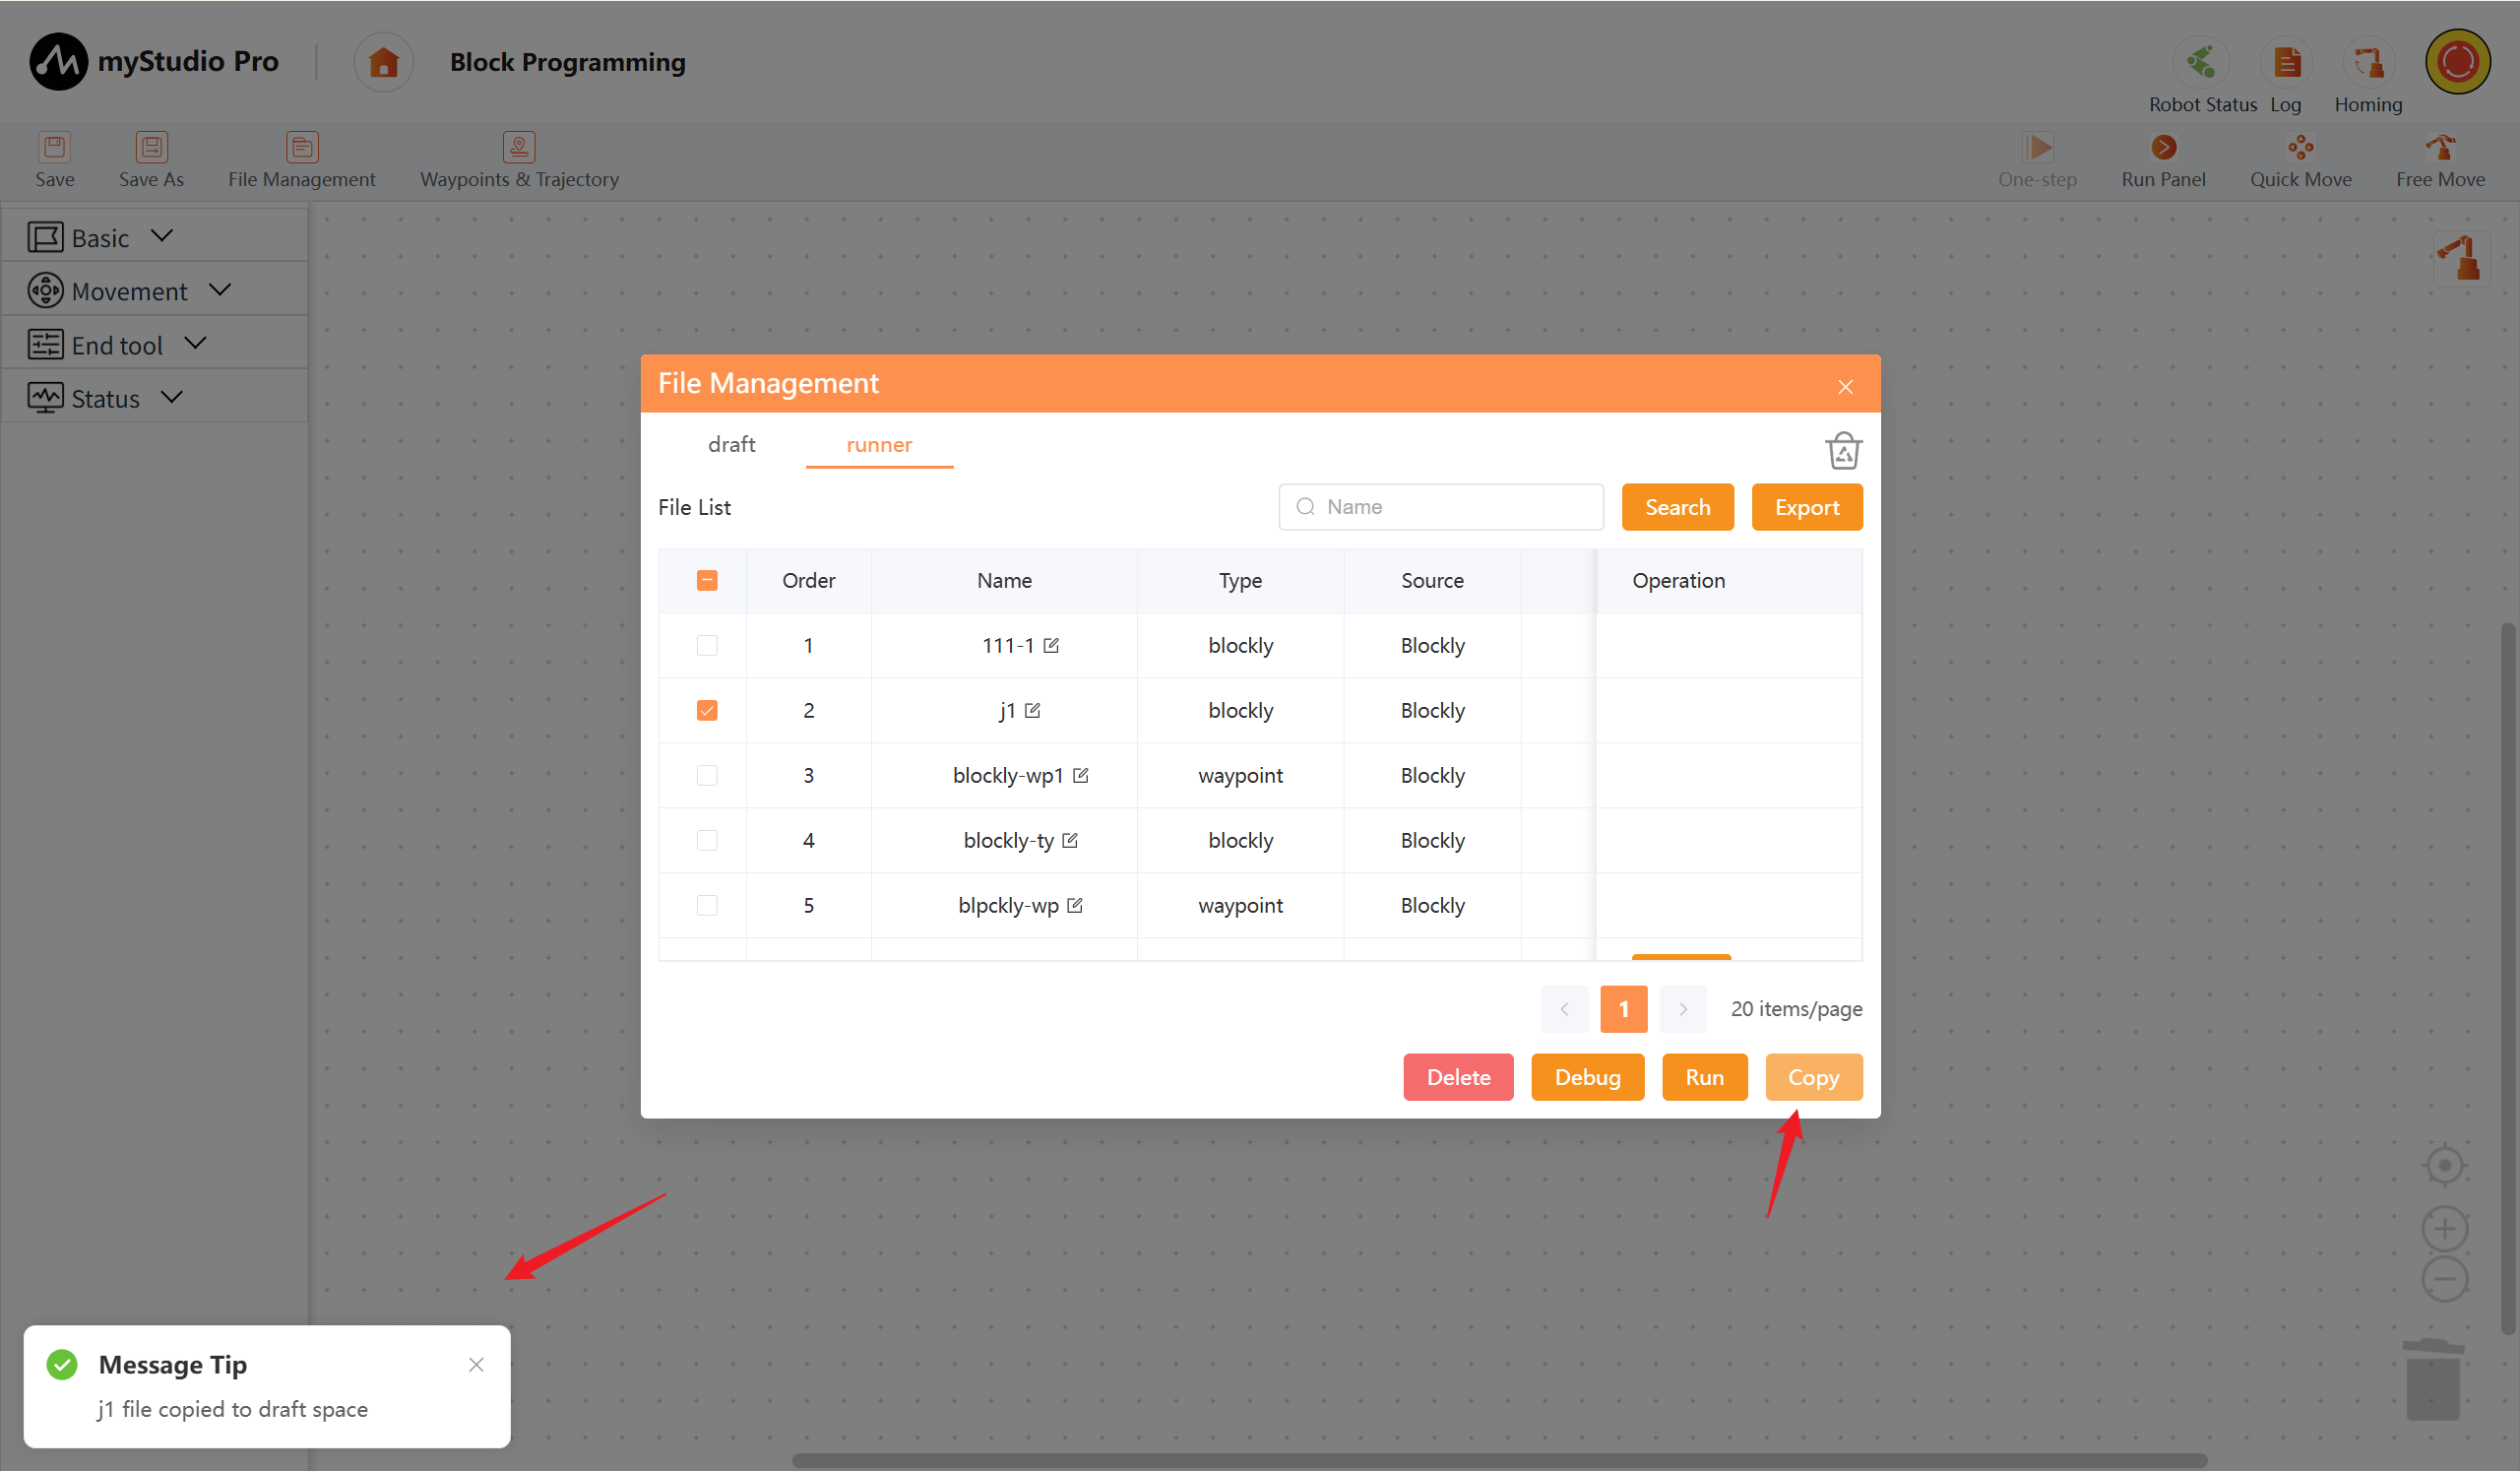
Copy
Click the Copy button to copy the production space files to the test space. Batch file copying is supported.
12 Free Movement
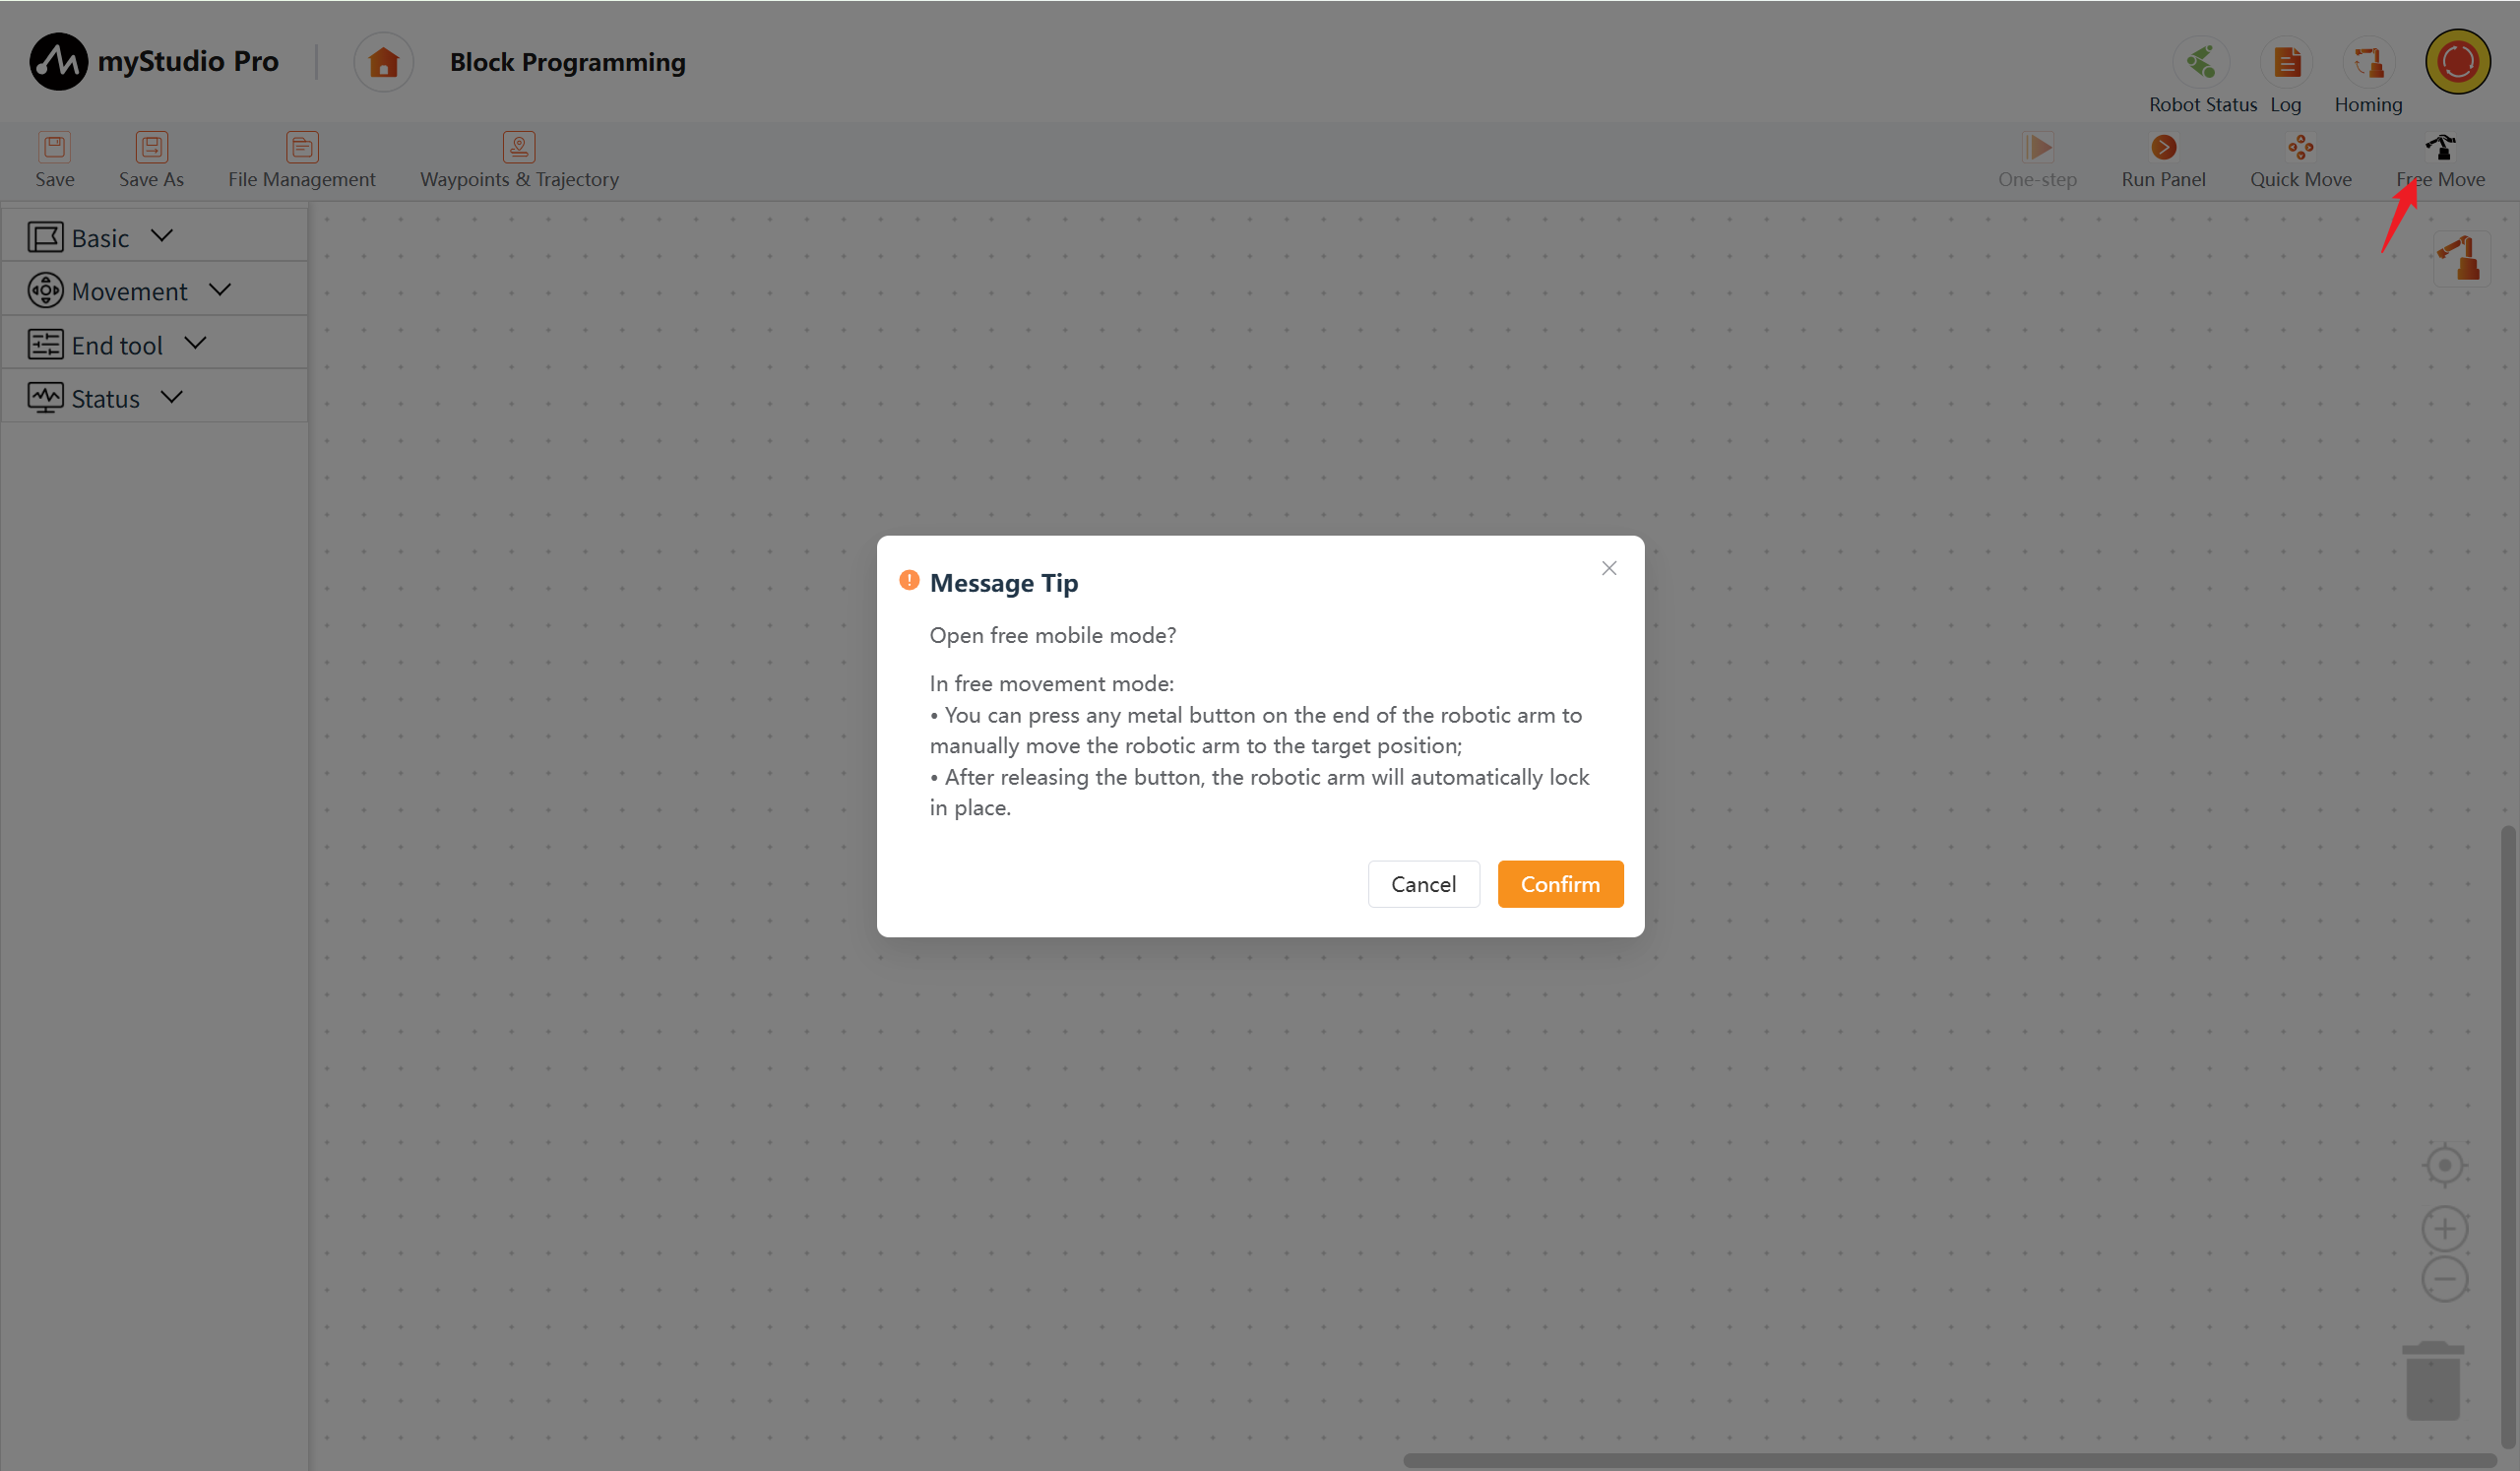
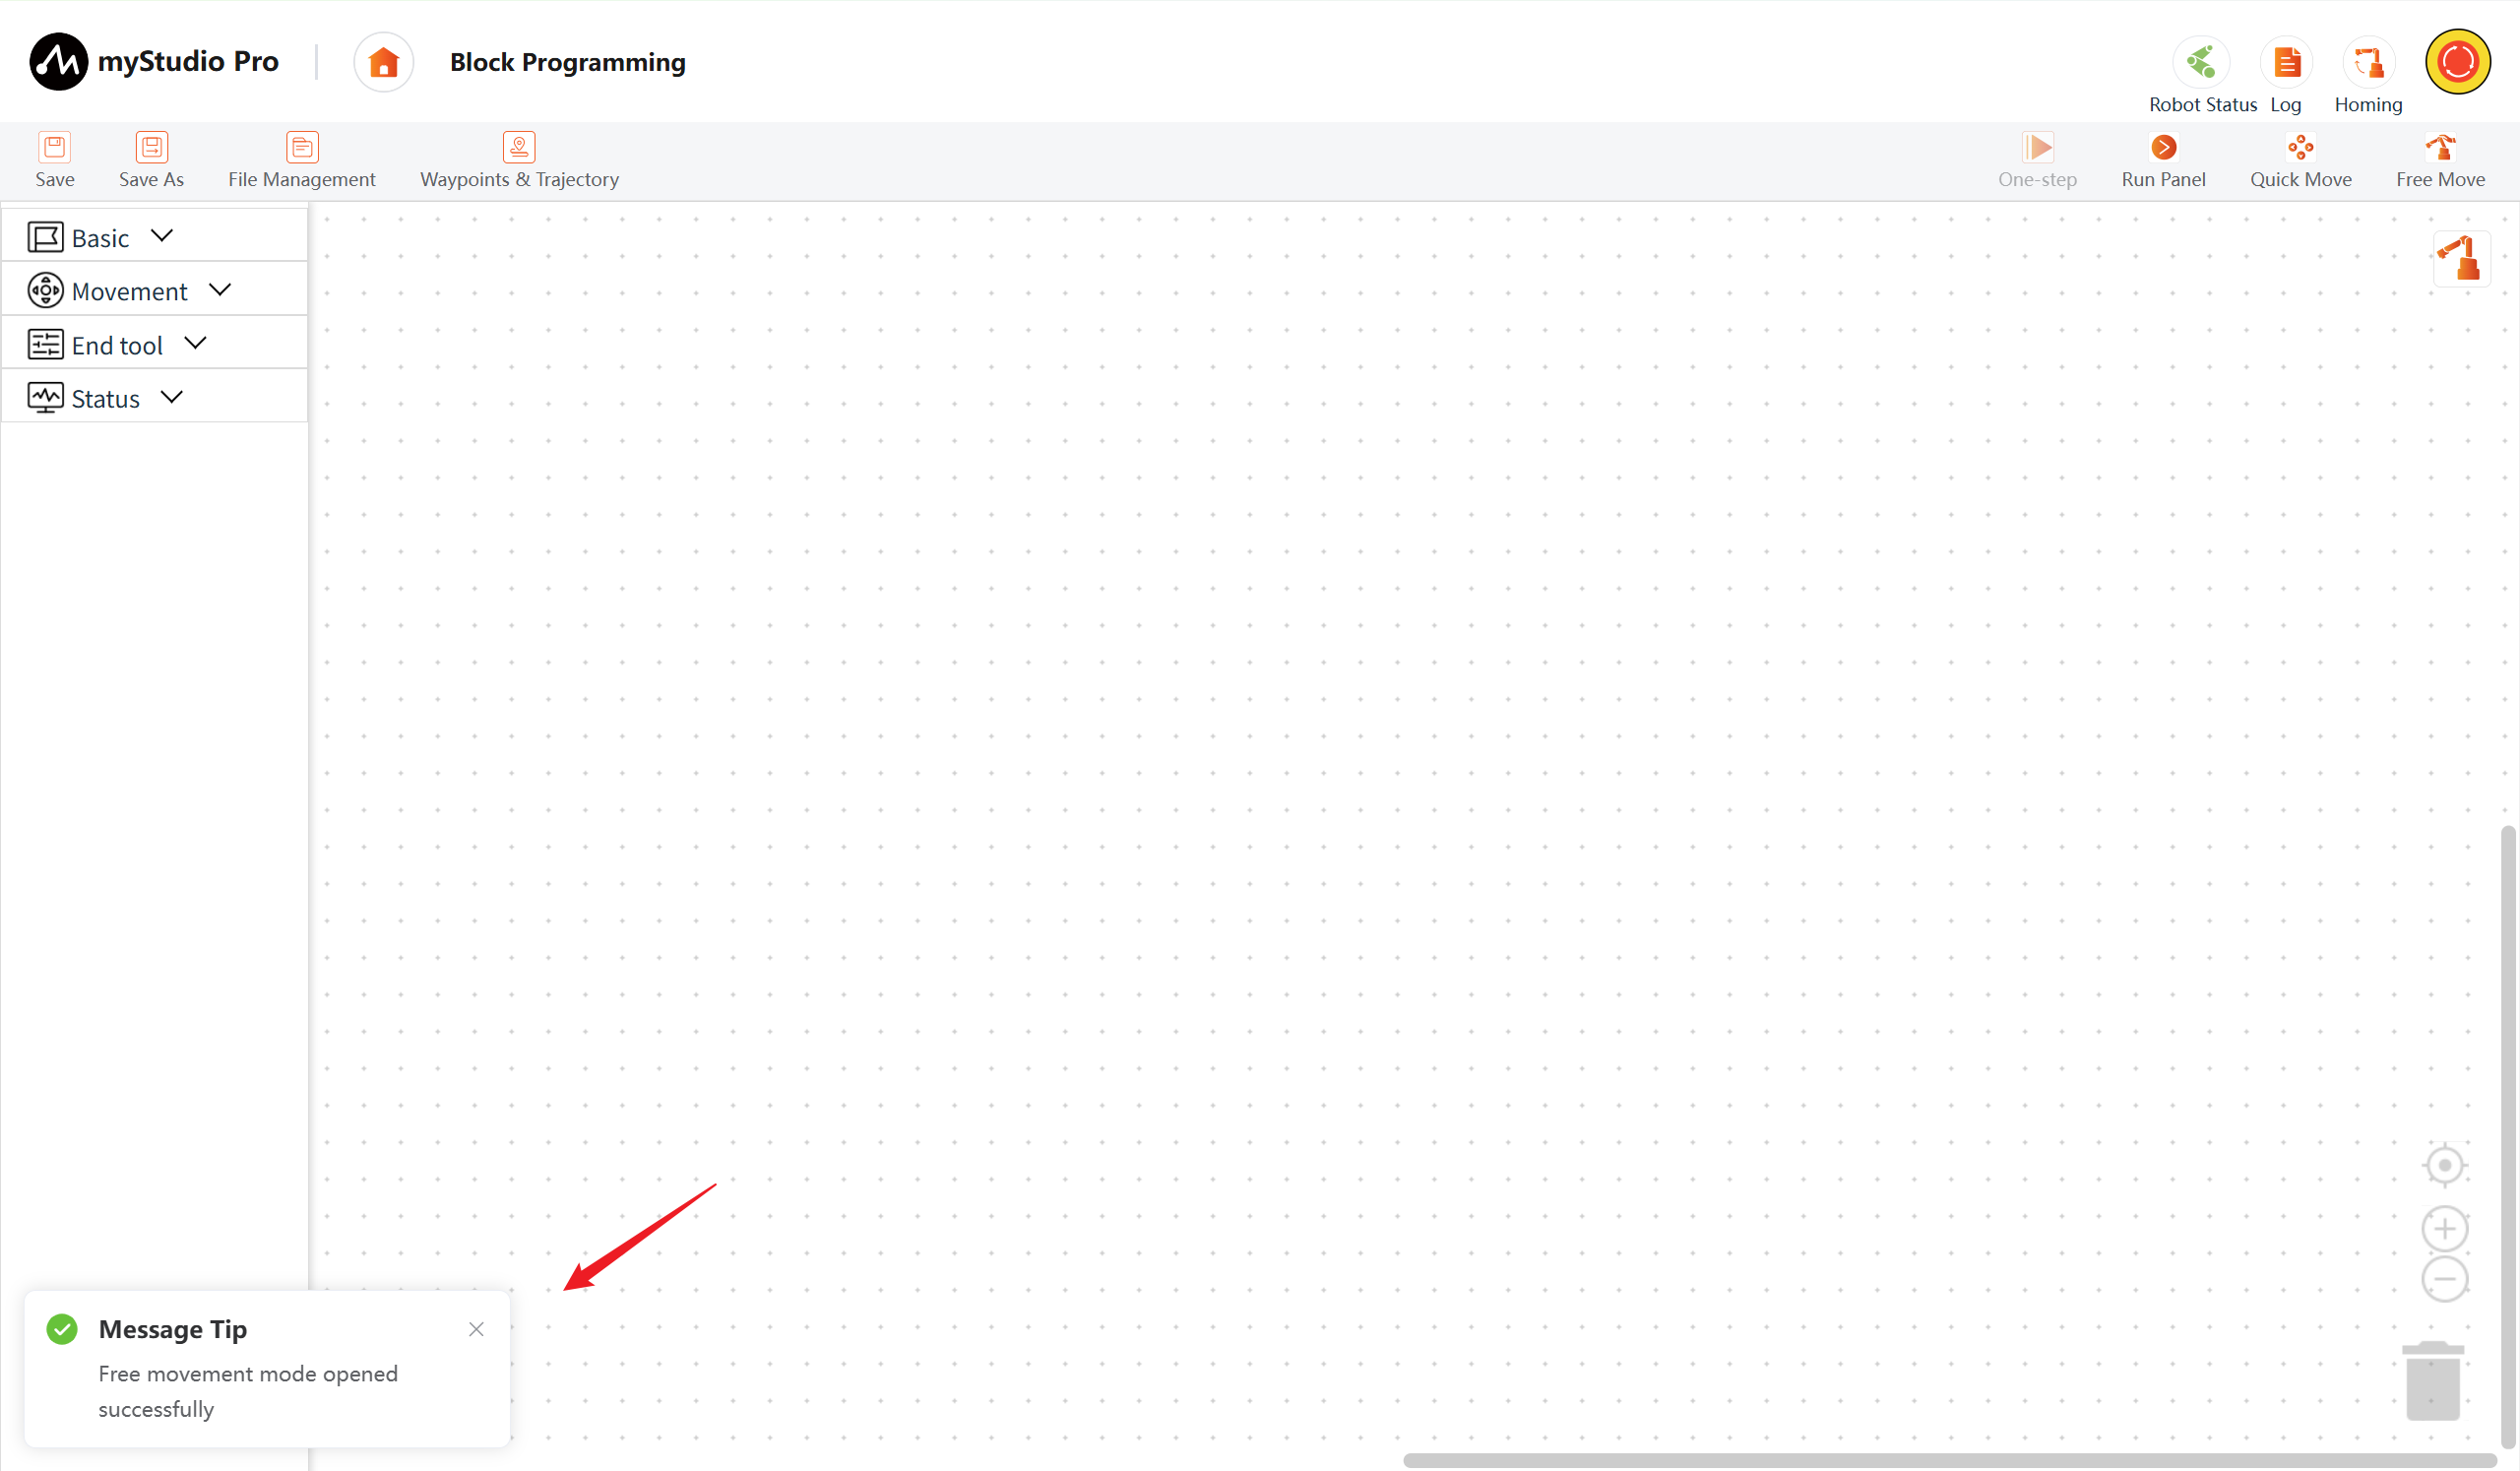
When the free movement mode is enabled, the icon is in color; when the free movement mode is disabled, the icon is in gray. By default, the block programming page is in the enabled state. Clicking will disable the free movement mode.
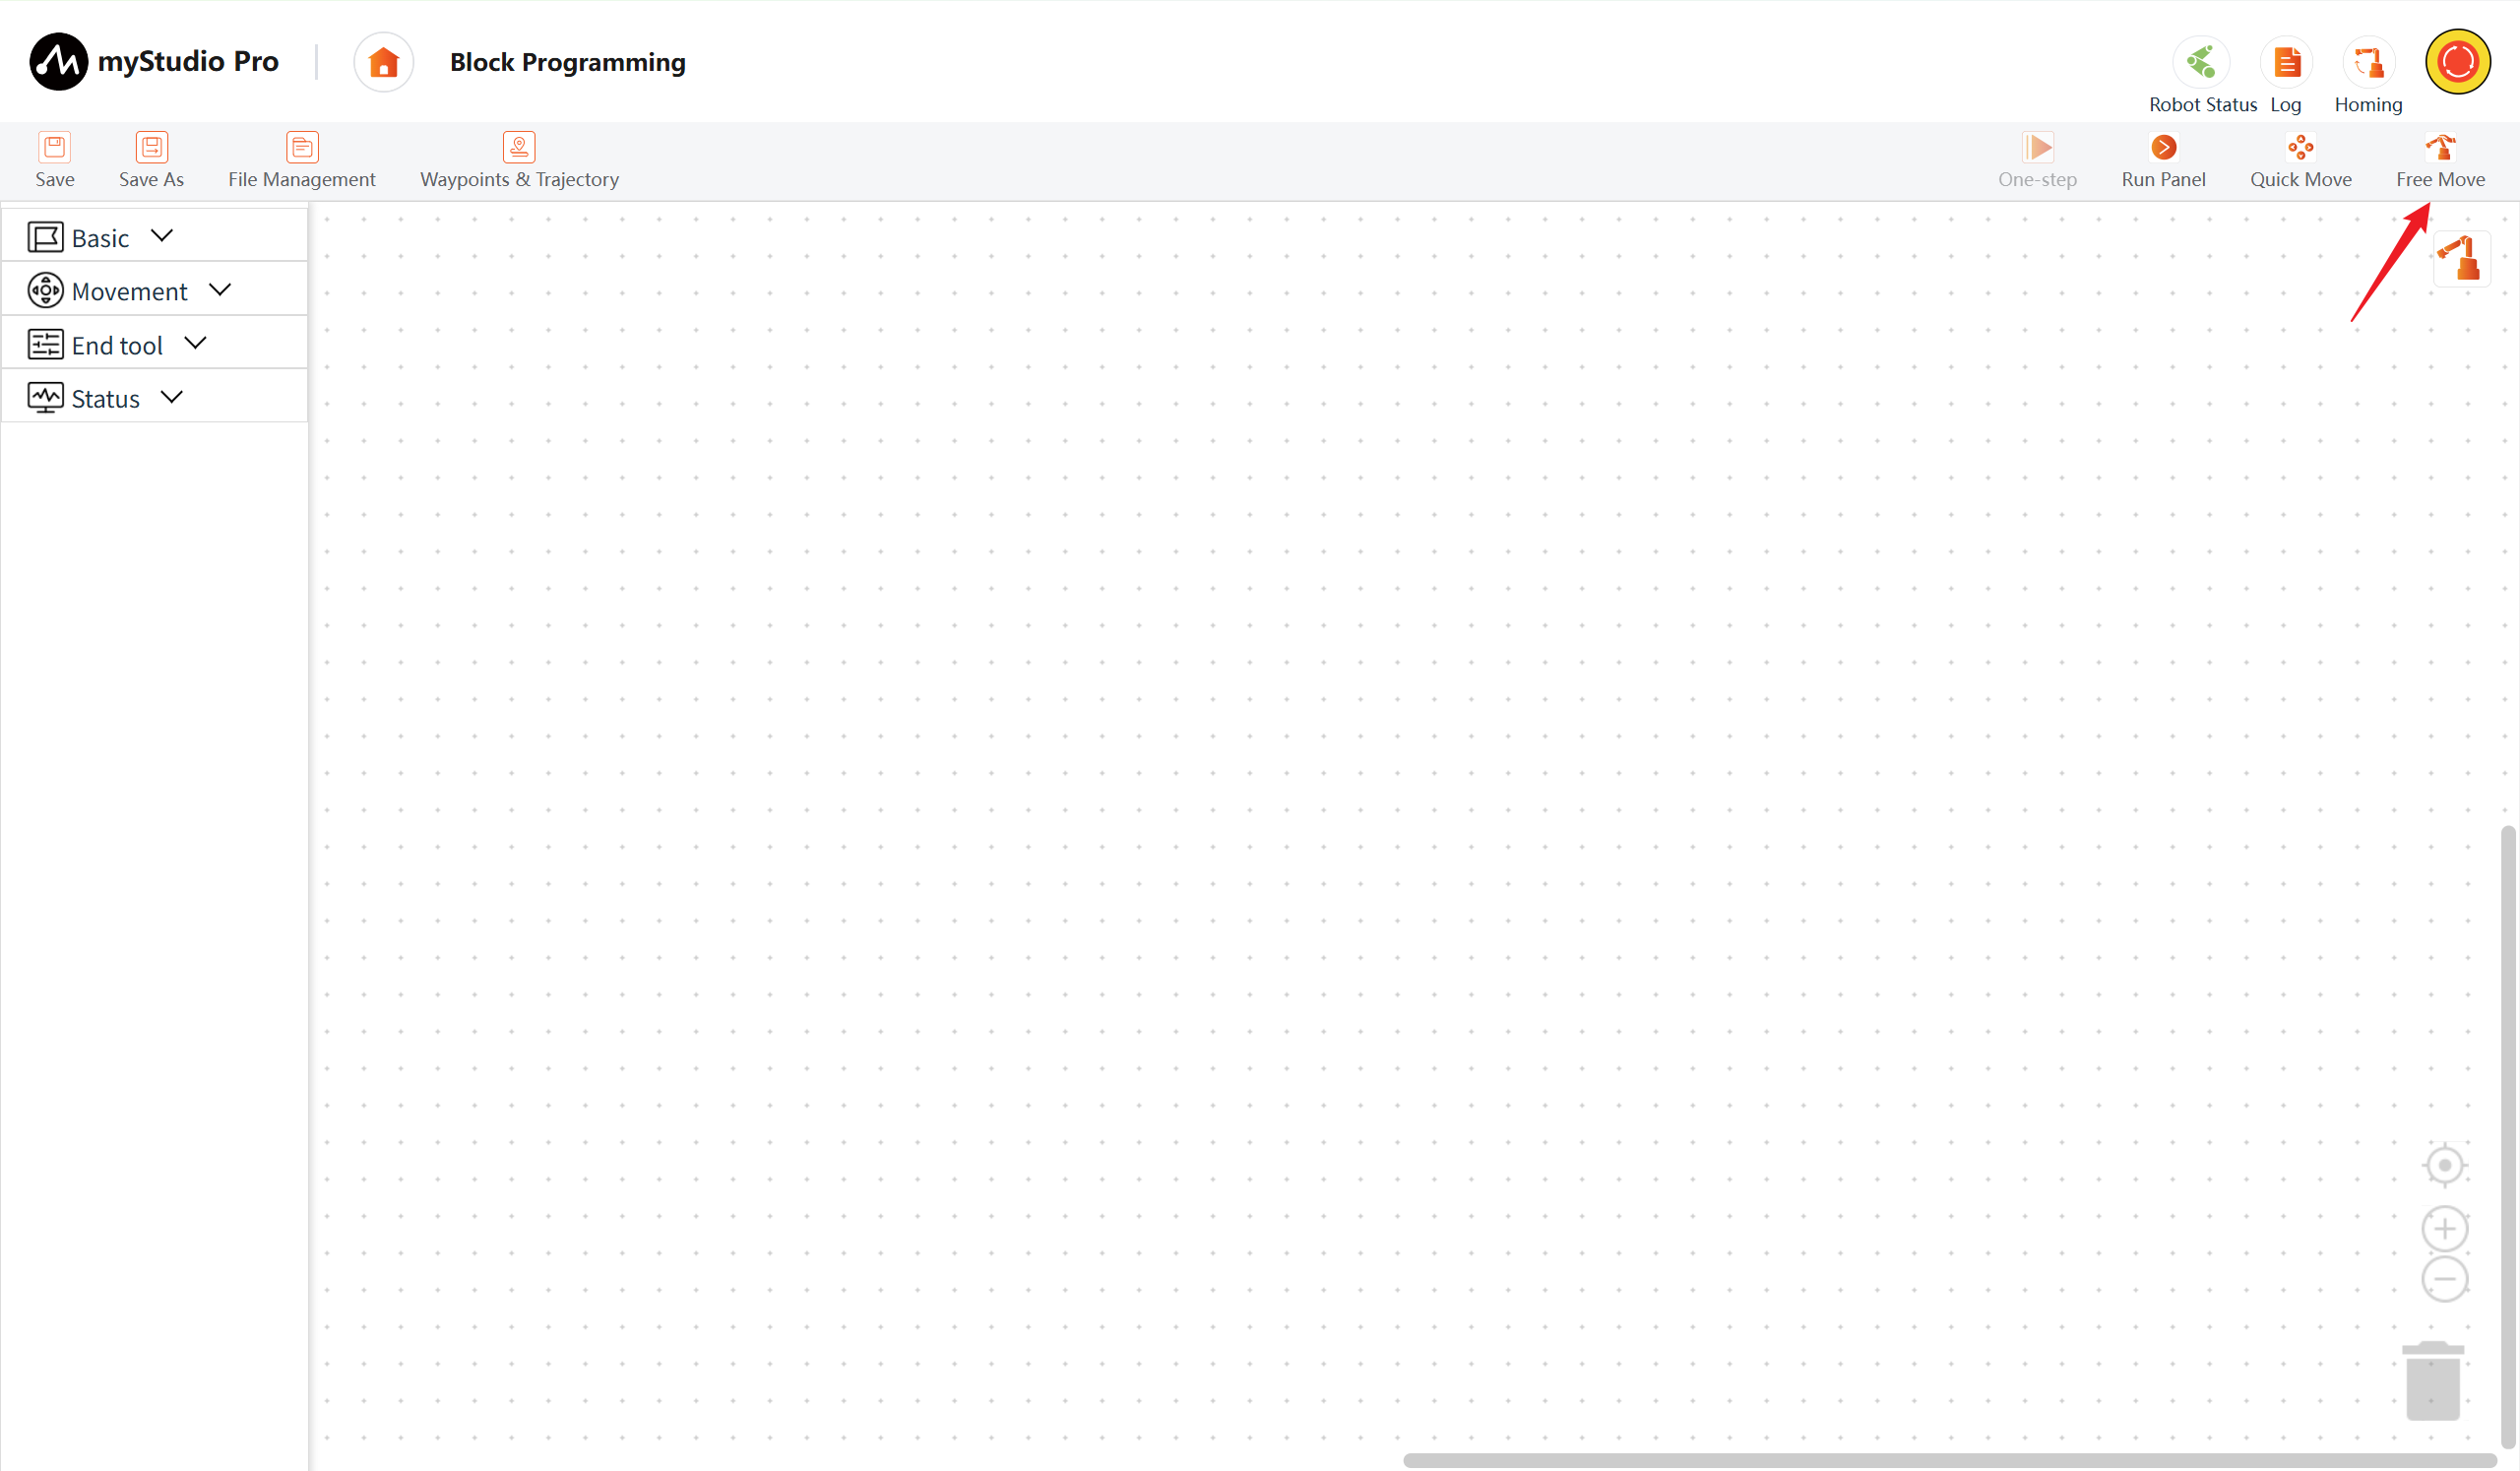
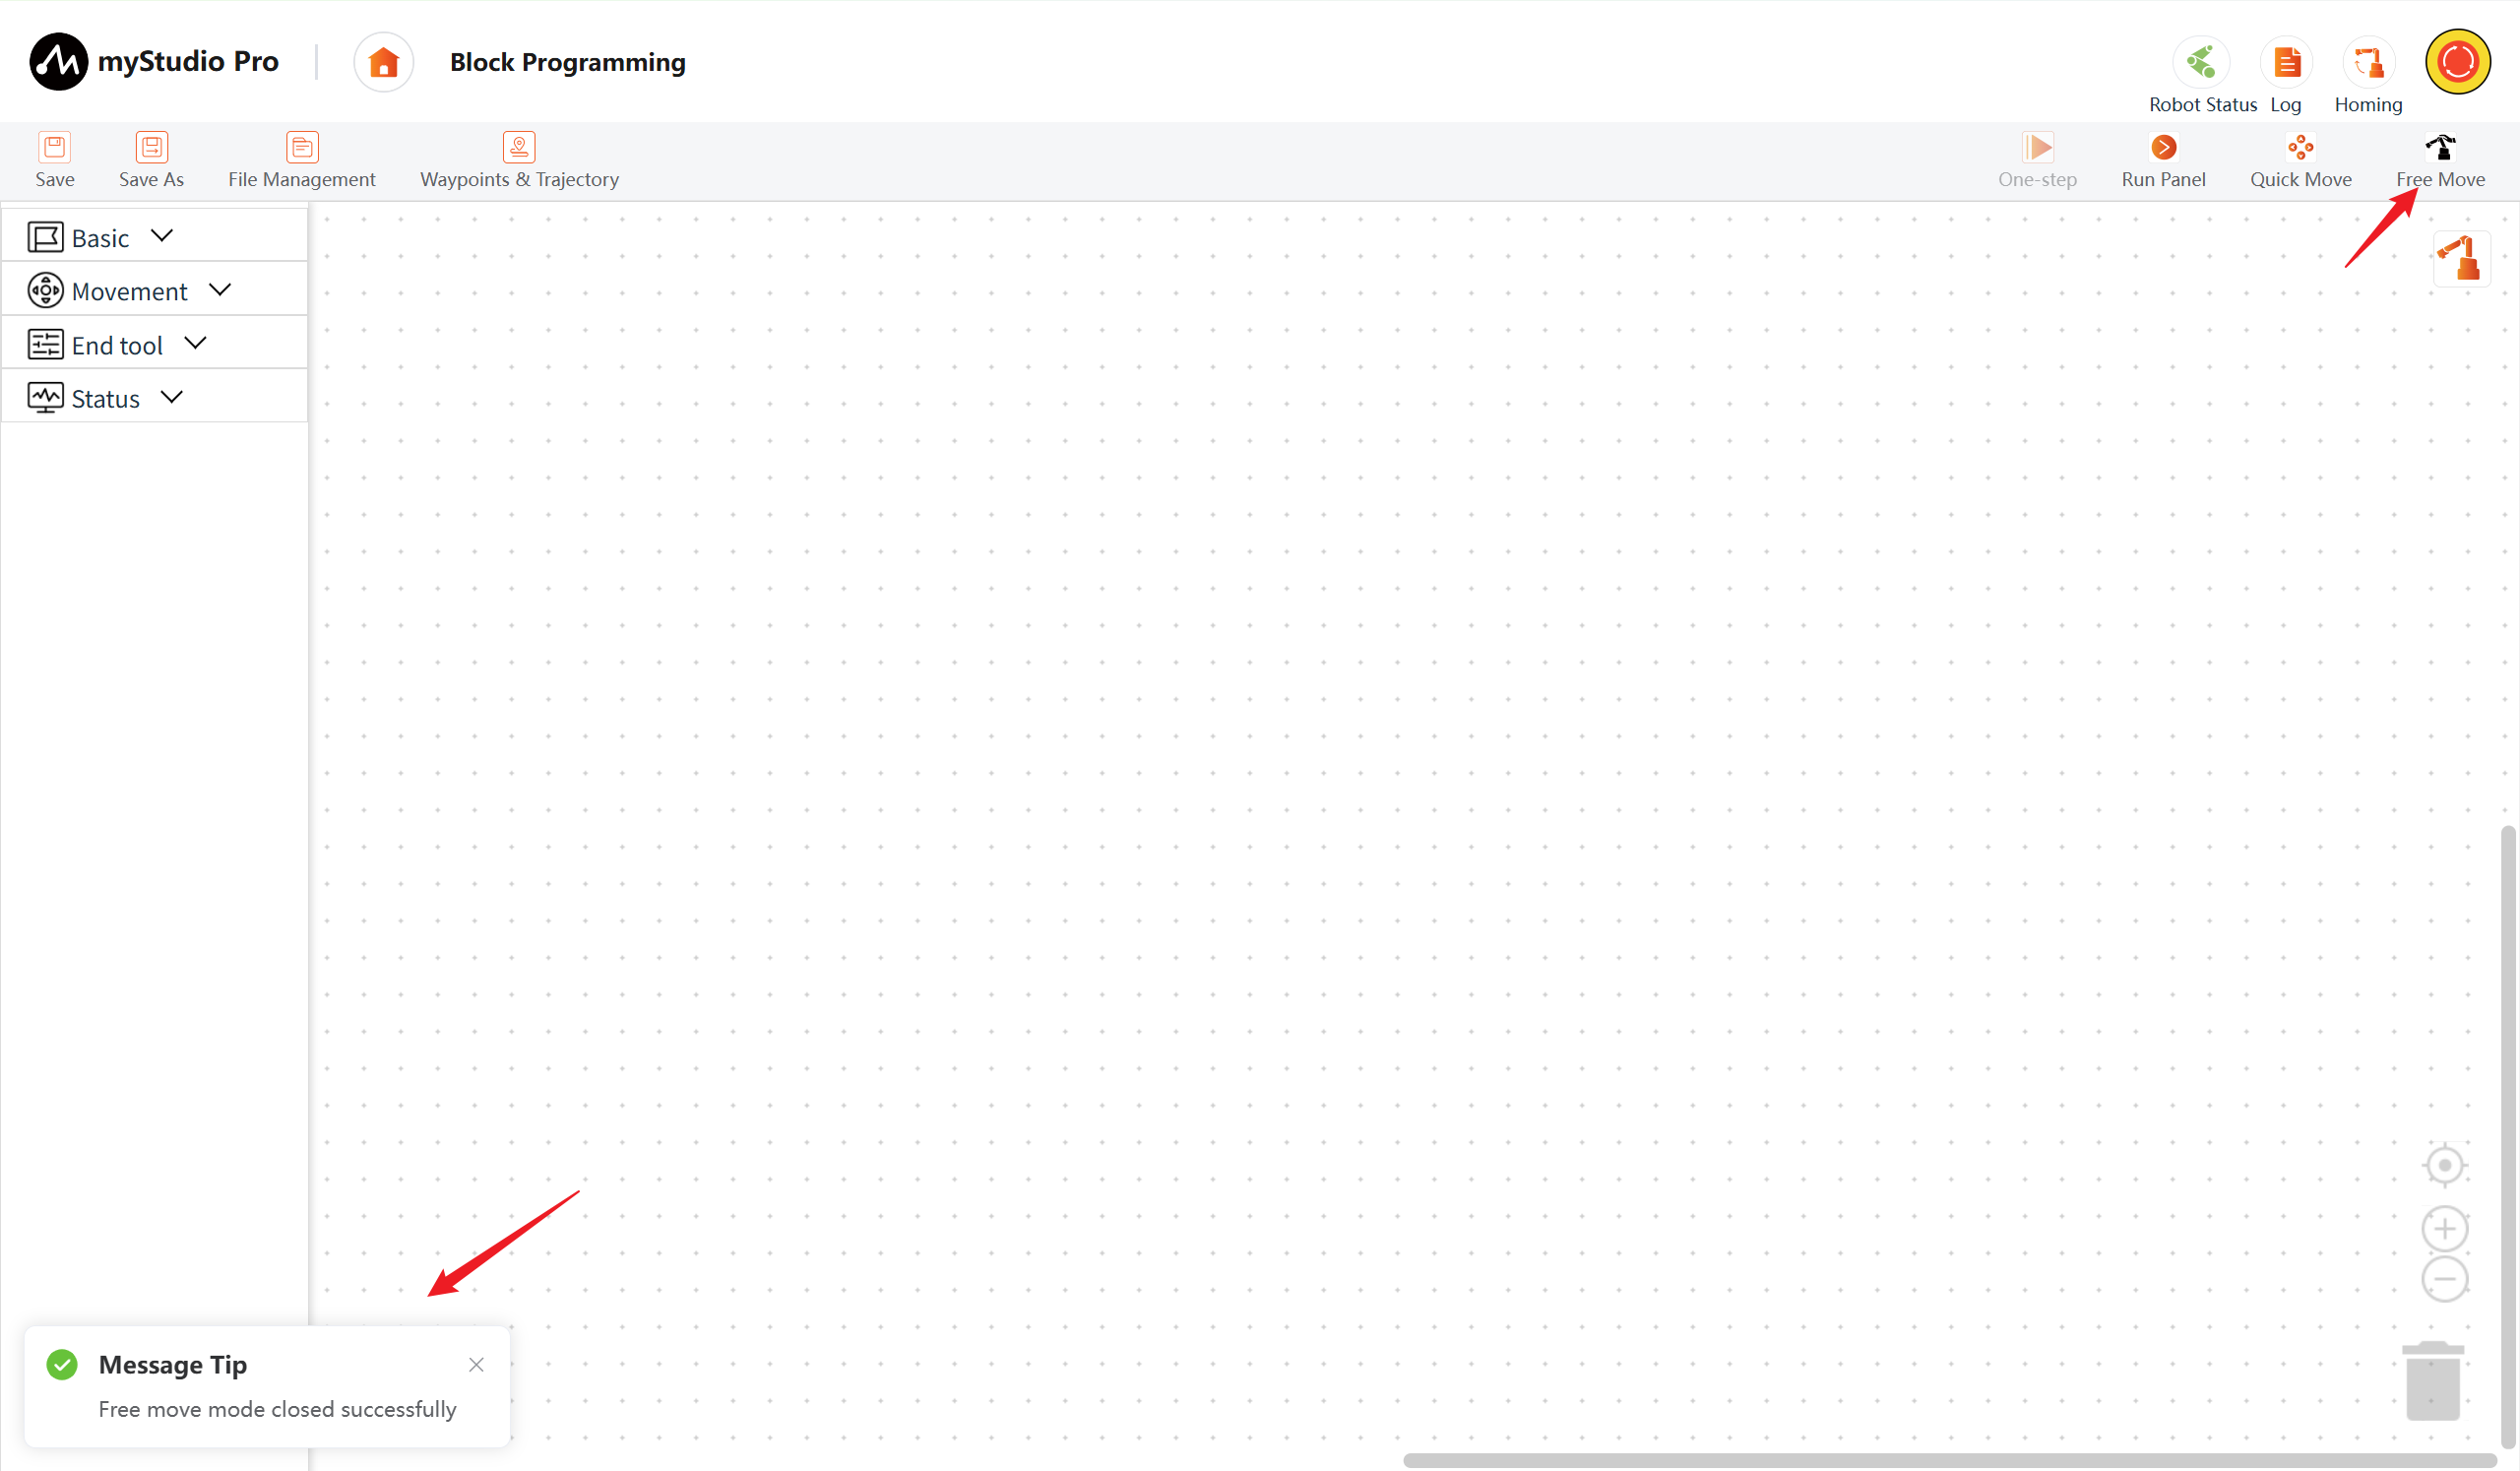
Click on the unactivated free movement button, and a confirmation prompt window for enabling the free movement mode will pop up. Click "Confirm" to activate it. After activation, you can press the end button to move the robotic arm.