Boot detection guide
1 Install the robotic arm
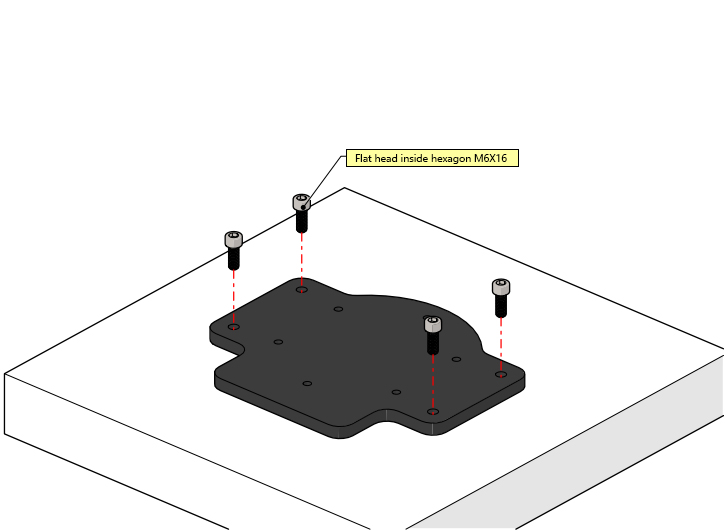
Install M6X16 screws to fix the bottom plate to the table
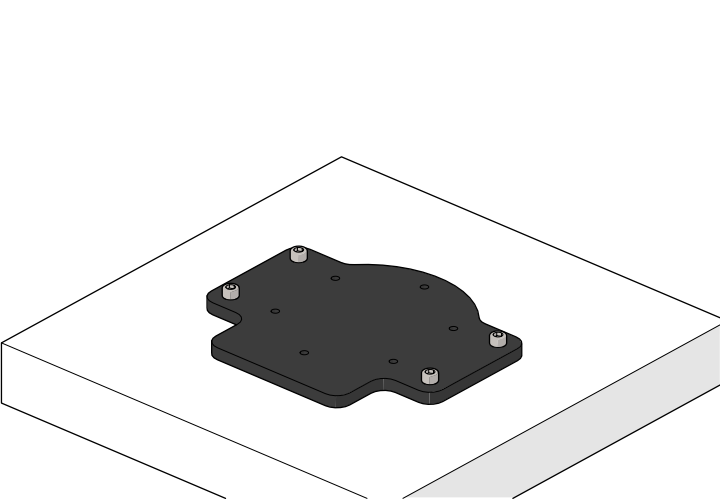
Completed installation renderings
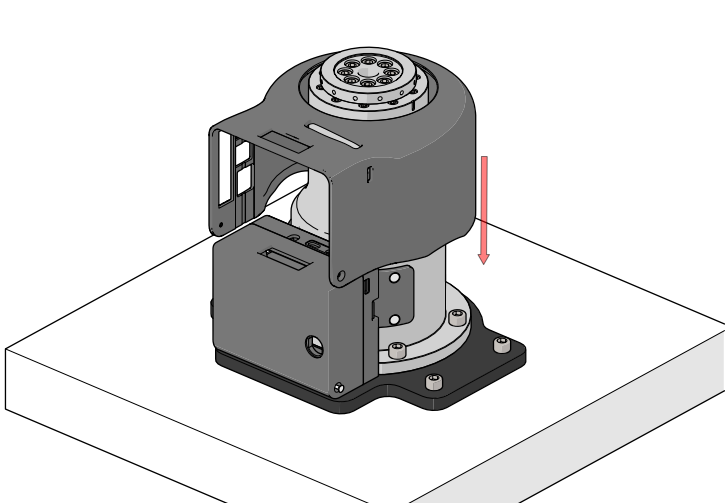
Place the robot arm base on the fixed base plate

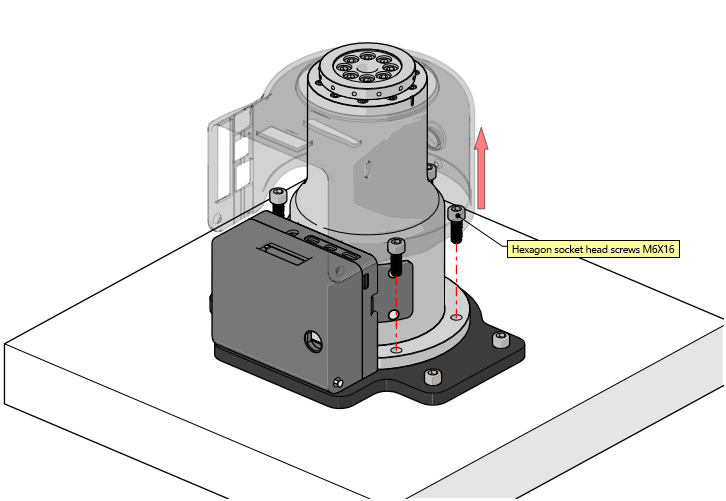
Remove the cover fixing screws on the base of the robot arm
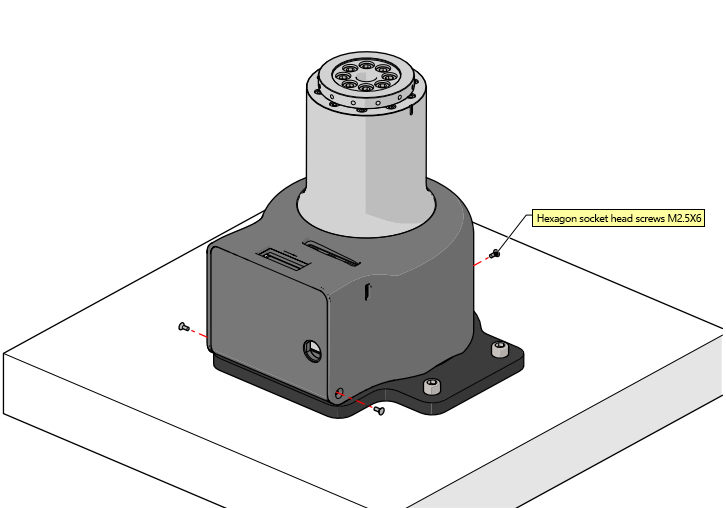
Open the cover of the robot arm base and use M6X16 screws to fix the robot arm base and bottom plate.
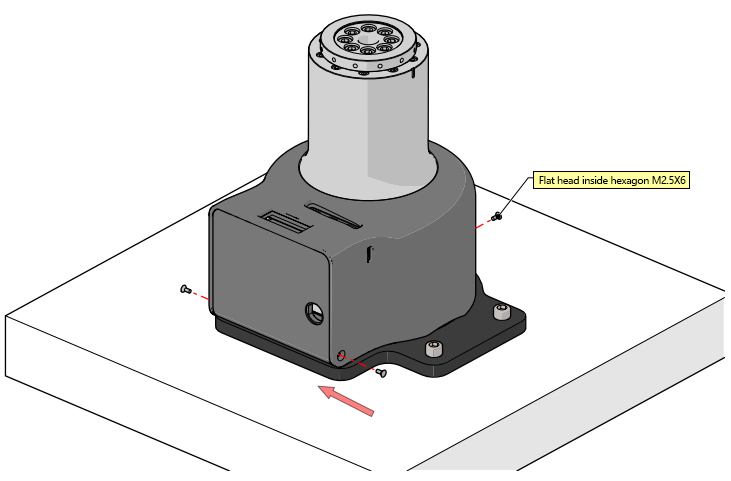
Install the cover fixing screws of the robot arm base
2 Power connection
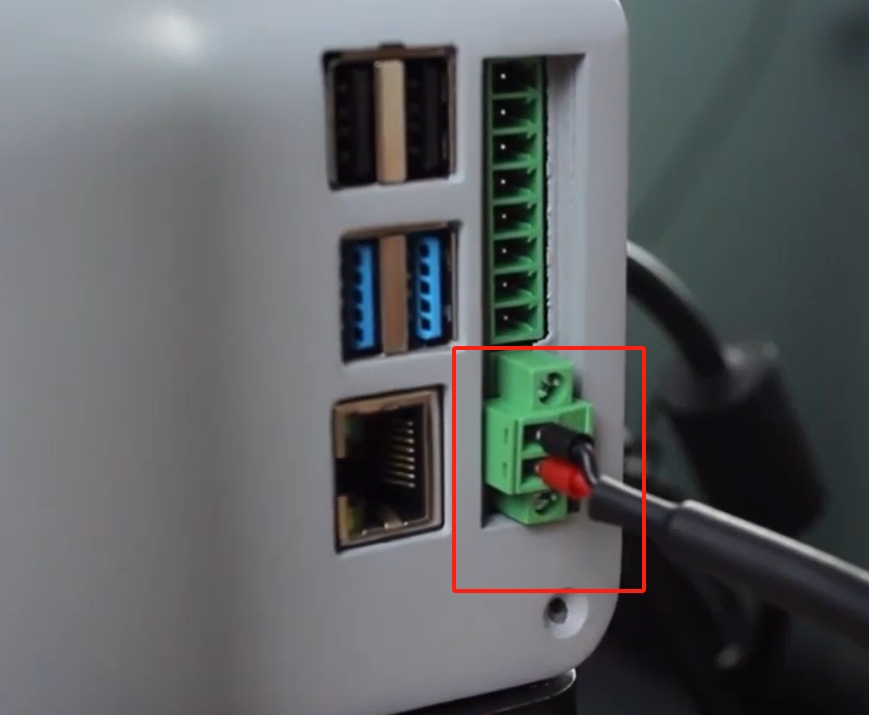
When the power adapter is powered off, connect the output end of the adapter to the power supply of the robot arm.

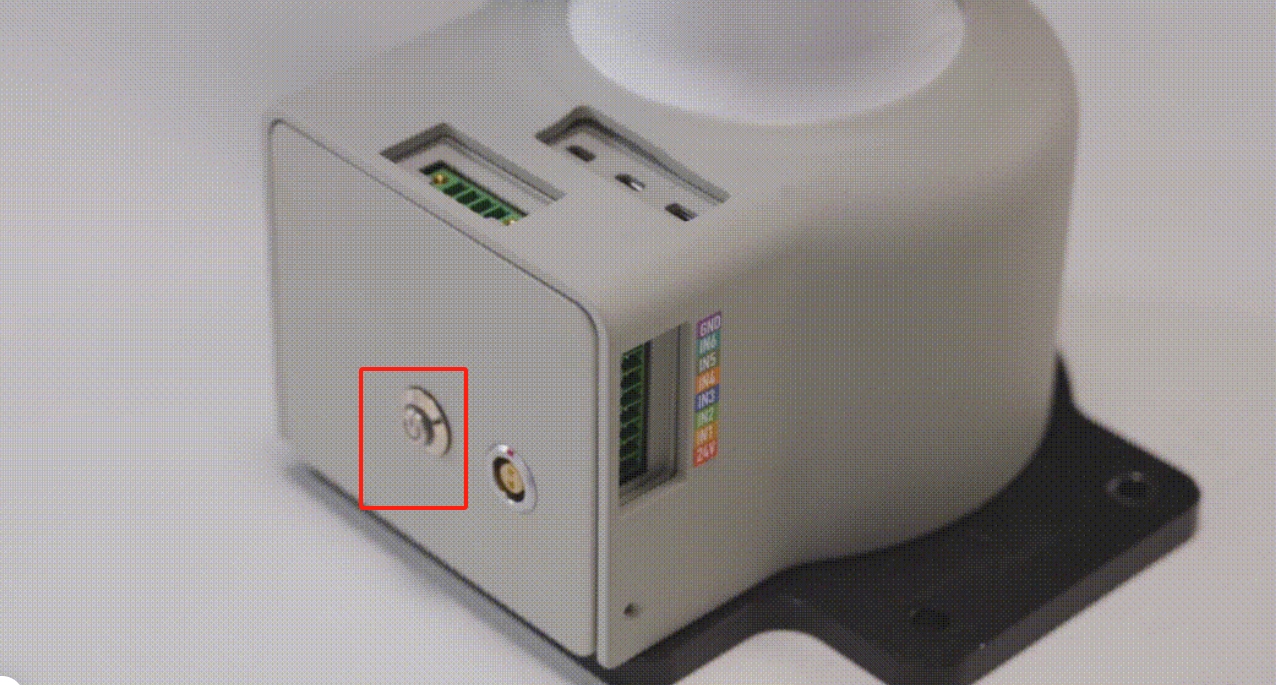
Then, after connecting the emergency stop knob, turn the emergency stop knob clockwise.
Then press the power switch
3 Display module connection
3.1 Display connection
Prepare the display cable included in the accessories, as shown in Figure 2-1. One end is an HDMI connector and the other end is a micro HDMI connector.
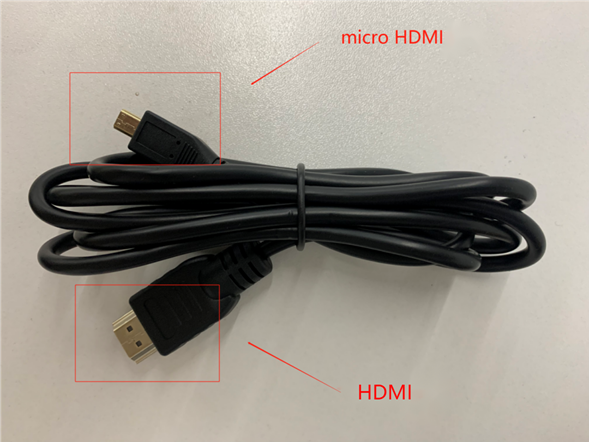
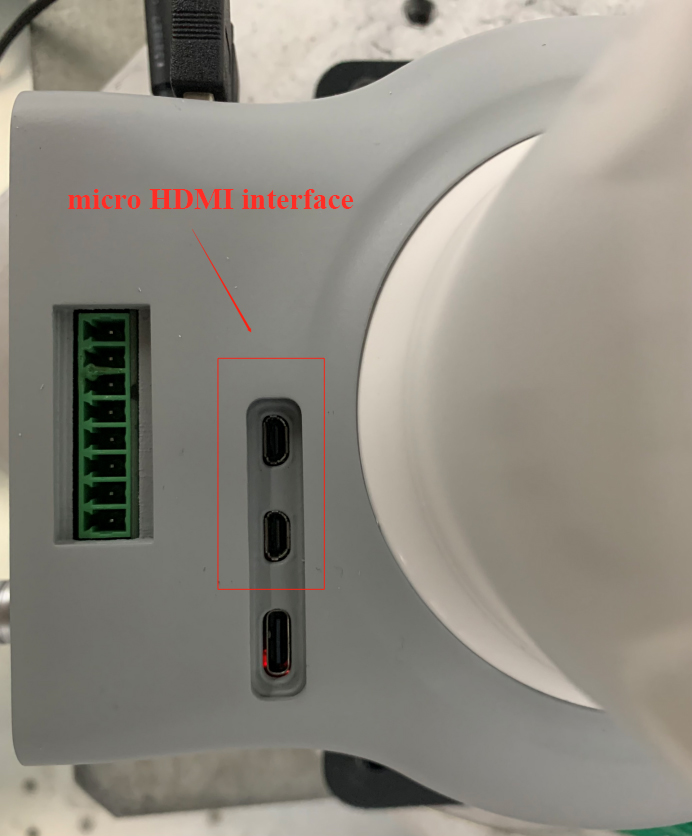
The HDMI connector is connected to the computer, and the micro HDMI connector is connected to the robot. The location of the robot interface is shown in Figure 2-2. After connecting, power on the robot to display.
3.2 Remote connection
To use remote connection, you must first download VNC Viewer Installation Tutorial
Wired connection
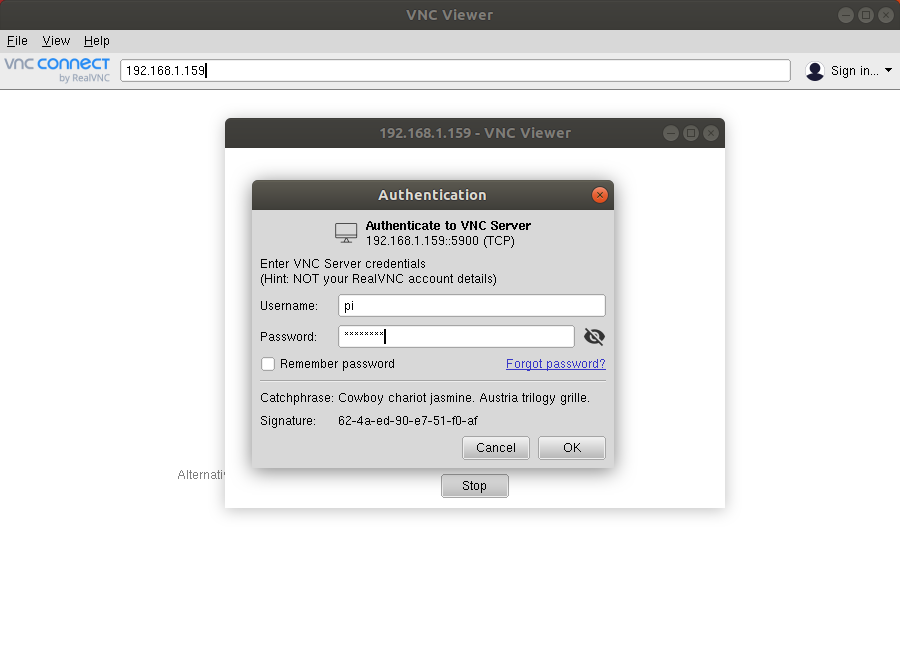
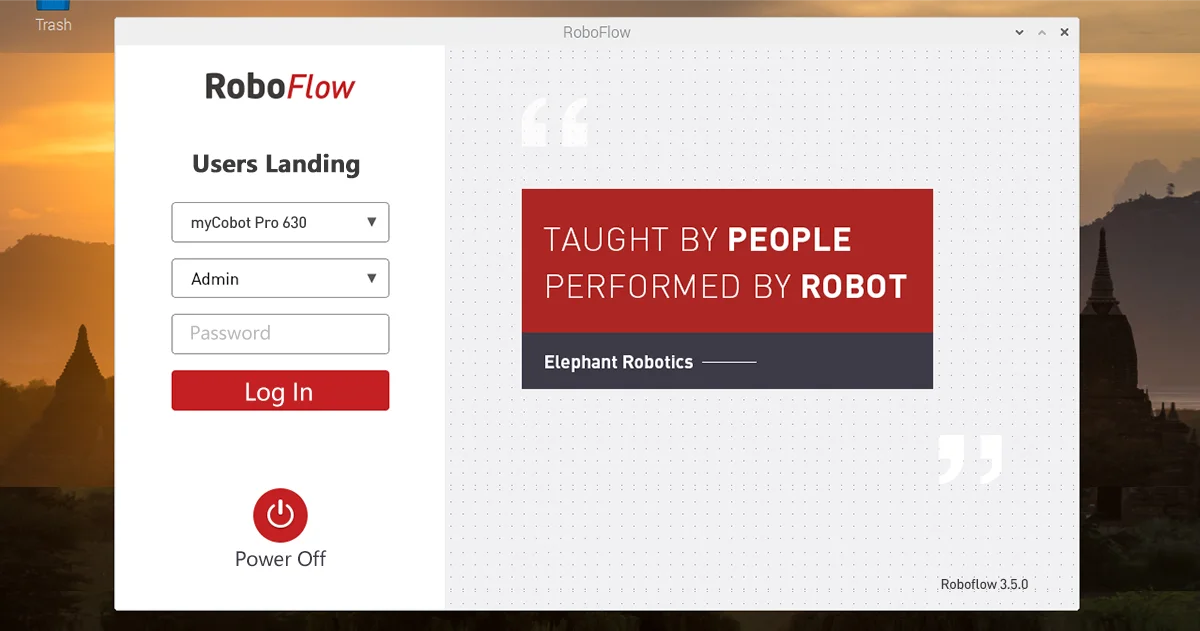
Power on the robot and connect the robot arm and PC using a network cable. The static IP of the wired network card of the robot arm is: 192.168.1.159. The IP network segment of the PC should be changed to network segment 1. Open the software "VNC Viewer" on the remote end, as shown in Figure 2-3, and enter the IP of the robot in the input box. address and press Enter to connect. Network segment modification tutorial

As shown in Figure 2-4, in the pop-up authentication window, enter the account and password of the robot. The default account name is "pi" and the password is "elephant". After completing the input, click the "OK" button to connect.
Wireless connections
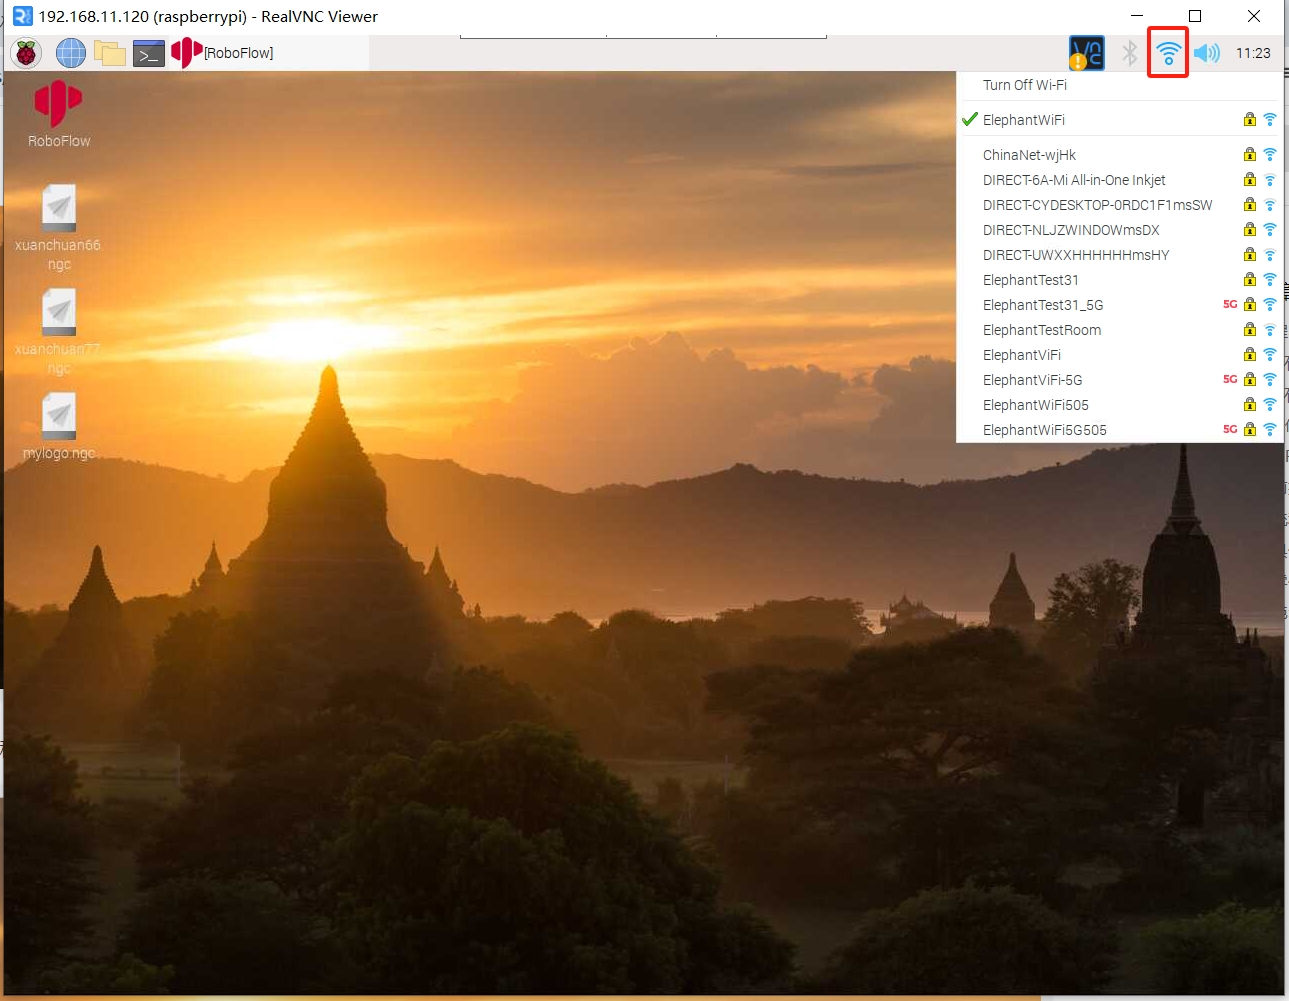
If you want to use a wireless connection, you must first enter the robot system using an external monitor or wired connection, then select the wifi hotspot you want to connect to, enter the password to connect, and check the wireless IP of the robot. The computer used by the customer must be connected to the same network as the robot. A wifi hotspot, open vnc, enter the wireless IP of the robotic arm, user name and password, you can remotely enter the operating system of the robotic arm.
Click the WiFi icon with the mouse to connect to the desired WiFi
Just move the mouse to the WiFi icon to display the wireless IP

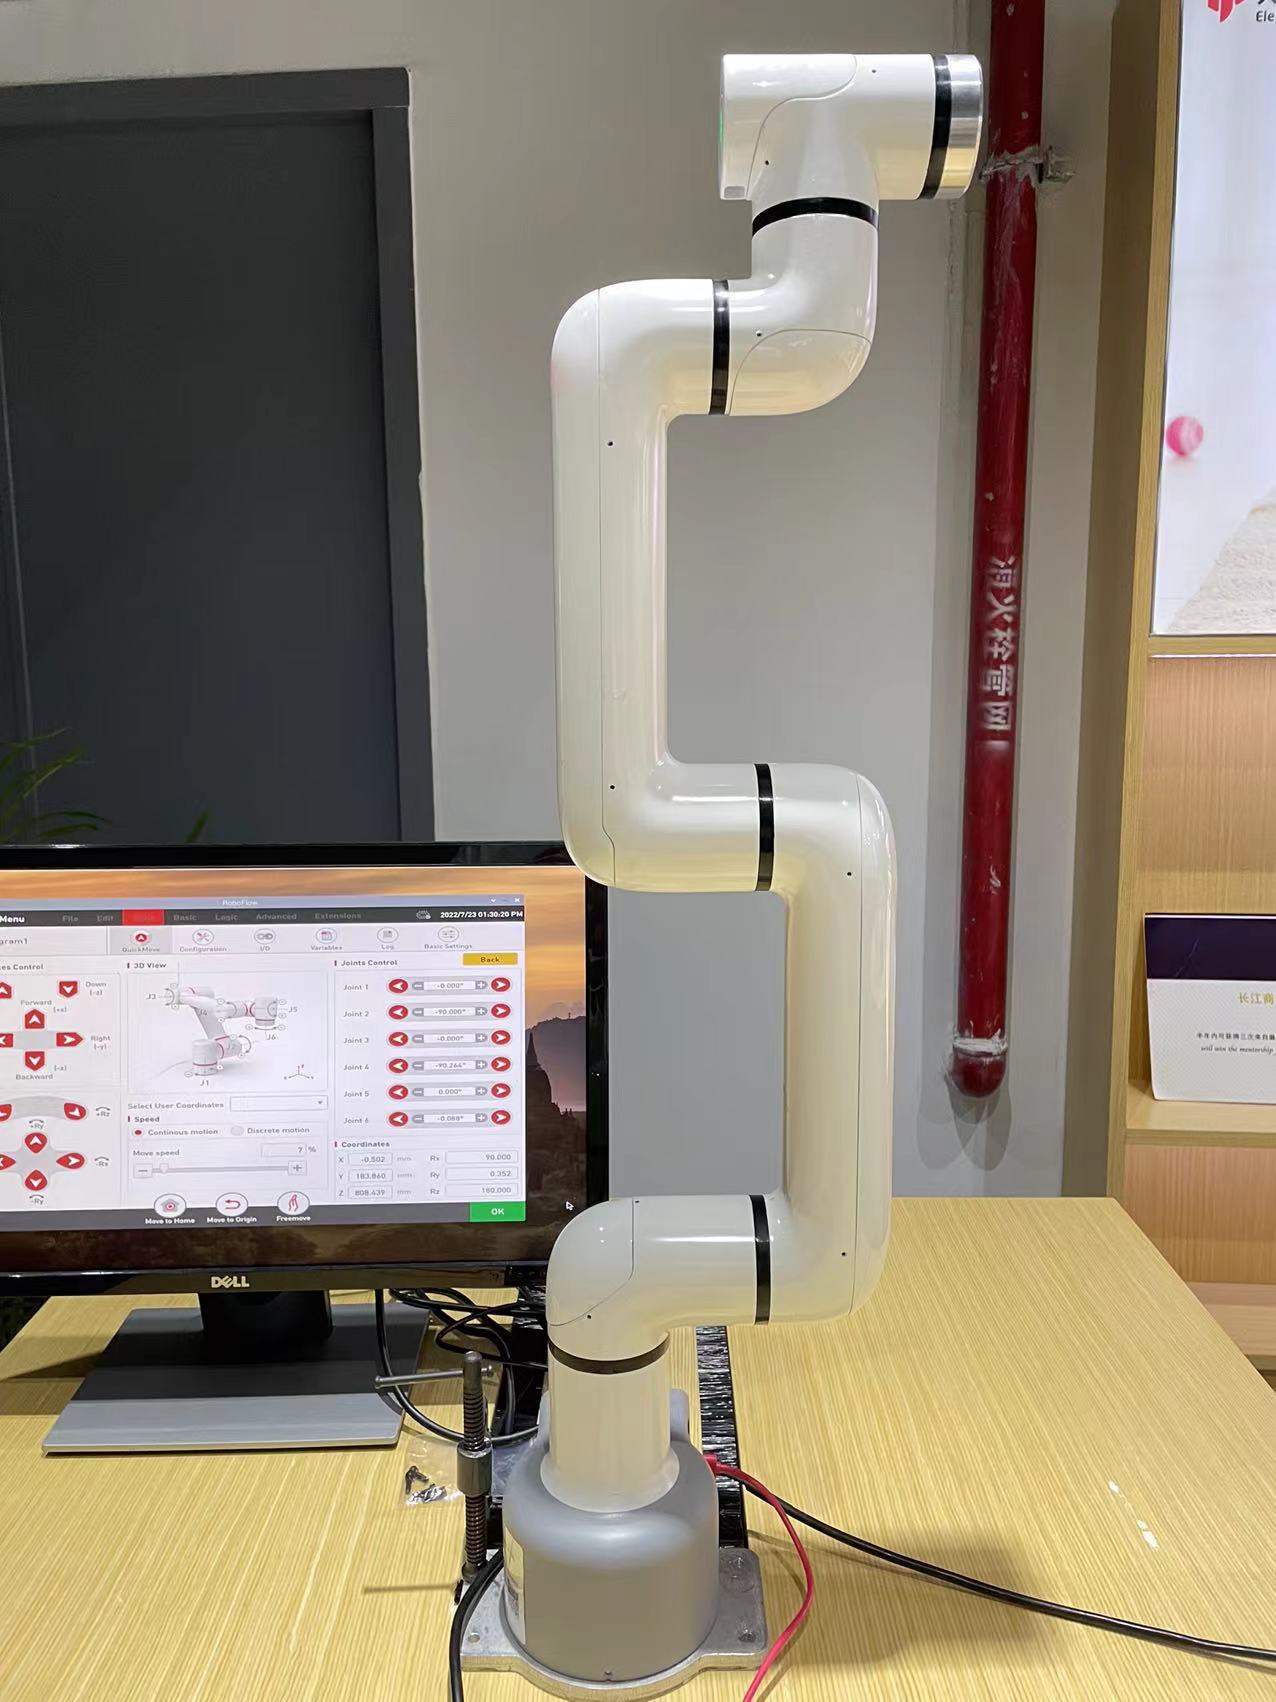
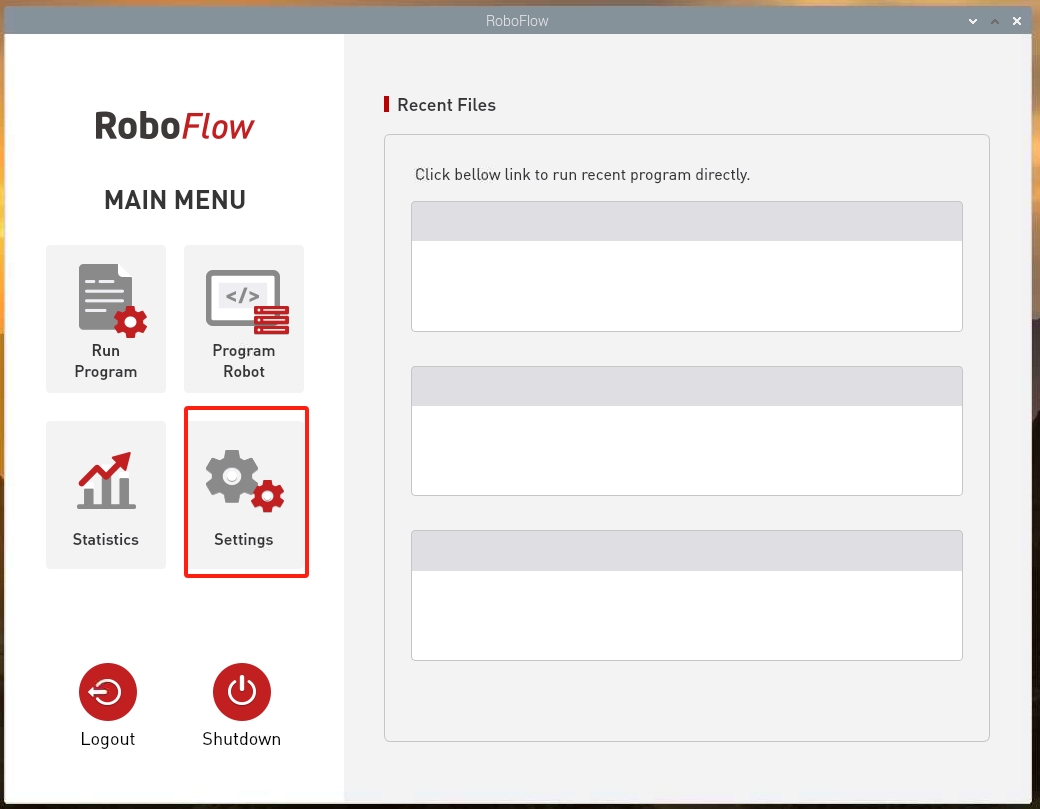
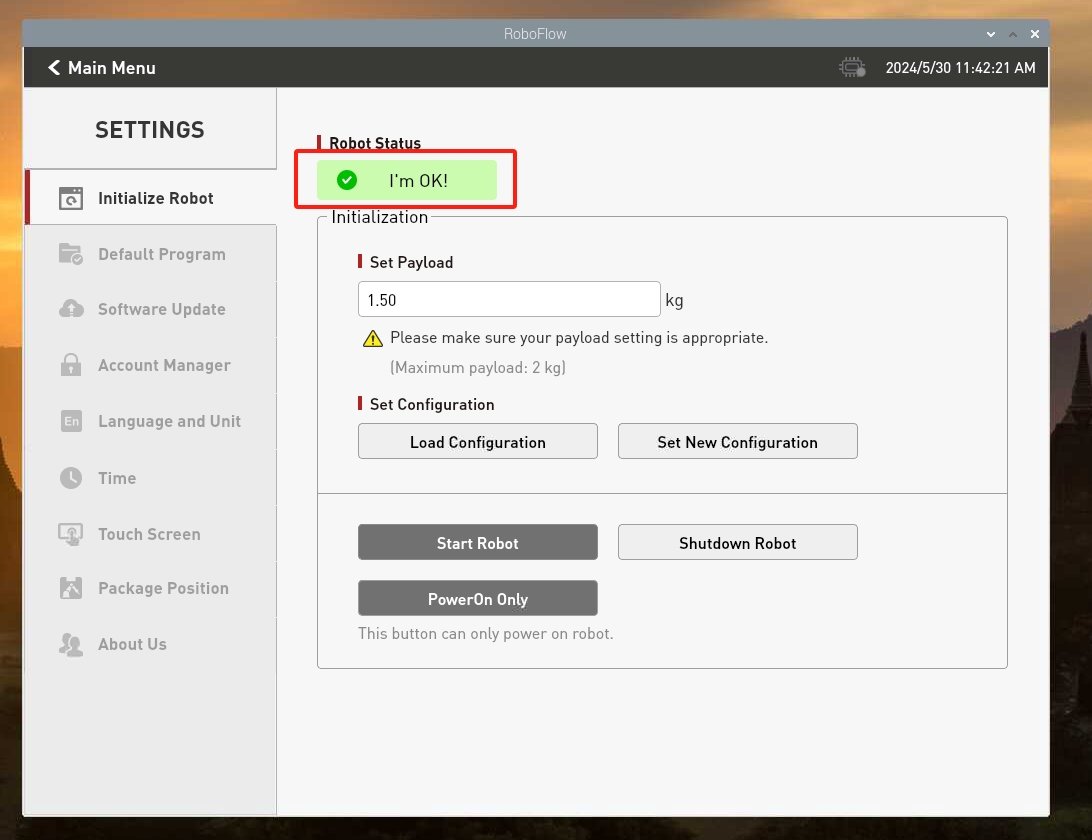
4 Zero position check
After the robot is powered on, use VNC to log in to the RoboFlow operating system, and the password is elephant.
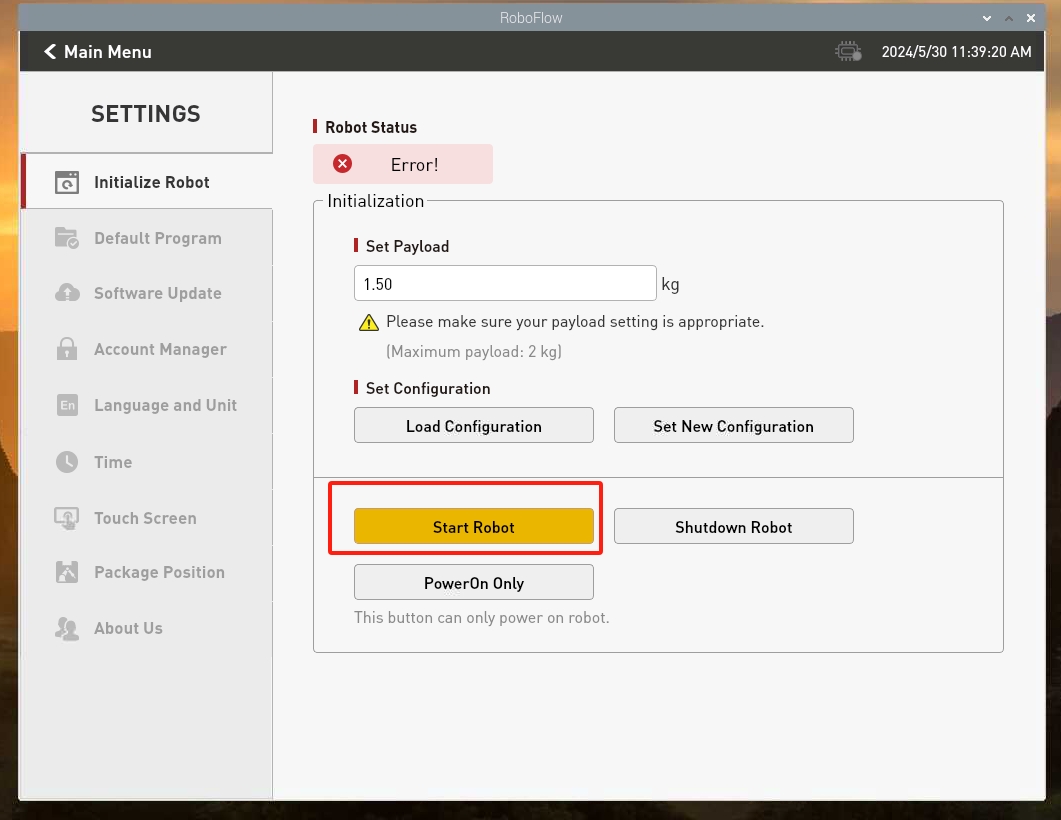
Enter the configuration center and click the Start Robot button
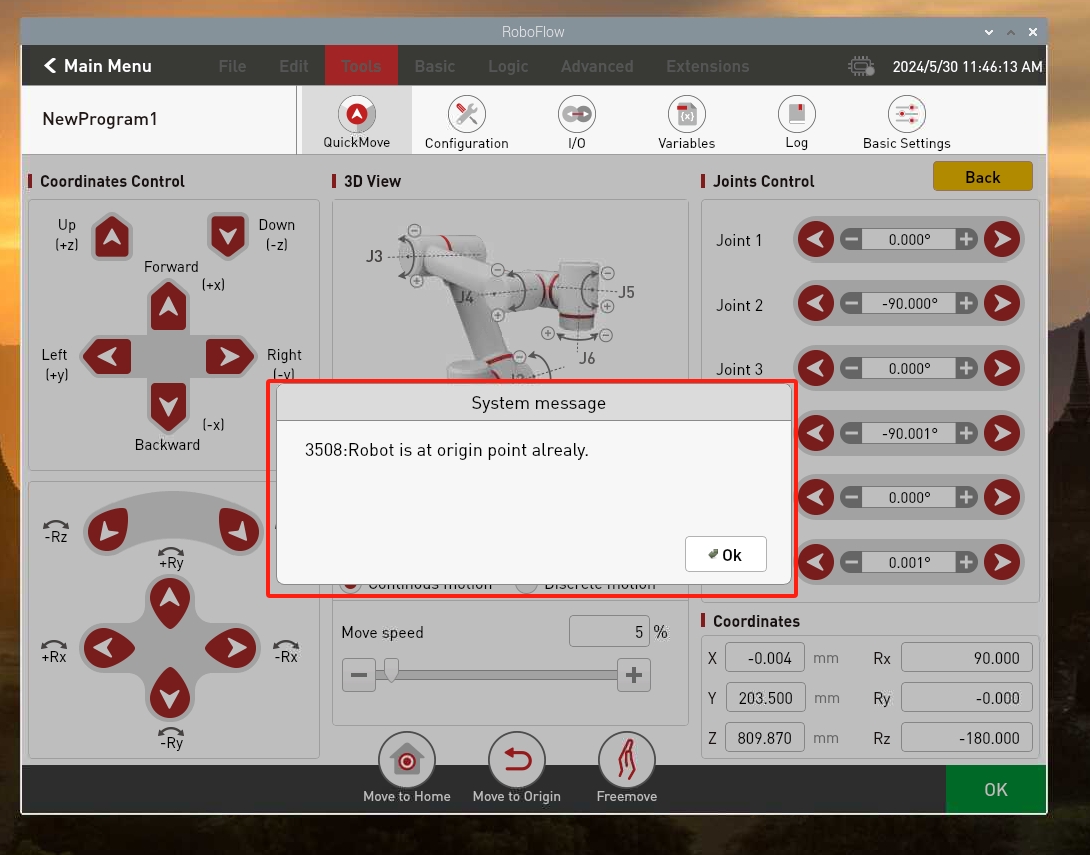
Long press the return to zero button, and each joint of the robotic arm will return to the corresponding zero point.
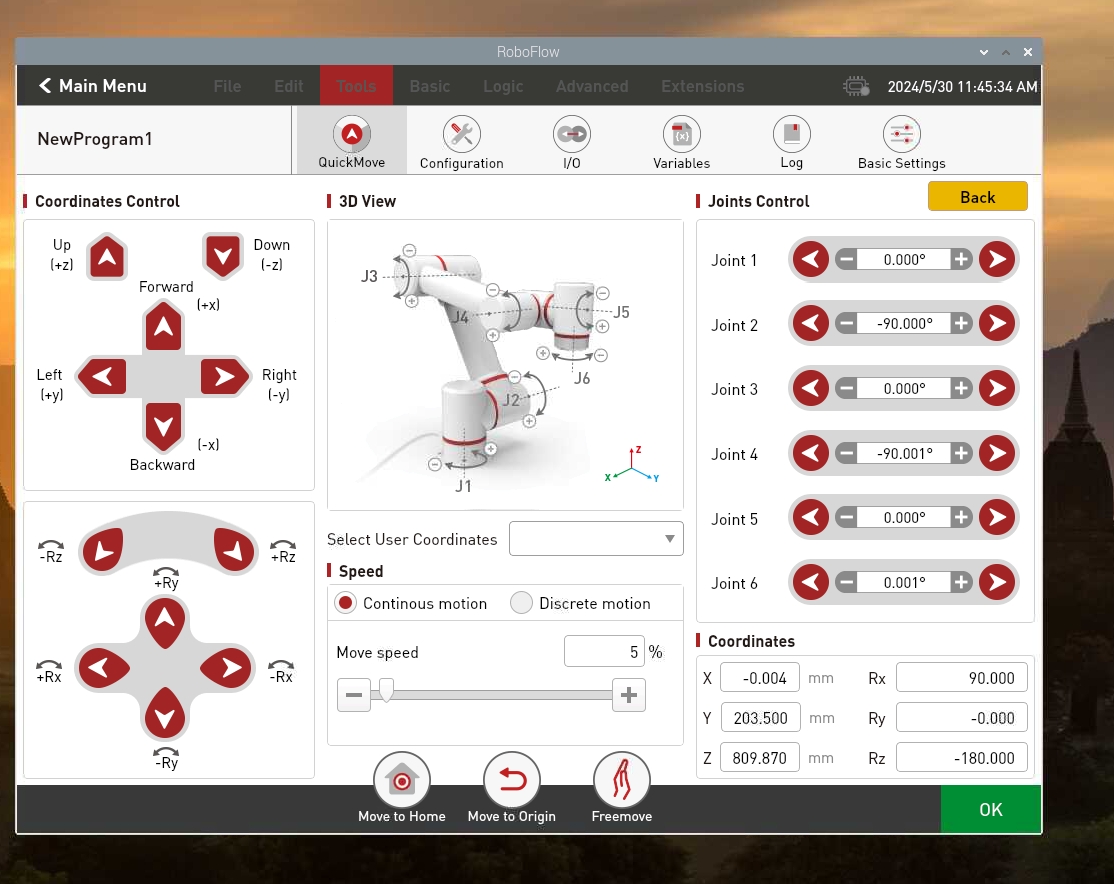
There will be a pop-up window reminder after each joint of the robotic arm is in place. At this time, you can release the return to zero button.
Reference posture of the robot arm after returning to zero