Brief introduction and use of rviz2
Rviz2 is a visualization tool for displaying messages in the robot environment, providing a 3D perspective to view the robot's status and activities. It can help developers better understand the current status and activities of the robot, as well as other visual messages. Rviz2 provides a series of visualization tools that can help developers better understand the status and activities of robots, such as visual coordinate systems, laser scanning messages, point cloud messages, robot models, etc. Using Rviz2, robotic systems can be easily viewed and debugged to better achieve robotic goals.
1 Introduction to rviz2
The successful installation of ros2 indicates that rviz2 is also successfully installed together, because the installation of ros2 includes rviz2.
Open a new terminal (shortcutCtrl+Alt+T)enter the command to open rviz2
ros2 run rviz2 rviz2
# 或
rviz2
Open rviz2 and display the following interface:
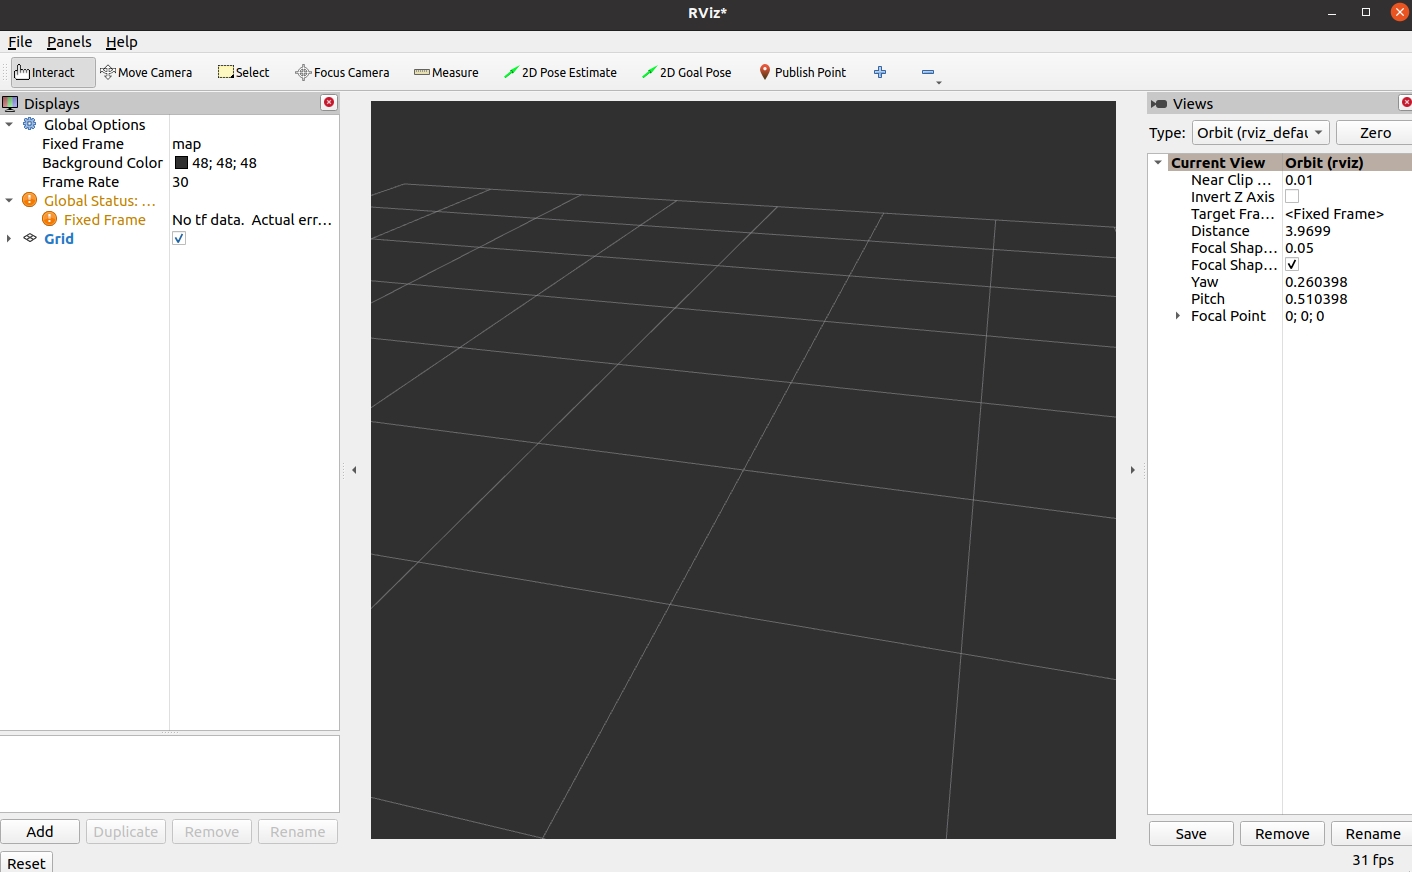
1.1 Introduction of each area
- On the left is the list of monitors, a monitor is something that draws something in the 3D world and may have some options available in the display list. Including functions such as adding, deleting, copying, renaming plug-ins, displaying plug-ins, and setting plug-in properties.
- Above is the toolbar, which allows users to use various function buttons to select tools with multiple functions
- The middle part is the 3D view: it is the main screen where various data can be viewed in 3D. The background color, fixed frame, grid, etc. of the 3D view can be set in detail in the Global Options and Grid items displayed on the left.
- Below is the time display area, including system time and ROS time.
- The right side is the observation angle setting area, and different observation angles can be set.
We only give a rough introduction in this part. If you want to know more detailed content, you can go to the user guide to view it.
2 Prerequisites
- Open the console terminal (shortcut key Ctrl+Alt+T), open the terminal window to view the device name:
# View the device name of the robotic arm
ls /dev/ttyUSB* # 2020 version myCobot320 M5

# If the terminal does not display the /dev/ttyUSB related name, you need to use the following command
ls /dev/ttyACM* # 2022 version myCobot320 M5
- Grant the serial port permission to the robotic arm:
# The default device name is /dev/ttyUSB0, if the device name is not the default value, it needs to be modified.
sudo chmod 777 /dev/ttyUSB0 # 2020 version myCobot320 M5

sudo chmod 777 /dev/ttyACM0 # 2022 version myCobot320 M5
Then enter the user password(Note: The password is not displayed, just enter it correctly).
3 Simple use
Launch through launch file
This example is based on the fact that you have completed Environment Setup and successfully copied the company's code from GitHub.
Open a console terminal (shortcut key Ctrl+Alt+T) Enter the following command to configure ROS2 environment.
cd ~/colcon_ws/
colcon build --symlink-install
source install/setup.bash
Enter again:
ros2 launch mycobot_320 test.launch.py
Open rviz2 and get the following result:
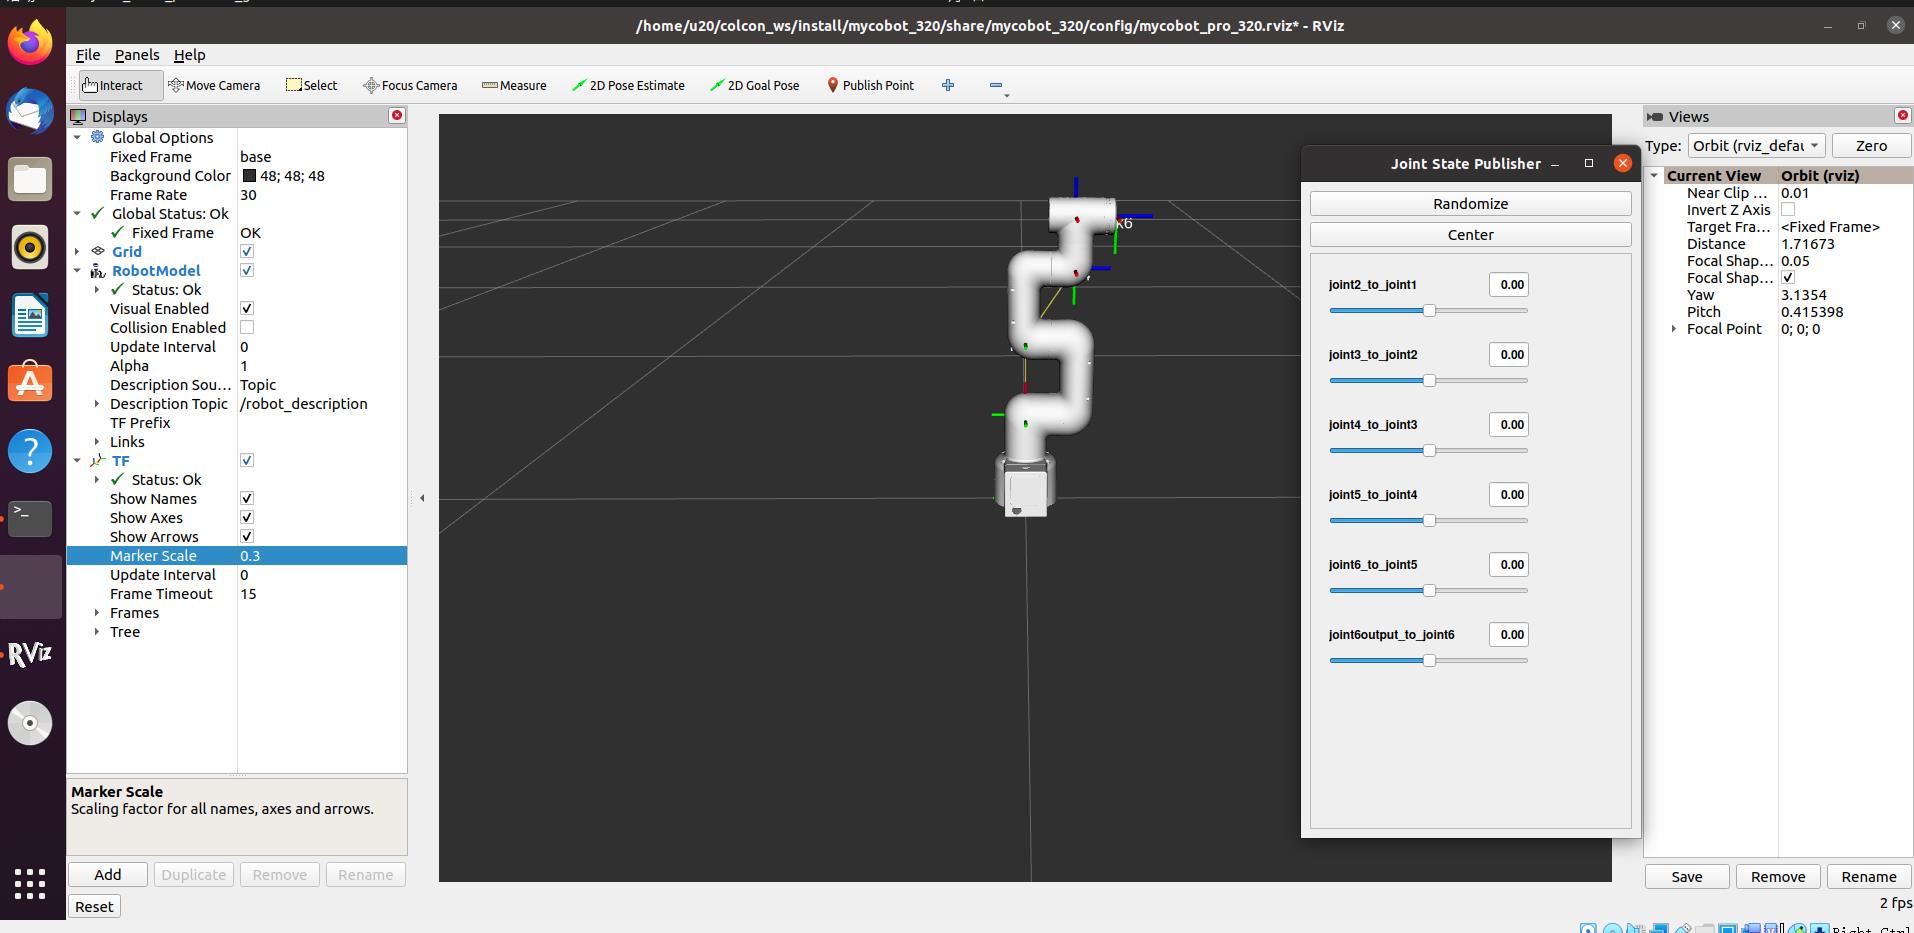
If you want to know more information about rviz, you can go to the official documentation to view it.