Drag teaching
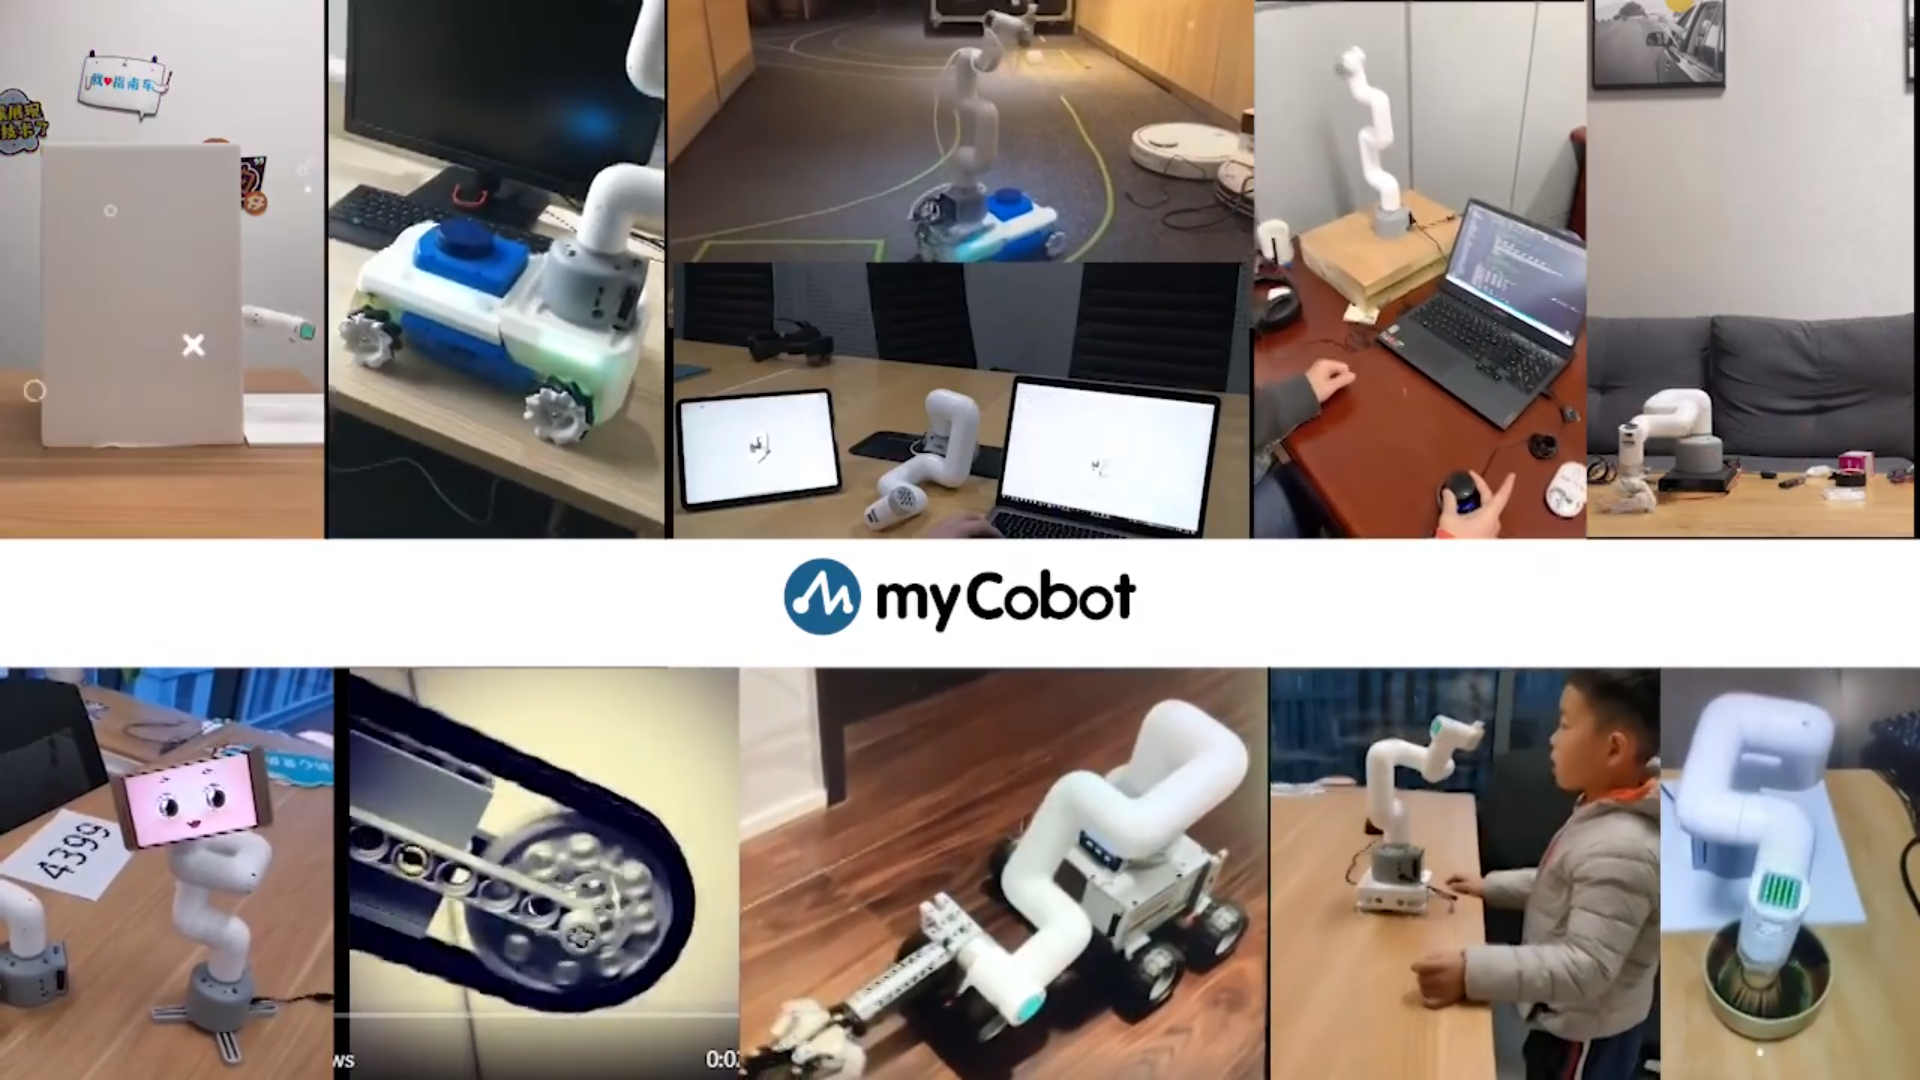
Robot drag teaching is a process during which the operator can drag the joints of the robot directly to make them do ideal postures, and then make records corresponding thereto.
The cobot is a system that has this function earlier. This kind of teaching avoids various disadvantages of traditional teaching, so it is a prospective technology for robot applications.
Different types of equipment have different operating methods. They have the approximate steps below:
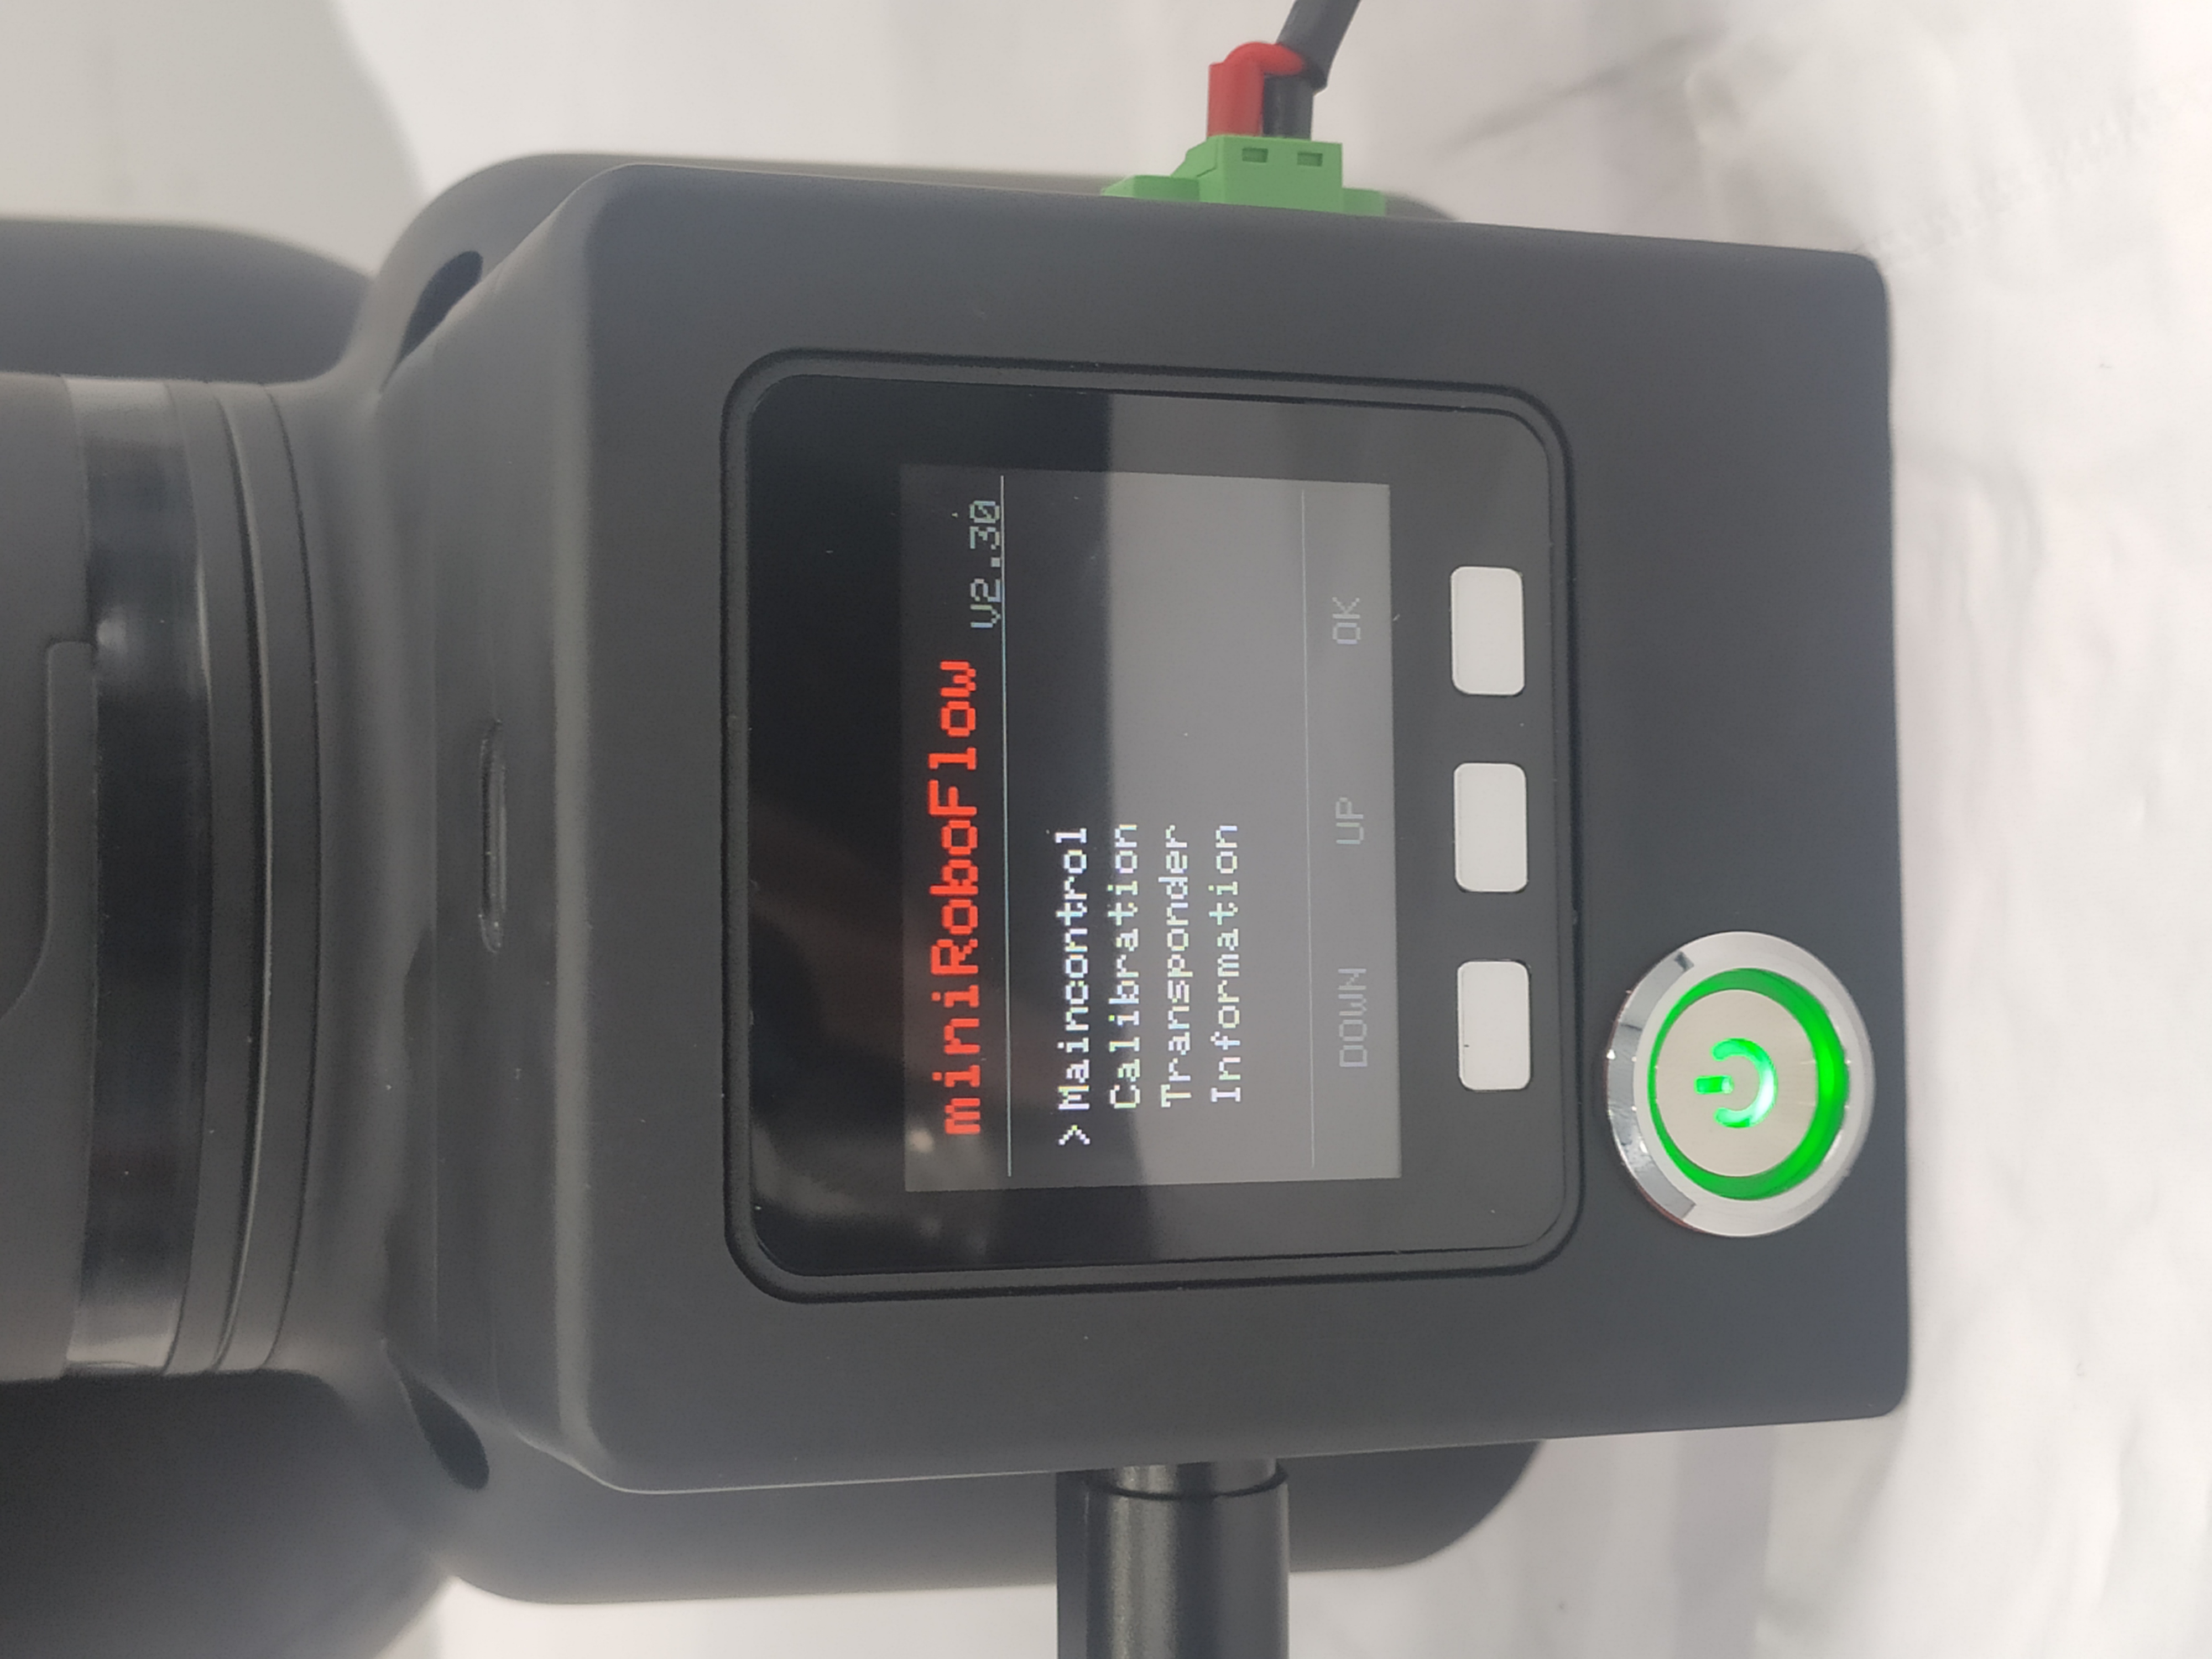
- Burn the latest version of atomMain for Atom, and the minirobot for M5Stack-basic. Choose the Maincontrol function (It is unnecessary to burn M5Stack-basic for micro-CPU devices).
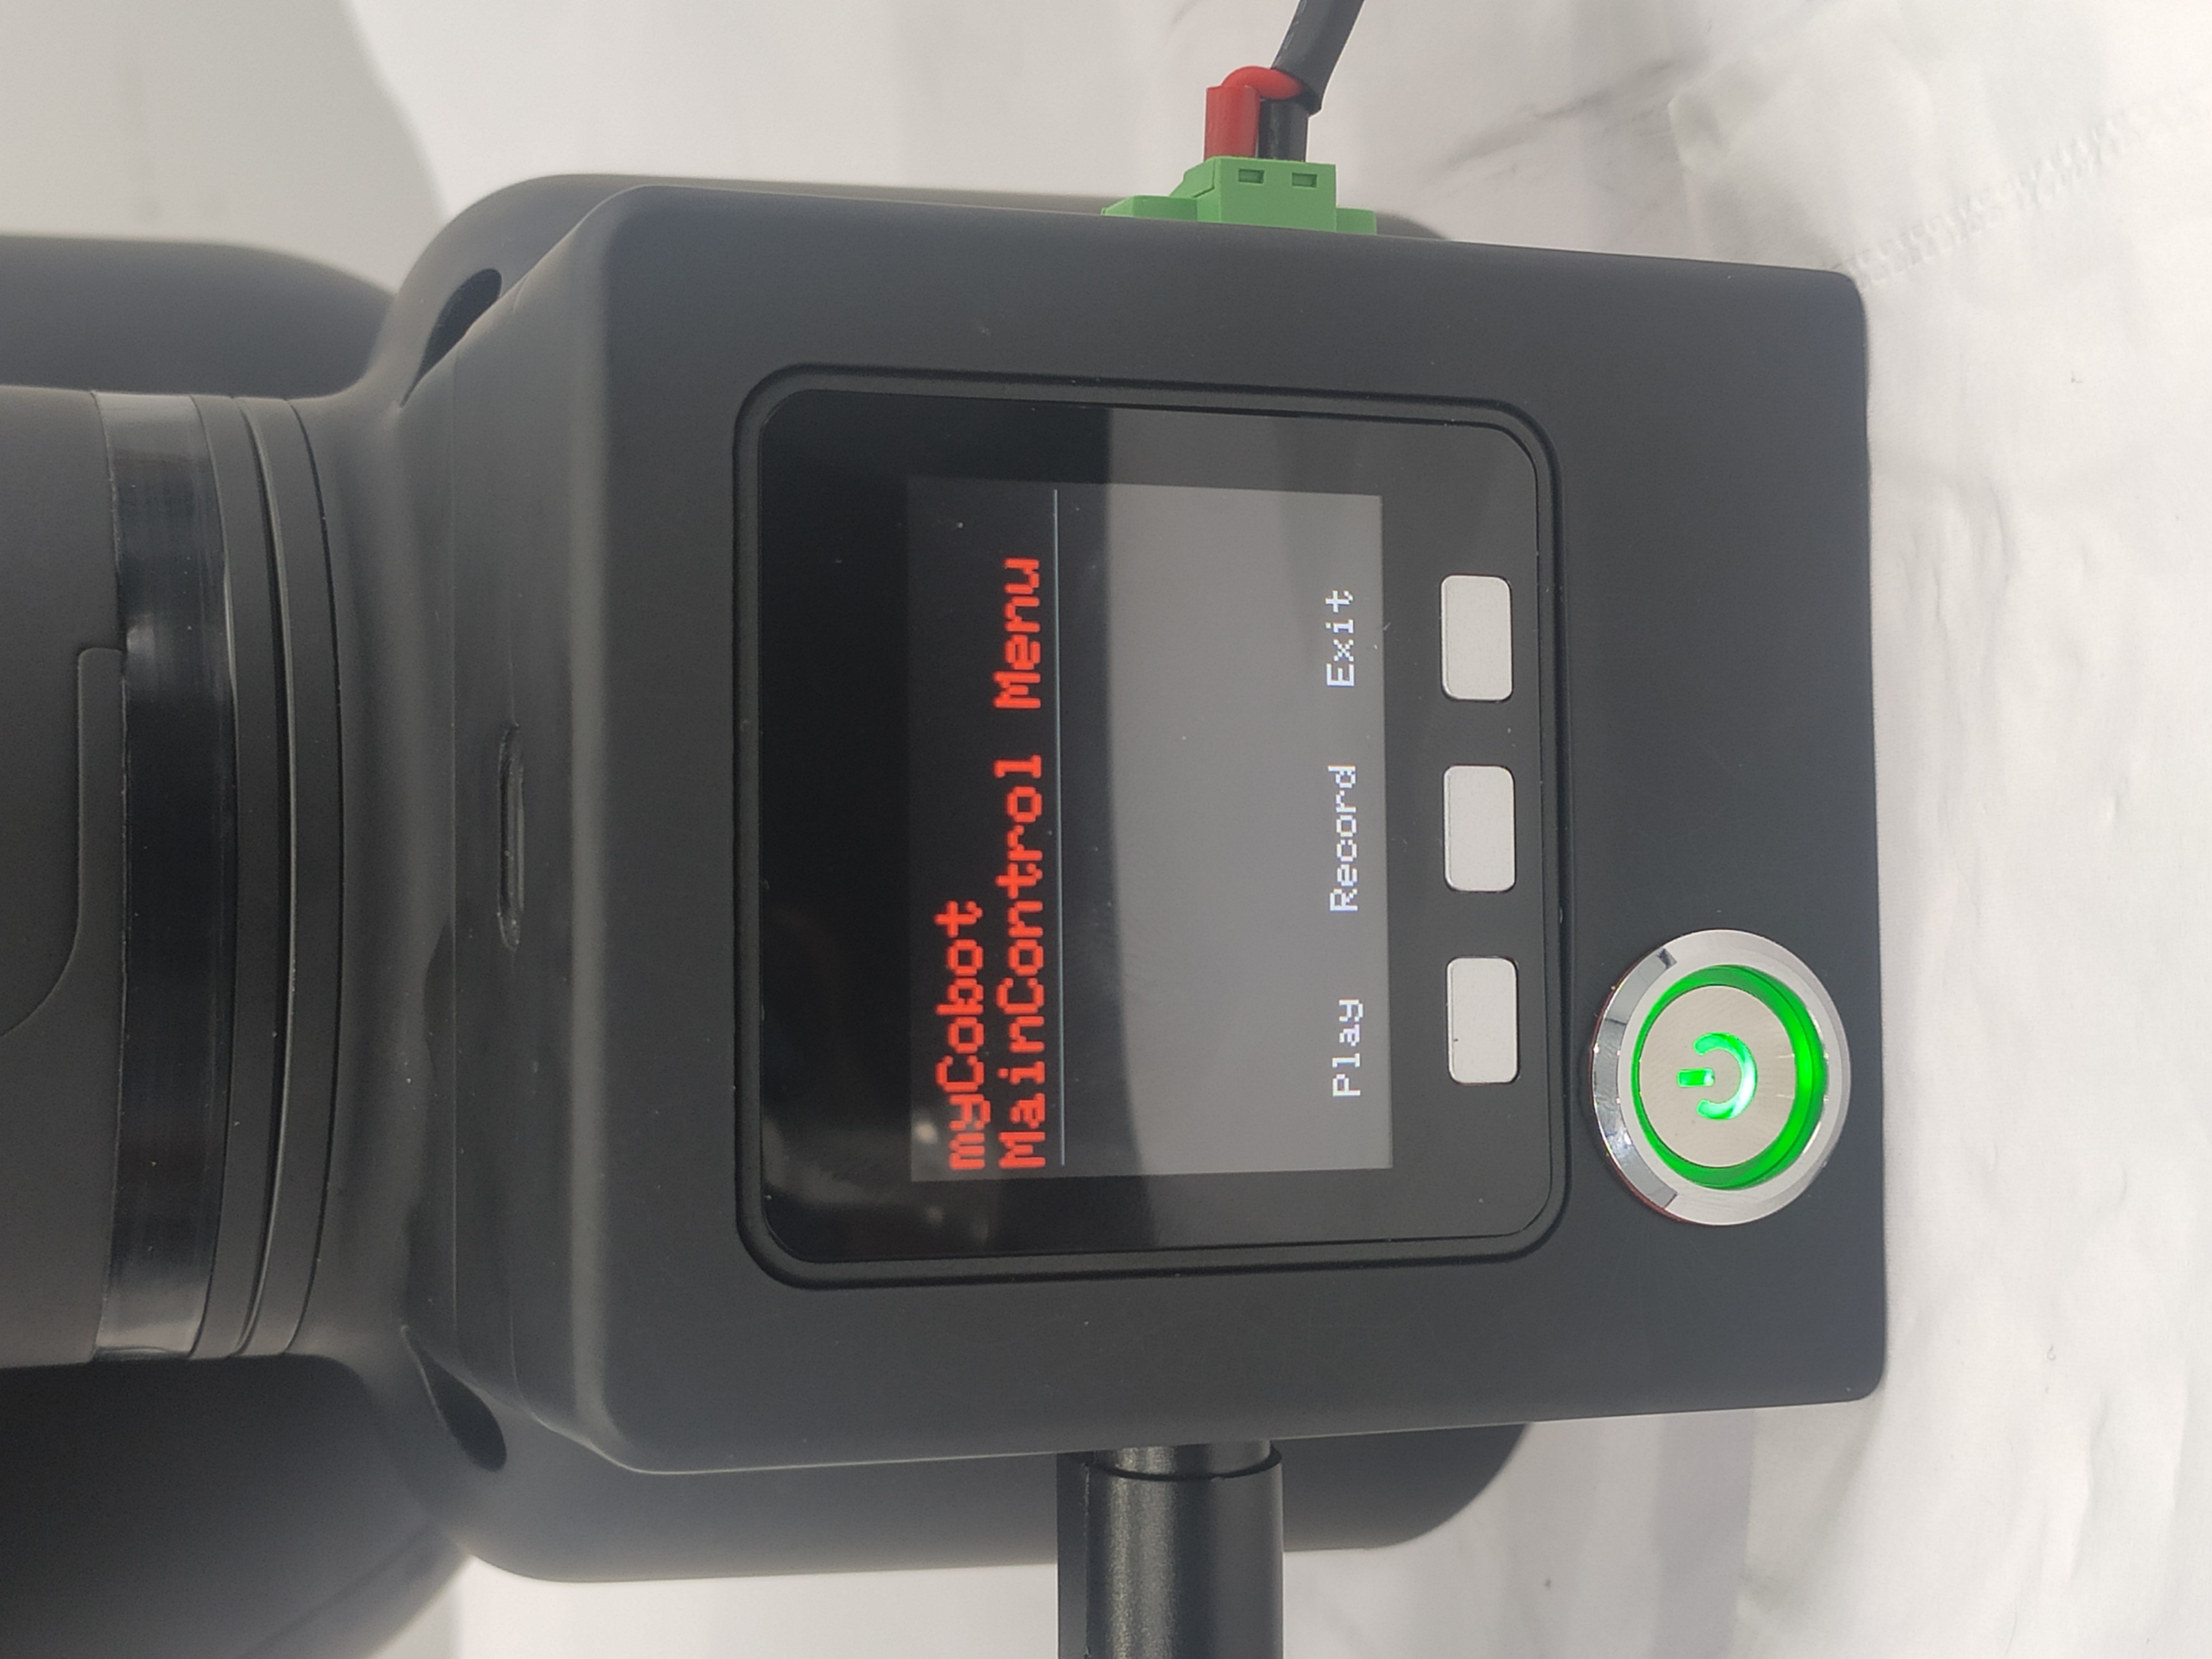
- Press the recording button/keyboard key
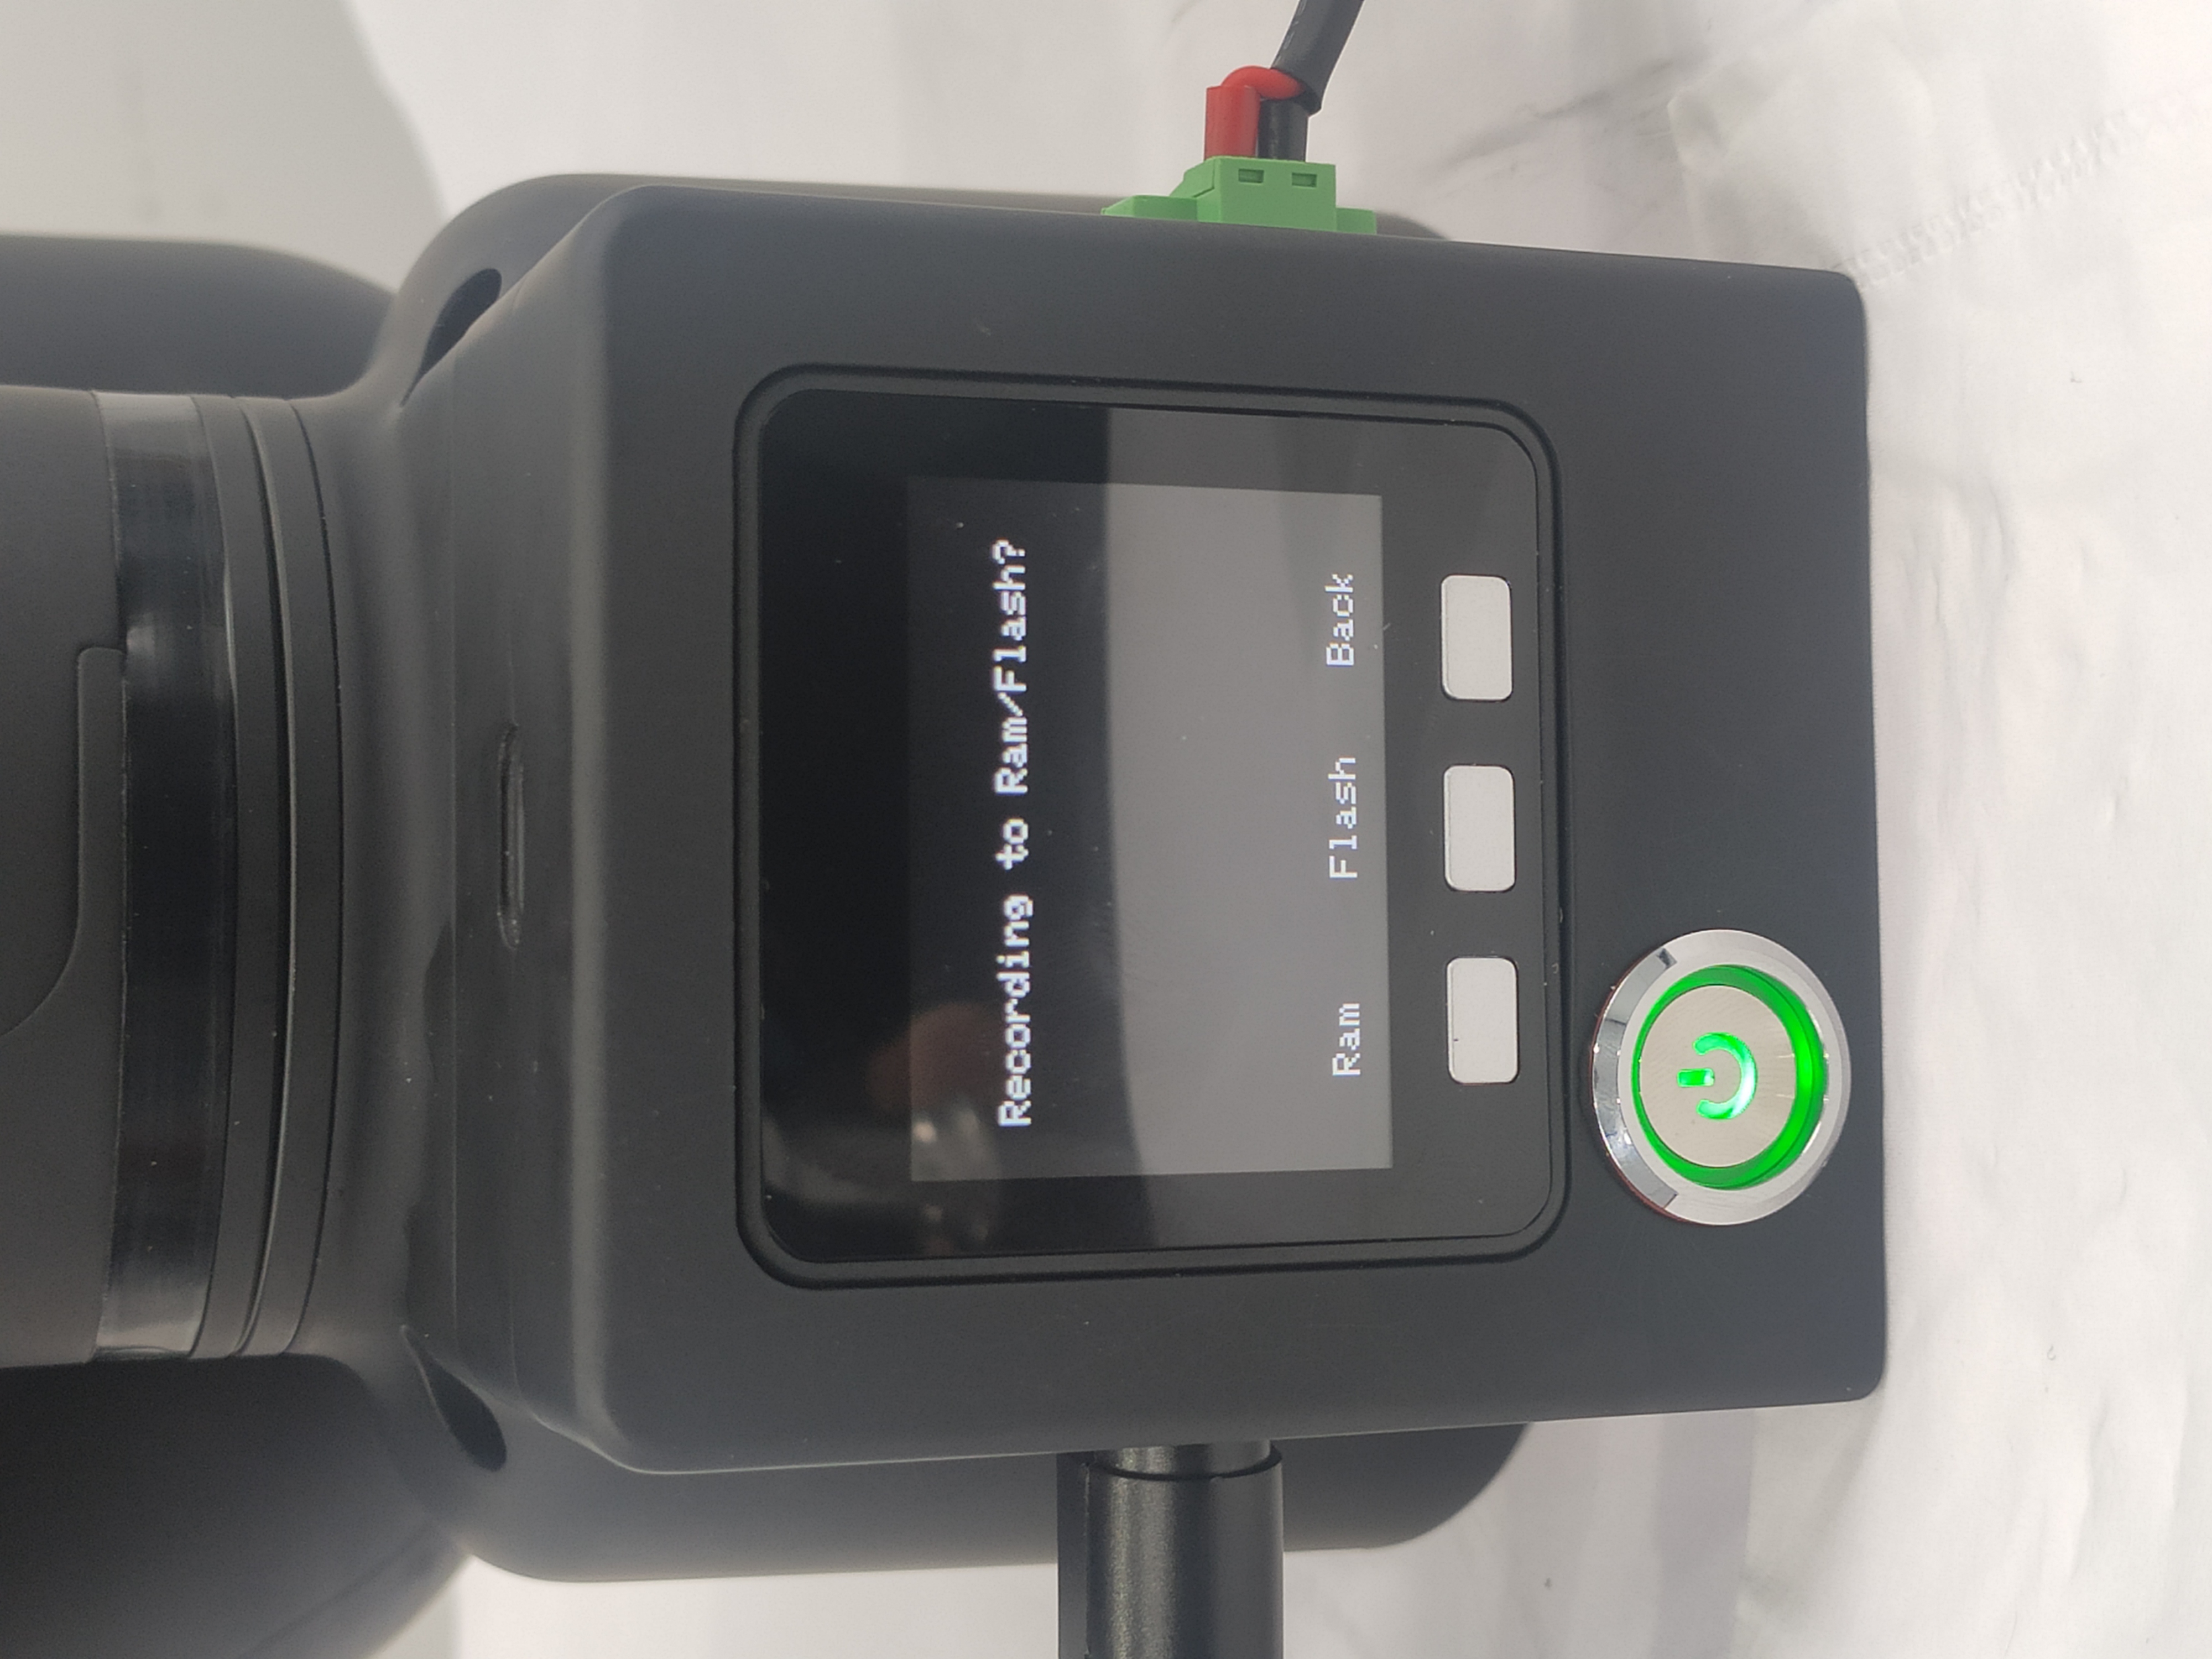
- select a storage path (micro-CPU devices haven't this step)
- directly drag the joints of the robot arm to move them to your desired positions to complete a set of movements
- press the designated button/keyboard key for saving
- press the play button/keyboard key/keyboard key
- select a corresponding storage path, and then the robot arm starts to move
- and finally press the exit button/keyboard key to exit this function
In this chapter, we will teach you how to get started easily and experience the fun of cobot drag teaching.
Drag-and-Record Demonstration
1 Applicable Robotic Arms
- myCobot 320 M5
2 Steps to Operate the Arms
Step1:
- Please confirm that you are aware of the product safety instructions and ensure that the device has been connected with cables as described in Chapter 4.
- Turn on the power switch and ensure that the emergency stop switch is connected and not pressed.
- Confirm that the Atom LED light board at the robot's end-effector is illuminated and that the robot's joints have torque output, making the joints unable to rotate.
Step 2: Press OK Select Maincontrol to Maincontrol Main Page.
Step 3: Press Record in Maincontrol Main Page.
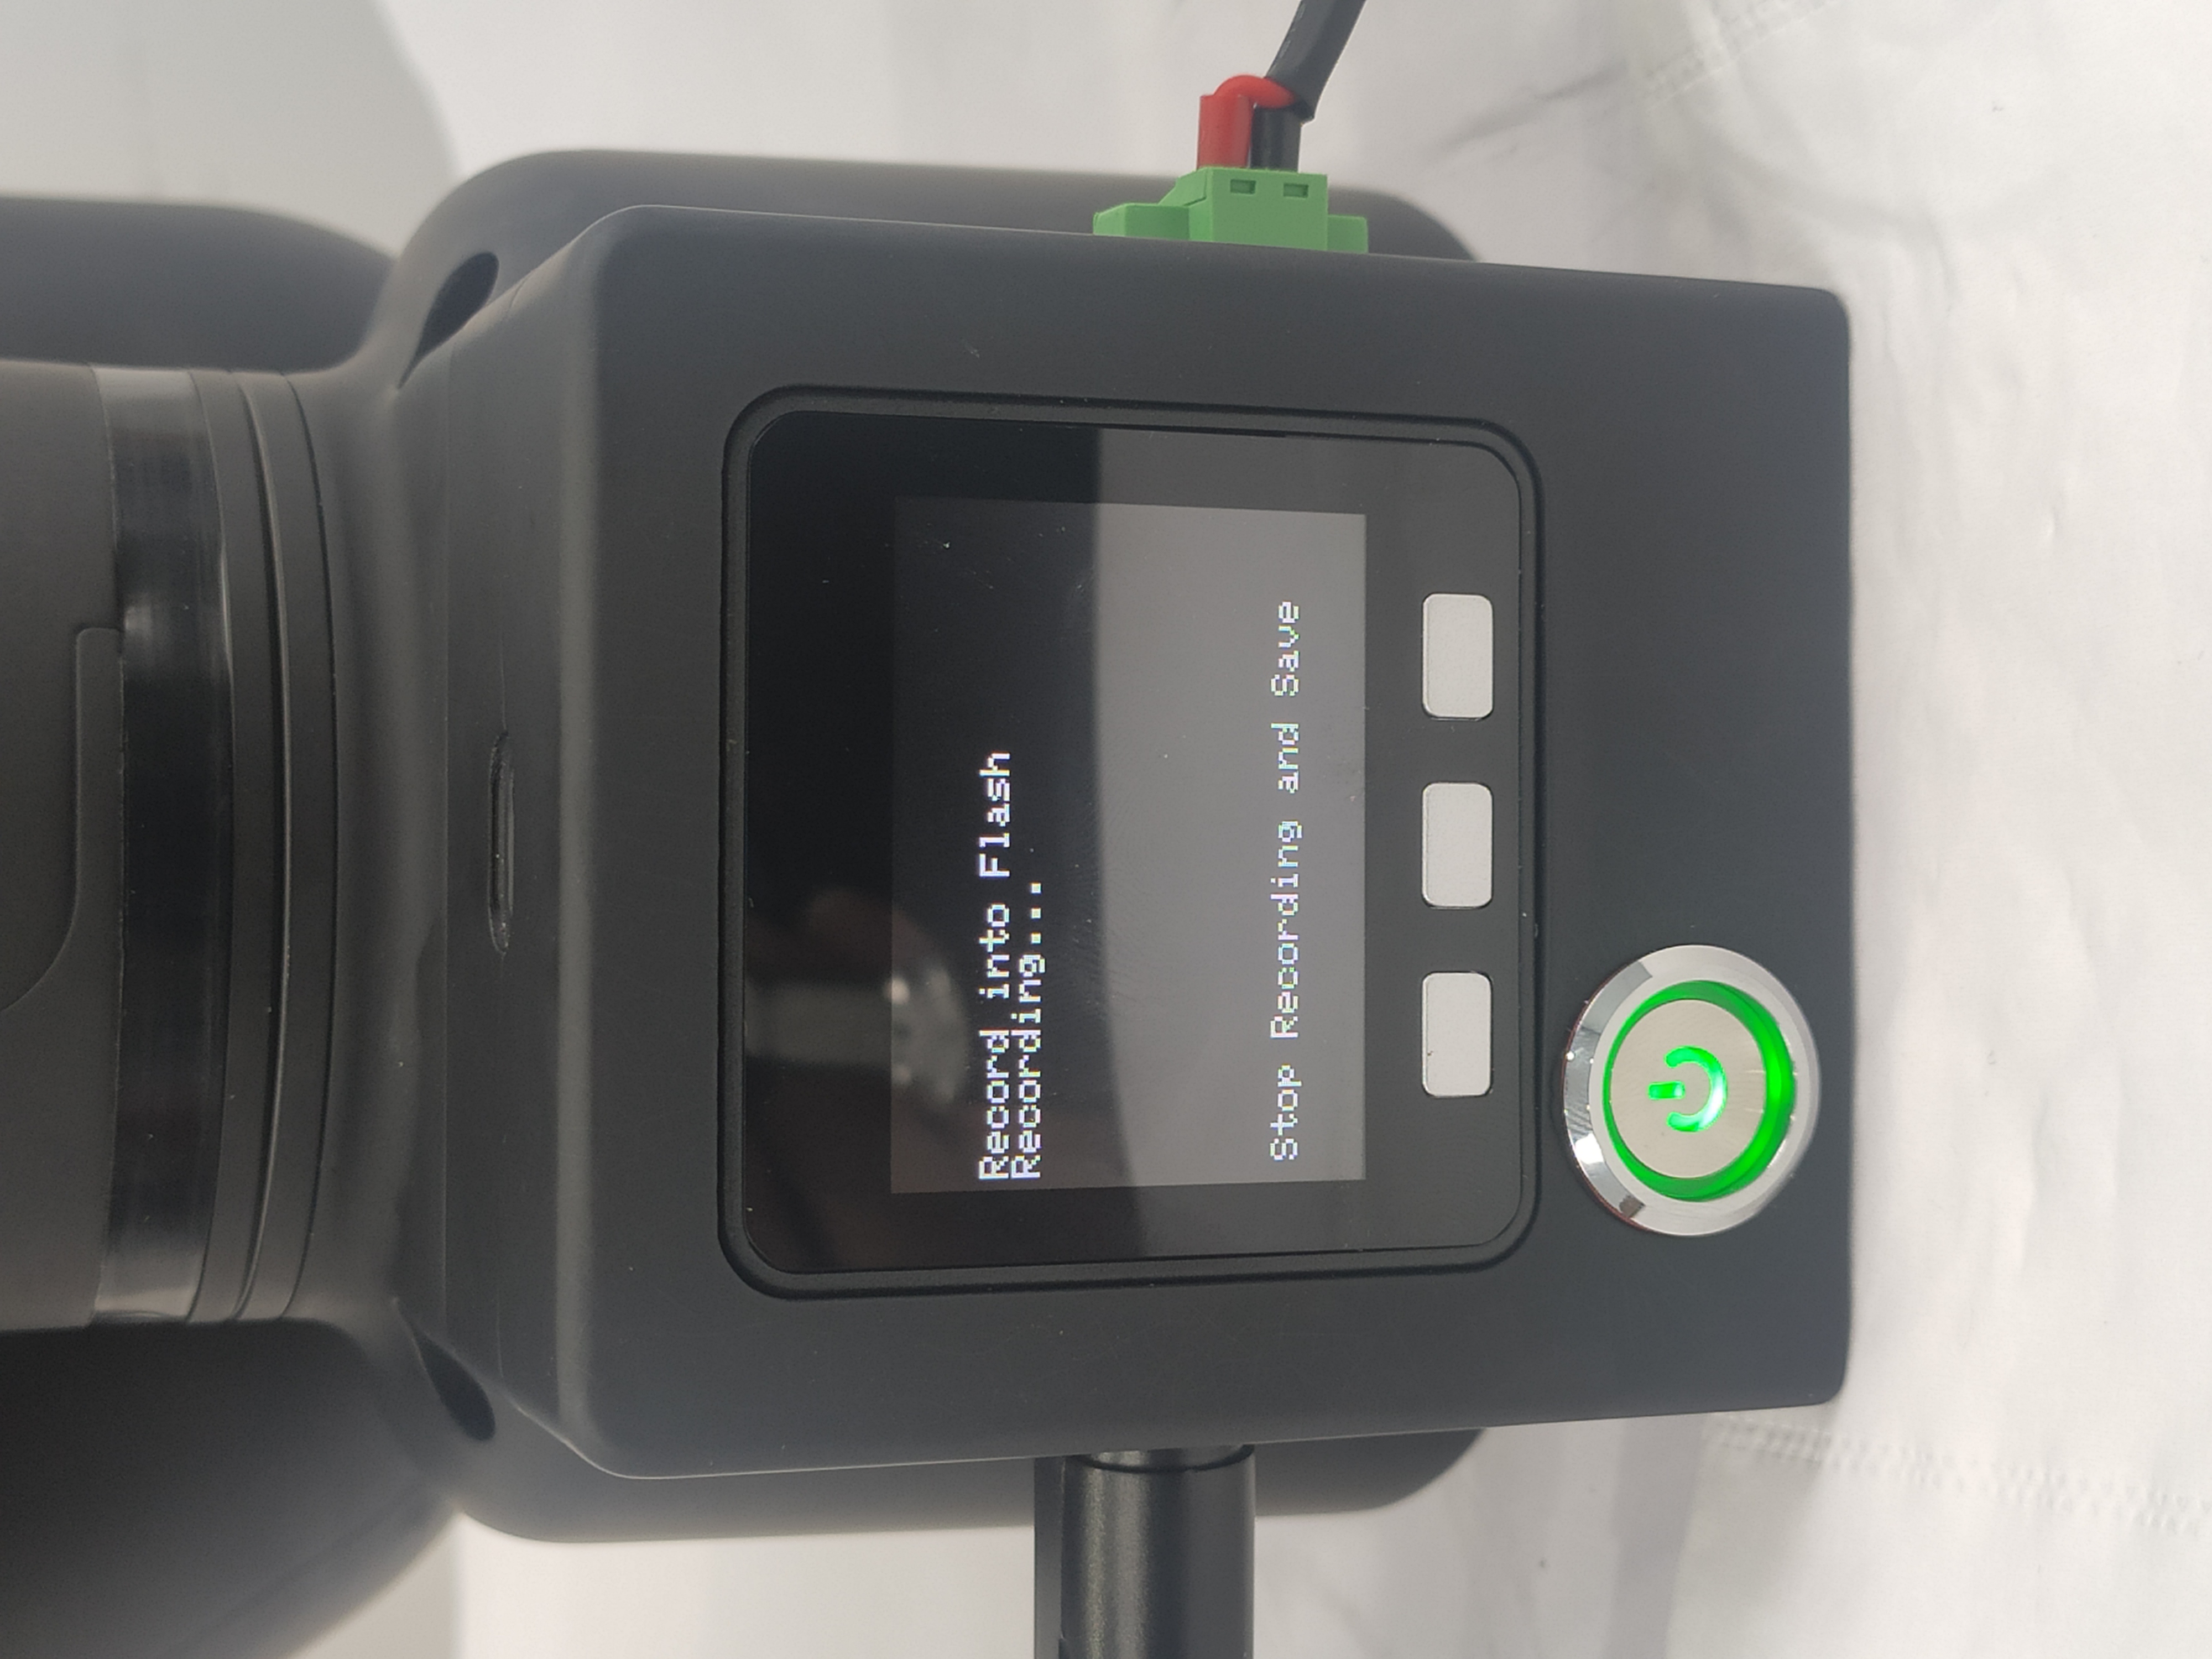
Step 4: Select path for storage, and press Ram or Flash.
Step 5: Move the joints of the robot arm to specific positions. After that, press any one of the three buttons so as to stop recording and save the motion.
Step 6: Press Exit to Main Page.
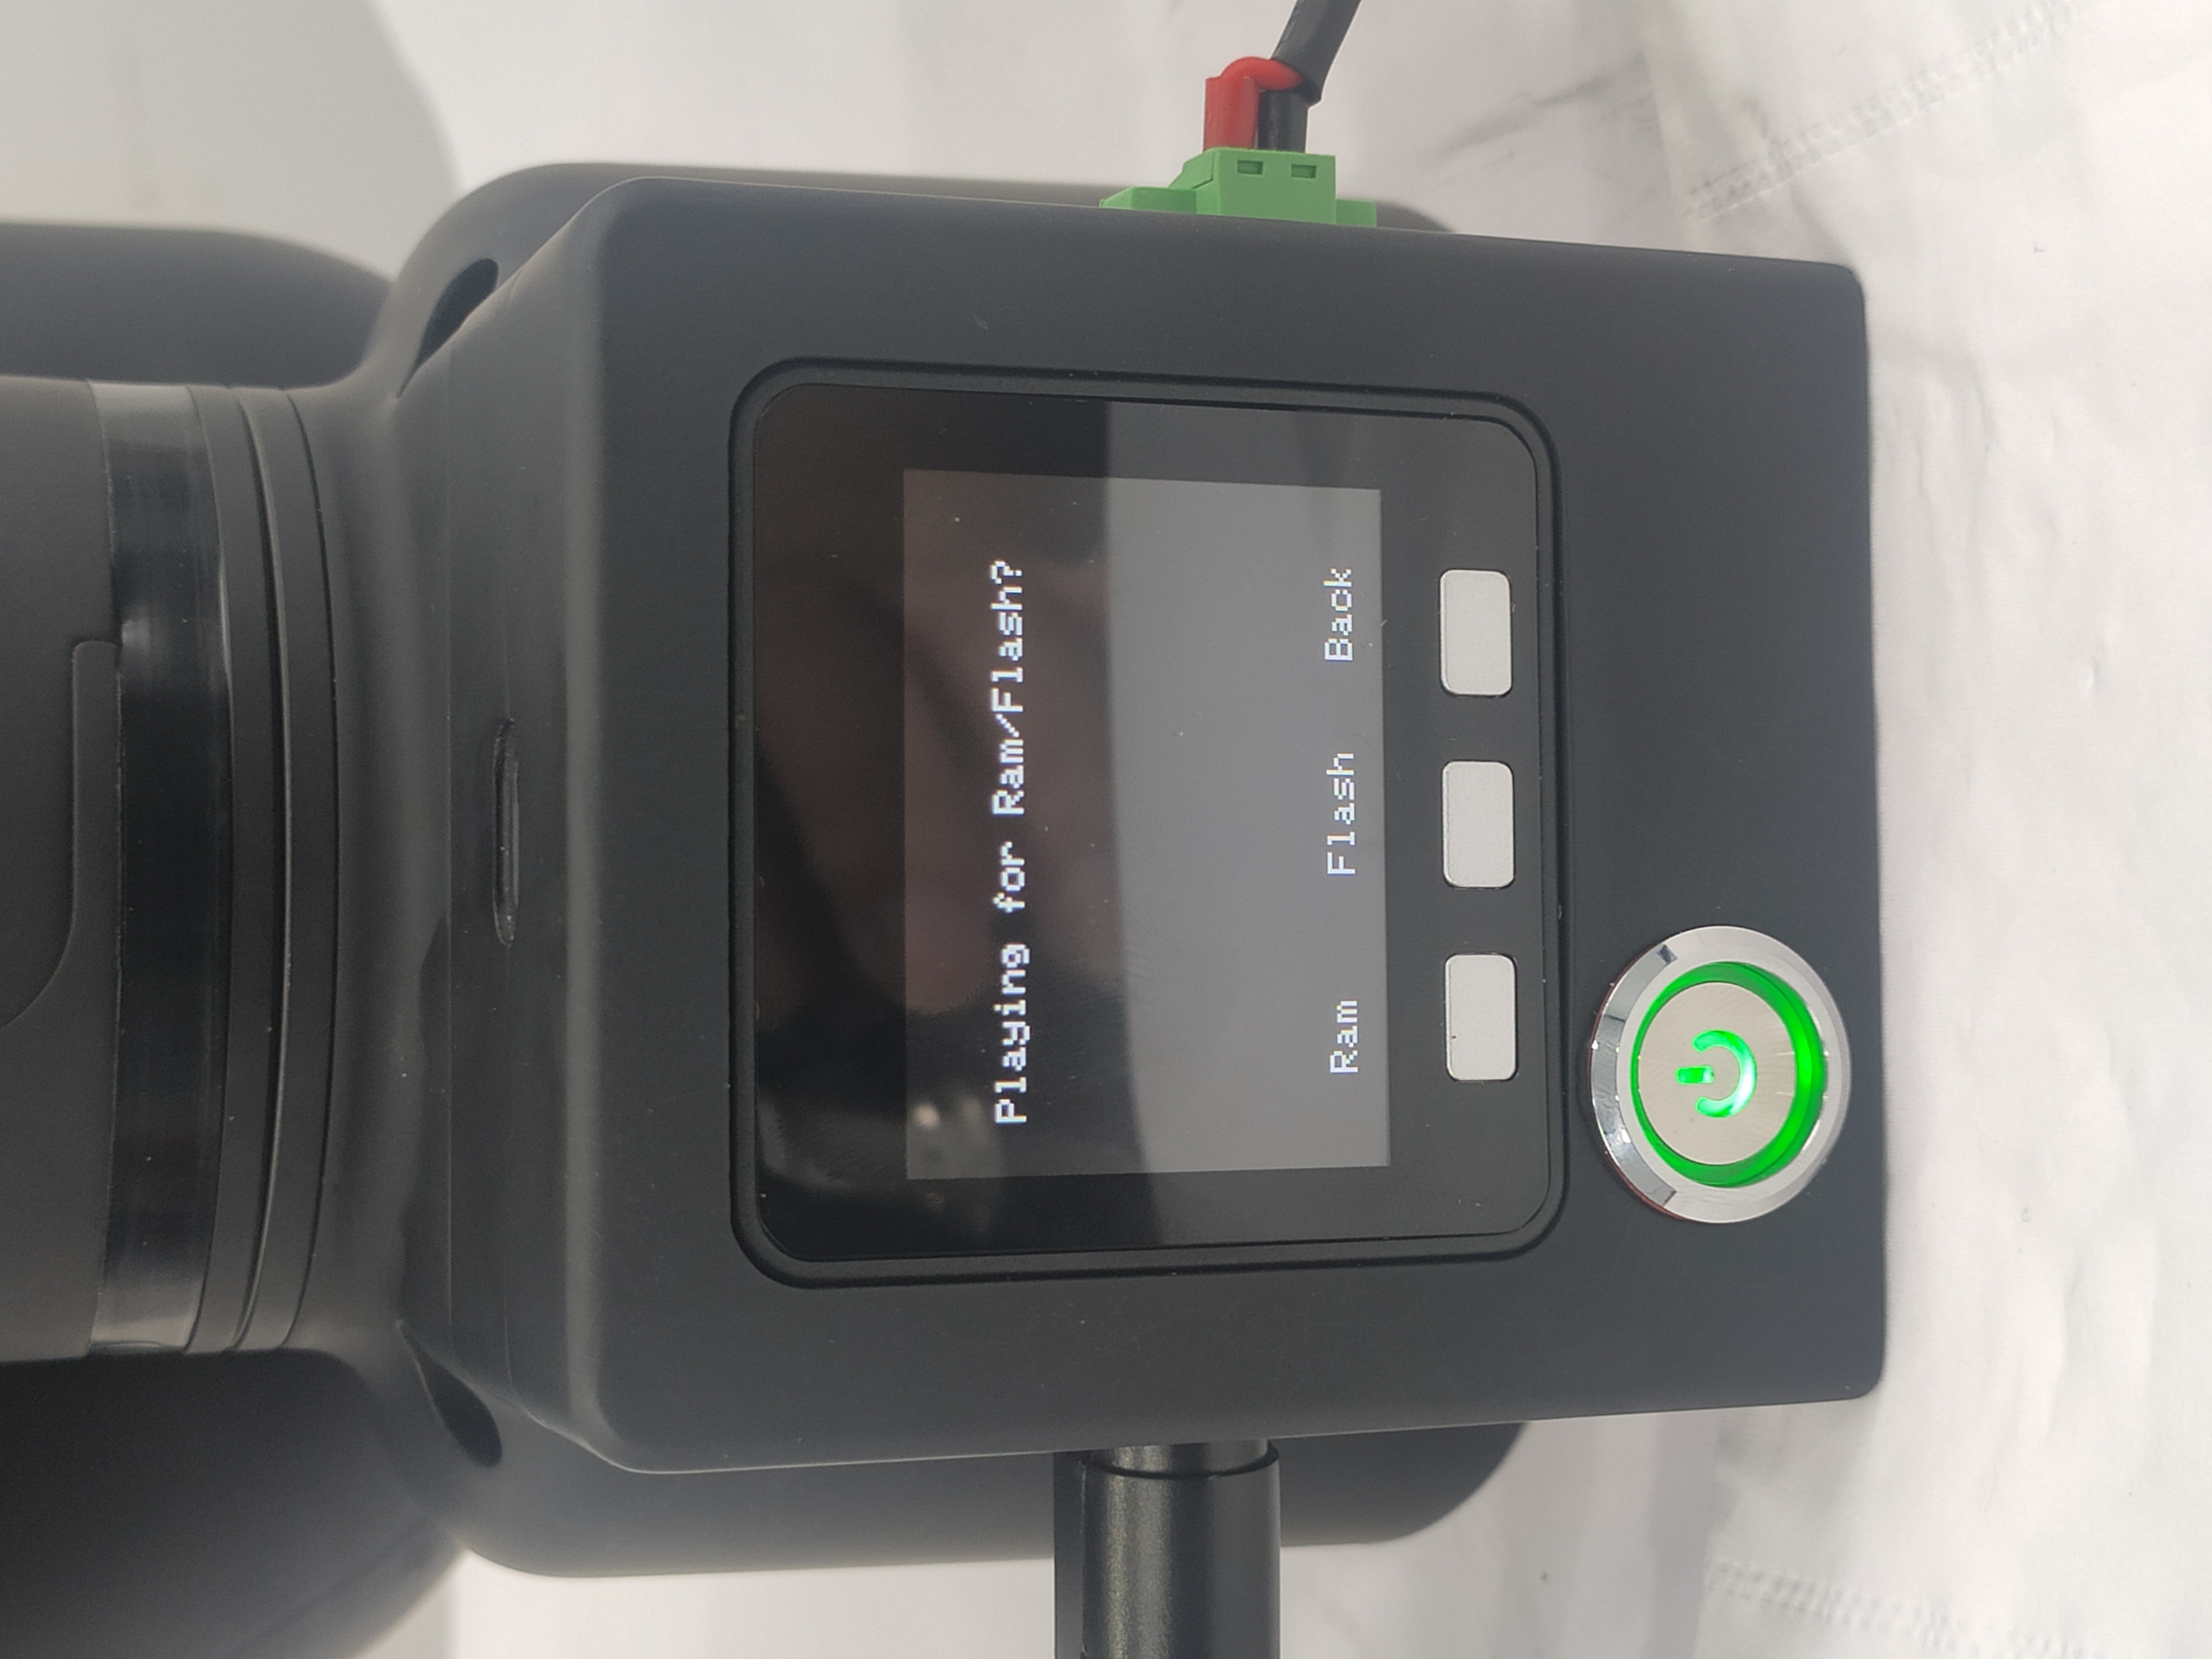
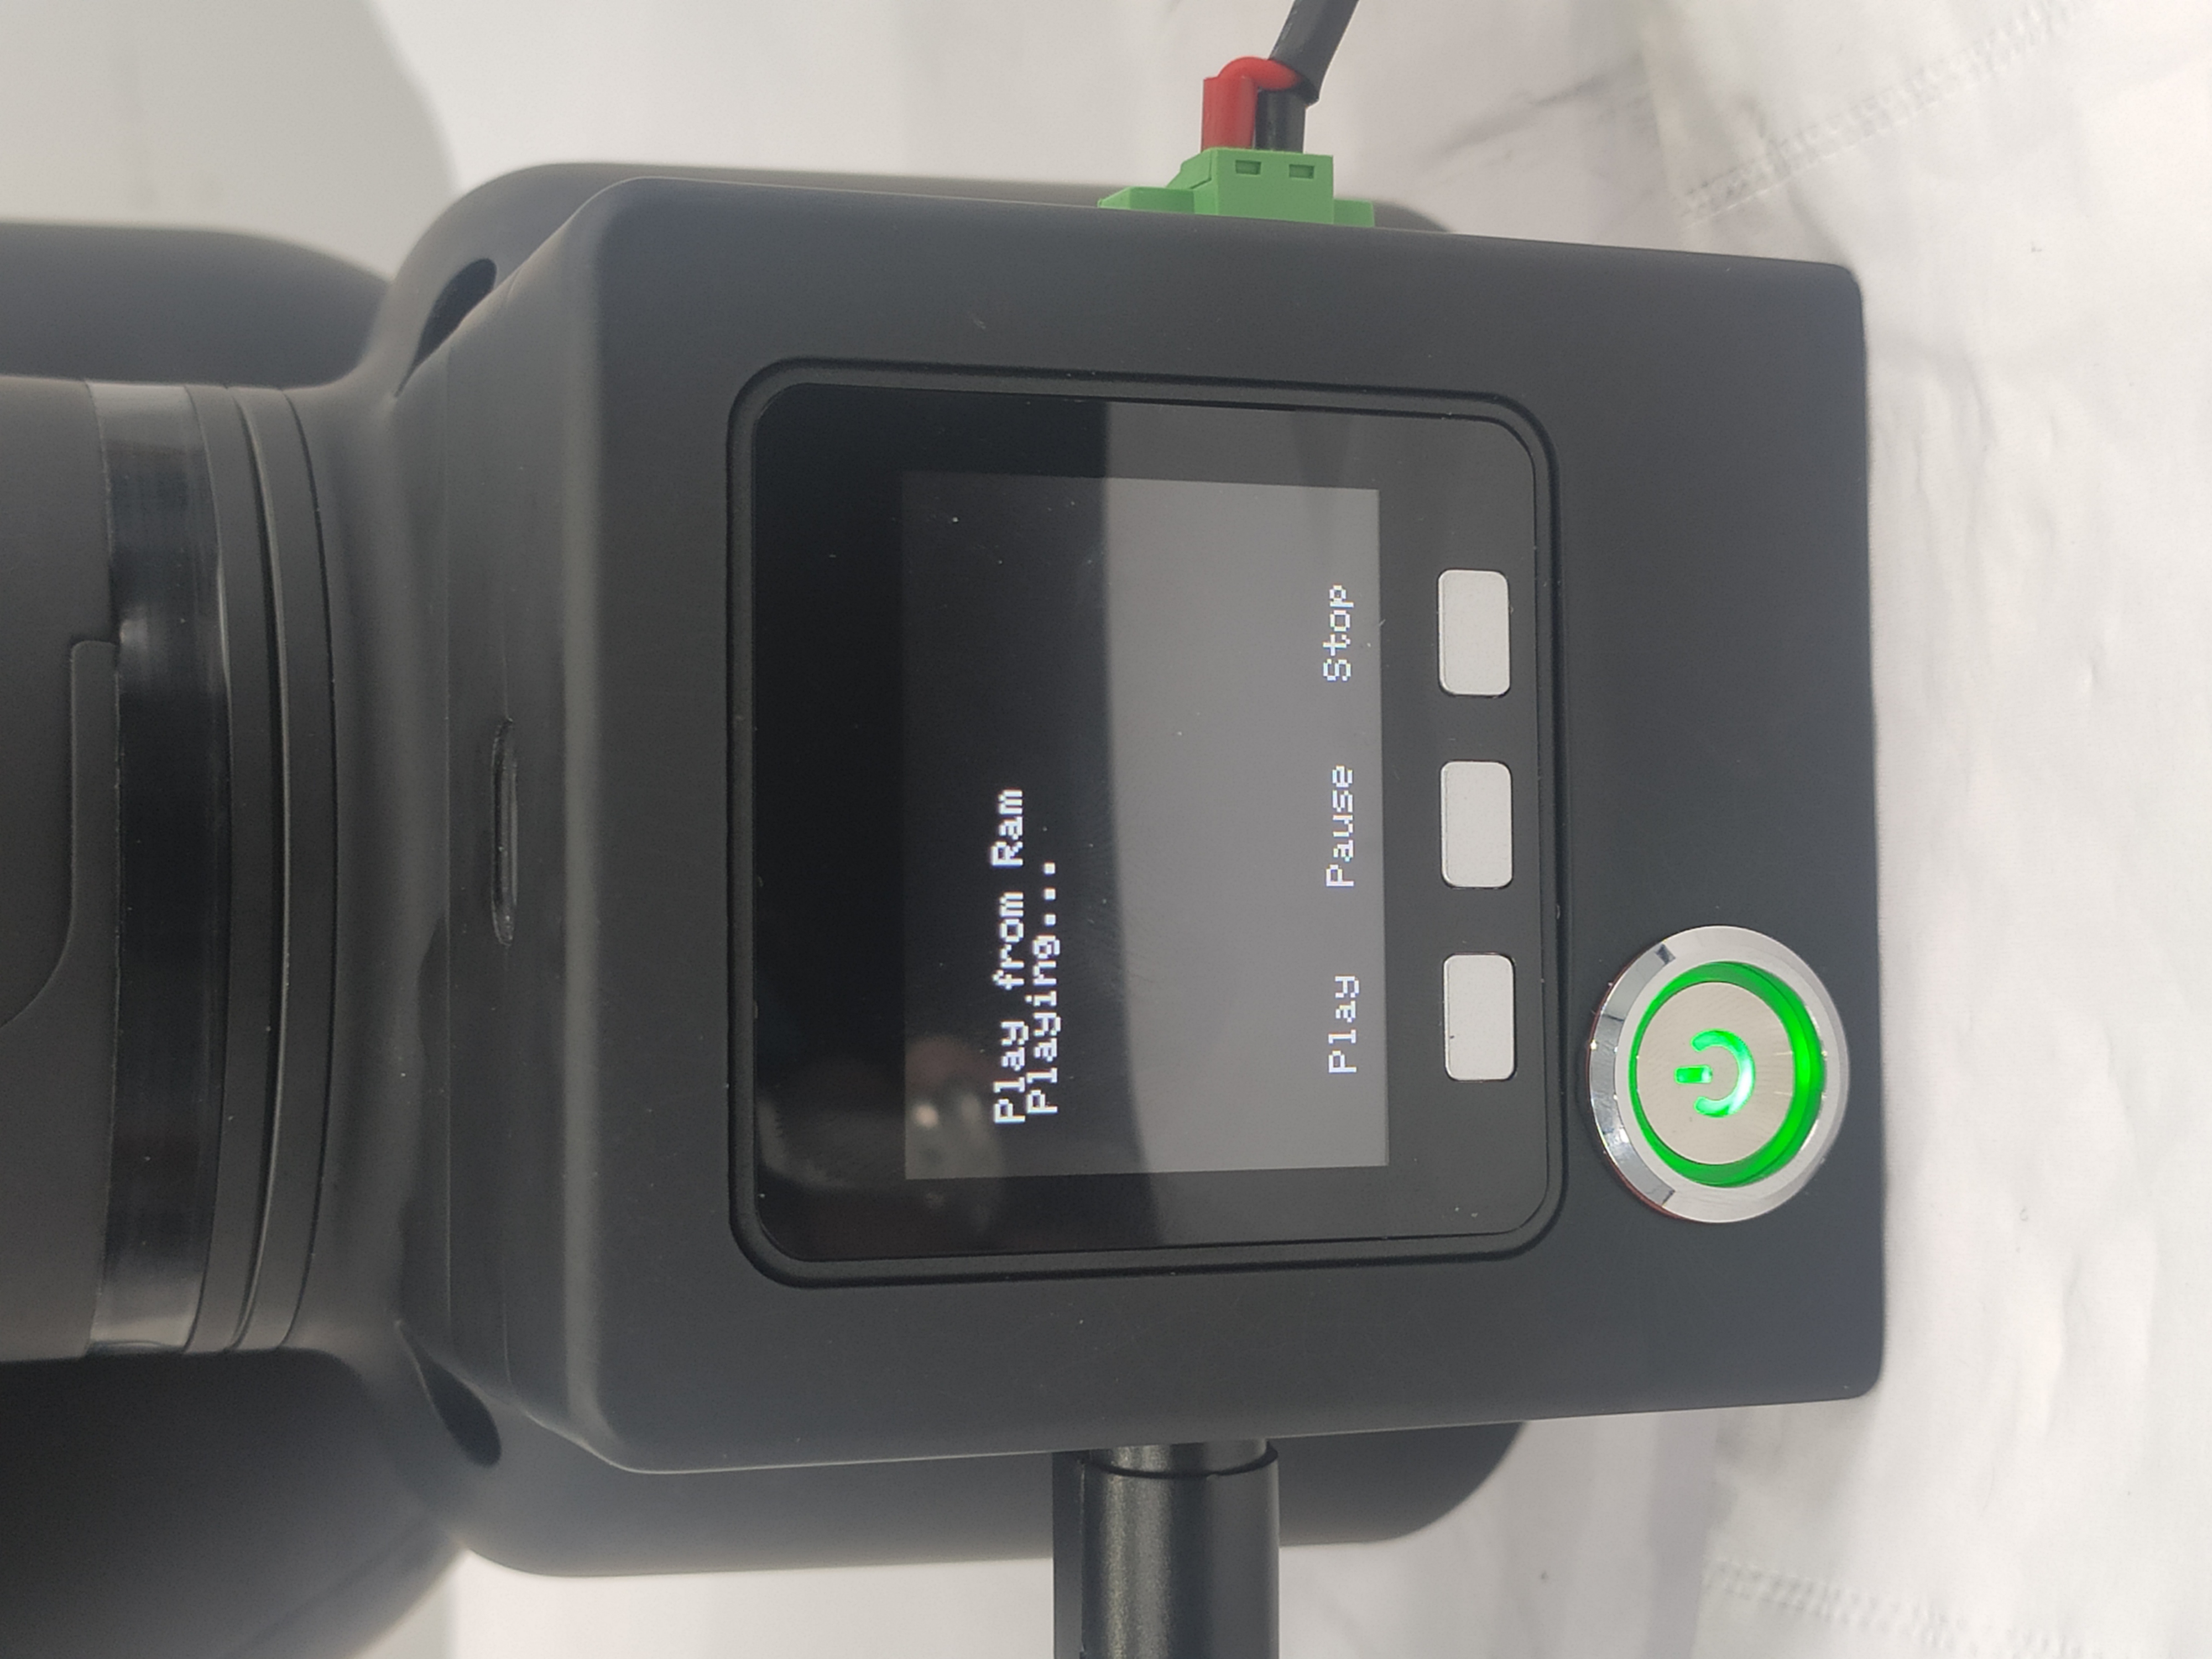
Step 6: Press Play to let the robot perform the motion recorded just now.
Notice:
Pause: pause the movement
Stop: stop the movement
Play: resume the movement