Use Gripper
Before the start
1. Make sure the machine is powered on
2. Make sure the machine connection is normal
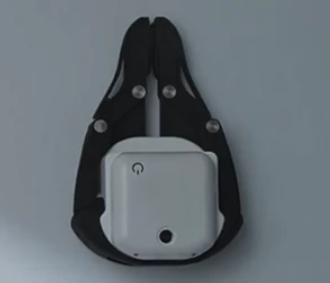
This chapter introduces how to use blockly to control the adaptive gripper connected to the Mercury A1 robotic arm (as shown below)
API display
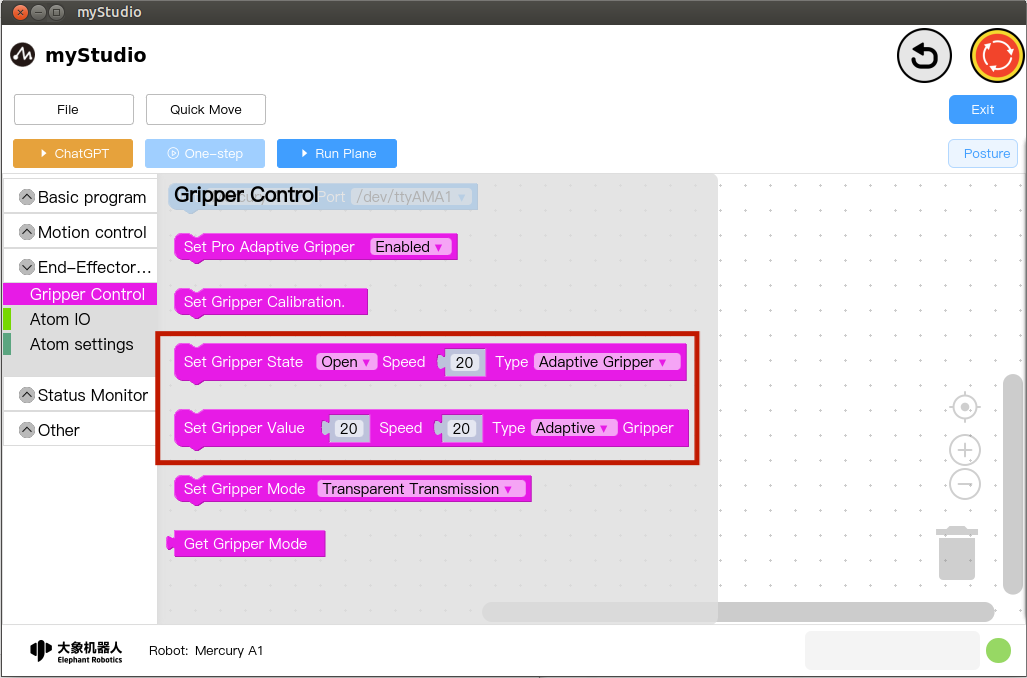
We will use the following building blocks
1:
Set Gripper State: Make the gripper enter the specified state (open or closed) at the specified speedParameter introduction:
This module has two parameters that can be adjusted:
- Clamp status parameters: closed state, open state
- Speed parameter: indicates the speed of rotation, the value range is 0~100
- Clamp type parameter: Select adaptive gripper here
  **2**: `Set Gripper Value`: Make the gripper reach the specified position at the specified speed

   Parameter introduction:

   This module has two parameters that can be adjusted:

   * Clamp value parameter: indicates the position that the clamp will reach, and the value range is 0~100.
   * Speed parameter: indicates the speed of rotation, the value range is 0~100.
   * Clamp type parameter: Select adaptive gripper here
Small case
The graphics code is as follows:
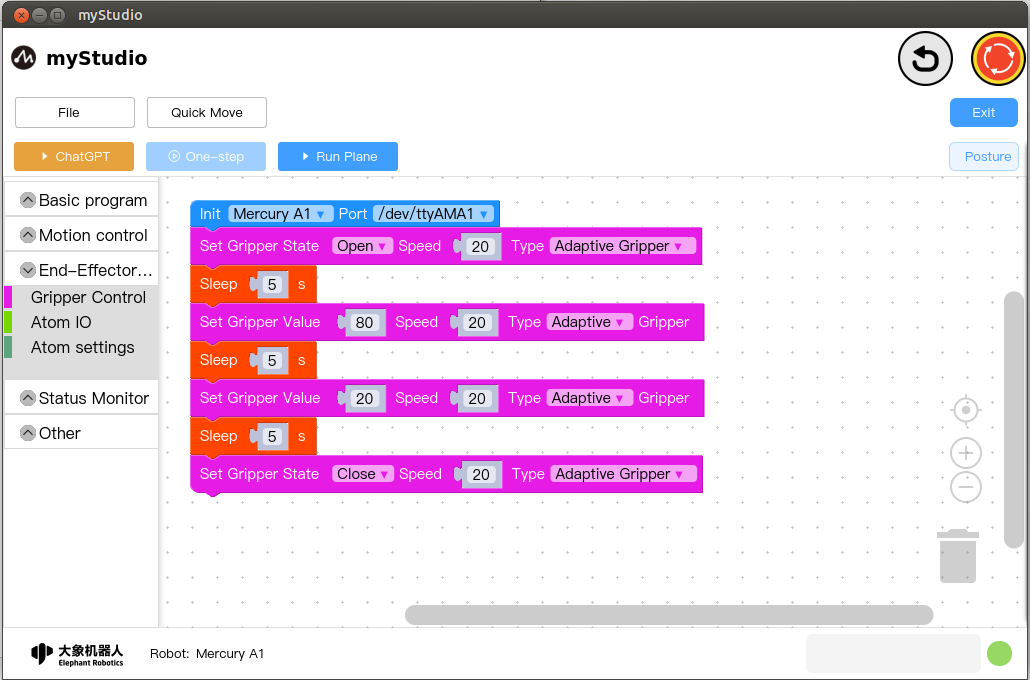
The execution effect of the code:
Control the adaptive gripper to open at a speed of 20
Wait 5 seconds
- Control the adaptive gripper to reach the position with a value of 80 at a speed of 20
- Wait 5 seconds
- Control the adaptive gripper to reach the position with a value of 20 at a speed of 20
- Wait 5 seconds
- Close the jaws
Notice:
If you are unable to control the gripper from the example above, perhaps you need to set the gripper mode to Transparent Transmission
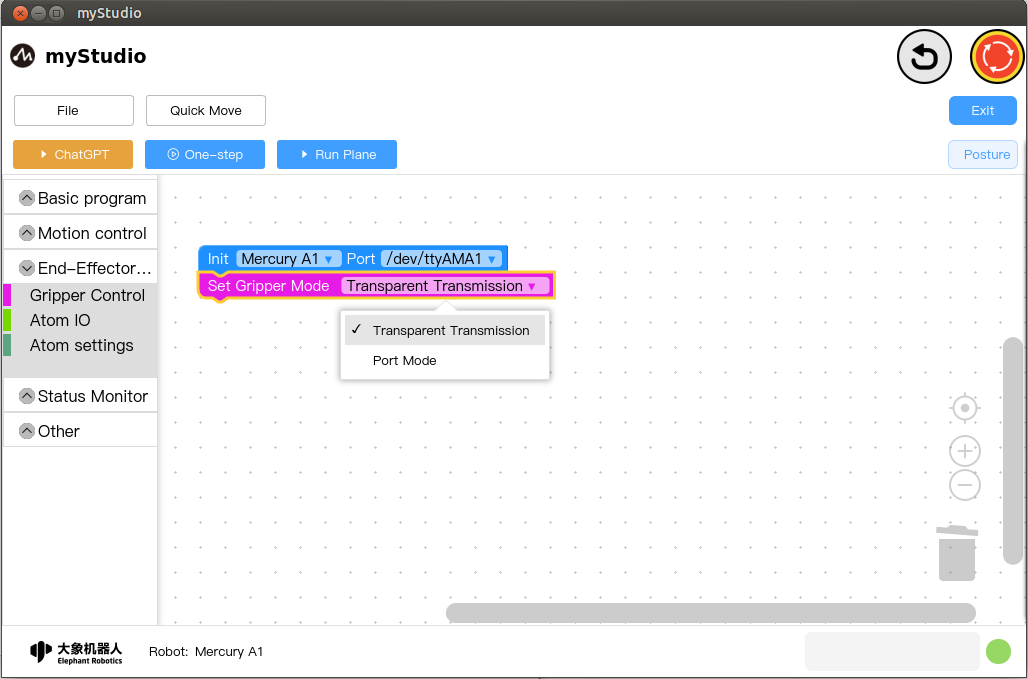
After setting it up, then run the small case code again.