Learn to use coordinate control
before the start
1. Make sure the machine is powered on
2. Make sure the machine connection is normal
3. Make sure the machine is in zero position
This chapter introduces how to use coordinates to control the robotic arm.
Mainly involved APIs:
Set Coord
- Prototype:
send_coords(values,speed) - Interface Description: Set multiple coordinates of the robotic arm
- Parameters:
- values: [X,Y,Z,RX,RY,RZ]
- speed: speed, range is 1-100
Small case
Before using coordinate movement for the first time, some operations need to be performed:
To return the robotic arm to the zero position, please refer to Controlling the robotic arm to return to zero
Set the initial attitude of the robot arm coordinate movement (the machine
J7needs to be parallel to the ground)-As shown in the code below:
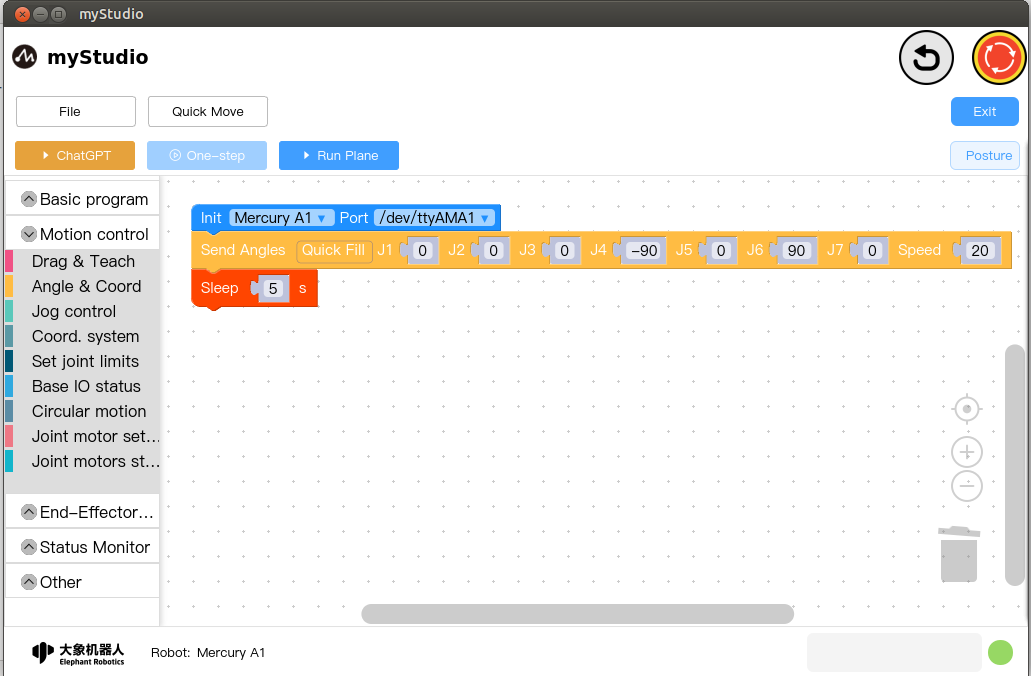
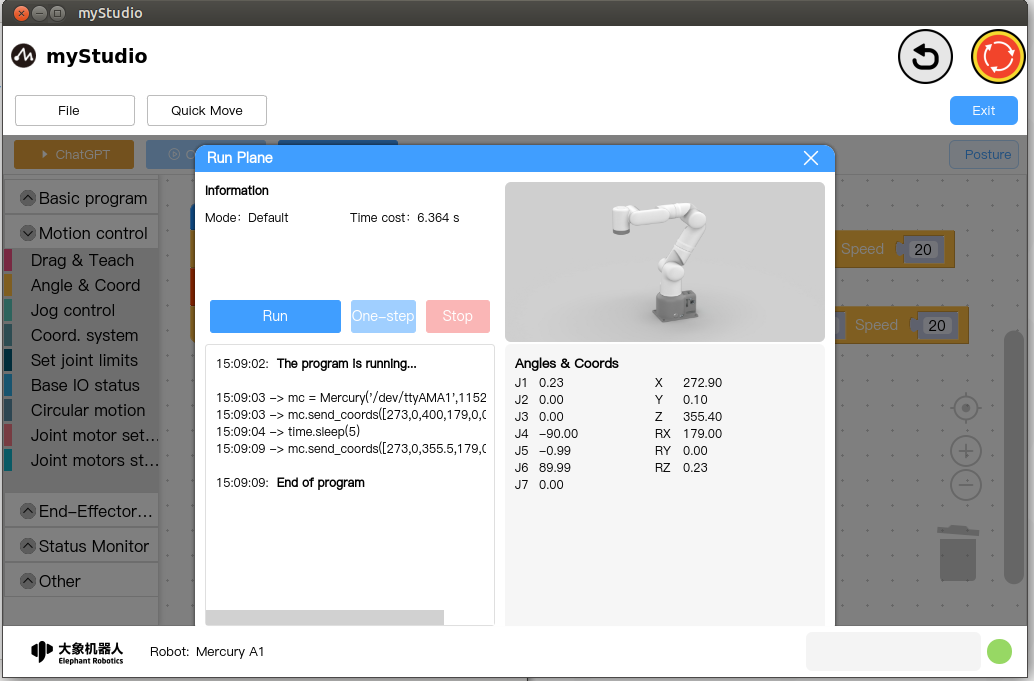
Open the
Run Paneland run the code.
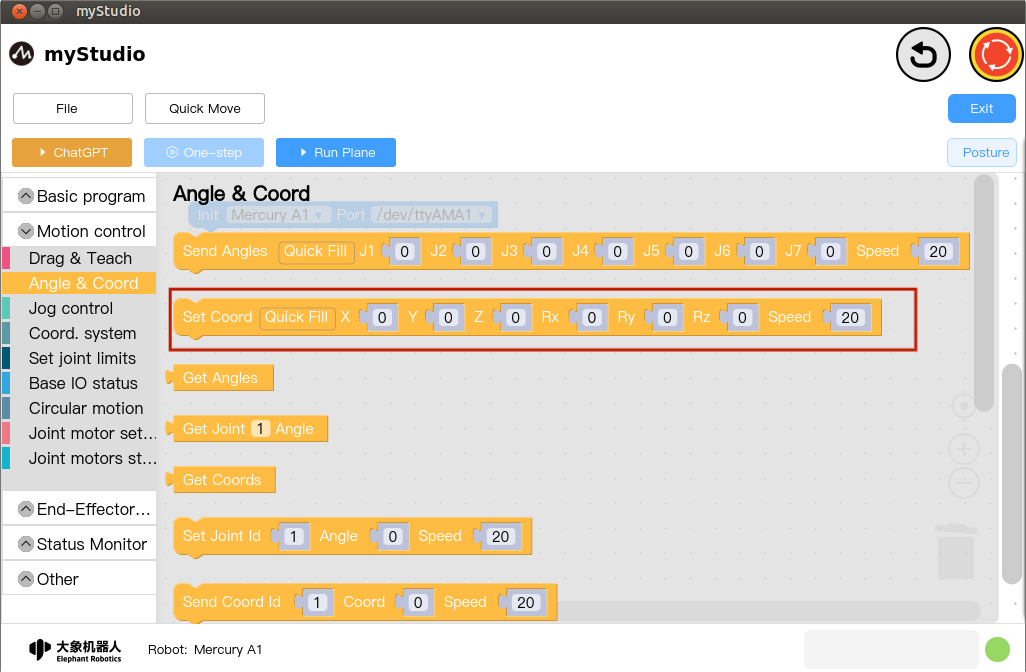
Coordinate movement
Drag a Set Coordinates' building block to the workspace, and click theQuick Fillbutton in the building block to fill in the data, and change theZaxis data to400`
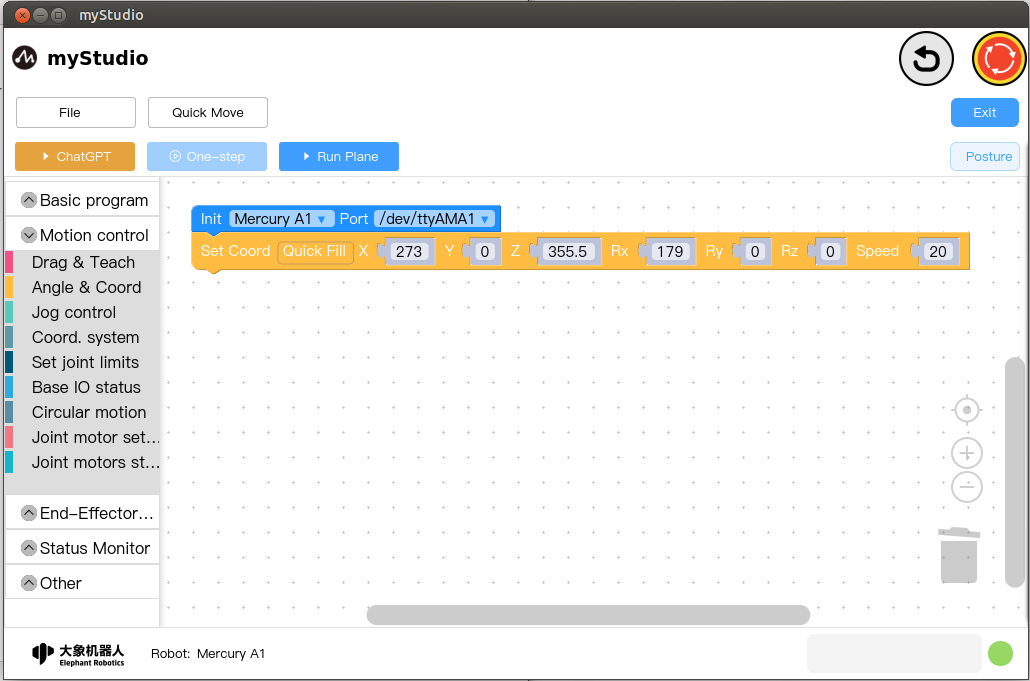
The complete code is as follows:
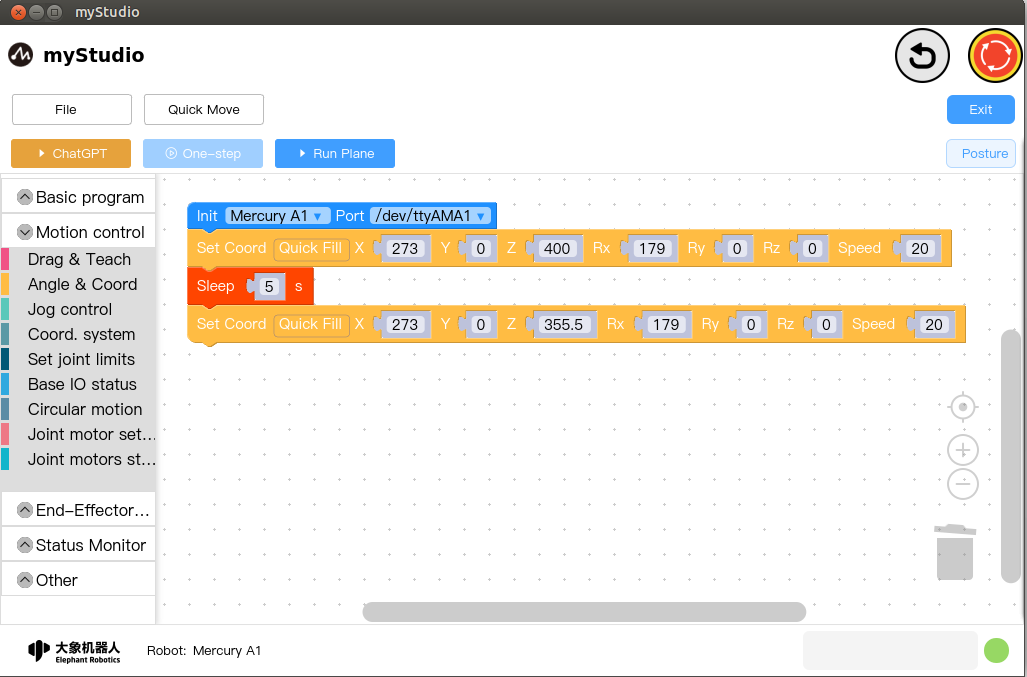
Execute the code and observe the robot arm moving up and down throughout the process