机械臂的控制和跟踪
1 滑块控制
单击桌面上的 "ROS1 Shell "图标或桌面下栏中的相应图标,打开 ROS1 环境终端:


然后运行命令:
# 2022 mycobot 320-Pi 版本的默认串行端口名称为"/dev/ttyAMA0",波特率为 115200。
roslaunch new_mycobot_320_pi mycobot_320_slider.launch port:=/dev/ttyAMA0 baud:=115200
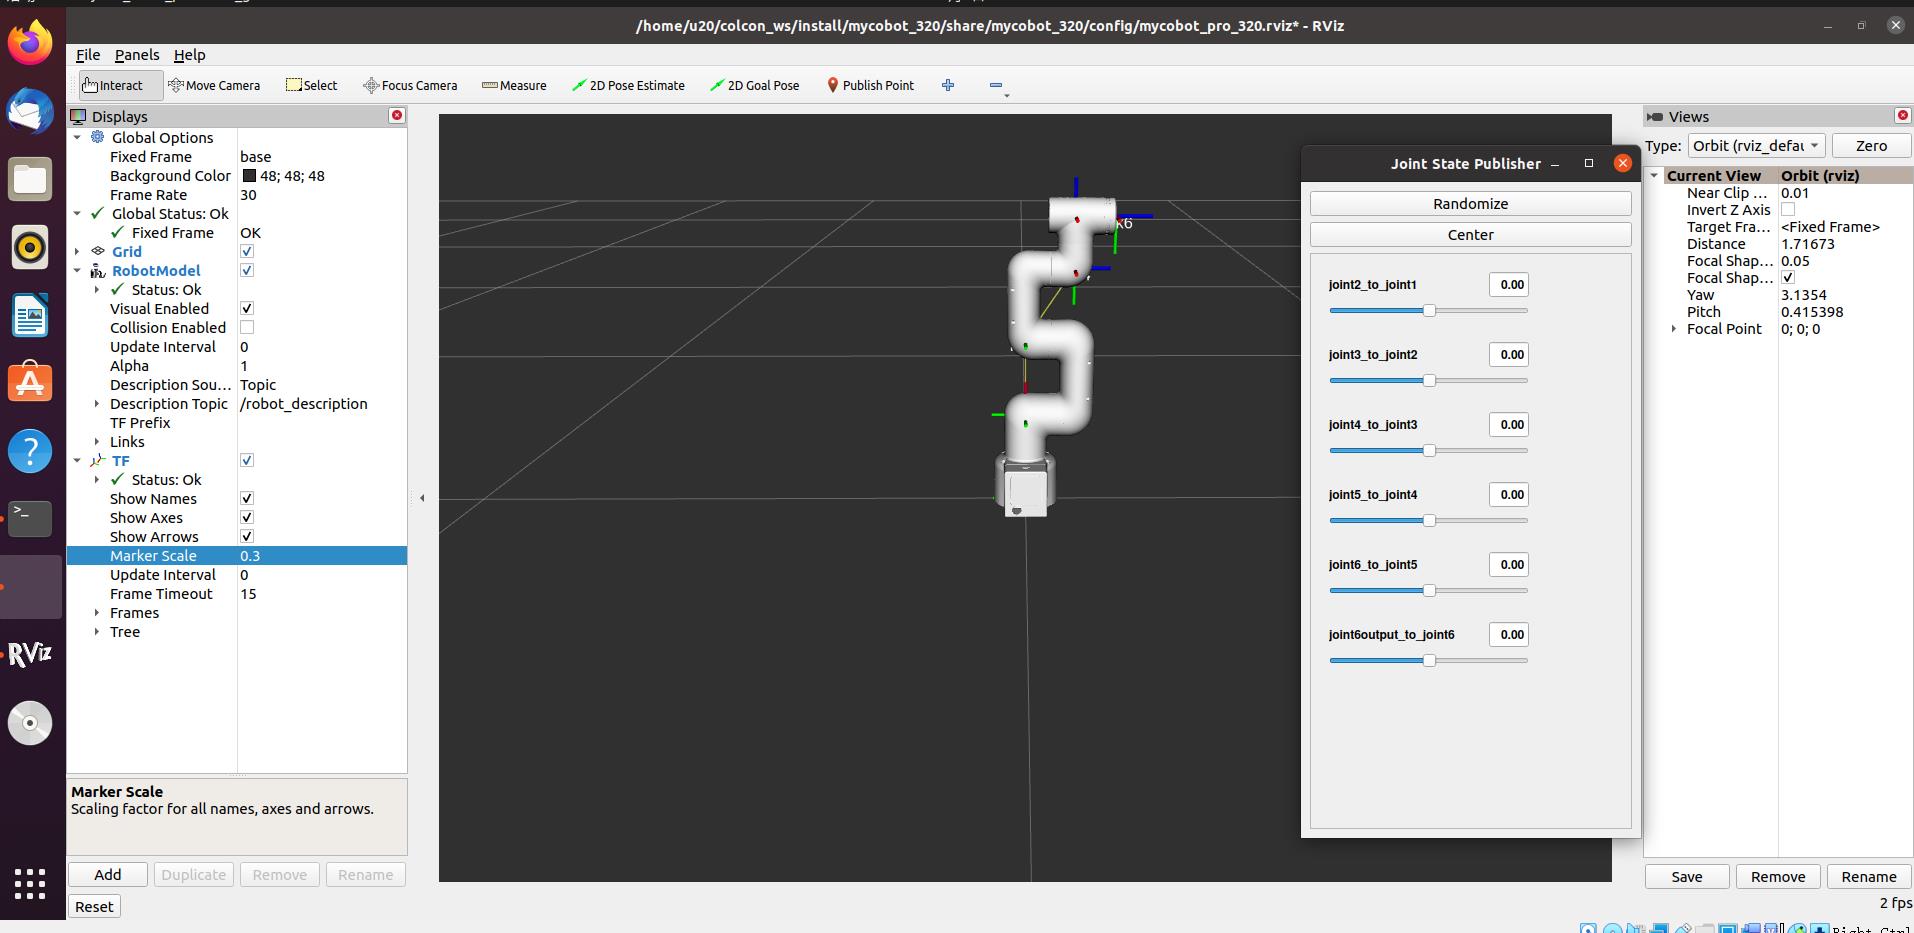
打开rviz 和一个滑块组件,您将看到如下界面:

然后,你就可以在 rviz 中控制模型,通过拖动滑块使其移动。如果想让真实的 mycobot 随着模型移动,则需要打开另一个 ROS1 环境终端:


然后运行命令:
# The default serial port name of 2022 mycobot 320-Pi version is "/dev/ttyAMA0", and the baud rate is 115200.
rosrun new_mycobot_320_pi mycobot_320_slider.py _port:=/dev/ttyAMA0 _baud:=115200
请注意:由于在命令输入的同时机械臂会移动到模型目前的位置,在您使用命令之前请确保 rviz 中的模型没有出现穿模现象 不要在连接机械臂后做出快速拖动滑块的行为,防止机械臂损坏
2 模型跟随
除了上述控制外,我们还可以让模型跟随真实的机械臂移动。打开 ROS1 环境终端:


然后运行命令:
# 2022 mycobot 320-Pi 版本的默认串行端口名称为"/dev/ttyAMA0",波特率为 115200。
rosrun new_mycobot_320_pi mycobot_320_follow_display.py _port:=/dev/ttyAMA0 _baud:=115200
然后打开另一个 ROS1 环境终端:


然后运行命令:
roslaunch new_mycobot_320 mycobot_320_follow_display.launch
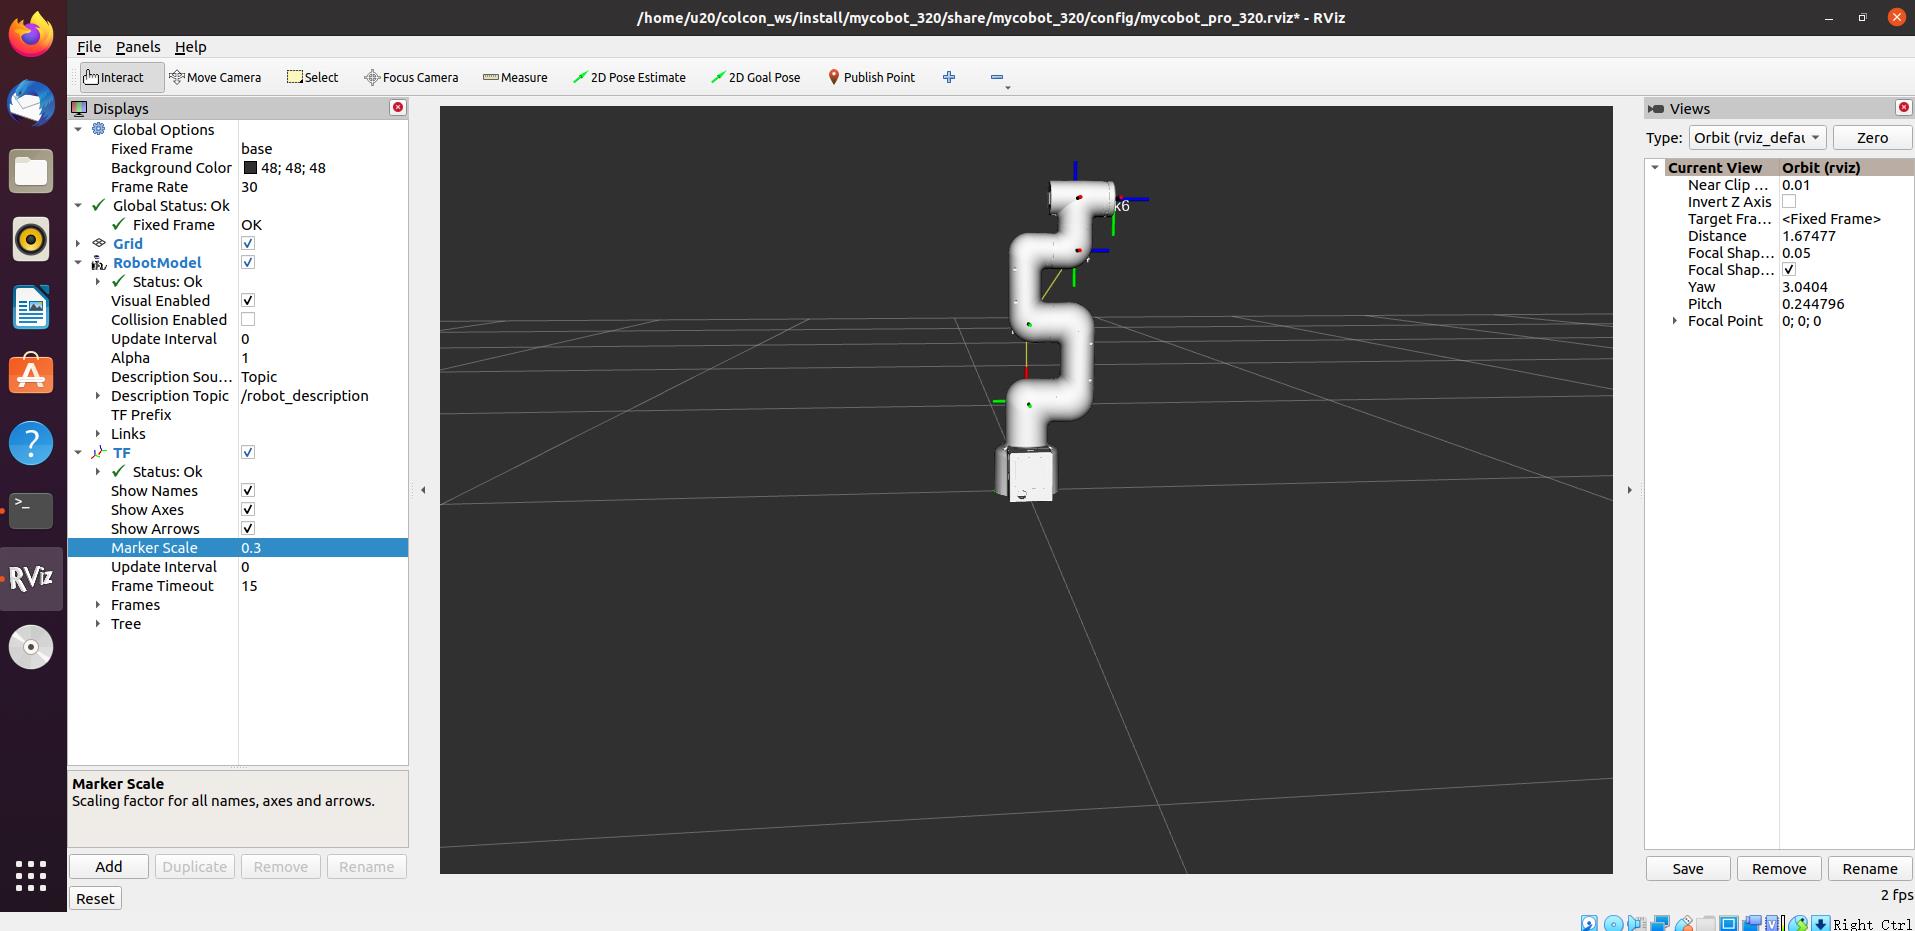
它将打开 rviz,显示模型跟随效果。
3 GUI 控制
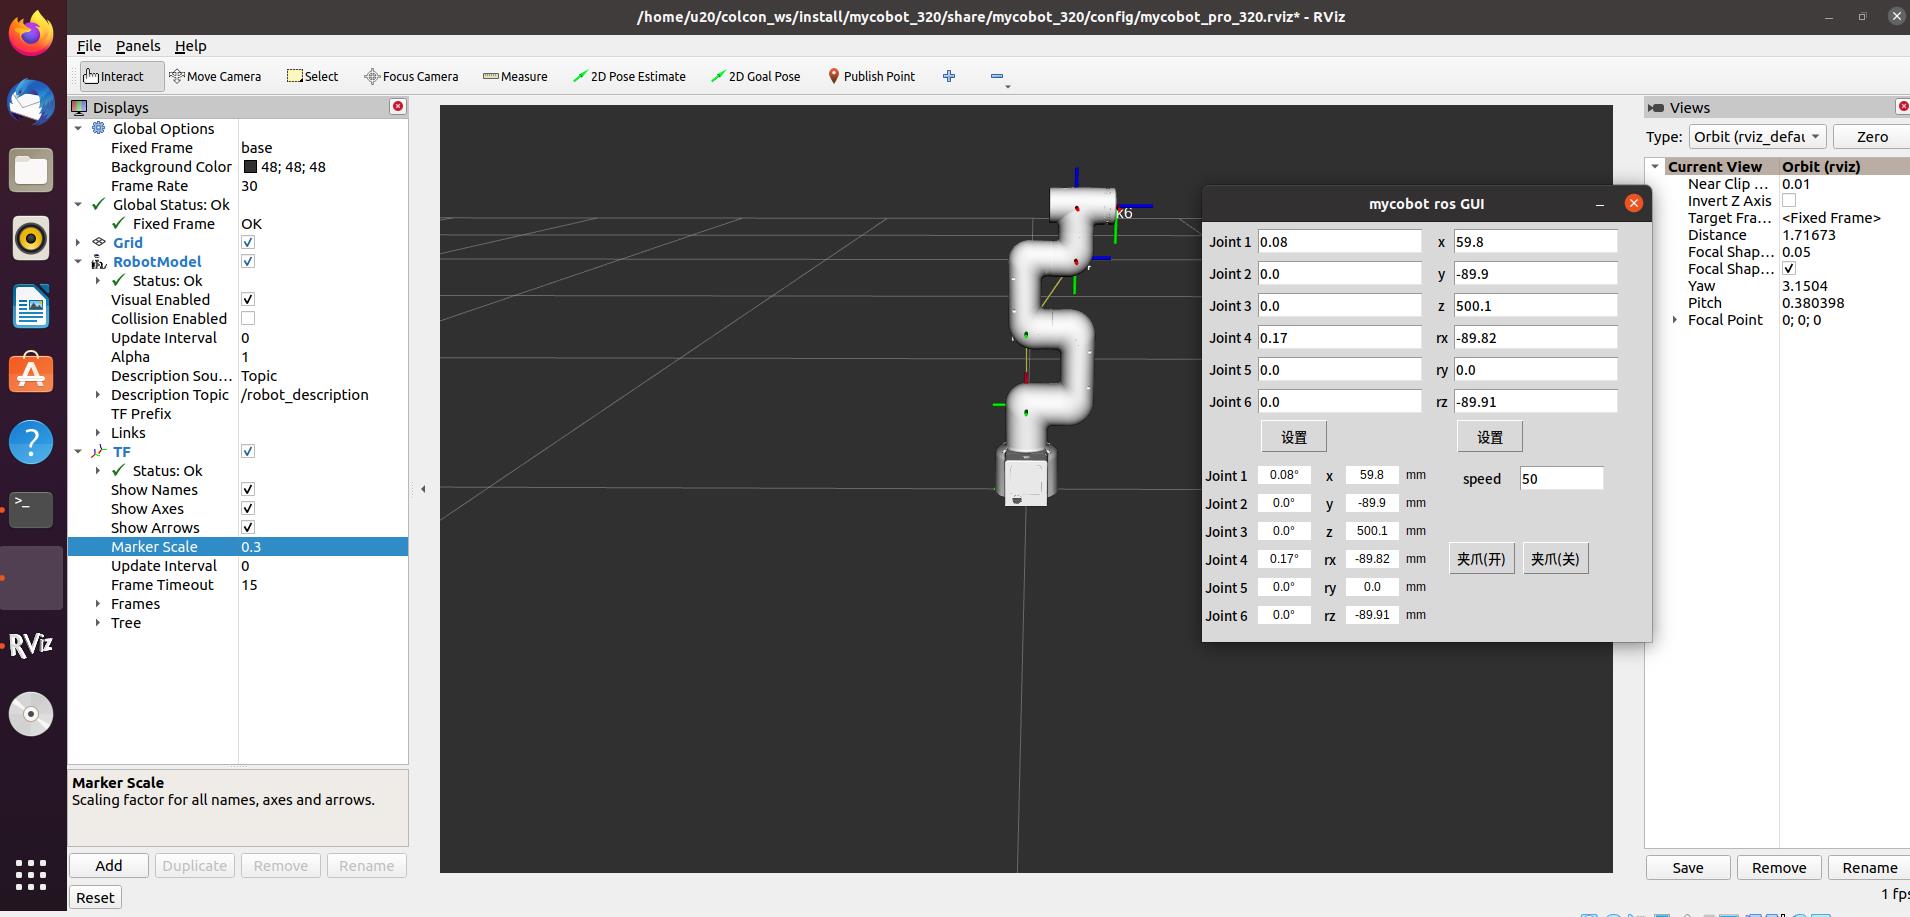
在前述内容的基础上,本软件包还提供了一个简单的图形用户界面(GUI)控制界面。连接到 mycobot。
打开 ROS1 环境终端:


然后运行命令:
# 2022 mycobot 320-Pi 版本的默认串行端口名称为"/dev/ttyAMA0",波特率为 115200。
roslaunch new_mycobot_320_pi mycobot_320_simple_gui.launch port:=/dev/ttyAMA0 baud:=115200

注意: 使用夹爪开关按钮前,请确保自适应夹爪已连接至机器人手臂末端。
4 键盘控制
在 new_mycobot_320_pi 软件包中添加了键盘控制功能,并在 rviz 中执行实时同步。 该功能依赖于 pythonApi,因此请务必与真正的机械臂连接。
打开 ROS1 环境终端:


然后运行命令:
# mycobot 320-Pi 版本的默认串行端口名称为"/dev/ttyAMA0",波特率为 115200。
roslaunch new_mycobot_320_pi mycobot_320_teleop_keyboard.launch port:=/dev/ttyAMA0 baud:=115200
运行效果如下

mycobot 的信息将在命令行中输出如下:
SUMMARY
========

PARAMETERS
 * /mycobot_services/baud: 115200
 * /mycobot_services/port: /dev/ttyUSB0
 * /robot_description: <?xml version="1....
 * /rosdistro: kinetic
 * /rosversion: 1.12.1.17

NODES
  /
    mycobot_services (new_mycobot_320_pi/mycobot_services.py)
    real_listener (new_mycobot_320_pi/listen_real.py)
    robot_state_publisher (robot_state_publisher/state_publisher)
    rviz (rviz/rviz)

auto-starting new master
process[master]: started with pid [1333]
ROS_MASTER_URI=http://localhost:11311

setting /run_id to f977b3f4-b3a9-11eb-b0c8-d0c63728b379
process[rosout-1]: started with pid [1349]
started core service [/rosout]
process[robot_state_publisher-2]: started with pid [1357]
process[rviz-3]: started with pid [1367]
process[mycobot_services-4]: started with pid [1380]
process[real_listener-5]: started with pid [1395]
[INFO] [1620882819.196217]: start ...
[INFO] [1620882819.205050]: /dev/ttyUSB0,115200

MyCobot Status
--------------------------------
Joint Limit:
    joint 1: -165 ~ +165
    joint 2: -165 ~ +165
    joint 3: -165 ~ +165
    joint 4: -165 ~ +165
    joint 5: -165 ~ +165
    joint 6: -175 ~ +175

Connect Status: True

Servo Infomation: all connected

Servo Temperature: unknown

Atom Version: unknown

[INFO] [1620882819.435778]: ready
Then open another ROS1 environment terminal:


Then run the command:
rosrun new_mycobot_320_pi mycobot_320_teleop_keyboard.py
You will see the following output in the command line:
Mycobot Teleop Keyboard Controller
---------------------------
Movimg options(control coordinations [x,y,z,rx,ry,rz]):
              w(x+)

    a(y-)     s(x-)     d(y+)

    z(z-) x(z+)

u(rx+)   i(ry+)   o(rz+)
j(rx-)   k(ry-)   l(rz-)

Gripper control:
    g - open
    h - close

Other:
    1 - Go to init pose
    2 - Go to home pose
    3 - Resave home pose
    q - Quit

currently:      speed: 50       change percent 5
在该终端中,您可以控制机械臂的状态,并使用命令行中的按键移动机械臂。
本脚本支持的参数:
- _speed:机械臂的运动速度
- _change_percent:移动距离百分比
5 moveit 使用
mycobot_ros 整合了 MoveIt 部分。
打开命令行并运行:
roslaunch new_mycobot_320_pi_moveit mycobot320_moveit.launch
操作效果如下:

如果想让真正的机械臂同步执行计划,则需要打开另一条命令行并运行:
# 2022 mycobot 320-Pi 版本的默认串行端口名称为"/dev/ttyAMA0",波特率为 115200。
rosrun new_mycobot_320_pi_moveit sync_plan.py _port:=/dev/ttyAMA0 _baud:=115200
修改运动速度
为了防止关节在实际机械臂运动过程中晃动,需要降低关节的运动速度。
在
sync_plan.py文件中,修改机械臂 Python API 的速度参数,此处改为 25。... def callback(data): # rospy.loginfo(rospy.get_caller_id() + "%s", data) data_list = [] for index, value in enumerate(data.position): radians_to_angles = round(math.degrees(value), 2) data_list.append(radians_to_angles) rospy.loginfo(rospy.get_caller_id() + "%s", data_list) mc.send_angles(data_list, 25) # Change speed to 25 ...在 Moveit RViz 界面中,修改速度和加速度的缩放比例。在这里,将其改为 0.5,然后保存当前配置。
 >
>