python 码垛搬运
1 环境搭建
1.1 安装python
- 安装python及需要用到的库
- 可参考章节 python环境搭建
1.2 安装myBlockly
2 开始使用
2.1 如何读取机械臂角度和坐标
双击打开软件
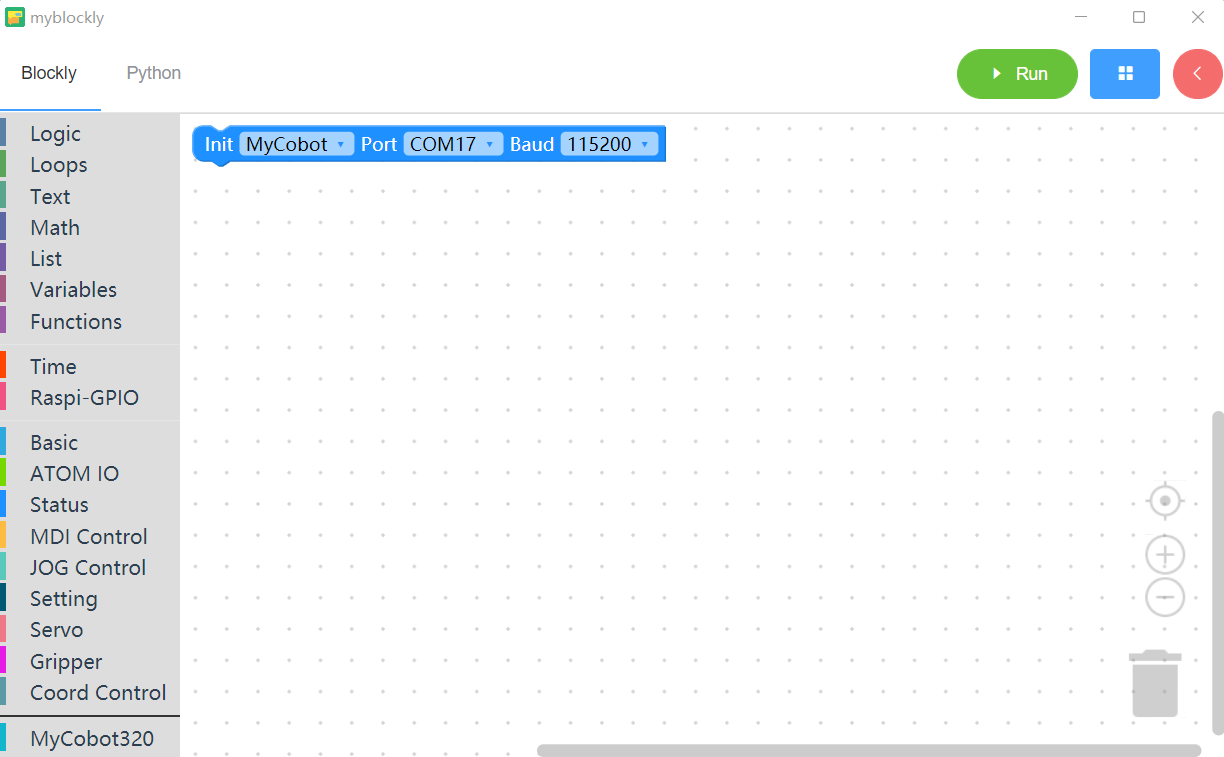
打开工具面板

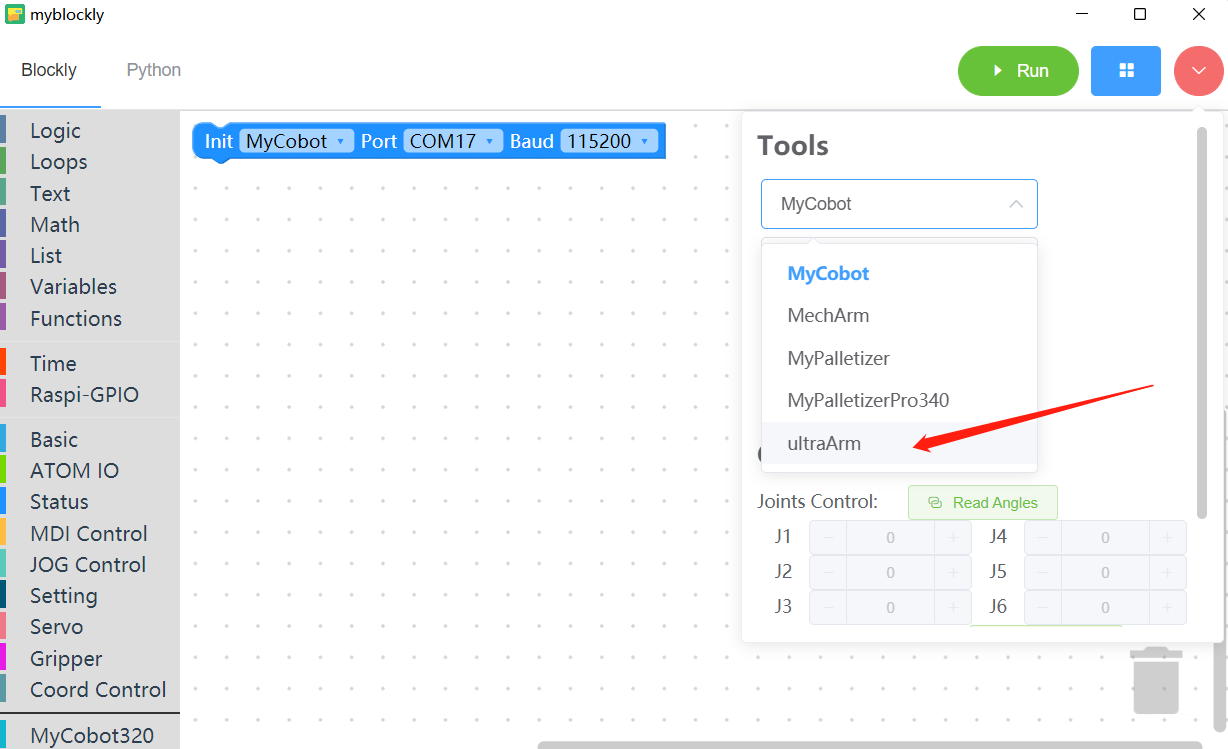
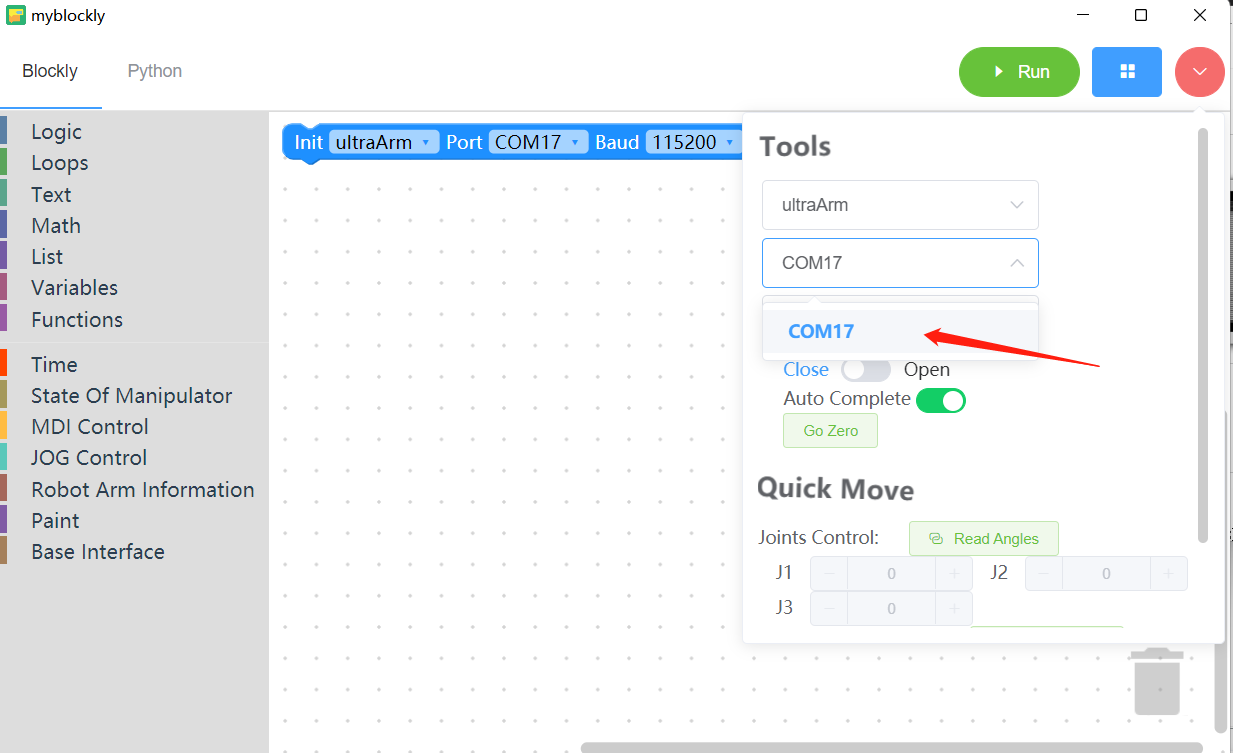
选择对应机器类型和串口号,打开串口
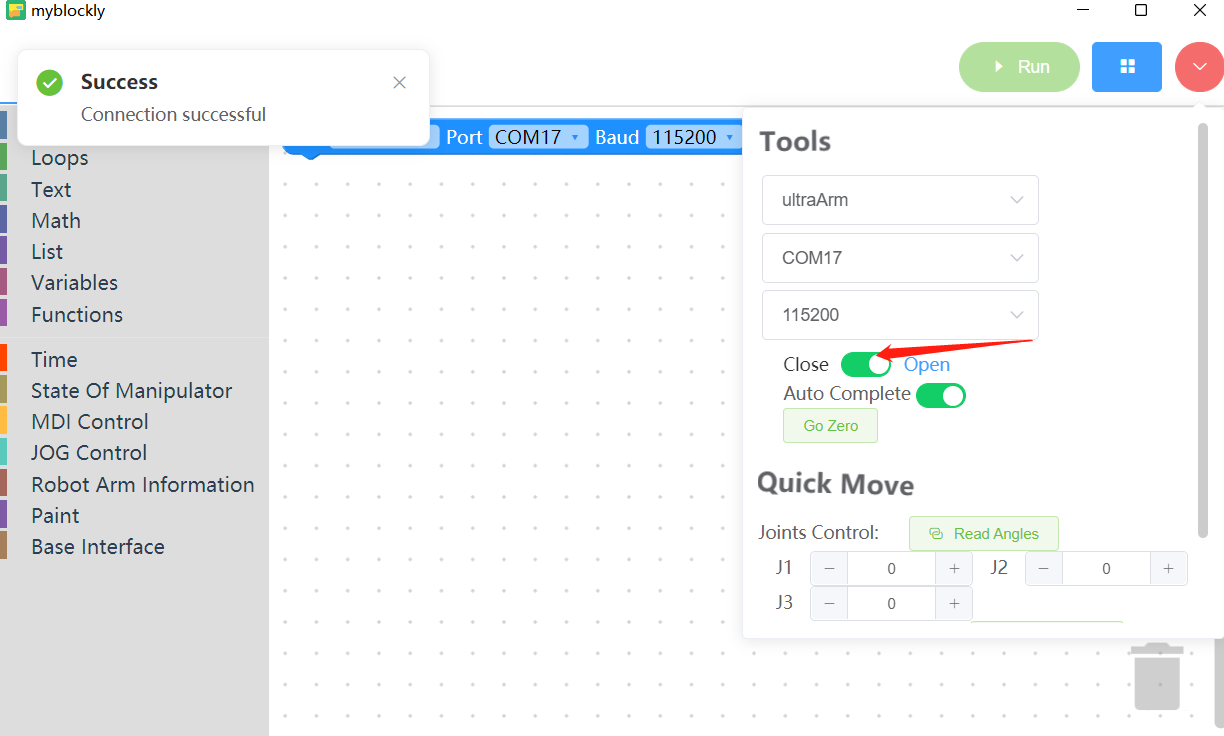
使机械臂回零
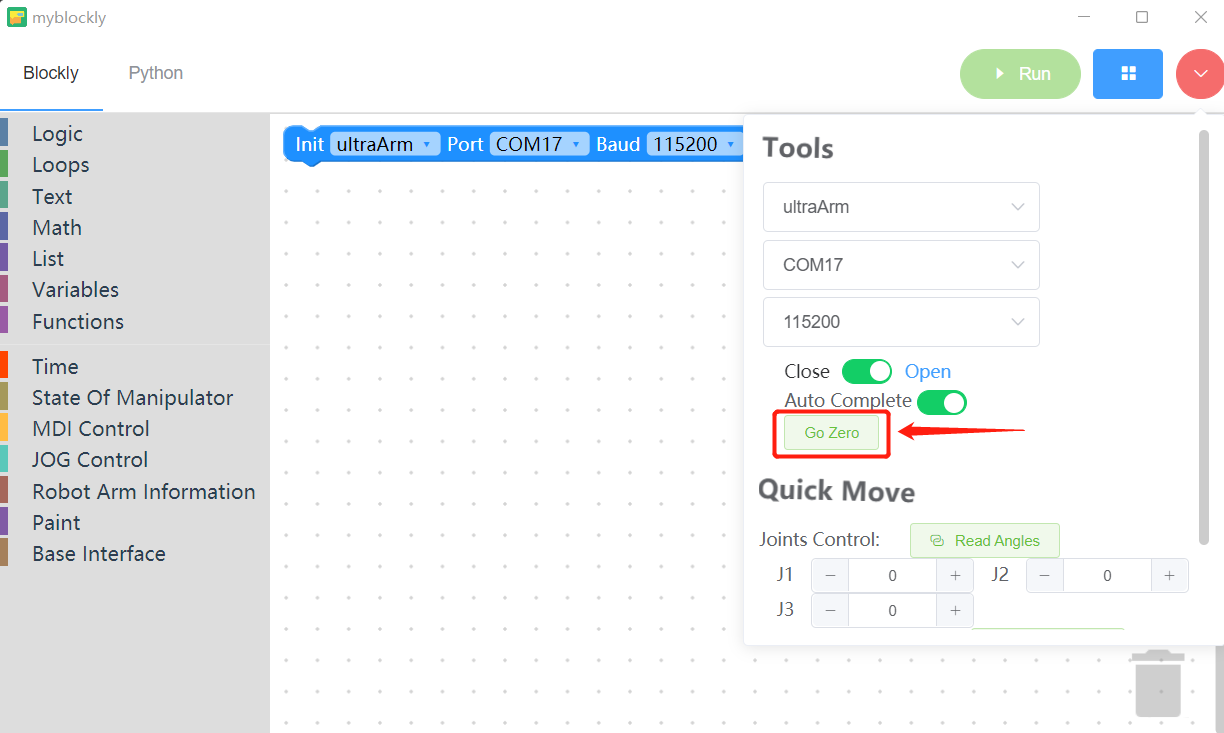
回零结束后,通过快速移动面板,控制机械臂进行运动
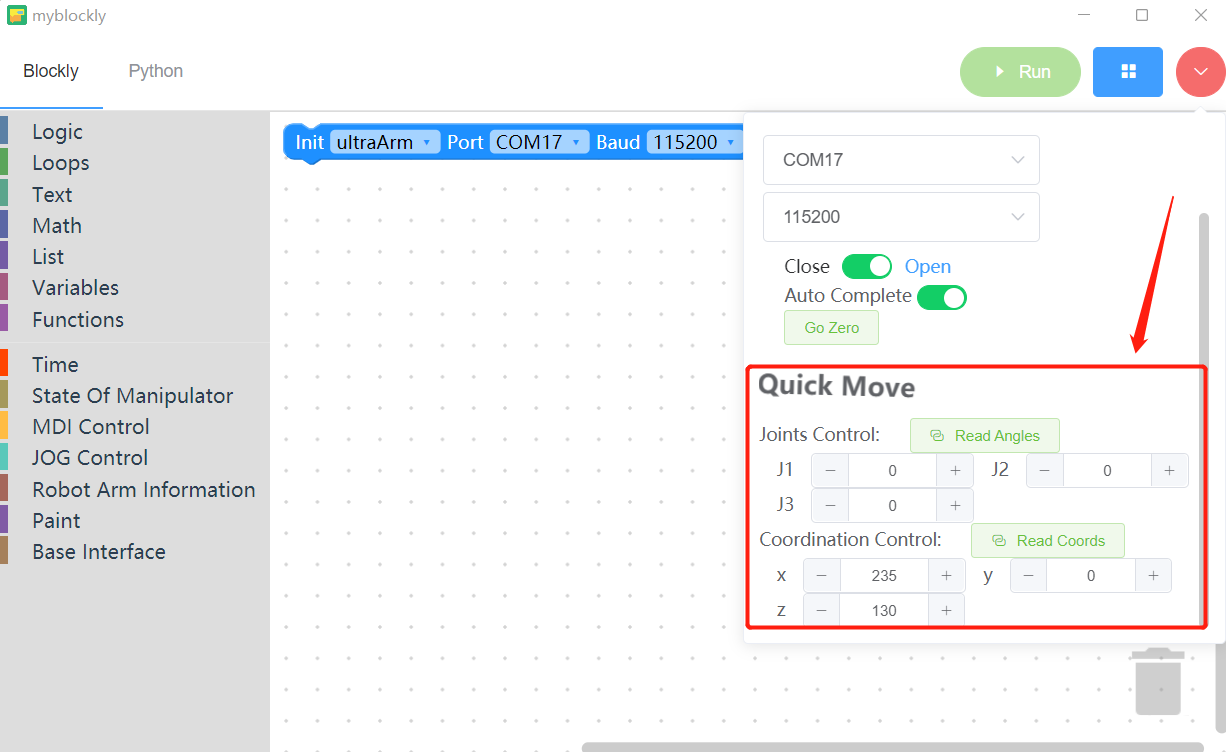
控制机械臂到达需要的位置,记录此时角度/坐标参数
- 将记录下来的角度/坐标参数填入api,输入速度参数

2.2 示例
- 以下为一套简单的码垛搬运动作示例,用到的木块规格为40X40,您可以复制代码进行使用或者修改
from pymycobot.ultraArmP340 import ultraArmP340

# 被搬运的木块的坐标位置
green_pos = [[74.6, 167.55, 120], [74.6, 167.55, 92.45], [74.6, 167.55, 52.45], [74.6, 167.55, 12.45]]
red_pos = [[112.67, 173.5, 120], [112.67, 173.5, 92.45], [112.67, 173.5, 52.45], [112.67, 173.5, 12.45]]
yellow_pos = [[150.92, 167.61, 120], [150.92, 167.61, 92.45], [150.92, 167.61, 52.45], [150.92, 167.61, 12.45]]

# 木块到达的坐标位置
cube_pos_g = [[200, -75, 120], [200, -75, 15], [200, -75, 55], [200, -75, 95]]
cube_pos_r = [[150.63, -75, 15], [150.63, -75, 55], [150.63, -75, 95]]
cube_pos_y = [[109.63, -75, 15], [109.63, -75, 55], [109.63, -75, 95]]

# 被搬运的木块所在的方向
block_high = [60, 5, 0]

# 木块到达的位置所在方向
cube_high = [-30, 10, 10]


# 连接串口
ua = ultraArmP340('COM16','115200')

# ultraArmP340进行坐标运动/角度运动之前必须进行回零,否则无法获取到正确的角度/坐标
ua.go_zero()
ua.sleep(0.5)


# Yellow
# 搬运第一个木块
# 移动到木块所在方向
ua.set_angles(block_high, 50)
ua.sleep(0.5)

ua.set_coords(yellow_pos[0], 50)
ua.sleep(1)

# 到达木块所在位置
ua.set_coords(yellow_pos[1], 50)
ua.sleep(1)
# 打开吸泵
ua.set_gpio_state(0)
ua.sleep(0.5)

# 移动到需要到达的位置上方
ua.set_angles(cube_high, 50)
ua.sleep(0.5)

# 下降到需要到达的位置
ua.set_coords(cube_pos_y[0], 50)
ua.sleep(0.5)
# 关闭吸泵
ua.set_gpio_state(1)
ua.sleep(0.5)

# 移动到木块所在位置上方,一次搬运动作完成,后续搬运动作跟此次搬运动作一致
ua.set_angles(cube_high, 50)
ua.sleep(0.5)

#2
ua.set_angles(block_high, 50)
ua.sleep(0.5)

ua.set_coords(yellow_pos[0], 50)
ua.sleep(1)

ua.set_coords(yellow_pos[2], 50)
ua.sleep(1)
ua.set_gpio_state(0)
ua.sleep(0.5)

ua.set_angles(cube_high, 50)
ua.sleep(0.5)

ua.set_coords(cube_pos_y[1], 50)
ua.sleep(0.5)
ua.set_gpio_state(1)
ua.sleep(0.5)

ua.set_angles(cube_high, 50)
ua.sleep(0.5)

# Red
# 1
ua.set_angles(block_high, 50)
ua.sleep(0.5)

ua.set_coords(red_pos[0], 50)
ua.sleep(1)

ua.set_coords(red_pos[1], 50)
ua.sleep(1)
ua.set_gpio_state(0)
ua.sleep(0.5)

ua.set_angles(cube_high, 50)
ua.sleep(0.5)

ua.set_coords(cube_pos_r[0], 50)
ua.sleep(0.5)
ua.set_gpio_state(1)
ua.sleep(0.5)

ua.set_angles(cube_high, 50)
ua.sleep(0.5)

#2
ua.set_angles(block_high, 50)
ua.sleep(0.5)

ua.set_coords(red_pos[0], 50)
ua.sleep(1)

ua.set_coords(red_pos[2], 50)
ua.sleep(1)
ua.set_gpio_state(0)
ua.sleep(0.5)

ua.set_angles(cube_high, 50)
ua.sleep(0.5)

ua.set_coords(cube_pos_r[1], 50)
ua.sleep(0.5)
ua.set_gpio_state(1)
ua.sleep(0.5)

ua.set_angles(cube_high, 50)
ua.sleep(0.5)


# Green
# 1
ua.set_angles(block_high, 50)
ua.sleep(0.5)

ua.set_coords(green_pos[0], 50)
ua.sleep(1)

ua.set_coords(green_pos[1], 50)
ua.sleep(1)
ua.set_gpio_state(0)
ua.sleep(0.5)

ua.set_angles(cube_high, 50)
ua.sleep(0.5)

ua.set_coords(cube_pos_g[0], 50)
ua.sleep(0.5)

ua.set_coords(cube_pos_g[1], 50)
ua.sleep(0.5)
ua.set_gpio_state(1)
ua.sleep(0.5)

ua.set_angles(cube_high, 50)
ua.sleep(0.5)

#2
ua.set_angles(block_high, 50)
ua.sleep(0.5)

ua.set_coords(green_pos[0], 50)
ua.sleep(1)

ua.set_coords(green_pos[2], 50)
ua.sleep(1)
ua.set_gpio_state(0)
ua.sleep(0.5)

ua.set_angles(cube_high, 50)
ua.sleep(0.5)

ua.set_coords(cube_pos_g[0], 50)
ua.sleep(0.5)

ua.set_coords(cube_pos_g[2], 50)
ua.sleep(0.5)
ua.set_gpio_state(1)
ua.sleep(0.5)

ua.set_angles(cube_high, 50)
ua.sleep(0.5)
2.3 实际运行效果
此处会有一个动作视频