Environment building
pymycobot is a Python package used for serial communication with myCobot. It supports Python2, Python3.5 and later versions.
If you want to control myCobot 280 series and myCobot 320 series of equipment, myPalletizer 260 and other equipment through Python programming, then it is your choice.
Before using pymycobot, make sure that you have built a Python environment, have a robot arm, and have made preparations.
1 Detailed installation steps of Python
Currently there are two versions of Python: 2.x and 3.x, These two versions are incompatible. Due to the increasing popularity of the version 3.x, our tutorial will be based on the latest version 3.10.1.
1.1 Installing Python
Enter Python\'s official downloading address:
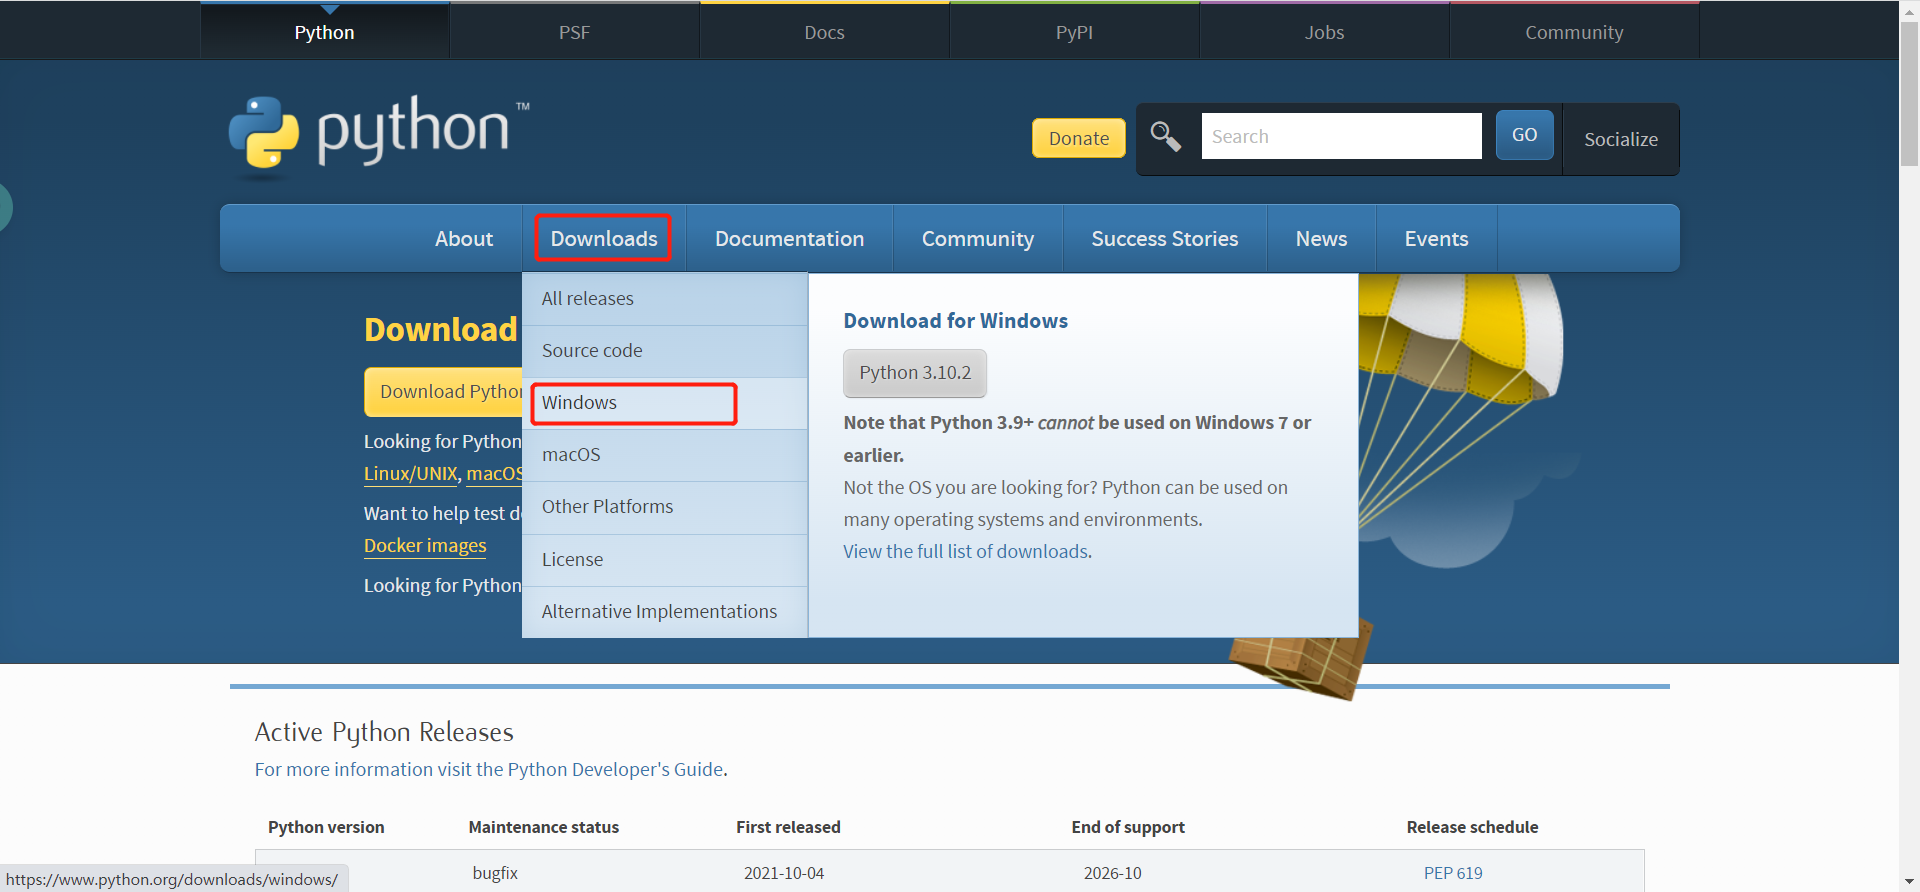
There are many versions, and we choose the latest version 3.10.1 here.
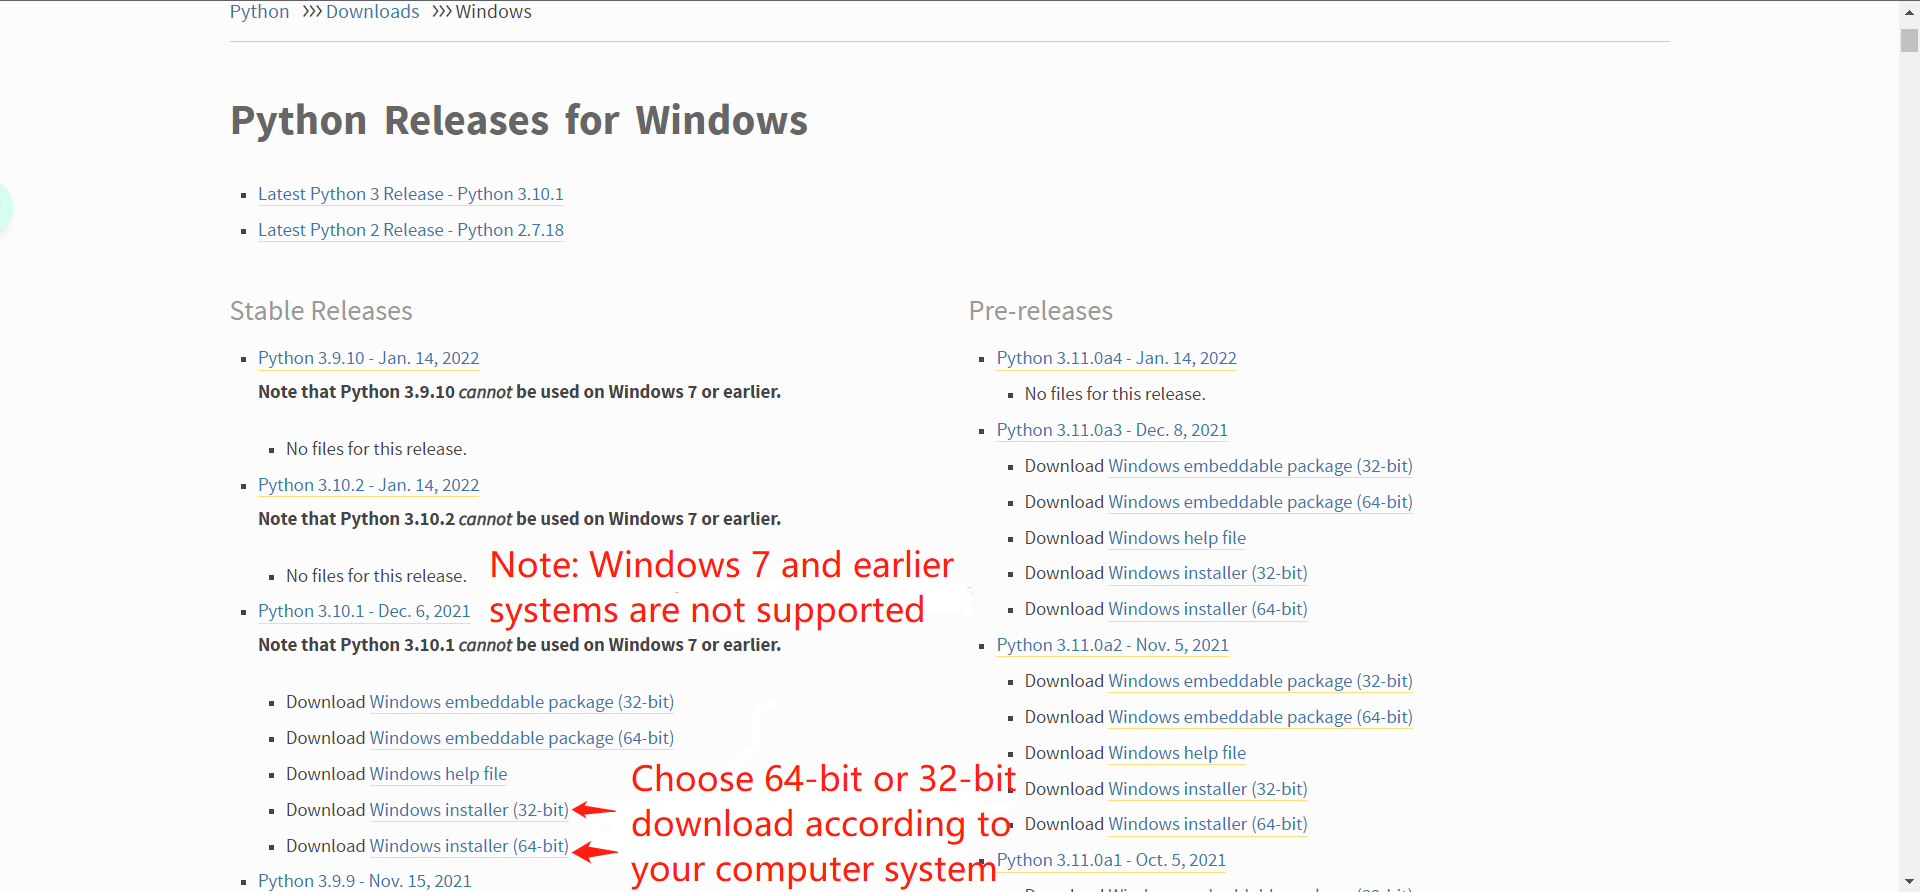
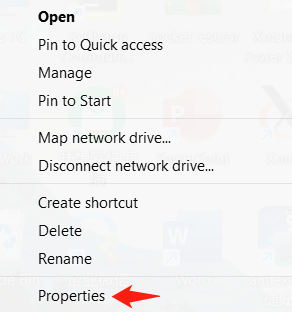
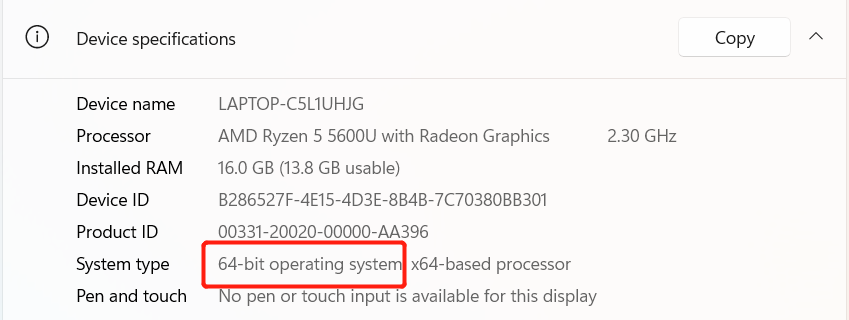
To confirm whether your computer is a 64-bit or 32-bit operating system, you can right-click on the My Computer icon on the left and select Properties. The following figure shows a 64-bit operating system, so we select the 64-bit Python installation package
After downloading is complete, double click the package, and the installation interface will appear. Remember to check Add Python 3.9 to PATH.
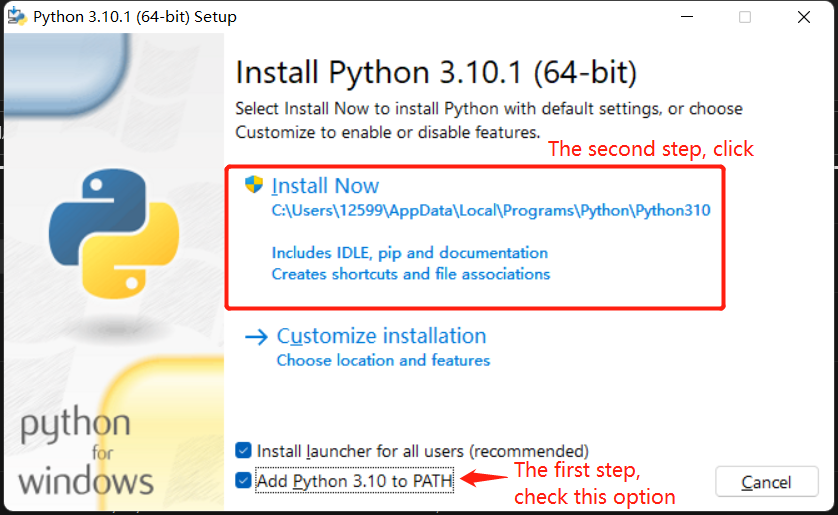
Because Python has been installed, the following pictures are quoted from csdn, but the installation steps are exactly the same as the original ones. Please understand:
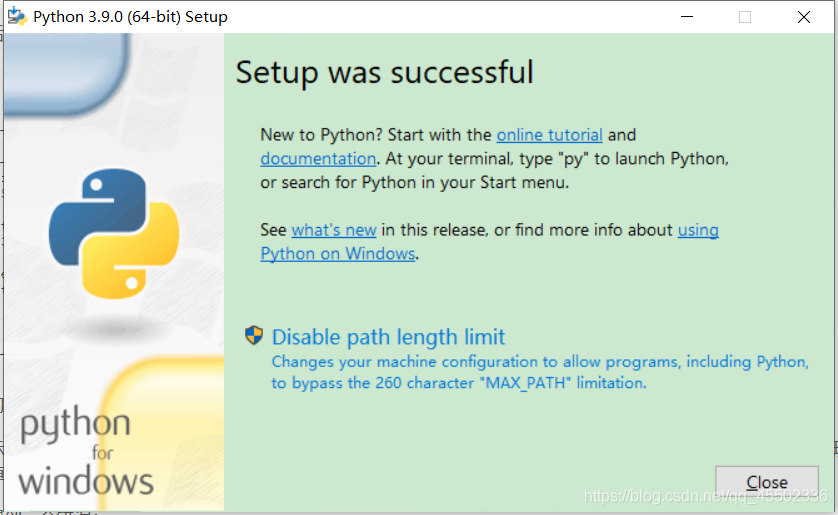
When this appears, it means that the 64-bit Python is successfully installed.
1.2 Running Python. After successful installation, open the command prompt window (win+R, input cmd and press Enter), and after you type Python, there will be two situations:
Situation 1:

When this appears, it means that Python is successfully installed. When you see the prompt >>>, it means that we have been in the Python interactive environment. At this point, we can input any Python code, and we will obtain the execution result immediately after pressing Enter.
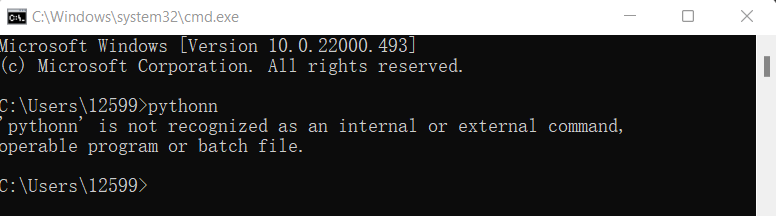
Situation 2
Because I installed it successfully, I still want to provide a demo in which I used the wrong pythonn instead of python, so that an error message was prompted.。
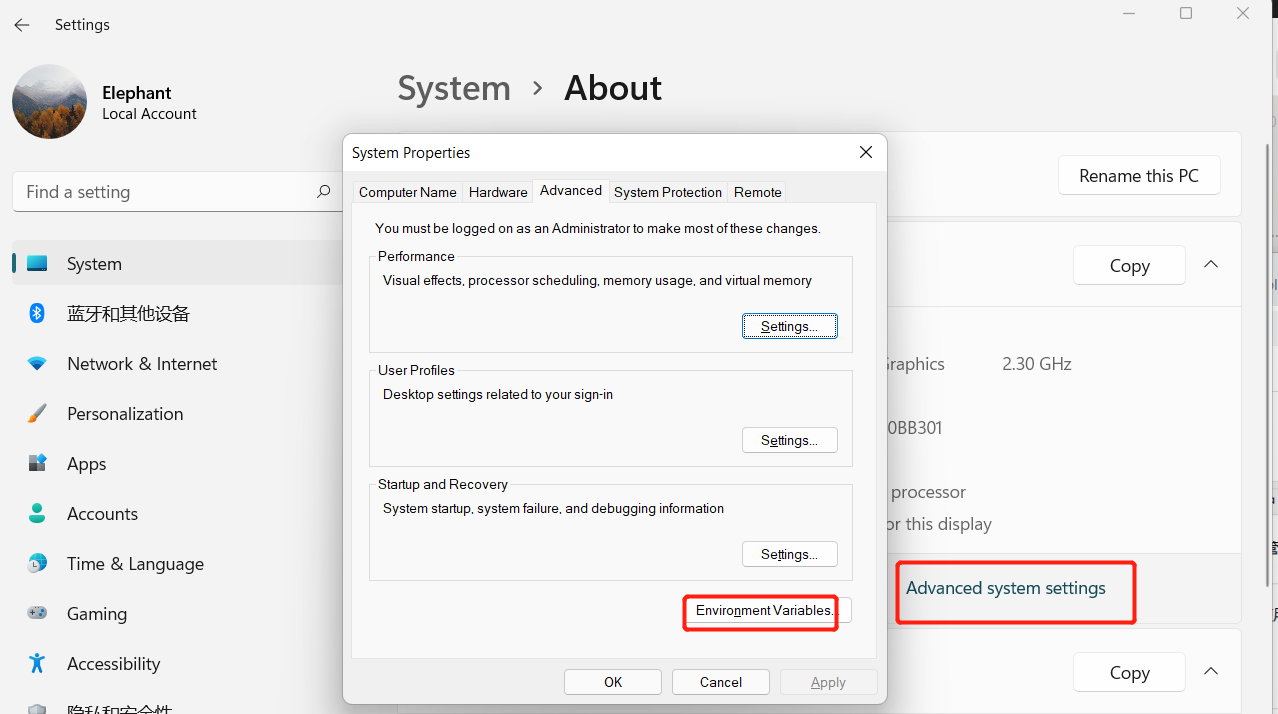
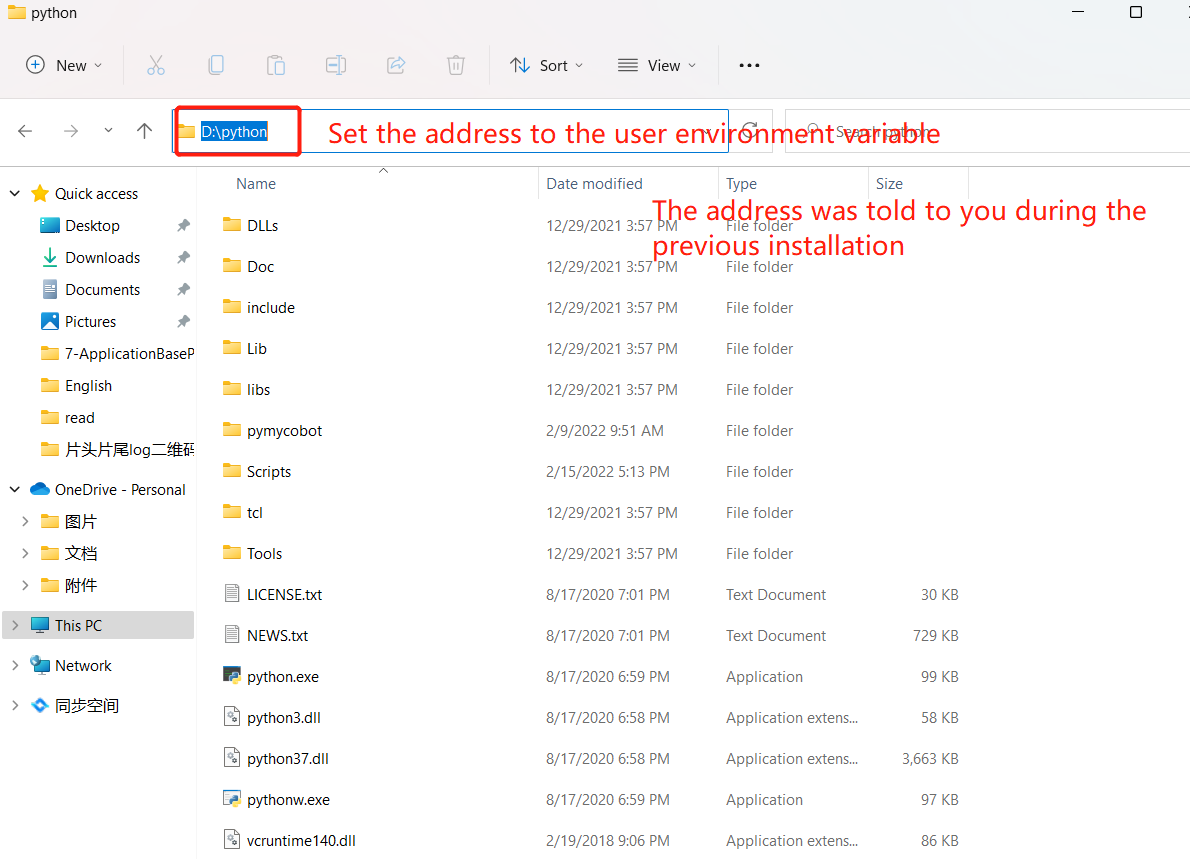
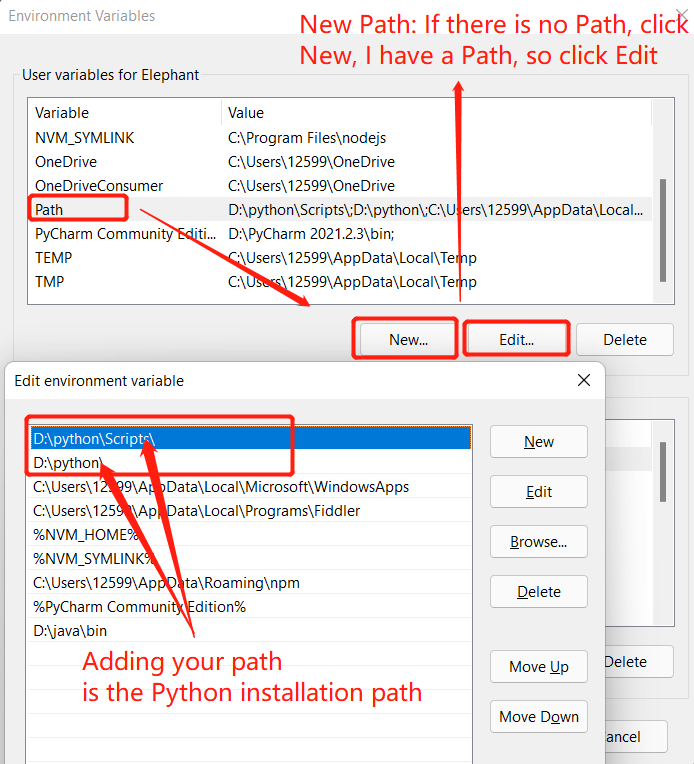
3.Configuring environment variables The reason for doing so is that Windows will search python.exe according to the path set by a Path environment variable. If it is not found, an error will be reported. If you fail to check Add Python 3.9 to PATH during installation, you have to manually add the path where python.exe is located into Path. If you find that you forgot to check Add Python 3.9 or you cannot set the PATH path, you have to reinstall Python, and do remember to check Add Python 3.9 to PATH. (Step 2: When an error message appear, it is generally due to failure to configure environment variables.)
Steps: Right-click My Computer -> select Properties -> select Advanced System Settings -> select Environment Variables in the lower right corner.
The environment variables mainly include user variables and system variables. The environment variables that need to be set are in these two variables. The user variables means that you can use your own downloaded program in the cmd command, and that you can use it after writing the absolute path of the program into the user variables.
Here go back to and open the command prompt window (win+R; input cmd and press Enter), and after you type Python, displaying this means that there are no problems.
2 Detailed installation steps of pycharm
Pycharm is a powerful python editor with the nature of cross-platform. The way to install pycharm into Windows is introduced below.
After entering the website, we will see the following interface.
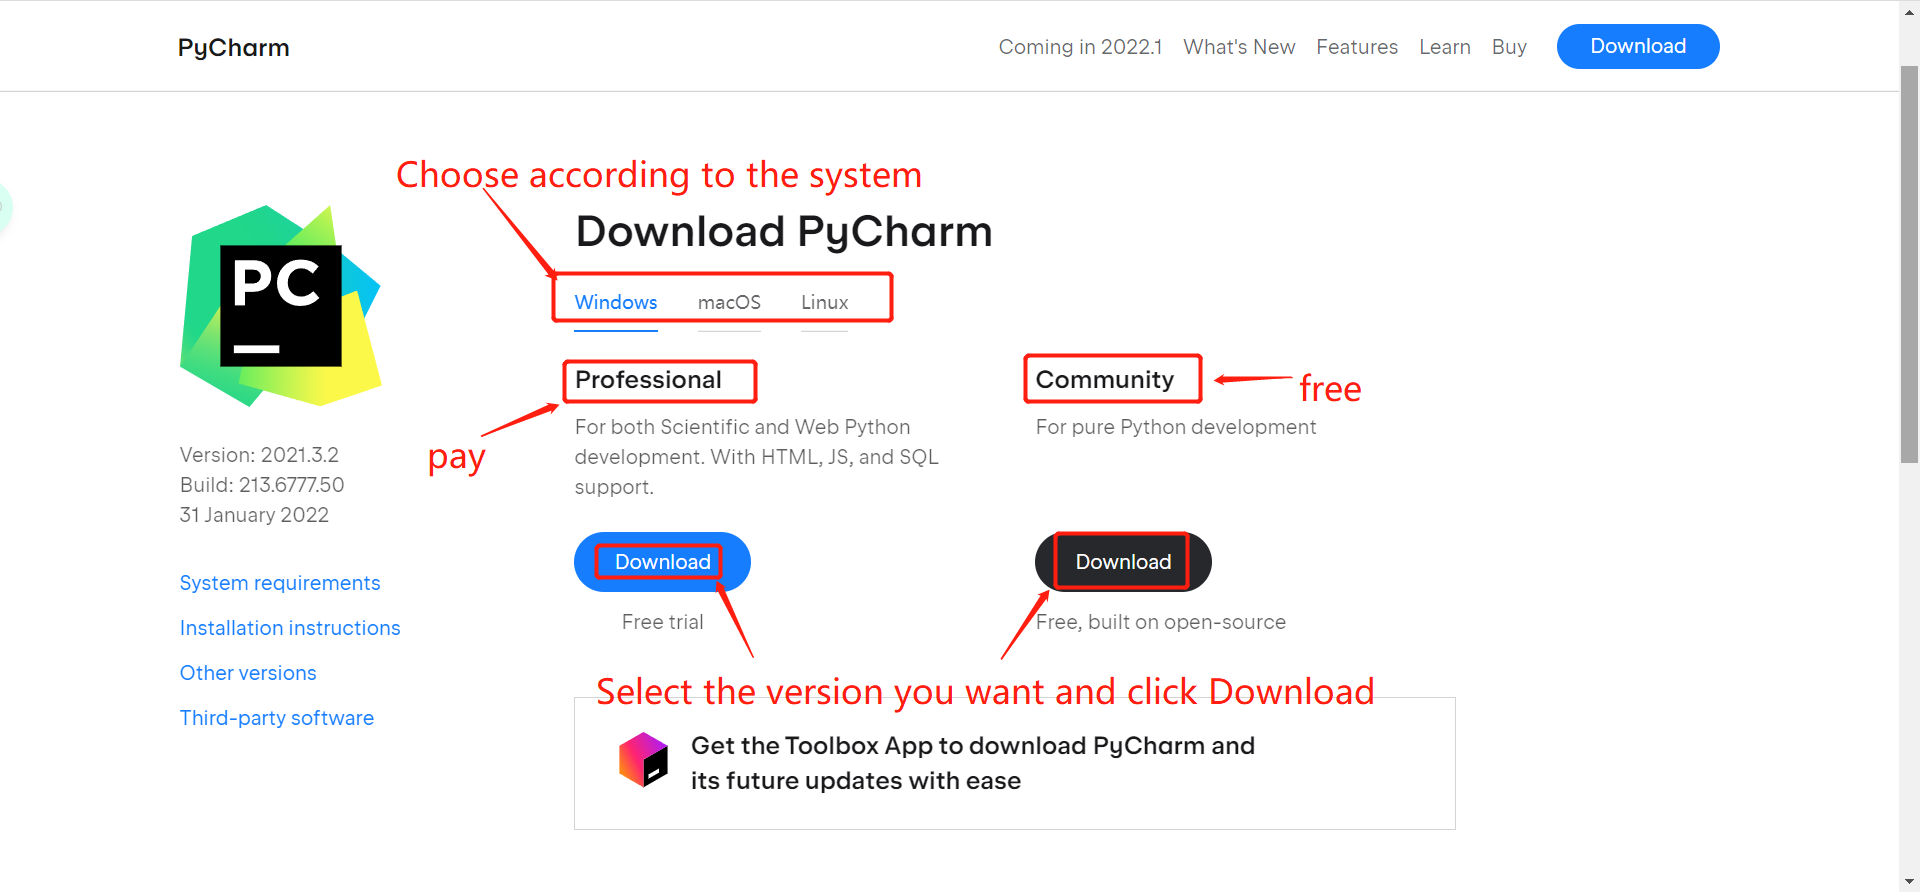
Download the file according to the introduction on the interface. Professional means the professional version, and community is the community version. It is recommended to install the latter version because it is free.
After downloading, double click the file to install it. Here I install it in the E disk. Of course, you can install it in another disk after modifying the installation path.
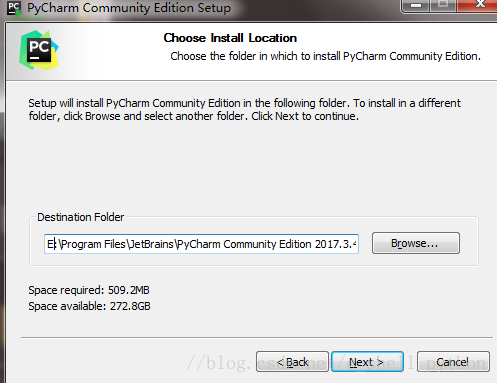
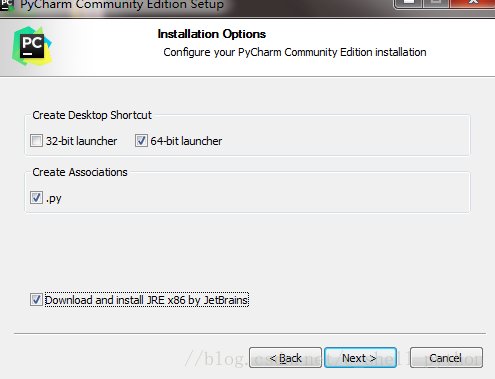
Click Next to enter the next step:
Click Next to enter the next step:
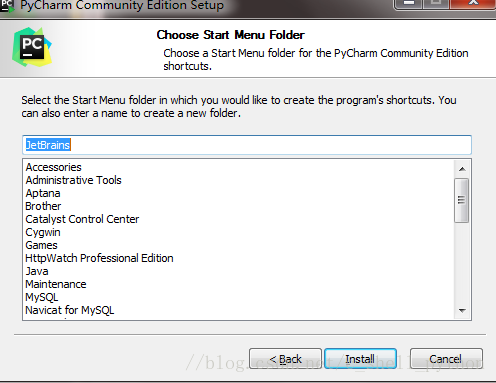
Click Install to install it. After installation is completed, the following interface appears, and click Finish to end the installation:
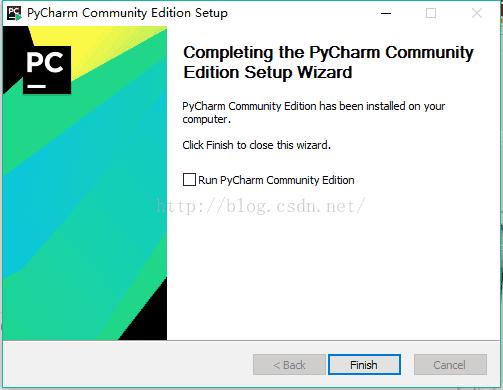
After completing the above steps, it means that Pycharm is successfully installed. At this time, let's enter the software and create our first program:
Click the pycharm icon on the desktop, enter pycharm, and click OK directly, as shown in the figure below;
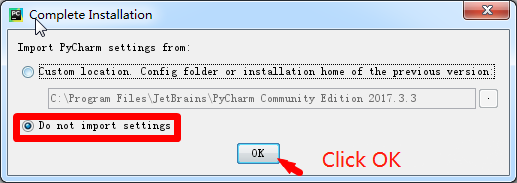
Select the second one, and then click OK;
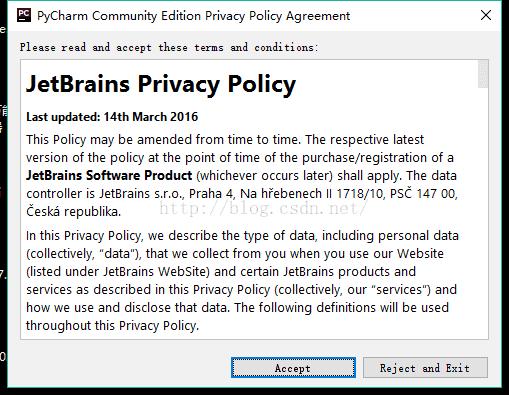
Click the Accept in the figure above to enter the next step;
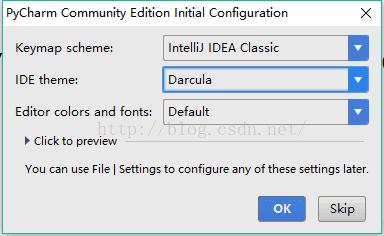
Click the OK in the figure above to enter the next step;
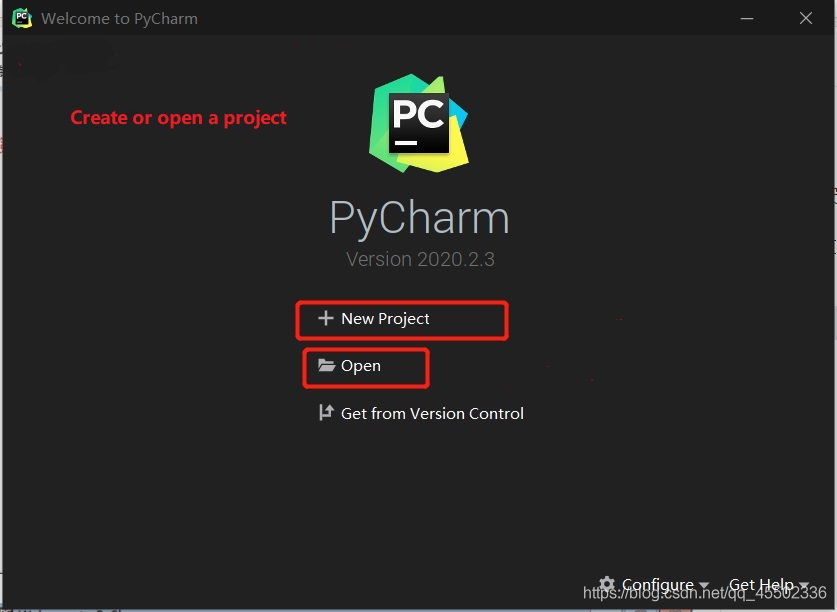
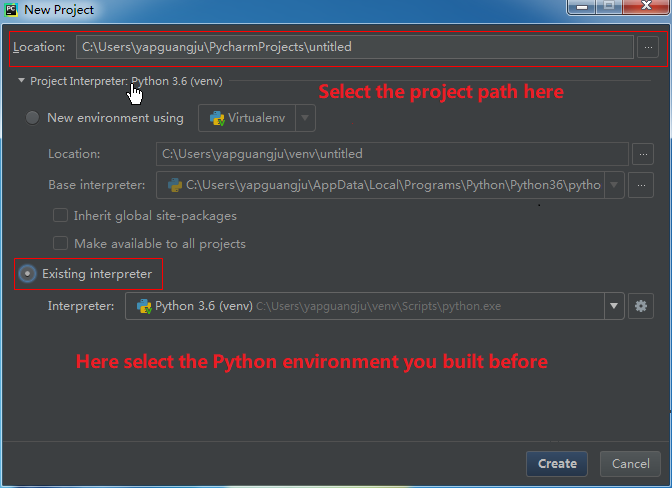
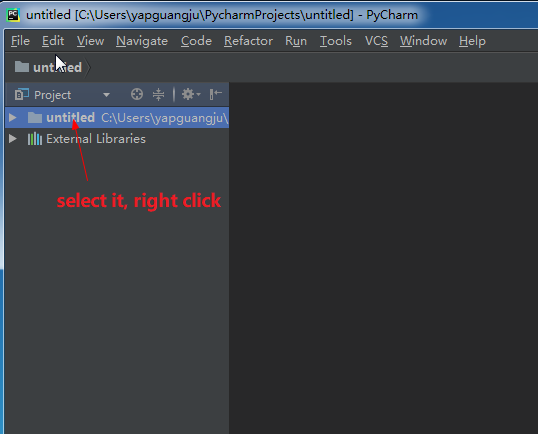
Click New Project to enter the interface shown in the figure below. The interpreter therein is used for you to select the python to be installed; Location is used to customize the project storage directory; and after selecting the directory, click Create.
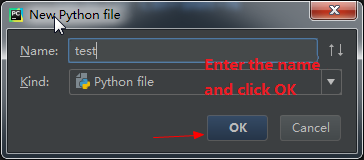
In the interface you have entered as shown in the figure below, right-click the place pointed by the arrow in the figure, select python file, and fill in the file name in the pop-up box (It is allowed to fill in any file name).

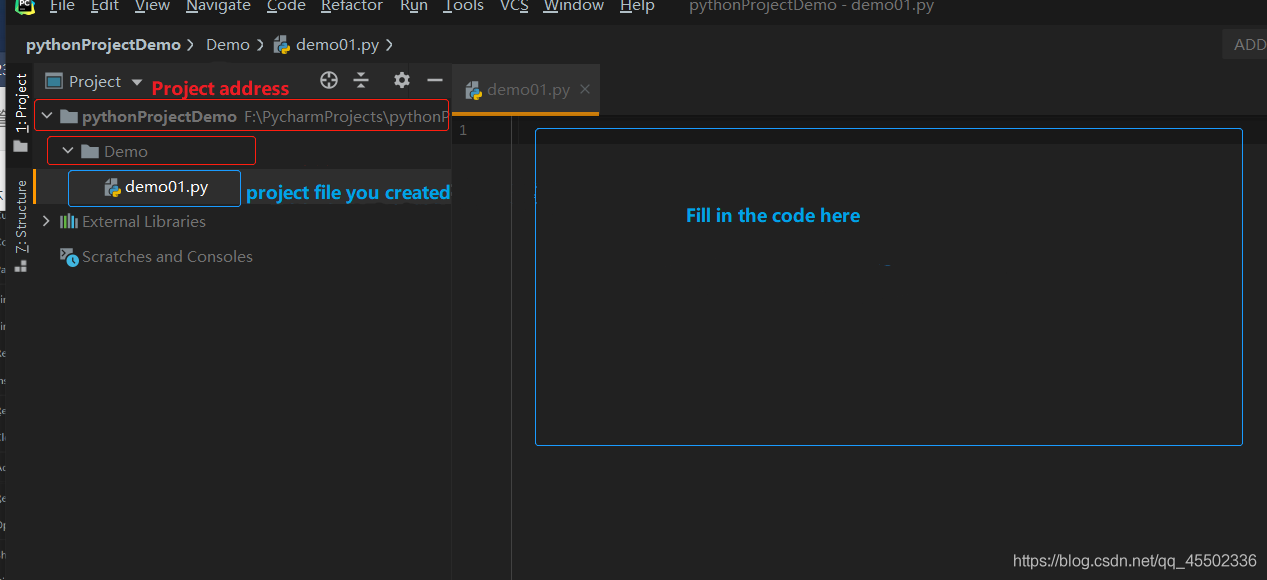
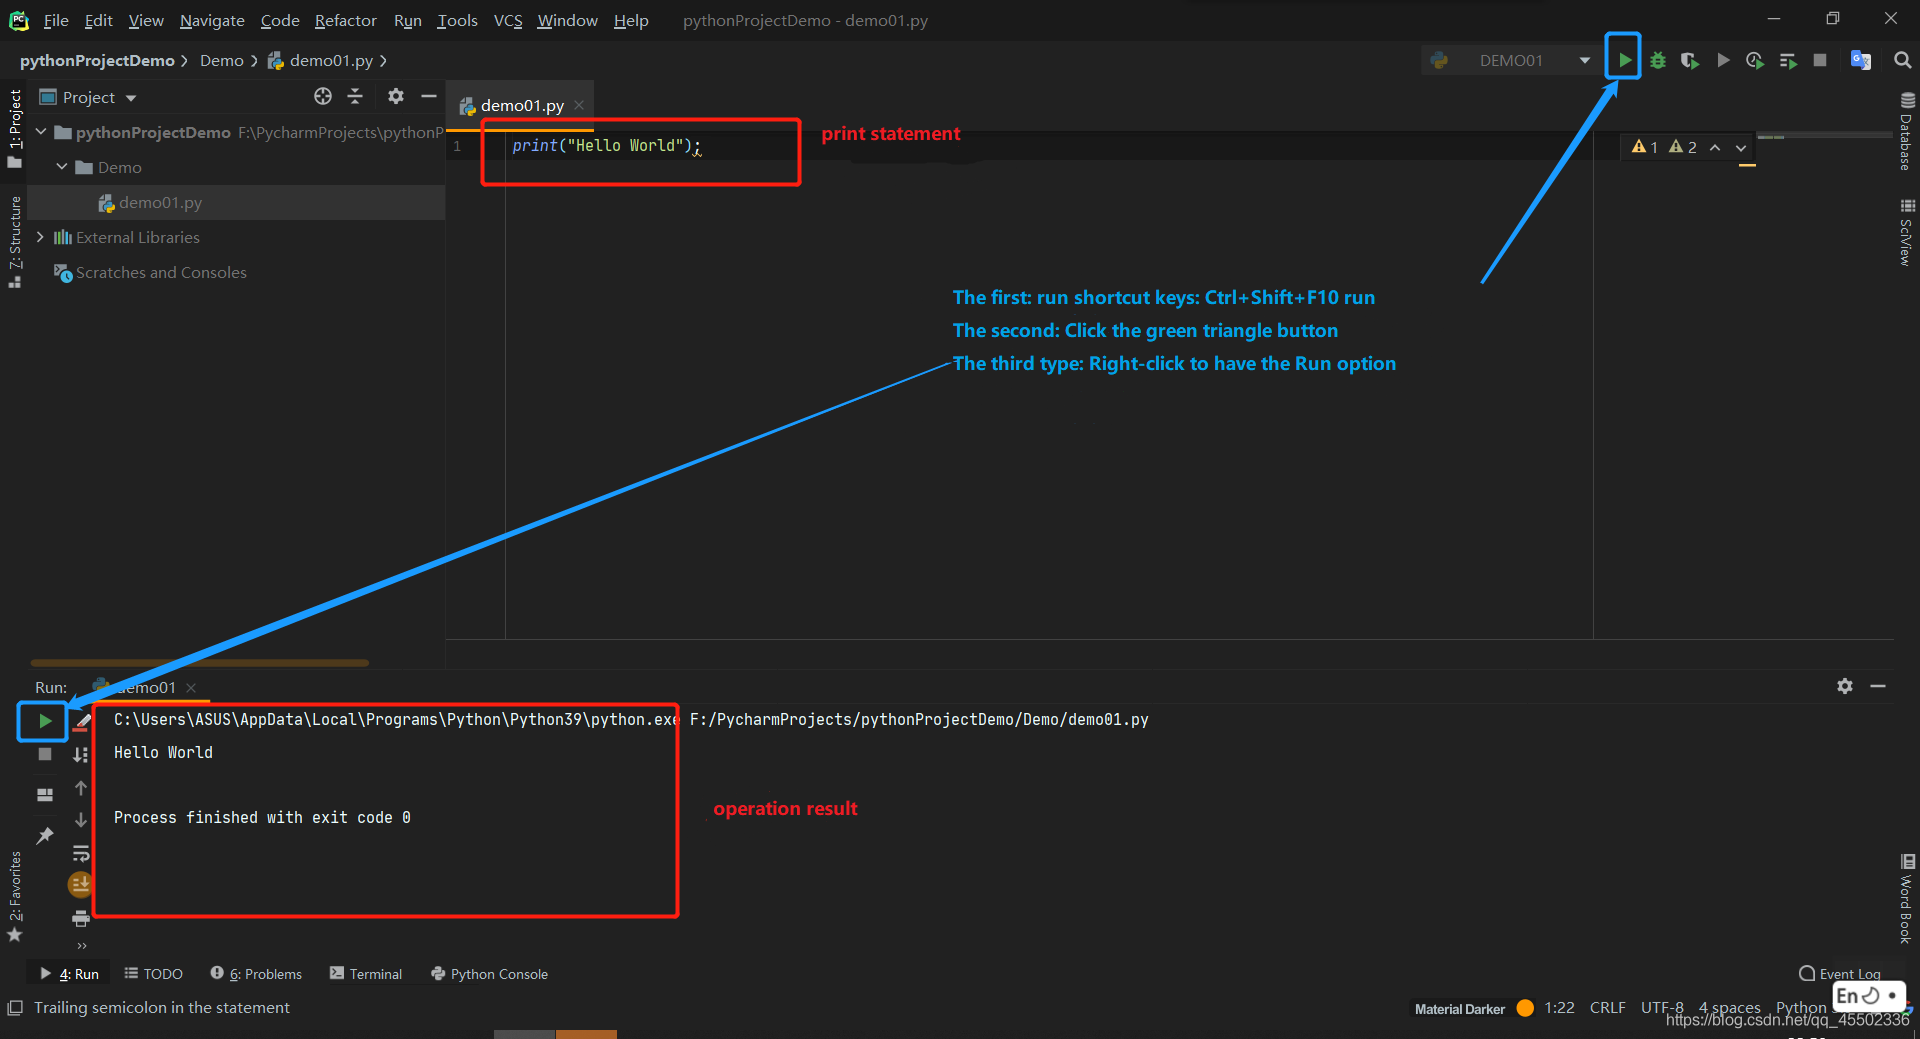
After the file is successfully created, you will enter the following interface where you can write your own program.
Of course, if you are not satisfied with this interface, you can set the background yourself. No more details will be explained here (You can search them via Baidu yourself).
3 Ubuntu system download vscode installation tutorial
VSCode is a free, open source, cross-platform code editing software that supports Windows and Linux systems and has a wealth of plug-ins. It can support C, C++, JAVA, Python and other development languages by installing plug-ins.
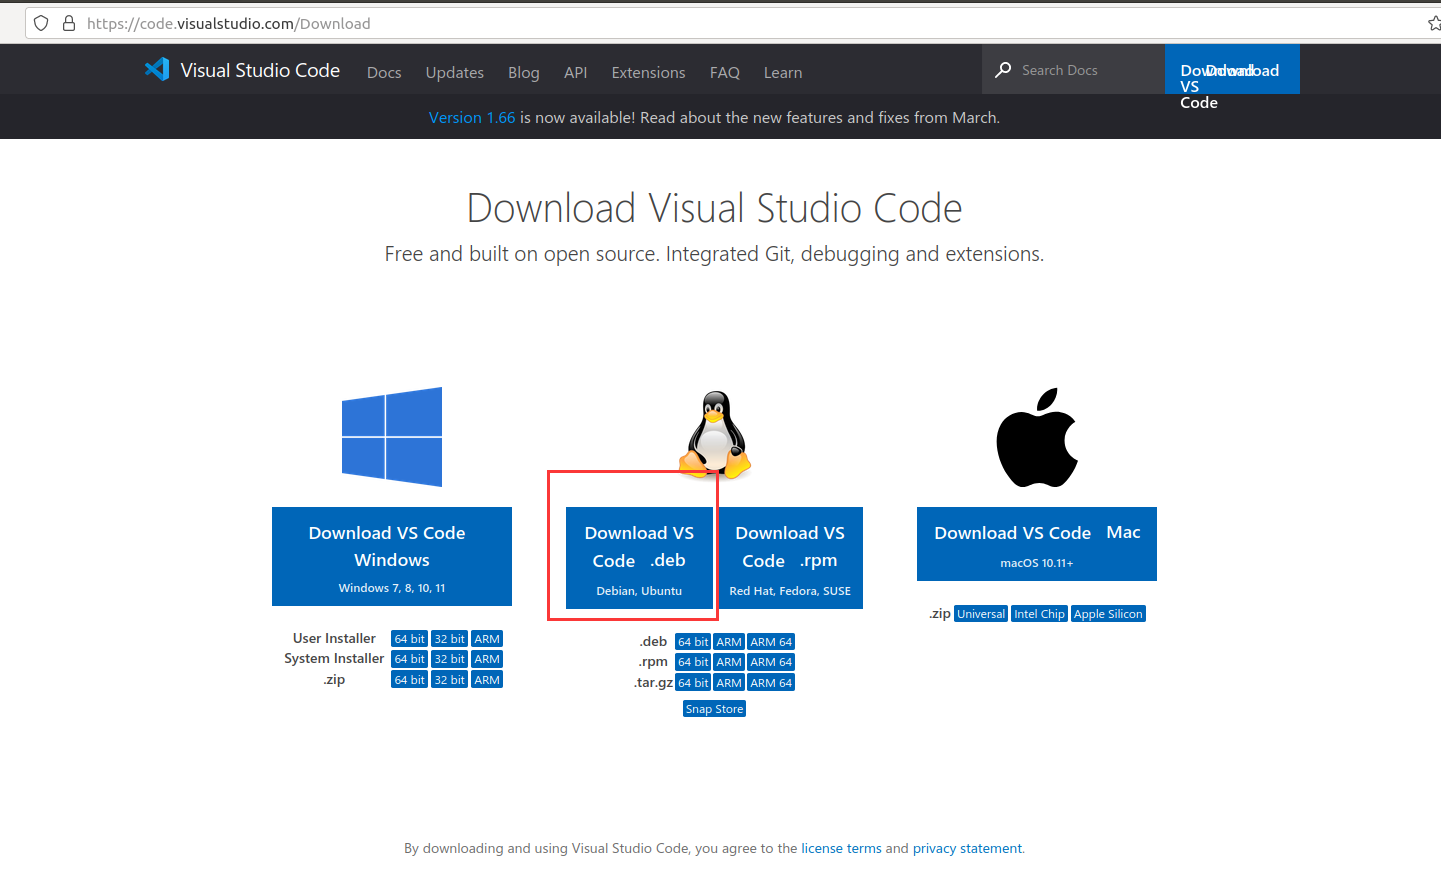
Click the download link below, you can see the following interface, here select ubuntu
VSCode official download address
Note: Be sure to download the file with the file suffix .deb
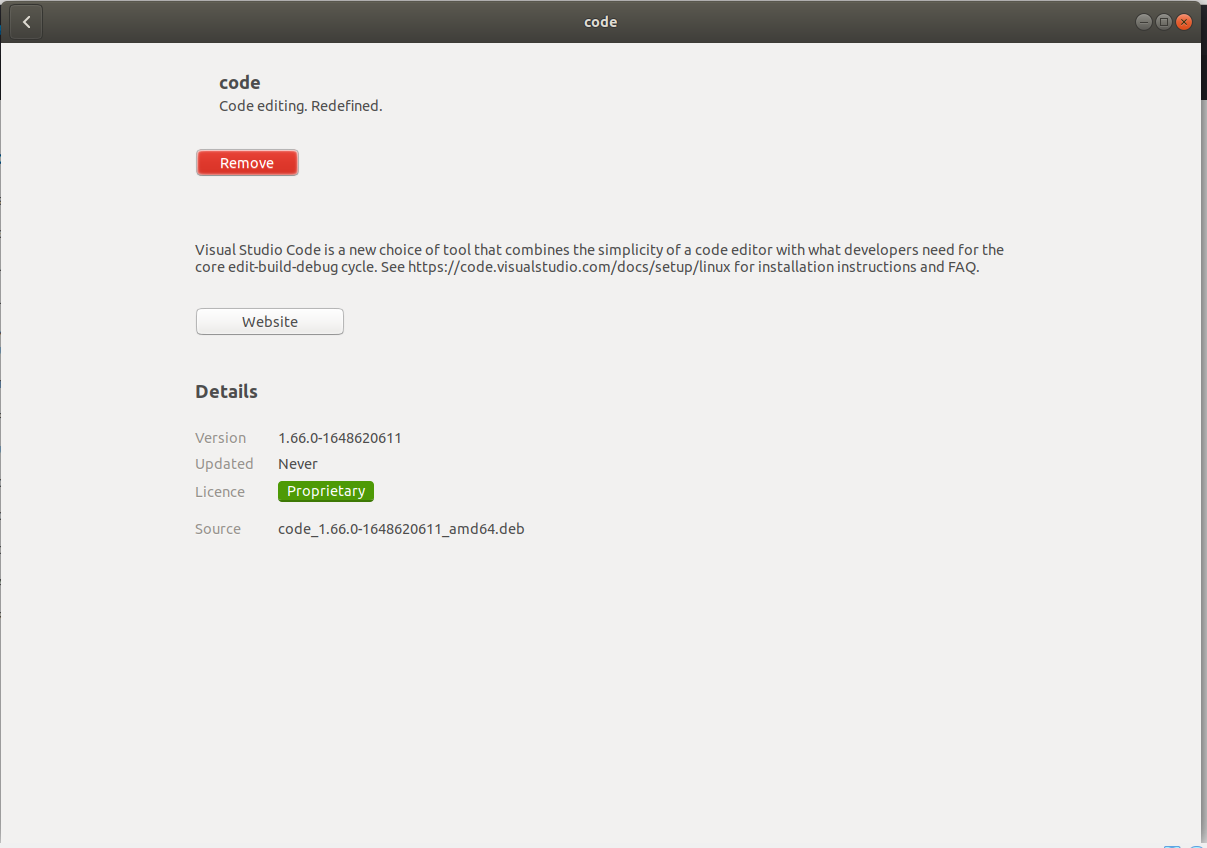
After the download is complete, the page that pops up, select Install

Enter the user login password

When the following interface appears, the installation is successful
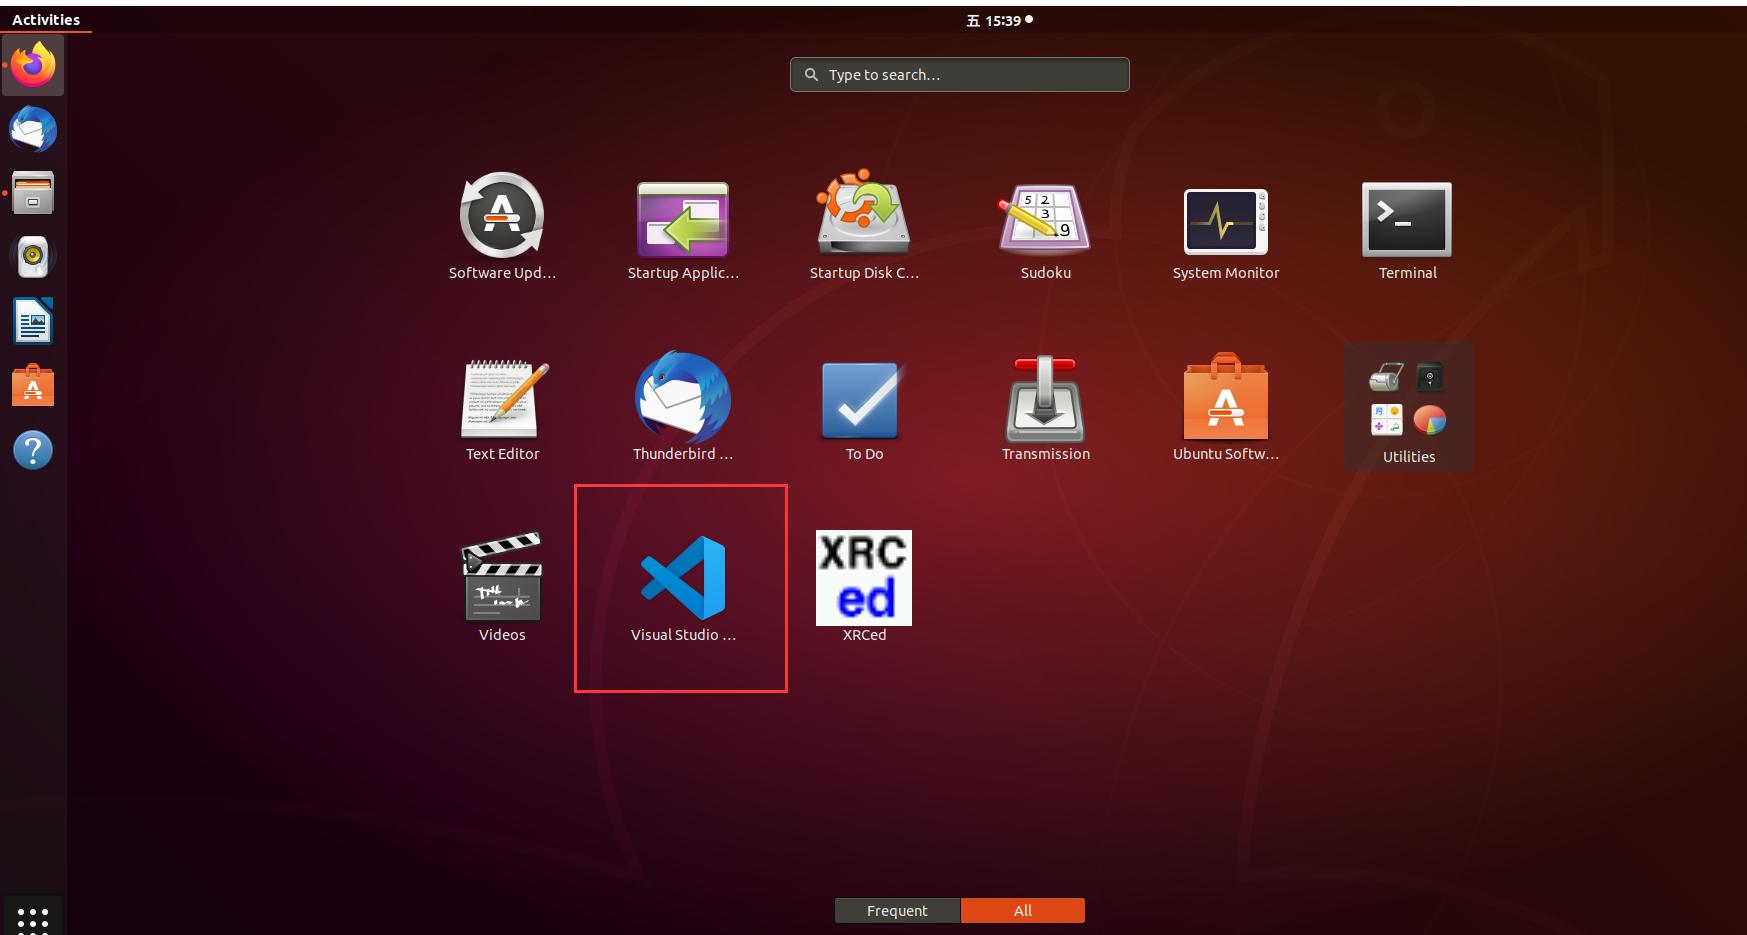
In the software library interface, you can see vscode
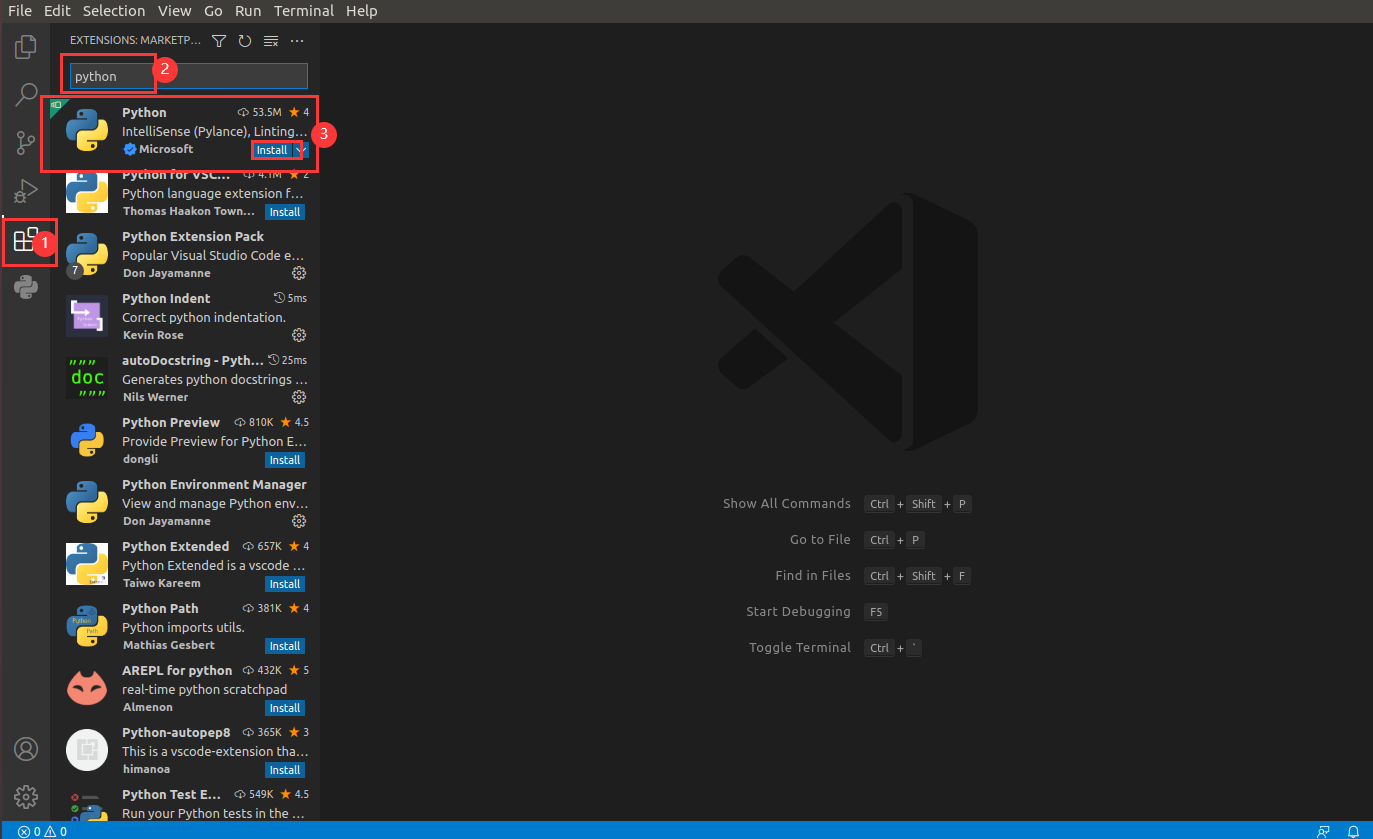
Open vscode, install the python plugin, click the extension (shortcut Ctrl+Shift+X), enter Python, and choose to install Python
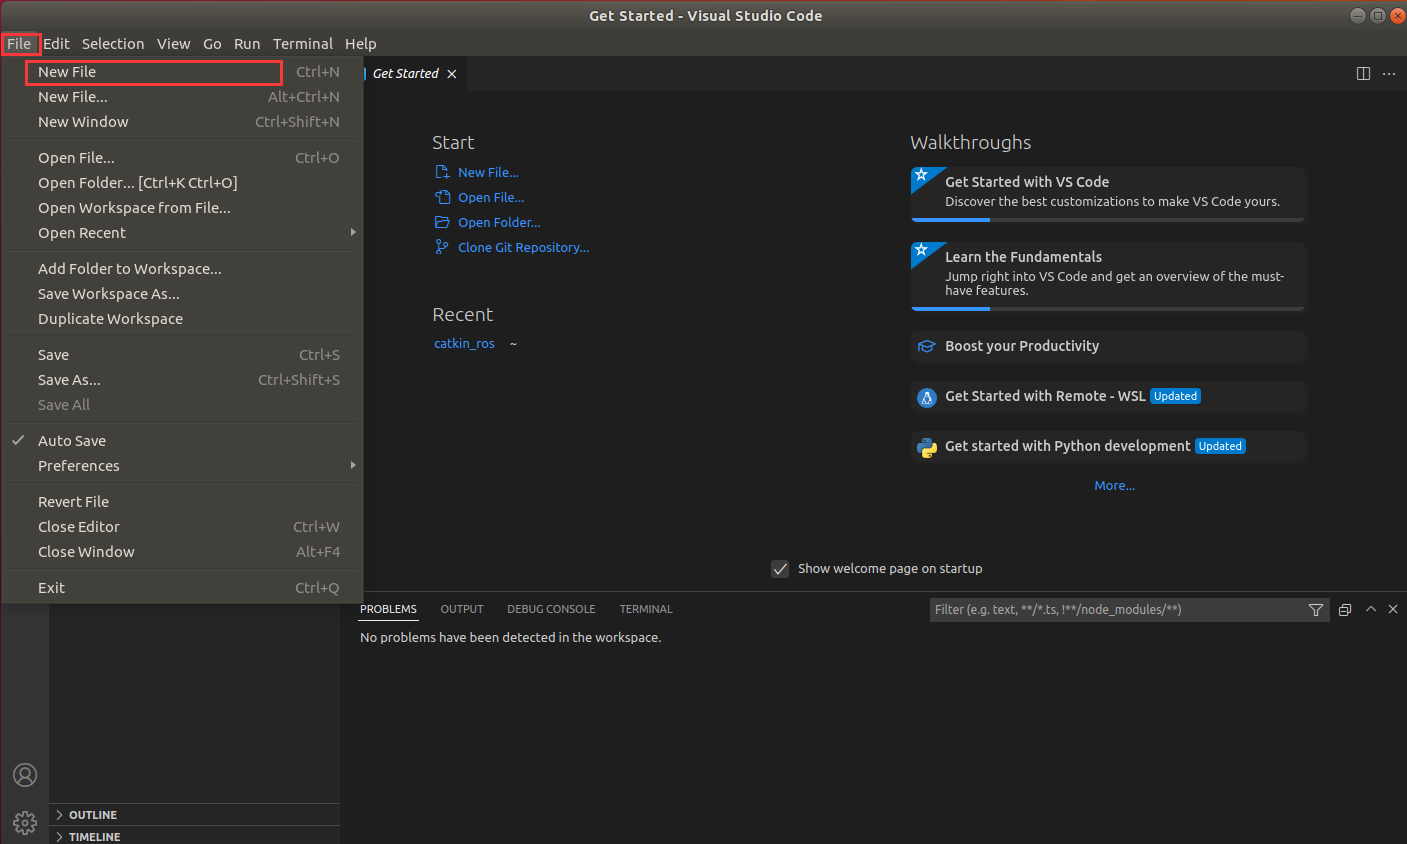
After the python plugin is installed, select New File
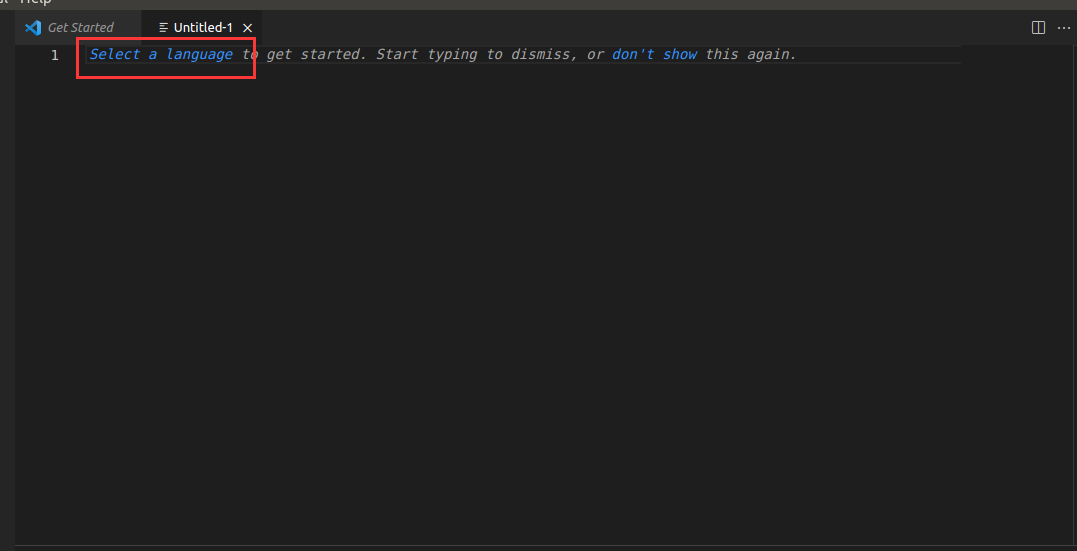
Choose a programming language
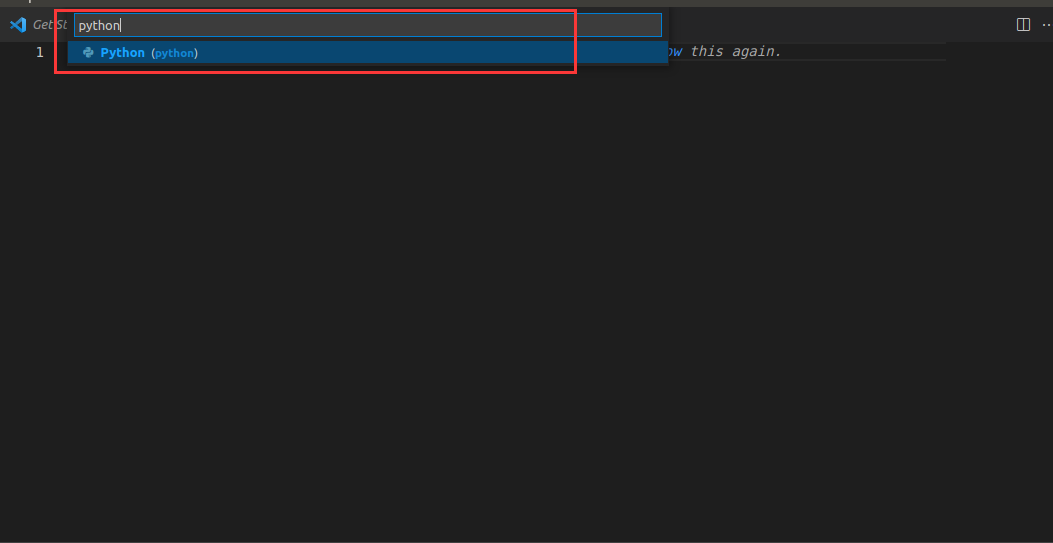
Enter python in the pop-up search box and select Python
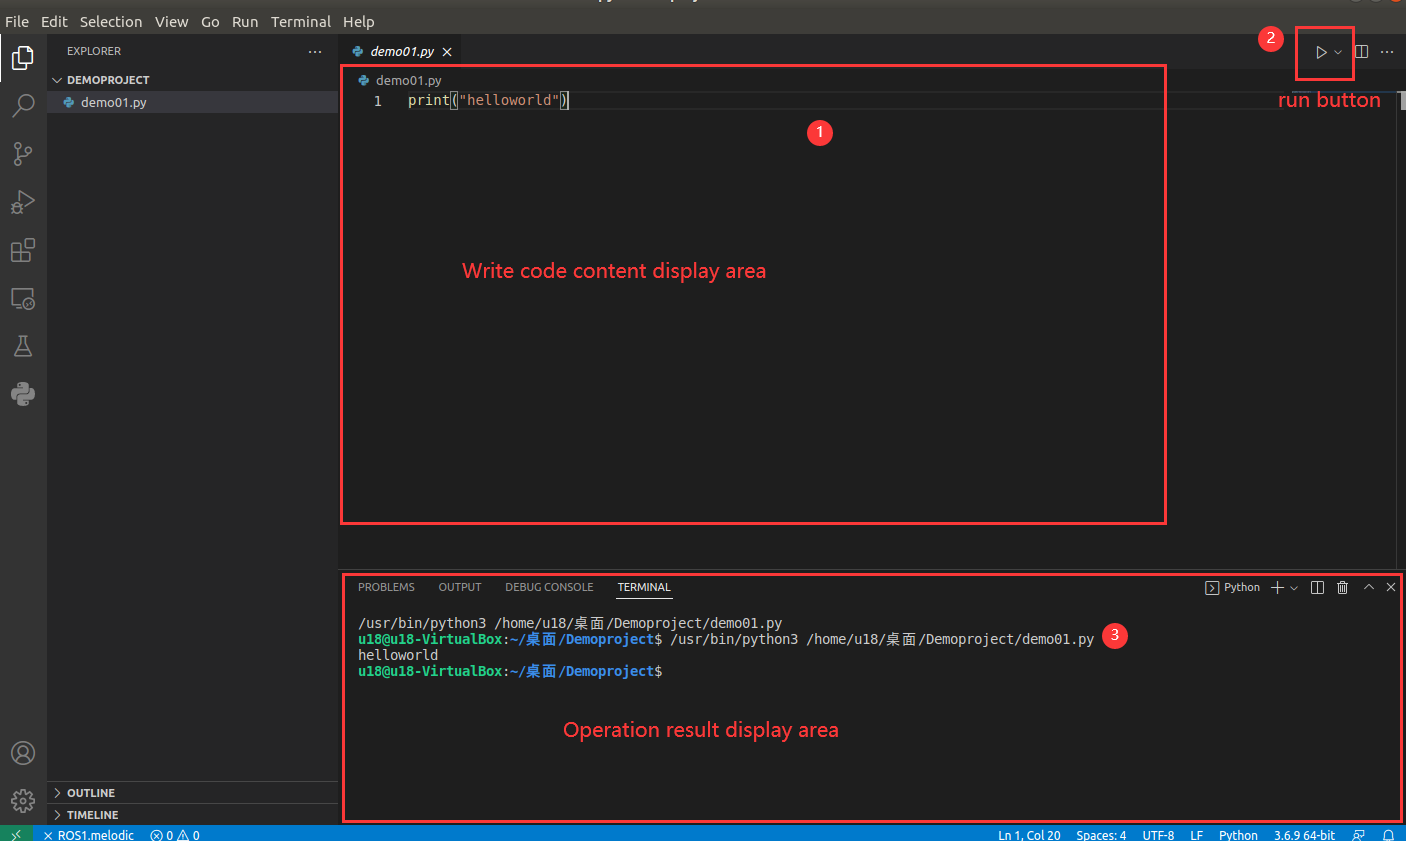
After writing the content of the helloworld script, press the shortcut key Ctrl+S to save the file, click the run button, and the terminal below will output the running result
Of course, if you are not satisfied with this interface, you can set the theme color yourself, which will not be explained in detail here (you can do it by yourself).
4 Preparations
Be sure to burn AtomMain for Atom at the top and ``minirobot for Basic at the bottom. And then choosetransponder function. For device firmware burning, refer to MyStudio) chapter.
The downloading address for firmwaresAtomMain andminirobot:
You can also use myStudio to burn the firmware. MyStudio\'s downloading address:
Pip installation command
Windows system:
Open a console terminal (shortcut key: Win+R; input cmd and enter the terminal), and input the following command:
pip install pymycobot --upgrade --user

Ubuntu system:
Open a console terminal on the desktop (shortcut Ctrl+Alt+T), enter the following command:
# python2 version
pip apt install python-pip
# python3 version
pip apt install python3-pip
After installing pip, execute the following command
pip install pymycobot --upgrade

If you want to use the python3 version, you need to execute the command pip3 install pymycobot --upgrade
Notes:
Currently only
Atom2.4and later versions are available. If you are using previous versions, installpymycobot1.0.7.Open a console terminal (shortcut key: Win+R; input cmd and enter the terminal), and input the following command:
pip install pymycobot==1.0.7 --user

Installing source code
Open a console terminal (shortcut key: Win+R; input cmd and enter th terminal), and input the following command to install it:
git clone https://github.com/elephantrobotics/pymycobot.git <your-path>
#Fill in your installation address in <your-path>, do not choose the current default path.

cd <your-path>/pymycobot
#Go to the pymycobot folder of the downloaded package.

#Run one of the following commands according to your python version.
# Install
 python2 setup.py install
# or
 python3 setup.py install
5 Use method
After completing the steps above, open your installed pycharm or vscode, create new python file, enter the code and import to our library:
from pymycobot import MyCobot, Angle, Coord, utils
After you import your installed project package on pycharm, for example, inputting from pymycobot.mycobot import MyCobot, if no red wavy line appears below the font, this proves that it has been successfully installed and can be used; and if a red wavy line appears there,you can refer to How to install the API library and How to call the API library.
If you don't want to install the API library through the above command, you can use it the following operations.
First, you need to go to the project's github to download it locally.
Enter the project address https://github.com/elephantrobotics/pymycobot
click the code button on the right side of the webpage, and click Download ZIP to download it locally; put the pymycobot in the pymycobot file project of the zip file into your python dependent library directory, and then you can import and use it directly.
6 Simple use of Python
LED Blinking
Create a new Python file, and enter the following code to execute the LED blinking.
For myCobot 280-M5, myCobot 320-M5 and myPalletizer 260, you may refer to the following codes.。
Notice: The baud rates corresponding to all types of devices are not the same. Before using them, refer to the information related thereto. The serial port number can be viewed through calculator device manager or a serial helper.
For more cases and running result videos, see 7.7 Use Cases
from pymycobot.mycobot import MyCobot

from pymycobot import PI_PORT, PI_BAUD      # When using the Raspberry Pi version of mycobot, you can refer to these two variables to initialize MyCobot, if not, you can omit this line of code
import time
#The above needs to be written at the beginning of the code, which means importing the project package

# MyCobot class initialization requires two parameters:
#   The first is the serial port string, such as:
#       linux:  "/dev/ttyUSB0"
#          or "/dev/ttyAMA0"
#       windows: "COM3"
#   The second is the baud rate::
#       M5 version is:  115200
#
#    Example:
#       mycobot-M5:
#           linux:
#              mc = MyCobot("/dev/ttyUSB0", 115200)
#          or mc = MyCobot("/dev/ttyAMA0", 115200)
#           windows:
#              mc = MyCobot("COM3", 115200)
#       mycobot-raspi:
#           mc = MyCobot(PI_PORT, PI_BAUD)
#
# Initialize a MyCobot object
# Create object code here for windows version
mc = MyCobot("COM3", 115200)

i = 7
#loop 7 times
while i > 0:
    mc.set_color(0,0,255) #blue light on
    time.sleep(2)    #wait for 2 seconds
    mc.set_color(255,0,0) #red light on
    time.sleep(2)    #wait for 2 seconds
    mc.set_color(0,255,0) #green light on
    time.sleep(2)    #wait for 2 seconds
    i -= 1
Running result. The blue, red, and green lights on the top of the robot flash 7 times continuously at an interval of 2 seconds.