The First-Time Use
1 Unboxing and the Working Environment
Notice: Please check whether there is any damage or lose at the first place after receiving the package. If any, contact the logistics company and the supplier in time. The picture shown below are for illustration only and actual products may vary due to product enhancement.

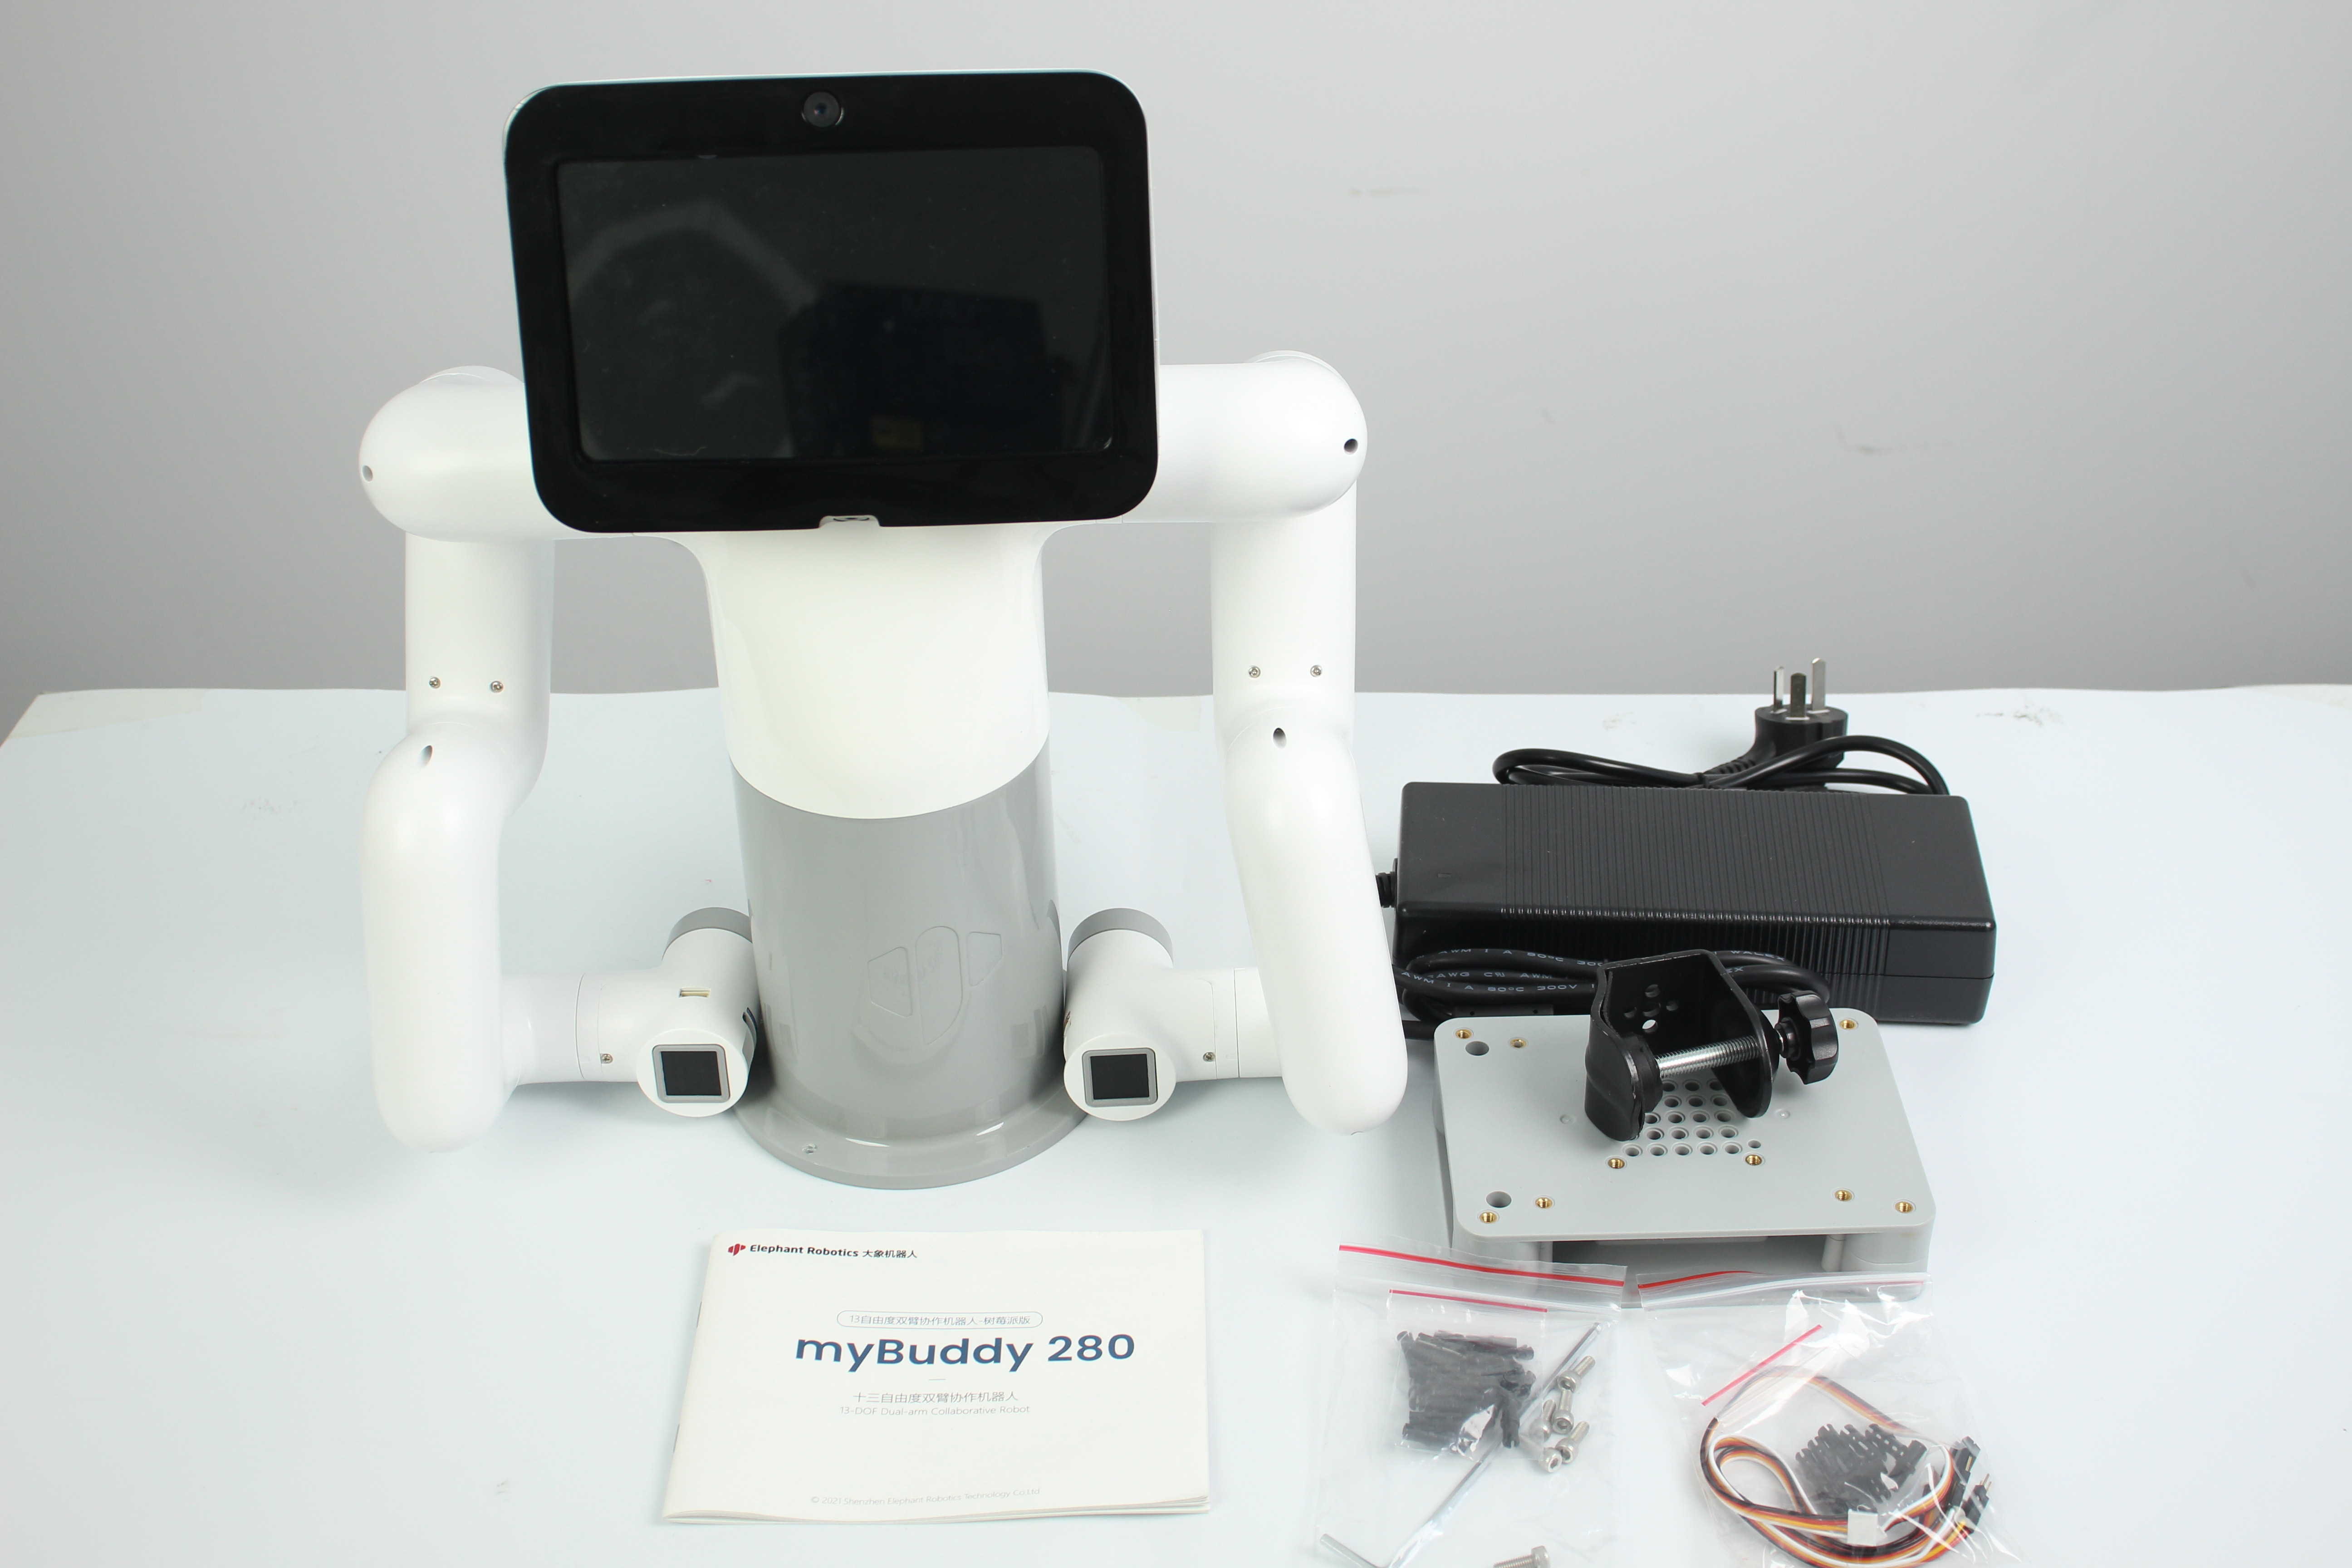
Table 2-2 myBuddy Robot Arm [Standard Set]
| myBuddy [Standard Set] |
-myBuddy 280 Raspberry Pi -Product Manual -Power Supply -Flat Pedestal & G-Shaped Clamp -Jumper -M4*35, Stick-Shaped Hexagon Socket , Full-Thread Screw, Stainless Steel Screw -Hexagon Wrench |
|---|---|
Install the robot system in an environment that meets the conditions described in the table so as to ensure the best performance and safety.
Table 2-3 Working Environment and Conditions
| Working Environment | Condition |
|---|---|
| Temperature | 0°C~45°C |
| Relative Humidity | 20%~70% |
| Space Requirements | Indoor |
| Other Requirements | -Avoid sunlight exposure. -Avoid dust, oil fume, salt, iron filings, water, etc. -Avoid flammable and corrosive liquids and gases. -Avoid shock and vibration, etc. -Avoid strong electromagnetic interference sources. |
2 Installation Requirements
myBuddy weights 2.75kg. Given that the center of gravity changes along with the movement of the robot , it is required that the robot be fixed on a solid ground during utilization. (A fixed pedestal or mobile pedestal are both acceptable.)
Size of Interface
The fixing holes on the pedestal serve to fix robot and connect with other pedestals.
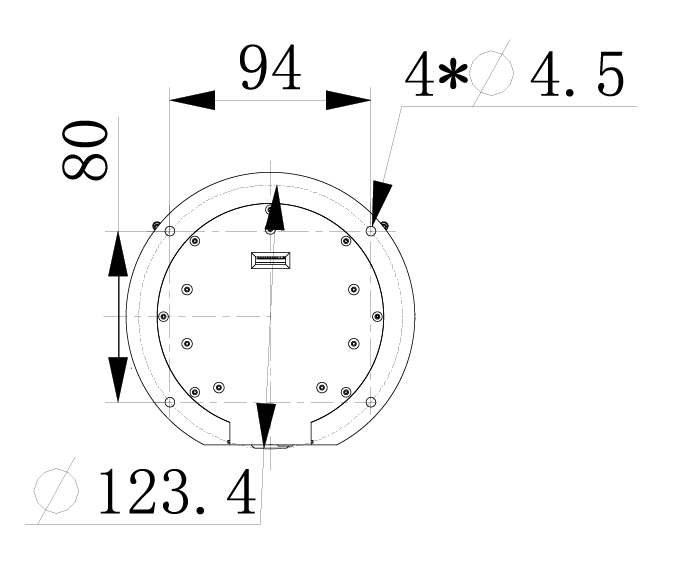
Please make sure that there are corresponding threaded holes on the pedestal.
Before the official installation, please confirm:
- The working environment meets the requirements listed in Section 15.3.1.
- The installation position is no smaller than the working space of the robot, and there is enough space for installation, use, maintenance and repair.
- Put the robot in a suitable position.
- Installation related tools are ready, such as screws, wrenches, etc.
After confirming the above requeirements, please move the robot to the mounting table, adjust the robot position, and align the fixing holes with the holes on the base mounting table. And then twist the screws tightly.
Notice: When adjusting the position of the robot on the base installation table, please try to avoid pushing and pulling the robot directly on the base installation table to avoid scratches. When manually moving the robot, try to avoid applying external force to the fragile parts of the robot body, so as to avoid unnecessary damage to the robot.
3 Power on the Robot
Before operation, please make sure that you have read Chapter 1 Safety Instructions. At the same time, connect the power adapter to the robot, and fix on the table. Refer to Figure 3-1 for connection.

Figure 3-1 Location of the power connector

Figure 3-2 Front of the robot
myBuddy must be powered by an external power for sufficient power:
Rated voltage: 24V
Rated current: 9.2A
Plug: DC 5.5mm x 2.1
4 Basic function
Our company provides various function tutorial videos of myBuddy. Please click here or scan the QR code below for watching.

mybuddy 280 Teaching Series
5 Use of the End Tools
5.1 Sucking Pump
Details: 4 Sucking Pump
Suction pump installation video to be added...
5.2 Adaptive Gripper
Details: 5 Adaptive Gripper
Adaptive gripper installation video to be added...