IO control
IO is the input and output of data. There are multiple pins on the Basic and Atom of our robot arm. The input and output modes can be set through the following function interface.
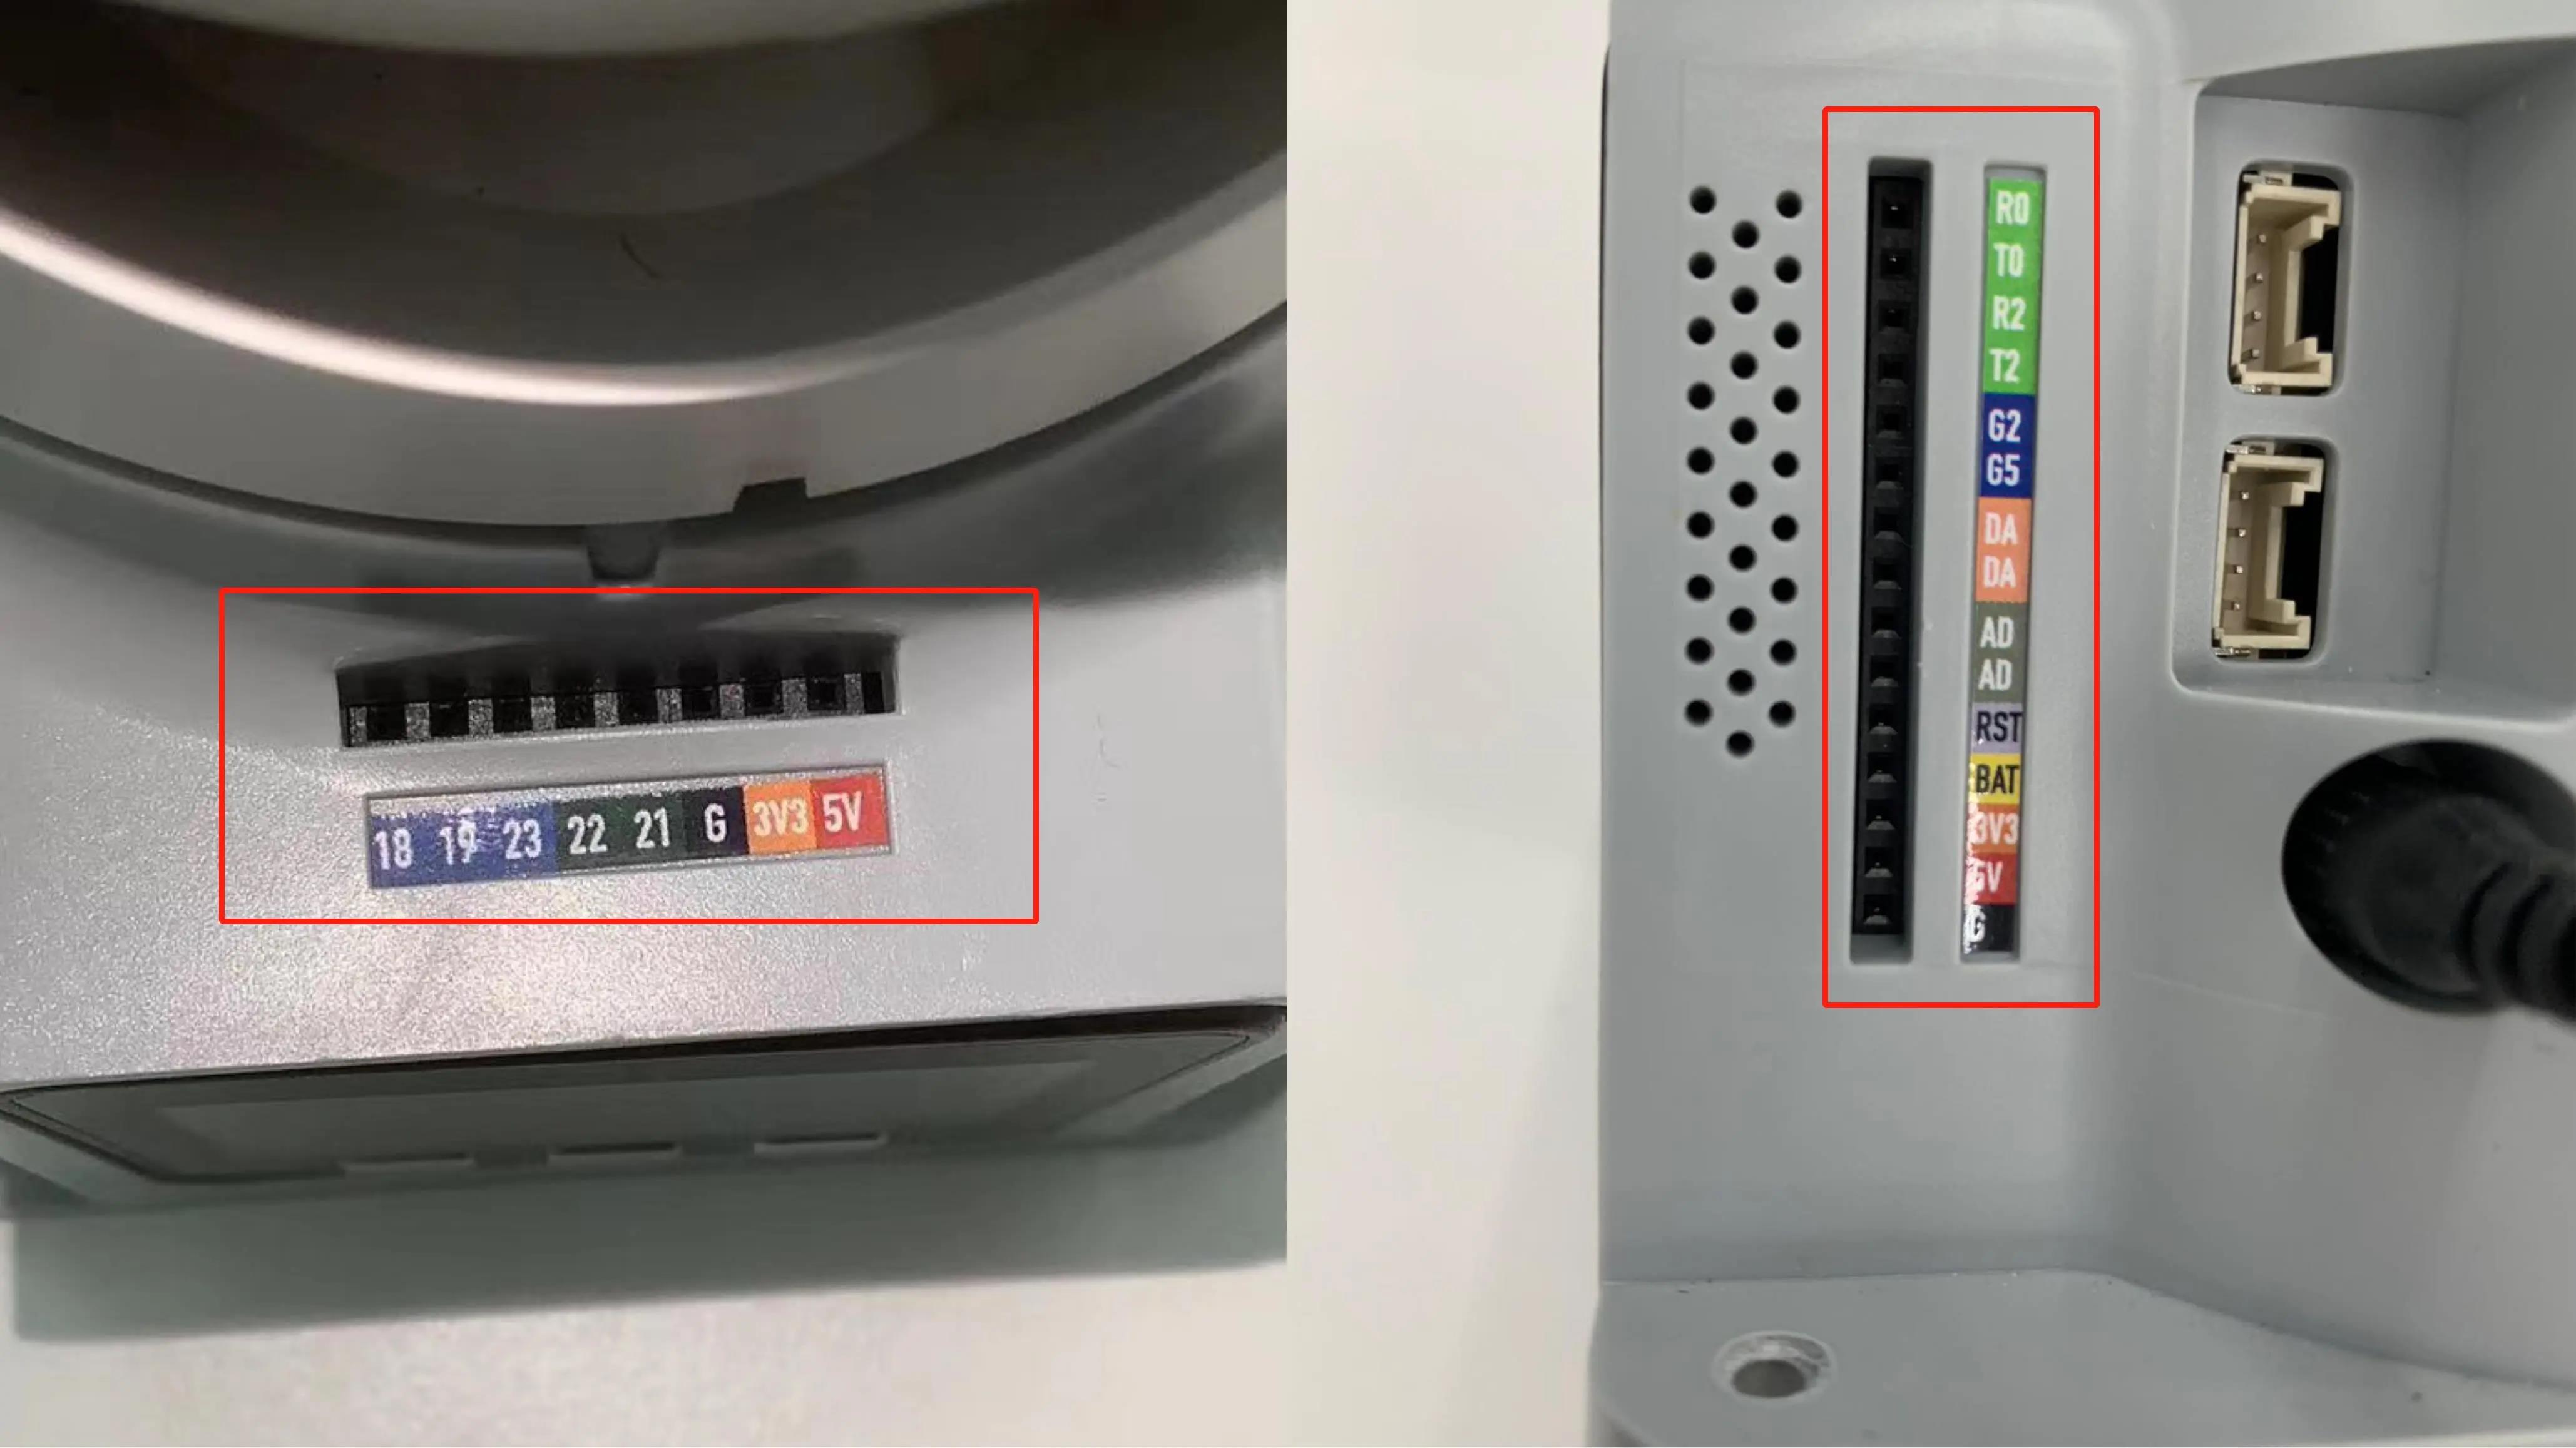
1 Basic IO
1.1 get_basic_input(pin_no)
- Function: to obtain the working state of the bottom pin number
- Parameters:
pin_no: represents the specific pin number at the bottom of the robot. - Return Value:
pin_signal(int) When the returned value is 0, it means running in the working state; when it is 1, it means the stop state.
1.2 set_basic_output(pin_no, pin_signal)
- Function: to set the working state of the bottom pin number.
- Parameters:
pin_no(int). Only the numerical part of the numbers marked at the bottom of the equipment is taken.pin_signal(int): Inputting 0 means setting to the running state, which inputting 1 means setting to the stop state- Return Value: None
1.3 get_tof_distance()
- Function: to obtain a detected distance (An external distance detector is required).
- Return value: The detected distance value (in mm).
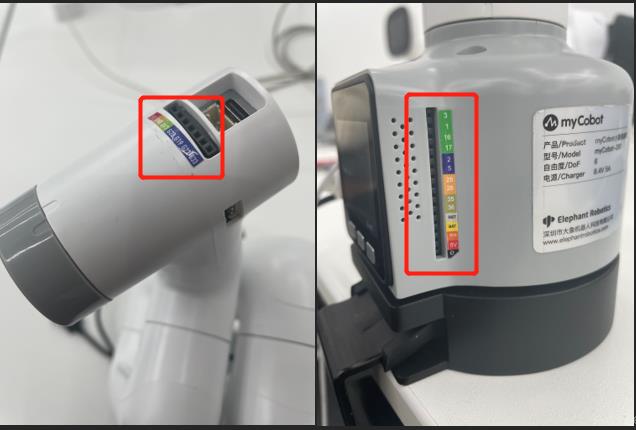
2 Atom IO
2.1 set_pin_mode(pin_no, pin_mode)
- Function: to set the state mode of the specified pin in the atom.
- Parameters:
pin_no(int): represents the specific pin number on the top of the robot.pin_mode(int): limited to 0-2- 0 means setting it to the running state;
- 1 means setting it to the stop state;
- 2 means setting to the pull-up mode.
- Return Value: None
2.2 set_digital_output(pin_no, pin_signa)
- Function: to set the working state of the end pin number.
- Parameters:
pin_no(int). Only the numerical part of the number marked at the end of the equipment is taken.pin_signal(int). Inputting 0 means setting to the running state, while inputting 1 means setting to the stop state.
- Return Value: None
2.3 get_digital_input(self, pin_no):
- Function: to obtain the working state of the end pin number.
- Parameters:
pin_no: represents the specific pin number at the end of the robot. - Return Value:
pin_signal(int) When the returned value is 0, it means running in the working state; when it is 1, it means the stop state.
3 Raspberry Pi——GPIO
For Raspberry Pi version, use the following API.
Type the code at the beginning:
from pymycobot import MyCobot
from pymycobot import PI_PORT, PI_BAUD
import RPi.GPIO as GPIO
3.1 gpio_init()
- Function: Initialize GPIO module, set BCM mode.
- Return value: None
3.2 set_gpio_mode
- Function: Set Raspberry Pi GPIO Pin Mode
- Parameter
mode(str) Input: "BCM" or "BOARD" to enter the corresponding mode
3.3 set_gpio_output(pin_no, state)
- Function: Set the pin to high, low.
- Parameter:
pin(int) pin number.state:0 is set to low level 1 is set to high level (low level of suction pump starts working, high level stops working)- Return Value: None
3.4 get_gpio_in(pin_no)
- Function: Get the pin level status.
- Parameter Description:
pin_no(int) pin number.
- Return Value: 0 is low level 1 is high level
4 Simple Demo
280-M5 version:
from pymycobot.mycobot import MyCobot
from pymycobot import PI_PORT, PI_BAUD  # When using the Raspberry Pi version of mycobot, you can refer to these two variables to initialize MyCobot
import time
# Enter the above code to import the packages required by the project

# MyCobot class initialization requires two parameters:
#   The first is the serial port string, such as:
#       linux:  "/dev/ttyUSB0"
#          or "/dev/ttyAMA0"
#       windows: "COM3"
#   The second is the baud rate::
#       M5 version is:  115200
#
#    Example:
#       mycobot-M5:
#           linux:
#              mc = MyCobot("/dev/ttyUSB0", 115200)
#          or mc = MyCobot("/dev/ttyAMA0", 115200)
#           windows:
#              mc = MyCobot("COM3", 115200)
#       mycobot-raspi:
#           mc = MyCobot(PI_PORT, PI_BAUD)
#
# Initialize a MyCobot object
# Create object code here for windows version
mc = MyCobot("COM3", 115200)

#Let the basic2 position enter the working state
mc.set_basic_output(2, 0)

#wait for 2 seconds
time.sleep(2)

#Let the basic2 position stop working
mc.set_basic_output(2, 1)

#let atom 5 work
mc.set_pin_mode(5, 0)

#wait for 2 seconds
time.sleep(2)

#let atom 5 stop working
mc.set_pin_mode(5, 1)
280-Pi version:
from pymycobot.mycobot import MyCobot
from pymycobot import PI_PORT, PI_BAUD  #When using the Raspberry Pi version of mycobot, you can refer to these two variables for MyCobot initialization
import time
#Enter the above code to import the packages required by the project

# MyCobot class initialization requires two parameters:
#   The first is the serial port string, such as:
#       linux:  "/dev/ttyUSB0"
#          or "/dev/ttyAMA0"
#       windows: "COM3"
#   The second is the baud rate::
#       M5 version is:  115200
#
#    Example:
#       mycobot-M5:
#           linux:
#              mc = MyCobot("/dev/ttyUSB0", 115200)
#          or mc = MyCobot("/dev/ttyAMA0", 115200)
#           windows:
#              mc = MyCobot("COM3", 115200)
#       mycobot-raspi:
#           mc = MyCobot(PI_PORT, PI_BAUD)
#
# Initialize a MyCobot object
# Create object code here for Raspberry Pi version
mc = MyCobot(PI_PORT, PI_BAUD)

# initialization
GPIO.setmode(GPIO.BCM)
GPIO.setup(20, GPIO.OUT)
GPIO.setup(21, GPIO.OUT)
# open suction pump
GPIO.output(20,0)
GPIO.output(21,0)
# wait 2 seconds
time.sleep(2)
# Turn off the suction pump
GPIO.output(20,1)
GPIO.output(21,1)
MyPalletizer 260:
from pymycobot.mypalletizer import MyPalletizer
import time
#Enter the above code to import the packages required by the project

# initiate MyPalletizer
mc = MyPalletizer("COM3", 115200)

for count in range(5):
# set a loop
    mc.set_basic_output(2,0)
    # Let the basic2 position enter the working state
    mc.set_basic_output(5,0)
    # Let the basic5 position enter the working state
    time.sleep(2)
    #等待两秒
    mc.set_basic_output(2,1)
    #Let the basic2 position stop working
    mc.set_basic_output(5,1)
    #Let the basic5 position stop working