2. Basic applicability of myblockly
2.1 myblockly interface introduction
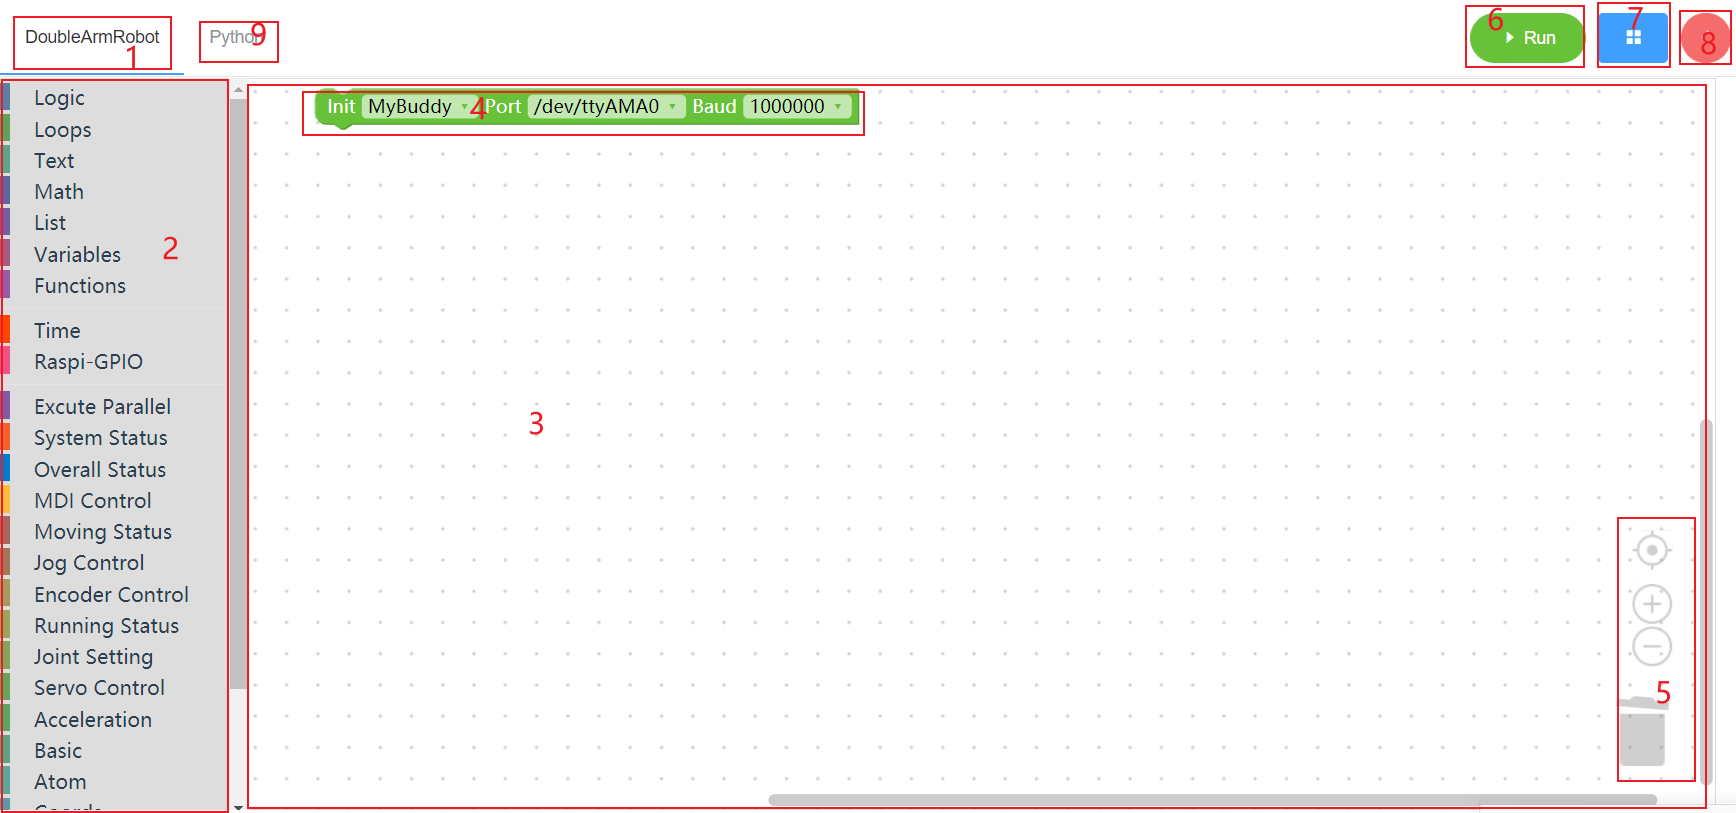
As shown above, myblockly is divided into nine parts:
- area 1 is the page where the main functions of MyBuddy are located. Users will spend most of their time on this page.
- area 2 is the toolbar where the building block is located. A corresponding menu can be opened by clicking the label of the toolbar. Users can place the building block in the workspace by dragging the corresponding building block.
area 3 is the software workspace, which contains all the building blocks selected by the user.
Mark 4 initializes the building blocks for the machines, the default do not delete, click the first drop-down box can switch to other models (temporarily only mybuddy a model), the second drop-down box for a serial port list, click can show on the system after all the serial port, users need to select the initialization of the machine corresponds to a serial port (each system shows the serial port name, The third drop-down box is the baud rate required to initialize the robot. Mybuddy is 115200.
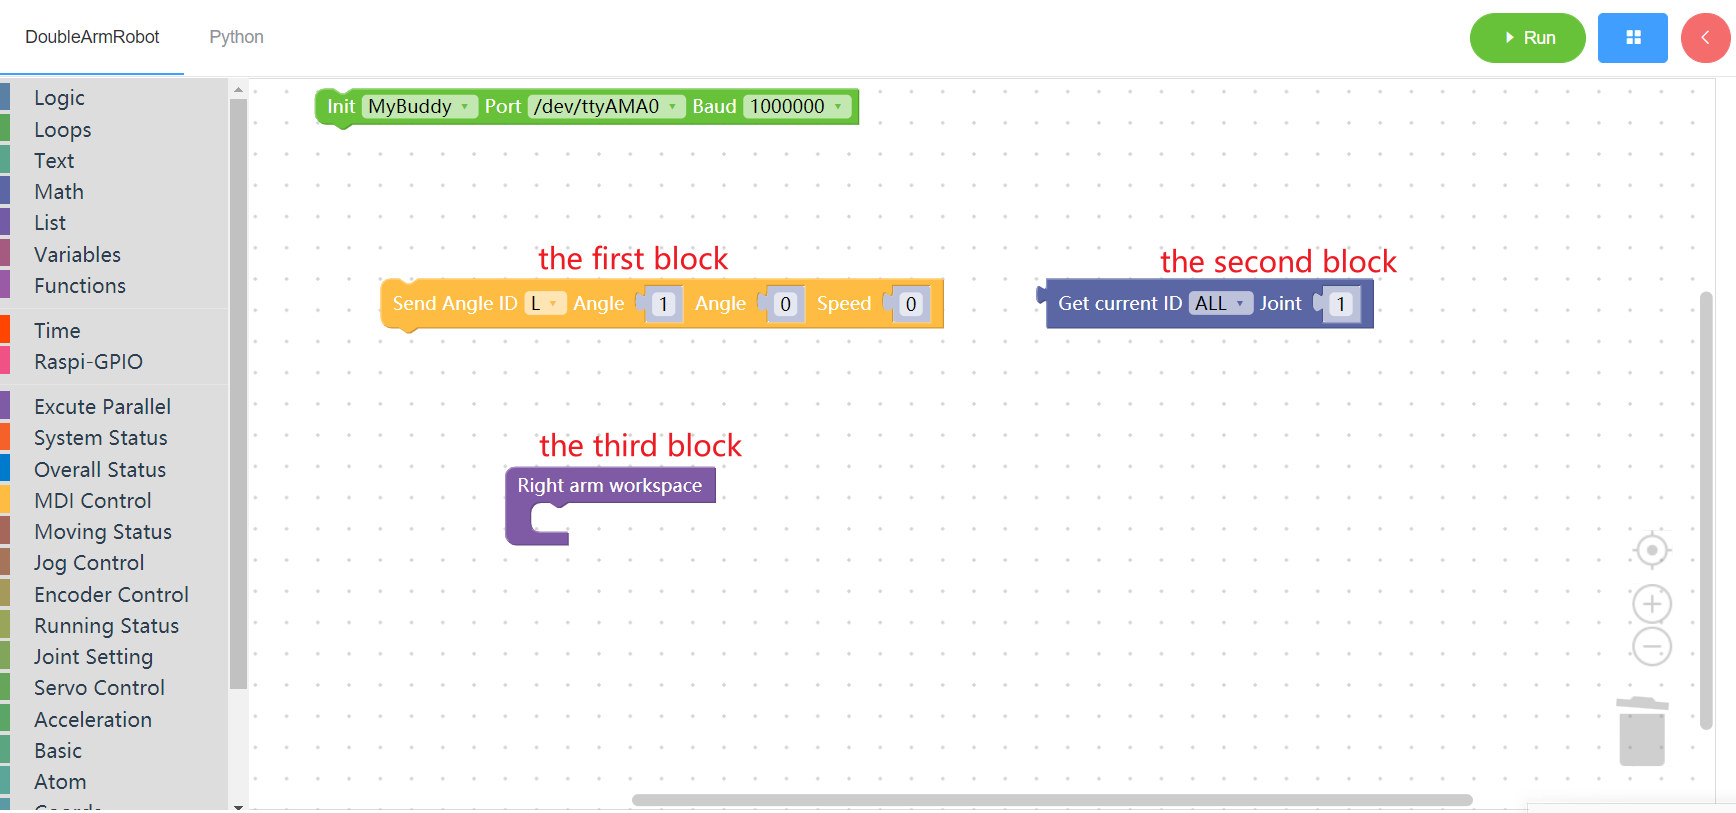
Note: In this software, there are three main shapes of building blocks. The first one is that the joint is in the form of upper and lower buckles, which can be placed arbitrarily according to requirements. The second for the button on the left side of the card, the building blocks in general is the return value type, if you want to put the blocks in the other building blocks, need to make sure that their type is consistent, this within the software already has to deal with, of course, the result of the performance on the user side is if the type is not consistent, cannot be put into the building blocks. The third type is less common. The blocks themselves have no clasp, only internal joints.
Examples of the three blocks are as follows:
area 5 is the workspace control module
- The dustbin is the first one from bottom to top, which stores the blocks deleted by the user. When the user wants to delete a block in the work area, he can drag the block to the dustbin and release the mouse to delete the block, or press del to delete the block. To restore the deleted blocks, click open trash and drag them out.
- The second button is the shrink button. When the user feels that the workspace block is relatively large, he can click the minus button to shrink the workspace scale, or use the mouse pulley to shrink the workspace
- The third is the enlarge button, click can enlarge the work area, also can enlarge the operation through the mouse pulley
The fourth button is to restore and locate the current workspace. When the user feels that the workspace is too large or too small, he can click this button to restore the workspace to its initial state and locate it to the center of the workspace
Note: The size of the workspace will affect the blocks in the toolbar, so you need to choose a proper scale to avoid blocks blocking the screen
- area 6 is the run button. Clicking on the button will convert the user's workspace code into Python code and execute it. At the same time, a pop-up window will print out the running results of the program
- area 7 For the software setup button, click to save workspace to file, load file to current workspace, set software language, theme, and view current software version information and the version required by PyMycobot
area 8 for fast moving toolbar, which contains mybuddy control arm around the waist of the coordinate and Angle, speaking, reading and writing, and the user to select machine, serial port and baud rate (keep pace with the workspace of the initialization data) and then click the open button to connect the robot, and then click add and subtract Numbers coordinates from the Angle of control arm movements. Note:The Python button cannot run when Quick Move is enabled because the serial port is occupied. If you need to run Python code, please turn off quick Move first.
area 9 is the Python code area. Users can click to view the Python code corresponding to the building blocks in the workspace