UIFlow User Manual
Obtaining interface key
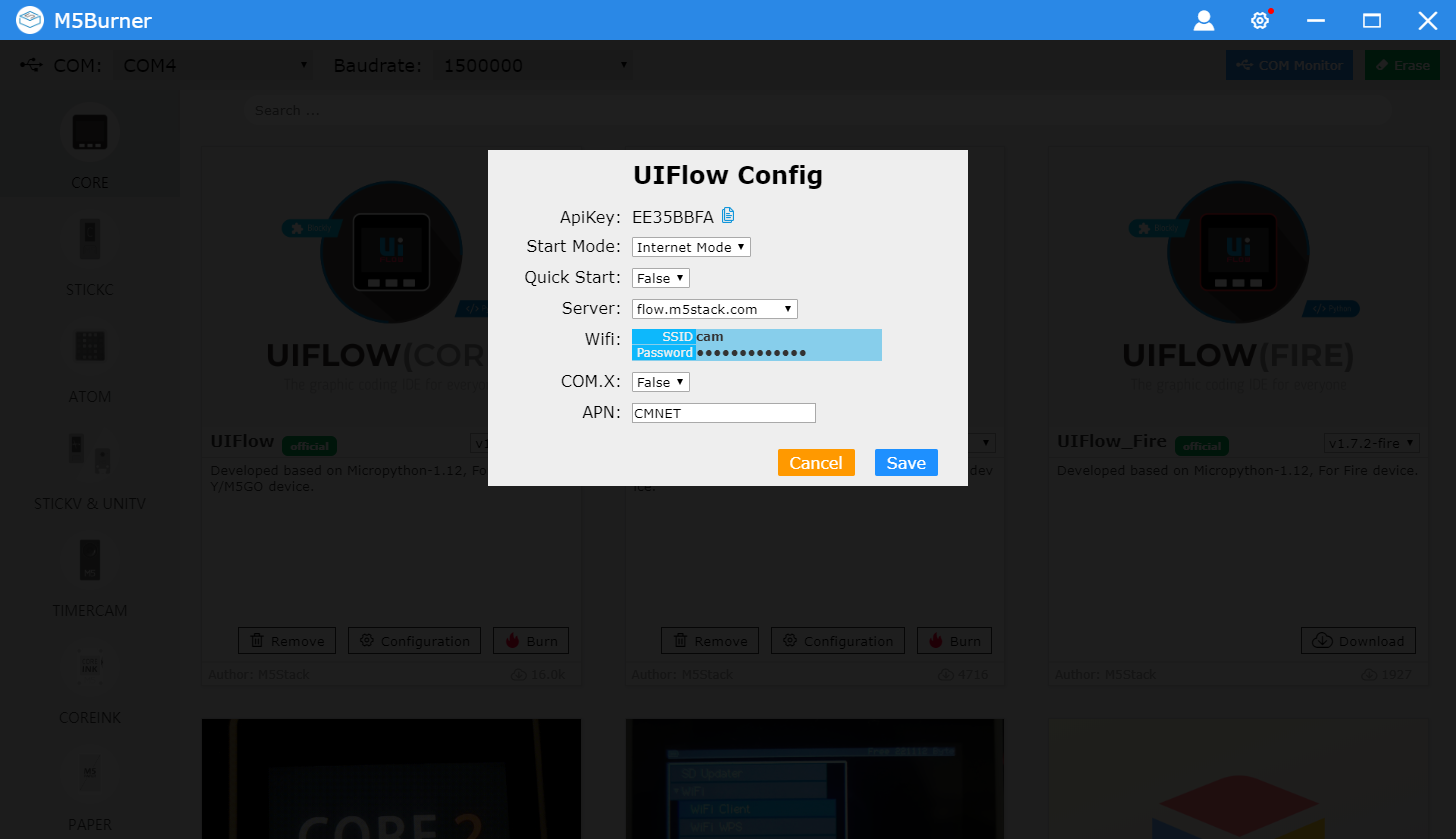
Connect the M5 device to the computer through a Type-C data cable, and
select the corresponding COM port. Click and check it. The information will be displayed in the configuration box (This is the credential for subsequent UIFlow communication); Configure as (After completing this configuration, the device will automatically restart and enter the online programming mode); for the description of other configuration items in the configuration box, refer to the configuration description below. configurationAPI KEYcopy and save APIKEYStart ModeInternete

M5 buring configuration description
If it is necessary to modify the configuration file, connect the M5 device to the computer through the Type-C data cable, select the corresponding COM, and click configuration to modify it.
APIKEY: Communication credentials of the M5 device during the use of UIFlow Web programming: Start enter the configurable mode: You can choose quick start to skip the start interface :server selection :configure Wifi SSID and password :choose whether to enable COMX. For LTE network (Please explain in detail), see COM network. LTE Tutorial ): configure COMX.LTE module access point. Start ModeQuick StartServerWifiCOMXThis function needs to stack COMX.LTE moduleAPN
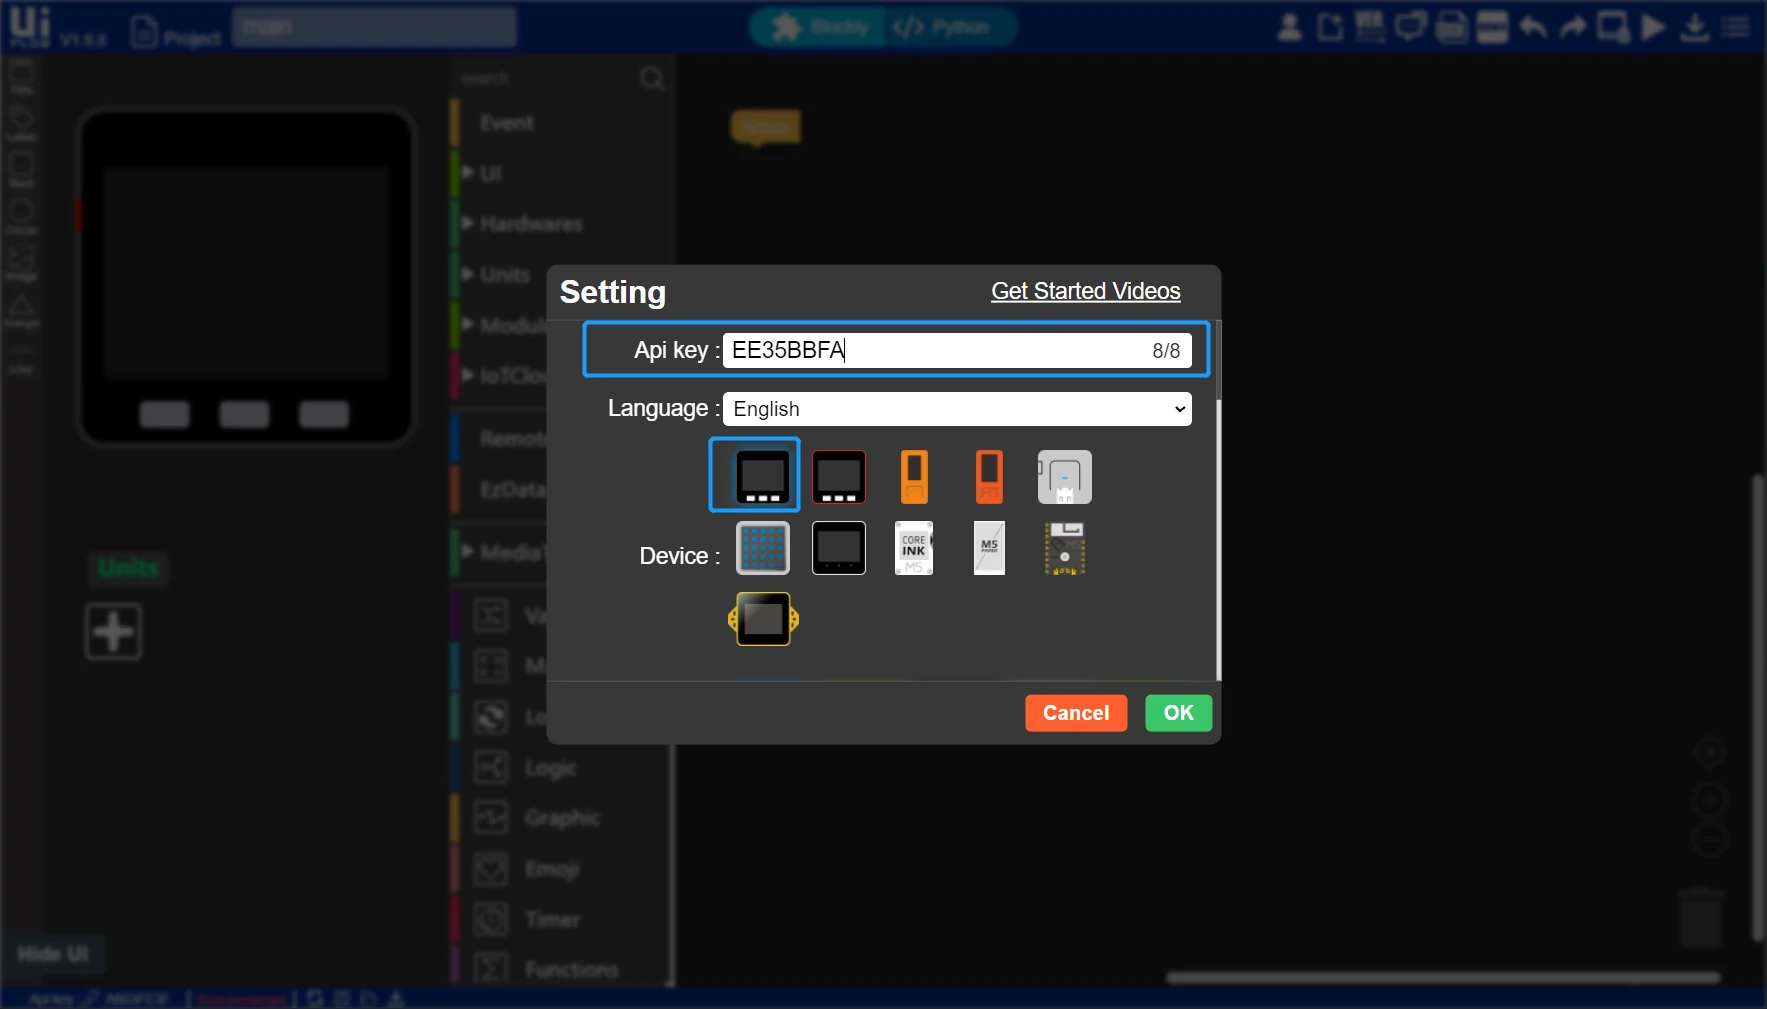
Interface key pairing
After configuring the device in the online programming mode, we need to establish a connection between the device and UIFlow through API KEY so that it can push programs for aspecified device. The user needs to visit flow.m5stack.com in the computer browser. After entering the UIFlow programming page, click the setting button in the menu at the upper right corner, and input the API KEY obtained by us in the previous step. Click confirm to save it, and wait for the prompt of successful connection.
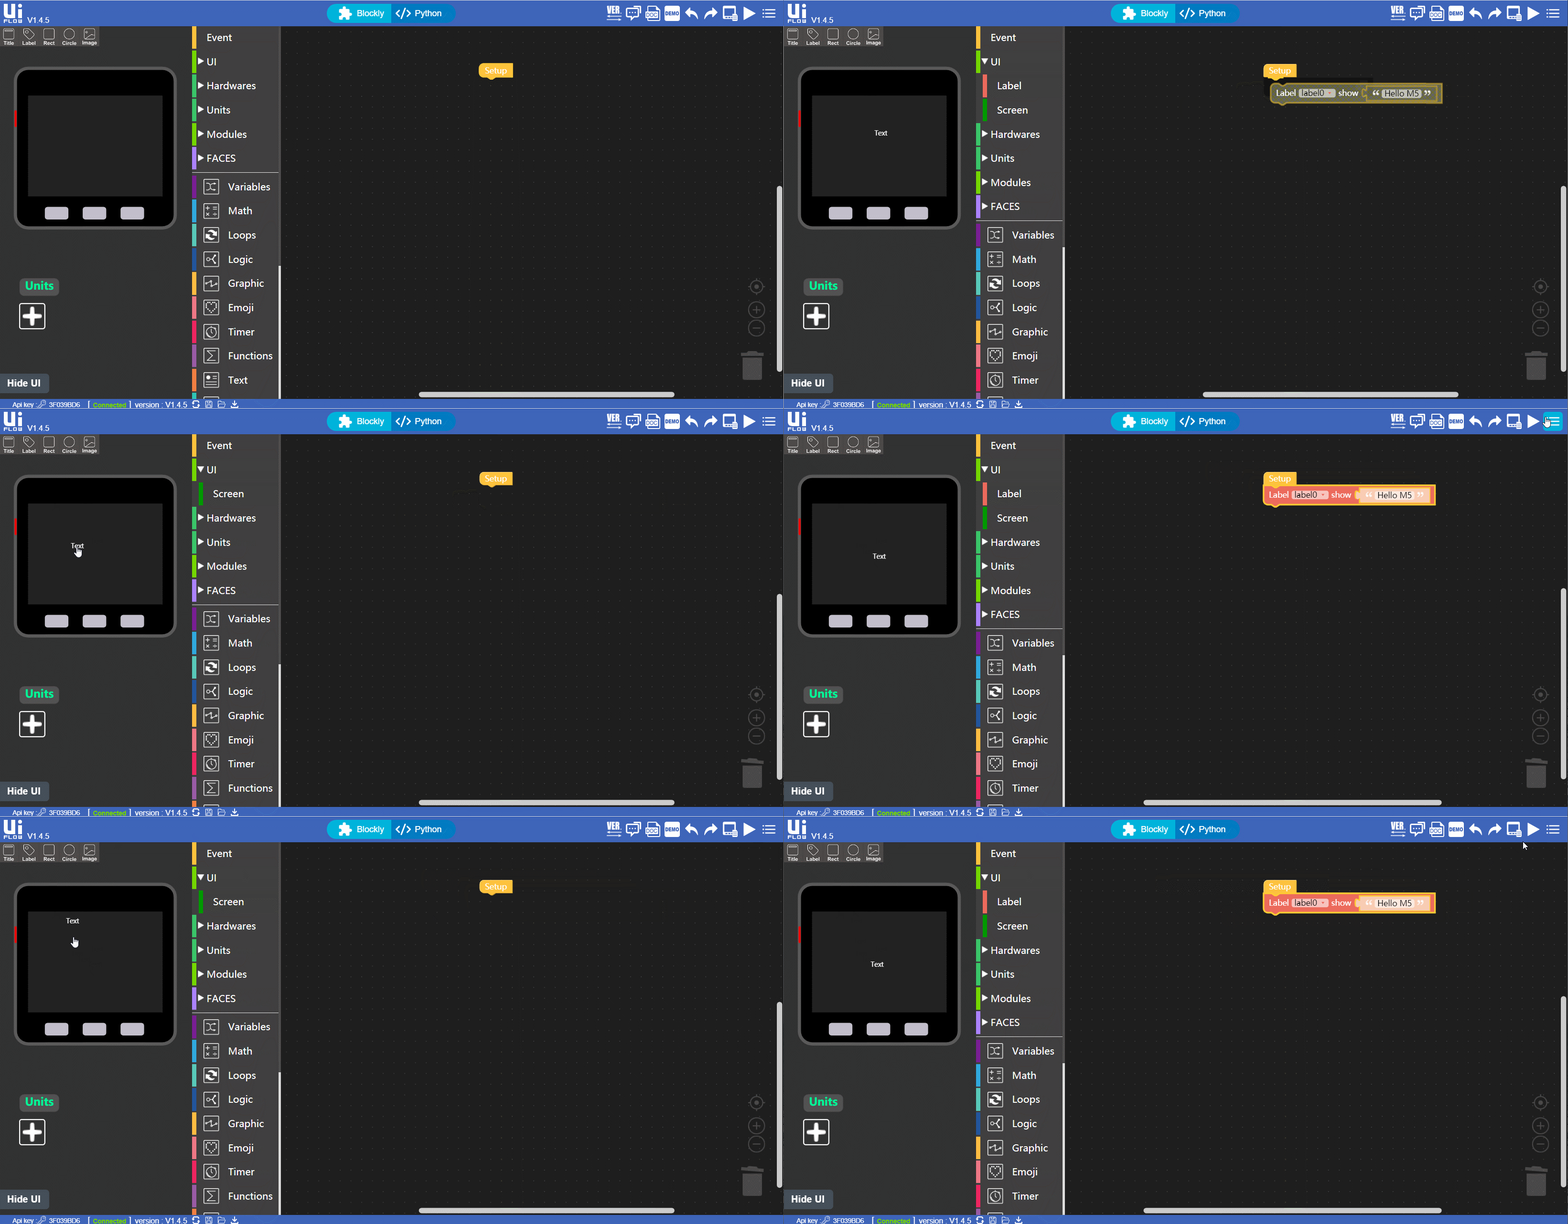
Hello M5
After completing the steps above, you can use UIFlow for programming. A simple program will be demonstrated below for you to drive the screen to display "Hello M5". (1. Place a label; 2. add a label block; 3. click the running button at the upper right corner)
Ruuning downloading program
Procedure: The button (triangle) in the online menu of UIFlow is running. After reset, the device will re-enter the online programming mode. The download button will send the current program to the device and configure it as. (If it is necessary to re-enter the programming mode at this time, refer to the mode switching description at the bottom of the file.) RunDownloadRunsingle testdownloadautomatically run on startup
UIFlow offline programming mode
UIFlow`` Desktop IDE is an offline version for ``UIFlow`` programmers. Its needs no network and can provide quick program pushing experience. According to your operating system, click the corresponding version of ``UIFlow``-Desktop-IDE to download it.
| Software version | Download link |
|---|---|
| UIFlow-Desktop-IDE_Windows | Download link |
| UIFlow-Desktop-IDE_MacOS | Download link |
| UIFlow-Desktop-IDE_Linux | Download link |
Unzip the downloaded zip file of UIFlow desktop IDE, and double-click it to execute this application. After starting the software, it will automatically check whether your computer has been installed with a USB driver (CP210X). If the driver has been installed, click "skip" to skip this step. When using the offline version of UIFlow for programming, you have to configure the device as follows: Press the button of the independent power supply to start the device; when a menu appears on the screen, press the right key on the panel quickly to enter an setting page; Use USB choose the corresponding port in the configuration box of UIFlow desktop IDE, and click the programming device to connect it. If such connection fails, try to change the data cable or insert/plug/change the port, and check whether the port is occupied. USB mode
Complementary description
Configuring wireless network for access point hotspot
M5 device supports the configuration of WiFi with a cellphone: Click the red power supply button at the left of the device to start it. After UIFlow Logo appears on the screen, press the test button at the right on the panel quickly to enter a "setting" page. Switch menu options up and down to this option with left and right buttons, press the middle button for a short time for selection, and then enter the AP hotspot WiFi configuration mode. After the device is skipped, a WiFi configuration page will be displayed. Follow the prompts to connect to the SSID hotspot via your cellphone or computer's WiFi, open your browser to access it and enter the WiFi information in the pop-up page to successfully configure network distribution (Note: special characters such as "space" are not allowed in the WiFi information). After successful configuration, the device will restart automatically and enter the online programming mode. Wi-Fi via AP192.168.4.1


