myAGV-Map Navigation
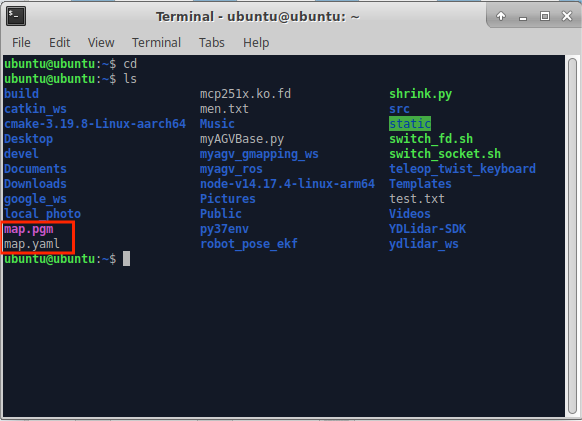
Previously we have built a spatial map and obtained two map files, map.pgm and map.yaml, in the home directory
Now let's see how to use the created map to navigate the car
1.Copy the map file to the corresponding location in the project folder
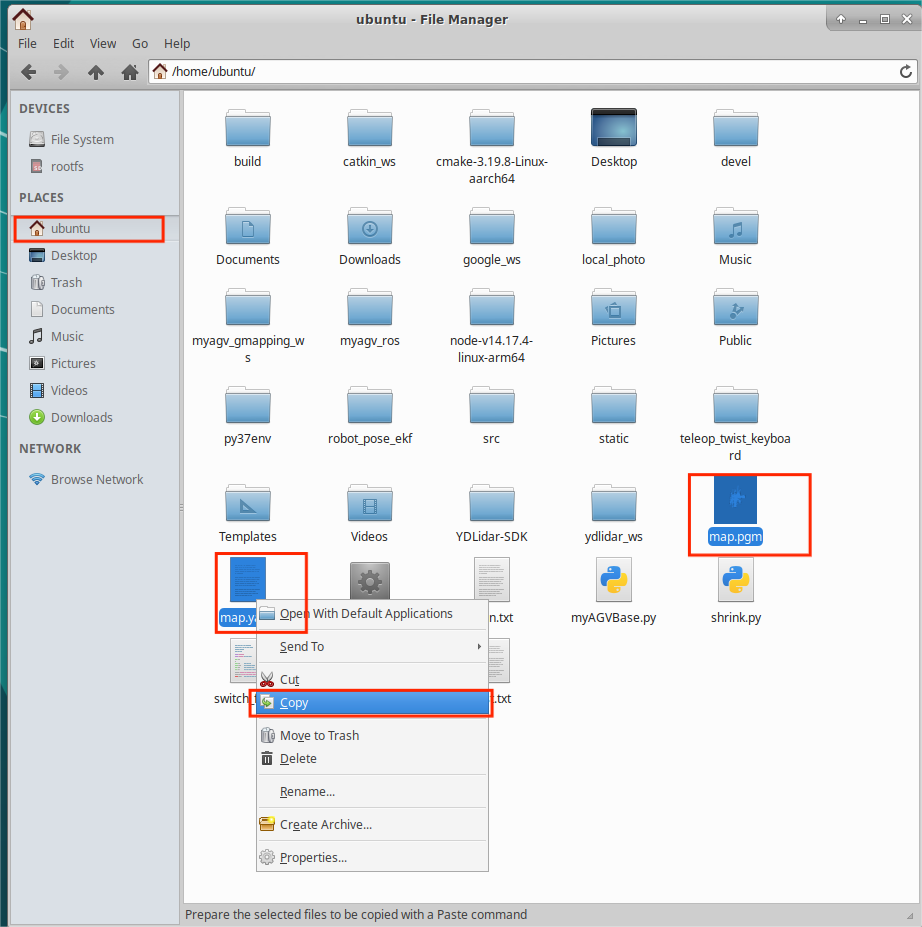
- Click on the File system icon on the desktop to open the file manager, click on "ubuntu" on the right to enter the /home/ubuntu directory.
- You can see that the map we created before is saved in this path, select these two files.
- Right-click and click Copy to copy these two files.
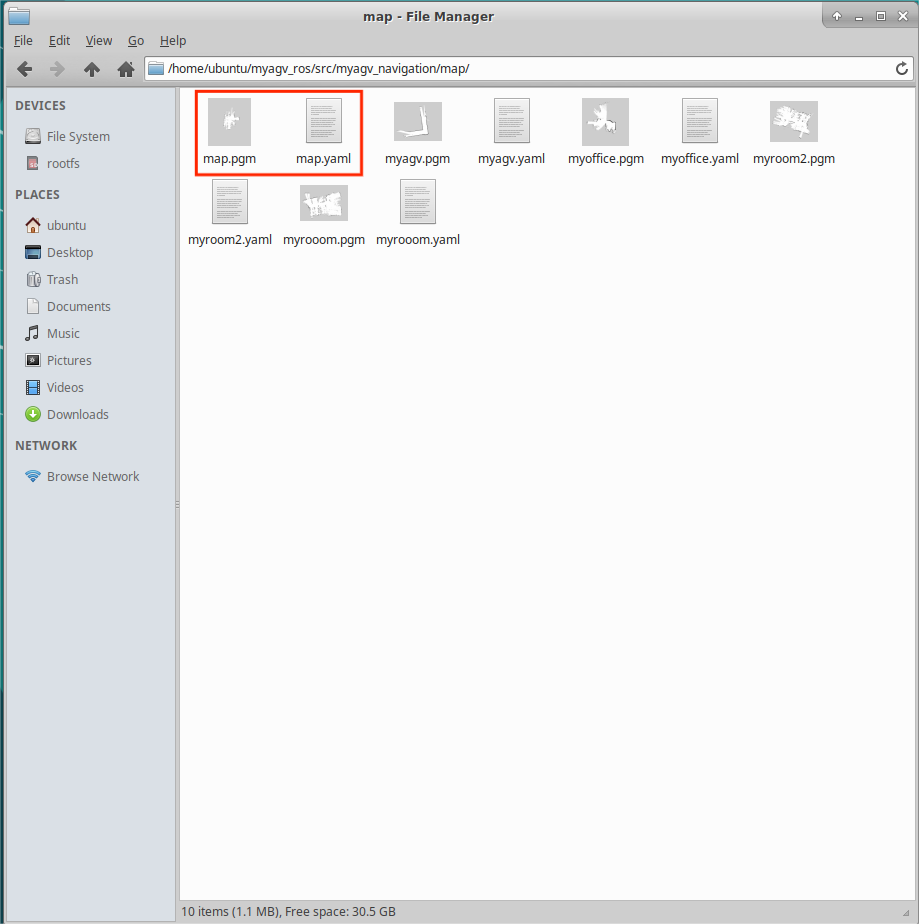
- Click the File system icon on the desktop to open another file manager and enter the following path, paste the map files you just copied into that path:
/home/ubuntu/myagv_ros/src/myagv_navigation/map/
2. Modify the launch file
- Click to open Visual Studio Code in the top left corner to open the code editor.
- Open the navigation_active.launch file in /home/ubuntu/myagv_ros/src/myagv_navigation/launch/ path.
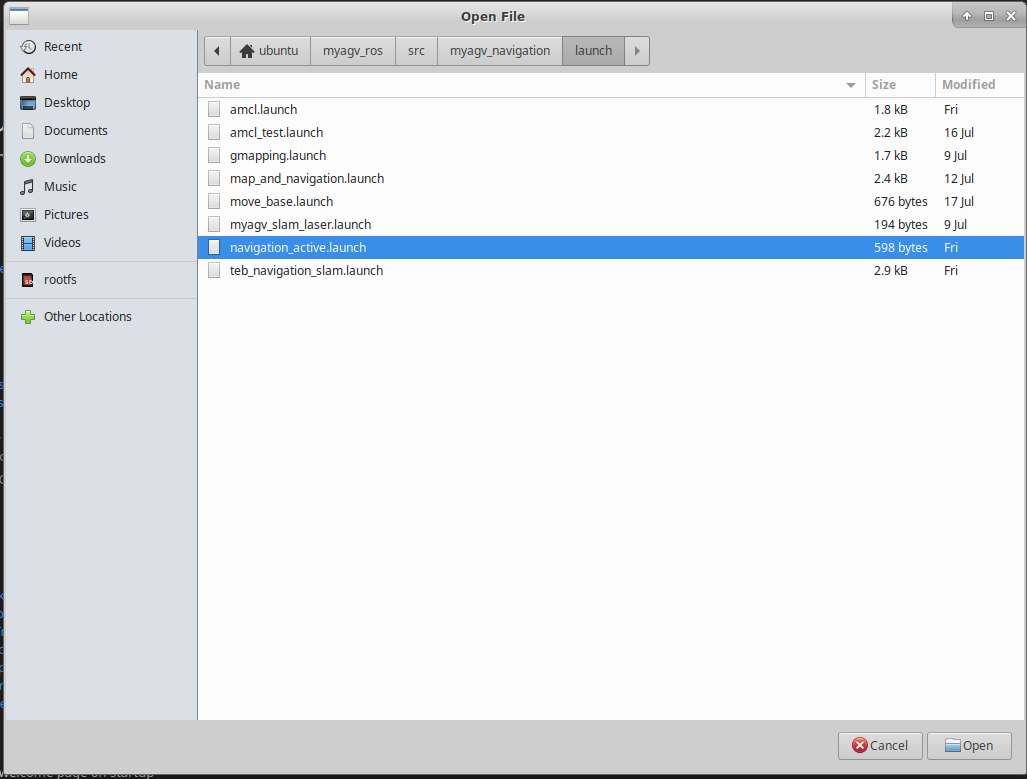
- Replace the myroom2.yaml in line 5 with our own map file name map.yaml.

- Save the modified file and exit (VScode is more memory intensive when running, it is recommended to close VScode after modifying the code, otherwise the running carsystem will be very laggy, you can also use vim and other lightweight editors.)
3.Run the launch file
After opening the car, open the console terminal (shortcut Ctrl+Alt+T) and enter the following command on the command line:
cd myagv_ros
roslaunch myagv_odometry myagv_active.launch
Open another console terminal (shortcut Ctrl+Alt+T),and type the following command:
roslaunch myagv_navigation navigation_active.launch
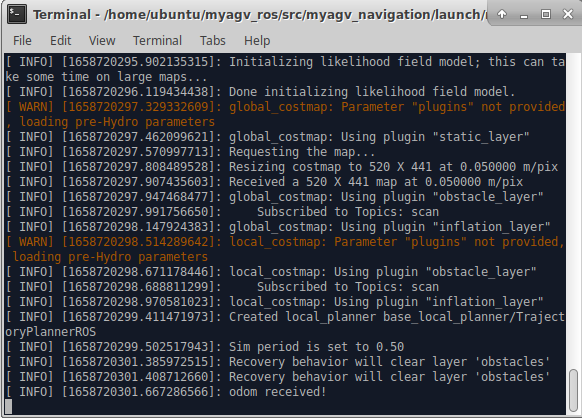
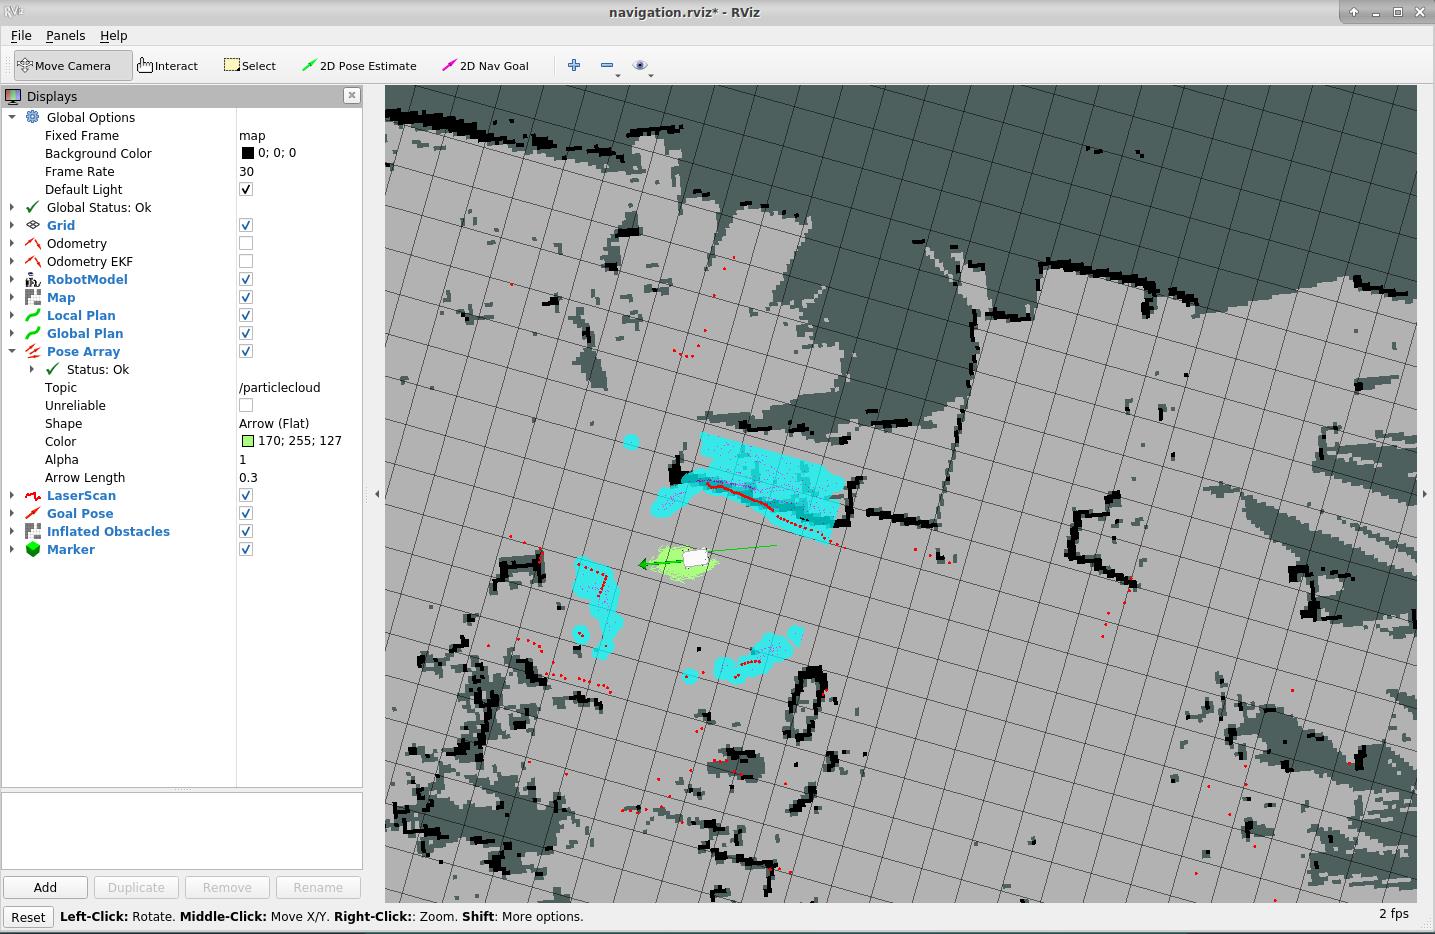
- You can see that an Rviz simulation window is opened.
Note: The initial position of the car is best placed at the starting position of the car when we build the map
If the car on the Rviz interface does not correspond to the actual car, click "2D Pose Estimate" on the top toolbar to adjust, so that the car on the Rviz interface and the realized car can correspond, and navigate after adjustment.
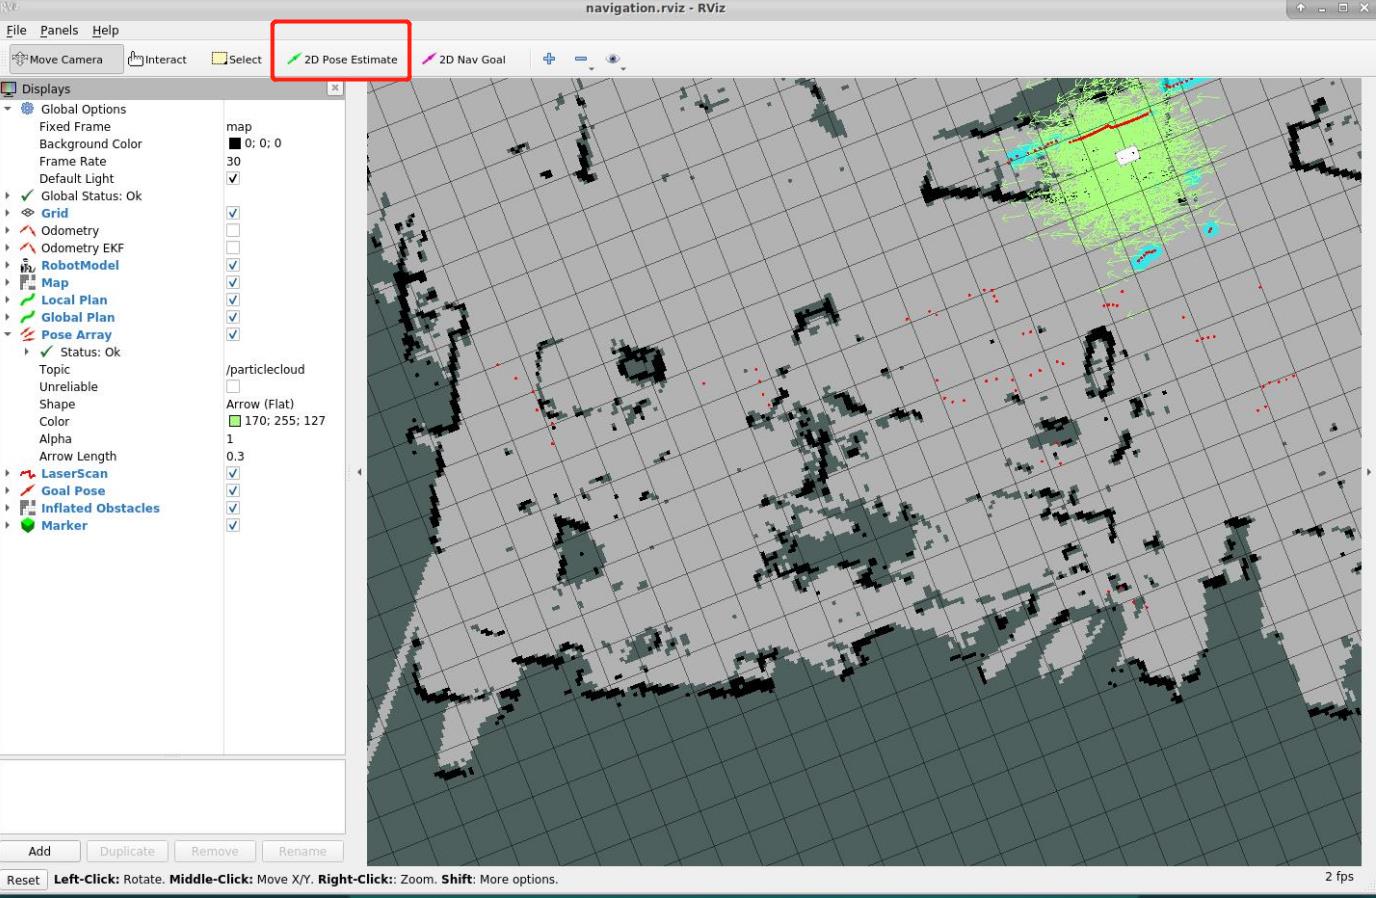
- Click on "2D Nav Goal" in the top toolbar.
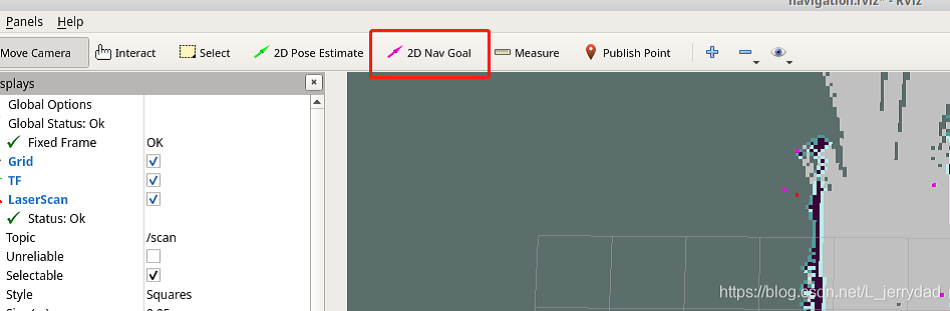
- Click on the point we want to reach on the map, the carwill start towards the target point, and you can also see in the rviz a planned path of the carbetween the starting point and the target point, the carwill move along the route to the target point.