Suit building
Installation video
1 Install the base
1.1 For the mechArm M5/Pi version of the robotic arm, first install the base of the robotic arm with M4X14 countersunk head screws.
1.2 Align the robotic arm with the holes and fix it with M3X12 Phillips screws.
1.3 Other robotic arm installation tutorials: align the base of the robotic arm with the hole at the bottom of myCobot Pi, and fix it with M3X12 Phillips screws, or install Lego keys on the base of the robotic arm.


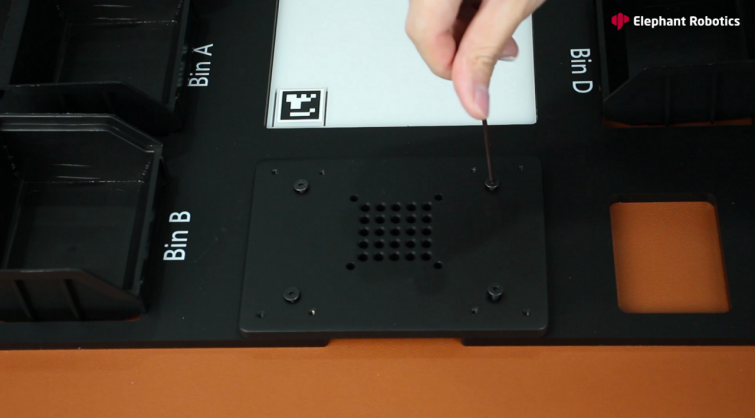
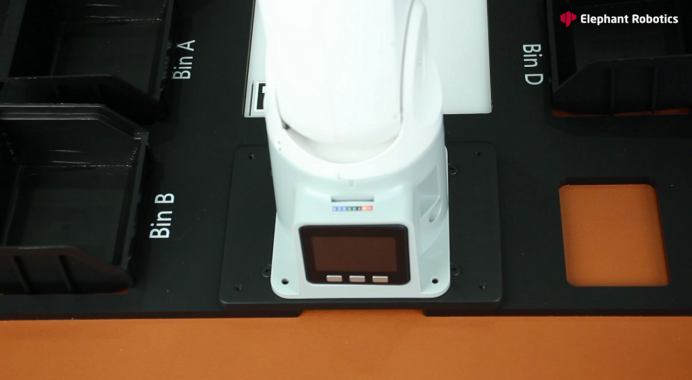
1.4 Put the installed machine on the acrylic bottom plate and fix it with M4X14 countersunk head hexagon socket head screws. Pay attention to simply fix the 4 screws first, and then tighten the screws one by one to avoid deviation of the hole position.

2 Install the camera bracket
2.1 Put the T-nut into the groove of the long profile, use the M5x8 pan head hexagon socket screw to install the corner code, and install 3 pieces in sequence。


2.2 Repeat the above to install the short profile corner code.
2.3 Put the T-nut into the groove of the profile, and install the short profile on the long profile with M5x8 pan head hexagon socket screws.
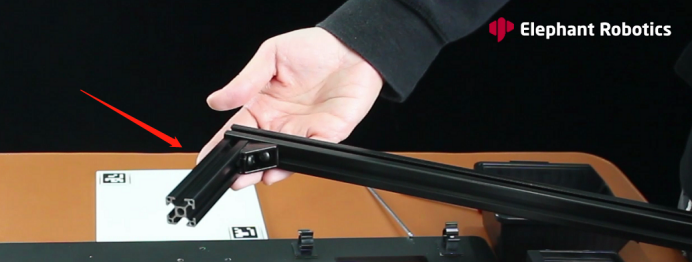
2.4 Align the assembled camera bracket with the holes on the acrylic board, and fix it with M5x10 pan head hexagon socket head screws. Pay attention to fix the three screws first, and then tighten the screws in sequence to avoid deviation of the holes.

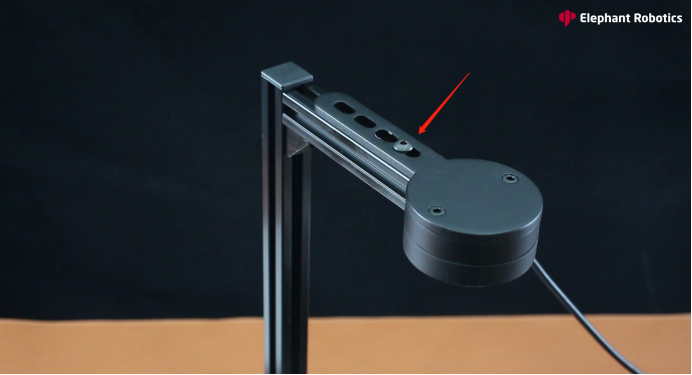
2.5 Put the T-nut first, and use the M5x10 pan head hexagon socket head screw to fix the camera, so it is installed.

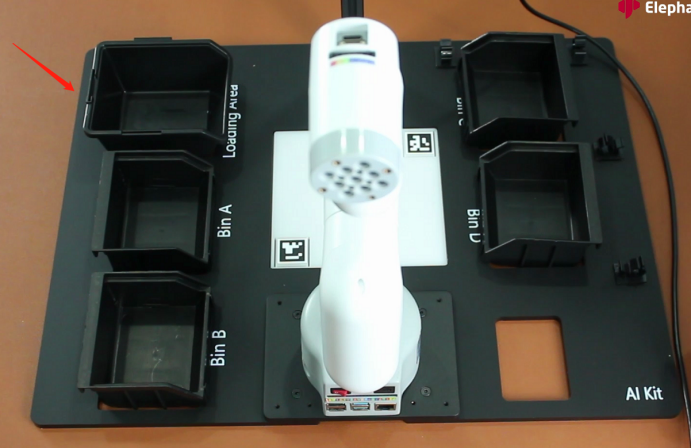
3 place parts
3.1 First tear off the yellow protective film, paste the QR code according to the video and place it.

3.2 Arrange large and small parts boxes.
4 Install the suction pump
4.1 The suction pump is filled with Lego keys and installed at the end of the robotic arm.
4.2 The Grove port is connected to the suction pump. According to the pin definition, the other end is connected to GND, 5V, 21, 22 of the Raspberry Pi in turn; the M5 version is connected to GND, 5V, 2, 5.

5 fixed routing
5.1 The self-adhesive cable clip is pasted on the acrylic base plate according to the position of the camera cable.

5.2 Use the black velcro to fix the cable of the camera.
5.3 Put the wire into the wire clamp to fix it.
5.4 Use the white Velcro to fix the air tube of the suction pump.
5.5 Finally put the wooden blocks, the overall assembly is complete, and you can start using it.
