1 Windows Environment Build
First of all, it needs to be clear that all case experiments are implemented based on python+opencv+pymycobot, so when using the M5 robotic arm, you need to use Mystudio to burn ATOM firmware and M5Stack-basic firmware on the head and bottom of the robotic arm respectively.
Usage environment: Windows 10 or Windows 11, Python3+OpenCV+pymycobot, Git
Applicable devices: mypalletizer 260 M5
1.1 Install Python+pymycobot
pymycobot is a Python package for serial communication with myCobot, supporting Python2, Python3.5 and later versions.
Before using pymycobot to control the robotic arm, you need to build a Python environment. For the specific building process, please refer to Pyhton Environment Build 章节。
1.2 Install OpenCV
OpenCV-Python is a Python-based library designed to solve computer vision problems. Before installation, make sure that the Python environment has been set up.
Open a console terminal (shortcut key Win+R, enter cmd to enter the terminal), enter the following command:
# The version numbers of the two need to be consistent, and version 4.6.0.66 is installed here
pip install opencv-python==4.6.0.66
pip install opencv-contrib-python==4.6.0.66


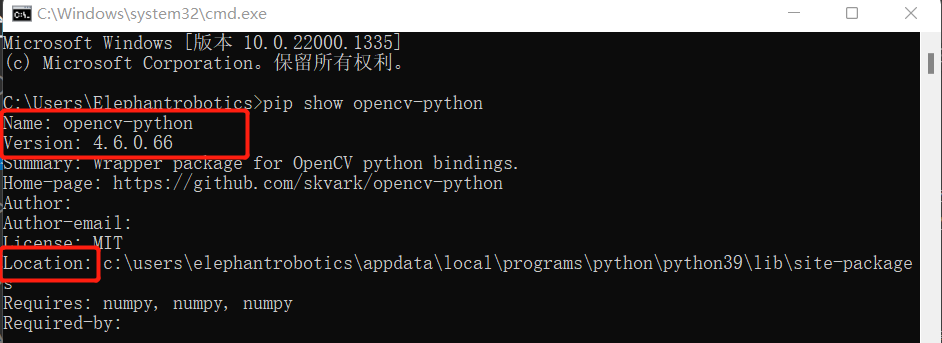
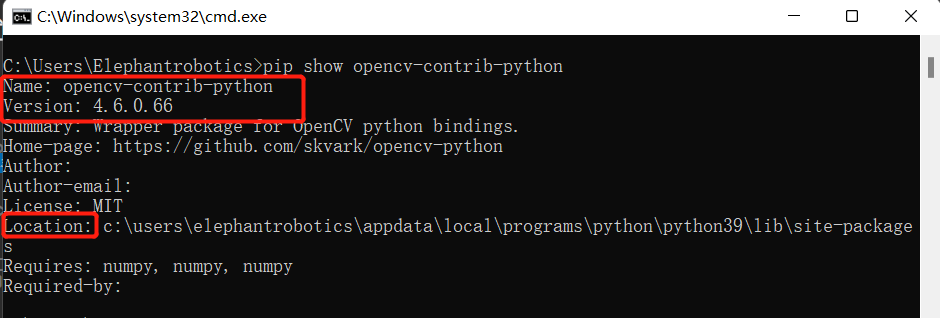
安装成功后,可通过下面的命令查看具体安装的版本以及安装位置:
# 也可查看其他python库  格式:pip show 库名称
pip show opencv-python
pip show opencv-contrib-python
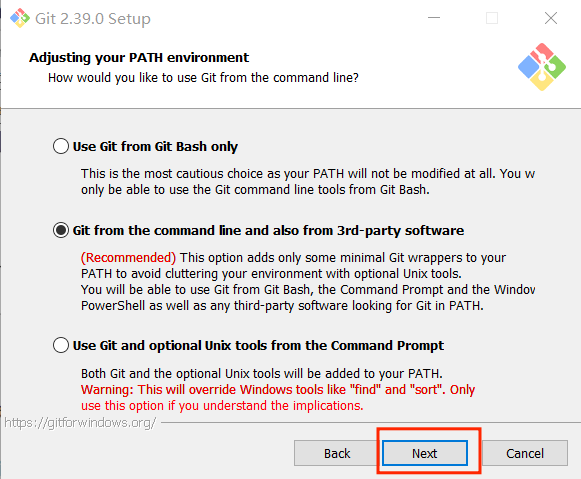
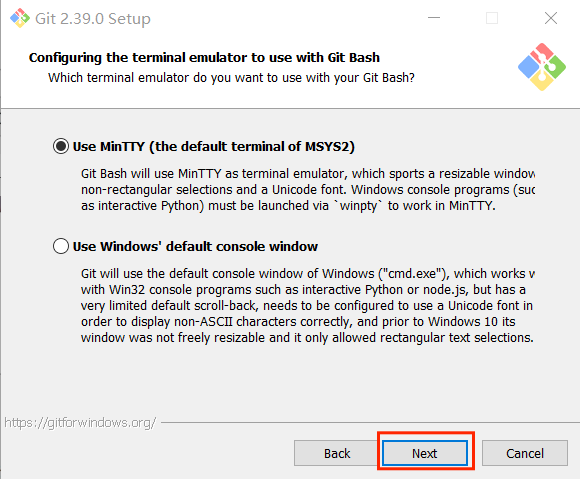
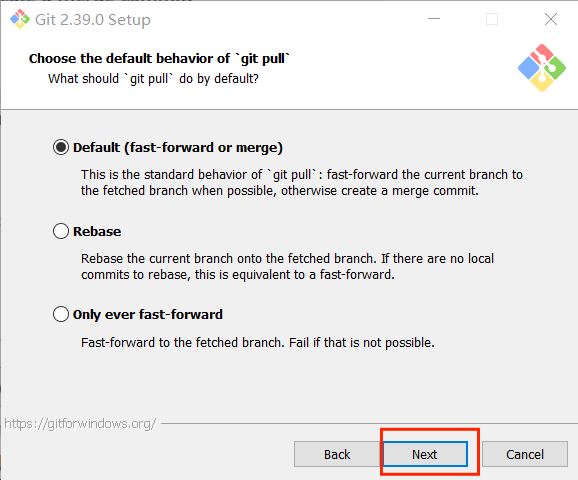
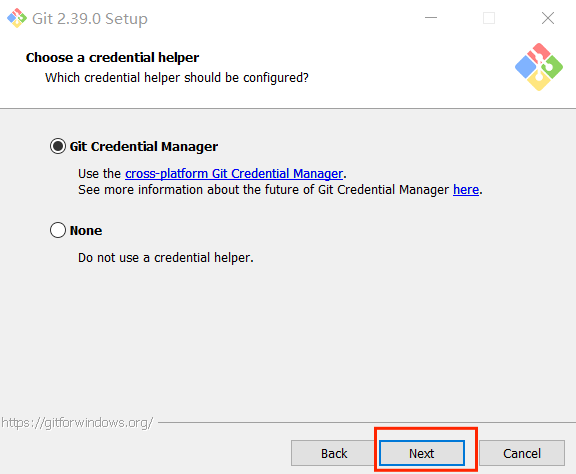
1.3 Install Git
Git is an open source distributed version control system for effective and high-speed processing of project version management from small to very large.
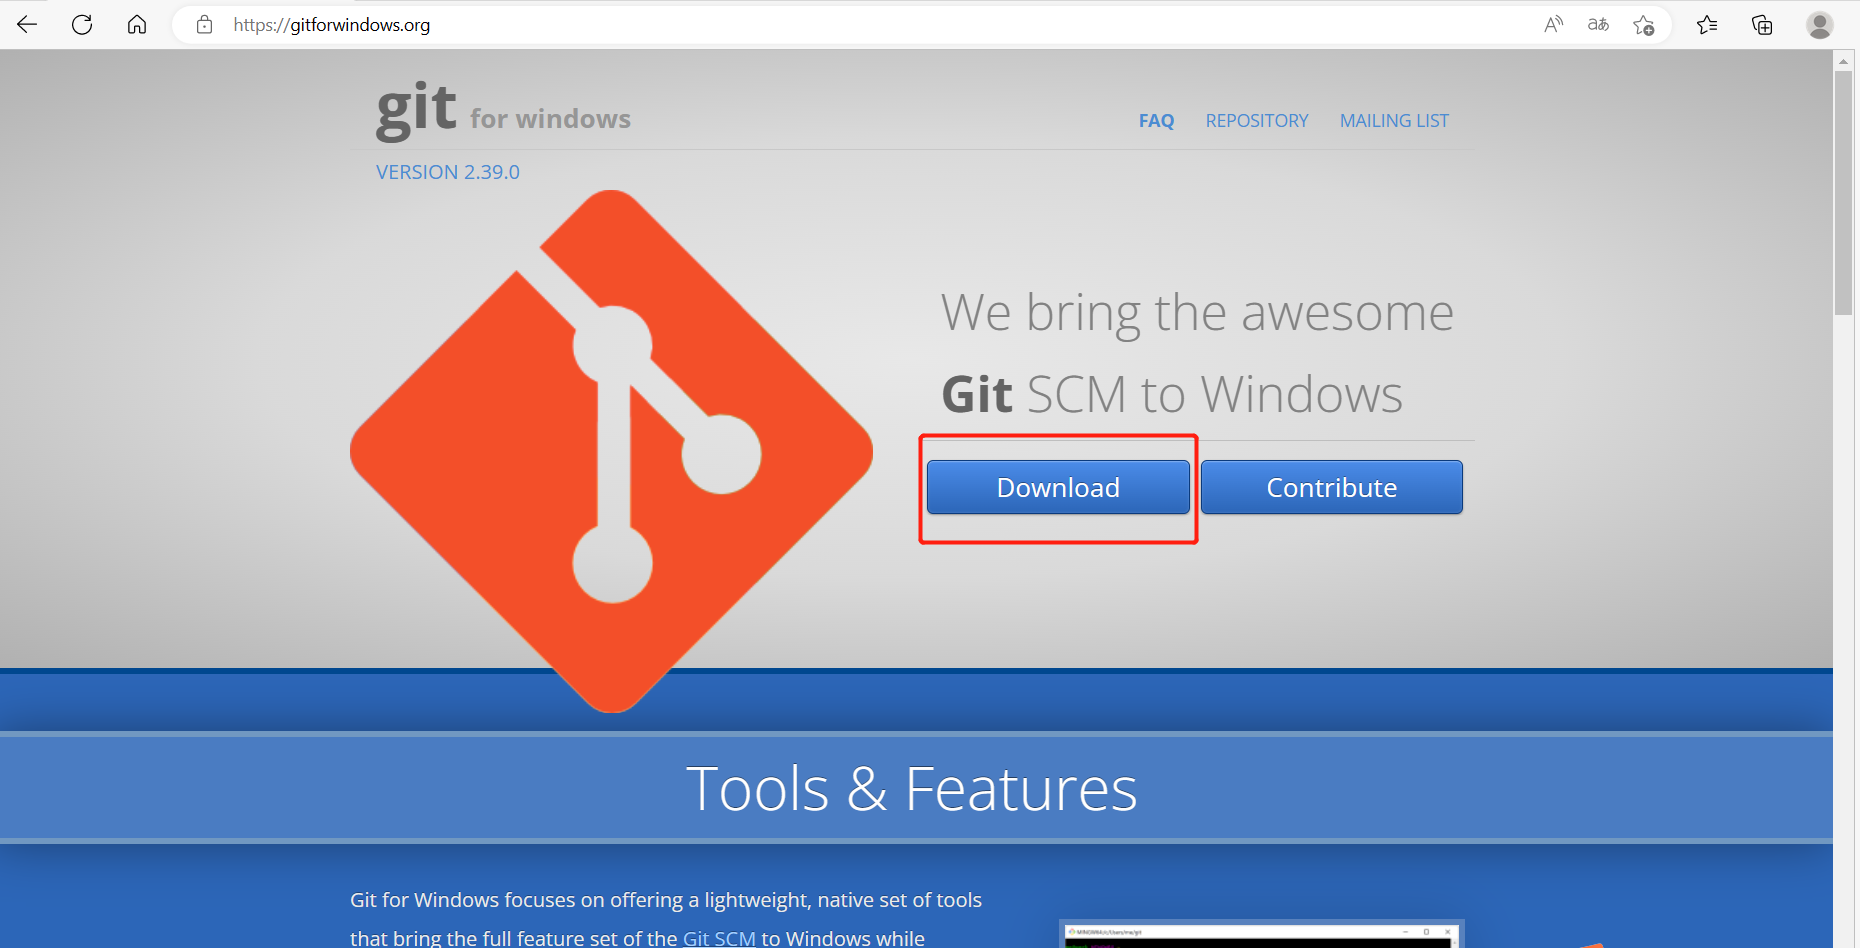
Git official download address: https://gitforwindows.org/
Click the
Downloadoption to start downloading Git
- Double-click the downloaded exe file to install

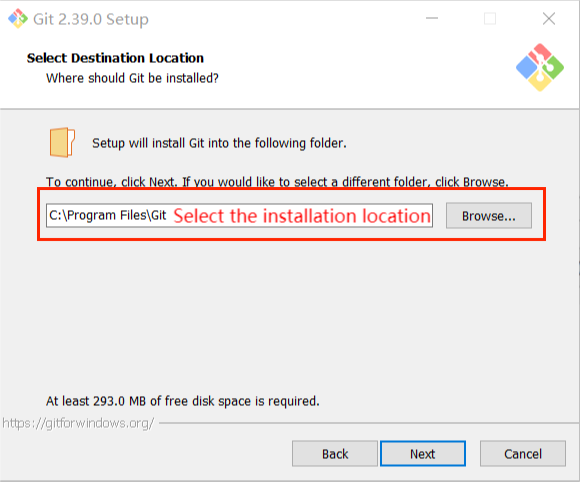
- Select the installation location, the default is under the C drive, if you don’t want to put it under the C drive, you can change the location. After selecting the installation location, click next.
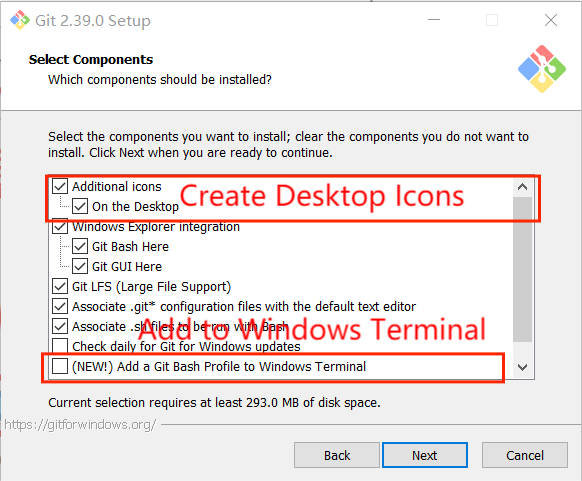
- By default, no icon will be created on the desktop, and a new feature has been added, adding GItBash to the Windows terminal, it is recommended to check it.
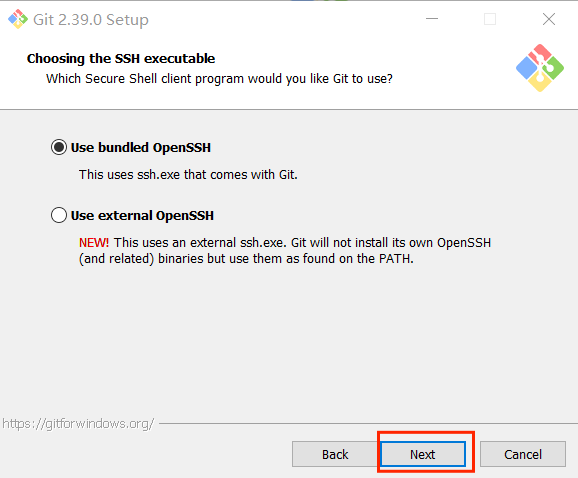
- The next step is the default, just select Next.
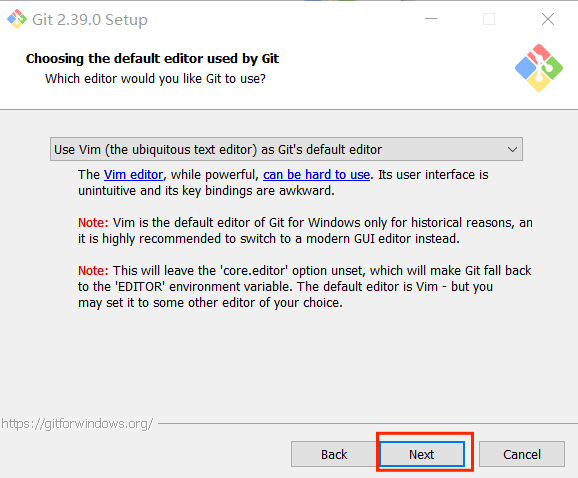
- Choose a default editor, the default is Vim (Linux), and there is Notepad inside, I choose to use Vim
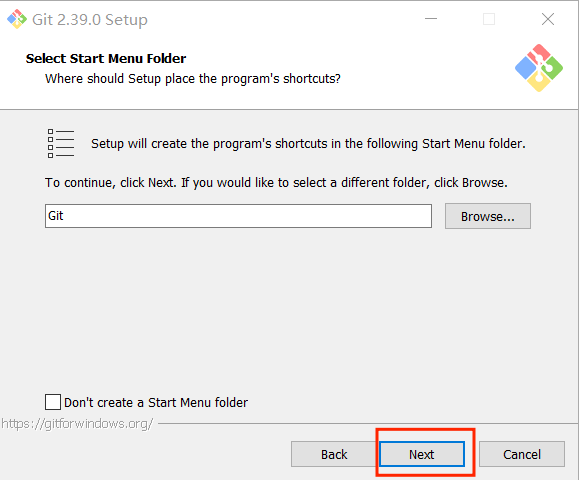
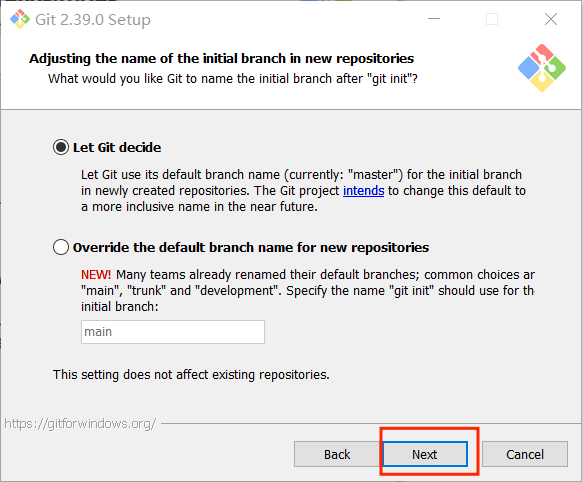
- The default name (master) after Git creates a branch. If there is no special default setting, click next.
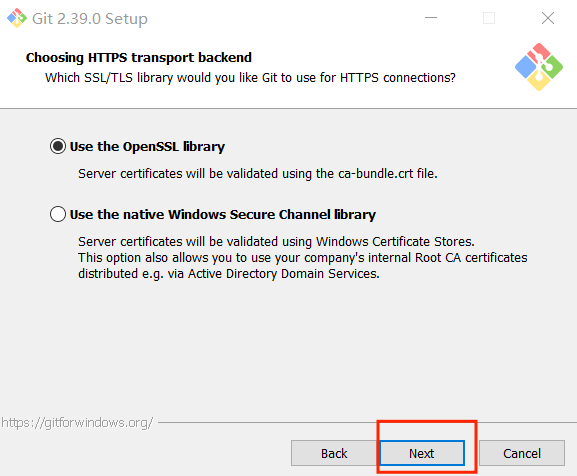
- The next step is the default, just select Next.
- The next step is the default, just select Next.
- The next step is the default, just select Next.
- The next step is the default, just select Next.
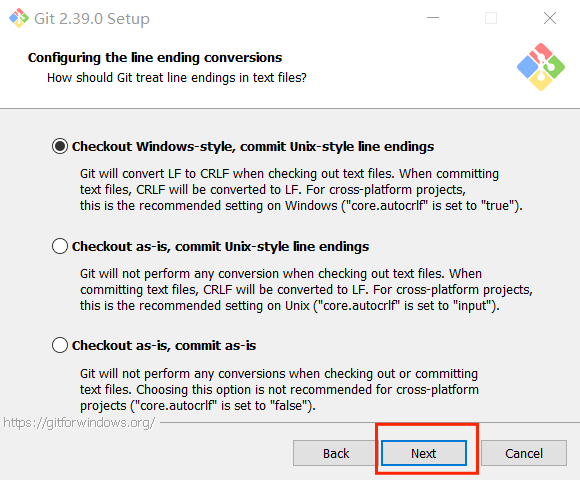
- The next step is the default, just select Next.
- The next step is the default, just select Next.
- The next step is the default, just select Next.
- The next step is the default, just select Next.
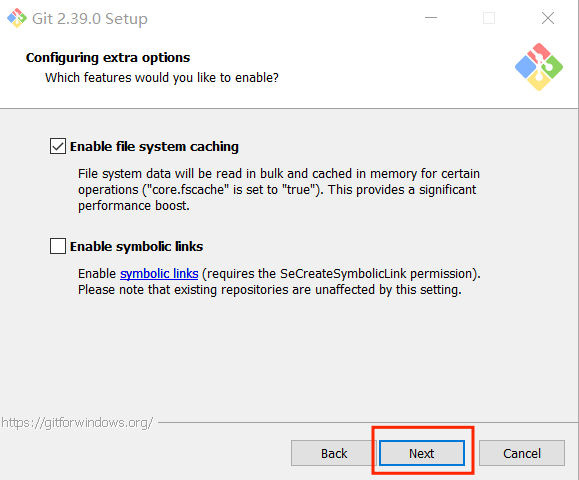
- Additional configuration options are not selected by default, you can check these two boxes, support (node, python although there are still bugs) and then choose install.
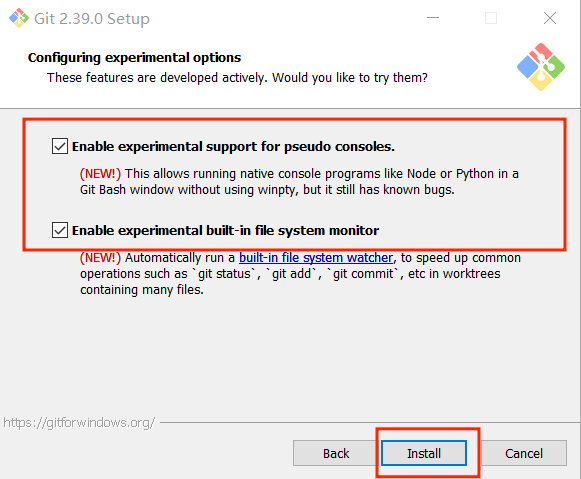
- After the installation is complete, click FInish to complete the installation.

checking
Open a console terminal (shortcut key Win+R, enter cmd to enter the terminal), and enter the following command to view the Git version information:
git --version

You need to use git to download the aikit_V2 package in the future. For the use of git, please refer to the link below:
1.4 aikit_V2 Install
aikit_V2 is launched by ElephantRobotics, which is an artificial intelligence kit V2.0 package adapted to its desktop robotic arm.
project address: https://github.com/elephantrobotics/aikit_V2
- 1 Double-click the
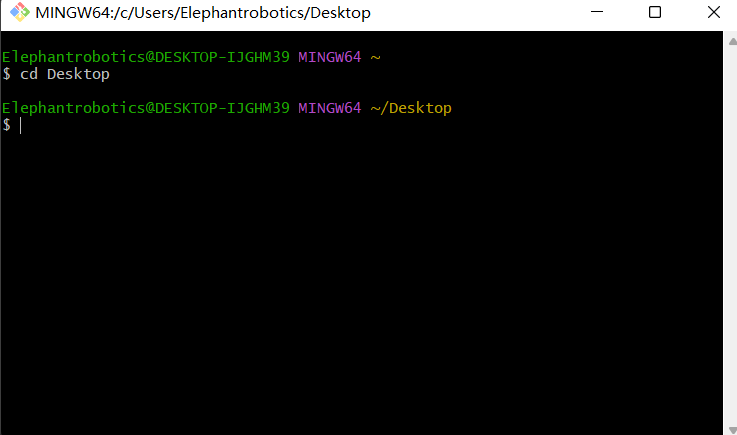
Git Bashicon on the desktop to enter the Git terminal.

- 2 Enter the following command in the Git terminal:
cd Desktop
git clone https://github.com/elephantrobotics/aikit_V2.git
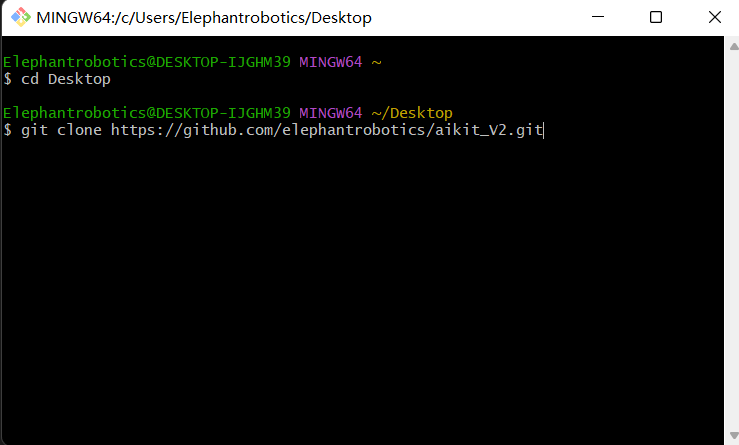
Then the aikit_V2 folder will appear on the desktop.

At this point, the Windows environment is built.
2 Raspberry Pi Environment Construction
Since the Raspberry Pi version has a built-in Ubuntu 20.04 system, there is no need to build an environment.
- Applicable devices: myCobot 280 Pi、mechArm 270 Pi
2.1 Install OpenCV
Open a console terminal (shortcut key Ctrl+Alt+T), enter the command:
# The version numbers of the two need to be consistent, and version 4.6.0.66 is installed here
pip install opencv-python==4.6.0.66
pip install opencv-contrib-python==4.6.0.66
2.2 aikit_V2 Install
aikit_V2 is launched by ElephantRobotics, which is an artificial intelligence kit V2.0 package adapted to its desktop robotic arm.
Applicable devices: myCobot 280 Pi、mechArm 270 Pi
project address: https://github.com/elephantrobotics/aikit_V2
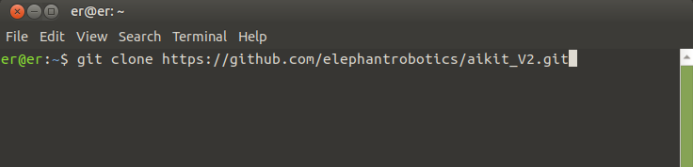
- 1 Open a console terminal (shortcut key Ctrl+Alt+T), enter the command:
git clone https://github.com/elephantrobotics/aikit_V2.git
- 2 Then under the main directory
/home/er, there will be a folder namedaikit_V2.
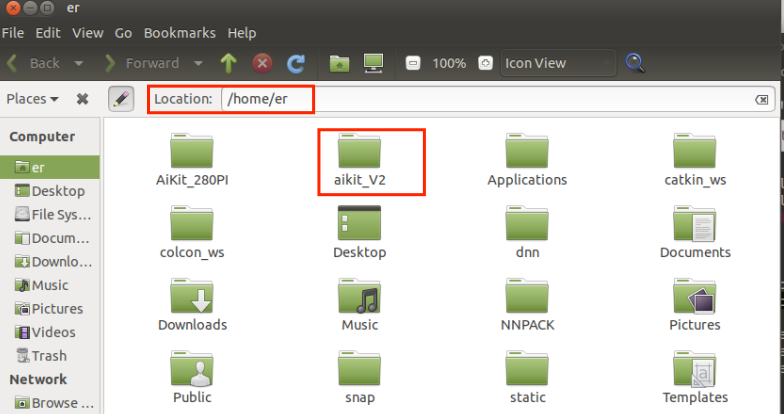
So far, aikit_V2 has completed the installation.
2.3 mycobot_ros Install and update
mycobot_ros is a ROS package launched by ElephantRobotics that is suitable for all types of desktop robotic arms. It also integrates the artificial intelligence suit V2.0 program package.
Applicable devices: myCobot 280 Pi
project address: https://github.com/elephantrobotics/mycobot_ros
Click the ROS1 Shell icon on the desktop or the corresponding icon in the lower bar of the desktop to open the ROS1 environment terminal:


Then enter the following command:
cd ~/catkin_ws/src  # Go to the src folder in the workspace
# Clone the code on github
git clone https://github.com/elephantrobotics/mycobot_ros.git
cd ..       # return to workspace
catkin_make # Build the code in the workspace
source devel/setup.bash # Add environment variables
Note: If the mycobot_ros folder already exists in the /home/er/catkin_ws/src (equivalent to ~/catkin_ws/src) directory, you need to delete the original mycobot_ros before executing above command.