Note: This function must be used on the same network. For example, both the server and the client use the same mobile hotspot or the same LAN WiFi
Start the server
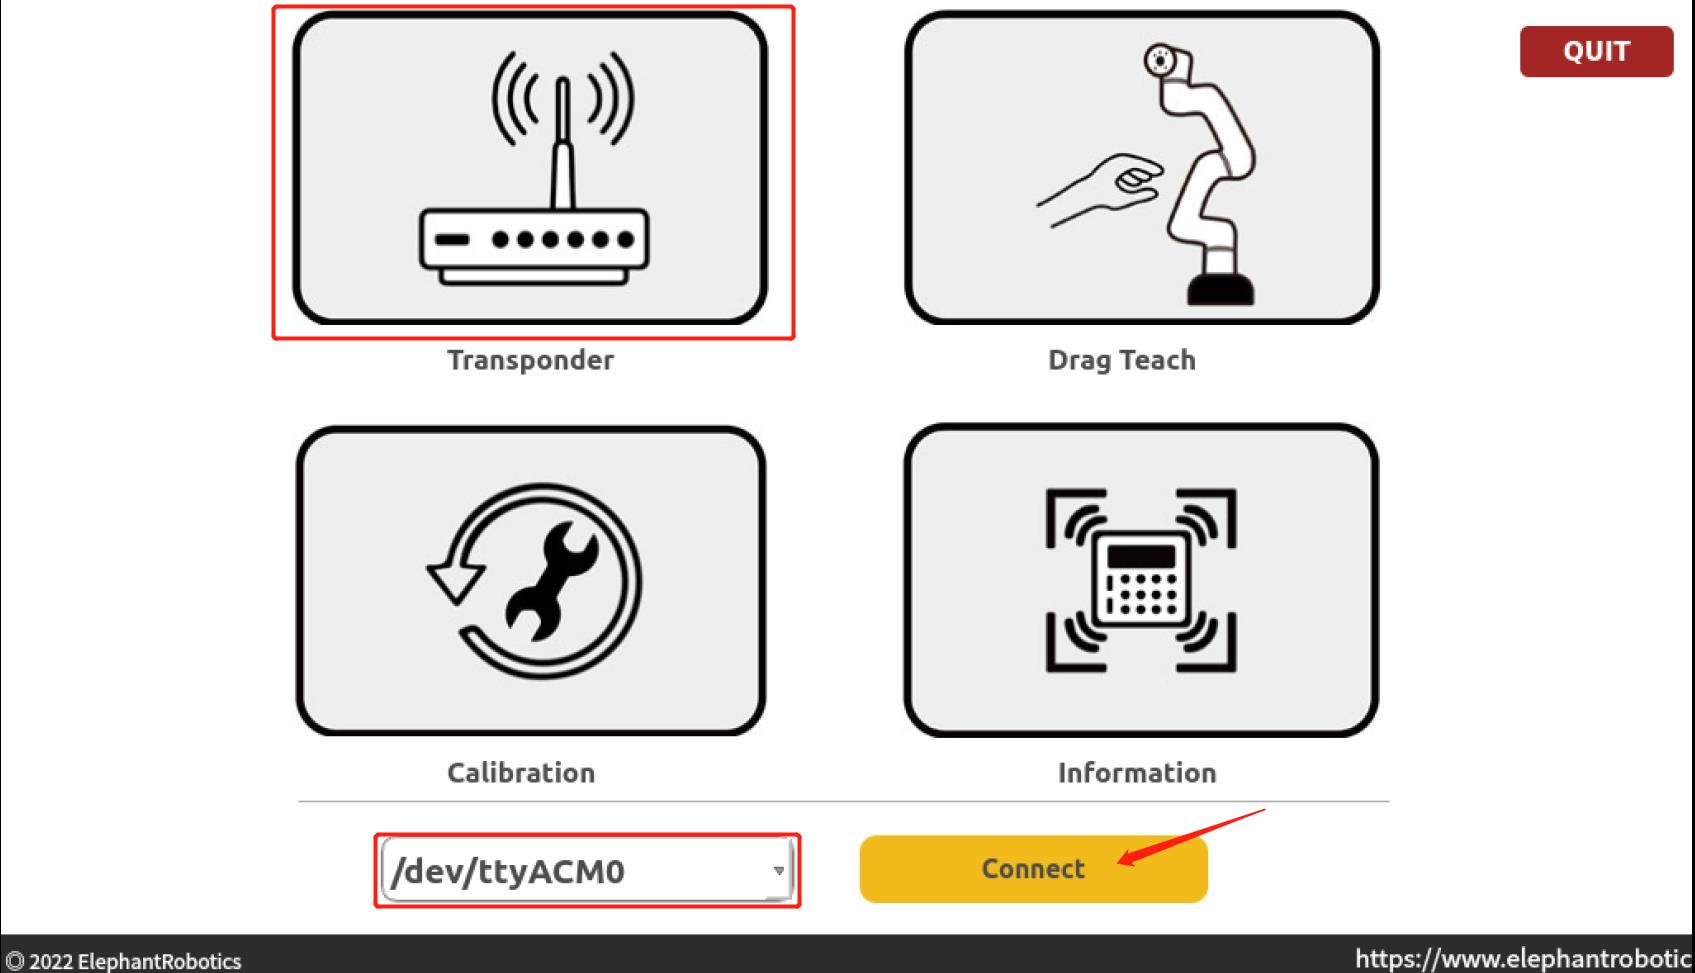
1.Double click to open this software on the desktop

2.Select Transponder, the port is /dev/ttyACM0, click Connect
3.Select "Wlan Socket"

4.Click "OPEN" to open the server
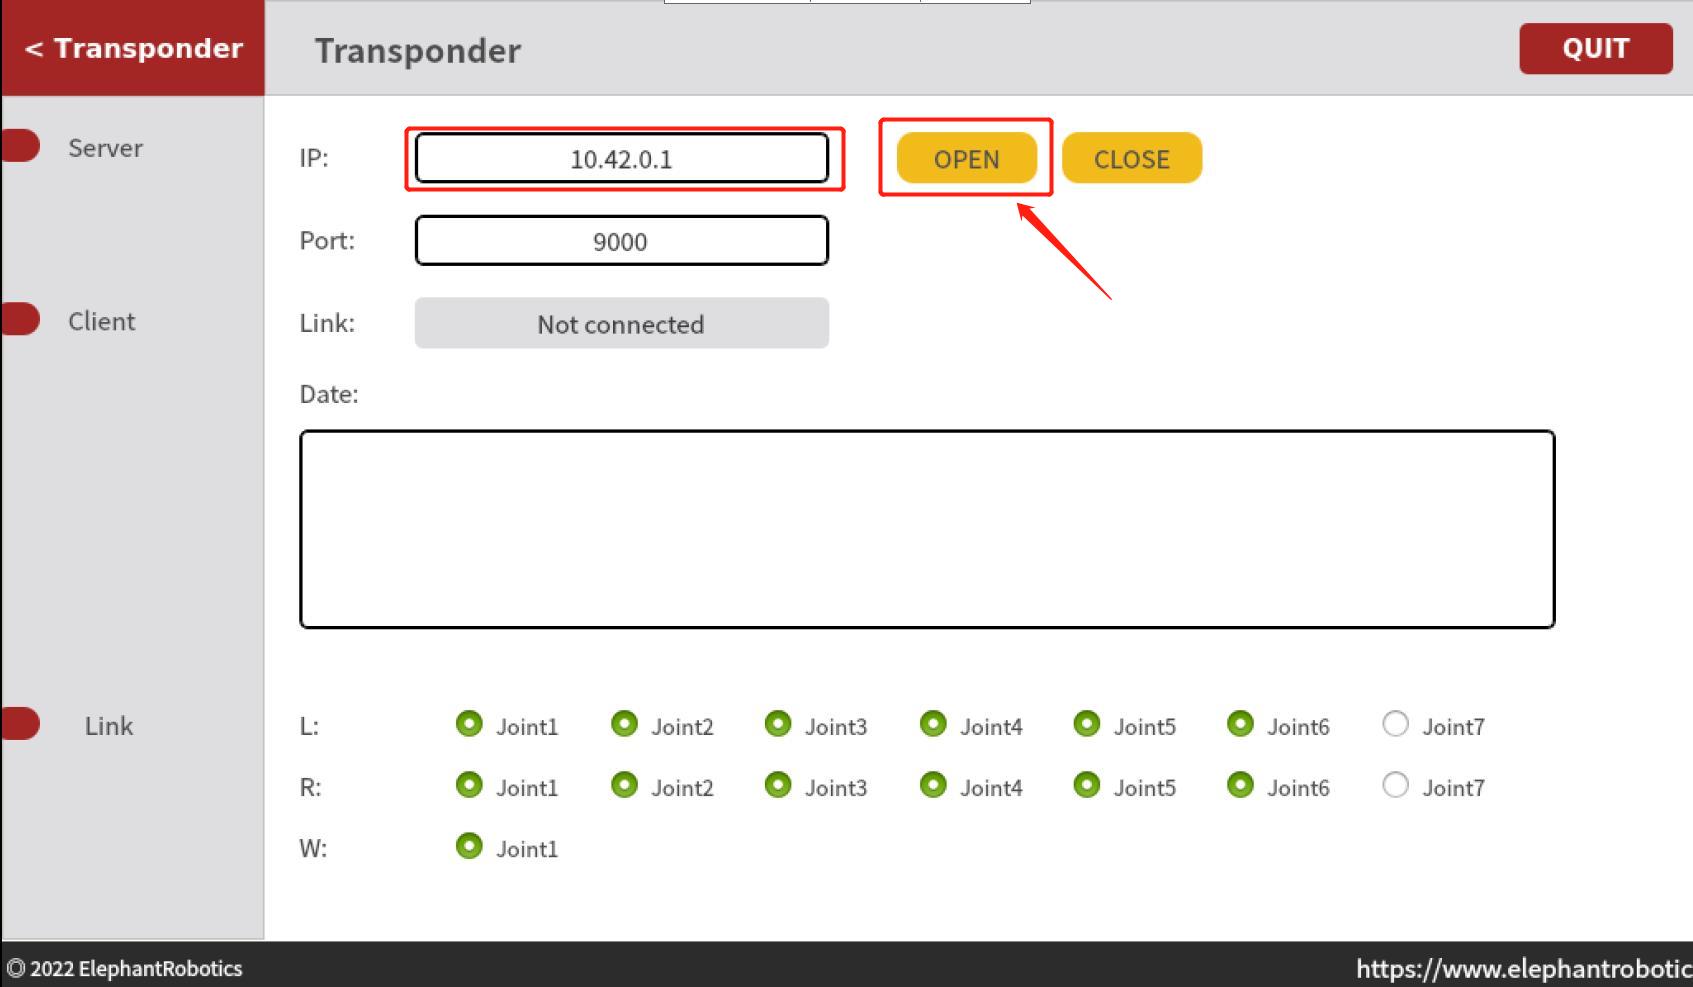
If the client connects to the server successfully, "Connected" will be displayed on the page and data will be received:

Note: The IP in the server is not unique and can be determined based on the actual network connected by the robot arm.
Client connection
Note: Ensure that the remote PC has completed the ROS environment building. For details, please refer to 12.1.2 Environment Building
Start ROS node
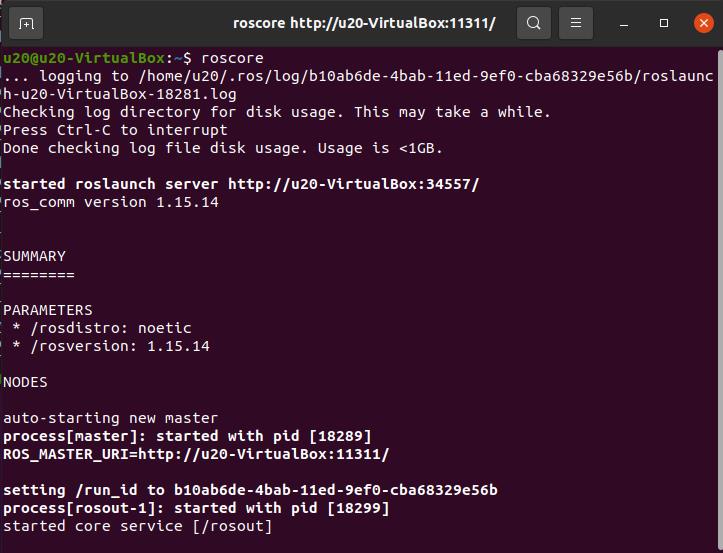
To start a ROS system, you need a ROS Master, or node manager. You can start the ROS Master by entering the roscore command at the terminal. Open a console terminal (shortcut key: Ctrl+Alt+T) and run the following command on the terminal:
roscore
If the following information is displayed, the ROS node is successfully started
Note: roscore is required as the first step before starting the ros node.
1 Slider Control
Open a console terminal (shortcut key: Ctrl+Alt+T) and run:
roslaunch mybuddy_socket slider_control.launch
rviz and a slider component will be opened, and you will see the following interface:
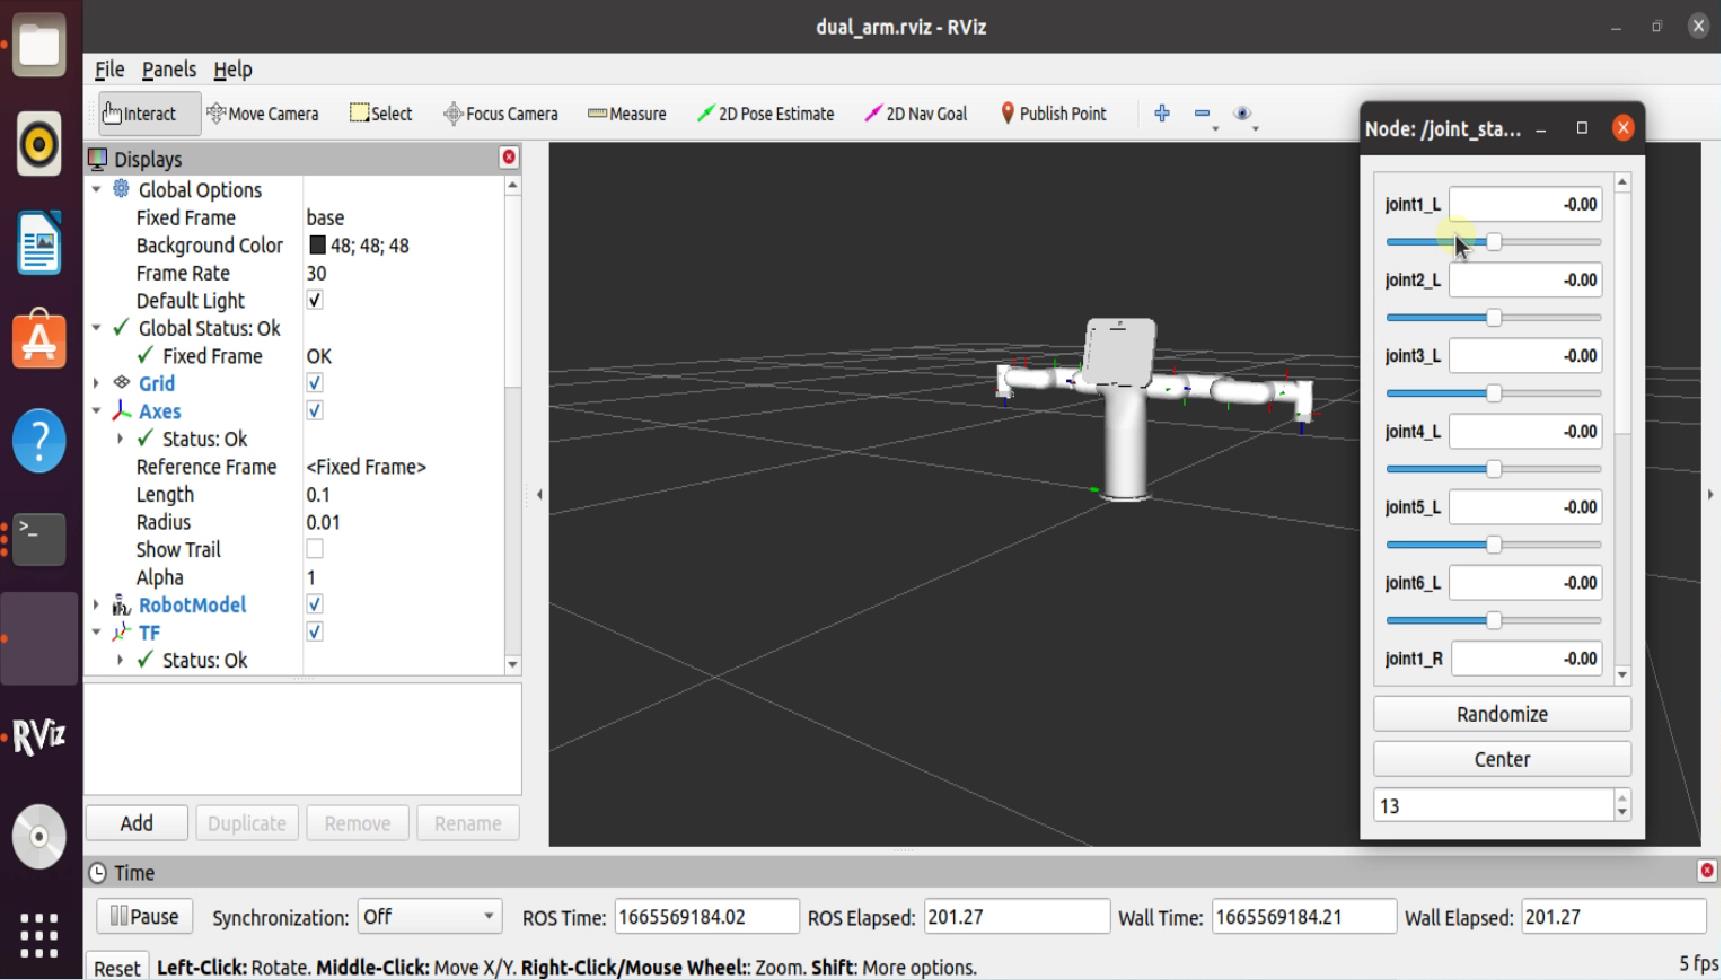
Then you can control the model in rviz to make it move by dragging the slider. If you want the real mybuddy to move with the model, you need to open another console terminal (shortcut key: Ctrl+Alt+T), run:
Note: Due to the use of different networks, you can modify the corresponding IP address in ~/catkin_ws/src/mycobot_ros/Mybuddy/mybuddy_socket/scripts/slider_control.py to ensure that it is consistent with the server's IP.
rosrun mybuddy_socket slider_control.py
Note: Since the robot arm will move to the current position of the model when the command is input, make sure that the model in rviz does not appear to be worn out before you use the command.
Do not drag the slider quickly after connecting the robot arm to prevent damage to the robot arm.
2 Model Following
In addition to the above controls, we can also let the model move by following the real robot arm. Open a console terminal (shortcut key: Ctrl+Alt+T), run:
Note: Due to the use of different networks, you can modify the corresponding IP address in ~/catkin_ws/src/mycobot_ros/Mybuddy/mybuddy_socket/scripts/follow_display.py to ensure that it is consistent with the server's IP.
rosrun mybuddy_socket follow_display.py
Then open another console terminal (shortcut key: Ctrl+Alt+T), run:
roslaunch mybuddy_socket mybuddy_follow.launch
It will open rviz to show the model following effect.
3 myBuddy Moveit
mycobot_ros has integrated the MoveIt section.
Open a console terminal (shortcut key: Ctrl+Alt+T), run:
roslaunch mybuddy_socket_moveit demo.launch
If you want a real robot arm to execute a plan synchronously, you need to open another console terminal (shortcut key: Ctrl+Alt+T), run:
Note: Due to the use of different networks, you can modify the corresponding IP address in ~/catkin_ws/src/mycobot_ros/Mybuddy/mybuddy_socket_moveit/scripts/sync_plan.py to ensure that it is consistent with the server's IP.
rosrun mybuddy_socket_moveit sync_plan.py
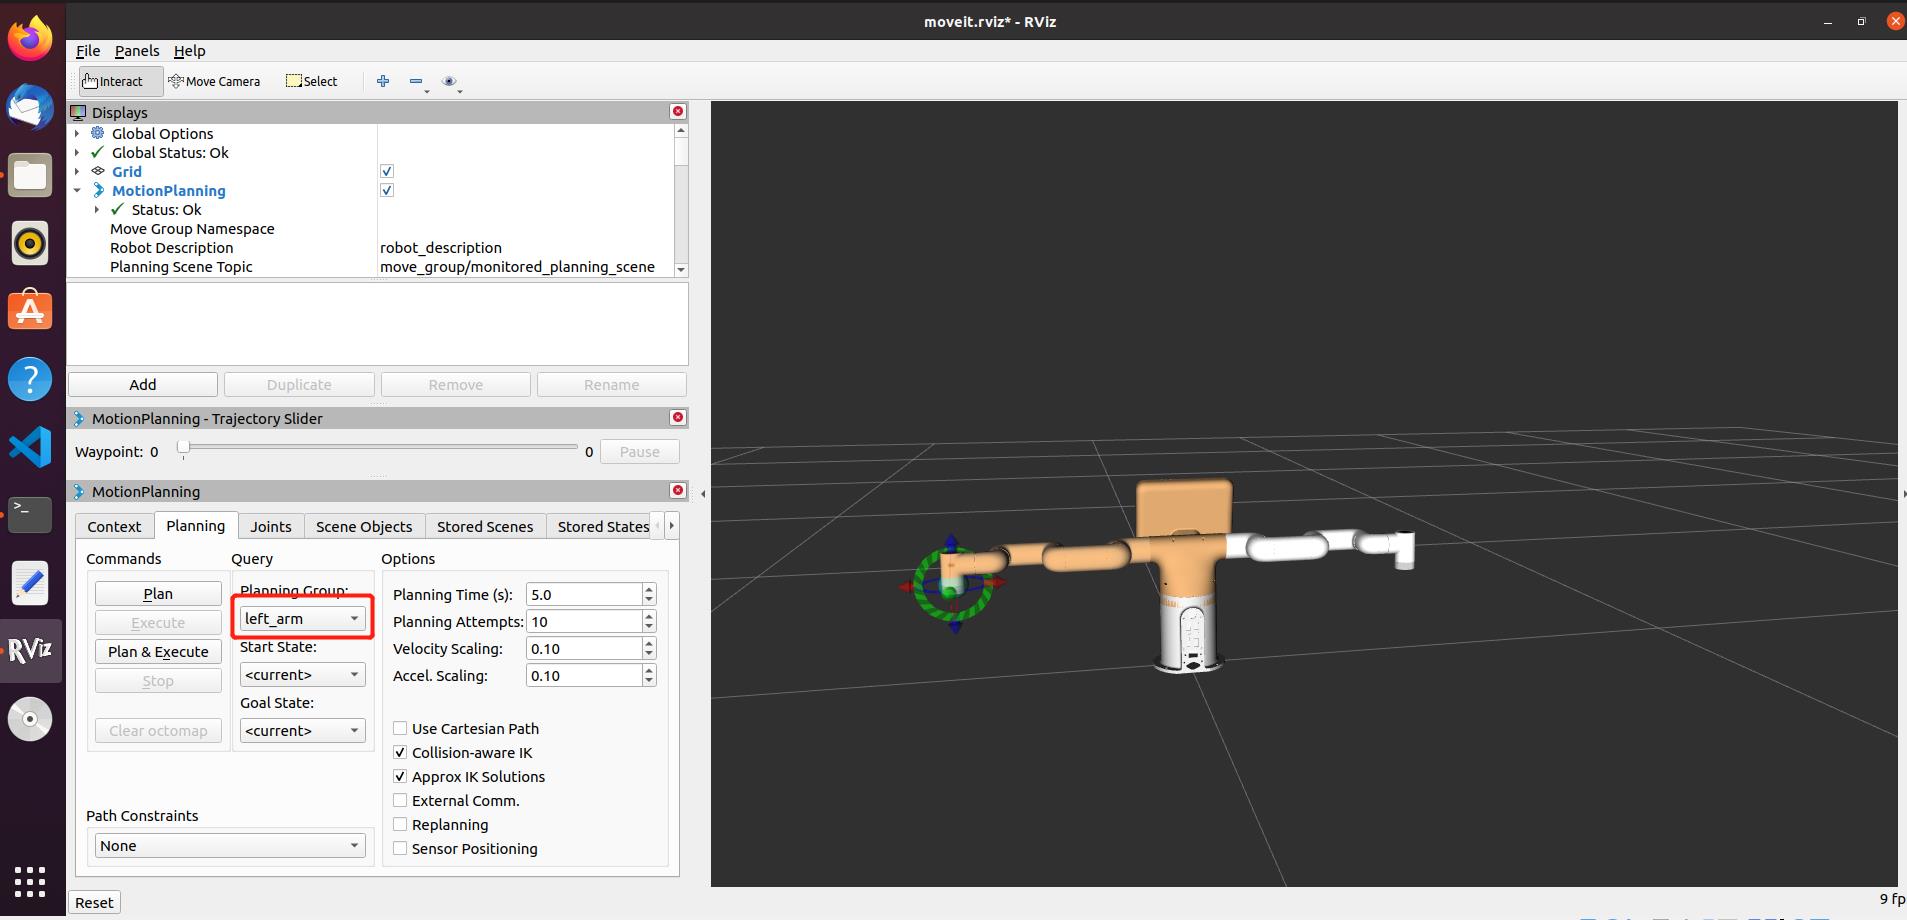
Moveit has four control groups, the operation effect is as follows:
1.Left Arm Control Group: plan the movement direction of left arm by dragging the trackball.
2.Right Arm Control Group: plan the movement direction of right arm by dragging the trackball.
