Recognize object
This case uses the eye-to-hand mode, utilizing a camera to load model data trained with TensorFlow through OpenCV. It recognizes objects and locates their positions in the video. Using relevant points, it calculates the spatial coordinates of the objects relative to the robotic arm. A set of corresponding actions is programmed for the robotic arm to place the recognized objects into a bucket. The following chapters will provide a detailed explanation of the code implementation process for the entire case.
Supported end effectors: myCobot Pro Adaptive Gripper.
1 Camera Adjustment
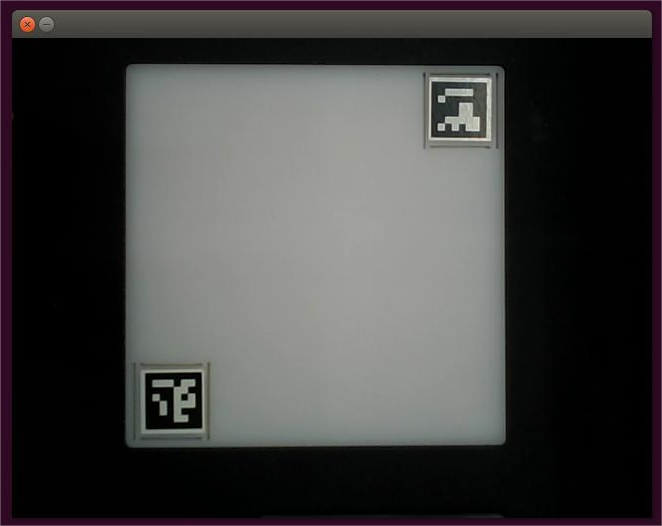
First, you need to use python to run OpenVideo.py under the aikit_V2 package. If the enabled camera is a computer camera, cap_num needs to be modified. For details, please refer to: Precautions. Make sure that the camera completely covers the entire recognition area, and the recognition area is square in the video, as shown in the figure below. If the recognition area does not meet the requirements in the video, the camera position needs to be adjusted.
M5 version:
- Open a command prompt terminal (shortcut Win+R, enter "cmd" to access the terminal). Switch to the directory path where "aikit_V2" is located, then enter the target folder.
cd Desktop/ikit_V2/AiKit_320M5/
- Enter the following command to open the camera for adjustment
python scripts/OpenVideo.py
Raspberry Pi version:
- Open a console terminal (shortcut key Ctrl+Alt+T), enter the target folder
cd ~/aikit_V2/AiKit_320PI/
- Enter the following command to open the camera for adjustment
python scripts/OpenVideo.py
2 Add new object
- The usage is the same as the mechArm 270 Pi.
M5 version:
- Open a command prompt terminal (shortcut Win+R, enter "cmd" to access the terminal). Switch to the directory path where "aikit_V2" is located, then enter the target folder.
cd Desktop/aikit_V2/AiKit_320M5/
- Enter the following command to start the process of adding objects.
python scripts/add_img.py
Raspberry Pi version:
- Open a console terminal (shortcut key Ctrl+Alt+T), enter the target folder
cd ~/aikit_V2/AiKit_320PI/
- Enter the following command to start the process of adding objects.
python scripts/add_img.py
Operate according to the prompts entered by the terminal, and capture the image in the second image box that pops up.
After the image capture area is completed, press the Enter key, and according to the terminal prompt, enter a number (1~4) to save to the folder corresponding to the image, and press the Enter key to save it to the corresponding folder.
3 Case Reproduction
M5 version:
- Open a command prompt terminal (shortcut Win+R, enter "cmd" to access the terminal). Switch to the directory path where "aikit_V2" is located, then enter the target folder.
cd Desktop/aikit_V2/AiKit_320M5/
- Then enter the following command to start the object recognition program.
python scripts/aikit_object.py
Raspberry Pi version:
- Open a console terminal (shortcut key Ctrl+Alt+T), enter the following command to enter the target folder:
cd ~/aikit_V2/AiKit_320PI
- Then enter the following command to start the object recognition program.
python scripts/aikit_object.py
- When the command terminal shows ok and the camera window can be opened normally, it means that the program runs successfully. At this time, the identifiable objects can be placed in the recognition area for recognition and capture.
Precautions
- When the camera does not automatically frame the recognition area correctly, you need to close the program, adjust the position of the camera, and move the camera to the left or right.
- If the command terminal does not display ok, and the picture cannot be recognized, you need to move the camera slightly backward or forward, and the program can run normally when the command terminal displays ok.
- Since the recognition method has been changed, please make sure that there is a folder for storing pictures and pictures that need to be recognized under the code path. If not, you can use
python scripts/add_img.pyto add pictures. - OpenCV color recognition will be affected by the environment, and the recognition effect will be greatly reduced in a darker environment.